Knowing how to change a tire is a necessary skill for all drivers. If you rely on a cell phone to save you in a roadside emergency, there’s always that chance you will forget to charge it, be out of range, or leave it at home. Flat tires can happen anywhere, and a cell phone is no substitute for knowing how to change a flat tire.
Thankfully, changing a tire isn’t all that hard! Just adhere to the following guidelines to be prepared in case you have a flat.
These items should have come with your vehicle:
Jack
Lug wrench
Fully inflated spare tire
Vehicle owner’s manual
If you have misplaced any of these items, or if your car did not come with these items, you should purchase new ones right away. And be sure you’re regularly inflating the spare tire to your vehicle manufacturer’s recommended PSI. You should check the spare’s air pressure every time you check your other tires.
Remember to check pressure every month and before long trips or carrying extra load.
Here are some items that don’t come with your vehicle but that you should stow in your trunk or glove box in case you have to change a flat tire:
Flashlight with working batteries
Rain poncho
Small cut of 2"x6” wood to secure the jack
Gloves
Wheel wedges
As soon as you realize you have a flat tire, do not abruptly brake or turn. Slowly reduce speed and scan your surroundings for a level, straight stretch of road with a wide shoulder. An empty parking lot would be an ideal place. Level ground is good because it will prevent your vehicle from rolling. Also, straight stretches of road are better than curves because oncoming traffic is more likely to see you.
Never attempt to change your tire on a narrow shoulder near oncoming traffic. Keep moving (slowly) until you find a safer spot. While driving on a flat risks ruining your rim, replacing a rim is better than being hit by an inattentive driver.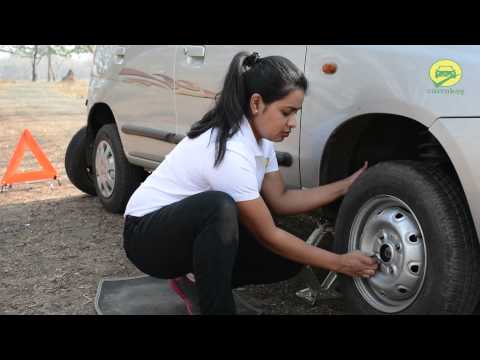
Make sure to consult your owner’s manual and review their specific steps on how to change a flat tire for your vehicle
Your hazard lights or “flashers” will help other drivers see you on the side of the road. To avoid an accident, turn them on as soon as you realize you need to pull over.
Once stopped, always use the parking brake when preparing to replace a flat tire. This will minimize the possibility of your vehicle rolling.
Wheel wedges go in front of or behind the tires to further ensure the vehicle doesn’t roll while you fix the flat tire. If you’re changing a rear tire, place these in front of the front tires. If your flat tire is at the front, put the wheel wedges behind the rear tires.
Bricks or large stones will work just as well as “real” wheel wedges. Just be sure they’re large enough to stop the car from rolling.
If your vehicle has a hubcap covering the lug nuts, it’s easier to remove the hubcap before lifting the vehicle with the jack. If your lug nuts are exposed, you can skip ahead to Step 6.
Use the flat end of your lug wrench to remove the hubcap. This will work for most vehicles, but some hubcaps need a different tool to come off. Consult your owner’s manual for proper hubcap or wheel cover removal procedures.
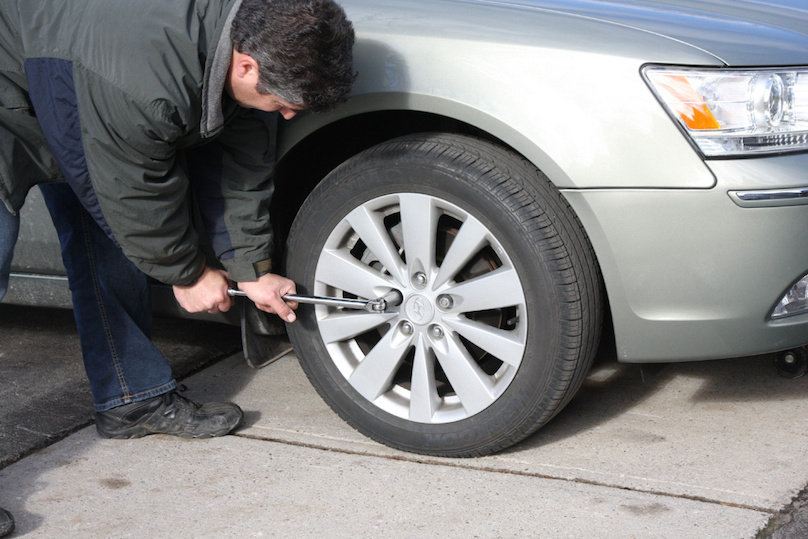
Using the lug wrench, turn the lug nuts counterclockwise until you break their resistance. You may have to use force, and that’s ok. Use your foot or all of your body weight if necessary.
Loosen the lug nuts about ¼ to ½ of a turn, but don’t remove them completely yet. Save that for when it’s time to remove your tire/wheel from the vehicle.
The right place for the jack is usually beneath the vehicle frame alongside the tire that’s flat. Many vehicle frames have molded plastic on the bottom with a cleared area of exposed metal specifically for the jack. To safely lift and avoid damage to the vehicle, follow the instructions for jack placement in your vehicle owner’s manual.
To prevent the jack from settling under the weight of your vehicle and coming off balance, place a small cut of 2x6” wood beneath it before attempting to raise your vehicle. This tactic is especially helpful on asphalt.
With the jack properly positioned, raise the vehicle until the flat tire is about six inches above the ground.
Never put any part of your body under the vehicle during or after raising the vehicle with the jack.
Now it’s time to remove the lug nuts all the way. Since you've already loosened them, you should be able to unscrew them mostly by hand.
Gripping the tire by the treads, pull it gently toward you until it’s completely free from the hub behind it. Set it on its side so that it doesn’t roll away.
Now place the spare on the hub by lining up the rim with the lug bolts. Push gently until the lug bolts show through the rim.
Put the lug nuts back on the lug bolts and tighten them all the way by hand. Once they are all on, check each one again, tightening as much as possible. You will tighten them with the wrench after lowering the vehicle to the ground.
Use the jack to lower the vehicle so that the spare tire is resting on the ground but the full weight of the vehicle isn’t fully on the tire. At this point, you should tighten the lug nuts with the wrench, turning clockwise, as much as you can. Push down on the lug wrench with the full weight of your body.
Bring the vehicle all the way to the ground and remove the jack. Give the lug nuts another pull with the wrench to ensure they’re as tight as possible.
If the hubcap you took from the flat tire will fit your spare, put it in place the same way you removed it initially.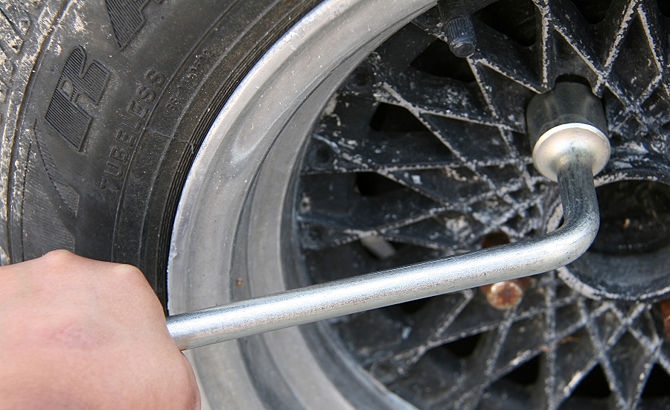 If it doesn’t fit, stow it away with the tire when you stow your equipment.
You have before you a jack, a lug wrench, wheel wedges, your flat tire, and possibly a hubcap. Don’t forget to put all of them in your vehicle before driving away.
You should check the tire pressure of the spare tire to make sure that it is safe to drive on. “T-Type” temporary spares, also called “mini-spares,” require 60 psi (420 kPa). If the tire needs pressure, drive (slowly) to a service station immediately.
Temporary spare tires aren’t made to drive long distances or at high speeds, so drive cautiously until you’re able to visit a tire technician. A professional should be able to determine whether your tire needs a repair or if it’s time to replace it.
Aside from taking your tire to a professional, the above procedure shouldn’t take more than 15 to 30 minutes to change a tire. Just be sure you don’t leave out any steps.
It’s beneficial practice changing a tire in your garage or driveway to ensure you’re ready to handle this situation if it ever happens to you.
Knowing how to fix a flat tire is great, but regular tire maintenance is even more important. In addition to reviewing this guide regularly, remember to do the following:
Keep your tires properly inflated
Rotate your tires according to the manufacturer’s guidelines
Monitor for tread wear
All of these precautions will extend the life of your tires and reduce the likelihood of a flat. While there’s no way to prevent flat tires completely, proper care can improve performance and ensure your tires last as long as possible.
There’s never a good time for a flat. That’s why Bridgestone DriveGuard tires are masterfully engineered to keep you moving for up to 50 miles at speeds up to 50 MPH without disruption.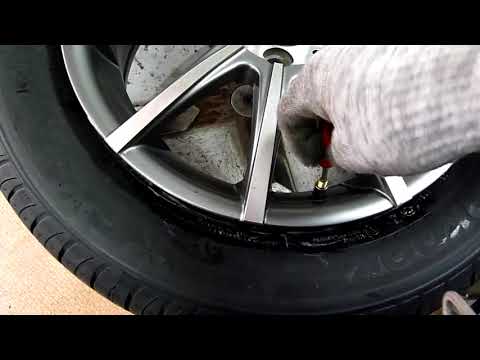
There’s never a good time for a flat. That’s why Bridgestone DriveGuard tires are masterfully engineered to keep you moving for up to 50 miles at speeds up to 50 MPH without disruption.
See Details Find Your Fit
September 16, 2022
Flat tires can happen at any time and place, and emergency roadside assistance may not always be available. So whether you’re a seasoned driver or a teen who’s getting behind the wheel for the first time, it’s important to know how to change a car tire.
We admit, it’s not as simple as jump-starting a car or checking fluid levels, but there’s no need to be intimidated—changing a tire really isn’t too difficult. This guide covers everything you need to know about changing a flat tire, step by step.
New cars come equipped with the basic items needed to change a tire, but over time they may be misplaced. If you bought a used car, it could be missing some, or all, of the things you need to change a tire. Check your car for these essentials and replace any items you don’t find.

In addition to the essentials outlined above, there are a few things SafeWise recommends having on hand to make changing a tire easier and less dangerous. Pack these items—along with a first aid kit, bottled water, and other safety items—in a durable bag and stow them in your car. Or purchase a roadside emergency kit that contains most, or all, of these things.
If you’re driving when you get a flat tire, slowly decrease your vehicle’s speed, turn your car’s hazard lights on, and look for a safe place to stop. If possible, pull into a parking lot with open space or find another low-traffic area.
Once stopped, put your car in park and engage the parking brake. This is another safety measure to help your car remain in place while you change the tire.
If you have flares or reflective warning triangles, set them out according to product instructions.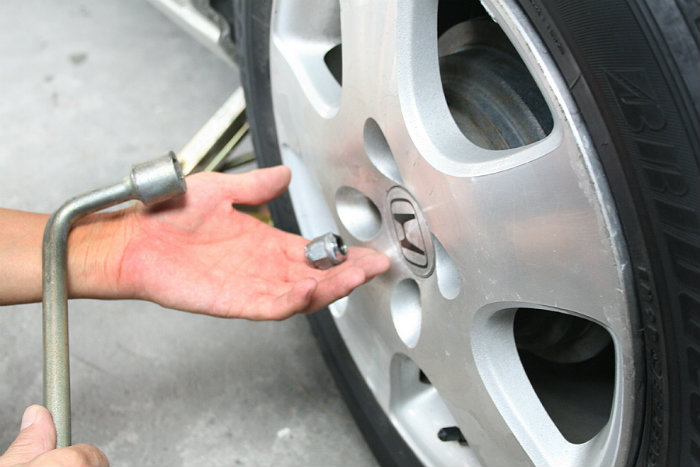 Use extreme caution and never turn your back to oncoming traffic.
Wheel wedges help prevent your car from moving. When changing a front tire, place them behind your car’s rear tires. When you change a rear tire, place them in front of the car’s front tires.
Next, you need to remove the hubcap. This is necessary so you can get to the lug nuts that secure your tire to the car. Use the pry bar (the lug wrench’s flat end) to pop the hubcap off the tire rim.
Use the lug wrench to loosen the lug nuts. Remember: lefty-loosey. You might need more leverage or an extra oomph of strength if the lug nuts are especially tight. Longer lug wrenches give more leverage, and sometimes you can push the lug wrench down with your foot to loosen the nut—just be careful not to loose your balance.
The best place for a jack is under the vehicle frame, next to the flat tire.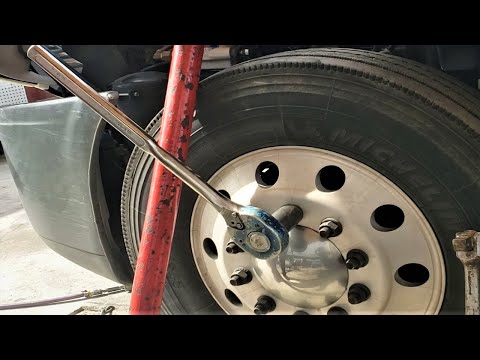 For safety and to avoid damaging your car, consult your vehicle owners manual for specific instructions on where, and how, to place the jack.
Pump the jack slowly until the flat tire is off the ground. Make sure none of your or anyone else’s body parts go under the car while you’re raising it or once it’s raised. If your car moves while it’s on the jack, don’t try to stop it. Move away from your car and wait for it to fall, then try again.
With the lug nuts already loose, finish unscrewing them by hand. Put the lug nuts in a safe location so they aren’t misplaced.
Pull the tire toward you to remove it from the hub, then place it on its side and out of your way. If it's being stubborn, kick it. No, really—a swift kick can loosen any rust and help you pull the tire off. If you're wearing flip flops or sandals, sit on the ground (if it's safe to do so) and put both feet on the tire and push.
Line up the spare tire with the lug bolts and push it on the wheel hub until the bolts penetrate the rim.
Place the lug nuts on the lug bolts and tighten them down by hand. Don’t use the lug wrench to secure them yet.
Using the jack, lower your car until the spare tire touches the ground. Be careful not to lower it to the point where it bears your vehicle’s whole weight.
Tighten down the lug nuts by turning the wrench clockwise as much as you can. It’s important to tighten the lug nuts in the correct sequence to help ensure they stay secure on the hub. The star pattern is a good rule of thumb for tightening lug nuts.
Lower your car completely and remove the jack. Tighten your wheel’s lug nuts one more time, using the same pattern as you did in the previous step.
If the hubcap you removed fits the spare tire, put it back on.
If the hubcap you removed fits the spare tire, put it back on.
Gather all the items you used and secure them in your car. Be sure to stow your owners manual, jack, and lug wrench in their proper places.
It’s dangerous to drive on a spare tire for long distances so take your flat tire to a professional auto repair shop and have it fixed or replaced as soon as possible.
Taking proper care of your car tires can’t guarantee you’ll never get a flat, but it may reduce the chance. Regular tire maintenance can also help extend the life of your tires, make your vehicle safer to drive, and improve fuel efficiency.
According to the Rubber Manufacturers Association’s (RMA) tire maintenance checklist, there are a few easy things you can do to help keep your tires in good condition: regularly check tire air pressure, rotate tires based on your vehicle manufacturer’s recommendations, and have them balanced and aligned periodically.
Preventive maintenance can help keep your tires in good working order, but it’s still important to inspect them frequently. The RMA recommends setting aside five minutes every month to look for early warning signs of car tire failure: cracks in the tire sidewall, uneven tread wear, excessively worn-down tread, and bulges. If you note any of these problems, go to an auto repair shop and have your tire repaired or replaced.
Before you or your teen hits the road again, practice changing your car’s tire in a safe location like the driveway or garage. Getting familiar with the process now will make you better prepared to change a tire under less ideal conditions. We suggest keeping this guide in your car’s glove compartment, and reviewing it every now and then to brush-up on how to change a tire.
For any other vehicle-related questions, visit our Car Safety Guide to find auto safety checklists and educational opportunities.
SafeWise wants you to keep in mind that changing a tire can be dangerous. If you get a flat in an especially unsafe location, like a busy highway, and you can’t get your vehicle to a safer place, put your car’s hazard lights on and call the police for help. They can help block or divert traffic while you or your roadside assistance provider change the tire.
Product | Best for | Price | Specs | Stand-out feature | Learn more | Read review |
DroneMobile X-1 | Best car alarm | $129. 95 95 | 3,000 ft range | Remote start Diesel engine safe | View on Amazon | Read review |
|---|---|---|---|---|---|---|
Rexing V1P | Best dash cam | $159.99 | 4K Full HD 170° front and rear | Tolerates -20°F to 176°F | View on Amazon | Read review |
Vyncs | Best vehicle tracker | $89.99 | OBD port plug-in | Maintenance reminders | View on Amazon | Read review |
Torin Big Red | Best portable car jack | $25.60 | Lifts up to 15 in. and 3,000 lbs. | Lightweight Affordable | View on Amazon | Read review |
Garmin DriveSmart 61 | Best navigation system | $278. 05 05 | 6.95 in. touchscreen | Voice control | View on Amazon | Read review |
Disklok | Best steering wheel lock | $189.98 | Hardened steel 3 different sizes | Tamperproof lock | View on Amazon | Read review |
*Data as of post date. Offers and availability may vary by location and are subject to change. SafeWise uses paid Amazon links.
Written by
Alexia Chianis
Wanderlust junky and mom of two, Alexia is a former police officer and U.S. Army Captain who draws on her experiences to write about a myriad of safety topics.
Read More
12/20/2022
Best DIY Home Security Systems of 2023
SimpliSafe is the best DIY home security system because it's cost-efficient, effective, and easy to.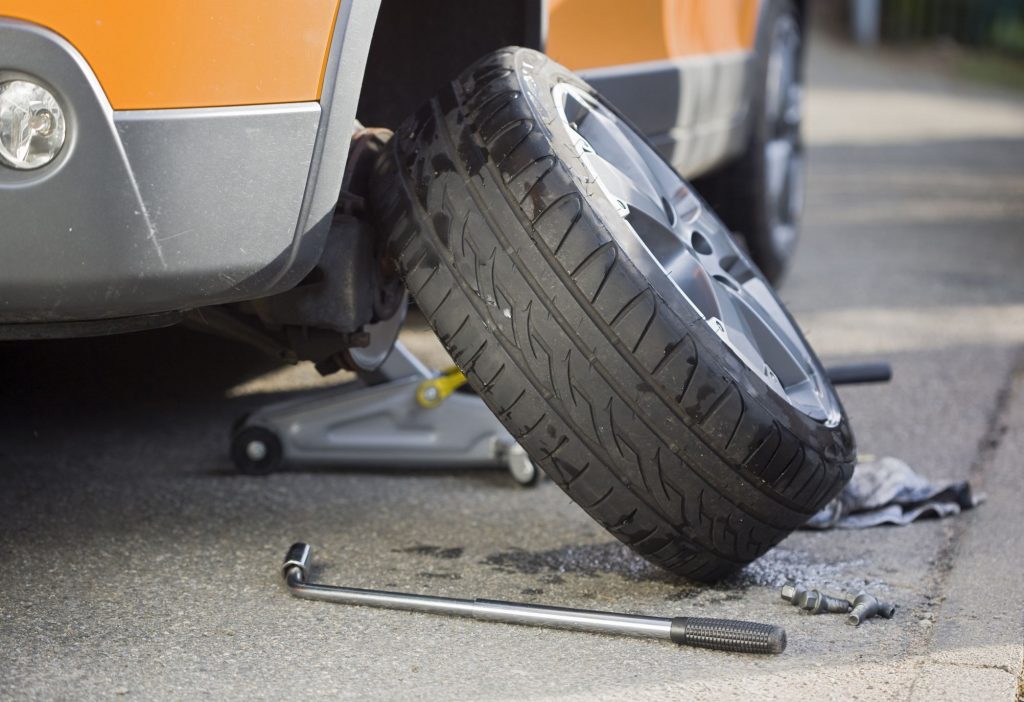 ..
..
Related materials
Tire inflation with nitrogen and 7 more wirings at the tire fitting
The tire manufacturer's instructions say to change shoes when the temperature drops below +7°C. In my opinion, it's too early. There are still a lot of cars with summer tires on the roads around. And at this temperature, the braking distance on studded tires may be even longer.
I advise you to change the wheels to winter ones when the temperature drops below zero at night. That's when it really is time, because in the morning an icy area may come across on the roads. At the same time, out of habit, it will seem very slippery. nine0003
Precisely in order to do it at the most correct and convenient time. The vagaries of the weather are unpredictable. Residents of the Rostov region, for example, say that sometimes during the winter period they rearrange the wheels from winter to summer and back several times.
Dismantling wheels (that is, dismantling a tire from a rim) at home is a difficult task that requires appropriate skills and knowledge. We will describe a simpler job that, in theory, any average motorist who does not have special tools and experience in tire fitting should be able to handle. And therefore we mean that you have a complete set of serviceable winter tires mounted on disks. You remember that in the spring they did not lose pressure, there are no cuts on them, and a couple of self-tapping screws do not stick out of the tread in addition to the spikes. And, most importantly, the tread height is more than 4 mm. These are the modern requirements for winter tires. If at least one of the conditions is violated, then it is better to solve the problem before the onset of the hot tire season. nine0003
Related materials
If I change wheels, do I need to balance them every season?
There are car owners who meticulously balance tires before each season. In my opinion, this is not justified by anything. I recommend installing the wheels on the car, then drive at different speeds, but not higher than your usual ones. If the imbalance (it is manifested by vibrations on the steering wheel or seat) is not felt, then balancing can be postponed until future seasons. In principle, winter tires can be balanced before being stored for storage: after all, the spring period for changing wheels in tire shops is more extended in time compared to autumn, and therefore the queues are noticeably shorter. nine0003
So we take the wheels out of storage. For one, this is the corner of the garage, for the other, a balcony, for the third, the warehouse of the nearest car service that provides a wheel storage service. Depending on storage conditions, tires may have different temperatures. Wheels removed from a warm room, having cooled down by 20 ° C, will lose about 0.2 bar of pressure, and gradually, as they cool down. Well, the cold ones have nothing to lose! Therefore, cold ones can be immediately pumped up to the nominal pressure, well, maybe 0.1–0.2 bar more, given that it will only get colder further. And warm tires must either be inflated with a large margin immediately, or set the pressure at the end of all work, when the air in them cools down. nine0003
If you use a standard jack, it is better to place a special stand under the car for insurance. Well, or at least place the spare wheel so that when it falls, the threshold lies on the rim, and not on the tire. Please note that this will most likely damage the disc. Therefore, it is better to use an old unnecessary wheel.
If you use a regular jack, it is better to place a special stand under the car for insurance. Well, or at least place the spare wheel so that when it falls, the threshold rests on the rim, and not on the tire. Please note that this will most likely damage the disc. Therefore, it is better to use an old unnecessary wheel. nine0003
Related materials
Which jack is better? — expert examination of the ZR
We find a flat area with a hard surface. If you change wheels yourself twice a year, then I strongly advise you to get a convenient jack. At least small and inexpensive, but rolling. It is noticeably more reliable and durable than the regular one that was equipped with your car. It is advisable to use a balloon wrench with a cruciform or with an extended handle - it is more convenient than the standard one attached to the car. nine0003
Prepare a wheel stop - yes, at least half a brick. Inspect the secret key for damaged code elements and clean the secret nuts/bolts on all wheels.
If the winter set of wheels has different disc characteristics, remember if spacers are needed between the disc and the hub lug - they should be prepared in advance.
The wheel jack is based on a hydraulic cylinder. Raises quickly, and lowers even faster.
The wheel jack is based on a hydraulic cylinder. Raises quickly, and lowers even faster. nine0003
 We slightly raise the car with a jack, but not until the wheel comes off. We unscrew the completely secret nut / bolt. We loosen the rest of the fasteners by half a turn.
 Just in case, after the first ride, check the tightness of the wheel fasteners, and the next morning, check the tire pressure.
Our new video
Why I choose a used Vesta and not a new Granta: 5 arguments
The first test of the Chinese Dongfeng EC35 (video)
Nivas and UAZs became the best gift for the soldiers of the NWO
Like this article? Subscribe and you will always be in the know!
Driving in Zen
News smi2.ru
Changing shoes is the hottest off-season topic for motorists. In spring and autumn, queues traditionally line up at tire fitting points. But not everyone wants to participate in this ritual: having collected a second set of tires and wheels, many car owners change the wheels themselves. Let's talk about how to do it right - especially since every driver has to change a wheel on the road sooner or later. nine0003
To remove a wheel from the car, you first need to get it off the ground - make sure you have a good jack for this. A regular factory jack is in any car, but still it is intended for emergency replacement of a flat tire, and not for regular tire fitting. If you change all the wheels yourself twice a year, it is better to buy a jack more convenient and reliable than a regular one.
Rolling jack is a great solution if you have a garage; you will immediately appreciate its convenience. It is rolling jacks that are used at tire shops, where the speed of work comes first. A few moves and the wheel is already in the air! After a little practice, with the help of a rolling jack, simultaneously hang out two wheels at once - but you must definitely use wheel chocks (stops). nine0003
Learn more about how to choose a car jack.
Drivers often ask themselves the question: why is the car's standard cylinder key so inconvenient? The answer is simple: the length of the wrench is chosen so as not to exceed the tightening torque of the wheel nuts (100-110 Nm for passenger cars). But loosening stuck nuts often requires more force! In addition, the driver is different for the driver: for example, it will be difficult for a girl to tighten the wheel nuts to the nominal torque with a regular wrench. And don't say you haven't seen girls changing wheels. nine0003
In order not to have to kick the wrench or jump on it (which threatens to break the wheel studs), buy a reinforced wheel wrench: elongated or telescopic. When tightening nuts with such a wrench, you do not need to be zealous - remember the maximum tightening torque. And it will be much easier to unscrew the nuts.
When changing tires, remember to rotate them to ensure even wear. Usually tires with a large tread remain on the drive axle, because there they wear out more intensively. If the car is all-wheel drive, proceed from the design features of 4WD: the original front-wheel drive car with a connected “rear” wears out the front tires more, and the original rear-wheel drive car wears the rear tires. nine0003
Tire rotation is more competently performed according to the instructions for the car - but for this you need to mark each of the wheels in advance (for example, with a marker on the inside of the disk). Examples of standard rotation patterns are shown below, and it is recommended to swap tires for even wear every 10,000 km.
On rear- and all-wheel drive vehicles, the front tires are moved to the rear axle diagonally (Diagram A) or are changed crosswise (B). On machines with front-wheel drive, the opposite is true: the rear tires are moved diagonally forward (diagram C). nine0003
Tires with a directional tread pattern cannot be turned without overbeading. To rotate them without removing them from the disks, the front wheels are simply swapped with the rear wheels on each side of the car (Diagram D).
If the car is equipped with a full-size spare tire, not a spare tire, and you have bought a set of five new tires, be sure to include the spare tire in the rotation (diagrams E and F). This will allow you to use the kit longer and easily replace any of the main ones with a spare wheel in case of damage, because their wear will be the same. Thanks to this scheme, buying five tires is more profitable than four, due to the longer operation of the kit. nine0003
After removing the wheel, clean the wheel studs with a wire brush and brake cleaner. You also need to clean and grease the mating surface of the hub with graphite grease so that the rim does not stick to it. Graphite is chemically neutral, does not interact with nickel and chromium, therefore it does not oxidize and does not damage rims.
Whether it is necessary to lubricate the studs themselves is an open question: some automakers recommend it, while others directly prohibit it. If you use standard wheel nuts with a cone, which attract the disk well, and observe the tightening torque, then there will be no harm from a small amount of graphite grease on the studs - most importantly, do not use other types of lubricants (for example, lithium) in this assembly. nine0003
The wheel mounted on the hub is tightened crosswise (4 studs) or with an asterisk (5 and 6 studs), moving from each nut to the opposite one, and not to the next one - this way the even tightening is achieved.
The wheel nut tightening torque for most cars is 100-110 Nm, SUVs: 120-150 Nm. The exact parameters for tightening the nuts are indicated in the instructions for the car, and to withstand them, use a torque wrench. Of course, not all motorists have it. Without a “speaker”, be guided by the length of a regular wheelbarrow wrench and common sense: do not use the pipe as a lever and do not press on the wrench with your foot. nine0003
Tire pressure may change after six months of storage - be sure to check it after installing all the wheels using a manual pressure gauge. Pressure is always measured with cold tires. If the pressure in the tires is different, equalize it with a compressor, otherwise the car will pull to the side when driving.
Learn more about tire pressure: how and why to measure it.
The removed set of wheels must be stored correctly until the next season. This requires a well-ventilated, dry area, protected from the sun and precipitation - for example, an indoor heated parking lot. Private garages are not always suitable: if the roof leaks after every rain, then the humidity will destroy the paint on the rims in six months. Too dry air is the other extreme: rubber in such conditions ages intensively, cracks and cracks. Optimum humidity for wheel storage: 55-65% at 20-25°C. Such indicators are maintained all year round in the Tire Hotel Giperavto, a special warehouse for seasonal storage of wheels. nine0003
Tires and assembled wheels (tires on rims) are stored differently. Without disks, tires are stored vertically: they are placed in a row, periodically turning over to change the fulcrum.