Please enable javascript to view the website ..
Repair help > Front-Engine Lawn Tractor repair > Front-Engine Lawn Tractor repair guides
January 1, 2015
By Lyle Weischwill
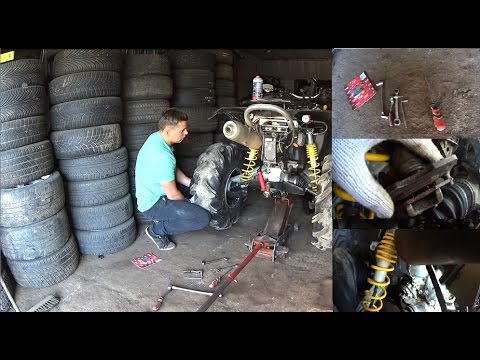
This step-by-step repair guide explains how to change a front tire on a riding lawn mower if the old tire is damaged beyond repair. Replacing the front tire is fairly easy; you just need a few tools and a manufacturer-approved riding mower part.
Follow the steps in this repair guide and video to replace the front tire on Craftsman, Husqvarna, Toro, Troybilt, Ariens, Poulan, MTD, Murray, Snapper, Yard-Man, John Deere and Weed Eater riding mowers and lawn tractors.
If you'd rather use tire sealant to repair the tire, the video How to Repair a Riding Lawn Mower Tire shows how.
Quick links
Tools required
Floor jack or bottle jack
Jack stand
Slot screwdrivers
Pry bars
Pliers
Valve stem core removal tool
Liquid detergent
Water
Wood blocks
Work gloves
Safety goggles
Compressor air supply
Repair difficulty
Time required
60 minutes or less
Repair difficulty
Time required
60 minutes or less
Replacing a front tire on a riding lawn mower
This video explains how to replace the front tire on a riding lawn mower.
01.
Park the riding mower on a level surface and set the parking brake.
Turn the ignition switch off and remove the key.
Wear work gloves to protect your hands and safety goggles to protect your eyes.
Lift the riding lawn mower hood and disconnect the spark plug wire.
Lower the tractor hood.
Tip: Disconnect both spark plug wires if your engine has 2 cylinders.
PHOTO: Disconnect the spark plug.
02.
Block the rear tires to keep the riding mower from rolling.
Position the jack under the frame and jack up the riding mower to raise the front wheel.
Place a jack stand under the frame to support the riding mower.
Remove the jack.
PHOTO: Block the rear wheel.
03.
Pull off the axle cover.
Remove the retaining ring and then pull off the washers.
Pull the tire off the axle.
PHOTO: Remove the front wheel.
04.
Remove the valve stem cap.
Remove the valve stem core, which lets any remaining air out of the tire.
Break the tire bead and pry the tire off the wheel rim on one side.
Pry the tire off the rim on the other side.
PHOTO: Pry the tire off the rim.
05.
Clean the wheel rim.
Set the new tire flat on a work surface.
Lubricate the top tire bead with liquid detergent.
Pry the rim into the top side of the tire.
Flip the rim and tire over.
Lubricate the tire bead with liquid detergent.
Pry the remaining side of the tire onto the rim.
Warning: Use blunt tools to pry the tire to avoid damaging the new tire bead.
PHOTO: Lubricate the bead.
06.
Fill the tire with air to seat the tire bead.
Reinstall the valve stem core.
Fill the tire fully with air.
Tip: If the tire didn't fill with air, install a ratcheting tension strap around the center of the tire tread, tighten the strap to force the beads outward, and fill the tire with air to seat the tire bead. Carefully release and then remove the strap.
Tip: If the bead doesn’t seal, check the rim and replace it if you find damage.
PHOTO: Shoot air into the tire.
07.
Slide the wheel on the axle.
Reinstall the washers and snap the retaining ring onto the axle.
Push the axle cover onto the wheel.
PHOTO: Reinstall the wheel.
08.
Push the jack under the frame and raise the riding mower, and then pull out the jack stand.
Lower the riding mower to the ground.
Remove the wood blocks from the rear tires.
09.
Raise the tractor hood.
Reconnect the spark plug wire and lower the hood.
Tip: Reconnect both spark plug wires if your engine has 2 cylinders.
Warning: Undertaking repairs to appliances can be hazardous. Use the proper tools and safety equipment noted in the guide and follow all instructions. Do not proceed until you are confident that you understand all of the steps and are capable of completing the repair.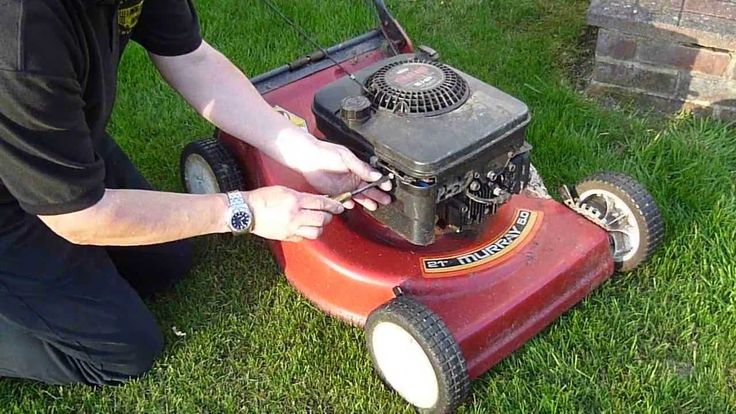 Some repairs should only be performed by a qualified technician.
Choose a symptom to see related riding mower and lawn tractor repairs.
Main causes: punctured tire or inner tube, leaky valve stem, damaged wheel rim
Read moreMain causes: worn or broken ground drive belt, bad seat switch, transaxle freewheel control engaged, transaxle failure, dirty carburetor
Read moreMain causes: shift lever needs adjustment, neutral control needs adjustment
Read moreMain causes: worn or broken blade belt, broken belt idler pulley, blade clutch cable failure, bad PTO switch, damaged mandrel pulleys
Read moreMain causes: damaged cutting blade, worn deck pulley, damaged mandrel pulley, loose fasteners on mower deck components
Read moreMain causes: engine overfilled with oil, leaky head gasket or sump gasket, damaged carburetor seals, cracked fuel pump, broken fuel line
Read moreMain causes: clogged carburetor, damaged flywheel key, dirty spark plug, stale fuel, improper valve lash, engine needs a tune up
Read moreMain causes: faulty battery, bad alternator
Read moreMain causes: unlevel mower deck, dull or damaged cutting blades, worn mandrel pulleys, bent mower deck, engine needs tune up
Read moreThese step-by-step repair guides will help you safely fix what’s broken on your riding mower or lawn tractor.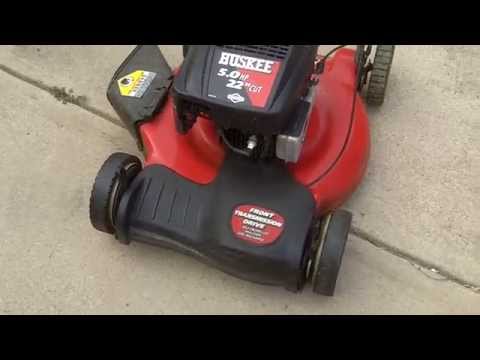
January 1, 2015
By Lyle Weischwill
Your mower can’t run on a damaged rear tire. Here’s how to install a new one.
Repair difficulty
Time required
60 minutes or less
Read moreJanuary 1, 2015
By Lyle Weischwill
If a blade on your mower is dull or bent, replace it following the steps in this repair guide.
Repair difficulty
Time required
30 minutes or less
Read moreJanuary 1, 2015
By Lyle Weischwill
Help your mower run better by replacing the fuel filter during your riding mower's annual tune-up.
Repair difficulty
Time required
15 minutes or less
Read moreUse the advice and tips in these articles and videos to get the most out of your riding mower or lawn tractor.
August 5, 2022
By Lyle Weischwill
Learn about Sears Technical Institute and the advanced technical content being developed for aspiring appliance techs.
Read moreAugust 6, 2020
By Lyle Weischwill
Learn how a blade removal tool makes replacing the blade easier and safer
Read moreApril 9, 2019
By Lyle Weischwill
Keep these 6 things on hand to keep the mower season running smoothly.
Read moreSamsung DVE52M7750V/A3-00 dryer parts
Shop GE JBP70WK4WW electric range partsShop Maytag MET8885XB02 electric range partsShop Kenmore 79096419406 electric range parts
Shop KitchenAid KEBS177YAL2 electric wall oven parts
Shop Model #917274961 Craftsman lawn tractor
Weatherking Furnace Repair Parts
Shop Craftsman 13953918D garage door opener parts
Shop Magic Chef 83EY-1 gas range partsShop Model #NX58K3310SS/AA-00 Samsung gas slide-in range
Shop MTD 31AS6HEG799 gas snowblower parts
Shop Craftsman 137212290 miter saw parts
Refrigerator Door Bin DA63-08646A
Refrigerator Parts CraftsmanNorge Refrigerator Repair Parts
Craftsman Snowblower attachment Repair Parts
Kenwood Speaker Replacement Parts
Shop Roper RT18HDXJW00 top-mount refrigerator parts
Shop Model #6209SR Roadmaster sidewalk wagon
Craftsman 12512008 wet/dry vacuum parts
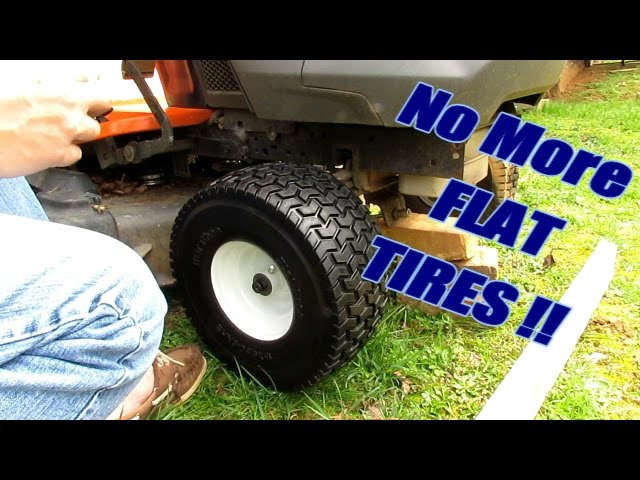
If you’ve had a lawn mower for more than a couple of seasons, chances are you’ve had a flat tire.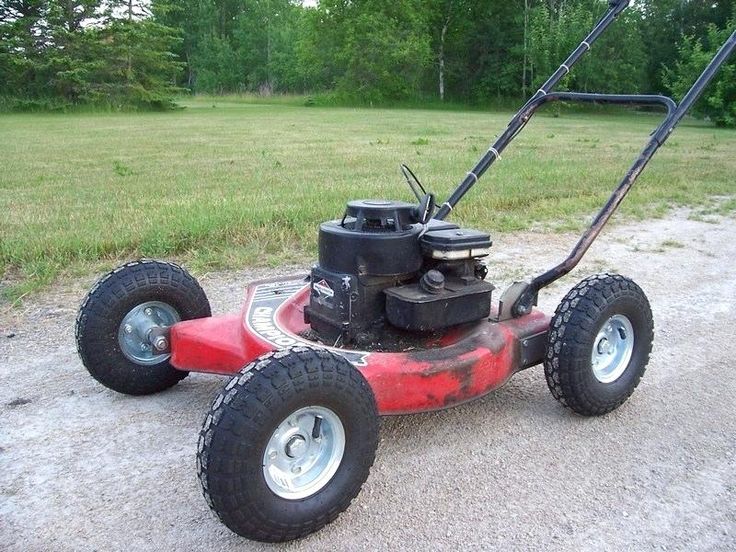 In this article, we’re going to tell you how to get a flat tire back on the rim and how to change a tire if you need to.
With our step-by-step guide—lawn mower tire flat & off the rim? Here’s how to fix it, you’ll be back to cutting your lawn in no time.
A tire that’s slipped off the rim is never a wanted sight!Using simple tools and a few helpful tricks, you can get your tire back on the rim or replaced. With a little effort and minimal cost, your mower will be ready to go again.
Want to know how to get your lawn mower tire back in working order? Let’s get stuck in.
For this repair, you’ll need a few tools. And if you need to replace the tire, a few more. For both repairs, don’t forget your safety gear. Here, we’ve listed what each job requires:
Not all flat tires are created equal. Sometimes a flat caused by a very slow leak or just time can simply be reflated. And it will last a good while until next time. But sometimes a flat causes the tire to come off the rim of the wheel, and this requires a more complicated fix. And in the worst case, with a damaged or worn-out tire, you’ll need to replace it.
No matter if your tire is just off the rim, or needs replacing, we’ve got you covered. Here is our step-by-step guide to fixing a flat on your lawn mower. Steps 1, 2 and 3 are required for both fixes. After that we’ve split the instructions depending on whether you’re putting it back on the rim (steps 4a to 7a) or changing the tire (steps 4b to 10b).
I know it’s obvious, but we’re nothing if not complete. Make sure your mower is on a flat surface. Then turn off the mower and remove the ignition key. It’s a good idea to chock the wheels as well.
What might not be so obvious, is that we highly recommend you remove the spark plug cable as well.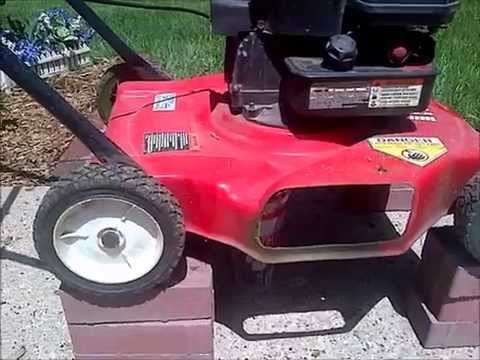 Removing the cable means there is no chance of the blades moving while you’re fixing your flat. It’s never wasted time to do things safely.
In order to get to your tire, you’re going to need to jack up the mower. Any jack will do as long as it’s rated for more than the weight of the mower. We would recommend fixing your flat on a hard surface, driveway, garage or shed. But, if your mower is still on grass, and you’re using a bottle jack, you’re going to need to put wood under the jack to stop it from sinking into the grass.
Jak up the mower so your tire spins freely. You want enough height to make it easy to get your hand underneath the tire. Once you’ve reached the required height, support the mower with a jack stand.
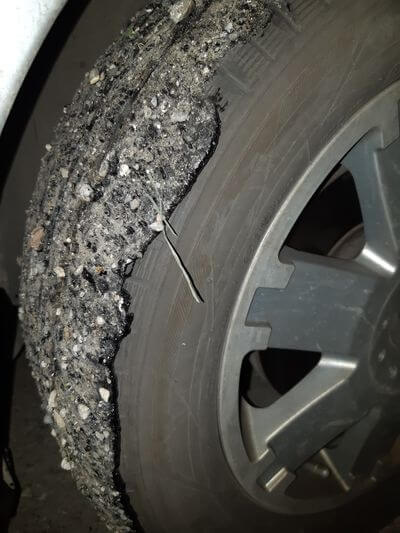
You need to check the tire for obvious damage, holes or sharp objects. If it helps, put a little chalk mark on the tire. Carefully roll the wheel round, inspecting both side walls and the surface for damage.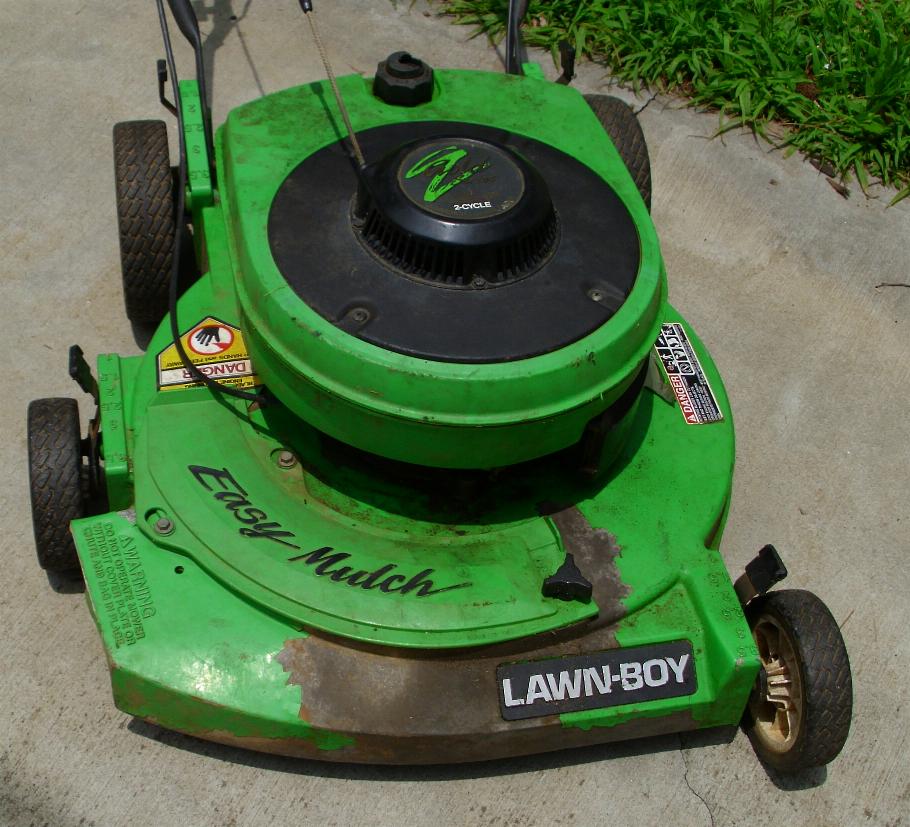 When your chalk mark comes back around, you know you’ve covered the whole tire.
If you can’t find any obvious holes or damage, and the tire is not completely worn out, you can try putting it back on the rim, inflating it and seeing if it holds. If the tire is punctured, ripped, or completely worn out, you’re going to need a replacement.
These days most mower tires are tubeless. That means there is no inner tube inside the tire that holds the air. Instead, the air is held inside the tire by a seal formed between the tire bead and the rim.
In order to refill a tire where the bead has come off the rim, you first have to create a seal between the bead and the rim.
The easiest way to do this is to apply pressure to the surface of the tire. This pushes the bead outwards and helps create the seal you need. On used tires, it’s usually not possible to do this by hand. So instead, we can wrap a ratchet strap or a rope around the tire and use that to help.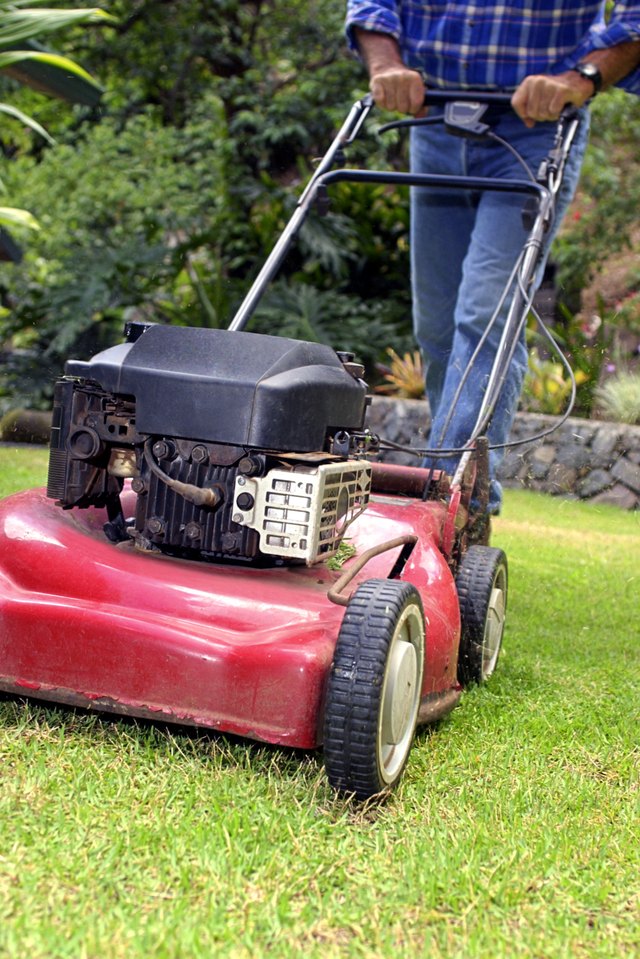
Get your ratchet strap around the tire and ratchet it a few times to apply pressure. This pushes the middle of the tire down and the sides outwards.
Once you’ve applied a bit of pressure, try pushing the sidewalls near the rim. If the bead seems solid against the rim, you can start adding some air and seeing if you have a seal.
If air still escapes from the sides and the tire won’t inflate, ratchet a couple of times on your strap and see if that helps. Once you have a seal, inflate the tire enough to keep the pressure on the bead so that you can remove the strap.
After removing the strap, you can continue to inflate the tire. The optimum tire pressure will be on the tire wall. And that is the number to aim for. Usually it’s between 15-40psi and often around 20psi.
Make your to check the tire and inflate to the right pressure.Make sure you check your tire and inflate to that pressure. Under or over inflating can increase tire wear, decrease grip, and increase the chance of a puncture or blowout.
That’s it, your tire is back on the rim and fully inflated. Re-insert your jack and raise the mower enough to remove the jack stand.
Lower the mower back onto all its wheels. We recommend letting it stand for a few minutes before moving it. This way you can wait and see if your tire will keep pressure.
Once your happy everything is working, don’t forget to reconnect the spark plug wire and remove any chocks on the other wheels.
So, you’ve inspected the tire and decided to replace it. Now you need to remove the wheel. Take off the axle cover if there is one. Underneath will be a retaining ring. Use a slot screwdriver or pliers to pull it off.
Now you can remove the washer and pull off the tire. Beyond the tire is an inner washer. It’s best to pull that off as well. Make sure you put your two washers and the retaining ring somewhere safe. It’s really annoying to find you lost one when it’s time to put the tire back on.
Take the tire and lie it flat with the valve facing upwards. Remove the stem cap and use the stem core removal tool to unscrew and pull out the core.
Push down on the tire to dislodge the bead. Using a couple of slot screwdrivers, pry the tire up and off the rim on one side. Take your time. Pry a little of the bead up, slide another screwdriver next to the first and pry a bit more. Continue around the rim until the whole side is free. Flip the tire over and do the same again so that you can pry the tire completely off the rim.
While you’ve got the rim separate, give it a clean. Removing any dirt and grime will give a better seal between the new tire bead and rim.
Now it’s the reverse procedure from removing the tire. Using your slot screwdrivers (and make sure there are no sharp edges that could damage the tire) pry one side of the tire onto the rim. Flip it over and pry the other side on.
Flip your tire vertical again and find your compressed air. With a new tire, and not attached to the mower, it shouldn’t be necessary to use a ratchet strap or rope to get the bead to seal.
Push down a little on the tire and start to inflate. The bead should seal. Once you’re happy you have a seal, re-insert the valve stem core.
With the valve stem in, you can continue inflating the tire to the optimum tire pressure. Remember to check the optimum pressure on the tire wall and only fill to this value. As we said above (step 6a), over or under inflating a tire is not a good idea.
Using the reverse procedure from taking off the wheel, you can now re-install it. Find your washers and the retaining ring.
Put the back washer on first and then slide on the wheel. Add the front washer. Using pliers, put the retaining ring back on the axle and then replace the axle cover.
That’s it, you have a new tire. Re-insert your jack and raise the mower enough to remove the jack stand.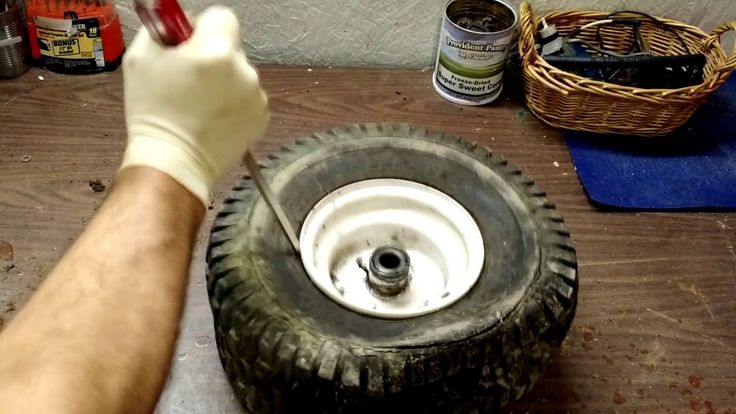 Lower the mower back onto all its wheels.
Once your happy everything is working, don’t forget to reconnect the spark plug wire and remove any chocks on the other wheels.
Well done! You have fixed your mower tire and are ready to get back to your lawn.
I hope this guide has been useful to you. Whether you’ve put your tire back on the rim or replaced it completely, following our step-by-step guide should get your mower back on the grass in no time. Happy mowing!
For RC, TC, MC models
User messages table.
PAUS - Once you turn on the app and connect to the mower, touching R in the schedule or swiping to the left pauses automatic mowing.
0011 - most likely you need to change the wheel gear
0013 - most likely you need to change the wheel gearbox
E2 - swap the wires at the base
Display (level 1)
Display (level 2)
pressing the left arrow
Description
Probable cause / event
Corrective action
E 1
0031
Stuck in place
- Robomo is stuck in place.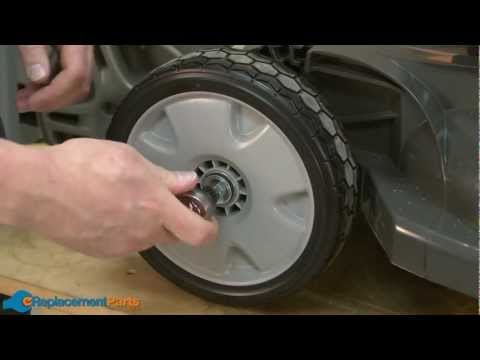 He cannot keep moving.
Drive wheel motors operate under heavy load.
- Robomow has difficulty getting into place because the front wheel is blocked by a ditch or uneven ground.
- Remove mower from this location and restart.
- Fix the cause of it getting stuck.
- Check the ground around the mower in ditches or on level ground. Align.
- Check that the drive wheels are free and nothing is blocking them.
- Make sure cutting height is not set too low for grass conditions - increase cutting height if necessary
0027
Start elsewhere
Drive wheel motors run under heavy load during automatic or manual operation
- Make sure the mower is not stuck by making the drive wheels slip.
- Check the ground around the mower for holes or depressions. Pour in dirt and level.
- Check that the drive wheels are free and nothing is blocking them.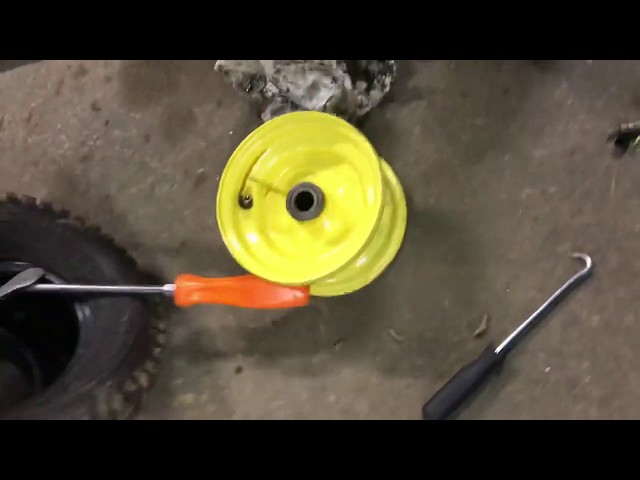
- Remove mower from this location and restart
E2
0028
Cross outside
Perimeter wire too close to edge.
- The slope of the lawn is too large.
- Robomow does not have time to turn on the edge, and this causes the mower to slip out of the designated area.
- Robomow has slipped out of the wire rope perimeter due to an incline or wet grass.
- Remove the wire towards the inside of the lawn.
- Do not include this area due to its steep slopes.
- Fill holes and holes in the ground.
- Increase cutting height.
0030
Start inside
Automatic mode starts when the robot is taken out of the perimeter loop.
Place the mower on the lawn and resume work
E3
0012
No wired signal
- Power Box / Perimeter switch not enabled or connected
- You may need to restart the Power Box
- The perimeter wire is not connected to the base station/perimeter switch.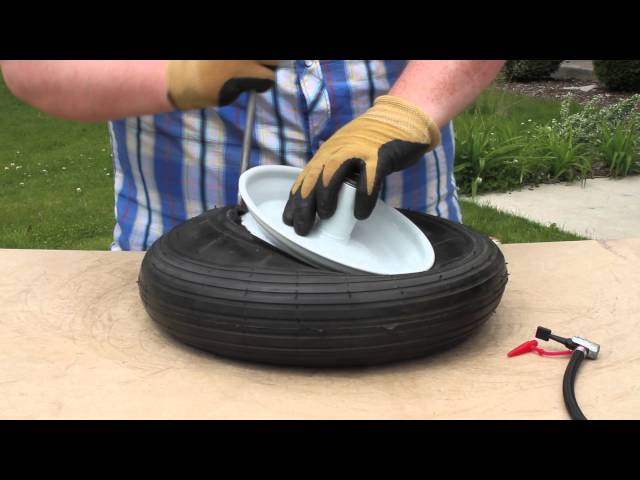
- Perimeter wire cut.
- Make sure the base station is connected to the network.
- Disconnect the power supply from the mains and reconnect it after 10 seconds.
- Make sure the low voltage cable between the power supply and the base station is connected.
- Check the LED indicators on the power supply.
- Check the connection of the perimeter wire to the base station/perimeter switch.
- Check installation on cut wire. Repair the damaged cable using the waterproof connector included in the package.
E4
0023
Check power
- The power supply is not properly connected to the power outlet.
- There is no power at the wall outlet or the main power is off.
- The mower or base station contacts are dirty.
- Charging not detected, although there is physical contact between the contacts of the mower and the base station.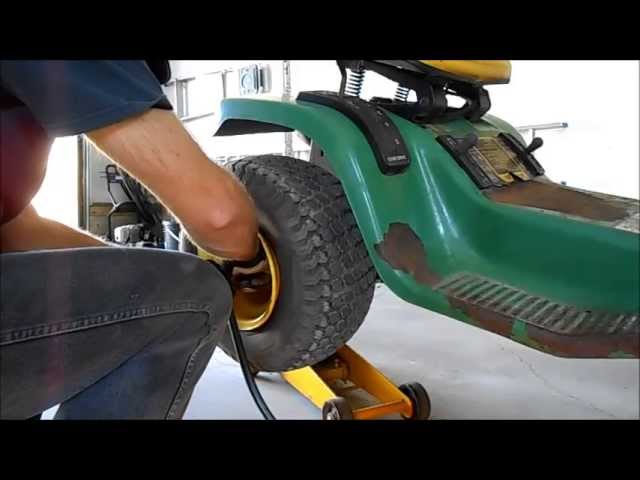
- Confirm that the power supply is plugged into an electrical outlet.
- Turn on power from electrical outlet.
- Test the outlet with another device.
- Clean the contacts with a brush or cloth.
- Confirm that the Power Box is well connected to the base station.
E5
0010
Mower overheating
The mowing motor has been under heavy load for too long.
No action required - Robomow will automatically resume operation after the mowing motor has cooled down.
0021
Check cutting height
The mowing motor has been exposed to excessive conditions for too long as a result of tall grass or an obstacle that gets stuck or wraps around the blade.
Something is preventing the blade from rotating freely. A heavy accumulation of grass under a shovel, rope, or similar object is wrapped around the mower.
WARNING. Turn off the safety switch before checking the blade.
- Inspect blade for foreign material or debris preventing rotation.
- Clean accumulated grass clippings with a wooden stick.
0022
Check mowers
The mower motor encountered excessive current at the base station for too long before starting work
WARNING. Turn off the safety switch before checking the blade.
- Remove mower from base station. Inspect the blade for foreign material or debris preventing rotation.
E6
0011
Drive overtemperature
Drive motors run too long under heavy load
Nothing to do.
TheRobomow will automatically resume operation once the drive motor has cooled down.
E7
0014
Front wheel problem
The front wheel left the ground too long during operation.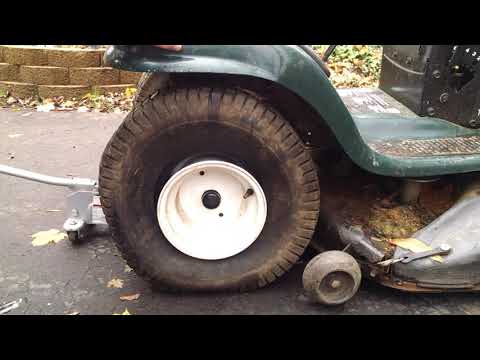
- If Robomow enters an obstacle, turn off the safety switch by raising the front: remove or exclude the object from the mowing area.
- If Robomow is used on a slope too steep for safe mowing, exclude it from the mowing area.
- If tall grass is preventing the front wheel from turning fully on the ground, raise the cutting height.
- If there are large holes or depressions in the ground where the front wheels could fall while passing, fill these areas with dirt and level.
E8
0061
Reduce idle time
- Too many inactive days and/or hours have been set for your lawn zone. The current settings will not be changed.
- The cutoff frequency is too high for the current inactive time settings. The Inactive Time settings will be set to their default values.
- Area setting too high for current inactive time settings. The Inactive Time settings will be set to their default values.
- Reduce inactive days and/or inactive hours to allow Robomow to complete lawn mowing.
- Reducing the cutoff frequency (p001)
- Decrease zone setting
E9
0015
Key pressed
One of the control panel buttons is pressed at the same time.
Press "OK" to acknowledge the message and continue. This message is displayed for information only.
0016
Low temperature
- The mower does not automatically move away from the base station when the atmospheric temperature is below 5ºC (41ºF).
- Information. When the temperature is below 5ºC (41ºF), the grass does not grow and does not grow very slowly. However, Manual Depart is included.
- No need to do anything.
- Robomow will automatically resume operation as soon as the atmospheric temperature rises above 5ºC (41ºF).
0020
Rain detected
- Operation is delayed because Robomow detects rain.
- Robomow must resume 30 minutes after it stops to detect rain.
- No need for action.
- The message is shown until Robomow detects rain and then starts to mow.
0026
Major problem
Robomow cannot log into the base station several times in a row
- Adjust the position of the base station.
- Clean the contacts with a brush or cloth.
0060
Intensity error
The mowing speed you have set too high is too high for your lawn.
Reduce the mowing time percentage you have set for the zone(s) in the lawn.
|
Kosh errors | Reason for failure | Description |
|
| E501 | Reading wire signal higher than wire signal when reading |
|
|
| E502 | The wire reading indicated that the calibration failed because either the signal amplitude off reading or the signal on the amplitude reading exceeded their tolerances |
|
|
| E503 | The calibration reading showed that the calibration failed because we detect that the robot is not inside the garden during the calibration with a signal at |
|
|
| E504 | wire reading indicates calibration is not possible because we detect that I/O reading is invalid |
|
|
| E505 | Front wheel lift off reading is equal to or less than front wheel idle reading |
|
|
| E506 | Difference between front wheel up off reading and front wheel idle reading is too small. |
|
|
| E507 | Odometer readings on front wheels not allowed |
|
|
| E509 | Poor battery voltage calibration | The battery temperature reading indicates that the mains voltage set in the calibration cell is invalid |
|
| E510 | Poor battery voltage calibration | battery cell voltage readings exceed tolerances |
|
| E511 | battery connector disconnected |
|
|
| E512 | Mower configuration invalid |
|
|
| E513 | Thermistor disabled |
|
|
| E515 | Mower engine off | An engine shutdown is detected when mow pwm is at maximum and the mower odometer indicates that the engine is not moving. |
|
| E516 | Drive configuration icon not installed |
|
|
| E517 | Drive motor disabled | Engine shutdown is detected when the drive pwm is at maximum and the drive odometer shows that the engine is not moving. We will stop when this condition is detected for more than 15 seconds. |
|
| E518 | tilt calibration failed |
|
|
| E519 | Tilt calibration failed because accelerometer reading does not match |
|
|
| E520 | incorrect system configuration |
|
|
| E521 | STOP button is disabled in the user interface panel connector |
|
|
| E522 | Invalid drive configuration | one of the following: 1) left or right drive configuration unknown 2) left and right drive configurations are different | Something with wheel drive. |
| E523 | Standard power test failed |
|
|
| Display | Description | Action required |
| BATT | Battery Charging. Low battery voltage. | Charge the battery. |
| U001 | Check the position of the Base Station. Displayed during One Time Setup. | See section 5.2.4 of the User's Guide. |
| U002 | Peg base station. Displayed during One Time Setup. | See section 5.2.4 of the User's Guide. |
| U003 | Check wire position. Displayed during One Time Setup. 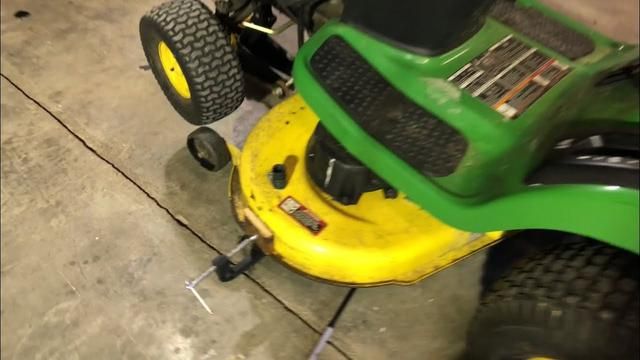 | See Section 5.2.5 of the User Manual |
| U004 | Wire Test ended (during One-Time Setup) Displayed only when using the Robomow application. | No action required. |
| U017 | Run time completed as expected. | No action required. |
| U018 | Operating time is shorter than expected | Battery operating time is too short. Replace Battery. |
| U024 | Keep charging when not in use. Only displayed if the mower is disconnected from the charging adapter. | It is recommended to keep the mower connected to the power supply when not in use. |
| U025 | Switch off before lifting | Turn off the System Switch before lifting and carrying the mower. |
| U029 | Change the wires in the plot connector displayed during the One Time Setup. 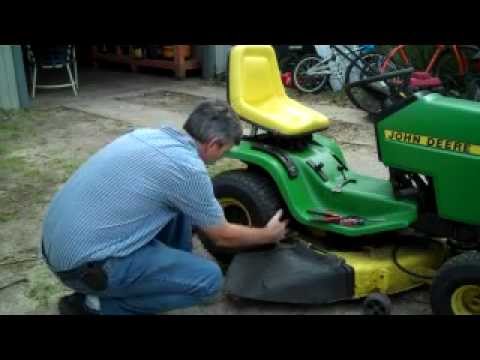 | Replace wires at site connector. See section 5.2.4 of the User's Guide. |
| U032 | Turn on the system switch. Displayed if the mower is connected to charging but the system switch is "Off". | Switch the system switch to the "On" position. |
| U041 | Press the STOP button when entering the subzone. | Press STOP at the point where the mower is to start mowing the subzone. |
| U042 | Distance between teaching edges. | The mower learns the distance along the perimeter of the wire in the Designated Zone. Press the STOP button to see the distance. |
| U043 | Walking towards the entry point to the Subzone. Displayed when the mower moves towards the subzone | No action required. |
| U044 | Place the mower on the Base Station.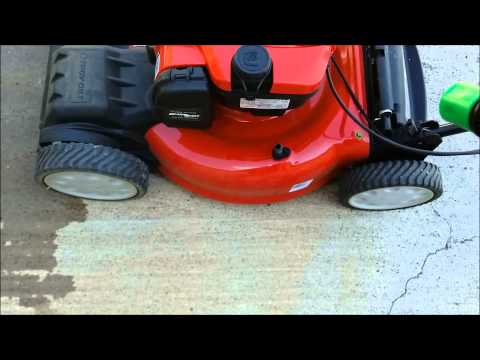 | Place the mower in the Base Station before starting the process of adding a sub zone. |
| U051 | Move the base station position. Displayed during One-Time Setup. | See section 5.2.4 of the User's Guide. |
| U052 | Adjust Wire | See section 5.2.5 of the User Manual. |
| U062 | The alarm will sound soon. | This message warns you to enter your PIN before the theft alarm sounds. |
| U064 | Base station search operation cannot be performed | When selecting the Home button in an area without a base station. |
| U086 | Waiting for a signal… Robomov stopped the operation. It does not detect a signal. | Check the power supply to the power supply. Power interruption may occur. You don't have to do anything.  Robomow will resume operation as soon as the power is turned on again. Robomow will resume operation as soon as the power is turned on again. |
| U087 | Motor mowing, overheating, cooling… Mower motor has been running too long under heavy load. | No action required - Robomow will automatically resume operation as the mowing motor cools down. |
| U088 | Drive motor overheating, cooling down… Drive motors have been running too long under heavy load. | Nothing to do. Robomow will automatically resume operation once the drive motor has cooled down. |
| U089 | The child lock is activated. Operation buttons are locked to prevent unintentional operation, especially by children. | To operate the mower, first press one of the operating mode buttons and then press the OK button to confirm. |
| U090-U093 | Subzone 1/2/3/4 Entry problem. | Try to start mowing manually (see section 6.3 - Manual control). Check to see if anything is preventing the mower from moving backwards and/or around the Base Station. Confirm movement of the mower around the perimeter |
| U090-U093 | The mower either does not leave / bypass the Base Station on the way to the Subzone, or does not enter it. | The wire does not fall off the edge of the lawn when it moves away from the Base Station. |
| U090-U093 | The mower will attempt to reach the Subzone every two hours. If the mower does not reach the Subzone within three attempts, it will remain at the Base Station until the end of the current mowing cycle | Check that the mower is able to follow the perimeter of the wire along the narrow passage until it reaches the Subzone. Refer to section 4.3.3 for proper narrow aisle installation. |
| U094 | Increase cutting height when turbo mode is activated. | See sections 5.1 and P026 in section 6.4.2 of the User's Manual. |
See also
Best gas heaters - ranking 2021 - 2022
Petrol lawn mowers come with front, rear and all-wheel drive. Each model is suitable for certain conditions. When choosing, it is most important to look at the wheel drive of the lawn mower. Be guided by the area and topography of your site. Let's take a closer look at models with different drives and decide which lawn mower is better.
Purchased for a large area.
Copes with the expressed relief.
Not designed for manoeuvring.
It will perform well on a large lawn without trees and paths.
While driving, the operator presses the handle with force, which raises the front wheels.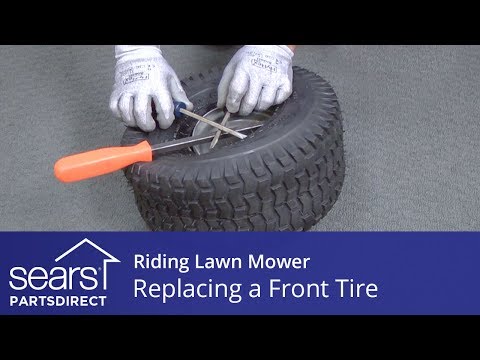 The driven rear wheels allow this to be carried without compromising the quality of the mowing.
Working close to solid objects will be difficult. It is difficult for the operator to cut grass in hard-to-reach places.
See also
Self-propelled and non-self-propelled snow blowers - which one to choose?
Front-wheel drive equipment is useful for owners of uneven areas of medium and large areas. It maneuvers around trees and problem areas.
Used in medium to large areas.
Suitable for areas with trees, bushes and bumps.
Handles slopes greater than 10%.
Engine power starts from 5 liters. With.
Uses blades with a wide grip - from 53 cm.
The engine speed allows you to use the equipment intensively for a long time.
See also
How to choose a starter charger for a car battery
Powerful model with high engine speeds and four drive wheels will perform the most voluminous and complex tasks.
Used in a professional environment.
It is used on uneven lawns of the big and average area.
More expensive than rear-wheel drive and front-wheel drive models.
The drive of self-propelled lawn mowers combines the advantages of both types of models.
See also
Gas heaters - questions, tips, recommendations
Engine Benefits:
ReadyStart® Easy Start System: ReadyStart engine starting system without pre-priming or choke manipulation. The system detects engine temperature and delivers the exact amount of fuel to the carburetor. The non-contact Magnetron® ignition system provides stable electrical generation, both cold and warm engine. All you have to do to start is pull the starter cable.
The EXi engine does not require an oil change - just check and top up if necessary. Read the instruction manual carefully before use.
Service friendly: Tool-free air filter change, extended oil filler neck.
For more than 100 years Briggs & Stratton, an American company, has been developing, manufacturing and servicing motors for small-scale mechanization. Reliability, easy starting and easy maintenance of the motor will save you energy for rest.
Best price
25722c 30 990c
RedVerg RD-GLM410G petrol lawn mower is an excellent combination of performance and affordable price.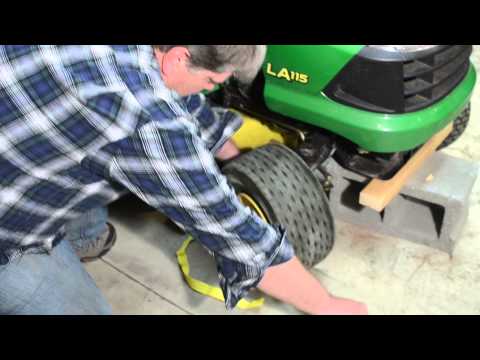 It is able to put in order a small or medium-sized area in the shortest possible time. This equipment does not depend on the electrical network. Maneuverable and stable, it will provide its owner with maximum comfort when working. The operator's hand does not slip off the handle, and he himself makes almost no effort to move the RedVerg gasoline lawn mower around the site. Easy to use, powerful and affordable, it will be an excellent choice for every customer.
Best price
13 139c 15830c
The RedVerg RD-GL40P petrol lawn mower with a reliable four-stroke engine model GP145-F, 2.7 l/s power is a practical and easy-to-use tool that is an indispensable assistant in the care of lawns in the adjacent garden area.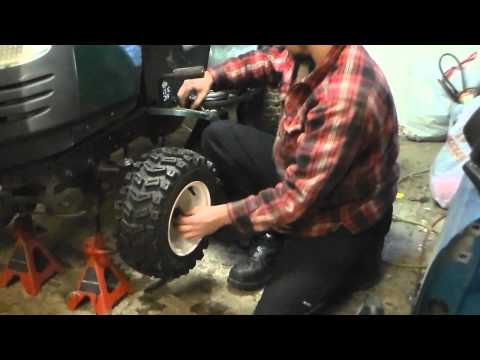

 We will stop when this condition is detected for more than 15 seconds.
  You need to remove the wheel drive after the battery. Unplug the connector and then plug it back in.