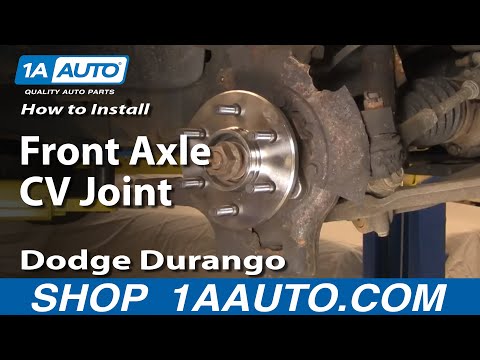
Changing out an ATV axle is a pretty routine job. All ATVs will need this done at some point in its life. With the rough terrain most riders take their quads on, there’s bound to be a bent axle problem sooner or later.
Sometimes you need to change the axle out because it got bent, sometimes people want to get a longer axle installed to widen the stance of their quad. Either way, the process is the same.
These steps are universal for any ATV cv joint axle change, but each quad is a little different. If you’re ever in doubt about one of the steps, it’s best to check your users manual. But first, lets go over the warning signs that your axle is actually bad and needs replacement.
The first thing to watch out for is a clicking or popping noise that you can hear while riding. This noise is most likely heard during tight corners or taking tight turns. This is a fairly common noise to hear if your cv joint axle is wearing out and needs to be replaced.
Physically get done and look at the axle itself. If it looks bent or dinged up enough that you can see a curve in the axle, it probably needs to be replaced. Check the boots and cv joints for wear or breaks as well.
If you feel a vibration or shaking when riding, it could be your axle is bent. There are a number of other issues that would cause a shaky feeling though. If a shaking or wobbling while riding is your only warning sign and the axle doesn’t look bent, I would check out my Common Reasons An ATV Will Shake article before swapping out the axle.
Now lets look at the tools you need and the steps to take to change out your ATV axle.
You will also want to wear safety glasses and gloves when working on your ATV. You may need a new cotter pin for the axle castle nut and penetrating oil and cleaner if the axle is stuck on there.
Lift the quad off the ground and place on jack stands or something very sturdy. You will be pulling on the lifted machine in later steps and don’t want it to tip.
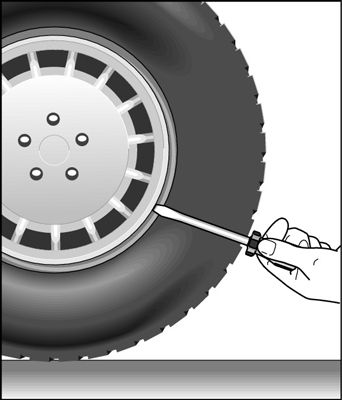
Get the lug nuts off and remove the wheel. It is easier to loosen the lug nuts before jacking up the quad. You can put the lug nuts back on the hub after the wheel is off if you’re worried about loosing them.
You might have a plastic cap covering the castle nut that you will need to remove first. Take the cotter pin out of the castle nut and remove the castle nut. It’s ok if you have some one hold the brake down to prevent the axle from rotating while you take off the castle nut.
The brake caliper is usually held on by two bolts, remove those and pull the caliper off the rotor. You don’t need to take the caliper apart any further than this. Simply zip tie it up out of the way and avoid letting it hang or putting strain on the brake line.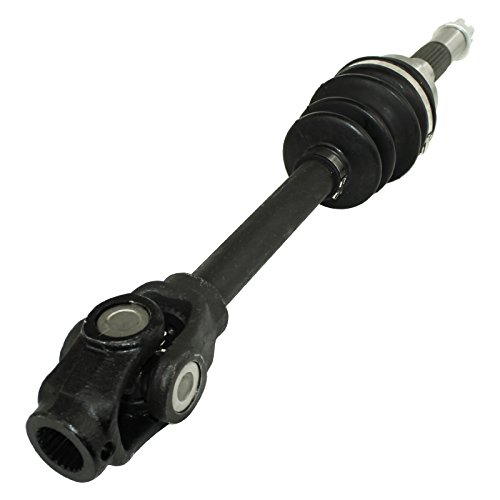
This is a good stage to check if you need to replace your wheel hub bearings. You will need to remove all the same parts and get to this point to do that job anyway, so why not if it needs it do it now.
If you try to rotate the hub bearing assembly and notice it wobbles or is grinding, check out my ATV Wheel Hub Bearing Replacement article to get more info about that. Now remove the hub.
This will allow you to move the A-Arms when you get to that step. Just remove the cotter pin if you have one and remove the bolt holding on the bottom of the shock. This is only required if you need to remove the bottom A-Arm bolt to move it out of the way, usually only need on front axle changes if you have to remove the tie rod ends from the steering knuckle.
To remove the bottom A-Arm bolt, simply take out the cotter pin if you have one and remove the nut holding it in place.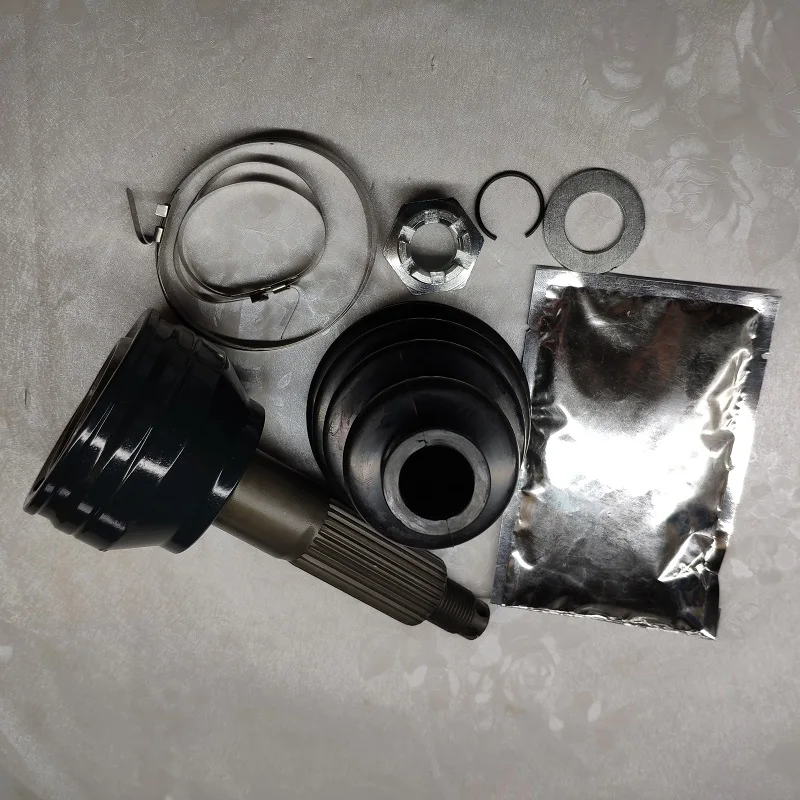 You need to pull the bottom ball joint out of the steering knuckle in order to get the axle out.
To remove the steering tie rod end the same steps apply. Remove the cotter pin if there is one and remove the bolt. You may not need to do this step depending on your machine, and this is also only required on a front axle change.
The main goal here is to get the steering knuckle or rear knuckle off the axle.
To remove the axle from the differential you will need to play with it a bit. A lot of times these axles can stuck on there and you may need to use some penetrating oil to make it easier.
Just give it a swift quick jerk on the axle to pull it out. This step is easiest done when you lower the bottom A-Arm and raise the top A-Arm and steering knuckle out of the way. Now it’s time to install the new axle.
Get the new axle and line up the splines with the differential before pushing the new axle into place. It’s a good idea to grease up the splines on the the new axles before installing. Anti-seize grease will work just as well.
You may need to hit the end of the axle with a rubber hammer a couple times to get it seated in all the way properly. You should hear and feel it click into place nicely. You can give it a little tug to make sure it seated the right way.
This step is pretty straight forward, you want reinstall everything in the reverse order you took it apart. Get the steering knuckle or rear knuckle back on the axle, bolt the tie rod ends and A-Arms back together, and bolt put the lower shock bolt back on.
Now put the hub back on with the washer if there was one and the castle nut with a new cotter pin. Put the wheel back on and take the machine off the jack or jack stands.
With any maintenance efforts that involve removing the tie rod ends or anything to do with the steering, it’s a good idea to do an alignment afterwards. Especially if you were installing a longer axle to widen the stance of your ATV.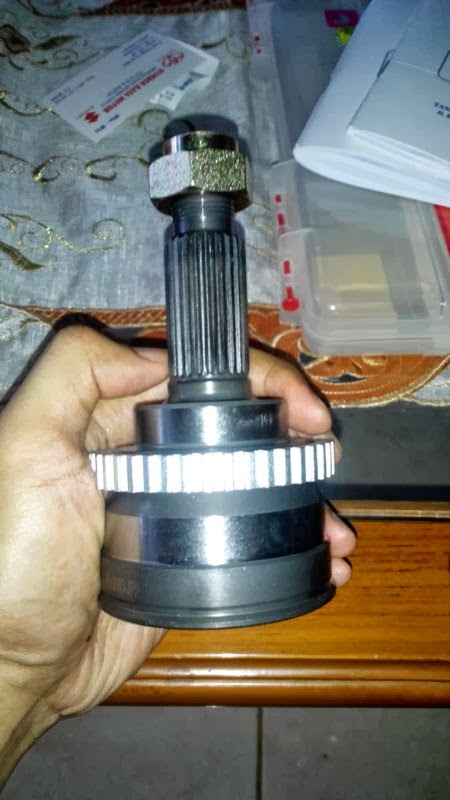
An alignment may not so crucial if you really only ride at lower speeds, but not getting one done can cause your tires to wear unevenly and cause extra wear to other parts of your machine.
To do an ATV alignment check out my How To Do An ATV Alignment article for the step by step process on how to get it done the right way.
That’s it! Those are the steps to replace the axle on your ATV. If you don’t know where to start the search for the replacement axle, I would try your local ATV parts store or Look At ATV Axles on Amazon. You can usually find the parts cheaper online, just make sure you get the right part for your make and model.
Sharing is caring!
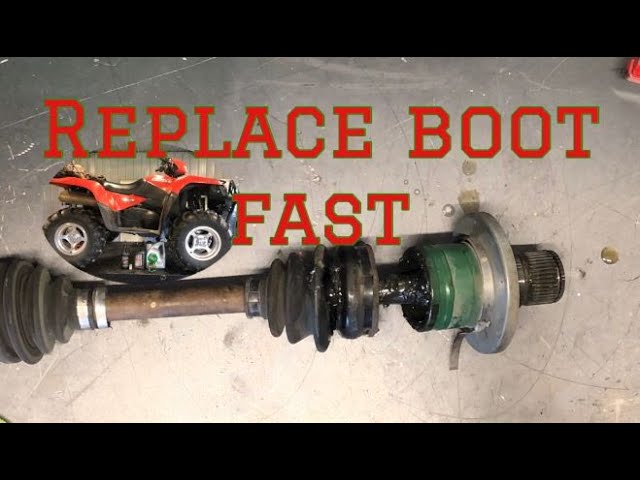
CV axles are used to drive every model UTV and independently suspended ATV on the market. Whether replacing a torn CV boot, a broken axle, or even upgrading to stronger or longer axles for an aftermarket suspension, as an ATV enthusiast, you are bound to be tearing into one at one time or another. While it looks a bit scary, there really is little mystery to axle repair, and the same basic process can be used on almost any model CV axle.
We will show you how to rebuild a broken RZR XP axle with OEM Polaris parts, but you can use these same steps for CV boot replacement with a boot kit from Moose Racing or All Balls. MTA also has a new, reasonably priced line of Slasher CV axles and boots.
Tools needed:
• Bench vise
• Dead blow or brass hammer
• Needle-nose pliers
• Side dikes
• Small flat screwdriver
• Band clamp tension tool
• Moly CV-joint grease
 A couple of quick pops should
 STEP SIX
 Re-torque your wheels and enjoy your
Continue Reading
AxlesCV Joints
Prev Post
Polaris RZR Factory Racer Ryan Piplic Takes SxS Pro at WORCS Round 6
Next Post
2017 POLARIS RZR XP TURBO TEST
A constant velocity joint, that is, a CV joint or a grenade, is one of the components of the chassis of the car. Through the CV joint, torque is transmitted to the wheels. Accordingly, the failure of this part will lead to the fact that the car will not be able to continue moving.
It goes without saying that a CV joint does not break in one second. First, there are signs indicating that the grenade's "life" time has begun to count down. They can go unnoticed only if the driver is extremely inattentive and always drives with loud music turned on. In all other cases, the attention of the car owner is certainly attracted by a characteristic crunch, which intensifies when accelerating, passing obstacles and cornering.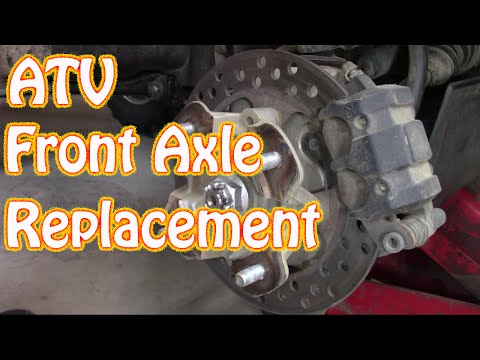
Another thing is that not all drivers rush to a car service, as soon as they diagnose a CV joint breakdown by ear. Someone pretends not to notice an unpleasant sound and postpones the replacement of the part (namely, the replacement, since the CV joint repair is impossible) until better times, someone looks at the tachometer and waits for it to show 100 thousand kilometers. Why? Because theoretically, the grenade replacement schedule falls exactly at this mark, but in fact the replacement time may come up even after six months of operation of the car and even the next day after its purchase, because a manufacturing defect of a part or an error made during assembly of the unit is always possible.
In addition to warranty failures, the service life of the CV joint is affected by driving habits. Aggressive driving with constant acceleration and emergency braking, sharp cornering and frequent off-road driving (as, in fact, on Russian roads) literally kill a grenade before our eyes.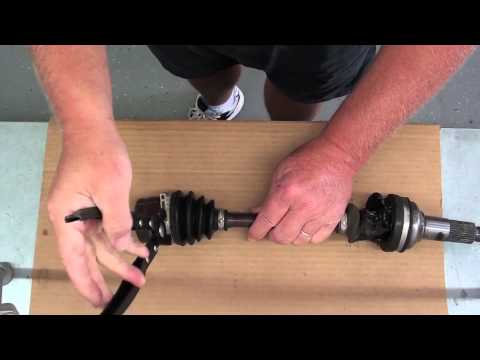 Many drivers are forced to change the CV joint two or three times a year.
Another factor that determines the life span of a constant velocity joint is the integrity of its anthers. Many car owners do not consider the boot to be too important a spare part, and in vain. Anthers are a kind of hoods that cover especially vulnerable mechanisms, in particular, CV joints, from dust, dirt, reagents and debris flying from the road. If the anther is rubbed or torn - and this happens quite often - the mechanism is defenseless. Small particles that get into it become abrasive, and moisture exacerbates the failure process. Therefore, replacing the anther is the most correct thing to do if you notice its damage - it will cost much less to replace the CV joint.
What will happen if, at your own peril and risk, you continue to drive with a crispy grenade? Roller bearing needles may fall off. This is dangerous because they will fall into the box body, and from there, together with oil, under pressure, they will rise to the gears and disable the unit.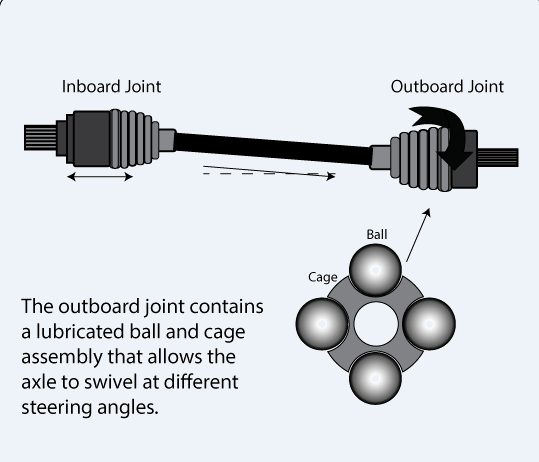 Then you will have to change not only the CV joint, but also the box, which is much more expensive, longer and more difficult.
An even worse scenario when driving with a crunchy CV joint: sudden jamming. This is a very common consequence of driver frivolity, which can occur at any speed and in any place. Imagine for yourself what will happen to cars, the driver, passengers and other road users if the wheel of the car jams at a speed of 80, 100, 150 km / h?
There can be only one conclusion: monitor the condition of the grenade - check and change the anthers in a timely manner, listen to the sounds coming from the wheels and do not delay replacing the CV joint if such a need declares itself.
In any mechanism where there are moving parts, great attention is paid to their protection.
If we talk about cars, then even a non-specialist at least once heard the words "tie rod boot" or "ball joint protective cover" and the like.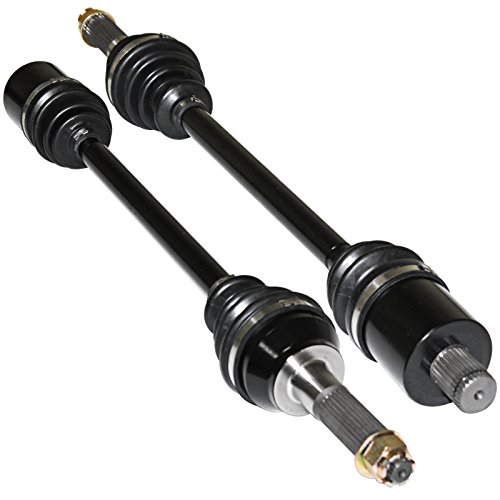 But today we will talk about the protection of SHRUS.
This assembly allows transmission of torque from the gearbox to the wheels with changing angles, which means that its insides are highly loaded and generously lubricated:
And all this needs protection. Requirements for CV joint boots:
1) Elasticity
2) Tightness
3) Lubrication resistance
8
5) Impact resistance
6) High temperature resistance
7) Long service life
CV joint boots: mainly 3 types of materials CR (neoprene), NBR and TPE (thermoplastic) are used. Initially, of course, they were made of a rubber-based material - rubber, in other words. The advantages include ensuring tightness, resistance to stretching, compression and bending. But the disadvantages outweigh: sensitivity to external influences (it is easy to damage, for example, snow frozen to ice on the levers), low resource with frequent loads (cracks appear on the folds of the "accordion" that grow to holes), aging from the external environment (reagents on the roads , increased temperature from wedged brakes).
Then came the age of plastic. Thermoplastic elastomers (TPE) - are a mixture of thermoplastic and elastomer, which characterizes high tensile strength, higher operating temperature compared to NBR and CR, better resistance to various lubricants, solvents, alkalis.
In theory, no. But we live in the real world, and besides, we can safely rely on extensive practical experience. So, without wasting time, let's get down to practical exercises. Namely:
This machine and this topic is a visual guide to the benefits of regular checkups. The owner of the car was not disturbed by anything, but during the diagnostics, the mechanic discovered that the small collar had fallen off the CV joint boot:
When the wheel rotated, it was obvious that a gap was formed between it and the drive, where, let's say, an aggressive external environment could easily penetrate :-) It can very quickly turn the lubricant into an abrasive paste and disable the CV joint itself. The solution is to replace the boot, flush the CV joint, assess its condition and, if no signs of damage are found, simply fill it with new grease.
The first step is to remove the central bolt - and this must be done while the machine is still on the ground. But we must take into account the fact that if you unscrew it, there is a risk of damage to the wheel bearing. So mix, but do not talk (this is from 007) move, but do not unscrew:
- raise the car, unscrew the wheel;
- unscrew the central bolt:
- unscrew the nuts securing the ball joint to the lever:
- pull the lever down, and drain outward, remove the CV joint shank from the hub:
As you can see, everything is simple and easy. It's in the manual. But in real life, there can be problems at this stage. More than once or twice, the shank did not want to part with the hub, in such cases, VAG ordered to use a special puller that is screwed to the hub and pushes the CV joint:
- remove the old clamps:
You can safely deform them, re-installation is not provided
To remove the CV joint from the drive stick, the same VAG provides for the removal of the entire drive, then it must be clamped in a special vice and the CV joint itself be tightened using another special puller:
the CV joint shank is through, and if you screw in the original central bolt to the end, it will work like a puller:
Easy movement - and the CV joint is in your hands.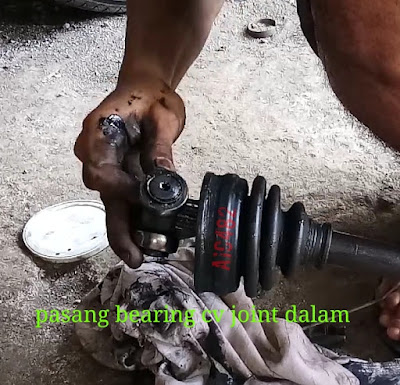 It remains only to wash the drive stick from the old grease:
Do not rush to throw away the old boot! Two conical rings remained inside, steel and plastic:
Not all kits with anther contain new rings, so the old ones can come in handy
- disassemble and wash the CV joint:
If there are no obvious signs of wear can be assembled and filled with fresh grease. You need to do it this way: cut off a corner in a bag of grease, press it firmly against the central hole and squeeze it out until the grease appears from under the balls:
IMPORTANT! Grease should not get on the outer part of the CV joint housing, especially in those places that are in contact with the anther
We return to the washed drive stick. Pay attention to the part on which the boot is pressed:
Damage to the surface is most often the result of poor sealing:
If you do not pay attention to this point, then installing a new boot is a waste of money.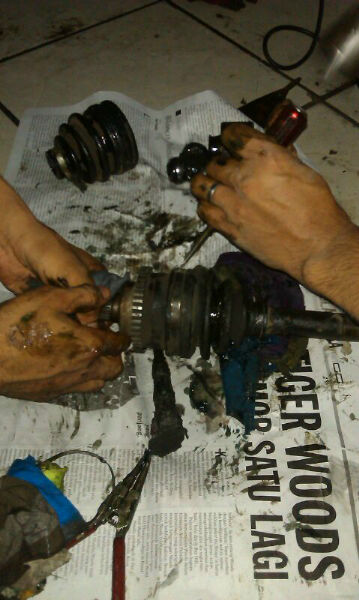 What to do? Thoroughly clean and... apply sealant:
- immediately put on a new boot with a clamp:
In fact, one of the disadvantages of plastic covers is less elasticity compared to rubber ones. And a clear proof of this is poor tightness in this particular place. Even if the surface is not damaged, and the anther is crimped with the correct clamp, the CV joint often failed due to moisture, which still seeped in at the place where the anther fit. Especially at low temperatures. So I recommend applying a thin layer of sealant always.
And the fact that they are different - both in materials, and in size and method of tension.
Plastic anthers require the use of extra strong steel clamps:
And when choosing the manufacturer of the anther and accessories for them, it is important to pay attention to the clamps. The original ones do not even offer tension options, but are designed strictly for a certain size, and if the analogue is the same, then there are good prospects for its long work.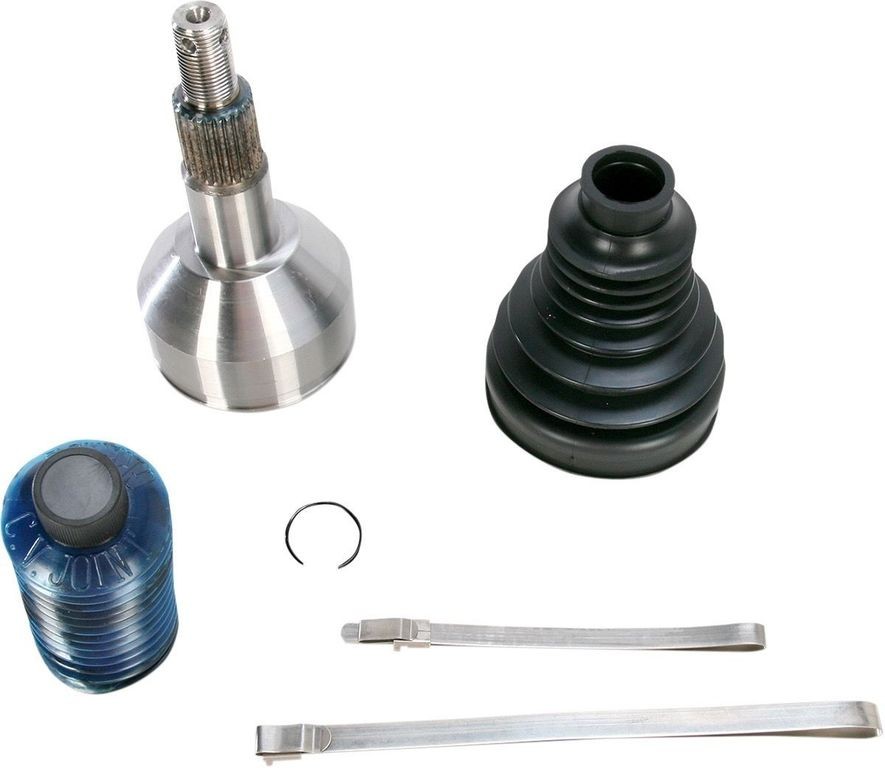 However, such a clamp requires special attention to installation. Or rather - to the effort with which it is necessary to compress the lock. It is strictly regulated, which means that it involves the use of not only a torque wrench, but also special pliers:
- tighten the small clamp with a force of 25Nm;
- put a steel cone ring on the drive stick, with a cone towards the gearbox:
- put on a plastic cone ring, with a cone out:
worse quality:
- screw the old bolt into the CV joint a few turns, screw the CV joint onto the drive stick so that the splines match. Without warping and holding the drive itself with one hand, put the CV joint on the drive with a hammer:
- without distorting the CV joint itself, pull the boot on it, put on the clamp: Nuances:
- use only a new central bolt:
- tighten the central bolt with the wheel suspended, and tighten it already on the ground;
The tightening torque depends on which bolt is being screwed in:
The difference is not so much in the length as in the number of head faces:
Hexagon bolt = 200 Nm and 180° tightening
And the torque of the hex bolt depends on the presence or absence.