Don’t know how to break a tire bead by hand? No problem. We have you covered with all the information you will need in this step-by-step guide.
We break down the procedure from knowing what the tire bead is to successfully breaking it. Read on to save yourself from a trip to the auto shop!
The tire bead is a steel cable covered in rubber that holds the edge of the tire to the wheel. It prevents the tire from shifting out of position when it rolls.
When the wheels are fully inflated, the bead is secured in place within the grooves of the rubber by the air pressure inside.
A couple of reasons you might want to remove the bead yourself are saving money and keeping up the maintenance. Breaking down the bead helps keep the rubber surface clean because it allows you to remove any dirt or debris that would otherwise be locked in the surface.
A mechanic can do the removal but will charge you for a simple task easily done in your driveway. So, let’s learn how you can do it yourself.
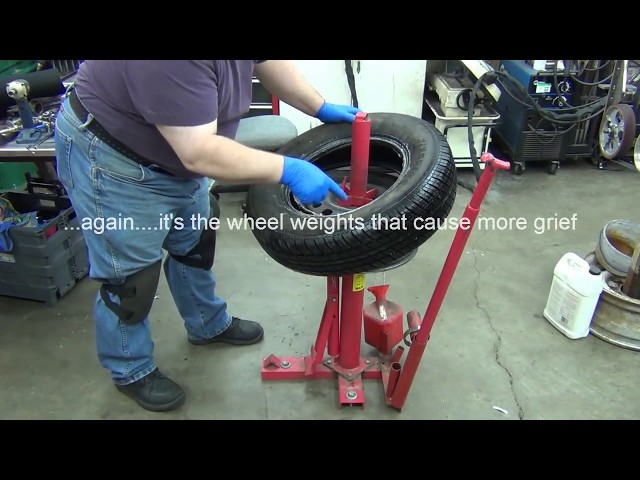
Before you can get started on how to break a tire bead by hand, the first step is to position the tire on the ground.
You want the wheel to lay down flat on a hard surface. Working on concrete will be easier than on grass or dirt, where the surface may be uneven. You will need to release the air evenly before moving onto the following steps that will require you to have a good grip on the tire.
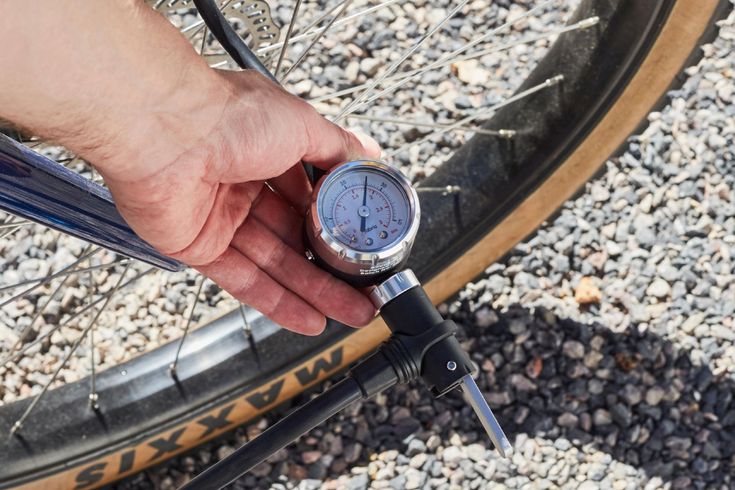
Releasing air from the tire will bring down the PSI or pounds per square inch, so the pressure against the wheel’s rim will decrease. This will make it easier to separate the bead from the rest of the rubber. In any other circumstance, you want to make sure your wheels are properly inflated.
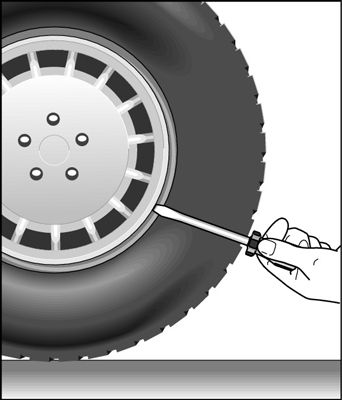
One method is to rotate the cap on the valve stem counterclockwise to expose the metal pin located in the center of the valve. Use a screwdriver, a pair of needle-nose pliers, or a similar small tool to press down on the metal pin.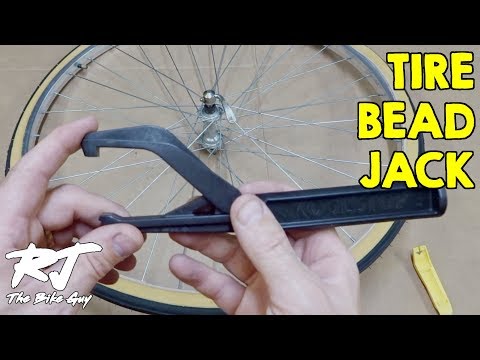
Once enough air has been released, lift the tool off the pin, and the wheel will stop deflating. Replace the cap when finished.
If you want to deflate the tire entirely, you can also unscrew the metal pin with a pair of needle-nose pliers. Air will escape much quicker.
Whichever method you choose, do not lose the cap for the valve stem or the metal pin. Keep them in a safe place until you are done.
The next step leading to the action of how to break a tire bead by hand is to prepare the area around the inner circle of the wheel. When the PSI is below the necessary level for keeping the bead secure, the rim will be easier to pull off. If the tire bead is stubborn, you may need to either deflate it some more or apply more pressure by standing on the tire as you pull it apart.
Since the bead is held firmly against the rim by steel cable and glue, you need to use a lot of force to break the connection. Applying an automotive lubricant along the edge of the rim will make it easier to slide the rubber out from around it.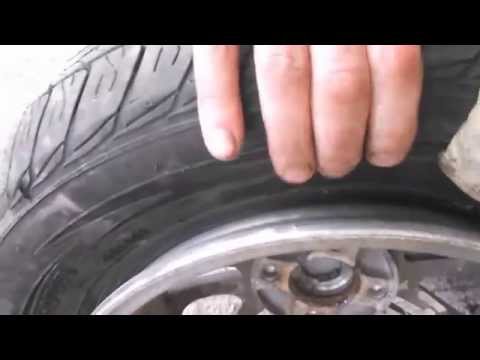 To prevent the metal from being scratched, you can tape it before adding the lubrication.
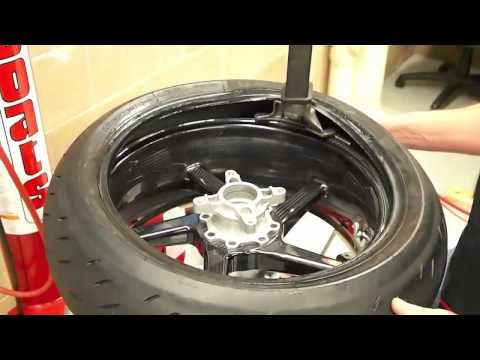
You want to push the rubber downward as hard as possible so the bead can pop out. Be careful to follow the seam to avoid damaging the metal rim. If you follow the prepping step above, the metal should be well protected.
The lining should be easy to grip and loosen until it can be pulled out from around the rim. The rim can also be removed without requiring additional tools or a machine. When the bead pops out, it will tear away from the rim.
Consider checking: How To Break Bead On ATV Tire
When learning how to break a tire bead by hand, realize that there’s a chance you can cause harm to yourself or the metal rim. Remember to stay safe and follow our step-by-step instructions.
If you ever have doubts, feel free to reach out to a certified mechanic.
Did you find this guide helpful? Then feel free to check out:
How To Set The Bead On A Tire
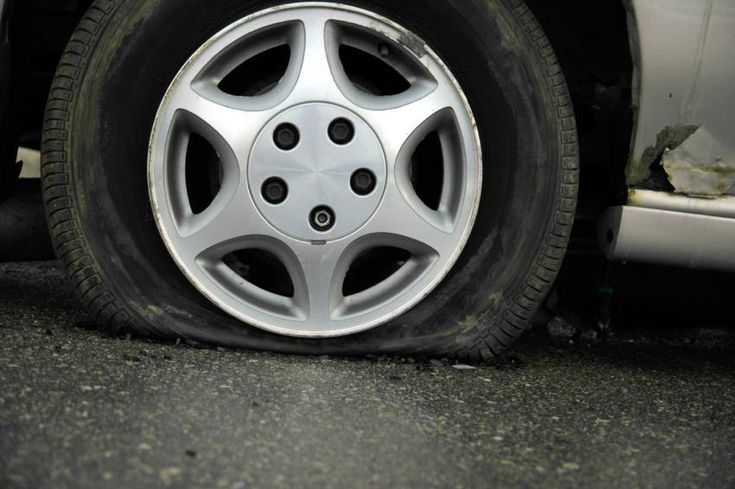
If you’re a regular driver, you may have had the bad luck of experiencing a broken tire bead.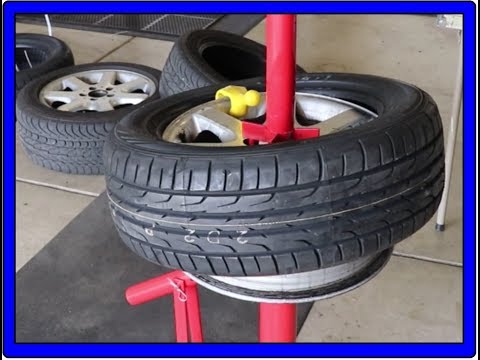
Hitting the curb or pothole, or even a quick sharp turn can result in an unseated tire bead, making the tire impossible to re-inflate.
Reseating the bead by taking it to a workshop might not be the most viable option when you’re left stranded in the middle of a road.
But do not worry because there is a rather quick (albeit dangerous) fix to pop a tire back on the rim.
All you need is some combustible fluid, a source of ignition, and a little faith in science. Just spray a little starter fluid outside the rim, and light it on fire. The expanding gas will push the sidewalls of the tire up and out, causing the tire bead to snap back into place.
You would require the following items to perform this task:
Follow the steps outlined below to properly seat a tire back on the bead:
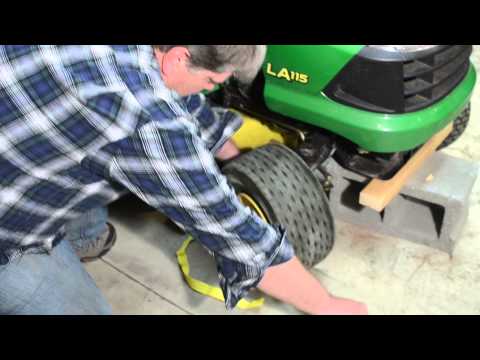
Step 1: Lift the tire up from the groundElevate the wheel off the ground with the help of a jack. If you’ve already disassembled the wheel, place the rim inside the tire and lay it flat on the ground.
Don’t have a jack?
Well, don’t worry you can check out our guide to jacking up a car without a jack!
Carefully spray some starter fluid in the cavity created by the rim and the sidewall of the tire.
Make sure you don’t spray too much of the liquid as that might damage the sidewall of the tire.
Once you’ve sprayed it around the entire bead, spray a little off the edge of the tire and onto the floor in a straight line.
Be extremely cautious with the amount of fluid that you spray onto the wheel.
Starter fluid is highly flammable. Using exorbitant amounts of such combustible liquid can cause a fire that might be difficult to contain.
Due to this reason, always keep a fire extinguisher nearby.
Using a lighter, matchstick, or whatever source of ignition you have, light up the starter fluid starting from the link you previously made on the ground.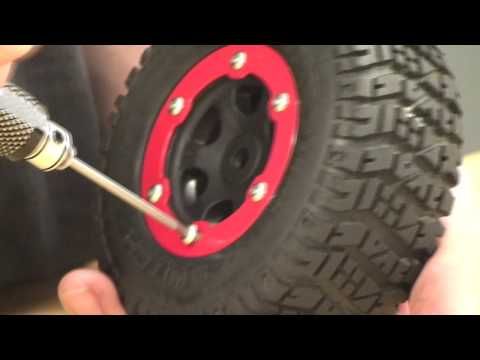
This step must be carried out immediately after spraying the tire bead so that the fluid does not evaporate away.
You might want to step back and distance yourself a bit after this step as it will cause an explosion.
The fire will cause the gases in the wheel to ignite and expand rapidly.
This sudden expansion of gases (an explosion) will cause the tire beads to move along the wheel and catch the grooves, seating them back in place.
As soon as you hear a popping sound, put out the fire as soon as possible.
This indicates that your tire is seated back onto the rim.
Finally, pump air into the tire using an air pump and you’re all set to hit the road again!
There are some disadvantages that come along with this method of popping tires back onto the rim. If not done properly, this can result in Pyrolysis, which is basically the thermal decomposition of the tire.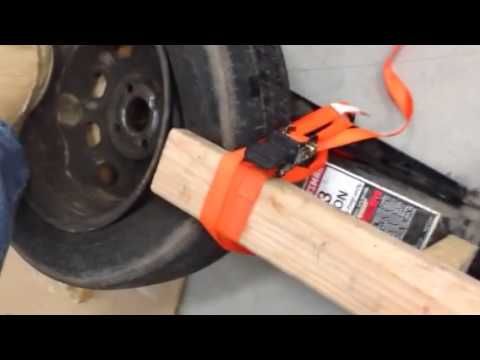
Pyrolysis can not only cause chemical deterioration of the tire over time but can also lead to a full-blown-out explosion.
The pressure inside may rise up to 7000 kPa and seriously injure anyone in close proximity to the tire.
Watch this video to learn the science behind using fire:
This is why you must always put off the fire as soon as you hear the ‘pop’ sound – usually a couple of seconds after you light up the fire.

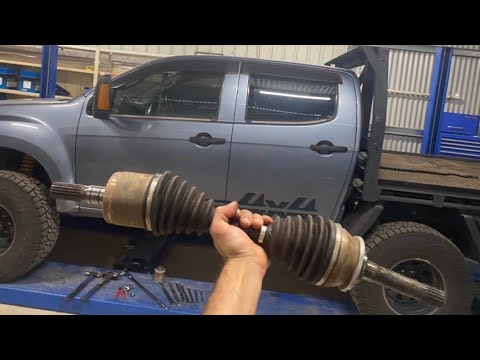
Any kind of clicking or popping sound from your car’s tires is a cause for alarm, and something not to be taken lightly.
Sounds coming from a vehicle’s wheels might be due to an underlying problem in one (or more) of the following parts:
In order to find out the exact cause of trouble, you would need to take the car for a road test.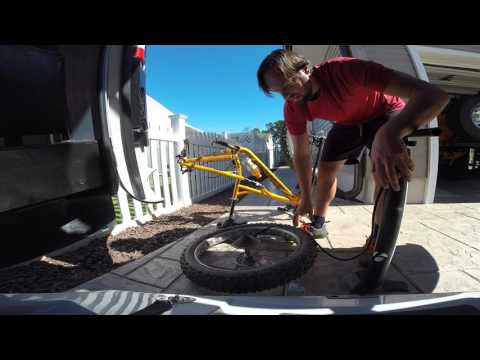
However, before you do that, make sure that there isn’t something dangling off your vehicle or a broken car part causing the noise.
Using fire might be a convenient way to pop your tire back onto the rim, but it surely isn’t the safest. Playing with combustible fluids and fires can be very risky and dangerous if you don’t know what you’re doing exactly.
Always try to seek help from a professional first, and if that isn’t possible, only then should you try pulling off such a feat. Just make sure that you abide by all the necessary safety protocols, and you should probably be fine.
(Visited 5,616 times, 6 visits today)
0003Related materials
Tire inflation with nitrogen and 7 more wirings at the tire fitting
In the middle-end of autumn, car owners storm tire shops. However, you can disassemble the wheels yourself. We'll show you how to do it. We will need a special tool, as well as a screwdriver to unscrew the wheel valve, and a couple of pliers to help remove the tire from the rim.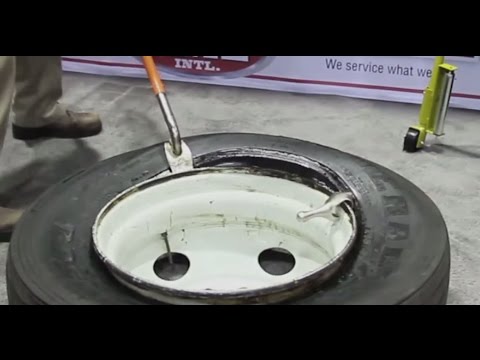
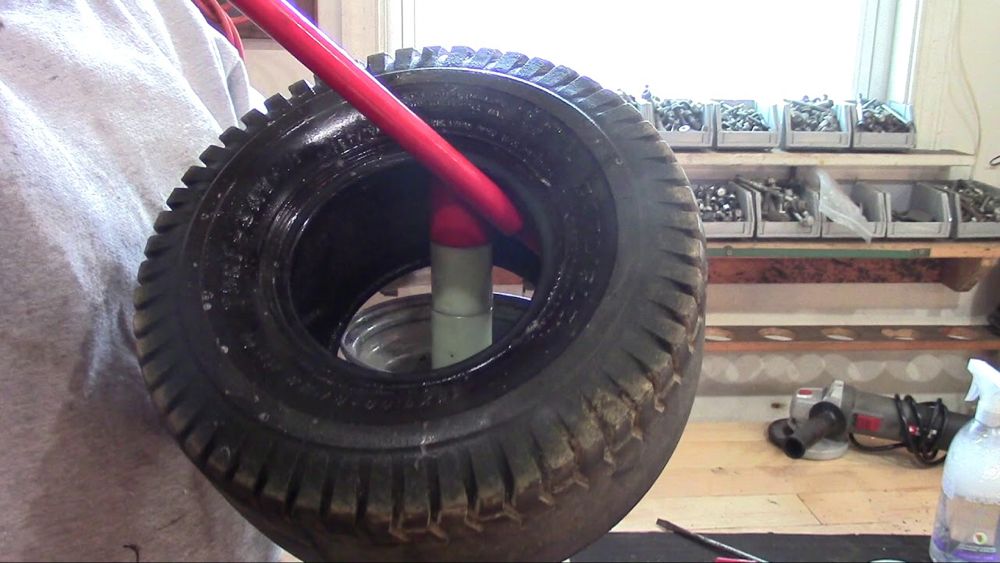
To rid the rim of the tire, we bought a simple but very useful device - a mechanical wheel beader. There are several options on the market, but we chose the one produced by the Sorokin company. It is inexpensive. Thanks to the ability to adjust the retractable linkage, tires can be removed from discs of different diameters. You only need to select the desired position of the rod and tighten the two bolts holding it, after which you can start working.
Related materials
Is it possible to pump up a wheel without a compressor - the experiment "Behind the wheel"
We took a 16-inch wheel. It is more convenient to remove the tire if you put it on the floor. In order not to scratch the aluminum disc during work, we will place a sheet of foamed polyurethane under it, which is used in construction for sound and heat insulation. We unscrew the cap on the valve, holding it with a finger, unscrew the spool so that it does not pop out under air pressure.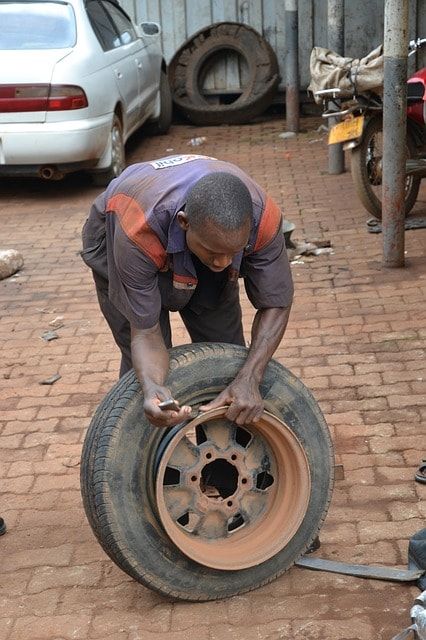 The tire starts to deflate.
Before carrying out work with the help of a special tool, it is necessary to moisten the working edge of the disc with a penetrating liquid. Otherwise, we risk damaging the disk. Also, the liquid, having seeped under the edge, will facilitate the removal of the wheel from the humps.
We apply our device to the disk. Its hook in this case should protrude from the mandrel by 7–8 cm. For reference, this is one hole on the retractable rod. With a hand, we press on the device from one side so that it goes under the protrusion of the disk, and we wind the hook under the disk from the opposite side. We spread the levers of the device in different directions. The main thing is not to try to throw off the tire immediately, but to move it off the hump gradually. Otherwise, the tire may be damaged. Please note that the device should not be inserted near the wheel valve.
Related materials
Changing shoes correctly: everything you need to know about discs
Pulling out and moving the tool, slowly move the tire off the hump around the entire circumference. You can hold the side of the flight attendant, where there is no hook, with your foot. Having removed the tire on one side, turn the wheel over and do the same work on the other. Don't forget about lubrication. By the way, it is not necessary to use a liquid, a silicone composition is also suitable.
We removed the tire from each side of the humps. It remains to take mounting blades and completely remove the tire from the disk. We process the belt with penetrating lubricant. It is advisable to get on the inside of the rim, this will make things easier. We start the first blade under the tire. It is convenient to do this in the area of the wheel valve. We take the assembly aside in advance so as not to damage it during work. Hold the mount with your foot. We insert a second spatula next to it and lift the edge of the tire with it. We do this along the entire inner circle, also gradually. We removed the tire from one side of the disc, it remains to do the same on the other. We turn the wheel.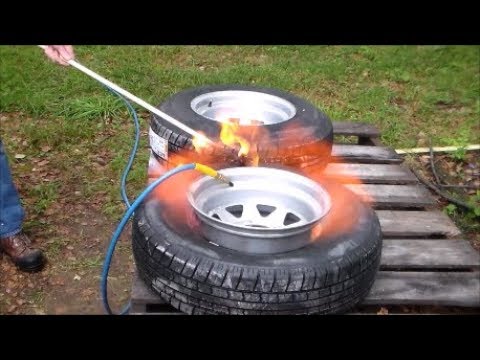 We wind the blade behind the disk and begin to remove it from the tire. As soon as we succeeded, we can consider that the work is over.
Taking apart the wheels yourself is easier than you think. The main thing is to stock up on the right tool and free time, as well as take into account the characteristics of rubber.
Please send all questions and suggestions regarding the Technical Environment series to: [email protected].
Our new video
Simplified UAZ Patriot — no ABS and pillows, Chinese box
A new brand has appeared in Russia — we are testing its first crossover
A new Russian SUV: we all really need it!
Did you like the note? Subscribe and you will always be in the know!
Driving on Yandex.Zen
News smi2.ru
But what to do if the erased tire relief does not give the proper level of grip? In this case, you need to take a groover to cut the tread and restore the grip level.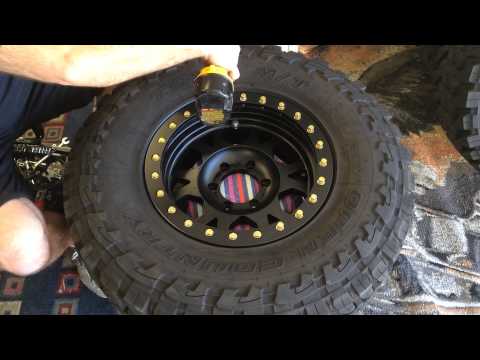 How to do it? Read about it in our article.
Factory cutting of lamellas in car tires involves the creation of grooves with a sufficient depth, but over time their height melts, rubbing against the asphalt and the ground surface.
The minimum admissible knurling depth cannot be less than:
If the tire is worn down to the marker sewn into the rubber, you will have to buy a new tire. If you want to avoid unnecessary expenses, try cutting new grooves in thick rubber before its height drops below 0.8-2.0 millimeters.
To restore rubber, you will need a special groover knife and a good eye. If you have the skills and a special tool, you can cut the tread with your own hands in just one or two hours, saving a lot of money. However, this technology does not work with all tires.
| Photo of UAZ car tire before cutting | Photo of UAZ tire after cutting |
|
| |
The widespread fascination with ecology and the threat of global warming has changed the fate of worn wheels. Previously, such tires formed man-made mountains in every landfill. Today, according to the requirements common in the European Union, the following types of tires are subject to mandatory restoration:
Restoration of truck tires and swamp tires for SUVs is possible only with the assistance of a manufacturer who has provided for compatibility with cutting technology at the rubber production stage.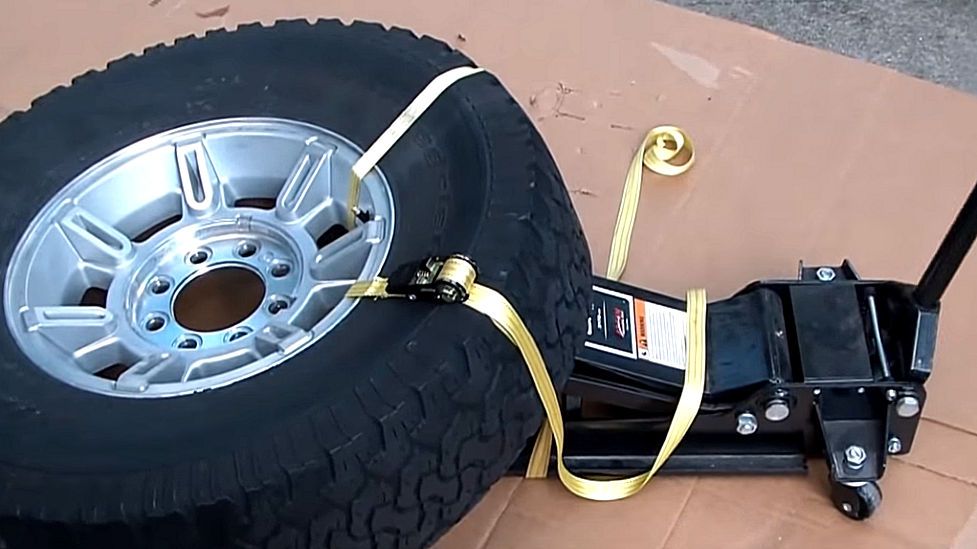 Therefore, it is possible to cut tires at home only if the inscription - REGROOVABLE is read on their sides.
If you do not see such an inscription, contact a car repair shop or abandon the idea of \u200b\u200bretreading. After all, the wheel of a passenger car is pumped up to 2.5 atmospheres, and up to 8 bar is blown into the tire of a truck, so even the slightest mistake when cutting will reduce the life of the tire several times.
Before cutting new grooves on the tread, you need to find a device suitable for the case. In auto repair shops, a special machine for car tires is used for these purposes, and home craftsmen prefer to cut the tire with their hands using knives or machines.
The most popular tread cutter is the electric regrower. This knife-soldering iron hybrid cuts grooves from 0.5 to 5 millimeters deep to create a new tread pattern. Even a cast tire cannot resist such a cutter.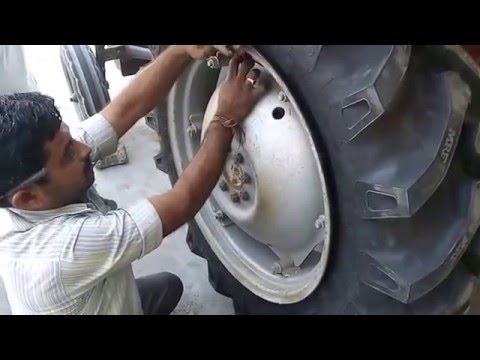 Moreover, the combined (thermal and mechanical) effect on the rubber does not involve great effort when cutting. A professional device for restoring lamellas differs from a tool for garage craftsmen in the ability to change cutting nozzles. Manufacturers of such machines produce special sets of nozzles for each brand of car or truck tires. Some tools allow you to cut several lamellas at once in one movement.
Reducing the tread depth reduces the tire's grip on the road, so to improve stability, you need to deepen the existing grooves without widening them. For these purposes, you need to find a special regrower attachment or make a homemade knife for passenger tires and cargo treads.
If tires are cut with a car regrower, the tool moves from the center of the tread to its edge. In this case, you need to control the position of the elbow - it must remain in a plane parallel to the contact patch. If you raise or lower your elbow during a cut, an extra hole or an area that is not selected in depth will appear on the tread.
When cutting thick truck tires or cast tires for special vehicles, this error can be corrected by transferring them to a car repair shop. Thin passenger tires do not forgive such failures. You can ruin a tire in just one awkward move. Therefore, most often, owners of old tires for UAZ, ZIL or GAZ take up self-cutting, but it is better for owners of passenger cars to restore their tires only in the workshop.
Summer Drive Protection Sound Comfort
Rating:
4.5
Tires Goodyear Eagle F1 Asymmetric 3 SUV
Summer Drive protection
Rating:
4. 5
5
Tires Goodyear Eagle Sport TZ
Summer Drive protection
Rating:
4.5
Tires Goodyear EfficientGrip 2 SUV
Summer Drive Protection Run On Flat
Rating:
4.5
Tires Goodyear EfficientGrip Performance
Winter Drive protection
Tires Goodyear UltraGrip Arctic 2 SUV
Winter Drive Protection Sound Comfort
Rating:
4. 5
5
Tires Goodyear UltraGrip Ice 2
Winter Drive Protection Sound Comfort
Rating:
4.5
Tires Goodyear UltraGrip Ice SUV
Winter Drive protection
Tires Goodyear UltraGrip Performance+ SUV
All season Drive protection
Rating:
5
Tires Goodyear Vector 4Seasons Gen-3 SUV
Summer Drive Protection Run On Flat
Rating:
4
Tires Goodyear Wrangler HP All Weather
All season Drive Protection
Rating:
4. 5
5
Tires Goodyear Vector 4Seasons
Summer
Rating:
4.5
Tires Goodyear Wrangler All-Terrain Adventure with Kevlar
Summer Drive protection
Rating:
4.5
Tires Goodyear EfficientGrip SUV
Summer Drive Protection Run On Flat
Rating:
4
Tires Goodyear Eagle F1 Asymmetric SUV
 After that, carry out the entire complex for cleaning the wheels before selling - remove the dust, wash the rubber from the inside and out, perform blackening. It is much more pleasant to work with a clean tire, especially if you do all the work with your own hands and home tools.
  Just do not press the tool on the tire - this way you can cut the rubber through and through. A professional does the job in several passes.
This video shows the sequence of processing a tire by a professional groover. As you can see, the master uses special nozzles that allow you to neglect measuring the depth of cut.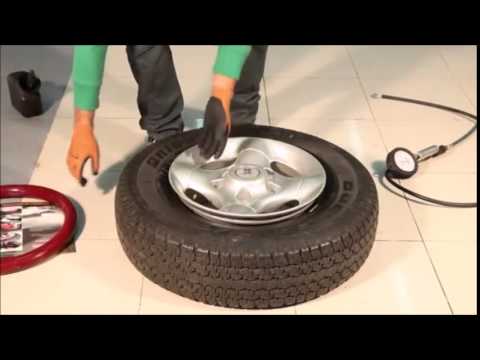 This saves time and improves the quality of processing.
If you want to go that route, first check how much professional cutting equipment costs. It is possible that its price will seem excessive to you, and you will prefer to order this work from professionals.
This video shows how the homemade tool works. A machine made from a conventional soldering iron works no worse than professional equipment. A heavily worn tire is covered with new grooves in just 6-7 minutes. But if you want to go this route, pay attention to the impossibility of adjusting the depth of cut. In fact, it depends on the pressing force. The author of the video suggests “cutting the tire as you like,” which does not guarantee the long life of the rubber and the safety of the vehicle owner.