Removing an inner tube for repair or replacement can sometimes be a real fight but with a bit of patience and a few pro tips, you can make things a lot easier for yourself.
Our tech team are switching tyres and tubes on a weekly basis so here are their top tips to get the job done.
If you're looking for more helpful maintenance advice, Cyclingnews is bringing you a series of guides so that you can learn how to perform basic bike maintenance tasks yourself. Check out the other guides that are available:
If you can get the tyre on and off without levers then that minimises the accidental pinch risk, but that’s a big ask with some tyre and rim combinations. Invest in quality levers, as cheap ones can bend or snap, and beware old-school metal levers particularly if you’re using carbon rims.
You also need a decent pump. A hand pump will be fine for lower pressures on a gravel bike, but if you’re heading upwards of 60psi then a proper workshop track pump makes things much easier. Obviously, you’ll need a fresh inner tube that’s the right size for your tyre and has the right valve type and valve length.
Today's best deals
Lezyne Power Lever XL
$9.89
View
See all prices
Lezyne Alloy Floor Drive pump
$89.99
View
See all prices
 Deflate the tyre
Firstly you need to remove the wheel from the bike. Now if the tyre isn’t already fully deflated, let the air out of the inner tube by loosening the small barrel at the top of the Presta valve slightly and then pressing it down. Now unscrew and remove the knurled collar at the base of the valve.
If you’re working on a kid's bike or mountain bike with the car-style Schrader valve, then depress the pin in the centre of the valve to let the air out.
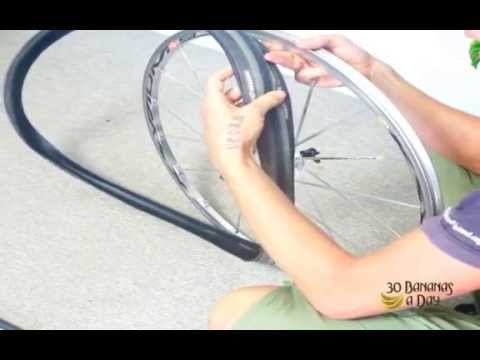
Unseat the tyre from the edge of the rim to create slack (Image credit: Mick Kirkmann)With the innertube deflated, squeeze the tyre inwards to push the bead into the centre of the rim. Do this all the way around the tyre on both sides so it feels baggy on the wheel.
Gather all the slack to one point and push the tyre over the edge of your rim with your thumbs (Image credit: Mick Kirkmann)If the tyre is a loose fit, you can lift the whole wheel by the tyre and give it a shake to get all the slack to one place.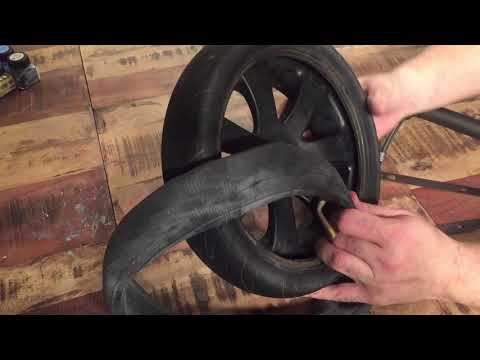 Otherwise, you’ll have to collect that slack manually by pushing the tyre around the wheel in both directions simultaneously, aiming to make it as baggy as possible when your hands meet again at the bottom of the wheel.
If there’s plenty of slack or you’re just feeling strong, push the edge of the tyre off the rim with your thumbs. This isn’t just about flexing your skills and tendon toughness, it also removes any chance of trapping the inner tube between the rim and the tyre lever, and puncturing it. It’s worth persevering if you can.
Image 1 of 2
Hook the tyre lever under the tyre and lever it out of the rim (Image credit: Mick Kirkmann)Slide the tyre lever along to rim to unseat the tyre (Image credit: Mick Kirkmann)Don’t be ashamed if you need to use tyre levers though, just be careful. Sneak both levers under the bead about 2cm/1inch apart with the spoon side hooking under the bead of the tyre. Make sure you haven’t trapped the inner tube against the rim with the other side or you’ll create another puncture you need to fix.
Press one of the levers down to hoist the tyre edge over the rim, then press the second one down to pull a longer section of the tyre clear. Hook one of the tyre levers around the nearest spoke to keep the tyre from creeping back onto the rim.
If the tyre is really tight then you might need to use both levers simultaneously to pry the tyre over the rim. If you're using two levers to work away at a very tight tyre, be careful, as there's often a risk of things going flying. Watch yourself and keep the danger zone away from valuables.
Once removed the tyre can be easily inspected for cuts or wear (Image credit: Mick Kirkmann)Now work around the whole tyre with the levers until it’s completely off the wheel all the way around. Leave the far side of the tyre in place and push the valve back through its hole before gently pulling the inner tube out.
With the inner tube removed it’s a good time to check the tyre for any damage or splits in the tread.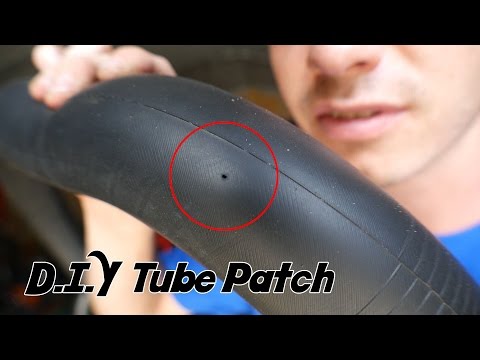 Check for thorns, nails etc. that might have penetrated through to the inside and remove them, otherwise they’ll puncture the fresh inner tube as soon as you put it in. Be careful if you’re running your finger around inside the tyre without looking first, as you don’t want to puncture yourself! Check the rim of the wheel for cracks, dents or sharp edges too.
If it isn’t already lined up, pull the tyre around so the name or logo matches up with the valve hole. It makes it much easier to find the valve in a hurry, gives you an easy reference point for finding punctures, and it looks better in pictures too.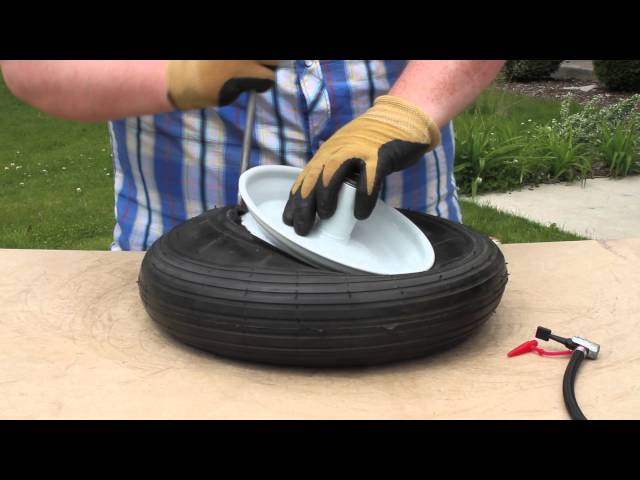
To reduce the risk of pinching, inflate the inner tube enough for it to take some shape. Remove the threaded collar, keeping it handy for later, and then push the inner tube valve through the rim. Massage the inner tube into the belly of the tyre, so it doesn’t push out over the rim edge. Be mindful as you do this, and avoid twisting or pinching the inner tube.
Some tyres can be slid on using only your hands (Image credit: Mick Kirkmann)Starting opposite the valve use your thumbs to start persuading the tyre back onto the rim. If you're working with tight tyres, remember how you moved the slack of the tyre into one place before removal, and try to emulate that movement as you push the tyre back onto the rim. You want to be left with as much slack as possible for the last part of the process. Be super careful not to trap and puncture the inner tube between the bead and the rim.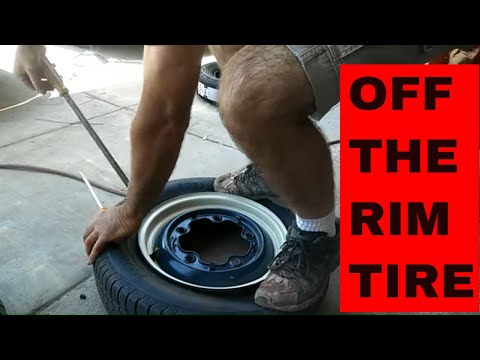
Try to get the tyre on with your thumbs as far as white knuckle, tendon straining determination will take you. When you really can’t get it on any further by hand insert the levers carefully under the tyre edge. Position them about an inch/2.5cm from each unfitted end. Brace one lever against the tyre to stop it slipping back and then use the other lever to lift the tyre onto the rim. Alternate this action working inwards towards the valve.
Carefully inflate the tyre whilst checking for pinches or bulges (Image credit: Mick Kirkmann)Once the tyre is on, double-check that there are no bits of inner tube poking out. Push the valve back into the tyre to check that it's not trapped and then thread the lock ring back onto the valve to secure it into the rim. Keep checking all the way round as you gradually inflate the inner tube, watching for any inner tube hernias or weird bulges and bumps in the tyre. Increase pressure until the tyre pops into place all around the wheel, using the line on the bottom edge as a guide to check it’s properly positioned all the way around.
With the tyre up to the right pressure, remove the pump and spin the wheel to double check alignment both side to side and vertically. If there’s anything weird going on, deflate and massage the affected area to re-centre the tube and tyre before re-inflating.
Once you’re happy that everything is settled, you’re ready to ride. Make sure you check the tyre frequently on the first couple of rides, in case something sneaks out of place. Finally, always check both tyres for pressure, damage or debris after every ride.
Today's best road bike tyre deals
Reduced Price
Schwalbe Pro One tubeless tyres
$81. 97
97
$61.40
View
See all prices
Reduced Price
Continental GP5000 Clincher Road Tyre
$87.95
$49.83
View
See all prices
Reduced Price
Vittoria Corsa G2.0 TLR Road Tyre
$87.99
$61.59
View
See all prices
Reduced Price
Vittoria Rubino Pro Graphene 2.0 Road
$64. 98
98
$56.70
View
See all prices
Individuals carrying out the instructions in this guide do so at their own risk and must exercise their independent judgement. There is a risk to safety if the operation described in the instructions is not carried out with the appropriate equipment, skill and diligence and therefore you may wish to consult a bike mechanic. Future Publishing Limited provides the information for this project in good faith and makes no representations as to its completeness or accuracy. To the fullest extent permitted by law, neither Future Publishing Limited, its supplier or any of their employees, agents or subcontractors shall have any liability in connection with the use of this information, provided that nothing shall exclude or limit the liability of any party for personal injury or death caused by negligence or for anything else which cannot be excluded or limited by law.
Thank you for reading 5 articles in the past 30 days*
Join now for unlimited access
Enjoy your first month for just £1 / $1 / €1
Already have an account ? Sign in here
*Read any 5 articles for free in each 30-day period, this automatically resets
After your trial you will be billed £4.99 $7.99 €5.99 per month, cancel anytime. Or sign up for one year for just £49 $79 €59
Join now for unlimited access
Try your first month for just £1 / $1 / €1
Already have an account ? Sign in here
Do you feel hopeless when your bicycle tires are punctured in the middle of riding your bike? Bike owners like us have been there.
This nerve-wracking situation is worrisome, especially when we have a busy schedule ahead or when we’re on the side of the road. But learning how to change a bike inner tube doesn’t have to be complicated and stressful.
Replacing your bike inner tube is easy if you have the right tools and follow the correct process. This tutorial will help you navigate when you have a flat tire.
Table of Contents
These are some of the essential tools needed when you want to replace the inner tube of your bike.
Follow through these simple steps, and you can replace your bike’s inner tube in no time.
To begin, place the bike upside down and take the bike wheel away from it. If the tyre isn’t already completely deflated, free the air pressure of the internal tube by slightly loosening and then pressing the little barrel above the Presta valves if you have them. Loosen and take out the knurled nuts at the valve’s base.
If you’re dealing with a child’s bicycle or an MTB having car-style Schrader valves, press down the pin in the middle of the valve to free the air.
When the inner tube is already flattened, push the tire inwards to force the tyre bead to the rim’s midpoint. Apply this step on the two sides of the tire until the wheels feel baggy.
If the tire is loose, shake it to get the slack to one place, or else, you’ll have to move the tire around the wheel in opposite directions at the same time, aiming for as much slack as possible when your hands get close to each other at the bike wheel’s bottom part.
If there is a lot of slack or you feel kind of strong, depress the tire’s edge off the bike rim using your thumb.
This eliminates the possibility of trapping the internal pipe between the bike edge and the tire lever and perforating it.
Be cautious when you use a tire lever. Remove the dust cap from the valve stem, then remove the fastener. Place both levers about 2 centimeters or 1 inch apart under the bead, with the ladle part underneath the tire’s bead.
To avoid punctures, ensure that you haven’t trapped the inner tube valve against the rim with the other side.
Apply pressure to one of the levers to elevate the tire over the rim, then do this again on the other lever to clear a larger area of the tire. To avoid the tire slipping back onto the rim, hook a single part of the tyre lever around the nearest spoke.
If the tire is extremely tight, you may have to use two levers at the same time to pry the bike tire over the bicycle rim.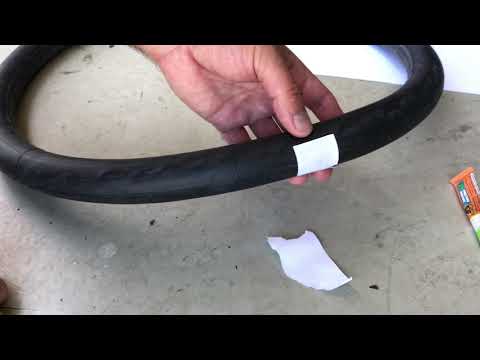
Be careful if you use two levers to deal with an extremely tight tire, as there is usually a hazard of flying components.
Go around the wheel, removing the tire’s edge from the rim. Take note that you are not removing the tire entirely. Only one side of the tire must be removed (keep the far side where it is).
Work the tyre lever around the entire tire until the inner tube is entirely off the bike tire. Gradually draw the inner tube out after pushing the valve back through its hole.
With the internal tube detached, inspect the tire for any disfigurations or tread ruptures. Partially fill the inner tube. You should be able to hear or feel little air escape from the hole. Once you’ve located the hole in the tube, match it with the tire.
Inspect for spikes, nails, and other objects that may have infiltrated the tyre and take them away. Or else they will puncture the new internal tubing. Check the wheel rim for sharp edges and splits as well.
A pinch puncture is most likely if the hole is on the inner border of the tube. When the tire caught the tube, the rim tape was either not in the proper place or not present at all. If this is the case, use extreme caution when re-inserting the tube.
Be cautious when you examine the inner tube. You don’t want to puncture yourself as you run your fingers around the tire’s internal area. Make this step easier by wearing gloves.
Remove the objects by hand from the tube if you see something obvious such as glass or a nail. If it’s particularly stubborn, use the screwdriver to pull it out. Then, use the towel to rub around the inside of the tire to see if it sticks on anything else.
Once you’re satisfied with the tire’s condition, place the tire label over the valve hole. It’s time to insert a new tube into your bike.
Purchase a bicycle inner tube replacement, making certain that it’s the correct size.
Fill the internal tubing enough to give it shape.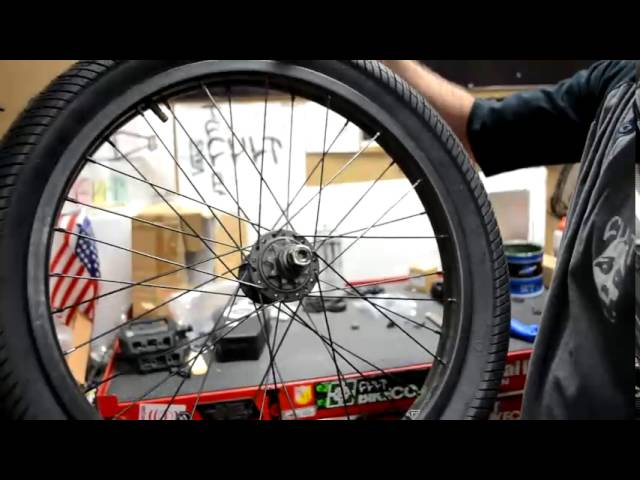 Take out the threaded collar and slide the internal tube valve into the rim.
Knead the internal tubing into the wheel’s belly, so it doesn’t protrude over the rim’s edge. Take care not to twist or pinch the inner tubing when you do this.
Starting from the opposite part of the valve, start coaxing the tire over the rim with your thumbs. When dealing with close-fitting tires, recall how you shifted the tire’s slack into one place. Try to repeat that step when you press the tire to the back of the bike rim.
It’s good to have as much slack as you can for the final stage of the procedure. Take extreme caution not to make a hole in the inner tubing.
When it’s hard to get tyres on any farther by hand in replacing bicycle inner tube, carefully place the tyre levers beneath the tire edge (roughly an inch or 2.5 centimeters apart from every end that requires fitting). Place one lever against the tire to prevent it from slipping back, then pull the tire on the edge with the other.
Once the tire is installed, double-check for any portions of the internal tubing poking out. Move the valve back into the tire to ensure it is not stuck, and then put back the lock ring on the bike’s valve.
Pump the tire gently once the tire is locked behind the rims. Carefully spin the wheel to look for any bumps.
If everything appears to be in order, proceed to pump to the desired pressure. Get the wheel in the dropouts, then tighten the quick release skewer and brakes.
Put away the hand pump and spin the tire to recheck the alignment vertically and on both sides. If you notice anything unusual, deflate and knead the afflicted part before you re-inflate.
On the initial few rides using your new tube, carefully inspect the tires regularly in case something is amiss.
Now that you have a concrete idea on how to replace bike inner tube, you can quickly replace the inner tube of your bike in no time. In case you have questions regarding the whole process, you can also check out this video tutorial.
Pro Tips:
Mark the hole with a pen or chalk once you’ve located it.
Dry the surface and gently massage it with sandpaper. Then, press and smooth the glue around the hole, allowing it to sit.
Remove the patch from the foil and press it firmly against the glue to remove any bubbles. It’s always better to do this on a flat surface.
After the adhesive has dried, sprinkle the chalk over any exposed glue to prevent it from sticking to the interior of the tire.
Did you enjoy following the simple steps above?
As long as you know how to change a bike inner tube, nothing can stop you even if your tire gets punctured on your next bike ride.
Keep in mind that replacing bike inner tubes isn’t rocket science, and everyone can do it entirely on their own.
We’d also love to hear from you! So, let us know how changing your bike’s inner tube went. If you have any suggestions for other bike owners, share them in the comments section. Sharing this article can also help us a lot, so we’d greatly appreciate it.
Gary Johnson
“I ride my bike to work for years, but is that enough? Our carelessness towards our surroundings has taken a toll on the environment. And now, everyone is responsible for changes; even the most minor contribution is counted. With this hope and spirit, I started with my partner to establish Biketoworkday to help more individuals commute to their work sites on their bikes.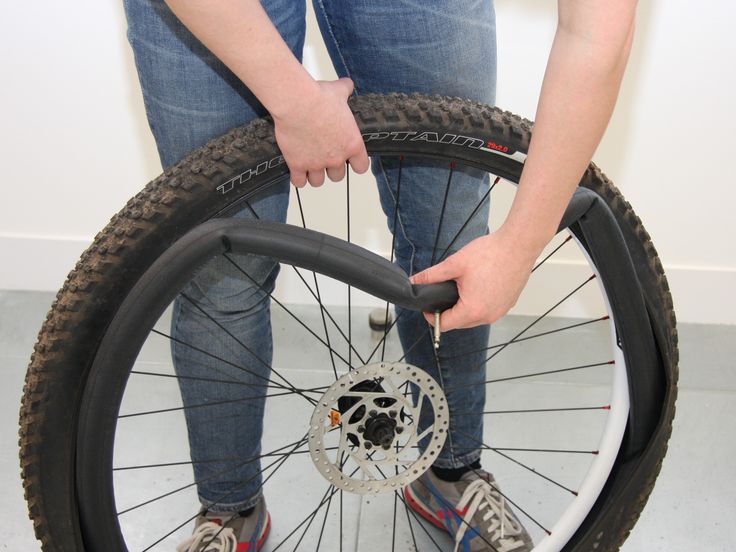 ”
”
Content
Causes of the wheel replacement can be very different - from the frequent fraction of the tape or “ snakebite” with the edge of the rim before updating the wheel and transferring the old proven camera to it. There is no difficulty in how to change the camera on a bicycle. Consider how to do this, and what you may need in the process.
If we change the camera in "ideal" conditions, we already have a garage ready, a tool kit, a repair kit and a new camera. Unfortunately, not everything is always so “successful”. It may turn out that the camera burst on the street during a long race or even in competitions.
The easiest option is to carry the chamber and pump with you. Not every damage can be sealed, and the easiest way is to change the whole camera. The only negative of this kit is the weight and volume. The sealing kit is a small box, but the “spare tire” is already a serious piece of rubber that can get in the way in a small bag, if you have one at all.
Unfortunately, the condition of the roads and the general susceptibility of modern bikes to damage means that you can't go further than the city center without a spare bike tube or repair kit. What will be needed to replace in the minimum version?
With these tools, you can easily disassemble the rear wheel, remove the camera and install a new one in its place.
The repair kit is worth considering separately. Many never open it from the moment of purchase, but in fact you can assemble it yourself. Homemade repair kit comes out several times cheaper.
What is in the repair kit?
 In modern industrial kits, patches are made of synthetic rubber, smooth on one side and rough on the other. On the smooth side, they are sealed with foil or plastic film to stay clean.
 Actually, all parts of the repair kit can be assembled by yourself. Old cameras are used for patches, cleaning is done with ordinary sandpaper, glue is sold in any store, and ordinary alcohol is a degreaser.
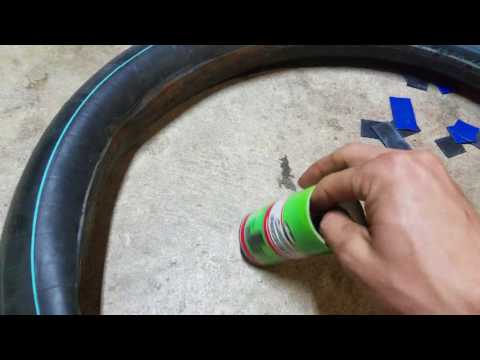
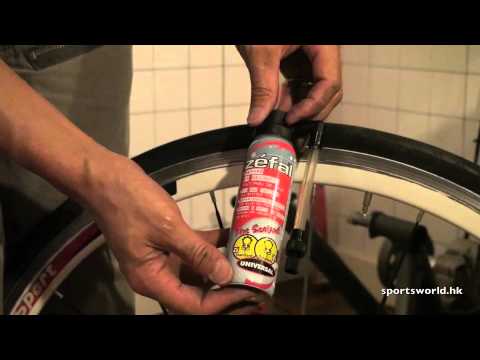
Recently, some people use anti-puncture gels, and it is enough to pour sealant into a new chamber before pumping it up and carefully “disperse” it over the inner cavity of the chamber.
Repair kit with breakouts but no glue
Those who have changed the tube with their own hands know, perhaps, the main problem is the bending of the tire bead. Modern tires adhere so well to the rim and are so stiff that it is not always possible to do this by hand.
That's why many multi-tools or kits include a break-down. These are small plastic or metal "spoons" that are inserted between the tire and rim, allowing you to pry and bend the tire, and then put it back on.
So, what steps do you need to take to change the camera. Everything is simple, the main thing is accuracy and a small amount of physical strength.
So, the camera is removed, you can repair it or print a new one. Install everything back:
That's it, the replacement is done! As you can see, there is nothing complicated in this process.
Tube replacement is a simple process that every cyclist should be prepared for. A puncture on the road, damage to the camera in the forest, or just updating a bicycle wheel - it's always nice to deal with the problem yourself and quickly, and not carry the bike on yourself to the workshop.
Every serious cyclist already carries a repair kit and a pump, ready for any eventuality.
Recommended
How to raise the handlebars on a bicycle?
How to inflate the Presta nipple?
How to inflate bicycle wheels
Each cyclist must acquire certain necessary skills to maintain a two-wheeled vehicle. This will help you quickly and easily deal with unforeseen situations on the road. One of these troubles most often becomes a puncture of the camera. Some tips and tricks will help both novice cyclists and more experienced athletes to eliminate the problem most effectively.
To get out of this situation, you will need the following tools:
The reason for the deflation of the chamber can be its clamping between the rim and the bead of the tire, other cases are also possible, but the technology of work is the same. Before changing the camera on a bicycle, you need to establish the cause of the puncture. First of all, you need to remove the damaged wheel and completely bleed the air by removing the cap from the nipple in the wheel. You need to bead the tire from the side of the rim, which is most effective. Then, using a pry bar, you need to pick up the tire, remove it from the rim. If such a tool is not at hand, then a wrench will do, but there is a risk of damage to the bicycle element. It is enough to choose an object without sharp edges. Holding the tire with one pry bar, we hook the edge next to it with the second. Then you need to carefully remove and completely remove the deflated camera.
It is necessary to find out the cause of the deflation, it is worthwhile to view the inner surface of the tire and view the camera. To do this, lightly inflate the pierced chamber and watch exactly where the air comes out. The spot where the puncture is located may appear to be accurate, and this means that the wheel has been damaged by a foreign object, such as glass, a nail, or a stone. In this case, you need to inspect the inner surface of the tire, if you find anything, be sure to remove it. You also need to remove dirt and sand, clean the surface of foreign objects that could damage the new part.
Next, you need to install a new camera. To make it easier to do this, you need to pump it up a little. Then we install, carefully and making sure that the bicycle nipple is directed exactly to the center in the wheel. Starting from the nipple, carefully and evenly put the side of the tire on the bike rim. You may need to use a mount. After this process is completed, you need to inspect the tire in the wheel for uneven installation, camera jams. If everything is in order, then you need to pump it up to a sufficient size.
It is not difficult to change the bicycle inner tube and by doing this several times, you can acquire the necessary skills and abilities and solve the problem quickly and easily in the future. It is important to use special tools or devices without sharp edges for work, which will ensure the integrity of the bicycle part. Also, when going on a long trip, it is best to foresee possible damage and take with you the necessary items for repairs. By carrying out regular maintenance and inspection of two-wheeled vehicles, many unpleasant moments that cause emergency repairs can be prevented. Thus, the service life of the bike will be extended, and trips will bring only pleasure and vivid emotions.
If there is no new, whole camera at hand, it is impossible to completely replace it, then a repair kit will always help. With it, you can install a patch and fix a punctured camera in a few minutes. To do this, you need to remove the wheel, remove the punctured chamber from the tire and, after inflating it slightly, determine the place where there is a puncture.