Biketoworkday is supported by its audience. When you buy through our links, we may earn an affiliate commission. Learn more
Written by Gary Johnson / Fact checked by Henry Speciale
All seasoned cyclists know that bike tires can do wonders in their riding experience. Bike tires not only enhance the entire aesthetics of the bike but also provide a more efficient ride. It can enhance comfort, increase traction, and reduce rolling resistance for a quality ride.
However, eventually, your tires will not be as reliable as before. You will notice that your tires are worn out, which compromises your safety when biking.
Thus, here is our easy-to-follow guide on how to change a road bike tire without needing to go to a bike shop. It includes taking off the old wheels, inflating the tire tube, fitting and installing the bike tire into the rim.
Table of Contents
As mentioned earlier, road bike tires directly impact how efficient your bike riding will be. It allows a smoother ride and ensures safety when you are on the road. Road bike tires can also give you full control when riding.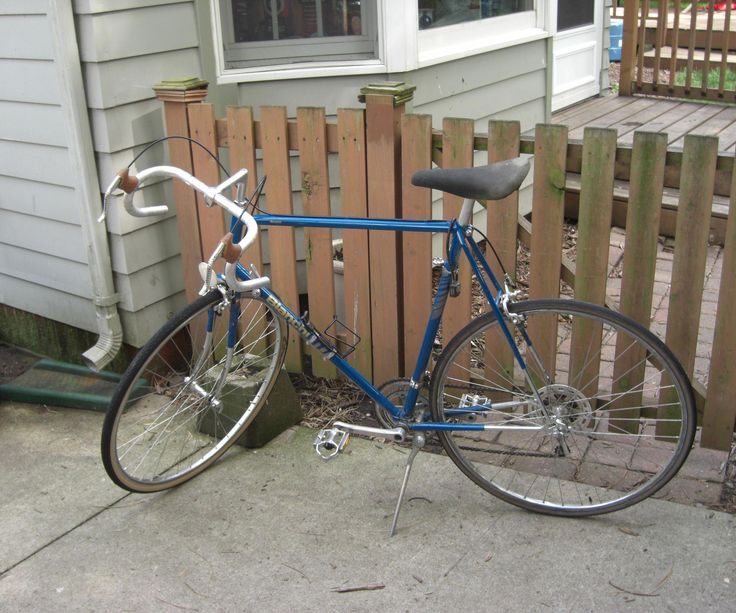
Here’s how you can tell when a tire needs to be changed or replaced:
Worn out treadWhen you look at a bike tire closely, you will notice a unique pattern of groove cutouts on the rubber. These cutouts are the bike tread. It is useful when you are navigating on any type of road.
If the tread became shallow, your bike tires would start wearing out until it gets smooth or bald. This will result in loss of traction and most likely compromise the quality of your ride. It also indicates that you need road bike tire replacement
Punctures when cyclingWhen your tires wear out, you will start having punctures frequently. It not only poses a danger when riding but will also become a major disturbance for you. A regular puncture will discourage you from taking the road or join group cycling because of the distraction it causes.
If this happens, check on your tires and see if they need to be changed.
Dry-rotWhen your tires are frequently exposed to corrosive chemicals like gasoline or cleaner, they will exhibit dry rot.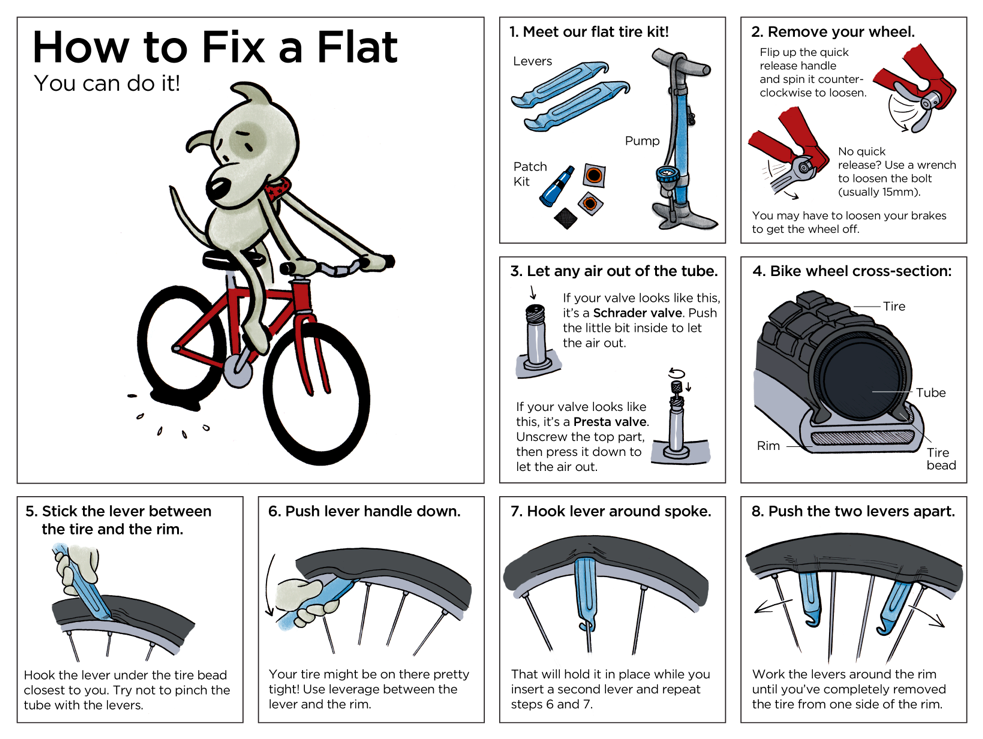 Having dry rot invites a potentially harmful situation. You might experience a tire failure, especially when riding at increased speed downhill. It is vital to check your tires for dry rot so that you can change a road bike tube and tire immediately.
Materials needed:
After discovering that your road bike tires need a replacement, you can head straight to a local bike shop for new tires. It is important to get the size of your wheels and measure your old tires. You should also consider the tread patterns and type of tire you want to use for replacing bicycle tires.
Step 2: Take off the wheelsThe first step to take in this process is removing the bike wheels. You can flip the bike upside down or use a bike stand for this step. You must loosen the brakes first for the front wheel, then locate the quick-release levers for easy removal.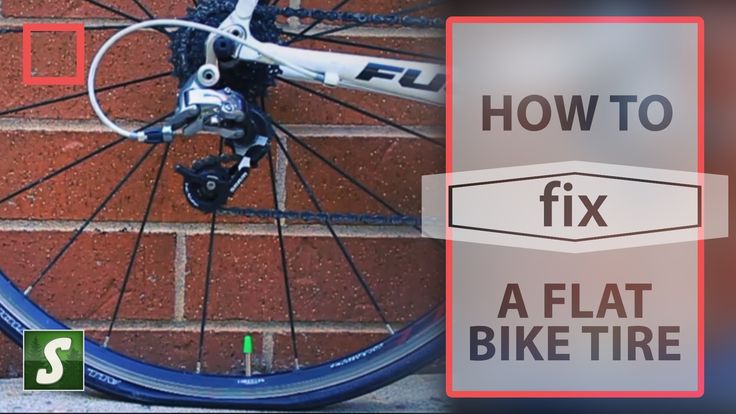
For the rear wheel, you must adjust the gears first up to the smallest ring. Loosen the brakes and locate the quick-release lever. Then, focus on the derailleur on the cassette and pull out the wheel slowly.
Step 3: Deflate the old tires before removingFor the tire and inner tube to be removed quickly, you must completely deflate the tires first. Once deflated, you can push the part of the tire closest to the rim and move away up to the midsection of the wheel. Do this step around the bike until the tire is already loosened.
Step 4: Take the tire away from the rimOnce the tire has loosened its grip from the rim, you can use tire levers to separate the tire and the rim. You can use the hooked end of the tire lever and attach it to the outer edge of the tire. When you secure the attachment, you can now pull the level over the edge of the rim. Do this in a clockwise direction until you finally take the tire off the rim.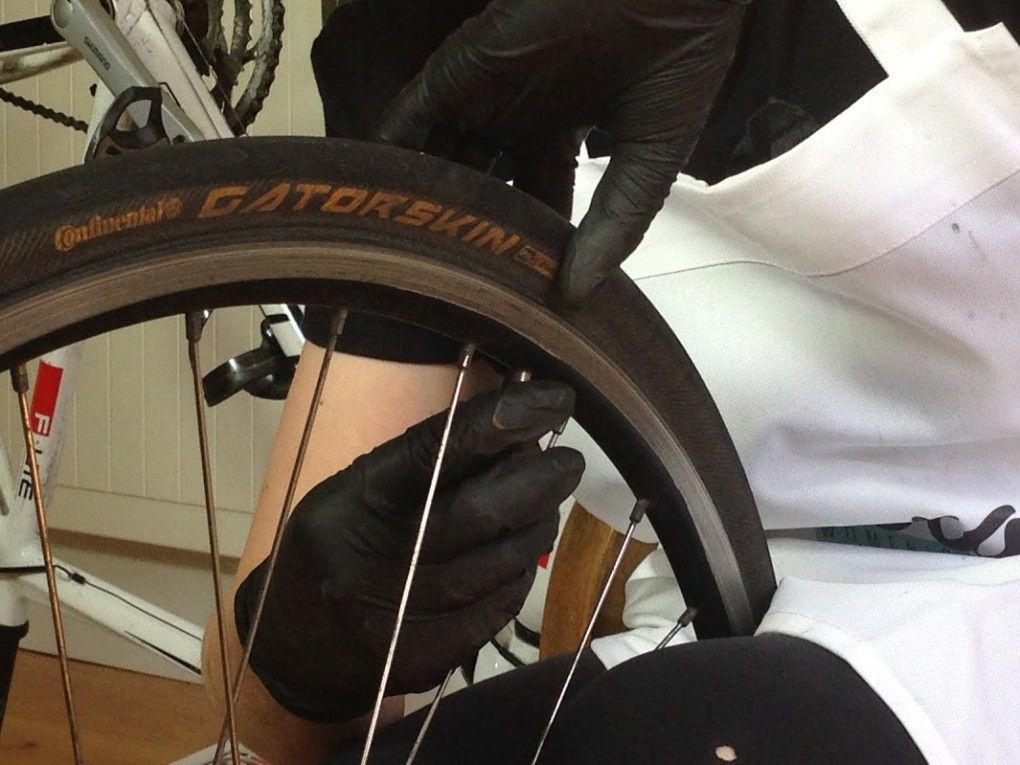
(Pro tip: You must apply consistent pressure when you remove road bike tires from the rim. In this way, the tire will not fall back into its old position)
Step 5: Pull out the tube from the inside of the tireLocate the tire tube and slide the tube out. When you touch the air valve, you can push it through the hole of the wheel frame and completely remove it.
Step 6: Fit the new road tireAt this point, you are now ready well-versed in changing a road bike tire.
First, you must lay the new tube flat and inflate the tube moderately with a pump. The tube must start getting in shape but should not be entirely inflated. Then, let the tube slide slowly into the tire and line up the tire tube valve to the rim’s valve hole. Check whether the tire fits perfectly into one side of the rim. You must get the proper fitting of the tire before inflating the tube.
Step 7: Install road bike tire into the rimBy this time, you have installed the half side of the tire and tube into the rim; using the tire lever, you can push the other side of the tire over the edge of the rim. Adjust the position of the tube inside when needed. When you replace road bike tube, ensure that the tube is properly installed between the tire and the wheel. Then, roll the rest of the tire to the rim edge slowly. Make sure that you put the tire in place for this step.
After putting the tires onto the rim, you can re-install the bike wheels to your bike. Next, inflate the tire tube using a bike pump. Then, you are done.
Changing your road bike tire is one of the skills you must learn as a biker. You will constantly encounter worn-out tires, especially when you regularly commute using a road bike. Thus, we have developed a simple guide on how to change a road bike tire so you can follow the entire process.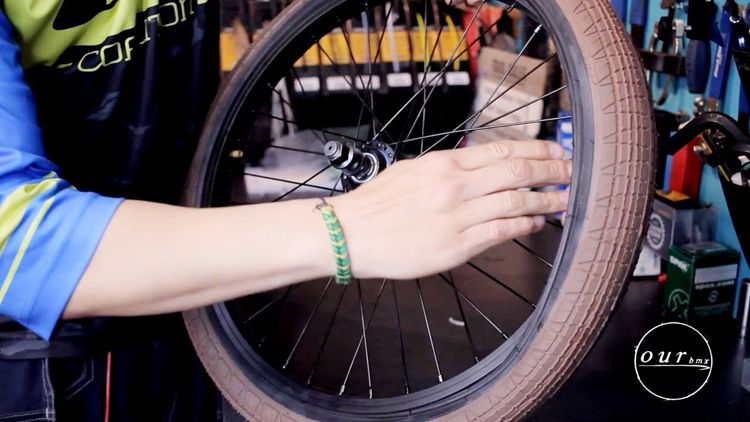 We kept the steps uncomplicated; even a beginner biker can understand.
Gary Johnson
“I ride my bike to work for years, but is that enough? Our carelessness towards our surroundings has taken a toll on the environment. And now, everyone is responsible for changes; even the most minor contribution is counted. With this hope and spirit, I started with my partner to establish Biketoworkday to help more individuals commute to their work sites on their bikes.”
Picture the scene: you’ve got a new tyre to mount on a wheel but, no matter how hard you try, you can’t get it on. It’s a scenario many cyclists have found themselves in.
In this article, we’ll run through the proper technique for changing a bike tyre (both installation and removal), explain why some tyres are so difficult to fit, and suggest what tools you can use when you need help with a particularly tight tyre and rim combination.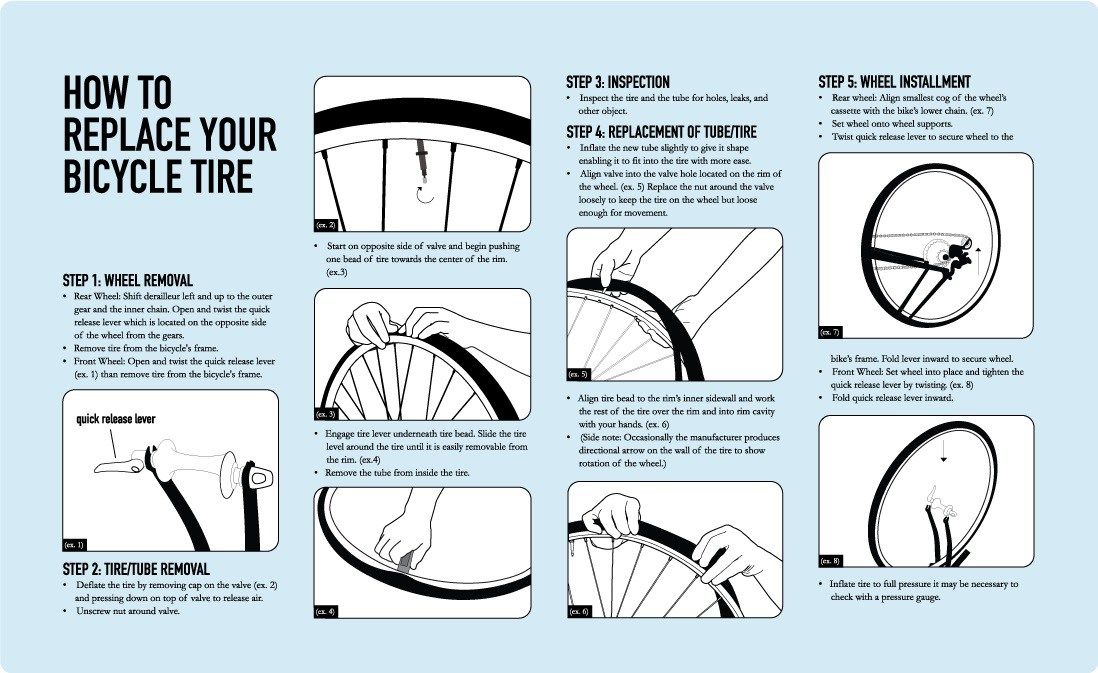
While installing a tyre on a wheel is something most riders can normally manage comfortably, even seasoned cyclists will experience combinations where muscling the last bit of tyre bead over the rim edge appears to require super-human strength and thumbs of steel.
The rise of tubeless tyres and rims across road, gravel and mountain bikes has increased the frequency of such issues too, as tubeless-ready tyres are made with stiffer beads and to tighter tolerances than equivalent clincher tyres.
To save yourself stress, sore thumbs and to prevent damage to delicate or expensive bicycle parts, proper technique when installing or changing tight bicycle tyres is crucial.
Beyond that, there are also now many useful tools to help ease tight tyres onto rims (as well as some tools you should avoid).
Before we get started, you can also use the links below to jump straight to the section you need:
Getting your tyre-mounting technique up to standard is the best way to ensure your tyres go on with the minimum amount of fuss.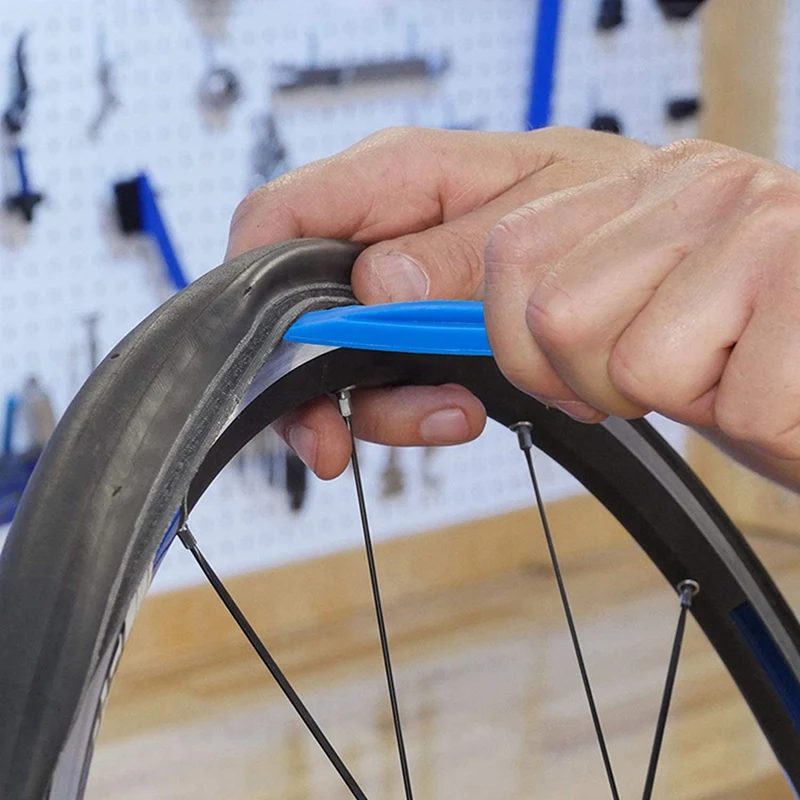
The increasing prevalence of tubeless-ready tyre and wheel systems on bikes of all kinds means proper technique is more vital than ever.
The following steps apply equally to both clincher and tubeless-ready tyres, though it’s worth checking our guide on how to set up road tubeless tyres or our tips for understanding mountain bike tubeless setup, if you’re installing tubeless-ready tyres.
If you’ve come here looking for tips on how to install tubular tyres, we’ll direct you to our how to glue a tubular tyre guide.
Unfold the tyre and get the shape as round as possible before attempting to fit it.Yogamaya von Bromley / Our Media
If the tyre is not brand-new, now is a good time to check its condition and the condition of the rim.
Replacing a worn-out tyre or damaged rim tape is key to safe running and for preventing future punctures.
If you’re replacing a tyre after a puncture, ensure you find the culprit (the object that caused the puncture) and remove it before patching or replacing the tube and reinstalling the tyre.
If the tyre is brand-new, it’s a good idea to ‘massage’ the tyre into a vaguely round shape because this will make getting the first bead on much easier.
Once the tyre is properly shaped, you can begin installing it onto the rim.Yogamaya von Bromley / Our Media
If your tyre has a directional tread, be sure to install it in the correct orientation for optimum performance. This is usually marked on the tyre sidewalls.
It will usually be possible to get the first bead onto the rim without tools, using the palms of your hands (rather than your thumbs) to lift the whole tyre over the rim edge, though a tyre lever can be used to pull it over in exceptional circumstances.
Installing tyres with the name label located centrally above the valve not only looks good (in our opinion), but it also locates key information, such as tyre size and minimum/maximum inflation pressures, above the valve where it can be easily viewed while inflating the tyre.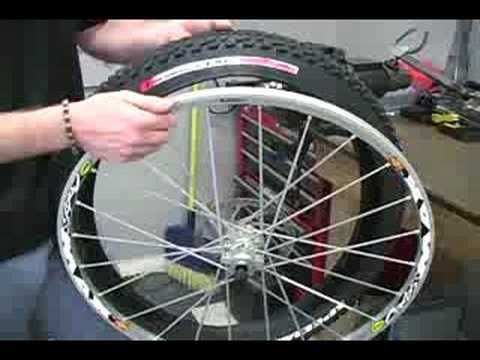
With the first tyre bead on the rim, you can install the inner tube or tubeless valve.Yogamaya von Bromley / Our Media
If using an inner tube, add a little air before installing it. This will help prevent the tube being pinched by the tyre bead while installing the tyre.
Avoid adding too much air, however, because this will make the tube take up too much space inside the tyre and prevent the tyre beads from falling into the deepest part of the rim’s central channel. Enough air to give the inner tube some basic shape is plenty.
Bonus pro tip: if you’re using latex inner tubes, a light dusting of talcum powder on the inner tube will help prevent it from sticking to the tyre or rim walls, or getting caught under the tyre bead. This can further reduce the likelihood of pinching the tube during installation.
Start working the second bead onto the rim from opposite the valve stem. Yogamaya von Bromley / Our Media
Start opposite the valve and slowly work your way around each side of the rim, leaving the last bit of unmounted tyre located centrally around the valve.
As you go, ensure both beads of the tyre fall down into the central channel of the rim.
With tubeless tyres and rims, the newly installed bead will sometimes sit on the rim shelf, instead of falling into the central channel, decreasing the amount of slack in the bead. Simply push the tyre bead into the channel using your thumbs.
Installing the final part of the second bead is usually the most difficult.Yogamaya von Bromley / Our Media
This is where things will usually start getting difficult.
As you get to the final part of the bead, use the palms of your hands to pull the whole tyre up and roll both sides of the bead over the rim edge bit by bit.
While it can be tempting to use your thumbs to push the bead over the rim edge, if the combination is very tight you’ll likely just end up with sore thumbs.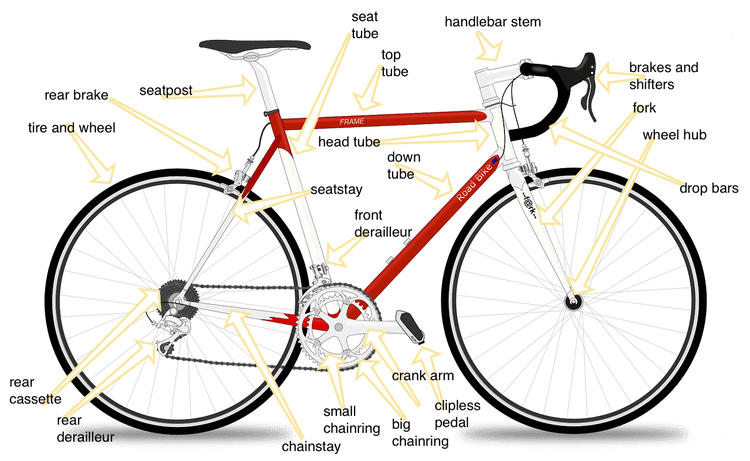
If you’re using very thin or wide tyres, which make it difficult to grab the whole tyre in the palms of your hand, you may have to resort to using your thumbs to push the tyre sidewall over the edge. In these instances, it’s advisable to wear protective gloves.
If you’re struggling, go back around the rim and double-check all of the installed parts of the tyre beads (on both sides) have fallen into the rim’s central channel. This is absolutely crucial to getting the last part of the bead on with the minimum of fuss.
It’s best to install the remaining tyre bead without resorting to tools, if possible, as incorrect use of tyre levers and other similar tools can potentially damage the rim, inner tube or rim tape.
If it’s not possible to install the remaining tyre bead by hand, however, careful use of tools can help you pull the last bit of a tight tyre bead onto the rim. We’ll talk more about that soon.
Ensuring all parts of both tyre beads fall down into the deepest area of the rim is crucial to installing tight tyres. Yogamaya von Bromley / Our Media
Go around the rim and check the inner tube (if you’re using one) is not being pinched or squashed under the tyre bead. If it is, simply lift the tyre up in that area to release the tube and allow it to rebound back into the middle of the tyre.
If using tubeless valves, with tubeless-ready tyres, make sure the tyre beads are sat on either side of the valve, and be sure to add the valve stem retaining nut onto the other end of the valve.
Once you’ve double-checked everything is properly fitted, you can inflate the tyre.Yogamaya von Bromley / Our Media
Once you’re sure both tyre beads are correctly installed around the entire circumference of the wheel, you can pump up the tyre. We’ve got a guide to help you find the correct tyre pressure for your road bike, as well as advice on perfecting mountain bike tyre pressure.
Just as some tyres can be tricky to install, removing a bike tyre from a wheel can also be difficult.
Proper technique is key to making things as easy as possible, and while it’s sometimes possible to remove a bike tyre without tools, a couple of good tyre levers can often make life much easier.
If you’re removing the tyre because of a puncture, the inner tube (assuming your wheel has one) will already have lost some air, but you may still need to deflate it fully to aid removal.
Unscrew the head on the valve and press it down to remove any excess air, then remove the retaining nut that threads over the valve and sits against the rim (assuming you’re using one – many riders don’t). You’re now ready to start removing the tyre.
As with installing tyres, pushing both beads into the deeper central channel of the rim gives you the maximum amount of slack to work with.
Push all of the bead down into the middle of the rim, and firmly grab the tyre in both hands. You should be able to lift a supple tyre up and over the rim edge by hand.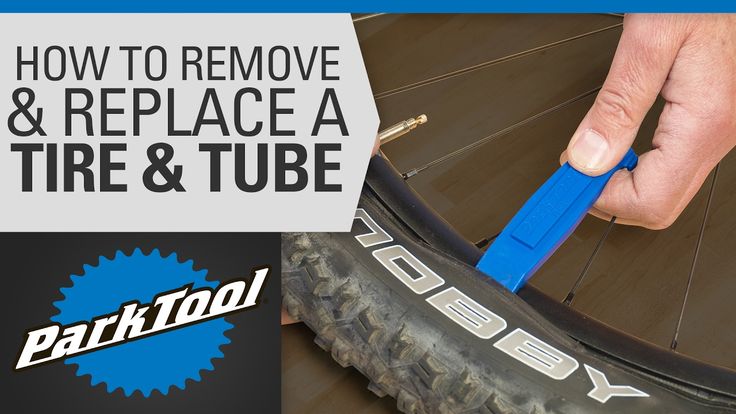 Simon von Bromley / Our Media
With supple clincher tyres, it will generally be possible to remove the tyre without resorting to using tyre levers.
Grab a section of the tyre opposite the valve stem firmly in both hands and lift up and over the rim edge.
With a small section of the tyre bead over the rim edge, the rest of the tyre should come away from the rim with ease.
This can be useful if you’re caught short on a ride without tyre levers, but also means you’re less likely to damage your rims, rim tape or inner tubes.
That said, tougher road or mountain bike tyres (particularly those in inflexible tubeless-ready beads) will likely require the use of tyre levers.
Insert the scooped edge of a tyre lever underneath the tyre bead and gently lever the bead over the rim edge
With a small section of the tyre bead off the rim, hold the tyre lever firmly in your hand and push it forward (away from you) around the rim edge to remove the tyre.
If the tyre is too tight to lift off using only one tyre lever, don’t resort to brute force.
Instead, insert a second tyre a few centimetres away from the first and use both to lift off a larger section of tyre.
This should then give you the required slack to slide the rest of the bead off using a tyre lever.
Leaning on the top of the wheel can help, as it means you aren’t working to stop the wheel from rolling away from you as you push the tyre lever forward.
With one full side of the bead off the rim, you can then pull the whole tyre away from and off the wheel.
Modern bicycle tyres and wheels are sized according to ISO standard 5775, set by the European Tyre and Rim Technical Organisation (ETRTO).
A size 28-622 tyre code, for example, indicates a tyre with a nominal 28mm width and a 622mm inner-bead diameter.
As you might have guessed, such tyres are compatible with wheels that have a 622mm rim diameter. In old money, that’s a 700c wheel.
However, as there are many different types of bicycle tyres and rims, made by countless different manufacturers, there can be a number of reasons why some bicycle tyres are harder to install than others.
In this section, we’ll explore some of the main culprits in greater detail.
To start with, anything that makes a tyre casing or its bead stiffer and less supple is likely to make it harder to install on any given rim.
It’s for this reason that high-end clincher tyres designed for road racing and time trials, such as those made with unvulcanised cotton casings and flexible tyre beads, are typically easier to install.
Supple, lightweight clincher tyres for road bikes are typically fairly easy to install because they have relatively flexible casings and beads.Matthew Loveridge / Immediate Media
In contrast, a burly tyre designed for durability, high mileage and low cost – perhaps a winter training tyre or a tyre intended for cycling to work – may prove a much tougher nut to crack.
On mountain bikes, lighter, fast-rolling tyres designed for cross-country racing are likely to be easier to install than tougher ones designed for enduro or downhill use. This is especially true of super-tough downhill tyres with heavy casings and wire beads.
Furthermore, the beads on tubeless-ready tyres are designed specifically to be unstretchable, both for performance and safety reasons. This typically means there is less margin for poor installation technique, and greater strength or specialist tools may be required.
In contrast, burly mountain bike tyres designed for enduro or downhill use can prove difficult to install, as they feature tough casings and stiff tubeless-ready beads.Dan Milner / Our Media
The size and shape of the rim you’re trying to install a tyre on can also make a significant difference to how easy the process is.
Modern, wide, tubeless-ready rims (either hookless or with traditional bead hooks) will likely feature a deep central channel. This helps because it reduces the effective diameter of the rim once the first side of the tyre bead is installed, which increases the amount of available slack in the second bead.
Pushing the second bead down into this channel as you work it onto the rim is key to making tyre installations as easy as possible.
Rims designed for use with clincher tyres only may lack such a deep central channel, and can therefore make the installation of tight tyres harder.
This can make installing a tubeless-ready tyre onto a clincher-only rim very difficult, and is generally something to avoid, even if the two may be technically compatible (providing you use an inner tube).
The three most common rim shapes available today.Enve
These days, non-tubeless compatible mountain bike wheels are virtually unheard of.
Thanks to a longer history of tubeless technology in mountain biking, even non-tubeless-specific legacy rims also may be convertible, with conversion systems available from many brands, such as Stan’s and Muc-Off.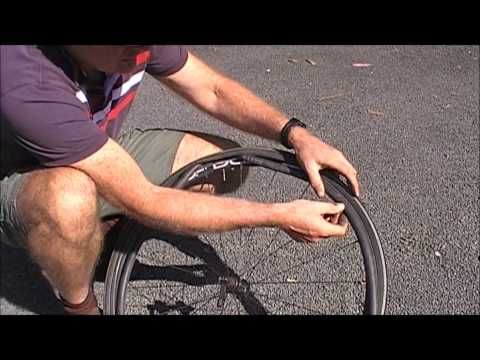
Furthermore, the vast majority of modern mountain bike tyres will be tubeless compatible, even down to the most budget offerings from major manufacturers. Thus, ‘clincher only’ is a term largely reserved for road cyclists.
While the exact sizes of any wheels and tyres are supposed to precisely match the international standards, in reality, variations in the manufacturing process will mean any product’s dimensions will fall within what is deemed to be an acceptable degree of tolerance.
A wheel’s rim diameter may, for example, be a few tenths of a millimetre larger than specified, and a tyre’s bead diameter may be similarly undersized.
While each in isolation may not cause any noticeable issues, an unlucky combination of an oversized rim and an undersized tyre can lead to a particularly difficult installation process.
Some tyre-fitting tools can be incredibly helpful, but careful use is advised. Simon von Bromley / Our Media
The best tip we can give for installing tough tyres is that practice makes perfect.
The more familiar you are with the proper technique, the easier it will be when you’re outside, far away from home, trying to fix a puncture with cold hands.
Nevertheless, there will undoubtedly be times when you need to resort to using specialist tools, such as tyre levers or tyre bead seating tools.
There is, of course, no shame in this. After all, there are no prizes for being able to install tyres without tools.
All that matters is you are able to easily and safely set up your bike, whether doing so at home or by the side of the road or trail.
Some tough gloves can be invaluable in protecting your hands and getting a good grip on tyres during installation.Joe Norledge / Immediate Media
Tough workshop gloves can help protect your hands from strain and friction.
They can also make grabbing a handful of tyre securely a little easier, especially if you’re working in hot conditions or with sweaty palms.
Tyre levers can help with getting tight tyres on and off rims.Simon von Bromley / Our Media
Tyre levers can be invaluable in coaxing the final section of a tight tyre bead onto a rim, and are something every cyclist should carry with them while riding (often in a saddle bag). They are also very useful when removing a tyre.
While holding the opposite side of the tyre in place on the rim, use a single tyre lever to lift a small section of the bead onto the rim. Repeat until all of the remaining bead is installed.
Don’t start in the middle of the remaining bead and attempt to lift it all over in one go. That’s a recipe for a broken tyre lever and lots of swearing.
Likewise, be careful not to damage the rim tape while using tyre levers – especially ones that have seen heavy use and may have nicks or sharp edges.
Tyre levers can be used to carefully lift stubbornly tight tyres onto a rim.Yogamaya von Bromley / Our Media
The best tyre levers are typically made out of tough plastic, with a thin but strong and wide tip. Pedro’s tyre levers are favourites of ours, but anything similar should do the job.
Generally, metal tyre levers should be avoided, especially if you have carbon rims, as these can damage your rims.
There are also modern evolutions of the humble tyre lever, such as the Tyre Glider or the Crankbrothers Speedier Lever.
The Tyre Glider is a modern evolution of the standard tyre lever.Simon von Bromley / Our Media
These aim to continuously install the bead as you push it around the rim edge. Both tools also include a more traditional scooped edge to aid removal of tyres.
At a similar size and weight to traditional tyre levers, they are also suitable for carrying in a saddle bag or jersey pocket.
Tyre bead seating tools can be invaluable for quickly seating tight tyres without risking damage to delicate components.Simon von Bromley / Our Media
Specialist tyre-seating tools, such as Kool Stop’s Tyre Jack (and similar devices by other brands), can save you a great deal of hassle when installing tight tyres.
The rigid part of the tool rests on the rim edge, while the hinged part reaches over the tyre and hooks onto the tyre bead. The bead can then be pulled up and over the rim edge.
In our experience, these tools are fantastic at getting stubbornly tight tyres onto rims with minimum fuss.The only downside is they’re typically too big to carry in a saddle bag or jersey pocket for road-side use.
However, they are generally light enough to carry in bikepacking bags, a cycling backpack or a hydration pack.
A bead-seating tool could, therefore, be a sensible piece of kit to take on an adventure or long mountain bike ride, if you know you might have trouble reinstalling your tyres after a puncture.
If installing tubeless tyres, some soapy water can help lubricate the rim and tyre bead interface, easing the ability of the tyre bead to slip over the rim edge.
It’s not worth trying this trick when using inner tubes, however, as a wet tube can stick to the inside of a tyre, possibly causing a puncture.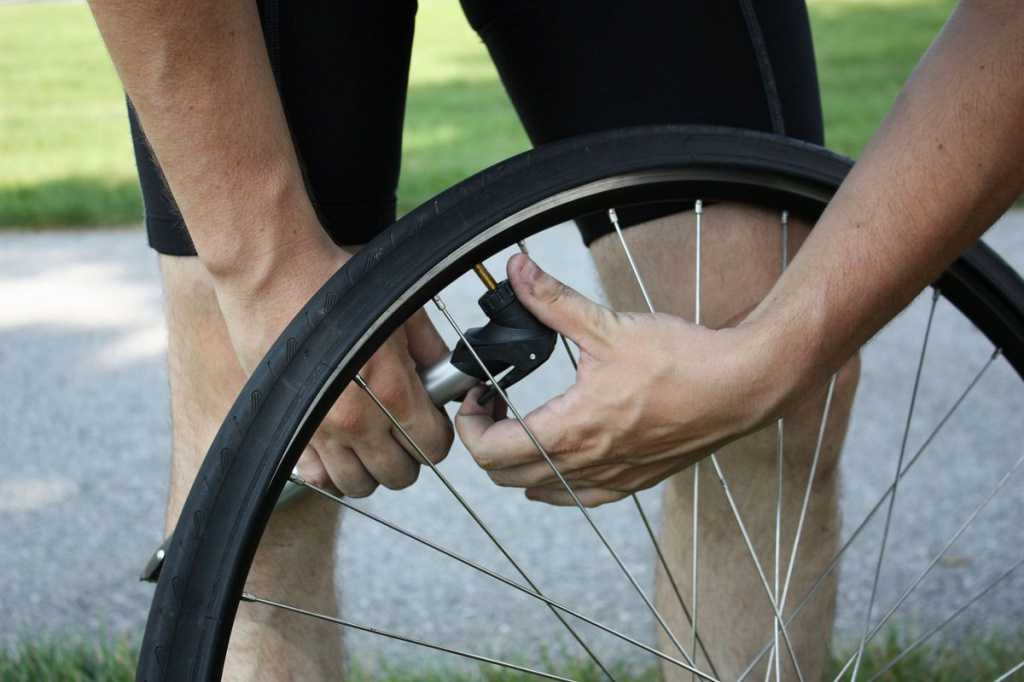
BikeRadar’s technical editor, Tom Marvin, suggests tough, box-fresh mountain bike tyres can be made a little more pliable by heating them in warm water for a few minutes.
Once they’ve warmed up, the rubber and tyre carcass should have softened enough to allow you to more easily shape the tyre and install the first bead onto a rim.
Muc-Off’s Stealth Tubeless Puncture Plug set is a highly rated option.Andy Lloyd / Immediate Media
As already discussed, installing tubeless tyres can often be more difficult than installing equivalent clinchers.
For this reason, repairing a tubeless puncture using tyre plugs can often help you avoid needing to remove the tyre bead from the rim while away from home.
Stan’s NoTubes DART tubeless repair kit and Muc-Off’s Stealth Tubeless Puncture Plug set are two kits we rate highly.
We’d still recommend carrying a spare tube or two as a last resort, but tubeless tyre plugs are typically the BikeRadar team’s go-to flat-fixing solution, in the first instance.
Using too much rim tape can make tyre installation harder, so always follow the manufacturer’s instructions.Joe Norledge / Immediate Media
When installing rim tape (tubeless-specific or otherwise), it’s important to not use more layers or thicker tape than is required.
An overly thick rim tape, or one or two wraps too many, effectively increases the diameter of the wheel, meaning there will be less slack in the bead when you come to install a tyre.
Adding a tubeless tyre liner can make installing a tyre very difficult. Note: if your tyres look like this, it’s time to replace them.Oliver Woodman / Immediate Media
Tubeless tyre liners, such as the CushCore tyre protection system or Vitorria’s Air-Liner kits for road, gravel and mountain bikes, are great for offering increased rim and puncture protection, and the ability to safely run lower pressures in tubeless-ready tyres.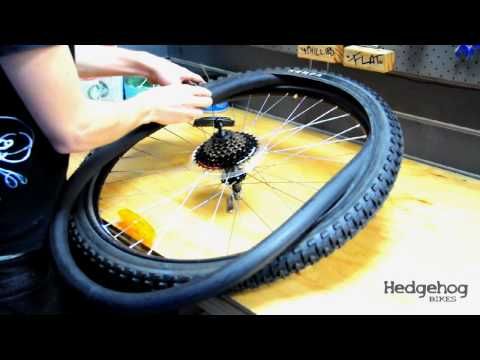
However, they also take up significant space within the tyre by design, which can prevent the tyre beads from dropping into the rim’s central channel during installation.
As we keep repeating, this reduces the available slack in the tyre bead, making tyre installation and removal harder.
For this reason, Vittoria includes a specific set of tyre bead pliers and bead retaining tabs with its Air-Liner road kit. You’ll almost certainly need them.
While tubeless-ready tyres are compatible with inner tubes, the inner tube can function somewhat like a tubeless tyre liner during installation.
Again, it takes up space within the tyre and prevents the tyre beads from falling into the deepest part of the rim channel.
This is especially true when installing narrow (sub-25mm) road bike tyres on relatively narrow rims (sub-19mm internal width), as there’s less room for the beads and the tube in the central channel of a narrow rim. Even a slightly inflated tube can push against the walls of a narrow tyre.
While we do advise slightly inflating the inner tube prior to installation to avoid it getting pinched by the tyre, it may be necessary to fully deflate the inner tube to allow the maximum amount of slack in the tyre beads.
Simon von Bromley is a senior technical writer for BikeRadar.com. Simon joined BikeRadar in 2020, but has been riding bikes all his life, and racing road and time trial bikes for over a decade. As a person of little physical talent, he has a keen interest in any tech which can help him ride faster and is obsessed with the tiniest details. Simon writes reviews and features on power meters, smart trainers, aerodynamic bikes and kit, and nerdy topics like chain lubricants, tyres and pro bike tech. Simon also makes regular appearances on the BikeRadar Podcast and BikeRadar’s YouTube channel. Before joining BikeRadar, Simon was a freelance writer and photographer, with work published on BikeRadar. com, Cyclingnews.com and in CyclingPlus magazine. You can follow Simon on Twitter or Instagram.
Removing the front/rear wheel is easy. Even if you are doing it for the first time. The wheel is removed to replace the tube, tire or spoke. Transportation in public transport or seasonal storage - for these reasons, dismantling is also resorted to.
You can always remove or install a wheel, carry out maintenance on your bike or solve any technical problem in our professional workshop.
The front wheel is easy to remove, but the rear wheel is a little trickier. After all, there is a chain, and a lot of sprockets, and a switch. But you definitely don't have to worry! In a new article, we will talk about this procedure in detail. There is nothing supernatural in this.
1. Depress the rim brakes.
2. Move the brake levers (one by one).
3. Slightly lift the cable holder up.
There are two ways to fix the wheel: with two nuts or with an eccentric (more often). In the case of nuts, you will need two wrenches. Use the first key on one side, holding it in one position. Turn the second one to the left (counterclockwise). It is not necessary to completely unscrew the nuts - you just need to loosen them enough. If the wheels are mounted on an eccentric, then the task is simplified: there is no need even for tools. Just pull the eccentric lever towards you, then, supporting the axle on the other side, make a couple of turns with it to the left - until the wheel is released. nine0003
When removing two wheels, it is advisable to remove both brakes. Otherwise, you will have to turn the bike over twice. If the tires have a large tread pattern or they are just very large, then deflate the air first.
It is also a good idea to loosen the chain as much as possible. To do this, put the chain on the smallest sprockets front and rear. Then you need to turn the bike upside down. Then simply open the eccentric / unscrew the wheel nuts.
Please note that in this position (wheels up) the bike will be very stable and accessible for maintenance. However, there is a certain nuance: if hydraulics are installed on the bike, then it is advisable not to keep it in this state for too long. Air can get into the hydraulic lines, which, in turn, will lead to a difficult and time-consuming process of bleeding the brake system.
How to remove the wheel (disc brakes)
If you have disc brakes, we recommend inserting a special plug between the brake pads (sometimes it comes with the bike). A piece of plastic or a ruler will do. This will prevent the pads from compressing if you accidentally press the brake lever. Then it is not so easy to unclench them back, and if this fails, you will not return the wheel back. nine0003
Installing the wheel is done in the same way - only in reverse order. Bring the wheel to the grooves, put the chain on the sprocket, insert the axle into the grooves, and the rotor (brake disc) into the caliper. It is important that the axis enters the groove to the very end. Most symmetrical. At the end, do not forget to tighten the eccentric well, but you should not overdo it either.
| Some beginner cyclists ask how to remove a wheel from a bicycle. Moreover, difficulties arise, as a rule, with the rear wheel. Quite often you can hear such phrases: "Oh, I'm afraid to remove the rear wheel, there are so many things screwed up, screwed on, I'll never put it back on and I'll definitely break something. I'll go to the service center better." Of course, you can do this, but rather than repeatedly wasting your time and money to go to a bicycle repair, it’s easier to just figure out how to do this operation yourself, especially since such a need may arise somewhere in the forest outside the city, and a bicycle workshop there will definitely not be found.
How to remove the front wheel?
Installing the front wheelAs you perfectly understand, the process of installing the front wheel is the reverse of removing it, and it makes no sense to describe it in detail. nine0003
How to remove the rear wheel? Removing the rear wheel is EXACTLY the same as removing the front wheel. |