By Amy Rodriguez
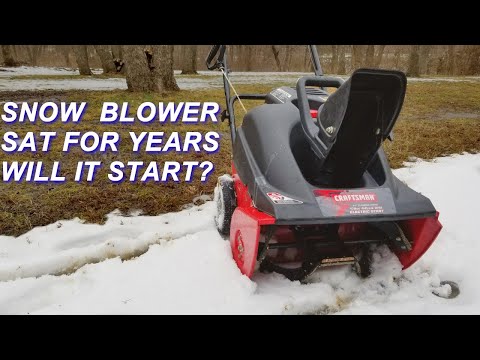
Not everyone lives in a region that receives consistent yearly snowfall, but many areas are prone to cold winter weather that can produce a surprise snowy day. Snow blowers carefully stored for years will need to be dusted off and powered on. However, many owners will find that one of their snow blower tires will just not hold any air. In these cases, the tire needs to be replaced. Careful attention to the tire's attachment point will guide you to a successful snow blower repair.
Unscrew the gas cap from the snow blower. Lay a piece of plastic wrap across the open gas orifice. Carefully screw the gas cap back on. This plastic wrap will prevent any harmful fuel spills during tire replacement.
Choose a sturdy surface to work on the snow blower, such as within a garage or on a concrete driveway. Lay a tarp down to protect the surface from any damage from the auger blades or dropped tools.
Tilt the snow blower up onto its auger by pushing the handlebar forward. If the snow blower is too heavy for you to tilt, ask a friend to help with the pushing process.
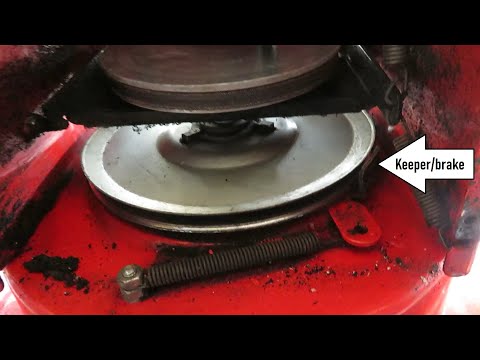
Examine the snow blower's bad tire connection to the snow blower. Each manufacturer has a different attachment design to the axle. The connecting screw should be on the center of the exterior wheel assembly or behind the wheel on the axle rod.
Detach the connecting screw from the blower with a screwdriver or socket driver. Fasteners may differ between manufacturers; consult the blower's specific manual for particular fastener types. Slide any washers off of the connection point and place aside.
Slide the wheel and tire assembly off of the blower's axle. Place a new tire and wheel assembly onto the blower's axle.
Place any necessary washers onto the connection point. Insert the fastener onto the connection point and tighten with the screwdriver or socket driver. If your blower model has a screw torque specification, use a torque driver to tighten the fastener to the manufacturer's value listed in the owner's manual.
Tilt the snow blower back down into its normal ground position carefully. Remove the plastic wrap from the gas cap. Tighten the gas cap back down onto the snow blower.
Test the snow blower's new tire by rolling it across the garage or driveway. The movement should be smooth and bump-free.
References
Tips
Writer Bio
Writing professionally since 2010, Amy Rodriguez cultivates successful cacti, succulents, bulbs, carnivorous plants and orchids at home.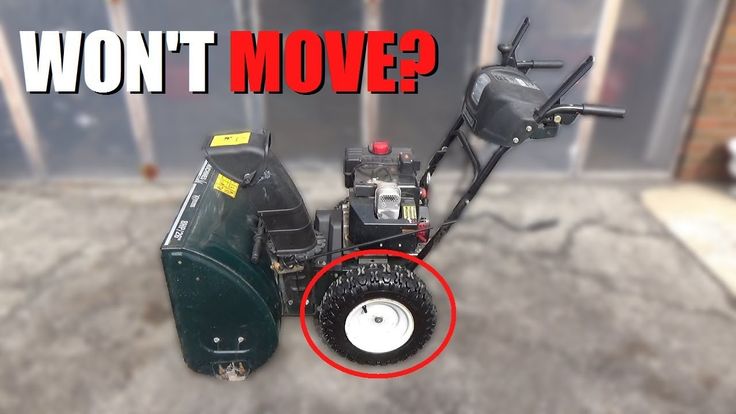 With an electronics degree and more than 10 years of experience, she applies her love of gadgets to the gardening world as she continues her education through college classes and gardening activities.
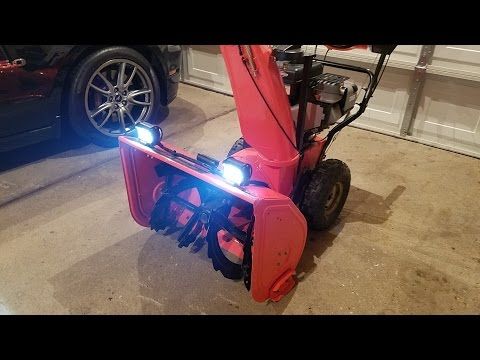
Have a flat on your Honda snowblower? Just got it out of storage to find a tire has come off a rim? Here’s what you need to do to fix it and keep it from happening again.
All Honda snowblowers built in the past two decades that use pneumatic tires are tubeless. That means if you have a leak, it’s in the tire itself. It also means that if the tire separates from the rim, the bead needs to be reseated to reinflate the tire.
Tire pressure should be checked before each use, even if you got your snowblower out the day before. If the temperature drops 10°F, tire pressure can drop up to one PSI. Tires can also lose one PSI each month they’re in storage. Honda’s snowblower tires are designed to operate at 8.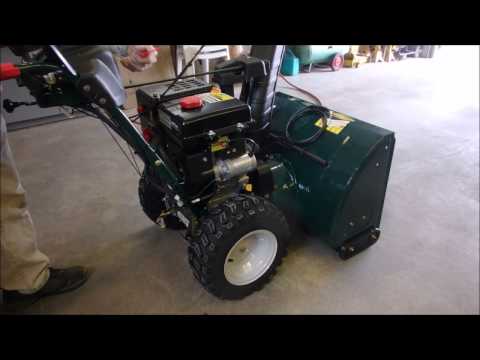 5 PSI, so it doesn’t take much for the pressure to drop significantly between uses.
Removing the wheel will make it much easier to work on the tire. Honda offers some tires and wheels as a complete set, letting you replace a bent rim and tire in one step.
1. Disconnect the spark plug wire to prevent an accidental start.
2. Lift up the rear of the snowblower so that the tires are off the ground.
3. Depending on the model, there will be either a bolt or a Clevis pin on the axle. Remove this part, and slide the wheel off of the axle.
4. Slide the new wheel onto the axle and tighten down the bolt or reinstall the pin.
5. Air up the tire before lowing the snowblower to keep the bead from separating it from the rim.
If the tire pressure is too low, rolling the snowblower can cause the tire bead to roll off of the rim. If that happens, it can be reseated by using air pressure to push out the sidewalls of the tire:
1. Remove the wheel.
2. Hold the tire and wheel in a way that lines the bead up with the rim.
3. Connect the air valve to a compressor or a pressurized air tank. You may need to go over the recommended operating pressure to push the bead onto the rim, but try not to go above the maximum pressure on the sidewall. The goal isn’t to put a lot of air in the tire, it’s to put the air in quickly to get the bead to meet with the rim.
Most of the time, the tire will expand and seat on the rim with just air pressure. If the bead still doesn’t want to seat, there are a few things you can try:
— Apply grease on the inside lip of the wheel. This helps the tire slide up to the rim, and can reduce the amount of air escaping as you air up the tire.
— Remove the valve stem. This reduces resistance when airing up the wheel. Be gentle handling the wheel and tire when reinstalling the stem as the lack of air pressure can let the bead slide off of the rim again.
— Tie a ratchet strap or a rope around the tire tread.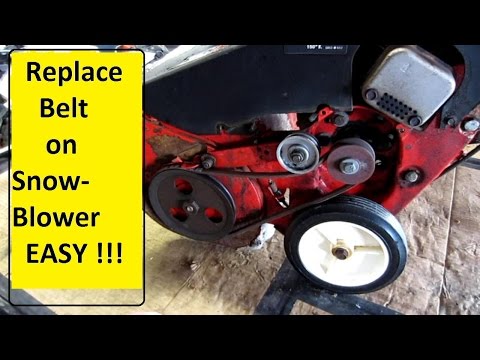 This pressure will help push out the sidewall so the bead doesn’t have as far to go to meet with the rim. To tighten a rope, slide a piece of pipe between it and the tire and twist, wrapping the rope around the bar.
It is possible to spray the rim with starter fluid and light it to pull the tire onto the rim, but it should be obvious that this is extremely dangerous. If the tire is that difficult to fit, it’s worth getting a complete wheel and tire instead of setting your snowblower and yourself on fire.
If there are cracks in the rubber or damage to the tire, it should be replaced.
1. Remove the wheel from the snowblower.
2. Push in the tire valve to release any remaining air inside the tire.
3. Use a set of tire levers or spoons to pull the bead over the rim. Once one bead is off the wheel, lift up the tire and pull the other bead over.
4. Fit the new tire onto the wheel using the spoons or levers.
5. Use the process above for reseating the bead. Air up the tire to the correct pressure, then install the wheel on the snowblower.
www.hondalawnparts.com is a certified Honda Power Equipment dealer, so we’re able to ship any OEM part currently available to any address in the U.S. or Canada. Check out our wheels section to find a replacement for your snowblower, or use our search system to find the right part for your model.
Like any technical equipment, a snow blower needs proper care. Proper maintenance of your snow blower prevents breakdowns and helps it stay in top working condition for longer.
The operation of an electric snow blower is much simpler than that of a petrol one: no need to change the oil, refuel with gasoline, or clean the spark plugs. Repair of power tools is also often easier and cheaper. And yet there are a few key rules for caring for the instrument, the observance of which will allow it to last longer - we have collected the main recommendations in our article. nine0003
Contents:
First, let's figure out how the snow blower works. Snow blowers with an electric motor are simpler than gasoline counterparts. Such tools consist of:
The most important parts of a snow blower are the motor and the auger.
The electric motor is the main part of the tool. The engine can run on mains or battery power: it makes the auger rotate, and the auger, in turn, grinds the snow and throws it out through the nozzle. nine0003
In self-propelled snow blowers, the engine also powers the wheels - these models drive themselves, which saves a lot of effort on the part of the operator.
Before using the snow blower for the first time after purchase or after a long period of inactivity, the snow blower must be properly prepared for work. First of all, you should make sure that everything is in order with the device, as screws may loosen or metal parts may rust in a few months. nine0003
Checking the condition of the snow thrower consists of the following steps:
Visual inspection for damage. Inspect tool body for defects and cracks, check wheels and tire pressure. Also check that there are no foreign objects in the nozzle and auger.
Check that nuts and bolts are tight. In all snow blowers, the bolts loosen over time, so they must be checked and tightened in time. Do not forget that a loose nut can cause breakage during operation. nine0003
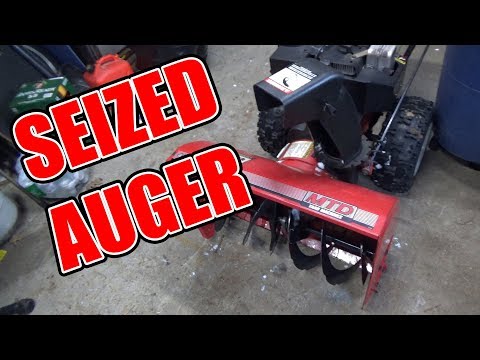
Auger test. When the device is turned on, the auger should rotate evenly and not make any hum or knock. There should be no damage or deep scratches on the auger itself.
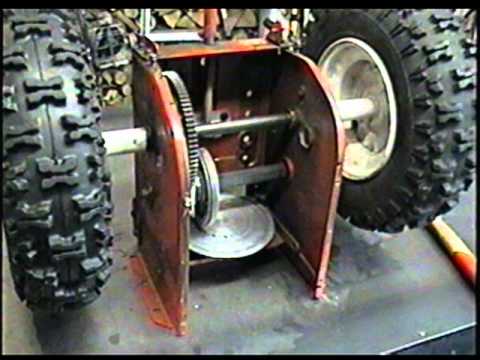
Checking and adjusting belts. The belt must be tight or the auger will not rotate. To check the condition of the belts for tension and wear, you will need to remove the protective cover. If any defects are found, the belt must be replaced.
Important: Before checking the parts of the snow blower, always make sure that the device is turned off, the wire is not connected to the outlet, and the battery is removed. nine0003
After completion of work, the snow blower also needs competent care. Here are some important rules to follow:
Important: the battery must be stored separately from the device - in a warm room. Under improper storage conditions, the battery capacity will be reduced.
During the off-season, the electric snow blower should be stored in a safe place, such as a shed or garage. Before that, it is important to follow a few simple preparatory steps that will help you avoid the hassle of servicing the device at the beginning of the next season.
If it is planned that the snow blower will be out of operation for more than a month, before cleaning the device it is necessary:
Let's talk about what should be done if a particular malfunction is detected during the operation of the snow blower. nine0003
The snow blower does not start. To get started, read the instructions for the correct start of the device and strictly follow the algorithm described in the manual. If the snow blower still does not turn on, the reasons may be the following:
For battery snow blowers:
For corded snow blowers:
 If necessary, replace the cable yourself or contact the service center.
 Greenworks snow throwers are equipped with engine overload protection. If the reason for stopping work is overload, you should wait a few minutes and then try to restart the device. nine0003
Engine runs hard or does not start. If the auger or nozzle is clogged or damaged, carefully inspect and clean them, and remove foreign objects from them, such as stones or branches that have fallen inside.
Motor runs but auger does not rotate. Inspect the belt for damage and make sure it is securely tightened. If necessary, replace the belt with a new one.
Severe vibration or unusual noise during operation. nine0056 Check the condition of the parts and the tension of the connecting elements. If necessary, tighten loose screws and nuts.
If these recommendations did not help to fix the problem and get it working, you should contact the service center, whose specialists will conduct a complete diagnosis of the snow blower and find the cause of the malfunction.
A major advantage of corded and battery-powered snow blowers compared to gasoline snow blowers is their simpler design, which means that operation is easier and cheaper. Still, electric snow blowers also need proper care. Proper maintenance of the snow blower with your own hands will extend the life of the tool and avoid the cost of possible repairs. nine0003
If you follow the simple rules of care and maintenance, the equipment will keep its excellent condition for a long time and will delight you with fast and efficient work for many years!
Back to the list
A snow blower is a complex piece of equipment that requires systematic maintenance and proper operation. It is important to use in accordance with the manufacturer's instructions. Otherwise, the frequency of breakdowns will inevitably increase, and with it the cost of repairs. However, simple repairs in case of urgent need can be done on their own.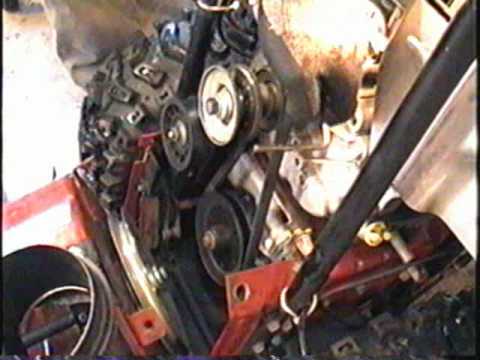 Next, we will talk about the common causes of malfunctioning snowplows and how to eliminate them. nine0003
 The decrease in speed may be due to objects that have fallen from the outside.
 Trying unsuccessfully to operate the wheels or augers using buttons or levers will help to understand that this particular part has failed. After all, it is one belt that transmits the torque to the auger, the second to the wheels. To replace the belts, loosen the cables, remove the cover that hides the belts, and unscrew the nuts securing the drive. Next, the old belt is removed and a new belt is put in. Since this breakdown is quite common, it is recommended that you immediately purchase an additional drive belt when buying a snow blower. nine0003
Soft metal auger fasteners are an important consumable item. They prevent serious damage to equipment in the event of a collision with an obstacle. When in contact with a stone, fence or curb, the keys are cut off, thereby stopping the operation of the augers. The temptation to replace soft screws with stronger ones is best avoided.