From time to time, you may need to charge your ATV or UTV battery using an external charger. The bike’s own charging system does not always have the capacity to keep up with the battery drain even from regular use. Some new batteries will also need charging before use.
This guide will tell you how to charge any ATV or UTV battery and answer some of the most common questions people have about the charging process.
Page Contents
ATVs do have a built-in charging system that is powered by the bike’s engine. But the current it provides is not very high.
You can charge the battery by going for a long ride, but it’s not always practical. Instead, you may use an external battery charger.
Tools and gear required:
The battery and charger must stay dry during the whole charging process.
Also, the battery must be somewhere well-ventilated to vent out any gases from the charging process.
Overcharging or even just charging a battery causes a chemical process that releases explosive hydrogen gas. With proper venting, you minimize the risk of the gas gets ignited by a spark, which may cause an explosion.
A garage or shed where you can leave the garage door open would be a good location.
If you don’t have a dry and well-ventilated area that will fit your whole ATV, consider removing the battery from the bike to charge it.
The ATV and all accessories should be turned off when charging to prevent sparks.
You need to make sure you have proper access to the battery. Some ATVs will have their battery hidden behind a plastic cover that needs to be removed for access. Others have the battery readily accessible without removing any parts.
The battery on my Polaris Sportsman XP1000 is hidden under the front cargo rack cover.
After locating the battery you should visually inspect it to look for cracks or other damages. Never attempt to charge a damaged battery!
Before you hook up the charger, you need to identify what type of battery you have.
Some types of batteries require a specific type of charger to charge properly, or that you add a few additional battery-specific steps to the charging process.
Here is a list of the different types of batteries you may find on an ATV or UTV, and how to tell them apart.
All batteries should have a label that indicates the battery-type, but sometimes these have worn off. Check out this post to learn what ATV battery numbers mean.
Also, look for a part number. A quick google search will tell you exactly what battery you have if you enter this number.
FLA batteries are a non-sealed wet-cell style of batteries that uses lead plates and liquid battery acid as an electrolyte.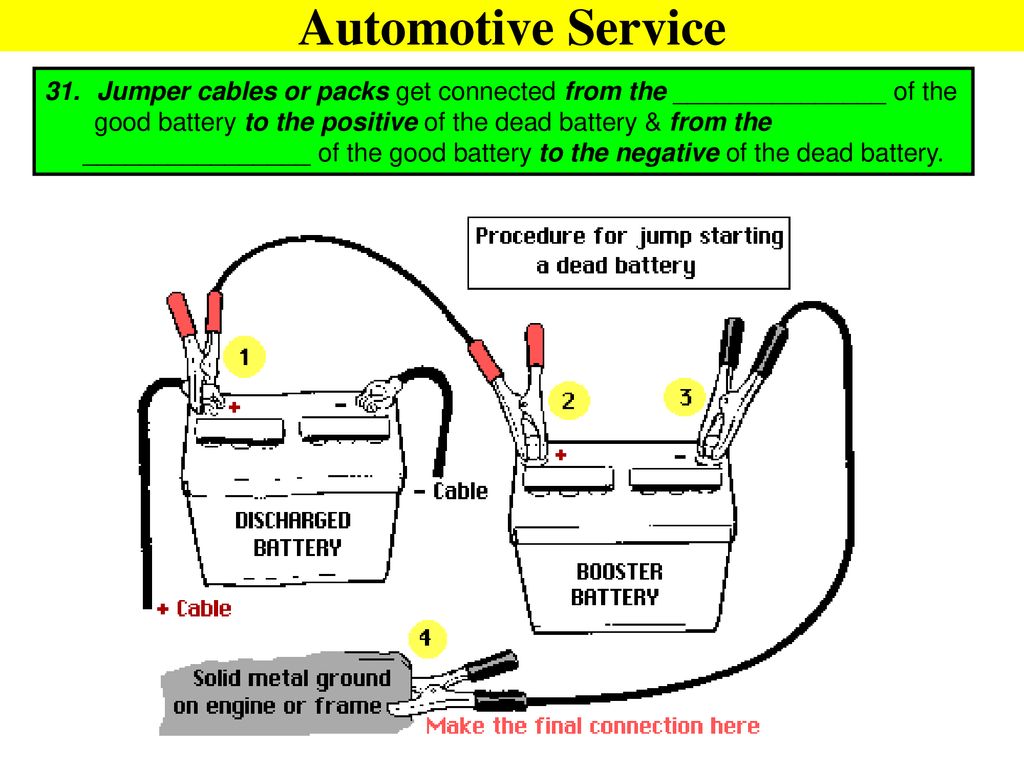 On top of the battery, there are removable caps, one for each cell. The caps are either threaded or pull-out style.
Another way of telling that you have an FLA battery is by its semi-transparent casing, where you will see the water level inside the battery. There are marks to indicate the maximum and minimum level of electrolyte.
FLA batteries only: Before you begin charging you should remove the caps to verify that the lead plates are covered by electrolyte fluid. Add distilled water if the level is below the minimum mark.
SLA and VRLA are different acronyms for the same type of battery. Their construction is quite similar to conventional flooded batteries, but there is one main difference.
If you overcharge a sealed battery, there is no way to open it to add more fluid. They have a flat top with no filling ports or caps. Never try to pry-open a sealed battery!
Type 3: Lithium-ion batteryThe easiest way to know that you have a Lithium-ion battery is to feel its weight. They weigh about 1/10th or less of other types of batteries.
Gel-cells are also lead-acid batteries. But instead of being a liquid, the electrolyte is in gel form. GEL-cells are not that common on ATVs because they are more expensive and do not offer the same power capacity as the others on this list.
A GEL-cell battery looks very similar to an SLA battery because of its sealed flat top. One way to tell them apart is by shaking the battery. You should hear the battery acid splashing around inside an SLA battery, while you will hear nothing when shaking a gel-filled battery.
GEL batteries are not the best option for ATVs, but some use them.AGM batteries are another variation of a lead-acid dry-cell battery. They are completely sealed and have a fine sponge-like mesh of glass fibers inside.
As with the GEL battery, you won’t hear any movement inside when shaking an AGM battery. Other than their labeling, it may be hard to tell them apart. Look up the model-number online if you are not sure.
The battery on my Polaris Sportsman XP1000 is a real pain to reach. But luckily, I was able to see the part number through the wires. A quick google search reveals that it’s a YUASA 18.9Ah AGM battery.If you use the wrong type of charger for your battery type, or set up a manual charger incorrectly, overcharge or undercharge the battery which may cause permanent damage.
Using a good quality, intelligent charger that is compliant with your type of battery is the easiest way to charge your battery safely. Under certain conditions, you may also use a manual bench-style charger.
A quality intelligent charger will be able to charge a variety of different battery types.Here are some guidelines to what type of chargers you may and may not use on different types of ATV and UTV batteries:
For all ATV and UTV batteries

Flooded lead-acid (FLA) battery
These batteries are the least picky when it comes to choosing a charger. If you overcharge a flooded battery, you may just add distilled water. Any manual or automatic charger will work as long as they are the right voltage and have low-amp settings.
Absorbed glass mat (AGM) and sealed lead-acid (SLA) batteries
While it is possible to charge both AGM and SLA batteries with a manual charger, it is not recommended. If you don’t monitor the charging process carefully, you may overcharge, which would cause gassing and water depletion.
Sealed batteries cannot be topped off, so the damage is permanent. That’s why it’s better to always use an intelligent charger for any sealed battery like AGM and SLA batteries.
Some, but not all intelligent chargers, will have a dedicated AGM charge mode. AGM and SLA batteries have a very similar charge profile. Therefore most brands of AGM batteries, as well as SLA batteries, will have no problems with any 12-volt intelligent battery charger as a charge source.
According to Optima (https://optimabatteries.com), a high-quality AGM compliant charger may improve battery performance and lifespan, but most battery chargers and maintainers will work just fine on Optima brand batteries and other AGM batteries.
GEL-cell battery
GEL-cell batteries are the most sensitive and require a very specific charge profile. The higher voltage from a flooded or AGM charger causes permanent hydrogen bubbles in the gelled electrolyte, which reduces battery capacity or ruin the battery altogether.
Never use a constant current manual charger to charge a GEL-cell battery, only a GEL-cell compliant intelligent charger. The charger should have reliable temperature sensing, voltage regulation, and a specific GEL-cell mode.
Lithium-ion battery
Technically you can charge a lithium-ion battery with a manual charger, but it is not recommended.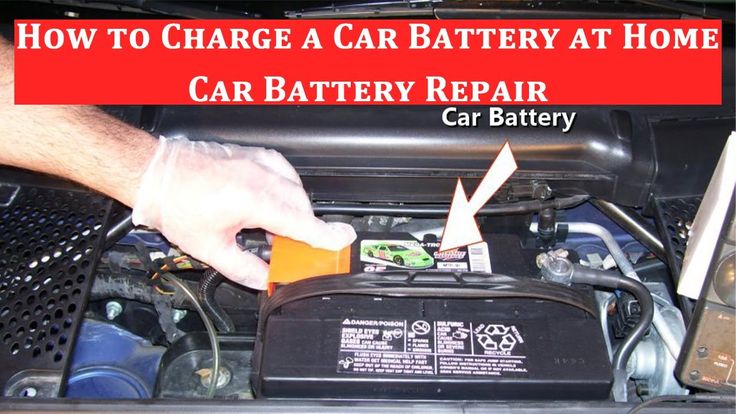 If you don’t follow a specific procedure, you will damage the battery permanently.
It’s recommended that you only use a Lithium-ion compliant charger.
Lithium-ions charge fast and at a higher voltage. A manual charger or even a standard intelligent charger will likely undercharge a Lithium-ion battery, which may damage the battery over time.
This step is not mandatory if you use a fully automatic charger that you know is compliant with your type of battery. The charger will do the job of choosing the right charge profile for you.
But if you use a constant current manual style of a charger, you need to know the battery’s voltage to be able to monitor the charging process.
In any case, the state of charge will tell you if your battery is completely dead or if it just needs to be topped off. It will also give you an indication of what charge time to expect.
Note that different types of batteries reach the same state of charge at different voltage levels.
| State of charge | Charge time |
| New (0%) | 14 – 20 hours or more |
| 75% | 3 – 6 hours |
| 50% | 6 – 10 hours |
| 25% | 10 – 14 hours |
A simplified formula to calculate the charge time of an empty battery is by dividing battery Ah rating with charging current in A (ampere). Charging a completely flat 15Ah battery with a 1,5A charger would take 10 hours.
Charging times will vary depending on various factors:
If you have a smart battery charger, it will stop charging automatically as soon as the battery is fully charged. Usually, this should take no more than 12-16 hours unless the battery was completely flat.
Do not plug the charger to a wall socket yet.
Your charger has one positive lead and one negative lead. The positive lead will have a red clamp and the negative lead clamp will be black.
The red clamp will be connected to the positive battery terminal. To identify the positive battery terminal, look for one or more of these markings:
Make sure the terminal is clean to ensure a proper connection. Use a wire brush, and remember to wear your eye protection.
The negative will be connected to frame ground. Look for a bare, solid metal part of the frame or engine. Bare metal bolts are often good options. Make sure your ground connection is clean as well.
When removing the first lead after charging, there might be a small spark. It’s best if this spark happens somewhere away from the battery where there is less risk of gas build-up from the charging process.
Modern intelligent chargers are designed not to overcharge the battery, so you will most likely have no issues if you choose to connect the negative lead directly to the negative battery terminal instead of the frame. After all, this is what most charger manuals will tell you to do.
Connecting it to the frame or engine instead just adds one more layer of safety.
From an electrical point of view, the battery will charge just as well whichever of the two options you choose.
Your negative battery terminal will have either:
Now that your connections are clean you can connect the charge leads.
Now plug the charger to a wall socket, but make sure it is not charging yet.
Manual charger
You need to set the charge rate (current) manually. A good rule of thumb to know what amperage your battery should be charged at is to divide its Ah- rating by ten. A 15Ah battery should use a charger with a power output of no more than 1,5A. You should never charge an ATV battery with more than 3A.
Intelligent charger
Choose the right charge-mode for your type of battery. Using the wrong mode on an intelligent charger or may overcharge or undercharge the battery.

You are now ready to initiate the charging process. Make sure you have enough time to charge the battery to full charge, or it will sulfate.
Do not attempt to start an ATV or UTV when connected to an intelligent battery charger.
For all types of batteries
You want to make sure the battery does not overheat during the charging process.
If the battery becomes warm to touch, turn off the charger, let it sit for a few minutes to allow any gasses to vent out before removing the charge leads. Let the battery cool off before you continue charging it.
For flooded lead-acid batteries
The electrolyte levels should be monitored during the charging process. If it falls under the specified level in any of the cells, you should remove the cap and add distilled water until you reach the correct level.
For manual battery chargers
A manual charger won’t turn off when the battery is fully charged. You need to monitor the voltage to keep track of the battery’s current state of charge. Use the table from step 5 as guidance.
When the state of charge is about 80%, you should turn down the amps to about half of what you started with. A lower amperage at the final part of the charging process will give you a slightly higher final charge rate, as well as reducing the risk of overcharging the battery.
When you reach a full state of charge according to the table, the charger must be switched off or put in a maintenance-mode if available.
Unplug the charger and let it sit for a few minutes to let any gasses vent before disconnecting the leads.
Use a piece of cardboard as a fan if you suspect gas buildup over the battery.
As long as the charger is unplugged, it doesn’t really matter which lead you to remove first.
But it is best practice to always start with the negative lead. There is no harm done if you accidentally touch ground with a negative lead.
Wait a few hours and use a voltmeter or multimeter to check if the battery still holds a charge. If the voltage drops, there might be a problem with internal sulfation.
It may be worth trying to charge the battery with a charger that has a specific desulfation mode before discarding the battery.
Read this guide to troubleshoot a battery that wont charge or won’t hold a charge.
The charging system on an ATV is not as effective as the one you will find on a car, so it will need more time to charge the battery properly.
Unless you do hour-long rides every time you start up your bike, it will likely draw more power to start the bike than it will be able to charge while you are running it.
In addition, ATV batteries are relatively small in both size and capacity to keep the overall weight of the bike down.
Combine that with a few power-hungry accessories like your ATV winch, and you will soon find your battery too low on power to start your bike. Leaving the battery on a low charge over time will also cause damage to the battery.
That’s why it’s a good practice to charge it now and then to save you from problems down the road.
ATV batteries should be charged any time the battery voltage drops below 12.4 – 12.6 volts. Top off the battery each fall and each spring, and use battery tender to keep the battery healthy when the ATV is sitting for long periods without being used.
A battery should be charged at three different stages for optimal performance and service life. An intelligent charger switch between the stages automatically.
Automotive-style manual chargers do not have proper regulation for charging in stages. If you charge the battery too hard at the final stage, it won’t be able to reach a full charge.
The three charging stages are:
Bulk stage: At this stage, the battery will be charged up to about 70-80% of its capacity. The charger will be putting out a constant current determined by what charge mode or amp settings you have chosen. The voltage will increase gradually.
Absorption stage: At this stage, the charger will maintain voltage to the battery, but will taper off the charging current gradually as the battery gets closer to a full charge. This allows you to reach a higher state of charge without the risk of overcharging the battery.
Float stage: At this stage, the battery will be fully charged. All the charger is doing providing a small maintenance charge to keep the battery fully charged. Both voltage and current will be reduced.
Intelligent chargers usually have different charge modes to choose from. Each charge mode will have a specific set of parameters that are optimized for different types and different sizes of batteries.
The charger uses microprocessors to collect information from the battery to see its current state of charge and to adjust the voltage and current accordingly.
For example, a lithium battery reaches 80% state of charge at a different voltage than a flooded lead-acid battery and needs the voltage input to be adjusted accordingly. And a gel battery cannot take as high of a charge rate as an AGM battery and will require a lower amperage.
All of these parameters are controlled by which charge mode you choose. Your chargers user manual will tell you more details about each charge mode your specific charger offer.
In general, there is no need to disconnect the battery terminals when you are charging an ATV or UTV battery, as long as you are using a fully automatic charger or a trickle charger at 1,5A or less.
Hooking up a high current booster charger, however, may cause a voltage spike that may damage your bike’s electronics. But you should never use a high-amp manual style charger on an ATV in any case, so this should be a non-issue.
If your bike, for some reason, has a high phantom drain, you may struggle to get any power to the battery. In this case, you should remove the negative terminal before charging your battery. Then you need to do some troubleshooting to identify what is draining your battery.
Also, please note that boosting your battery by hooking it up to another ATV using non-protected jumper cables may create a voltage spike that has the potential to damage your bike’s electronics. Always use cables that have built-in electronic protectors, and you should be fine.
For basic maintenance charging, where you are just topping off a battery that seems a bit low on power, there is no need to remove the battery from the bike.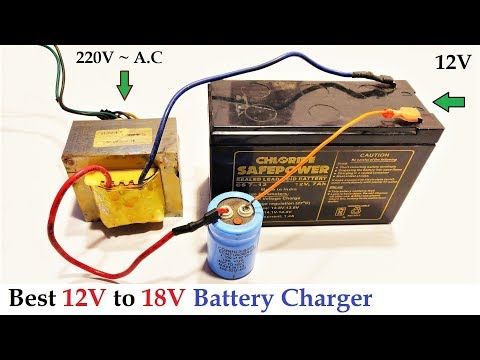
When you are charging a brand new battery that has never been charged before or a battery that has gone completely dead, you might want to consider removing it.
When doing a deep-charge, there is a slightly bigger risk for explosive hydrogen gas to build-up, as well as possible overheating.
By removing the battery from the ATV, you won’t cause any harm to the bike in the unlikely event that something goes wrong.
Flooded lead-acid batteries have removable caps to add more electrolyte fluid (distilled water) if needed. There is one individual cap for each cell or a strip that ties several caps together.
Some believe that you always need to remove these caps when you charge to let out any gas build-up. This is usually not necessary. Those caps are designed to vent any gas produced while charging, or there will be a separate vent.
Refer to your specific battery’s safety instructions to verify whether the caps need to be removed or not.
As long as the vents are not blocked (stuffed with mud, anyone?), you should have no issues leaving the caps in.
The only time you need to remove the caps is when you wish to check the level of electrolyte or top off one or more cells that are low on fluid.
When using a manual charger, you can remove the caps for a short period to give you an indication of when the charging process is finished.
When you see hundreds of bubbles forming on top of the battery cells, you know that the battery is full. Any further charging is overcharging.
PS! Remember that the gas you see forming is flammable, and the fluid is acidic. Never remove battery caps without wearing eye protection and vinyl gloves.
The charging process described at the top of this post will work both for doing a deep charge on a new battery as well as doing a refresh charge to top off a battery where the voltage has dropped a bit too low.
There are, however, a few things to keep in mind.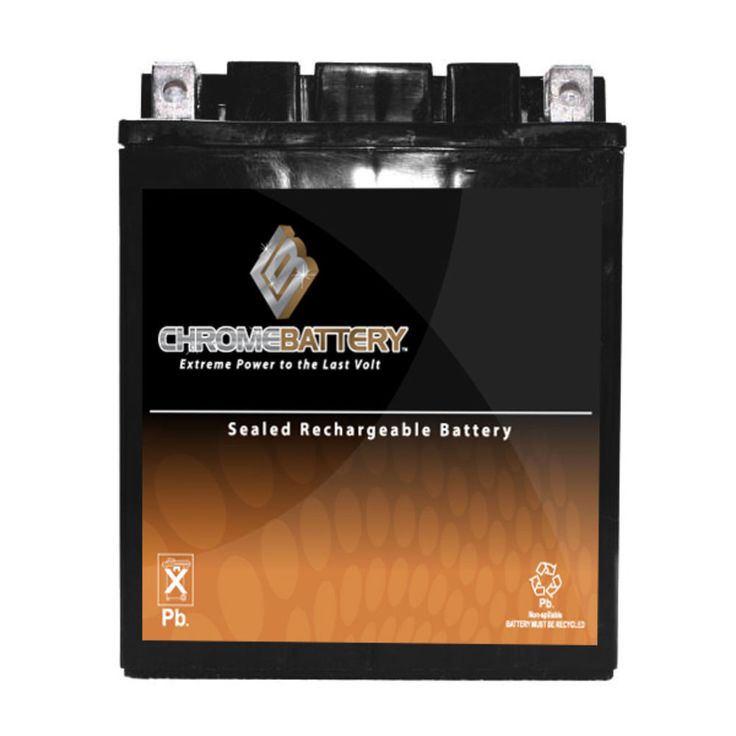

If you hook up the charger, but it fails to initiate it’s charging cycle, the battery voltage may have dropped below the minimum threshold recognized by the charger.
To solve this, you can use a fully charged battery to trick the charger into starting the charging process.
Tools and equipment required:
Follow these steps:
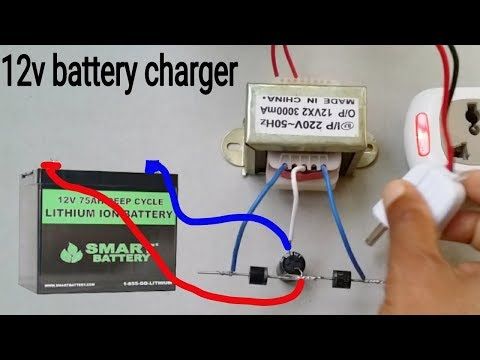
You should not use a car charger or a typical trickle charger to charge an ATV unless it has specific settings to limit the amp output as low as 1-3 amps. Car chargers typically come with an output of 10A. Charging an ATV battery at 10 amps would overheat it and damage it permanently.
You can use jumper cables to jump-start an ATV battery from a car battery, but it is not a suitable method for doing a full charge. The car must stay off as long during the whole process.
So your ATV battery won’t charge, not from running the bike and not even when using an external battery charger. Or maybe it seems to be charging just fine, but you can’t get it actually to hold a charge?
There are a few things you should look into before spending money on a new battery or other parts. If you’re lucky, you can fix the issue without even spending one single dollar.
Before you begin troubleshooting, it may be a good idea to read this post on how an ATV charges its battery.
Today’s post will cover these three different scenarios:
Let’s dive into the actual troubleshooting.
Page Contents
It’s a good idea to start your troubleshooting by identifying whether your ATV has a faulty charging system or if the problem is with the battery itself.
The easiest way to do this is by trying to charge the battery with an external battery charger.
If the battery charges fine when using a charger and holds its charge when sitting a few days under no load, you know that the problem is with the ATV and not the battery.
If it does not charge or hold a charge when sitting disconnected, well, then you know that the problem is with the battery.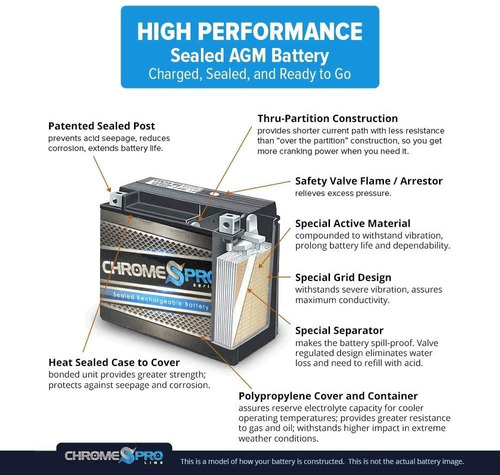
Even if your battery is brand new and you are experiencing issues, I suggest you follow these steps. Brand new batteries may be damaged as well.
I generally recommend using a good quality fully automatic battery tender (or a so-called smart charger) to keep your ATV battery in good shape when the bike is not in use or whenever it needs need to be topped off.
Smart chargers come with the advantage that they will automatically shut off when the battery is full or if there is a short or another issue inside the battery.
My trusty Ctek Multi XS 3600 is a cheap charger/tender that does its job well.I’ve been using Ctec chargers with great success for many years. The Ctec XS 0.8 is a reasonably priced, high-quality charger that fits well for most ATV batteries. Click here to see today’s price over at Amazon.
 ”
”Related:
When the charging cycle is complete, it’s time to read what voltage the battery holds. To do this, you will need a basic multimeter.
If you don’t have one, you can get them cheap at your local auto parts store. Even the cheapest ones will do the job. Every home mechanic should have one, and I promise that you will find plenty of uses for it as soon as you learn the basics of how to use it.

Now you should know whether you have an issue with the battery or if the issue is with the bike’s charging system.
Here are the most common causes when the battery won’t charge, even when using an external battery charger:
No battery lasts forever, and at some point, all batteries will stop working. If you take proper care of the battery, it should last for many years, but you can ruin it in months or even days if you misuse it.
If you could not charge the battery above 12.4V, there is a good chance the battery has gone bad from misuse or just from being old.
There may be a bad cell with an internal short that prevents the battery from taking a proper charge.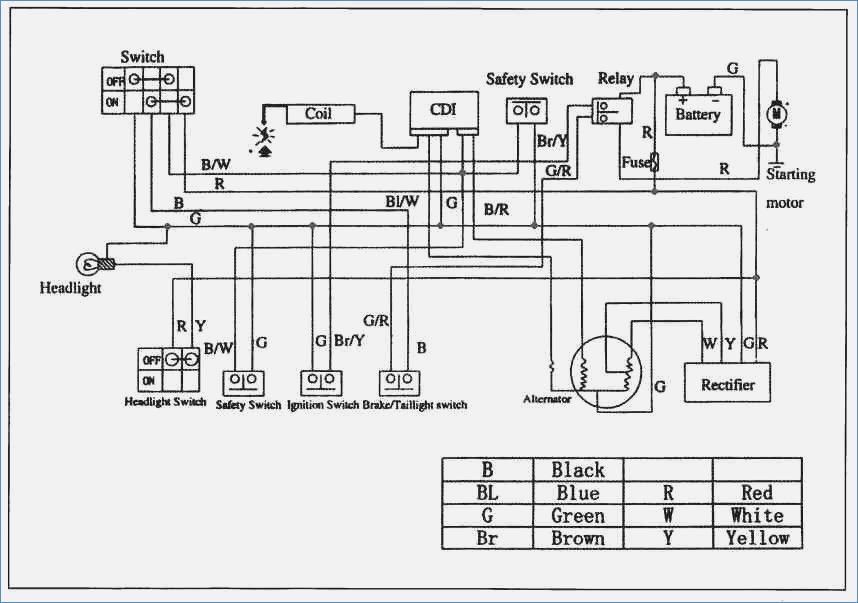
Another (and better) way of testing if the battery has gone bad is performing a so-called “Load test.” This simple test measures what charge the battery can maintain even under heavy load. You’ll find instructions on how to perform this test in this post about what to do when a battery keeps draining for no apparent reason.
Acid lead batteries need a certain fluid level to take and hold a charge. The electrolytes should fully cover the plates inside of the battery.
If your battery is the Lead-Acid type and has covers that are meant to be opened, you can follow these simple steps to inspect and top of a battery that is low on battery acid.
Warning 1: Do not try to open a battery that is not designed to be opened. If fluid levels run low on a battery like this, there is nothing you can do but replace it with a new one.
Warning 2: Battery acid is highly corrosive and will cause permanent damage if it gets in contact with your skin or eyes. Use proper eye protection and rubber gloves.
In this scenario, the battery will charge just fine when you hook up an external charger, but it will not charge from running the ATV.
There are a few common causes you need to address.
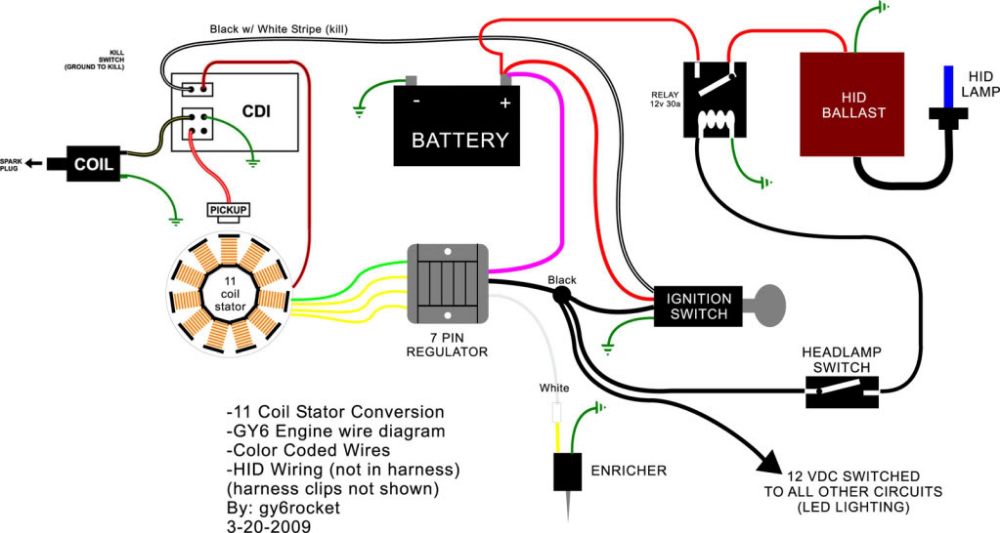
The charging system on an ATV is quite simple but nowhere near as efficient as the one you will find on a car. It uses a stator that produces a current inside of the engine when the engine is running. The output power from a stator is much less than what you get with an alternator used on cars.
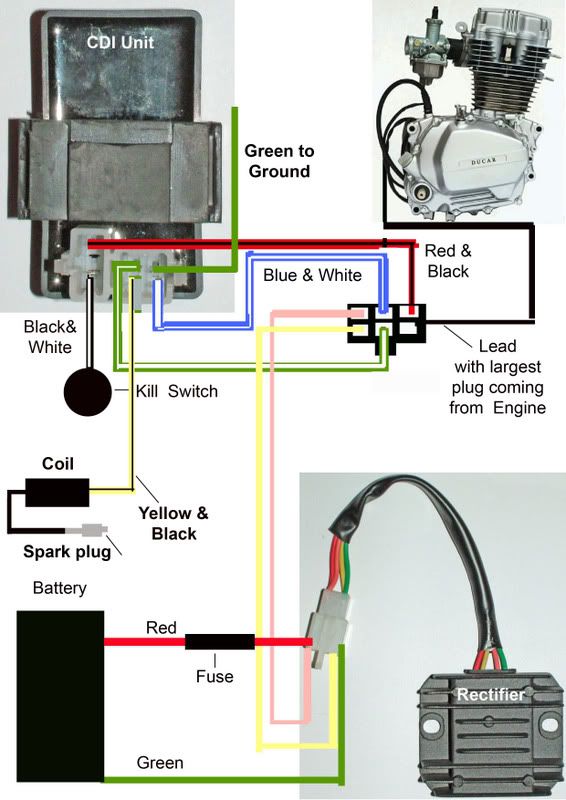
This is how the stator coil looks like.The current then runs through a voltage regulator/rectifier that converts the current from three-phase AC voltage to DC voltage and regulates the output current to 14V – 14.5V. This current is then what’s charging the battery and powering all of the bike’s electric components.
The stator and rotor are located inside the engine behind this cover.Even when the system works as intended, it may sometimes struggle to keep up to charge the battery to a full charge. This happens when you combine a low output charging system like the one you find on ATVs using power-hungry accessories like a winch or heated grips.
You can test the stator using a multimeter to measure resistance; this post describes the steps.
Alternatively, you can measure what voltage output you get from the stator. This method is less accurate but will give you a good indication of whether the stator is working correctly or not.
The output voltage on a working ATV stator should be about 20V AC at idle to 40V AC or more when revving.
If any of the three phases did not put out 20V – 40V or more, the stator is likely not working correctly and needs to be replaced.
If the stator checks out fine when doing the tests above, it’s time to see if the voltage regulator works as it should.

ATVs are often used in wet conditions or bumpy off-road riding. This leaves the wiring particularly exposed to corrosion or coming loose.
A corroded or loose connection will prevent the battery from being properly charged.
Disconnect the battery connectors and clean them with some sandpaper before installing them again. The ground wire is particularly prone to corrosion.
Do the same with any exposed connectors found in the wiring connecting the stator and the battery.
In this final scenario, we will cover what may be wrong when the battery seems to be charging just fine but then loses its charge after just a day or two, even when disconnected from the bike.
If you suspect that something other than the battery itself is causing it to drain, please refer to this post for proper troubleshooting for a battery that keeps going dead.
Even if the battery seems to be charging fine, there is a chance that fluid levels are low. Make sure all levels are correct as described above and recharge the battery to see if that helped.
Sulfation is a naturally occurring chemical reaction happening inside the battery when it’s being discharged. The process normally gets reversed when the battery is charged again.
Under certain circumstances, the sulfation becomes permanent and has damaged the battery.
This may happen when:

A sulfated battery loses a lot of its capacity and behaves as a small battery would. When you try to charge it, the charger will indicate that it is fully charged after just a short time of charging. But as soon as you disconnect the charger, the voltage will drop in just a matter of hours.
In some cases, it is possible to salvage a sulfated battery. But in most cases, the damage is beyond repair, and the battery needs replacing.
Try slow charging (trickle charging) the battery using a low amp charger 24h or more. Sometimes, this may bring a dead battery back to life.
There are also chemical treatments available that may help you recondition a sulfated battery. But because ATV batteries are relatively cheap, I recommend that you rather get a new battery instead of spending time and money on a battery repair that may or may not be successful.
Content
New models of ATVs are equipped with an electric starter. Therefore, problems with starting almost never arise. But in older models, 9 can be installed0029 manual kick starter . With him, beginners sometimes have difficulties.
To start the ATV, do the following:
Start the CFMOTO 500 with a manual starter?
Watch this video on YouTube
Paradoxically, but sometimes the owners of ATVs simply forget to pour gasoline into the tank. Therefore, before proceeding with the diagnosis, it is worth checking the fuel level.
It is not uncommon for the cause of the problem to be insufficient battery charge . It can be charged at home. If the ATV is small, you can purchase an additional battery. The cost of batteries for budget models is relatively low.
How to start an ATV?! If the battery is dead!? Life hacks! Subscriber reply | Irbis Atv 250s | SJ8Pro
Watch this video on YouTube
If the battery is good, but the starter does not work, it may be worth looking for the cause in the starting system. It is necessary to try to close the contacts, which are located on the starter relay. To do this, you need to use a screwdriver. The relay is usually located under the seat. Two thick wires are connected to it.
If you need to find a way to start the ATV without a key, you can also follow these steps. This technique will be effective only if the system is not controlled by the central computer . Otherwise, blocking will work.
If, after the manipulations, the engine starts up, then the problem is in the launch system . Otherwise, you will need to look for the cause of the malfunction further or visit a service center.
Each ATV has a stop button on the steering wheel. Usually it is red. This button is responsible for turning off the ignition, it turns off the engine . If you do not bring it to its previous position, the engine, of course, will not start. Therefore, it is worth checking in what position the "Stop" button is located.
Another security system provided in ATVs is a special check. This is a cable that is attached to the ATV at one end and to the driver at the other. If the latter falls off the ATV while driving, check flies out and the ignition turns off. You won't be able to start the vehicle without this receipt either. If this part is lost, you will need to look for the appropriate contacts and close them directly.
Another possible reason why the ATV won't start is a blown fuse. If the ATV is small, there is usually only one fuse. He is located next to the battery . The suitability of this part for operation can be assessed visually. The cost of the fuse is cheap, so it is better to have several of these parts in stock.
If there is no spare fuse, and the failure happened away from home, you can insert wire instead. This is a temporary solution that will allow you to get home. It is impossible to constantly replace the fuse with wire. You can burn much more expensive elements of the system.
This part is located under the saddle or next to the motor (depending on the model). It's a small box with wires coming out of it. They are connected to the ignition coil. It is difficult to assess the health of this part, so it is better to contact a service center with a similar problem.
If the spark plug wire is broken or the ignition coil is broken, it will not be difficult to check the performance of these systems. The candle is unscrewed and inserted into the candle cap. Next, you need to attach it with the metal side to the engine and press the starter button. If there is no spark between the electrodes, this is a sign of a breakdown. Try cleaning the spark plug electrodes and adjusting the gap between them.
If there is a spark, then the problem lies either in the candle cap or in the candle. You need to buy a new part and change it.
It will be possible to eliminate many malfunctions and start the ATV even in the forest. For models with a manual transmission, you can try to start the engine from the pusher. It should be said right away that this cannot be done with an automatic transmission. In other cases, it is recommended to look for the cause of the breakdown according to the points listed above.
How to start an ATV with a PUSHER
Watch this video on YouTube
1
Household robot vacuum cleaner
POLARIS
Model PVCR 1015 Golden rush
User manual
Our products are designed to the highest standards of quality, functionality and design. We are confident that you will be satisfied with the purchase of a new product from our company.
Before using the instrument, please read this manual carefully as it contains important information regarding your safety, as well as recommendations for the correct use and care of the instrument.
Save the manual along with the warranty card, sales receipt, if possible the carton and packing material.
Table of contents
General information…………………………………………………………………………………………………………………………………………………………………………………………………………………………………………………………………………………2
| General safety instructions ................................................. ................................................. | 3 |
| Special safety instructions for this instrument .............................................................. .................. | 4 |
| Area of use . | 4 |
| Product description .................................................. ................................................. ............................... | 5 |
| Contents .............................................. ................................................. ................................... | 5 |
| Unpacking the instrument and getting ready for use .................................................. ............................... | 6 |
| Operation .................................................. ................................................. ...................................... | 7 |
| Cleaning and external care of the instrument . | 10 |
| Troubleshooting .................................................................. .............................................. | 11 |
Storage…………………………………………………………………………………………..11
Transport……………… ………………………………………………………………….12
Implementation…………………………………...………… ………………………………………….12
| Disposal requirements………………………………………………………………… ….........12 | |
| Specifications .............................................................. ................................................. ........... | 12 |
| Certification Information .................................................. ................................................. .......... | 13 |
| Warranty .............................................................. ................................................. .............. | 15 |
GENERAL INFORMATION
This operating manual is intended for familiarization with the technical data, device, operation and storage rules of the household vacuum cleaner, model PVCR 1015 Golden rush POLARIS (hereinafter referred to as the vacuum cleaner, appliance).
GENERAL SAFETY INSTRUCTIONS
The device must be operated in accordance with the Rules for the Technical Operation of Consumer Electrical Installations.
The appliance is intended for domestic use only.
Please read this manual carefully before use and keep it.
The device must only be used for its intended purpose.
This appliance is not intended for use by persons (including children) with physical, nervous or mental impairments or lack of experience and knowledge, unless such persons are supervised or instructed in the use of this appliance by a person responsible for for their safety. Children must be supervised to prevent them from playing with the appliance.
Attention! Do not use the appliance near bathtubs, sinks or other containers filled with water.
Never immerse the device in water or other liquids.
Inspect the appliance each time before switching it on.
To charge the battery (battery), use only the charger (adapter) included with this vacuum cleaner model. Do not use this adapter for any other purpose.
If the adapter and power cord are damaged, never plug the adapter into a power outlet. If you need to replace (repair) the adapter, contact an authorized service center. Do not disassemble the adapter!
To charge the battery, first insert the adapter plug into the appropriate socket on the device and then plug the adapter plug into a socket. Do not leave the adapter plugged in after the battery has been charged.
Do not charge the battery until it is completely discharged.
Plug the adapter into AC power (~) only. Before switching on, make sure that the adapter is designed for the voltage used in the network.
Any erroneous switching will void your warranty.
Do not use non-standard power supplies or connection devices.
Before connecting the adapter to the mains, make sure that its plug is inserted into the appropriate socket on the device.
Do not use the device outdoors. Protect the device from heat, direct sunlight, impact on sharp corners, humidity (never immerse the device in water).
Do not plug in (touch) the power adapter with wet hands.
Always disconnect the adapter from the mains and from the charging socket on the device when the battery is charged.
Do not leave the device and adapter unattended. Keep the device and adapter out of the reach of children.
Do not carry the adapter by holding the power cord. Also, do not unplug the adapter by holding the power cord. When disconnecting the adapter from the mains, hold the adapter body without touching the conductive pins.
Do not repair the instrument or the supplied accessories yourself.
Unqualified repairs are a direct danger to the user. Repair,
3
Inspection and adjustment must only be carried out by qualified service personnel.
Only original spare parts may be used to repair the device.
SPECIAL INSTRUCTIONS FOR THE SAFETY OF THIS APPLIANCE
Do not place heaters or other sources of heat on the floor of the cleaning room while vacuuming.
Do not use the vacuum cleaner without a dust container, and without the filters provided in the container, installed and properly maintained in accordance with this manual.
Do not use chemical solvents to clean the vacuum cleaner.
Do not vacuum up the following objects and materials:
burning objects: ashes, coals, cigarette butts, etc.;
sharp objects: broken glass, needles, push pins, paper clips, etc.;
dye used in printers or copiers, as it is an electrically conductive mixture and is not completely removed from the filter;
poisonous, explosive and corrosive substances;
asbestos or asbestos dust;
Large leaf fragments;
moist debris and dust;
water and other liquids.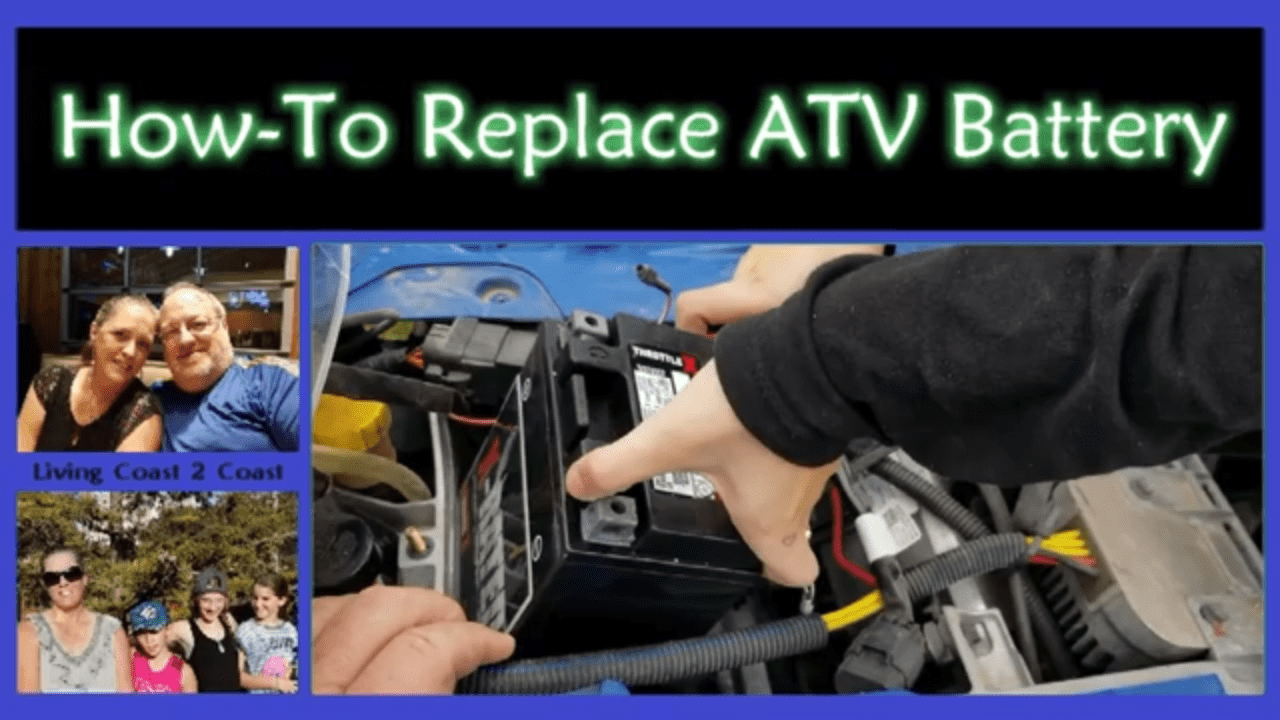
Use only accessories and replacement parts recommended by the manufacturer.
Do not block the air outlets of the vacuum cleaner.
Do not place the vacuum cleaner in operation on the edges and sides of the cabinet. The vacuum cleaner during operation must always be in a horizontal position, with the bumper cover up. Pay attention to the stability of the vacuum cleaner at the edge of the steps of the stairs and at the difference in floor heights. The width of the stairs must exceed the dimensions of the appliance, including the rotating side brushes, otherwise the appliance should not be used on stairs.
This appliance is suitable for hard floors and low pile carpets. The appliance must not be used on uneven floors, high pile carpets, or where there are wires on the floor that are obstructed.
When cleaning low pile carpets, the side brushes must be removed to prevent them from breaking.
The instrument is designed to work only with the original battery and charger supplied with
. Use of other devices for power and charging may cause damage to the instrument.
Before using the appliance, remove all fragile and breakable objects and wires from the floor.
Do not sit on the appliance or place objects or animals on it.
Clean the appliance and dust container after each use.
SCOPE
The appliance is intended for domestic use only in accordance with this manual. The vacuum cleaner is intended for dry cleaning of the floor of household premises with a hard, even surface
4
surface by suction of dust and small debris. The device is not intended for industrial and commercial use.
The device is also not intended for use outdoors and in unheated rooms with air temperatures below +15°C and in rooms with high humidity.
The manufacturer is not responsible for any damage resulting from incorrect use or use not specified in this manual.
INSTRUMENT DESCRIPTION
1. Corpus
2. Bamper-cover
3. Power switches
4. Follow Wheel
5. Lotpan sensors
6. High-rise of the height
7. Light
8. Supervisor
9. Rear motor-wheel
10. Bumper-cover fixer
EQUIPMENT
1. Robot vacuum cleaner - 1 pc.
2. Dust container with filter (installed) - 1 pc.
3.Battery (installed) - 1pc.
4. Charger - 1 pc.
5. Side brushes (left and right) - 3 pcs.
6.HEPA filter - 1 pc.
7. Instruction manual - 1 pc.
5
8. List of service centers - 1 pc.
9. Warranty card - 1 pc.
10. Packing (plastic bag + box) - 1 pc.
UNPACKING THE INSTRUMENT AND PREPARING FOR USE
Open the box, carefully remove the instrument, remove all packaging materials.
Remove all promotional stickers from the device.
Check the scope of delivery (see section "Pack of contents").
Remove all accessories and charger.
Check that all accessories are intact.
Install the side brushes. To do this, place the vacuum cleaner with the bottom panel up, side brushes (2 pcs.) With a square hole down. Unscrew the screws securing the brushes, install and fix the brushes with screws using a screwdriver, as shown in the figure.
The battery must be charged before the first use. See "CHARGING THE BATTERY".
Installing and removing the battery
Attention: Before installing or removing the battery, make sure that the charger is disconnected from the mains and from the device.
Note: If the battery is already installed in the device and is in good condition, it is not necessary to remove it.
Set the power switch (see Product Description) to the "O" (off) position.
Remove the bumper cover by sliding it relative to the body to the rearmost position and pulling up on the latch (see Device Description) and forward, removing it from the pressure stops in front.
Press the latch to remove the battery cover.
If there is no battery in the compartment, plug in the connector and install the battery in the compartment.
6
To remove - open the cover, remove the battery from the compartment and disconnect the battery connector.
Close the battery compartment cover, install the bumper cover by hooking it on the front of the push tabs and on the back of the retainer.
OPERATION
Make sure that the dust container and filters are cleaned according to the “Cleaning the dust container” section and installed in the instrument.
Attention: Do not use the vacuum cleaner without the dust container, or if it is not cleaned, this may damage the appliance.
Turn on the instrument by setting the power switch to the "I" position. The indicator under the cover will glow blue.
Place the vacuum cleaner on the floor, it will automatically start cleaning.
Raise the vacuum cleaner when you have finished cleaning. It will automatically stop. Set the power switch to the "O" (off) position.
Remove and clean the dust bin and filters (See "Cleaning the dust bin" section).
If the battery is running low, the indicator will flash red
If the red light is constantly on, a system error has occurred (see the "Faults and troubleshooting" section).
7
CHARGING THE BATTERY
1. Before charging the battery, the vacuum cleaner must be turned off.
2.Plug the charger plug into the side connector on the vacuum cleaner body.
3. Plug in the charger. Turn on the instrument by setting the power switch to the "I" position. The indicator starts blinking blue.
4.Charging is completed when the indicator is solid blue.
5.Unplug the charger from the mains and from the vacuum cleaner. Do not disconnect the charger until the battery is fully charged. Set the power switch to the "O" (off) position.
6. The device is ready for operation.
Note:
If the device is not used for a long time, it is recommended to charge the battery every 3 months, after completely discharging it, for which it is necessary to put the device into operation for the maximum possible time.
It is recommended to charge the battery only when the device indicates that it is low. Battery life on a flat hard surface after a full charge cycle can be up to 80 minutes.
When the machine is stored and used infrequently, and over the life of the machine, the battery life will decrease.
A battery that has become unusable must be disconnected and disposed of.
CLEANING THE DUST BAG
- Switch off the vacuum cleaner, make sure that the charger is disconnected from the mains and from the appliance.
-Remove the bumper cover, to do this, slide it relative to the body to the rearmost position and pull up on the latch (see Device Description) and forward, removing it from the pressure stops in front.
- Remove the container by pulling it up.
8
- Remove the lid of the container.
- Remove filters
- Shake out debris
- Clean filters with brush (not supplied)
- Rinse container and filters under cold running water, dry thoroughly without heat
9
within 24 hours
- Assemble the container and install it in place
- Install the bumper cover by hooking it on the front of the pressure stops and on the back of the retainer.
CLEANING AND EXTERNAL MAINTENANCE
1.Before cleaning, make sure that the device is disconnected from the charger and that the charger is plugged into the mains.
2. Do not immerse the instrument and charger in water or other liquids.
3. Do not use gasoline, alcohol or chemical solvents to clean the instrument.
4.Wipe the metal parts of the appliance with a clean, dry cloth.
5. Wipe the plastic parts of the appliance with a damp, wrung-out cloth. There should be no drops of water.
6. Store the instrument in a cool, dry place.
Cleaning the sensors
Gently wipe the sensors with a soft cloth, do not rub them.
Cleaning the side brushes
1.Check the brushes for any damage and/or foreign bodies.
2.Wipe the brushes with a cloth dampened with warm water and wrung out well.
3. If the side brushes are damaged, replace them promptly.
DESCRIPTION OF THE STAGES OF THE CLEANING PROGRAM
The cleaning program consists of the following stages, the selection of which occurs automatically:
1. "Random cleaning". The appliance cleans and moves in any direction.
2. "In a spiral". The device cleans in a circle, increasing the radius.
3. "Along the walls." The device cleans the room along 4 walls.
4. "In a spiral". The device cleans in a circle, increasing the radius.
5. Zigzag. The device cleans in a zigzag pattern from one wall to the opposite and back.
6. Spiral. The device cleans in a circle, increasing the radius.
7. Polygonal. The device moves along the trajectory of the 5th square, increasing the radius.
10
8. Spiral. The device cleans in a circle, increasing the radius.
Example of a sequence of selectable cleaning steps (sequence may vary).
TROUBLESHOOTING
This table lists the most common problems that may occur when using the instrument. If you cannot solve the problems yourself, contact the consumer support center or an authorized service center.
| Problem | Solution |
|
|
|
| Appliance does not turn on | Check if the battery is connected correctly. |
|
|
|
| No charge | Check that the adapter is connected correctly. |
|
| Check battery. If it gets hot, turn it off |
|
| adapter and wait 1 hour, then reconnect. |
| Appliance does not start immediately | Check that the sensors are clean and mechanical |
| after charging | blocking the bumper with foreign objects, at |
|
| Remove dirt as necessary. |
|
| Check battery. If the battery overheats, hold 1 |
|
| hour, then restart. |
|
|
|
| Vacuum cleaner does not pick up dust well | Check the condition of the dust collector and filters, |
|
| clean. |
| The vacuum cleaner moves backwards or | Wipe sensors, check for blockages |
| rotates in place | moving the bumper with a foreign object. Delete |
|
| pollution. |
| Wheel(s) not turning | Check the wheels. Clean if necessary. |
|
|
|
| Ultrasonic problem | Clean sensors, move bumper slightly |
| sensors or with sensors | and check for foreign objects. |
| bumper |
|
|
|
|
| Instrument body stuck between | Empty the instrument housing and start it again. |
| items |
|
Note: At the end of the appliance's useful life, do not dispose of it with normal household waste, but hand it over to an official collection point for recycling. In this way you will help save the environment.
Storage
Electrical appliances are stored in a closed dry and clean room at an ambient temperature not higher than plus 40ºС with relative humidity not higher than 70% and in the absence of dust, acidic and other vapors that adversely affect the materials of electrical appliances . Keep the appliance out of the reach of children
Transportation
Electrical appliances are transported by all modes of transport in accordance with the rules for the carriage of goods in force for a particular type of transport. When transporting the device, use the original factory packaging.
Transportation of devices must exclude the possibility of direct exposure to precipitation and aggressive environments.
Attention! At the end of its service life, do not dispose of the device with household waste. Take it to a specialized point for further disposal. By doing this, you will help protect the environment.
Implementation
Implementation rules not established.
Disposal requirements
Waste generated during the disposal of products is subject to mandatory collection with subsequent disposal in the prescribed manner and in accordance with the current requirements and norms of industry regulatory documentation, including in accordance with SanPiN 2.1.7.1322-03 "Hygienic requirements to the placement and disposal of production and consumption waste.
Specifications
PVCR 1015 Golden rush - household electric robot vacuum cleaner brand POLARIS Appliance diameter: 270 mm Appliance height: 70 mm
Dust container volume: 300 ml Appliance power: 18 W -Po 2000mAh 14.8V Battery charging time: 3-4 hours Battery life: up to 100 min.
12
Charger: PAD 1015 Golden rush Charger specifications: Input voltage: 100-240 V Frequency: 50/60 Hz Output voltage: 20 V Output current: 1000 mA Protection class – 2
Note: Due to the continuous process of changes and improvements, there may be some differences between the manual and the product. The manufacturer hopes that the user will pay attention to this.
CERTIFICATION INFORMATION
The device is certified according to Russian regulatory documents. Certificate of conformity No. TS RU C-HK.AG03.V.17225 series RU No. 0679095. Valid from 05/11/2018 to 05/10/2019
Russia, Moscow city, Khlebozavodsky passage, house 7, building 9, office 58, address of the place of business: 129626, Russia, Moscow, Mytishchinskaya street 3, building 3, building 1, apartment / office / room 405, registration number of the accreditation certificate No. ROSS RU.0001.11AG03, registration date 13.07. 2016, phone number: +74997068036 The design of the device complies with the requirements of TR TS 004/2011 "On the safety of
low-voltage equipment", as well as TR CU 020/2011 "Electromagnetic compatibility of technical means".
| Estimated product life: | 3 years |
| Warranty period: | 1 year from date of purchase |
| Production date: | marked on the nameplate |
Manufacturer:
POLARIS CORPORATION LIMITED Unit 1801, 18/F, 46 Jubilee Center, Gloucester Road, Wanchai, Hong Kong Kong
Owner of TM Polaris - Astrata AG.