Your tires are where the rubber meets the road – literally – when it comes to the safety and performance of your car. That means, if your tire is leaky, you could be putting your safety at risk.
A leaky tire causes low tire pressure, which can decrease fuel economy, and put you at risk for a blowout. It also decreases the ability of your car to handle properly, making it more difficult to respond to emergency situations or drive in inclement weather.
In this article, we’ll discuss how you can diagnose and fix slow tire leaks. Don’t just ignore that low pressure sensor – check out this guide!
The Most Common Causes Of Slow Tire LeaksThere are three common issues that cause slow tire leaks. Let’s discuss each one of them now.
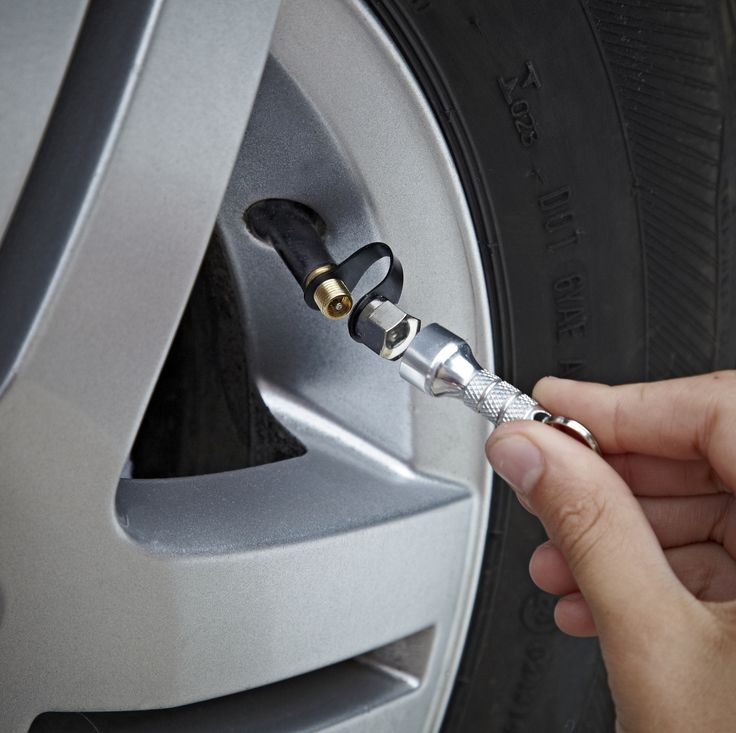
If your valve stem is damaged, there will be a slow and constant leak. This leak could come from either the body of the valve, or the base of the valve, where it meets the tire.
Contrary to popular belief, puncture damage usually doesn’t lead to an immediate flat tire or blowout, in most cases. This is because the object usually remains lodged in the rubber, preventing air from leaking quickly.
There are a few ways you can diagnose a slow tire leak
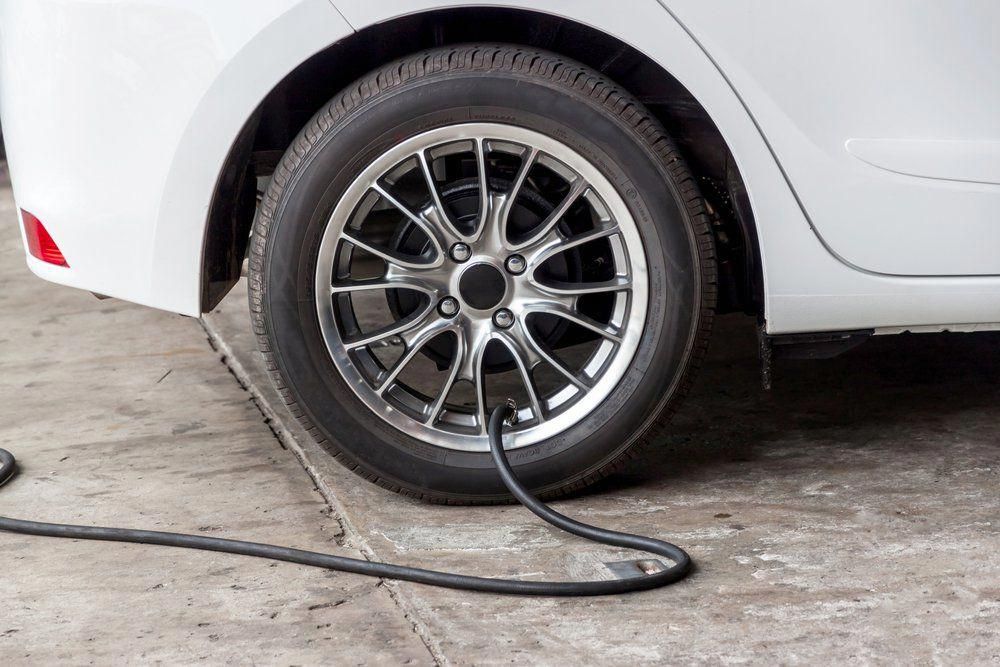
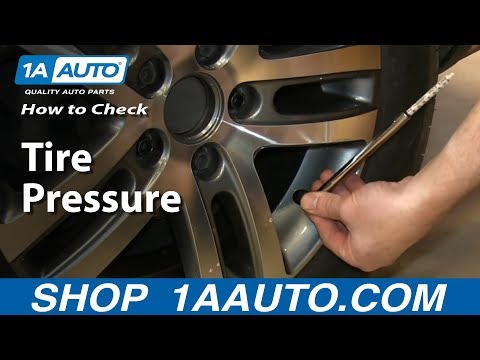
 If one of your tires seems perpetually under inflated, chances are you have a leak.
If you have a slow tire leak, you’ll want to have it repaired professionally as soon as possible. In some cases, you may want to keep a tire plug or patch kit in your vehicle. These kits are easy to use, and can keep your tire inflated until you bring it to a professional tire repair shop.
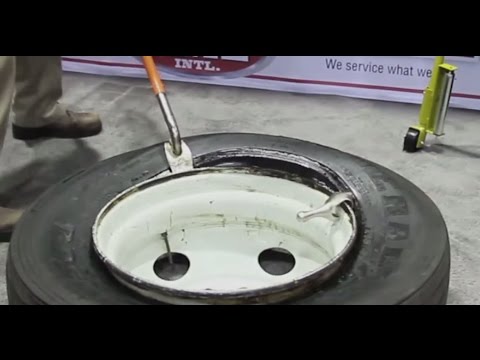
To permanently fix a tire leak caused by a puncture, you will need a “plug and patch”. This method of repair involves removing the tire from the wheel, and placing a combination plug and patch on the tire.
If your leak is caused by a faulty valve, you may need to replace it or your tire.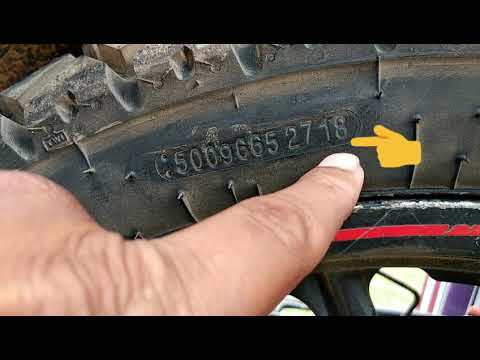 Leaks caused by a damaged mounting surface may require you to replace the entire wheel.
If you need to repair a tire damaged by a puncture, or you think your valve or mounting surface may be damaged, we can help!
Schedule your appointment on Ride Time today, and come to our service centre now in Winnipeg, to make sure you stay safe on the roads!
Posted by Matthew C. Keegan Know How
Continually losing air in the same tire is a certain sign that a leak is present. If you find a hole, then it’s a simple matter of plugging it, adding air and going on your way. Unfortunately, not every tire leak is easily found, making it all the more difficult to resolve a persistent problem. Here are some steps you can take to identify and fix a leak.
1. Add Air to the Affected TirePut sufficient air in your tire according to the pounds-per-square-inch (PSI) recommendation listed in the owner’s manual, on the placard found on the driver’s door jamb or on the inside of the glove box. The tire should be cold when inflating to ensure an accurate reading. Inflate each tire on your car and the spare accordingly.
If the affected tire continues to lose air faster than the other tires, then you have a leak. You’ll find most leaks by visual inspection — a protruding nail, a hole or a cut are obvious signs — and by listening to or feeling around the tire for air release. Remove nails and fill holes, but any puncture in the tire shoulder or sidewall areas means you’ll have to replace the tire.
3. Submerge the Tire to Discover LeaksSome leaks are imperceptible under normal observation, but there are two ways to find a leak. First, cover the affected tire with a solution of soap and water. If a leak is present, the impacted area will bubble up, revealing the leak. Second, you can always remove the tire from the car, then submerge it in water. Bubbles will soon form, making it easy for you to identify the source of the leak.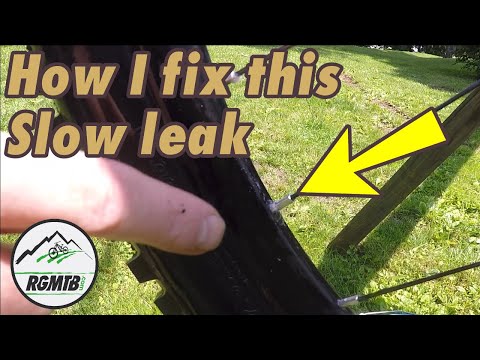
Not all leaks can be directly attributed to the tire. The tire itself may be in top condition, but there are two other ways a tire may leak.
First, a bad valve stem can cause a tire to lose air through the valve base or body.
Second, the wheel-mounting surface may be defective. It can be damaged by hitting a pothole or through corrosion.
These two hidden problems become visible through the soap-and-water test or by submerging the tire.
6. Replace or SealYou can resolve a tire leak in two ways.
First, if the leak is due to the tire itself, then a tube sealant kit can handle most small leaks.
Second, for leaks not involving the tire directly, replacing a worn valve stem or a damaged wheel should provide a comprehensive fix.
Check out all the driveline & wheel parts 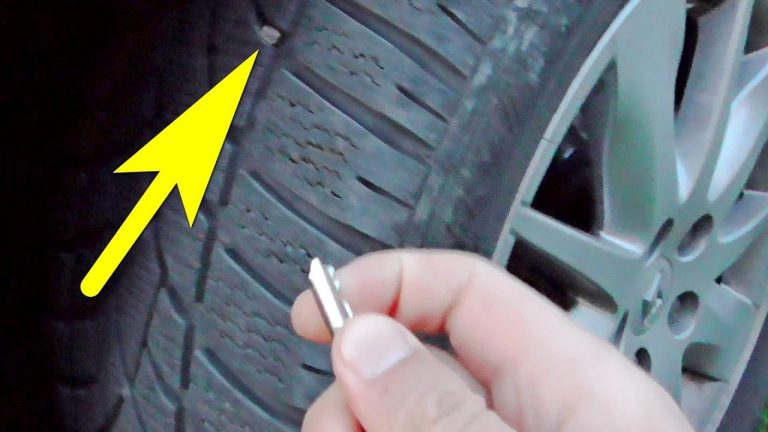 For more information on tire leaks, chat with a knowledgeable expert at your local NAPA AUTO PARTS store.
Photo courtesy of Flickr.
Categories
Know How
Tags
car care, flat tire, flat tire causes, tire care, tires, wheels
Matt Keegan has maintained his love for cars ever since his father taught him kicking tires can be one way to uncover a problem with a vehicle’s suspension system. He since moved on to learn a few things about coefficient of drag, G-forces, toe-heel shifting, and how to work the crazy infotainment system in some random weekly driver. Matt is a member of the Washington Automotive Press Association and is a contributor to various print and online media sources.
Page 1
The tightness of a tire depends mainly on the design features of the tyre, material quality and manufacturing technology. [1]
Valves for passenger tubeless tires.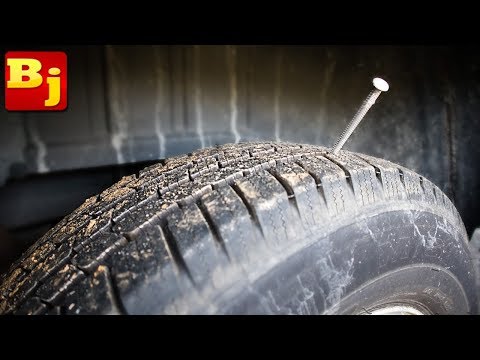 [2] [2] |
To provide with greater tightness of the tire on the rim in tubeless tires, the part of the bead adjacent to the rim edge sometimes has from 4 to 8 concentric protrusions (scores) with a height of 0 5 - 0 8 mm. [3]
To determine the location, direction and extent of damage to the sealing layer, check the tightness of the tire (by immersing the inflated tire with the rim in a bath of water) and carefully inspect the carcass from the inside. [4]
Thirdly, devices are needed to predict failures and emergencies, for example, a violation of tire tightness is an emergency situation in which the driver can make various decisions (braking, switching on pumping), so it is highly desirable to have diagnostics that would indicate the rate of pressure drop in the tires or the time remaining until an unacceptably low pressure is reached. [5]
The main symptom of a tire failure is a decrease in the internal pressure in it, caused by a violation of tire tightness . [6]
[6]
When using a spreader for internal inspection and repair of tubeless tires, even slight damage to the beads should be avoided, as this would impair the seal on the rim. The roughness of the sealing layer should be shallow. [7]
You should carefully monitor the serviceability of the rims and their flanges, the tightness of the fit of the valves. Check tire tightness is made not only after installation, but also during operation: the wheel with the inflated tire is lowered into a bath of water or individual sections of the tire and rim are moistened with soapy water. [8]
If the tire beads do not sit on the rim flanges, raise the wheel and hit the floor several times with the tire tread. Then check the tire for leaks by measuring the air pressure in it after a while or by immersing it in a bath of water. [9]
Recently started production of tubeless pneumatic tires. These tires do not have a tube, and on the inner surface of the tire carcass there is a special thickened rubber layer - a sealing layer. The design of such a tire, especially in the bead, as well as the design of the rim and the valve, ensures that the tire seals against the rim. [10]
Tubeless pneumatic tires have been started recently. These tires do not have a tube, and on the inner surface of the tire carcass there is a special thickened rubber layer - a sealing layer. The design of such a tire, especially in the bead, as well as the design of the rim and the valve provide tire tightness on the rim. [11]
| Tire tread wear depending on slip angles ( o and camber ( b. [12] |
Carefully check the condition of the wheels before carrying out assembly work. Wheel rims and their parts (side and lock rings) are cleaned of dirt and rust, curvature and dents are eliminated, and then painted to protect against corrosion. It is especially necessary to carefully monitor the condition of the rims of tubeless tires, since even slight damage to the surface of the rims (notches, scratches) can violate tire tightness .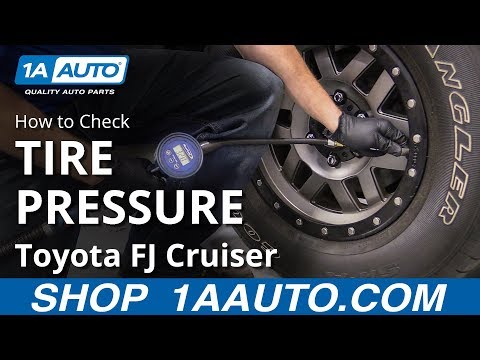 [13]
[13]
Pages: one
The article provides information on the correct installation of tires and features of the tread direction.
A tire is a complex multi-layered shell that is attached to the wheel rim. The shock-absorbing part is rubber or polymer, with a printed pattern, which, as a rule, indicates the direction of rotation of the wheel. The pattern is applied to the protector. The tread is the working area that creates the grip of the car with the road.
Tires are classified according to the following criteria:
Understand! Universal in reliability while driving are inferior to specialized ones. The directional ones provide better grip on wet roads at high speeds. If you correctly determine the direction behind the rotation of the wheels, the effect of aquaplaning disappears, which guarantees good rubber grip in puddles.
The structural features of rubber are distinctive features that increase the driving characteristics of the vehicle. It is important to understand them for the correct choice of replacement rubber.
Tubeless, long lasting elasticity in the event of a puncture. The rubber tightens around the stuck object. It does not overheat when driving, due to heat dissipation by the open (metal) part of the rim. Unlike the chamber one, there are increased requirements for rims, the need to apply additional sealant at the junction of the rim and rubber, and the complexity of installation. Tubeless are used more often, properly mounted - high wear resistance.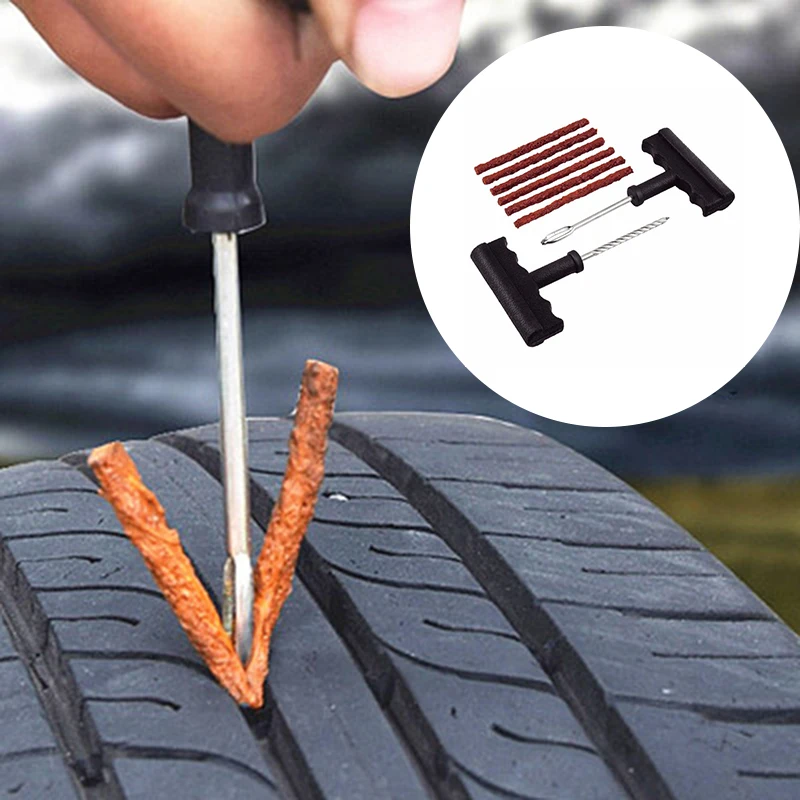
The difference between bias and radial tires can only be correctly identified by the marking. Radial - r. Diagonal - do not have a letter index. You can understand the marking of the diagonal ones by the presence of the designation TT - operation with a camera. Those who care about speed need to understand the differences.
Summer Drive Protection Sound Comfort
Rating:
4.5
Tires Goodyear Eagle F1 Asymmetric 3 SUV
Summer Drive Protection
Rating:
4.5
Tires Goodyear Eagle Sport TZ
Summer Drive Protection
Rating:
4. 5
5
Tires Goodyear EfficientGrip 2 SUV
Summer Drive Protection Run On Flat
Rating:
4.5
Tires Goodyear EfficientGrip Performance
Winter Drive protection
Tires Goodyear UltraGrip Arctic 2 SUV
Winter Drive Protection Sound Comfort
Rating:
4.5
Tires Goodyear UltraGrip Ice 2
Winter Drive Protection Sound Comfort
Rating:
4. 5
5
Tires Goodyear UltraGrip Ice SUV
Winter Drive protection
Tires Goodyear UltraGrip Performance+ SUV
All season Drive Protection
Rating:
5
Tires Goodyear Vector 4Seasons Gen-3 SUV
Summer Drive Protection Run On Flat
Rating:
4
Tires Goodyear Wrangler HP All Weather
All season Drive Protection
Rating:
4. 5
5
Tires Goodyear Vector 4Seasons
Summer
Rating:
4.5
Tires Goodyear Wrangler All-Terrain Adventure with Kevlar
Summer Drive Protection
Rating:
4.5
Tires Goodyear EfficientGrip SUV
Summer Drive Protection Run On Flat
Rating:
4
Tires Goodyear Eagle F1 Asymmetric SUV
Tire tread provides traction.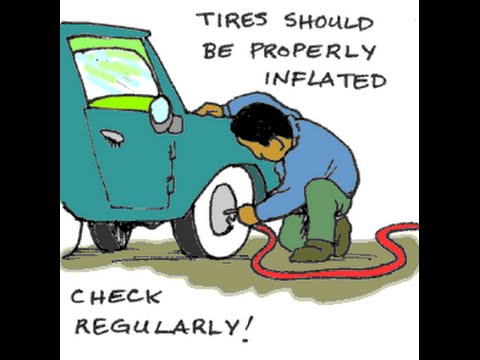 You can determine by the tread:
Asymmetrical tread pattern is larger on the outside. Do not purchase with even the slightest difference in the pattern - the tires rotate with a minimum lag - uneven grip with the roadway. Especially important for the highway, sharp descents.
Before determining the direction of a tire, it is important to know that Goodyear's tire direction marking for an asymmetric pattern is: LEFT; RIGHT - right; outside - outer side, inside - inner. install tires on the car according to the pattern on the tread or arrow. If symmetrical - navigate along a symmetrical pattern, its direction must coincide with the direction of movement of the wheel. If you need to install in the direction - the correct designation is ROTATION - rotation.
How to find out the direction if there is no marking - herringbone pattern? Rotate the tire in both directions - the top of the "herringbone" should be the first to touch the road. This is the correct way to install a wheel without a direction marking.
Recently, manufacturers have switched to symmetrical wheels, as it is impossible to know which one will fail. Correct replacement scheme:
It is also worth understanding that it is impossible to use anti-corrosion agents for processing fasteners on the road - imbalance.