|
|||||||||||||||||||||||||||||
Champion Power Equipment
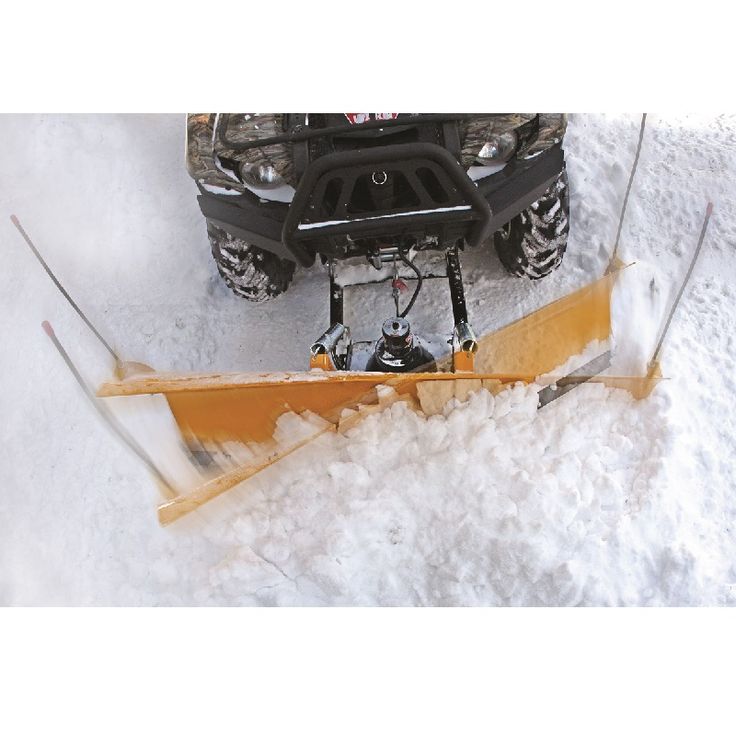
Champion’s 50-inch universal ATV snow plow system is engineered to transfer force to the ATV frame for smooth plowing. With a universal mount system designed to fit most ATVs on the market, Champion’s adjustable system allows five-position plowing and includes a 50-inch blade and push tubes.
Compatibility
The Champion 100398 50-Inch Universal ATV Snow Plow System is designed to use the power of your ATV to move snow smoothly and effectively.
Champion engineered this system for maximum efficiency. Since it’s a lower-mount system, the plowing force is transferred from the plow to the frame of your ATV where it belongs. Use with your vehicle's winch to easily raise and lower the plow blade.
No matter how heavy the snow is, you can count on Champion’s heavy-duty mounting system to stick with you season after season. The universal mount system will work with about 90% of ATVs on the market.
Everything you need comes in the box, including the 50-inch blade, push tubes, adjustable heavy-duty skid pads and all the hardware.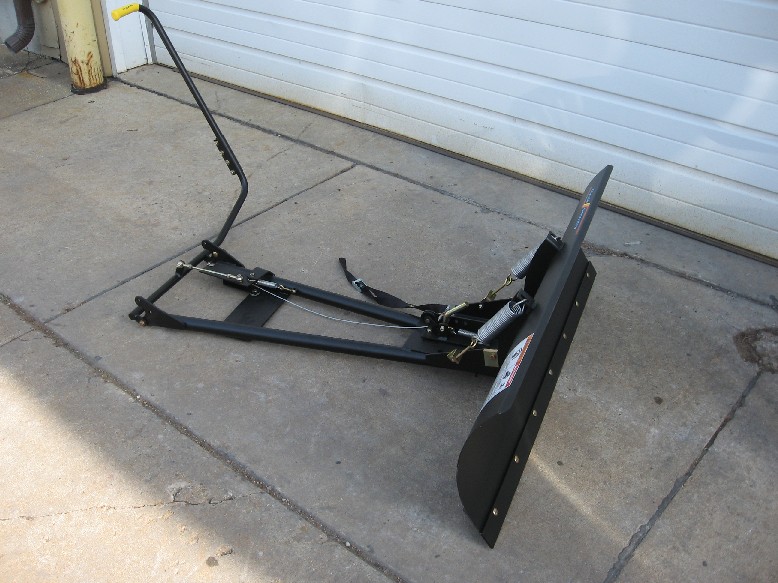 Champion’s thoughtful packaging and clear directions make setup hassle free, so your ATV snow plow will be ready when you need it.
The adjustable system allows for plowing in five different positions. Easily adjust the blade’s angle at any time so that every plowing pass you make will efficiently move the snow that needs to go.
You can count on year after year of reliable snow plowing with Champion. Built to last, all our plow components are industrial powder coated tough for the best finish available. The 50-inch (127 cm) blade is made of 14-gauge steel with 3/16-inch grade 3 gusseting. It also has 16 inches of blade height plus a two-sided, 3/16-inch (4.8mm) grade 50 steel wear bar attached with grade 8 bolts.
Buy with confidence - This snow plow system is Made in the USA. Champion Support and our nationwide network of service centers will back up your purchase with a 1-year limited warranty and FREE lifetime technical support.
For a list of common vehicles that are compatible with this snow plow, please reference our: Snow Plow Application Chart.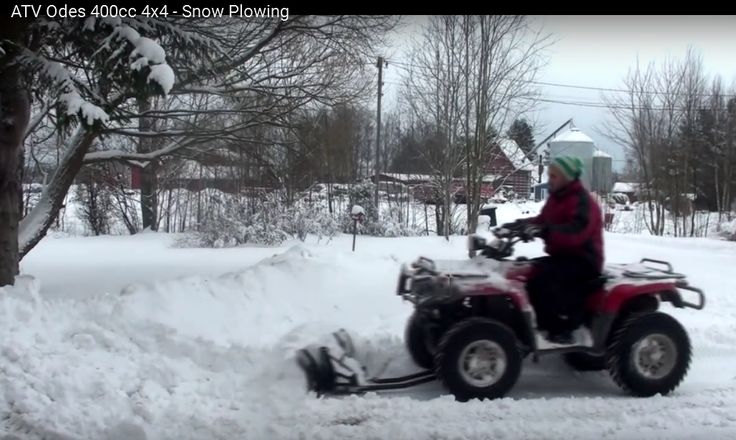
| Accessory Type | ATV |
|---|
| Length | 48.3 in. |
|---|---|
| Width | 50 in. |
| Height | 16.4 in. |
| Weight | 82.4 lb. |
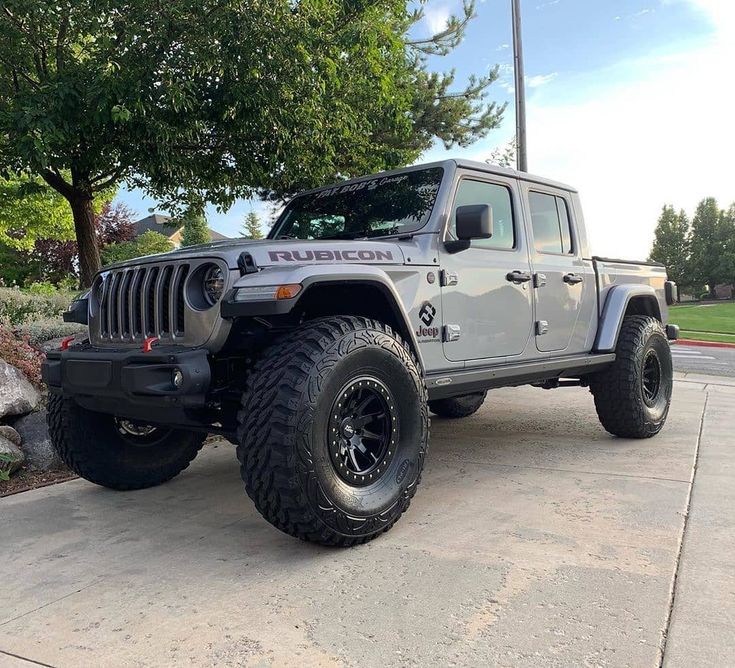
We design and manufacture cool accessories for your ATV. Now you can not only get a drive, but also change the world around you. Remove snow, mow the lawn, clean the sidewalk, plow the field, lift and transport a heavy load of more than 150kg - now it's a pleasure! Welcome to the world of Xator.
Unmowed field ahead, flat ground behind you. Chopper mower with 50mm ball tow hitch. Suitable for any rear mounted ATV. The XRW-1200 excels in grass, shrubs and small trees. Thanks to the rear attachment, the mower can even be mounted on low power ATVs or other equipment, such as a tractor, car, etc.
More
Rear Rack Installs Tow Bar Mount in Seconds. For installation, the ATV must be equipped with a 50x50mm square towbar mount. Helps to transfer loads no more than 100 kg.
More
ATV hydraulic system is your great household helper. It will help to transport cargo, lift heavy objects, remove snow, dig, level, clean, loosen and much more. Thanks to the standard connector, you can connect a large number of hydraulic equipment - a jack, a jackhammer, a vice, etc.
More
For those who like to watch and control. Mower chopper with installation on the front of the ATV. Friendly with ATVs with a capacity of at least 400cc. Equipped with a winch, it makes it easy to raise and lower the mower for moving from one mowing place to another. X-205 is tough on thick grass, bushes and small trees.
More
The XATOR broom is a quick and affordable way to clean large areas such as: roads, sidewalks, driveways, squares. Lifting is carried out using a winch. Capture width 1200mm.
Read more
The Snow Blower XSB-1200 snow blower has a double-circuit type of snow mass intake, which allows you to effectively clear large areas, the innovative auger design allows you to deal with snow crust, packed and wet snow.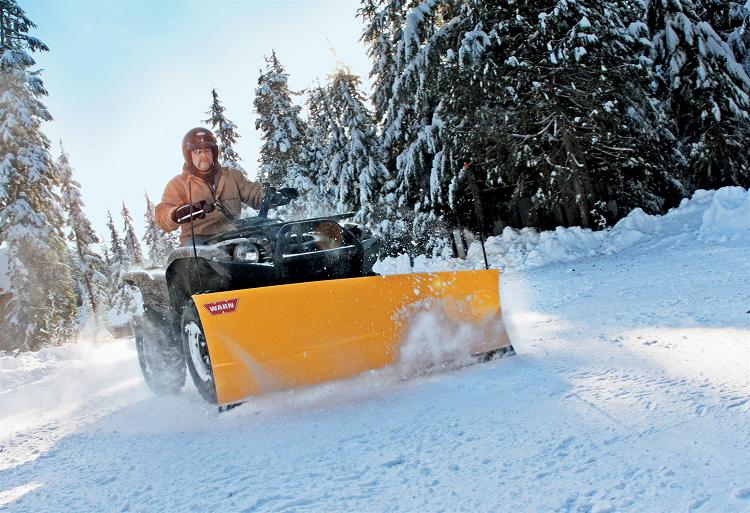 The universal snow blower is designed for installation on ATV (UTV) weighing at least 400 kg and equipped with a front winch.
Read more
XATOR is a Russian production. Similar products of foreign brands are much more expensive. Import substitution in this case has its advantages
All XATOR products are manufactured on modern machines with CNC technology, undergo multiple quality control. 3D-modeling and testing of prototypes allow us to minimize problems in the operation of our accessories
In addition to opening service centers throughout Russia, you will have access to inexpensive spare parts. You can always contact our company and get competent advice
We are always expanding the list of clients and are ready to cooperate all over the world. Describe your company work experience and we will be ready to establish mutually beneficial cooperation with you on an ongoing basis.
You represent *
Legal entity
Individual
Please! fill in all required fields.
Please! fill in all required fields.
I consent to the processing of personal data
Removing snow with a shovel is a rather laborious process. To facilitate it, a homemade snow blower can come to the rescue. Having made it, you will not only free yourself from the hard work of clearing the snow, but also save a lot of money by not spending money on expensive models of units in the factory.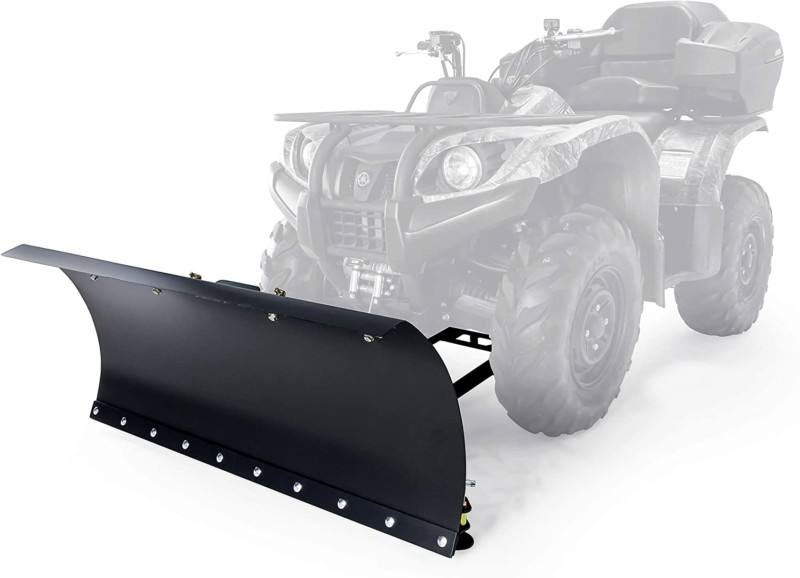
Contents
The main task of a snow blower is to capture and throw snow masses from the place of their accumulation, for example, from the sidewalk. Snow blowers made by craftsmen have a different design. But according to the type of snow capture, the models differ in screw and rotary.
The main part of the snow plow unit is the auger, which resembles a meat grinder screw.
There are two types of screw units.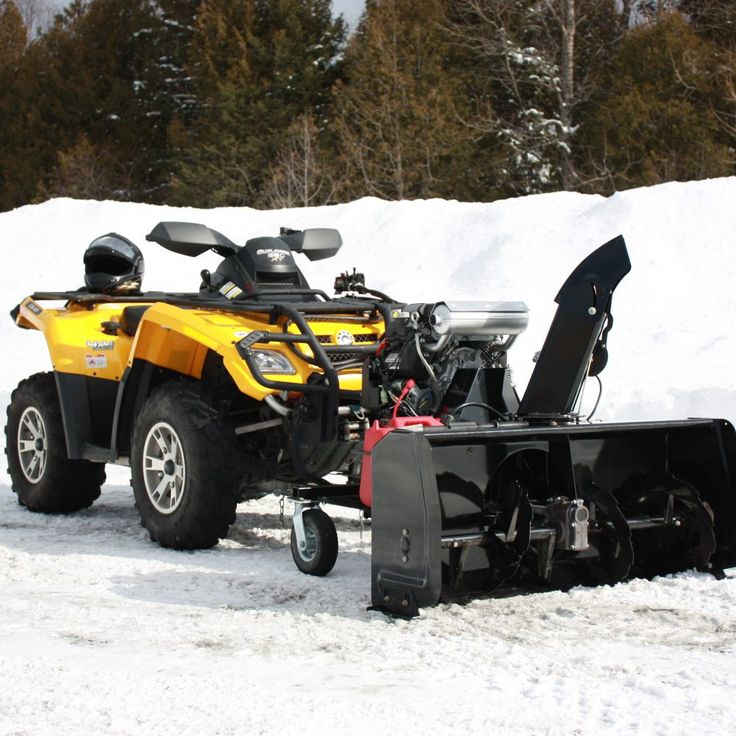
 But for better snow ejection, a rotor with 2 or more blades is installed at the rear of the bucket. An auger snow blower works on the same principle as a single-stage unit, but thanks to the rotor blades, the snow is better crushed and thrown out over a long distance (up to 15 meters). The following figure shows the structure of a two-stage type snow blower.
The rotary type snow blower is the simplest design and consists of a round volute body and guide vanes . In the upper part of the body there is a sleeve through which snow is thrown out.
Rotor with blades is installed in the central part of the volute. This impeller is driven by an engine (petrol or electric). The rotor, rotating at high speeds, captures the snow, crushes it in the body of the snail and throws it out through the sleeve.
Homemade snow throwers can be of two types.
 The motor is installed in the unit, after which it becomes a full-fledged snow blower.
 Before you make a manual snow blower, you need to understand what type of engine is better to choose - electric or gasoline.
Electric units are quiet and very easy to maintain . They also do not require any consumables. The only inconvenience of electric devices is the electric cable that constantly interferes with movement. Of course, you can use the engine running from batteries, but the operating time of such a cleaner will be limited by the battery charge level. Therefore, if you are going to make an electric snow blower, be aware that it can only work within the yard, that is, the range of movement of the unit will be limited by the length of the power cable.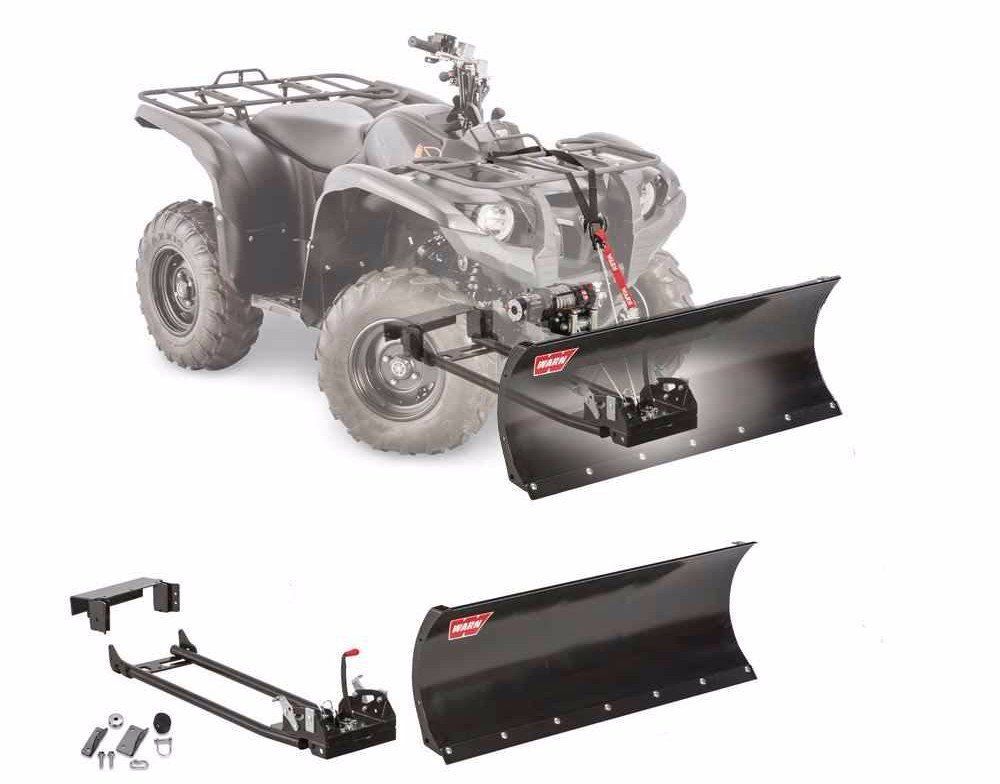
Petrol snow blowers are powerful and rather noisy units . They cope with thick snow covers, including icy ones. Gasoline devices have an advantage over electric ones, not only in terms of power, but also in mobility, since they do not depend on the electrical network. Due to this, the units can be used for cleaning snow drifts in large areas, for example, near private sector yards, in high-rise building yards, on sidewalks, on separate sections of the road, etc. But despite the listed advantages of gasoline devices, they also have disadvantages:
Based on the above, you can understand that if you need to clear drifts from the yard of a summer house or a small private property, then it is better to stop at the manufacture of an electric snow blower. If you intend to regularly clear large areas of snow, then a gasoline drive will cope with this task better than an electric one.
To make a snow blower with your own hands, you will need to choose an engine that will rotate either the auger or the rotor of the unit. If you are going to make a device with an electric motor, then any asynchronous type electric motor with a power of at least 2 kW and a rotation speed of 1500 to 3000 rpm is suitable as a drive component. If you take an engine with less power, then it will not cope with thick layers of snow and will stop all the time. In this case, cleaning drifts with a shovel will be much more effective.
As a drive component, some craftsmen use motors from electric trimmers and chain saws. It is not uncommon to find homemade snow plows made from a lawn mower. But the power of these units is only enough for cleaning freshly fallen and loose snow.
A more powerful variant of the driving part for the snow thrower is the Internal Combustion Engine (ICE). It can be taken from a chainsaw or petrol trimmer. Also, a snow removal unit can be made from a motor cultivator or a motor block.
The auger for the snow blower is the main moving part of the machine, the manufacture of which is not difficult. It is best to use a rubber belt from a conveyor 10 mm thick and 1.5 m long for the manufacture of the auger . From the rubber strip, it is necessary to cut out rings in the amount of 4 pieces with a diameter of 28 cm. The details are easily cut using an electric jigsaw.
Tip! To cut rings from the tape, you can do without a jigsaw. Screw 2 sharp screws into a small board and use this device as a compass. After a few full turns of the cutter, the ring will be cut.
Below are drawings of all auger parts.
Shaft is 27 mm diameter metal pipe . Adapters are fixed to its ends, on which bearings are installed. A cut 120 mm long is made in the central part of the pipe, into which a central plate will be installed, designed to throw snow. Also, 4 plates are put on and welded onto the pipe. Rubber rings will be attached to them and to the central plate. How this is done can be clearly seen in the next photo.
A metal strip can also be used to make the auger. But it is preferable to use rubber, because it does not scratch the paving slabs and is not damaged when it comes into contact with a hard obstacle, such as a curb or a fence.
It's also easy to make a bucket that will serve as a housing for the auger. For this purpose, roofing iron is usually used. The drawing below shows the dimensions of the bucket.
For bucket sides, plywood or 10 mm thick OSB can be used. The latter option is more suitable for this purpose, since it is more moisture resistant than plywood. Bearings are installed on the sidewalls of the housing (you can use the 205th, closed), and the screw shaft is already inserted into them.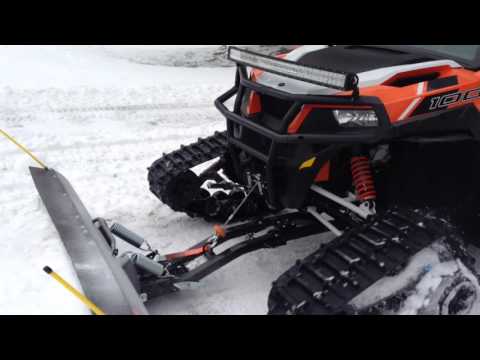 Bearings must be closed with glasses.
Important! When assembling the snowplow assembly, it is necessary to make a small gap, about 2 mm, between the bucket and the auger so that the latter does not touch the body.
To remove snow from the bucket, a hole is cut in its upper part. As a drain, you can use sewer plastic pipe with a diameter of 150 mm or another. The main thing is that the diameter of the chute exceeds the width of the folding blades of the auger.
To direct the snow ejected by the shovel to the side, a plastic bend can be put on the pipe.
The bucket with auger is mounted on a pre-made of metal corners (50 x 50 mm) frame (see drawing above). To fix the engine on it, corners of 25 x 25 mm are used.
Tip! If you attach a slightly curved sled to the frame, as shown in the following figures, then working with a snow thrower becomes much more convenient, since it becomes possible to tilt the mechanism for better gripping of snow.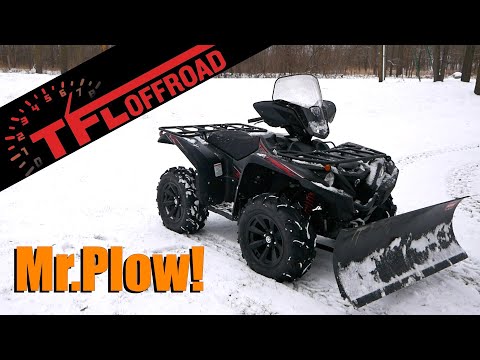
But this unit can be further improved. The improvement of the snow blower is to add small wheels to the rear of the skid . In this case, the snow blower will be more convenient to pull back and transport.
Snow throwers based on the auger are the most powerful and capable of handling even icy snow. In addition, the auger is most often used in self-propelled snowplows.
This snowplow is made by hand quite simply. Since it will be powered by a chainsaw engine, a few additional parts for the chain drive will be required. For these purposes, you can use front and rear sprockets from a motorcycle, as well as a chain from it.
How the frame and auger are made has been described above. A long handle is attached to the frame. A large sprocket from a motorcycle is installed on the auger shaft on the right side, and a small sprocket is installed on the chainsaw engine shaft. Next, the chainsaw is mounted on the frame, after which the chain is put on and pulled on the sprockets. To control the engine, the gas cable is brought to the handle attached to the frame.
Below are homemade drawings on a chassis, where a chainsaw is used as the main part of the drive.
To make an auger snow blower from an electric trimmer or a brush cutter, you will need to install a gearbox: it will serve to transfer rotational motion from the trimmer shaft to the auger shaft.
But there is one caveat. The gearbox for this type of unit is quite expensive, and it is not advisable to buy it for the manufacture of attachments to the trimmer. Therefore, on the basis of the latter, rotary-type snow blowers are made, which will be discussed later.
The simplest addition to the motoblock is snow plow.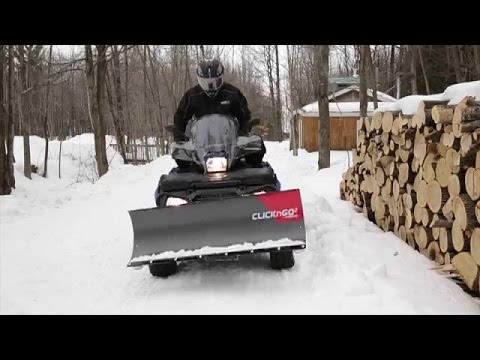
A self-made snow plow attachment (shovel) on the walk-behind tractor is screwed to the frame of the unit, after which it turns into a small bulldozer.
Tip! Instead of a blade, an auger can be attached to the front of the frame of a walk-behind tractor or a motor-cultivator, as a result of which you will get a self-propelled snowplow. This attachment for a walk-behind tractor, if not needed, can be easily disconnected from the main unit.
Below is a diagram that clearly shows the design of a snow blower based on a cultivator.
The scheme is decoded as follows.
A self-propelled snow blower makes clearing snow much easier, especially in large areas where the use of a device on skis, pushed by the operator, requires a lot of the latter's physical strength.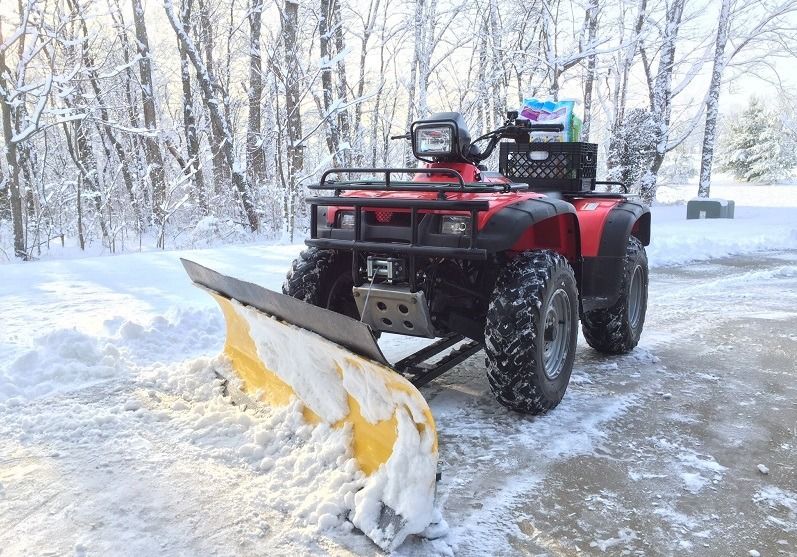
You can use the drawings below to make a snow blower.
The material for the manufacture of the rotor and its blades is sheet steel 2 mm thick. The rotor housing is made of roof iron or sheet steel thinner than 2 mm. All dimensions of parts are indicated on the drawing.
The transmission of rotation from the motor to the rotor shaft can be done using the belt or the chain. It is also possible to connect the gearbox shaft of an electric trimmer or lawn mower to the rotor shaft. Fortunately, these units already have an angular gearbox. The whole structure is mounted on a frame with a chassis. The result is a lightweight handheld snow blower on wheels.
Please note that the electric snowblower based on the trimmer should not be subjected to heavy loads, as its gearbox may fail. The same recommendation applies to the lawn mower if you decide to assemble a snow thrower on its base.
A simpler design of the unit mounted on a frame with skids can be assembled according to the diagram from an old magazine.