Your tires are where the rubber meets the road – literally – when it comes to the safety and performance of your car. That means, if your tire is leaky, you could be putting your safety at risk.
A leaky tire causes low tire pressure, which can decrease fuel economy, and put you at risk for a blowout. It also decreases the ability of your car to handle properly, making it more difficult to respond to emergency situations or drive in inclement weather.
In this article, we’ll discuss how you can diagnose and fix slow tire leaks. Don’t just ignore that low pressure sensor – check out this guide!
The Most Common Causes Of Slow Tire LeaksThere are three common issues that cause slow tire leaks. Let’s discuss each one of them now.
If your valve stem is damaged, there will be a slow and constant leak. This leak could come from either the body of the valve, or the base of the valve, where it meets the tire.
Contrary to popular belief, puncture damage usually doesn’t lead to an immediate flat tire or blowout, in most cases. This is because the object usually remains lodged in the rubber, preventing air from leaking quickly.
There are a few ways you can diagnose a slow tire leak
 If one of your tires seems perpetually under inflated, chances are you have a leak.
If you have a slow tire leak, you’ll want to have it repaired professionally as soon as possible. In some cases, you may want to keep a tire plug or patch kit in your vehicle. These kits are easy to use, and can keep your tire inflated until you bring it to a professional tire repair shop.
To permanently fix a tire leak caused by a puncture, you will need a “plug and patch”. This method of repair involves removing the tire from the wheel, and placing a combination plug and patch on the tire.
If your leak is caused by a faulty valve, you may need to replace it or your tire. Leaks caused by a damaged mounting surface may require you to replace the entire wheel.
If you need to repair a tire damaged by a puncture, or you think your valve or mounting surface may be damaged, we can help!
Schedule your appointment on Ride Time today, and come to our service centre now in Winnipeg, to make sure you stay safe on the roads!
“A tire only loses air if it’s punctured.” This is a common misconception that we have all had or heard and yet the reality is quite different. Indeed, a tire can lose air even without a puncture, as for example in the case of a crack in the valve that is used to inflate your tires. A punctured valve is difficult to detect, and not taking care of it in time can have real consequences for your tire, but also (and above all!) for your safety.
Blackcircles Canada, your online tire specialist, offers below a complete guide to the causes and consequences of a punctured valve, and how to repair a leaking valve stem.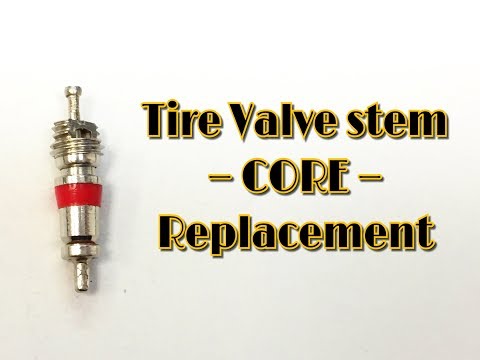
A valve is a pin located on the outside of the tire, through which the tire can be inflated/deflated. It has a mechanism consisting of a spring-mounted valve that closes tightly with the air pressure inside the tire. Over time, the stem valve may become brittle and cracked, which may increase the risk of air leaking through it.
When the stem valve leaks, the affected tire is no longer able to retain air. Depending on the extent of the damage, the air will leak out slowly or more quickly. In both cases, the valve must be replaced.
If the air leakage is slow, you will be subject to the problems encountered by drivers driving with underinflated tires. Internal damage that can shorten the service life of the tire by up to a quarter, increased fuel consumption due to higher rolling resistance: the tire will damage faster, and your energy-efficiency will be significantly lower. The tire will also have poorer traction and the stability of your car will be reduced when cornering, not to mention the more pronounced deformation of the tire that increases its internal temperature, which can cause it to burst. Finally, an under-inflated tire increases the risk of hydroplaning. Tire pressure is thus very important!
First of all, make sure it is the tire valve stem that is leaking. To do so, there’s a very simple trick! Apply a mixture of water and dishwashing soap to the valve with the cap removed. If bubbles start to appear, your valve is leaking. If this is not the case, and there is a definite air leak, it will be located elsewhere on the tire.
Step 2: Gather the right tools before you start!Before you begin, make sure you have all the necessary equipment to complete the replacement of the faulty valve stem.
For this, you will need the following:

You are now ready to start the process!
Step 3: Loosen the nuts on the wheel you are going to work on.To do so, use the wrench mentioned in the previous step to loosen each of the lug nuts holding your wheel in place. Do this while the car is still on the ground.
However, for certain models of vehicles, it is possible that the wheel nuts have an anti-theft ring. If this is the case, you’ll have to use the appropriate special key to remove the locking nut(s).
Step 4: Raise your vehicle with the jack and then remove the wheel.First and foremost, make sure the handbrake is applied so that your vehicle is completely immobilized. Then, use your jack to lift your car. Be sure to position it on the right part of the chassis so that the car is properly supported. This will prevent any damage to the car and any bodily injury. Once your car is lifted, secure it on jack stands. Unscrew the wheel bolts completely, then remove the wheel.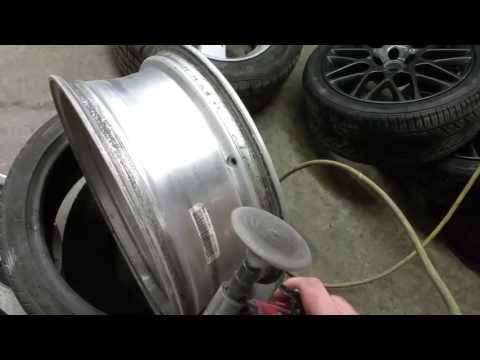 Finally, place the wheel on the ground flat, with the outside of the wheel facing up.
If you have not already done so, remove the valve cap. Then remove the valve stem core using the valve stem removal tool to release the air from the wheel, which should normally deflate completely on its own.
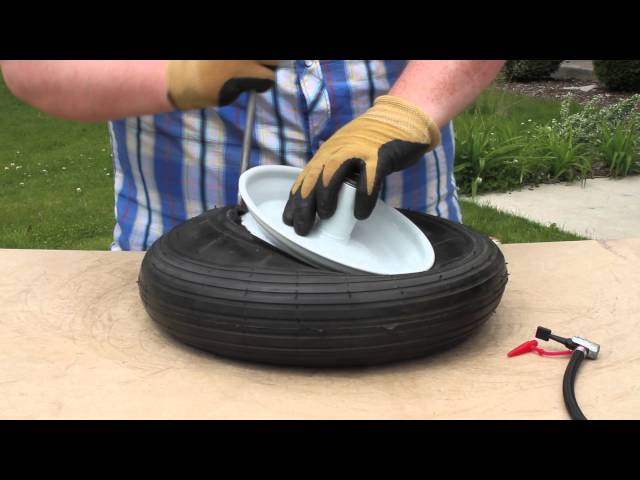
Step 6: Separate the tire’s bead from the wheel.For this step, use the sledgehammer in the following way: hit the tire sidewall with the sledgehammer in the same spot until you hear a crack or popping sound, and see the inside lip of the tire visibly break loose from the rim. This means that the tire has been successfully detached from the lip of the wheel.
Once the tire bead has been broken, continue hitting with the sledgehammer around the tire to detach the sidewall around the entire circumference of the wheel.
Step 7: Remove the tire from the rim.Once the sidewall of the tire is separated from the outer edge of the rim around the entire circumference of the wheel, insert your tire iron between the edge of the rim and the inside lip of the tire, and then pry upward to pull the lip of the tire over the edge of the wheel. Once you have pulled the lip of the tire over the edge of the wheel, work the tire iron around the rim until the entire lip of the tire is off the rim.
Once the sidewall of the tire is completely above the wheel, grab it by its removed lip and pull it upward so that the opposite lip that was at the bottom of the wheel is now touching the top edge of the rim. Use your tire iron again by inserting it between the tire’s lip and the edge of the wheel and pry upwards to pull the lip over the edge of the rim. As before, work the tire iron around the edge of the wheel until the tire is removed from the wheel.
Step 8: Remove the defective valve stem and replace it with the new one.Once the tire is separated from the rim, it is time to remove the valve stem. To do this, first pull out the valve stem free from the wheel using the needle-nose pliers. Once this has been done, install the replacement valve stem from the inside of the wheel. Once it is in position, use the needle-nose pliers again to pull it through into its right place on the wheel.
Once the stem is in place, it is time to put the tire back on its rim. To do this, start by pressing the tire down over the rim until the bottom bead clears the edge of the rim. The aim here is to return the lower sidewall of the tire to its original position on the wheel.
Then press the upper sidewall of the tire down underneath the edge of the wheel. Then tuck your tire iron between the tire sidewall and the rim edge and use it to make the opposite movement to the one you used to pull the tire sidewall out of the rim. Once the bead clears the lip of the wheel, use the tire iron to work your way round the entire wheel until the tire is completely installed on the wheel. Then inflate it to the correct pressure using the air compressor.
Step 10: Make sure there are no other leaks, and mount your wheel back on!Once the tire is inflated to the correct pressure, check for other leaks. If all is well, mount the wheel on your vehicle and bring it down by lowering the level of the jack stands until the repaired wheel touches the ground and you can safely remove them.
Ultimately, it is very important to make sure your tires are free of air leaks to maintain proper air pressure at all times. In the case of a slow air leak, the consequences can be dramatic. If the air leak is due to a faulty tire valve, you will definitely need to replace it. You can either follow the above procedure on how to repair a leaking tire valve or take it directly to a specialist. If, on the other hand, you need to change the entire tire, consult our selection of tires adapted for your car directly online on our website!
Tire Installation 101: When and how to change your tires?
A poor-quality valve can instantly leave a tire without air. How to choose the right one and how to replace it - Za Rulem experts figured it out.
Related materials
"Spikes" for crossovers: the choice "Behind the wheel"
The topic for research was proposed by a reader, a Zarulevite with 40 years of experience. Before a long trip, he accidentally saw deep cracks on the wheel valves. When trying to move one of them, the tire expired, although its age was not prohibitive.
After studying the issue, we found out that most of the valves sold are not eternal at all. And a special meanness lies in the fact that almost always this most important detail is chosen not by car owners, but by tire fitters.
Tool for CIP valve replacement.
Tool for CIP valve replacement.
Related content
Studs no longer have advantages - all questions about winter tires Pierced tire: 6 solutions (without removing the wheel) How to change the valve without removing the tire - an easy way
We meticulously study and select tires and wheels, but we consider tiny penny valves to be eternal and trouble-free. For normal products that automakers initially install, this is the case. But when, for example, you are preparing a winter set of wheels - is it really possible to choose a normal valve yourself? Let's try. Note that we are talking about parts with a rubber case. Products with pressure sensors, as well as metal valves for motorcycles and high-speed cars are a topic for a separate discussion.
A conventional valve consists of a rubber body, inside of which there is a metal sleeve with an internal thread for screwing in the spool and an external thread for screwing in a plastic or metal cap. They can be designated by several standards - for example, TR or ETRTO. On a branded product, its type and date of manufacture may be indicated, but you can not bother with this. It is more important to remember that valves vary in length and in the size of the hole in the wheel. The deeper it is relative to the outside of the rim, the longer the body should be.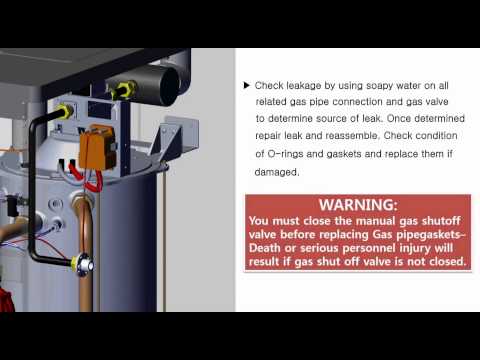 However, if possible! - it is advisable to install the valve shorter: this reduces the likelihood of tearing it off in mud or snow, and also reduces the imbalance of the wheel assembly.
The valve for Niva differs in its dimensions.
The valve for Niva differs in its dimensions.
Today, most valves are sold with chrome-look embellishments. Plastic is preferable to metal - it is lighter and does not corrode.
Today, most valves are sold with chrome-look embellishments. Plastic is preferable to metal - it is lighter and does not corrode.
Related materials
The best way to save your nerves and money is to subscribe to your favorite magazine
The rubber used is not oil and petrol resistant, therefore only soapy water can be used during installation. The insert into which the spool is screwed is made of brass or zinc alloy.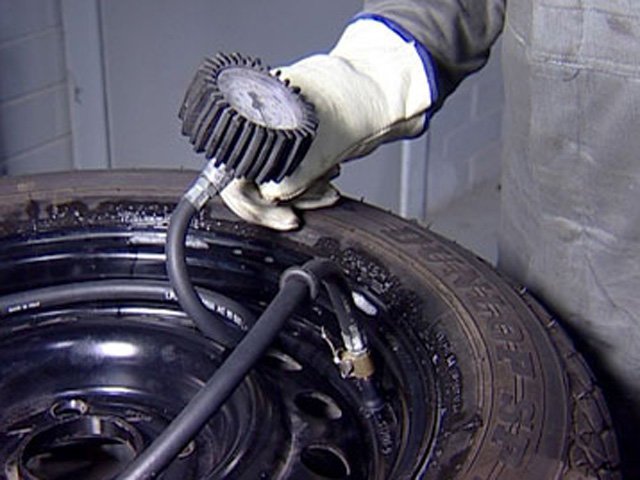 At first glance, they look the same, having a yellowish tint: initially light zinc is masked under brass with an appropriate coating. The corrosion resistance of zinc alloy is lower, so brass is preferred. The internal thread for the spool is applied by cutting, but the external thread is cast. A very unfortunate solution: due to the “weakness” of the thread, the tips of many compressors and pumps do not stick to it. Therefore, try to use brass products.
A machined thread (left) is distinguished from a cast thread (right) by the presence of a groove under the threaded part.
A machined thread (left) is distinguished from a cast thread (right) by the presence of a groove under the threaded part.
Caps can be metal or plastic. The metal ones are prettier, but sometimes, by the middle of winter, corrosion from road reagents seizes them so much that when you try to unscrew these caps, the insert in the valve collapses.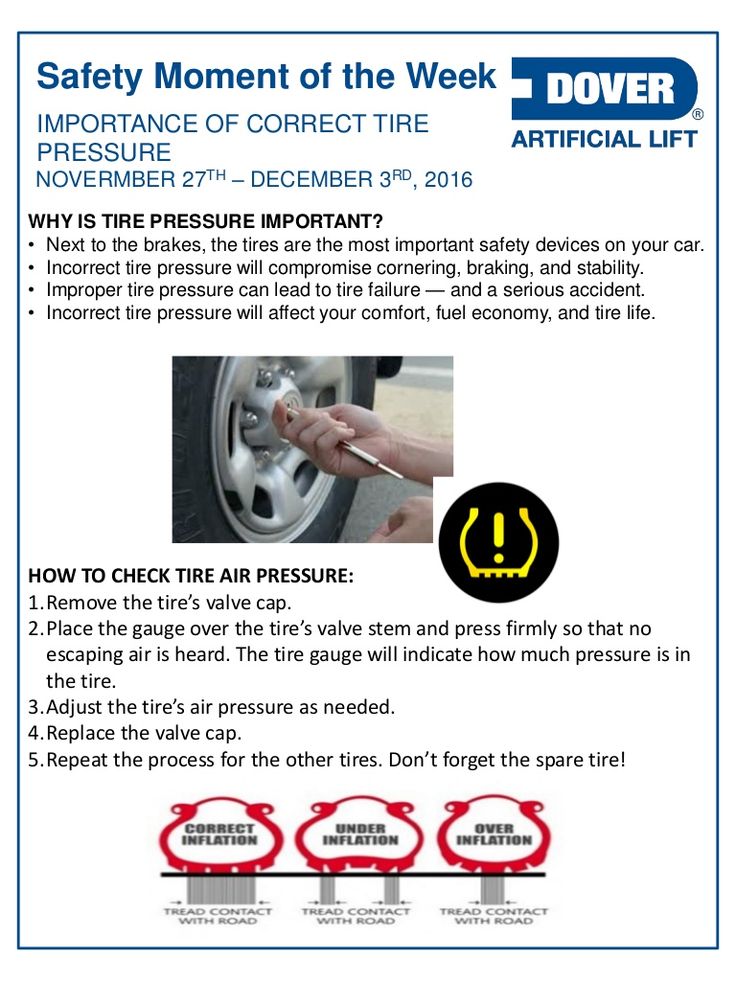 In addition, shiny parts are more likely to be stolen. Plastic caps do not shine with beauty, but they do not freeze.
Caps vary, but plastic caps are preferred.
Caps vary, but plastic caps are preferred.
If short valves fit your wheels, then it is better to take them. At the same time, do not miss the landing diameter: for example, valves for Niva steel disks are larger in diameter than for other VAZs. To distinguish a brass case from a zinc case, the latter must be scratched with something hard: the coating will quickly fall off the zinc, revealing a light alloy.
Any hard tool will help to distinguish brass from zinc: something whitish is hidden under the outer yellowish layer.
Any hard tool will help to distinguish brass from zinc: something whitish is hidden under the outer yellowish layer.
Unexpected valve failure is almost impossible to predict.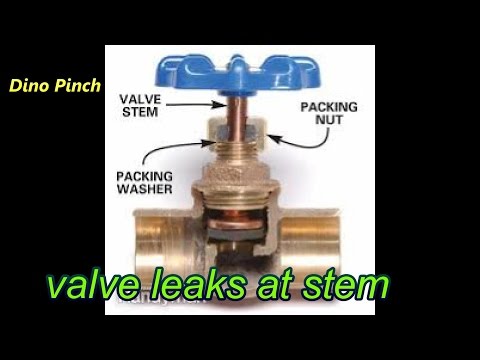 However, jokes with them are bad: a torn off "nipple", unlike a punctured wheel, will release air almost instantly. It remains to look at them more often, and at the first cracks go to a tire fitting. It would be nice to get a couple of normal branded valves in advance: the tire changer doesn’t care what parts to install, he looks at the price.
Removing the spool requires either a special tool or a horned cap.
To unscrew the spool, either a specialized tool or a cap with horns is required.
If the valve "poisons" air over the spool (this is usually checked by applying a little saliva to the hole), then you can try to tighten the spool with a metal cap "with horns". It is worse if the valve was torn off in a rut, ill-wishers cut it off, or it began to let air through the body. You can replace the valve on your own by depressing the sidewall of the tire and throwing the bead ring over the disc hump. Next, you need to cut off the old valve and insert a new one. The work is hard, but with a certain skill it is doable. And on sale there is a device for in-place replacement of the valve.
This is how you have to disassemble a tire at home.
This is how you have to disassemble the tire at home.
Divorce at the tire shop For impressionable car owners, tire changers recommend changing the valves every time the tires are changed. Total - twice a year. Moreover, a high-quality valve should serve no less than tires, that is, five or even ten years. |
Nobody checks this little thing at the tire shop. And in vain!
Nobody checks this little thing at the tire shop. And in vain!
Related materials
Disassemble the wheel yourself? It's simple!
In fact, it is worth changing the valves at every seasonal tire change. If such a thought came to you when the wheels were already assembled and put on the car, you should not pay for these works a second time. You can leave everything as it is and change the valves yourself. To do this, you need a simple device, a soapy solution and a little free time.
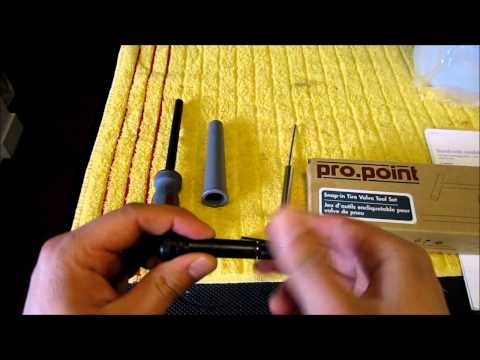
Work kit includes a hook with a handle, an internal threaded mandrel and a conical bush. Let's check the tool in action - let's try to change the valves on the outside on a stamped and cast disc with different connecting sizes.
Deciding to start simple, we took an ordinary stamped steel disc. We will carry out work without a tire - so that you can clearly see what happens on the inside of the disk when the old valve is pulled out and the new one takes its place.
First of all, apply a soap solution around the valve. This will help the hook to pass between it and the disk. Take the hook and insert it. Then we turn it 90 ° so that the hook catches on the hole in the valve. You can check if this worked out by slightly twisting the hook - the valve will move with it. We take out the valve. If the wheel were on the car, it would be more convenient to work with it, but we have to hold on to the stamping.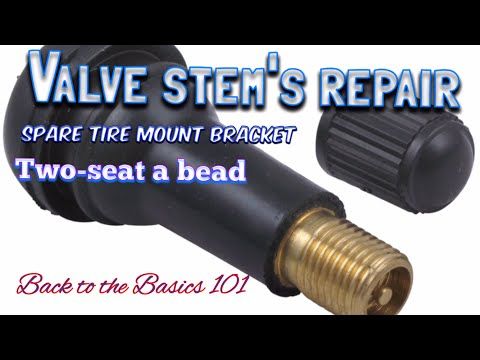 Nevertheless, the gate leaves the disk without much difficulty.
Now we will install a new valve. To do this, we wind it on a mandrel with a threaded tip until it stops. Wet the tip of the valve in a soapy solution, insert the valve into the conical sleeve and push until the tip appears almost at the exit. We apply a mandrel with a sleeve to the hole in the disk and press on the handle. It failed, which means that the tip of the valve went through the hole. We shake the handle and pull the valve so that it snaps into place and takes its place. We unscrew the threaded mandrel and remove the bushing with it. Valve installed!
We decided to test the wheel valve changer on the break-in to show that not every disc would be as easy to do. The conical bushing from the kit is not universal, and in some cases you will have to suffer with it. Let's show you what's wrong.
We apply the bushing to the stowage disk and see that the bushing does not fit snugly against the rim. This means that when we push the valve out of the mandrel, it will simply pop out and the valve will not fall into place. Hence the conclusion: in order to carry out the work, you will have to first sharpen the conical sleeve.
Related materials
Tire inflation with nitrogen and 7 more wirings at the tire fitting
We just need to check how the device behaves when replacing a valve on an alloy wheel with a tire. Recall that the mating plane of all aluminum wheels is different. In our case, the bushing clearly fits the hole in the disk. Therefore, there should be no problems with installing the valve.
First, we relieved the pressure. And now we can proceed directly to work. The procedure is the same: we apply a soapy solution around the valve, thread a hook between it and the disk, grab the valve and pull it out. We insert a new one into a threaded mandrel, moisten the tip of the valve in a soapy solution, put on the sleeve and, pressing it against the disk, push the valve into the hole.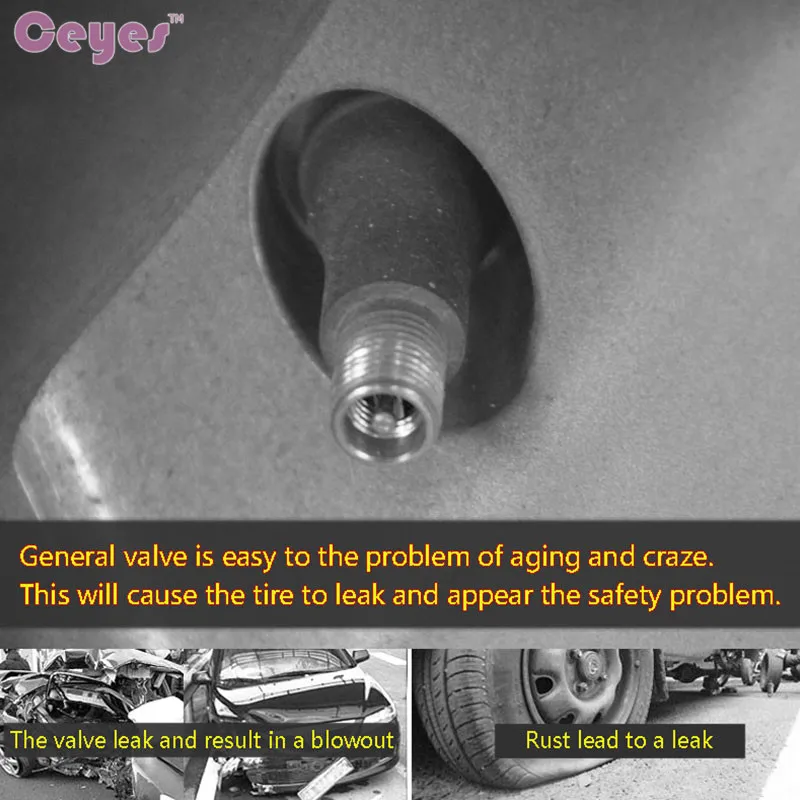 We pull the device towards us. When the valve is in place, unscrew the threaded mandrel. It remains only to pump up the wheel and make sure that we did everything right.
You can change the valves on the wheels without disassembling them. The device for this is inexpensive and quite simple. The work itself is easy to do, but not everyone is lucky. The tapered bushing is not universal and does not fit every disc. In this case, you will have to pre-finish the device by sharpening the sleeve. And then proceed according to the described scheme.
During the period of mass change of shoes, tire shops are not overcrowded. But you can save both waiting time in line and money. How to change the car yourself is described here.
Please send all questions and suggestions regarding the Technical Environment series to: [email protected].