Every editorial product is independently selected, though we may be compensated or receive an affiliate commission if you buy something through our links. Ratings and prices are accurate and items are in stock as of time of publication.
Modern vehicle tires are tough, standing up well to rough terrain and thousands of miles of driving. Trouble is, tires are not invincible. Every so often car tires spring leaks. Air can start leaking from anywhere on a tire, and the location of the leak determines whether or not you can fix it yourself. And if you can't fix it yourself, the location of the leak will also tell you if you need a professional repair or a new tire.
Whether or not your tire is tubed or tubeless affects things, too, because only tubeless tires can be repaired using the technique of plugging that we'll show you here. The good news is that modern vehicles always have tubeless tires, and this means that repairing with a rubber plug is often an option.
Plugging a tubeless tire is only a possibility when your puncture is in the tread area. If the air leak is where the sidewall of the tire meets the rim — this is called a "bead leak" — you'll need to visit a mechanic with a tire machine to dismount the tire from the rim and remount it with sealing liquid applied to the bead. If your sidewall has been punctured, you need a new tire, because damage there can lead to a blowout at highway speeds, even after repair.
Learn exactly how to plug a tire so next time you spring a leak between your treads, you'll be able to get up and running again in record time.
Total time completing the repair is about 15 minutes. Doing the work yourself will save you about $20 and the time spent driving to the garage and waiting.
Steve Maxwell for Family Handyman
Complete DIY projects like a pro! Sign up for our newsletter!
Do It Right, Do It Yourself!
Originally Published: August 27, 2020
Tire plugging is the fastest method to repair a punctured car. Tire plugging uses a cord to prevent the airhead from escaping.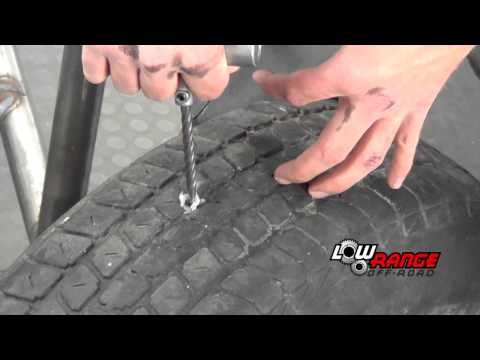 If you are an experienced person, you can avoid damage to your car with simple tips.
So, how long does a tire plug last? Most manufacturers say that plug versions can last 7-10 years if installed correctly.
Yet, this number is meant as a reference because you can’t always fix it perfectly. The article gathers useful knowledge and some of the most frequently asked questions about tire plugs. Let’s scroll down to read more information!
Buy Best Tire Repair Kits at Amazon.com
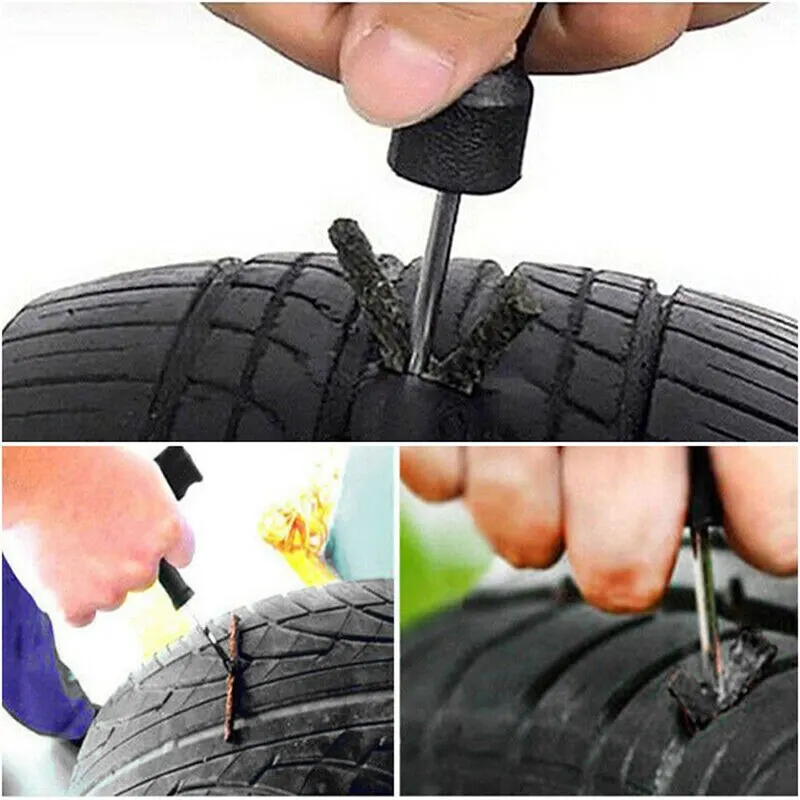
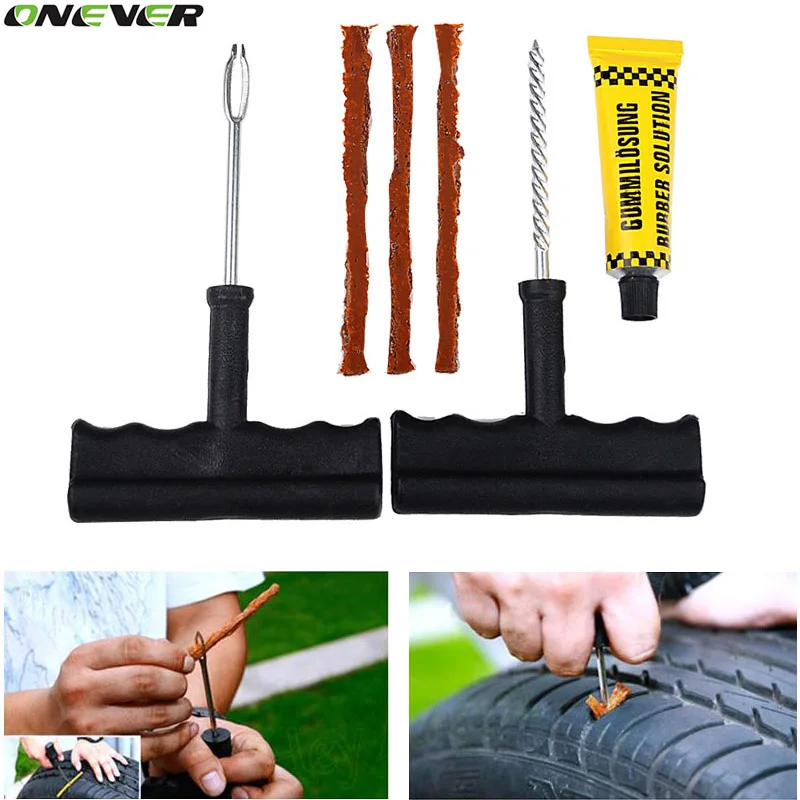
What Is A Tire Plug?It is the primary tool in the repair by plugging method. From the outside, it looks like a standard wire, and the structure is quite remarkable; it is a sticky object; depending on the case, the item can expand or contract to match the size of the hole.
Its working principle is also quite simple: after being inserted into the tire, the plug wire will sense the pressure, determine the shape of the wound, and then automatically expand to adapt.
In addition, the material that makes the wire must be guaranteed to meet the standards, confirming the certainty so that after the air is pumped in, there will be no problems.
There is no denying the convenience that the plug method brings, and you can even repair it without removing the tire from the rim. You can even plug in the tire in some exceptional cases, even when the wheels are connected.
How Long Does A Tire Plug Last?When a vehicle is repaired correctly and maintained, a plug’s life span can last up to 7-10 years. It is an unbelievable number for a wheel that has been repairable.
However, manufacturers advise users not to overdo patching like this in practice. When using too many repair measures, the impact will affect the inherent functions, causing deflation and explosion.
When traveling on the road, the car’s wheels have problems, do not rush to decide when the experience is not proficient; the best way is to take the car to a repair center to have expert advice on the appropriate repair method.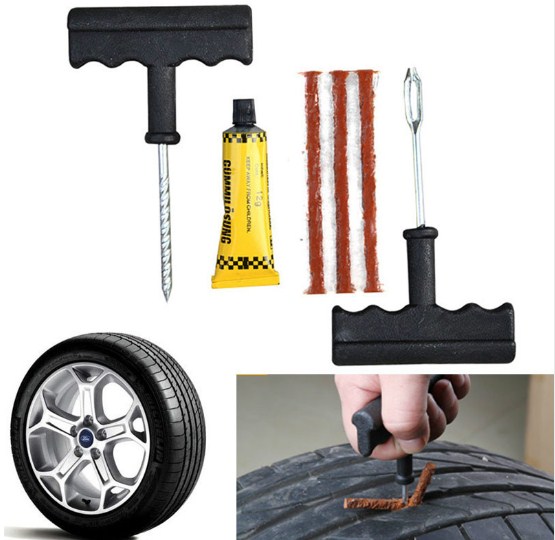
Buy Best Tire Repair Kits at Amazon.com
Plugging or patching is only a temporary measure before you have enough time to change into a new tire. The life of a tire after plugging can last from 7-10 years or 25,000 miles; no one can be sure that there will not be any problems.
Plugging in tires will be a good idea, even effective if the wheel is in an emergency that needs to be moved.
Is It Safe To Plug In A Tire?You can safely use your plugged-in tires when traveling in a specific section of the road. Unlike a spare tire, which has a short life, it is possible to prevent air from escaping through a previous puncture completely with a plug repair method.
Via many surveys, experts think there is a better measure than a plug – radial patch. It is a suitable method available on almost all popular tires on the market.
The process takes about 30 minutes while using a wire to insert the air hole takes up a few minutes.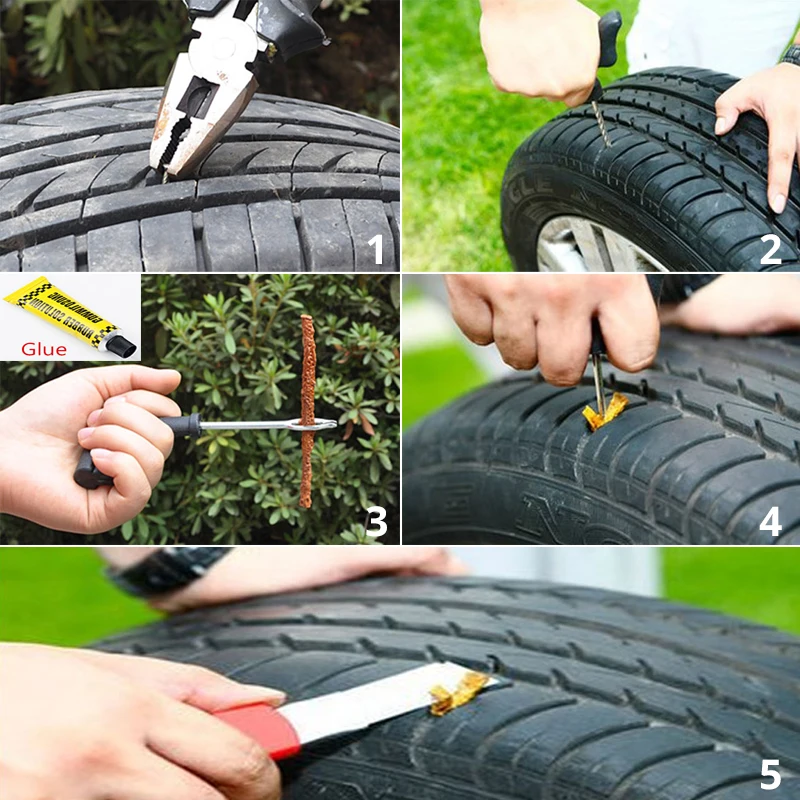 Both must be vulcanized to reinforce and increase the rubber surface’s certainty.
As long as the wound has adequately been reinforced, you are entirely safe traveling by car with tires. The safest time to use is not too long from when you repair using the above method.
Besides, some notes have also ensured stability when operating this type.
However, do not drive when there is a wound near the wall or on the side of the wheel; if the plug diameter exceeds ¼ inch, it is best to replace the tires.
Finally, the body’s weight, do not use plug tires to carry heavy objects; this inadvertently puts pressure on the wheels when the tires are weak.
How To Plug In A Tire?Here are some ways to help you better understand the plugging process.
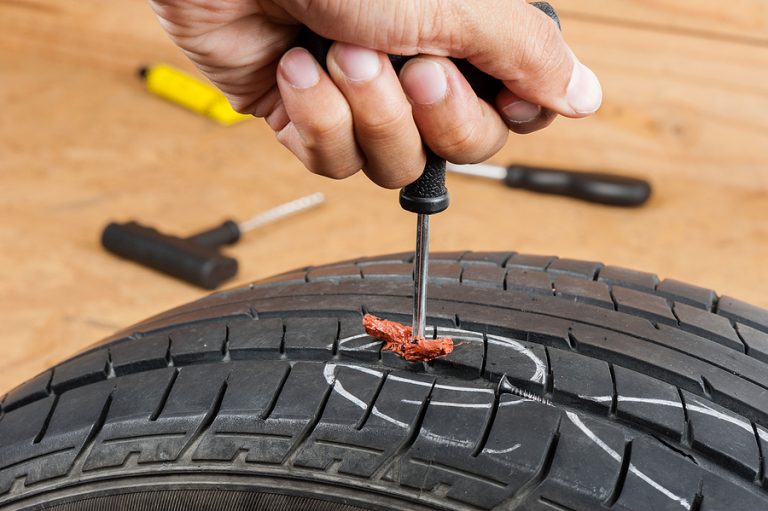
Step 1: Locate the leak
This step does not require you to remove the wheel altogether, but you can use a jack to support the wheel’s weight, so it is pretty easy to do the following steps.

The above article has provided you with knowledge related to plugging or manipulations to perform this process. Hopefully, it will help you when you encounter a similar situation.
This post was last updated on You got it: the tire is flat, but there is no spare tire. Modern tires are tubeless - if you managed to block a small leak with a sealing compound, pouring it into the valve, you can not look for a puncture. Effectively - plug the hole with a rubber band.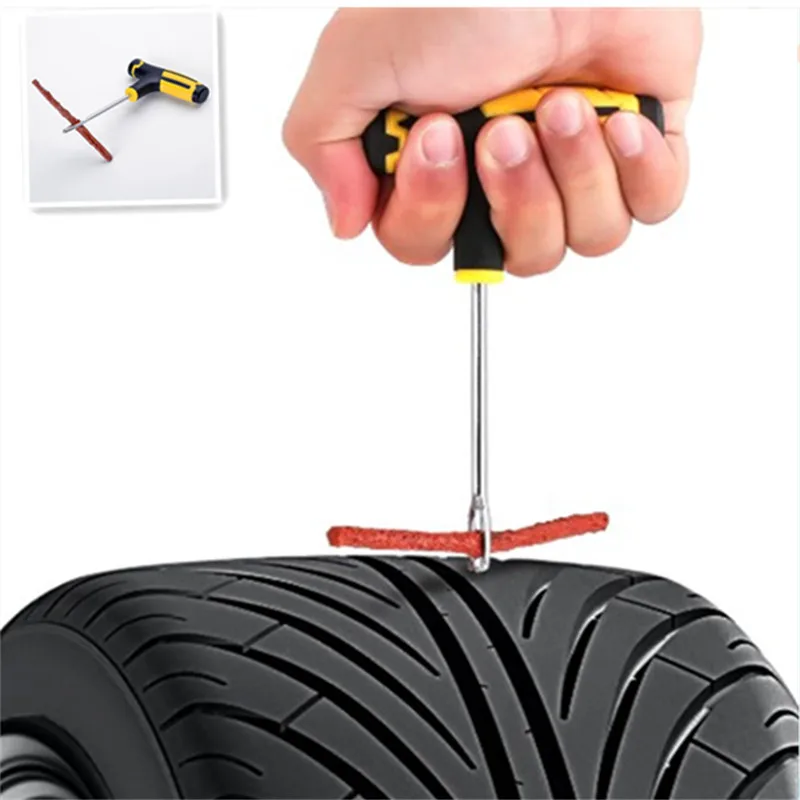 It is injected from the outside with a special device (such kits are inexpensive on the market). But now we are talking about an extreme case - when a careless driver has nothing at hand to quickly repair a puncture.
The technique is not new, but effective: we move the tire bead using the weight of the car and the force of the jack.
The technique is not new, but effective: we move the bead of the tire using the weight of the car and the force of the jack.
A small hole can be plugged by screwing a self-tapping screw into it. You can take it, for example, from the trunk lining. Another option, if the puncture is small: pour half a liter of water into the tire (with a pump through the valve) so that it slows down the air outlet. But periodically you will have to pump up the wheel.
Approximately ten cubes of gasoline, a torch, an explosion - and the board sits still!
Approximately ten cubes of gasoline, a torch, an explosion - and the board sits still!
To seal a large hole, the tire will have to be removed from the rim, at least on one side. But first, move both tire beads deep into the rim groove. Experienced people carry a piece of steel angle and a heavy hammer for such a case. Or they move it with a jack, resting its heel against the sidewall of the tire, and the shelf against the threshold of the car. Next, installers need to drag the desired bead over the rim flange, and only after that you can take on repair fungi, glue and patches.
The puncture has been repaired - but how to return the tire to the rim shelves? Not everyone has a high-performance electric compressor with them. And in order to use a conventional pump, you will have to seal the gaps as much as possible - for example, pull the tire around the circumference with ropes. If the sides hit the hump and the pressure began to rise, the problem is solved. In practice, these methods require manual dexterity. It's easier to land the tire with a light blast. This requires 10–15 g of gasoline. Pour a few milliliters of fuel inside the tire, then, so that it evaporates better, we roll the wheel. We put it on its side and, pressing on the sidewall, bring the flame to the gap. But not a match, but a torch! There will be a pop - and the tire is in place. A typical mistake is to pour too much gasoline: instead of popping, a fire will break out. We extinguish, we air ...
“Inflate” the tire with a watering hose. The matter requires patience, but on such a wheel you will reach the place of repair.
"Inflate" the tire with a garden hose. The matter requires patience, but on such a wheel you will reach the place of repair.
When the hole is in the knuckle, the tire cannot be salvaged. Unless you insert a camera into the tire. From the inside, it is useful to cover the hole with a "coat" of a couple of layers of rubber or with a bandage cut from the sidewall of a tire lying on the side of the road - there is a lot of this goodness along the roads. This will protect the chamber from sand and reduce the chance of further tearing.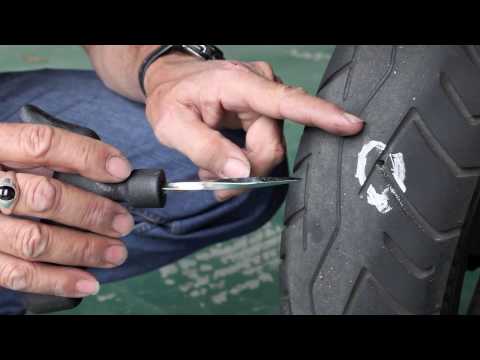 And if it's not far from the purpose of the trip? On a flat tire, you can drive 15–20 km on asphalt at speeds up to 40 km/h before it finally falls apart. We talked about this experiment in ZR, 2009, No. 7.
But what if there is no camera? Then turn on the fantasy. Someone "fills" the tire with a watering hose; all sorts of rags, sponge rubber from old seats, plastic film, linoleum strips, sidewalls cut from old tires, etc. will be used. With such stuffing, tires will wrinkle less on the go. But forget about driving in normal mode - slowly, extremely carefully, we drive to the nearest tire shop.
Travel kit: wedges, jack, pry bars, wheel wrench, hammer, gloves, corners, compressor. Do not forget repair fungi, self-vulcanizing patches and, of course, a valve cap with a head that is used to unscrew the spool. There are usually no such caps on the wheels of modern cars, but if you look, it may come in handy.
Travel set: stop wedges, jack, pry bars, wheel wrench, hammer, gloves, corners, compressor.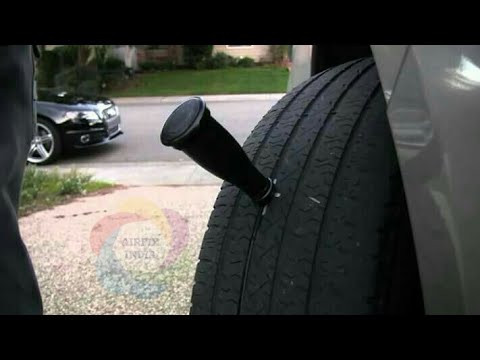 Do not forget repair fungi, self-vulcanizing patches and, of course, a valve cap with a head that is used to unscrew the spool. There are usually no such caps on the wheels of modern cars, but if you look, it may come in handy.
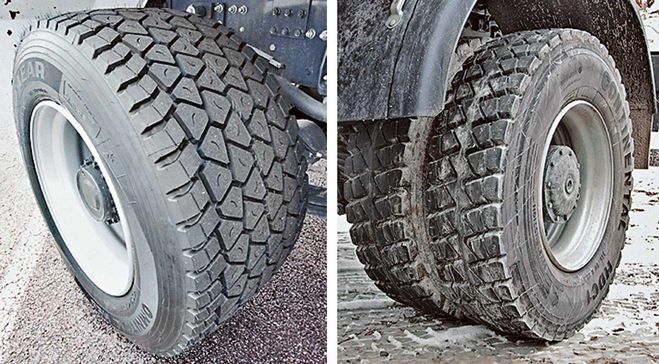
CARE OF THE WHEELS, RULES OF DISMANTLING AND ASSEMBLY
— Not all tire damage can be repaired without loss of its qualities. Drive in such a way that the risk of fatal injury is minimized. On a long journey, take a camera in reserve - it can come in handy.
- Monitor the condition of the wheelbrace and jack. Cracks or metal extrusion, heavily worn threads, tight rotation despite lubrication are unacceptable!
— Before jacking up the vehicle, secure the wheels on the opposite side. Stoppers under the support wheels - wedges, stones, etc. - should not slip along the road. To prevent the machine from sliding to the side, it is better to place the support wheels in shallow ruts or pavement potholes.
- If you have to work on soft ground or snow, place a wider support under the heel of the jack - for example, a piece of durable board. When turning the screw, do not adjust the jack with your other hand, especially do not stick your fingers into it. After lifting the car, for insurance, place a reliable additional support under the threshold (spare wheel, stable block of wood, etc.).
- When installing the wheel, the bolts (nuts) of the fastening must be tightened still on the weight - so it will be correctly centered on the hub.
- The threads of mounting bolts (nuts) will last longer if you lightly grease them before tightening them.
Roadside tire service
Tire service on the side of the road
According to history, one day in 1888, an English veterinarian and cyclist, John Dunlop, tired of shaking through the countryside of Britain on molded rubber tires, glued a piece of water hose with a ring and pumped it up with a football pump - this is how the first pneumatic tire appeared.
History is silent when it was pierced for the first time - but most likely it happened in the same year. So the need for tire repair appeared simultaneously with their appearance.
Puncture required cut with burrOver the past 124 years, tire repair technology has been brought to almost perfection. For several decades (after tubeless tires in the vast majority gave way to tubeless ones), the procedure for repair has practically not changed.
This procedure is outwardly quite simple - and car owners (as well as some of the workshop workers offering this service) have the false impression that it is not particularly important to follow the prescribed technology exactly - they say, "it will do." And many "specialists" do not really know the technology. And therefore they sincerely believe: why do we need all sorts of "extra" actions? Why take the tire off the rim when you can keep the wheel off the car at all? The client is in a hurry - so you can plug a puncture (and a cut) with a cord, as they say, “on the go”.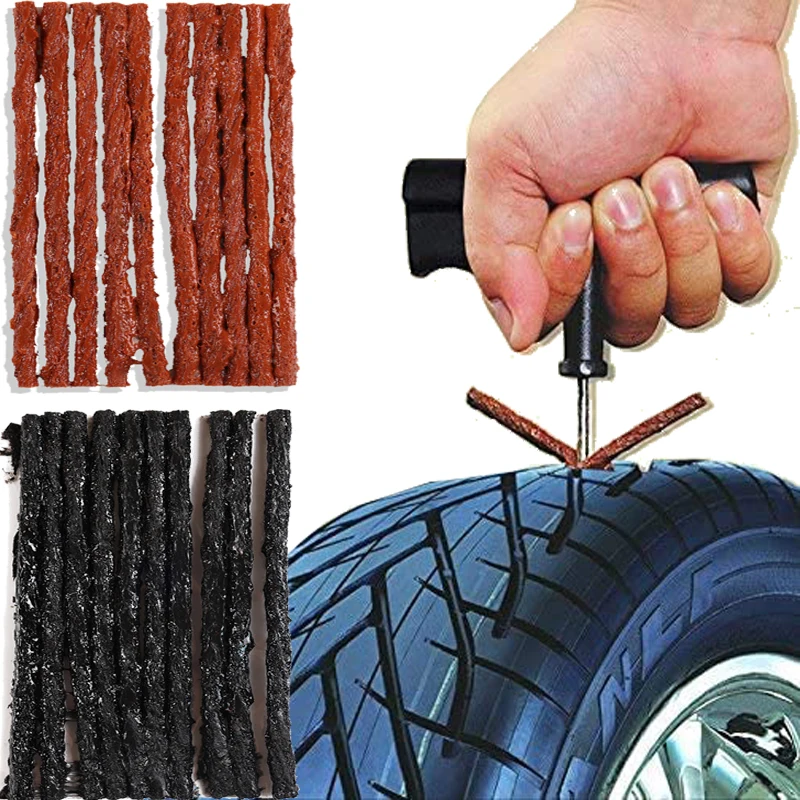 Does not poison the air, and everyone is happy. By the way, some workshops that promise “repair of punctures and cuts” do not have anything at all, except for cords and an awl for their installation.
In fact, each stage of tire repair technology, as they say, is "written in blood" - like military regulations and safety instructions. And this is not an exaggeration: what threatens a sudden rupture of a wheel at speed is not worth saying - if people do not die, then they are very lucky ...
We asked our expert, one of the heads of the Russian representative office of the German company REMA TIP-TOP GmbH, Alexander Akhapkin, to talk about tire repair technology and those common mistakes (or even outright hack work) that car owners have to face.
- Tire repair, in general, comes down to a simple and understandable action: you need to plug the resulting "hole" in it. It sounds simple - like the instructions for skydiving: stepped out of the plane and pulled the ring.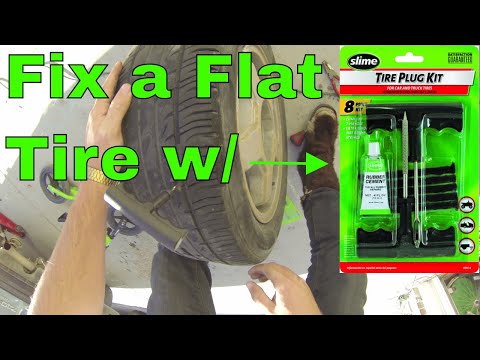 Only now, no one jumps with a homemade parachute, especially one packed according to rumors and advice from neighbors. Although the consequences of such a jump and improper tire repair are quite comparable.
So let's go in order: how to do it!
So, the first step: determine the type of damage - is it a puncture or a cut?
The difference, of course, is in size. Roughly speaking, if no more than 1-2 cord threads are damaged, then this is a puncture. Anything more is a cut.
If it is a cut, it is important to determine its size. Tires have speed categories - and the higher it is, the smaller the amount of damage that can be repaired. For example, it is allowed to repair the tread of a category Q tire (not higher than 160 km/h) if the damage is not more than 20 mm. If the tire category is S (up to 180 km / h), then the size of the permissible damage is not more than 12 mm. And on a category H tire (up to 210 km / h), only a puncture with a diameter of not more than 3 mm can be repaired.
In general, damage limits depending on their location, size and speed category of the tire are given in special tables RemaTipTop, compiled according to the results of tests and tests.
When repairing with a cord, it is necessary use adhesiveFor example, regarding damage to the shoulder of a category Q tire (up to 160 km/h), repairs are allowed if the “injury” does not exceed a diameter of 8 mm. And damage to the sidewall can be repaired if it is no more than 35 mm long (along the side height) and up to 20 mm wide.
Second step: what kind of repair is needed? To get there - or capital? The fact is that the most common repair of a puncture with a cord is actually exclusively temporary - just to get to the station and overhaul the tire. And often the car owner asks to fix an expensive tire with a cord, which he puts on an expensive car - and stops there. And at the stations they “go forward” to him: they say, the consequences are at the expense of the customer .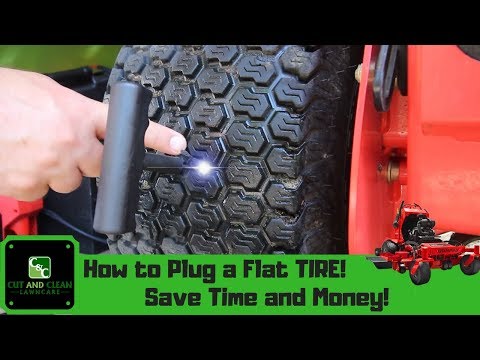 ..
..
But even with such a repair, some "masters" manage to cheat. The cord, before placing it in the puncture, is not even smeared with glue. There is a category of cords made of "raw" rubber (they are also called "snotty"). And it is mistakenly believed that glue is not needed for them. No - it's a must!
In addition, when repairing with a cord, it is necessary to form a hole with a burr to enter the repair material. And this is very often not done (on the principle - and so it will do!). For ten kilometers, maybe it will “get off” ...
Step three: puncture overhaul, after which the tire will reach its physical wear.
Fungi are installed at "vertical" punctures Here the choice of repair tactics depends on the location and area of damage. If the puncture axis runs perpendicular to the tread surface, then it is preferable to seal it with a fungus. If the puncture axis runs at an angle of more than 12 degrees from the surface, then a plug must be used.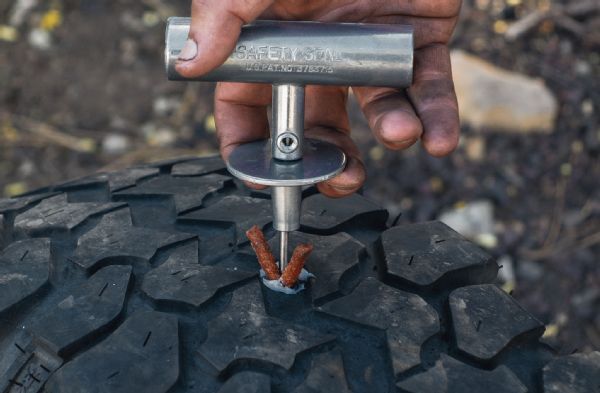
Tire repair fungus is preferred, but if the puncture is at an angle, the fungus head will not be able to fit snugly against the inside of the tire. And over time it can come off - which, of course, is unacceptable.
In principle, all actions of the wizard when using both fungus and cork are the same. The puncture is drilled with a burr with a diameter of 3 mm or 6 mm. The repair area from the inside of the tire is processed with a roughening tool - this is done so that the glue applied to the fungus cap or patch (if cork is used) firmly adheres to the surface of the tire.
But this is followed by an outwardly simple but obligatory operation - the dust formed after drilling and roughening is carefully removed with a brass or coconut brush, and then vacuumed. Moreover, simple “blowing” or brushing with a rag is unacceptable!
Processing with a special solution - required! Then the repair area is smeared with glue (the Germans call it "cement" - as it is written on the containers with it.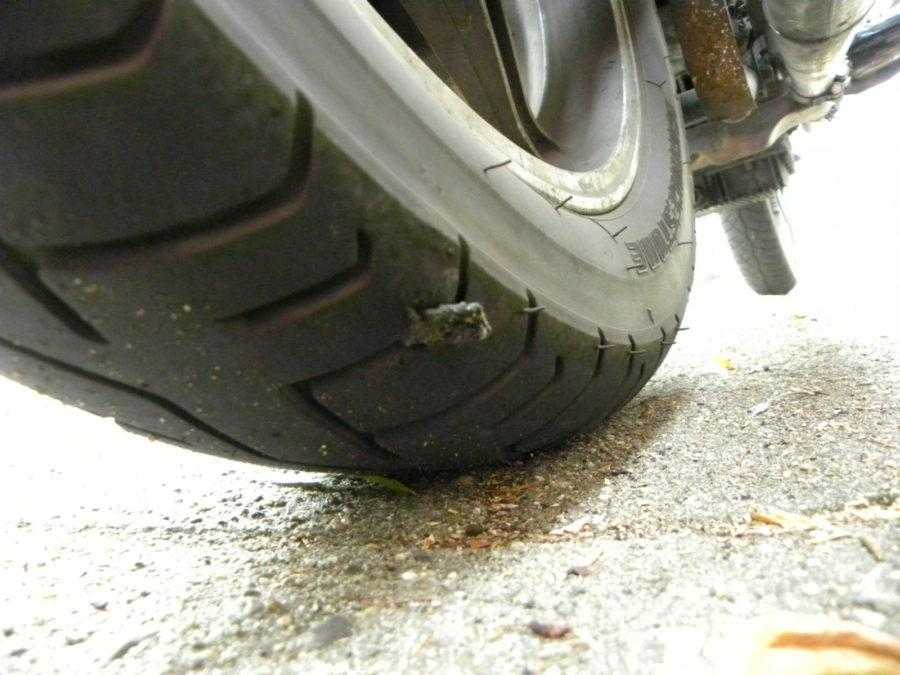 In fact, this is a high-tech adhesive system) and a fungus or cork is introduced into the hole - from the inside of the tire! Moreover, until the moment of installation, it is impossible to remove the packaging from the fungus or cork - it can be easily removed when they are introduced into the hole to be sealed. After installing the cork, its excess is cut off - and the repair area is smeared with glue. A patch is applied on top.
Next, the fungus cap or plaster is rolled on. And it remains only to cut off the excess fungal stem or cork from the outside of the tire.
It is very important for temporary repairs with a cord and a major fungus or cork to use materials from only one company! The fact is that the adhesives themselves are spilled: there are those produced on the basis of hydrocarbons, and there are those based on trichlorethylene. In addition, adhesives from different companies, even on the same basis, differ in composition. And therefore, in case of confusion, a reliable connection will not work - at best, it will last for some time. But - a little time ...
Fourth step: overhaul of large damage. Let me remind you that damage that exceeds a puncture, but does not exceed the maximum allowable, is considered large. With such damage, the tire is only scrapped - it is no longer possible to achieve the necessary reliability.
The technology of such a repair is simple - but there are no "extra" steps and steps in it. Outside, the place of damage is cut "under the funnel" - part of the damaged rubber is removed, the remains of the cord. From the inside, the place under the patch sticker must be roughened.
The plaster is a high-tech articleThen the dust must be carefully removed after processing with a vacuum cleaner - and this operation must not be skipped!
Further, the “funnel” is treated with a special solution: in the case of using the “Tip Top” technology, this is “MTRThermopress”.
And filled with raw rubber of the same brand as on the tire - heated strips or a special extruder. Raw rubber is treated with the same solution. And immediately closed with insulating foil for subsequent vulcanization.
Please note - do not skip a double treatment with mortar, nor cover the vulcanization site with foil!
A plaster is applied from the inside of the tire to the damaged area. And be sure to roll with a special rolling - this stage also cannot be skipped.
Something about band-aids: don't try to save money by replacing the "branded" band-aid with a piece of rubber! In fact, a patch is a rather complex rubber product reinforced with synthetic or steel threads that coincide with the direction of the tire cord threads.
Patches are produced separately for bias and radial tires. For their correct orientation (it is very important!) Arrows are applied on each of them, which are directed to the sides. You cannot cut the patch "to size" - it cannot be cut at all due to the complex internal construction of the cords. Companies produce several sizes of patches - and you need to choose from them using the Type Top damage table.
Naturally, the use of patches and adhesives with which they are glued, produced by different companies, is unacceptable - “cement” is applied to the surface of the patch, which needs to be smeared on the surface from the inside of the tire: only in this case the connection will be reliable and durable.
Step five: vulcanization. In order to vulcanize a “sandwich” of raw rubber, a tire and a plaster, it must be heated. But the problem is that vulcanizers, whose power allows you to warm up the entire volume of the repaired area, are expensive and consume a lot of electricity. In addition, they are bulky - the area of \u200b\u200bthe heating plate must exceed the size of any patch. So not every workshop can afford such a vulcanizer.
There is another solution - the so-called "two-stage" repair method. This is when a vulcanizer that is more affordable and consumes less electricity is only the site of damage.