If your ATV isn’t getting spark from the spark plugs at the engine, you’re basically dead in the water. This can be an extremely frustrating spot to be in because the engine won’t turn over and won’t give any hints as to why. I’ll tell you exactly how to check for spark on an ATV, and if you’re not getting any, how to diagnose the electrical components to find out exactly where your problem is.
To quickly tell if your ATV is getting spark, remove the spark plug from the engine. Reinsert the plug back into the coil wire. Hold the electrodes of the spark plug close to the engine to ground it, and try starting the engine. If you see spark coming from the end of the spark plug, your ATV engine is getting spark.
Keep in mind, on some models you will need to have the handle bar switch in the run position and the rear brake applied. Look for any other red buttons or kill switches that might have been pressed. A lot of quads have fail safes you need to think about when trying to start the engine.
If you have a hard time being able to tell if you can see a spark or not, you could always have a buddy hold the electrodes of the spark plug. If he yells when you try to start the engine, you have spark.
There are a few reasons an ATV won’t be getting spark from the spark plugs. The electrical systems on these quads can get a little tricky sometimes. Your best bet is to just check one thing at a time making your way down the list until you’ve found your problem.
The most common reason an ATV is getting no spark is a bad spark plug, either the wrong plug all together or just not gapped correctly. Or the spark plug just went bad, that happens quite often and it’s normal.
If you find out you need to replace the spark plug, you can usually find them easily on Amazon here: ATV Spark Plug.
If you know your spark plug is good and gapped correctly, then you’ll want to check for a loose wire, a bad switch, a bad connection, the ignition coil, or a problem with the stator. Lets go over how to check these one by one.
First, you’re gonna want to check the condition of the spark plug wire or ignition coil wire. This is the wire that hooks up to the spark plug when it is bolted into the engine. Sometimes these wear out because the wire itself is usually exposed to dirt, rocks, and debris while riding.
If the spark plug wire looks good, the next step is to check for bad connections or bad switches. To do this, disconnect the main electrical connector coming out of the engine. Doing this will unhook the kill switch, ignition switch, and all the wiring associated with those switches. Check to see if you get spark now.
If you got spark after unhooking the main electrical connector, then your problem is one of those switches or the wiring for one of those switches. Now your task is to go through and disconnect each switch one at a time to find the problem part. It will help to have an ohm meter to check each switch and each wire separately.
First off, you’re going to need a digital multi-meter to test the electrical components of your ATV. If you don’t know what that is, check out this Fluke 115 Compact True-RMS Digital Multimeter on Amazon. That’s the one I have and use, and I recommend it if you’re in the market for one.
You will also need basic tools to get the ignition coil on and off the machine. If you want to be extra safe, you could unplug the battery before starting. But I find it’s ok to just unplug the wiring to the ignition coil before removing it.
To locate the ignition coil, simply follow the wire connecting to your spark plug. Once you have the ignition coil out, you can hook your multi-meter up to it to begin testing. Start by testing the primary side of the ignition coil, where the ignition coil was wired, not the side that goes to the spark plug.
You should see between 0.2 and 5 ohms of resistance. That is a wide range because it varies from machine to machine.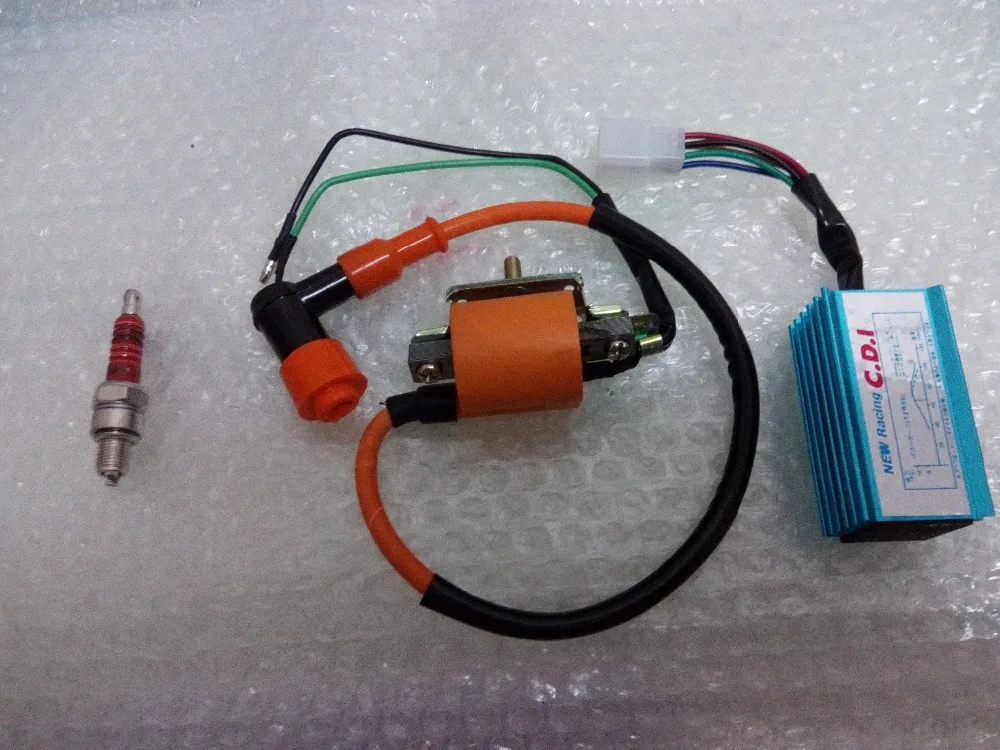 It’s best to look through your service manual to see what your ignition coil should read on its primary.
Next lets test the secondary side of the ignition coil. This is the side with the spark plug caps. If your ignition coil has two spark plug caps, simply put the red test lead in one and the black in the other. Look for around 16k ohms resistance, but again you should check your service manual for your specific measurements.
If you only have one spark plug cap, you will take one multi-meter lead and connect to the spark plug cap and the other to the primary side power connector.
Use the spark plug cap as if it’s the negative side of the primary for this test with that type of ignition coil.
Again you will need a multi-meter and basic hand tools to remove the stator. You either have a single phase or a three phase stator. Three phase is the most common, and probably the type you have.
To make sure, check the wiring harness coming from your stator, If you see group of three wires of the same color (usually white, yellow, or black) you have a three phase stator. A single phase stator will not have that set of three wires.
To start with the three phase stator, set your multi-meter up for ohms. Now get the connector with those three same colored wires we talked about before. You are going to be testing each of those wires against each other. So leg one vs leg two, leg two vs leg three, and leg three vs leg one.
You can do this by simply inserting the multi-meter leads into the connector. You should typically see between 0.1 – 1 ohms for each measurement. But check your service manual for your specs on your machine.
If your meter reads OL, that stands for open line, and you will need a new stator. To check if your stator is shorting to ground, simply hook one lead to a stator leg (through the connector) and the other to the stator body or chassis ground on your machine. You should not get any reading on your meter. If you do get a reading on any of the legs, you will need to replace your stator.
You can do this testing while the stator is still on the machine if you’re able to access it. I find it easier to remove the stator to do the actual testing, but that can be a pain all on its own.
That’s it for the most common electrical problems you’ll see with your ATV. It’s usually something like a bad kill switch or loose wire or connection. Hopefully you find your issue with out too much trouble.
Electrical problems can be some of the most time consuming. If you have the money to spare, it may be worth it to just bring your machine to a shop if you don’t feel like messing around with all the potential causes.
Even then, it doesn’t hurt to quickly look over some connections before calling in a professional.
Sharing is caring!
So youve established that your ATV doesnt have a spark or only has a weak spark. But now what?
Troubleshooting an ATV with no spark can be quite challenging and mildly frustrating, but it doesnt have to be.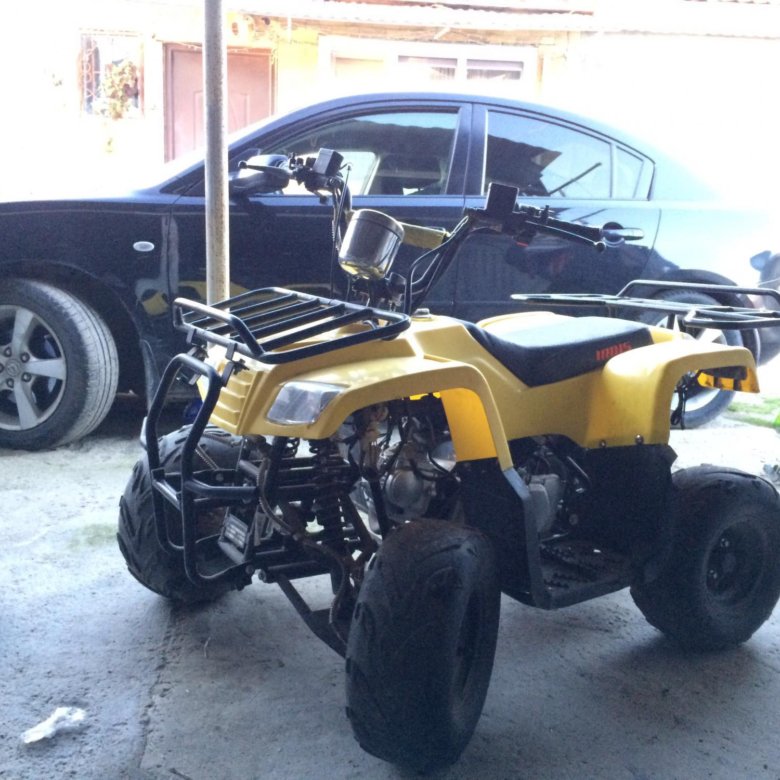 Thats why Ive made this simple step-by-step guide to help you identify why your bike is acting up.
Page Contents
Your bikes ignition system consists of various components that work together to create a spark. Each component in the system is just as important as the other. They all have to function correctly, or there will be no spark, or the spark will become weak.
When your ATV is not getting a spark, the problem is with one or more of these electrical components:
The easiest way of identifying which of the listed components is failing is through a process of elimination.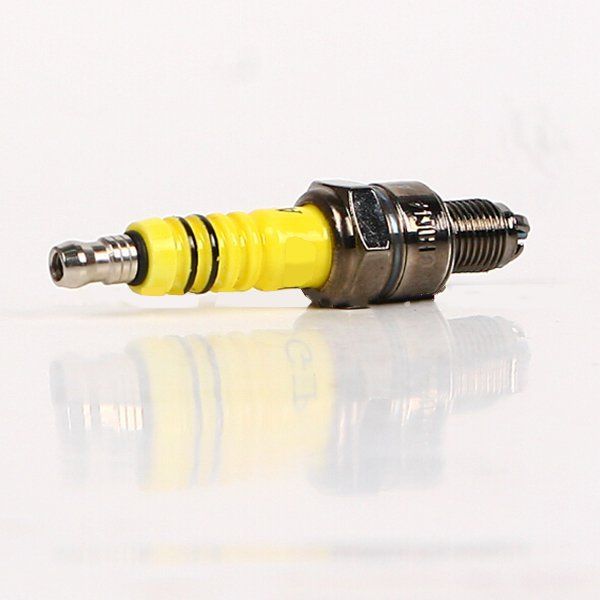
With electrical issues, it is always better to check the most straightforward stuff first. If you assume the worst and you begin by removing the stator, you may have to reassemble a bunch of components you didnt have to take apart.
More often than not, you will find that there is a problem with the spark plug, the kill switch, a wire, or a connector.
You should be able to pinpoint which component is faulty by performing various tests. Before youve established which part is acting up, there is no need to focus on one single component.
You may or may not already have done this step, but you must verify that the ATV actually has no spark before troubleshooting.
While you may feel confident that a lack of spark is the issue, remember that other starting issues could be causing similar symptoms. Therefore its not enough to assume the spark is not there; you need to test it.
An ATV needs fuel, air, and a spark to start. If you are not sure whether your bike not starting is caused by a lack of spark, or something else, we recommend you read this guide.
 This will ground the spark plug so that it can create a spark.
 Alternatively, you can test the plug by using a spark plug tester. Spark plug testers come in various styles, but here are two of the most common.
With the first spark plug tester style, you place the tools grooved part over the spark plug wire while the engine is running. The bulb inside the tool will flash to indicate a spark and how powerful and consistent it is.
Pen-style spark plug tester.The second style of tester connects where the spark plug normally would be. Remove the spark plug boot from the spark plug and connect it to the tool. The tool has an alligator clip that connects to ground, such as the engine or an exposed metal part of the frame.
If there is a spark, it will appear inside the see-through tool casing, jumping between the tho metal leads. If the spark is good, it will have a regular purple-blue color. If the spark is weak, the spark inside the tool will appear yellow-red and have a more inconsistent spark pattern.
Now that you have verified there is no spark, its time to begin the actual troubleshooting.
The ATV will not create a spark when the kill switch is off. However silly it may seem, youd be surprised how often people forget to turn it on before attempting to start their ATV.
ATVs with electrical starter motors wont even crank the engine if the kill switch is off. So if the engine will crank, you know that the issue is likely not with the kill switch.
On the other hand, pull start or kick start ATVs is another story. No matter how much you try, the ATV will not start with the switch turned off. So make sure the switch is turned on before you end up pulling until youve wet-fouled the spark plug.
While some ATVs will run without a battery, others need a healthy battery to power the ECM (electric control module) and the electric fuel pump. The ECM is a small computer that tells the ignition coil when to create a spark.
If the battery holds an insufficient charge, the ECM may not power up and, therefore, will not tell the ignition coil to create a spark.
Read the battery voltage by setting your multimeter to DC volts, placing the red lead to the positive battery terminal and the black lead to the negative terminal. A healthy battery should read 12.45volts or more when fully charged.
If you want to learn how to charge your battery correctly, please head over to this guide.
To test the battery ground, you should place the black lead on the engine block or an exposed metal part of the frame. The red lead goes to the positive battery terminal. If the battery ground connector is good, you should get a reading close to or identical to the one you got when testing directly to the battery.
If you get a reading indicating bad ground, ensure the main engine ground is properly fastened and has not corroded. You find it by tracing the big black wire coming from the battery.
Spark plugs are cheap and easy to replace. They are considered consumables that may go bad for no apparent reason.
Be careful not to crank the engine for too long before checking the plug, or you risk overheating and possibly damaging the starter motor.
Whether the spark plug gapping is incorrect, the plug has gone bad, or its the wrong plug altogether for your engine, it may no longer be able to provide a spark. Note that a spark plug may have gone bad even if it still looks good.
The easiest way of testing if the issue is a bad plug is by replacing it with a new one and then testing for spark as described above. You dont even have to remove the old plug. Just pull off the bott, insert a new plug, and test for spark.
If your new spark plug isnt creating a spark either, you know the problem is not with the actual spark plug.
A bad electrical connection in a connector may prevent the ignition system from working as it should. Ensure all connectors in the ignition system wiring harness are not damaged from corrosion, are not full of dirt, and are properly connected.
Check all connectors, especially the ones that connect the kill switch or ignition key.
Now test if this has fixed your no-spark issue.
If a wire gets damaged, exposing the metal leads, you may get a short to ground. Trace all the wires connecting the various components of the ignition system. If you find a damaged wire, repair or replace it.
If the kill switch internals fails, it may stay off even when in the on or run position.
You can test the switch by performing a continuity test using a multimeter, a test light, or a simple continuity tester.
Insert one probe into each of the two cables going into the switch. There should be no continuity when the switch is off and continuity when it is on.
Alternatively, you can do this simple test:
If your ATV has a 5-pin CDI box, you can use it to identify a safety switch issue. This test only works on 5-pin CDIs, typically found on cheaper Chinese youth ATV models or older ATVs.
 You may leave the rubber CDI box suspension connected to the bikes frame.
 The ignition coil generates the electrical pulses of current sent to the spark plug to create a spark.
With a multimeter, you can read the ohms resistance of the primary side and the secondary side of the ignition coil. Each of these readings can tell you whether the coil is okay.
Test the primary side:
 Refer to your ATV service manual for the exact value for your bike. If you get a reading outside this range, the ignition coil is likely bad and needs replacing.
 Test the secondary side:
While modern ATVs nowadays have ECM/ECU, many cheaper Chinese youth ATVs and older ATVs use 5-pin CDI boxes to control the spark.
There arent any good ways of testing these boxes at home. A CDI is relatively cheap, so your best bet is to replace it and try again.
ECUs, on the other hand, are more expensive. Youre likely better off testing or replacing your ignition coil and stator before possibly replacing the ECU.
The stator is what creates the electricity on your ATV. It is located behind an engine cover, but luckily you can test it without removing it.
There are two main ways you can test the stator. A static test, where you test internal resistance when the bike is turned off, and a dynamic test, where you read voltage while the engine is running.
If the stator fails any of the tests, you may have a defective exciter coil inside the stator, and the stator needs to be replaced.
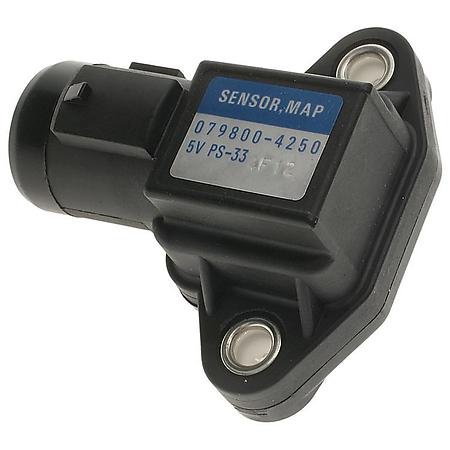
The crankshaft position sensor (CKP-sensor) registers and tells the engine exactly where the piston is as it moves up and down.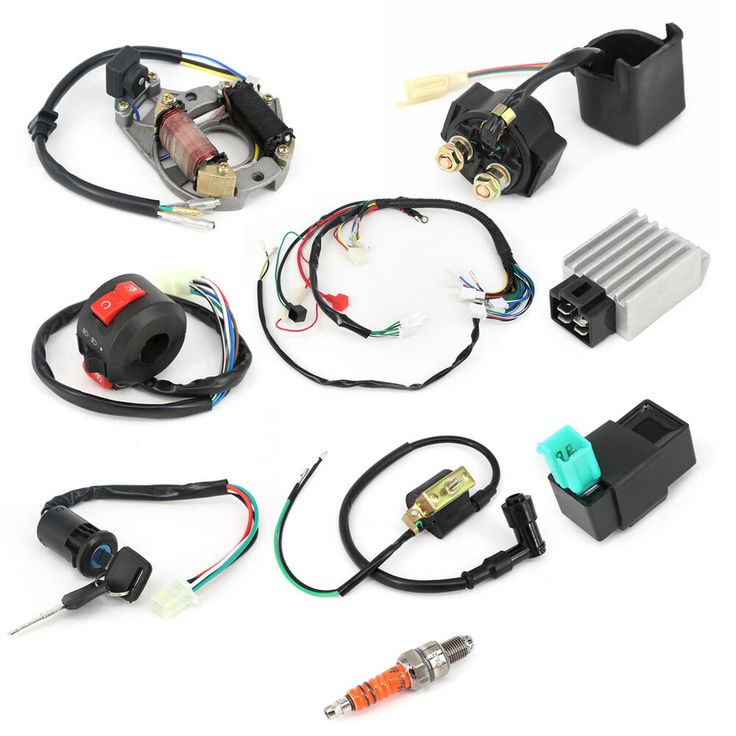 This information is necessary for the CDI or ECU to tell the ignition coil when to power the spark plug.
The CKP sensor is either built into the stator assembly or located separately on the engine.
Look for damaged wires going to the sensor or a cracked or bent sensor bracket if you have a separately located sensor.
You can test the sensor by using your multimeter to measure its resistance:
Ignition problems are one of the most common reasons an ATV won't start. And if you notice that there is no spark on the children's ATV or it is very weak, then you need to “dig” in this direction.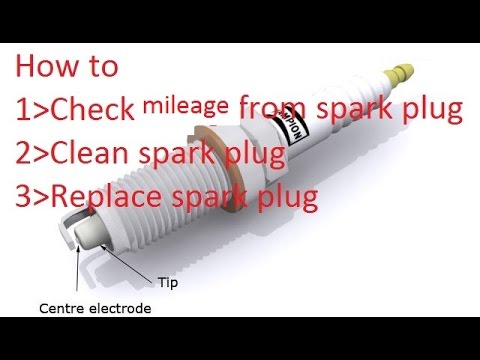 Therefore, let's figure out what can cause the problem, and how to fix the breakdown.
Lack of spark tells the ATV owner that there is a problem with the ignition system. This problem affects both inexpensive ATVs for children and top-end Japanese vehicles. So, every owner of motorcycles should know what causes problems and how to fix it. Typically, spark problems are due to:
The reason why a child's ATV has no spark can be quite specific. For example, if the owner has installed an inductive sensor incorrectly, the ATV will not start.
The first thing to do if there is no spark on the quadric is to check the spark plug. Most often, the problem occurs precisely because of this component. The owner of the equipment needs to unscrew, clean the candle from soot, and screw the element back.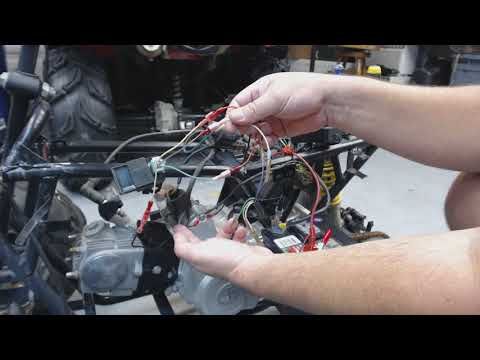
Also check the electrode. A working candle should have a light brown color. Any deviations from the norm (black or white tint, oily reflections, etc.) indicate problems in one or another system.
In fact, checking the performance of the candle is quite simple. You just need to insert one end of the candle into the cap, and the second will touch the engine. After that, you need to turn on the ignition, and crank the crankshaft. If there is no spark, then the spark plug needs to be replaced.
Note: The spark plug may not be the problem, so the rider should run a proof test with a good spark plug.
Another reason why a child's ATV has a weak spark is a broken spark plug cap. First, the component must be disconnected and dried. Checking the cap is performed in the same way as diagnosing a candle.
Another common cause of no spark is a broken wire or oxidized contacts. Even a slight disturbance of the winding can lead to current leakage. Therefore, the rider should:
In most cases, wiring problems arise due to inaccurate repairs or improper winterization of equipment. To avoid damage to the winding and prevent corrosion, it is recommended to store the quadric in a warm and dry room.
If the basic methods (inspection of the wiring, replacement of the spark plug and cap) did not work, you will have to start diagnosing the ignition system. If there is no spark on a 50-150cc children's ATV, check:
 Unfortunately, it is difficult to check the status of the switch, since it is made in one piece. Therefore, if there is suspicion, it is better to simply replace the element.
 If the problem persists, the rider should contact the workshop. The fact is that there can be minor and hidden problems in the ignition system that prevent the ATV from starting.
Check the spark plug regularly, not just when the spark is gone. The trick is that the component is a kind of indicator of problems, and allows you to diagnose a number of problems in time. For example, if on a candle:
 This indicates problems with the fuel system (fuel mixture too rich).
 And this is not a complete list of "symptoms" that can be found on the candle. Therefore, it is recommended to check it once every 3-4 weeks.
11/16/2020 9150
Friends, do not flatter yourself too much. The Internet, in particular, this site is intended only to help you in solving a particular problem. And the rest will depend only on you, or rather, only on your desire and nothing more.
To put it simply, the switch is a certain module (according to Feng Shui - DC CDI or AC CDI module) in which electrical energy is accumulated, which at the right time is supplied in the form of a pulse to the ignition coil, where it is multiplied many times in the form of electrical sparks jump between the electrodes of the spark plug.
Scooter commutator looks something like this
Depending on the type of commutators, the energy required for spawning can be stored in the commutator in two ways:
Offal
The switch power coils on the generator look something like this. On some models of generators there are two of them, on some there is only one
For the passage of a spark at the right time, a magnetic induction sensor is introduced into the design of the generator and the commutator like it (in the collective farm - “hall sensor”). The magnetic induction sensor is essentially a conventional alternator, only in miniature.
On the outer side of the generator rotor there is a small protrusion, when it passes near the sensor - a small alternating pulse is formed in the sensor windings, which enters the thyristor of the switch - the thyristor opens and the energy accumulated in the capacitor enters the ignition coil
Tools
For work we will need:
In order not to waste time - the test should begin with checking the electrical impulse that accumulates in the switch and enters the ignition coil at the right time.
We take a control light and connect it with one end to the green ground wire, the other to the black and yellow wire of the ignition coil. We turn the engine with a starter.
If the switch and the modules that ensure its operation are in good working order, the 3W light bulb in the engine cranking mode with the starter should burn to the floor of the glow
We take the tester, put it into the "dialing" mode (diode icon or sound signal icon), look for green wires on the switch - this is something other than a mass (according to Feng Shui - a negative wire), with any probe of the tester we touch the metal part of the engine , poke another probe into the green wires:
Depending on what the tester shows you, fix the problem or continue testing:
An example of a good mass: the tester beeps in the "continuity" mode, solid zeros on the display
In order for a spark to jump between the electrodes of the spark plug, the switch capacitor must be charged from something. And it is charged either from a battery or from a generator. Means what? Correctly! Check if power is being supplied to the switch.
Before starting to measure power, we determine what type of switch is on your scooter. If visually, then DC CDI type switches are twice as large as AC CDI. But this is not an exact criterion. The most accurate criterion - see the output of the high-voltage generator coil:
The output of the high-voltage coil of the generator is located in the same place as the output of the generator itself: we are looking for where the wires coming from the generator are connected to the on-board network of the scooter and if one of the two wires with round terminals is not connected, then the coil is not involved
measurement of direct current in the range of 20 V. We are looking for a power wire on the switch. Usually this is a black or gray wire, we touch one ground probe, the other - the power wires:
The power supply of this switch is in order
We put the tester into the AC measurement mode for the 200V range. We touch the ground with one probe, the power wires with the second and turn the engine with the starter:
 The supply winding of the generator in the mode of cranking the engine with a starter must produce at least 60V, and at medium engine speeds - about 160V
The magnetic induction sensor is a key element of the ignition system. And if there is any suspicion of a malfunction in the ignition system, it should also be checked.
Switch the tester to AC measurement mode on the 2V range. With one probe we touch the mass, with the second probe we touch the white-blue or red-yellow wire coming from the sensor and turn the engine with a starter.
There is an impulse