IS THE KILL SWITCH ENGAGED? IS THE KILL SWITCH DAMAGED OR STUCK? WHAT ABOUT THE MAIN POWER SWITCH? IS THE BATTERY ADEQUATELY CHARGED? ARE ANY OF THE BATTERY CONNECTIONS LOOSE OR DAMAGED? ARE THE BATTERY CONNECTIONS CORRECT? ARE THE FUSES OK? IS THERE A SHORT CIRCUIT? IS THE INITIAL SWITCH CORRODED?
The electrical systems in an ATV often play second fiddle to the mechanical parts, but they’re just as important to take care of. If your ATV doesn’t start, there’s no power on the display, or periodically loses power, then the issue is most likely to be somewhere in the electrics. In this guide, we’ll look at the most common electrical issues you can run into with an ATV and how to troubleshoot them.
Yes, it’s a simple thing to check, but most riders rarely flip their kill switch away from the run position so can completely forget it’s there. After another rider has borrowed the ATV or maintenance and been performed, the kill switch can be engaged. It’s even possible to bump the switch by accident when you go over a jump.
Just check that the kill switch isn’t engaged to save yourself some embarrassment.
We’re not done with that kill switch yet. Check that water hasn’t seeped into the kill switch, causing it to corrode.
A lightly-affected switch can be salvaged with just a spray of WD-40. Spray some in and toggle the switch multiple times. If the switch hasn’t come back to life, you may need to disassemble it, clean it, and add dielectric grease.
ATV are waterproof & breathable riding gear
Find out the items that suit your needs
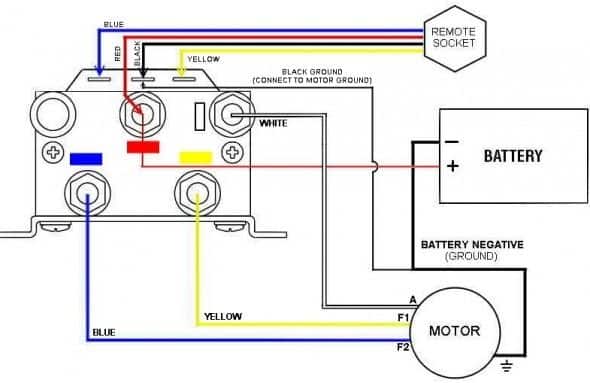
Some ATVs and UTVs have another power switch near the battery. It’s useful for saving the battery when it’s not in use and operating on the vehicle without having to remove the battery. Like the kill switch, it’s often forgotten when not used for a long time.
Image from www.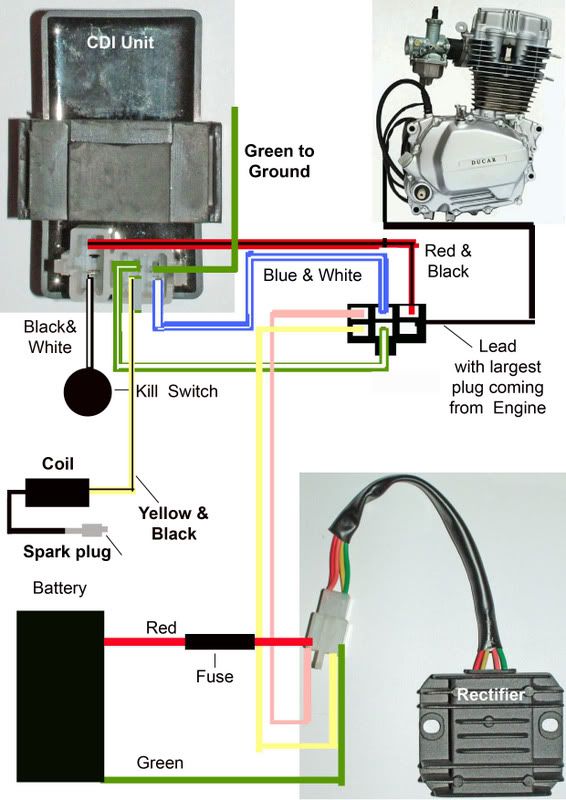 boostatv.com
If you don’t use your ATV often and don’t use a battery maintainer, your battery can run out of juice. Old batteries go bad, too. To test the battery, use a multimeter to see if the voltage is above 12.4V.
Next, check that none of the battery connections have come loose and that they’re relatively tight. A stray branch can feasibly dislodge a battery connection, for example.
Corrosion on battery terminals is a common problem and will lead to a lack of power or sporadic power. If you see corrosion, you can disconnect the connectors and clean them using a hot water and baking soda mix. Wear rubber gloves and eye protection.
If you’ve done any maintenance on your vehicle, you can forget to re-install the connectors, as many ATVs have more than one connector that hooks up to the battery. We suggest taking a photo of your ATV’s electrical wiring before performing any maintenance regarding the electrical system so you’ll always have a guide to follow.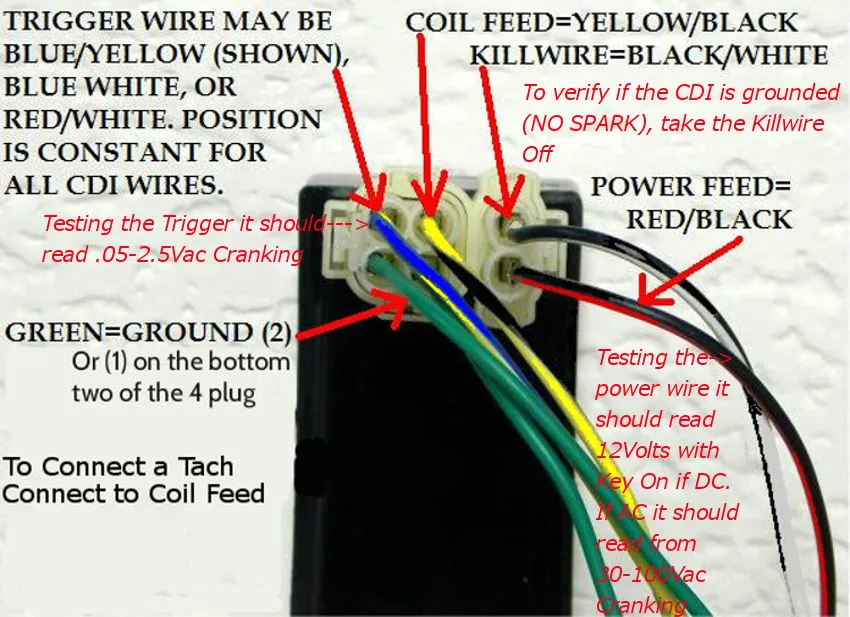
Positive connectors (red wires) should be connected to the positive terminal on the battery and negative connectors (black wires) should be connected to the negative terminal of the battery.
Also, check the ground wires that are connected to the frame of your ATV haven’t come loose, as the electrical function will fail without them.
Image from www.billavista.com
ATVs usually have multiple fuses, and sometimes they are located in multiple places on the vehicle. Refer to the service manual. The best way to check a fuse is with a multimeter in its continuity setting. Connect it to both metal parts of the fuse to see if the fuse is fine.
If you do find a broken fuse, it’ll need replacing. But it might also suggest there’s a further problem somewhere in the wiring. You’ll need to check all the electrical cables of your machine to see if they’ve become damaged or exposed. When the insulating cable gets rubbed against a sharp object (or chewed on by a rodent), the live wire can become exposed, resulting in a short circuit.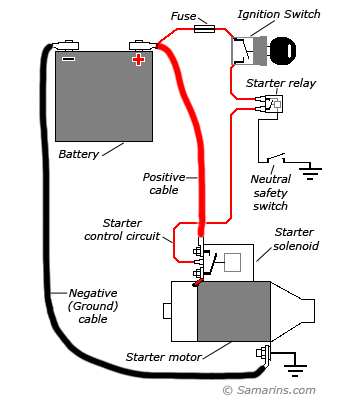
Corrosion or damage to the ignition switch can cause it to fail, so no power will get to the vehicle when you need it. Inspect the wires coming from the switch for corrosion, and if you suspect the ignition switch then you can test it using your trusty multimeter. There should be 12V flowing through the switch, only when it’s in the ON position.
HIT
ENDURO LIGHT Graphite
the most durable
458 EUR
HIT
ENDURO Camogrey
the most durable
657 EUR
ENDURO Graphite
the most durable
279 EUR
HIT
ENDURO Graphite
the most durable
657 EUR
-28%
AQUAMASTER-ZIP LIGHT Camogrey
with central zipper
598 EUR
430.40 EUR
HIT
ENDURO LIGHT Camogrey
the most durable
458 EUR
-12%
AQUAMASTER LIGHT Red
reliability & comfort
438 EUR
386. 20 EUR
NEODRY Black
17 EUR
11.90 EUR
ENDURO Camogrey
the most durable
279 EUR
AQUAMASTER Blue
reliability & comfort
647 EUR
-20%
HIT
AQUAMASTER Red
reliability & comfort
259 EUR
207.20 EUR
-40%
HIT
AQUAMASTER Orange
reliability & comfort
259 EUR
155.40 EUR
AQUAMASTER Red
reliability & comfort
677 EUR
BELT
9 EUR
ENDURO BF Camogrey
bootfoot waders
528 EUR
ALL SEASON Black
69 EUR
ENDURO BF Camogrey
bootfoot waders
329 EUR
MUDWAY Graphite
179 EUR
MUDWAY Camogrey
179 EUR
NEOSENSOR Camoarmy
12 EUR
8. 40 EUR
Explore all
Post-ride side-by-side UTV cleaning isn’t just about making sure your vehicle is looking its best, it’s about protecting your investment. Leaving mud, dirt, sand, or dust on your side-by-side (SxS) can damage it, from unsightly stains to serious rust and engine contamination. It takes only a little time and effort to spruce up your SxS on the heels of a day on the trails, and your promptness and diligence will be rewarded with a better looking, longer-lasting machine.
Cleaning your side-by-side UTV doesn’t require a whole arsenal of tools and supplies. You can wash adequately with a detergent or soap (either store-bought or mixed yourself), a plastic scraper, and clean cloths, towels, and/or a washing mitt. For water, you can use either a garden horse or a pressure washer.
Other items that can come in handy include any number of specialized cleaning solutions; an air compressor or leaf blower for drying, and waxes, polishes, and sprays for post-cleaning treatment.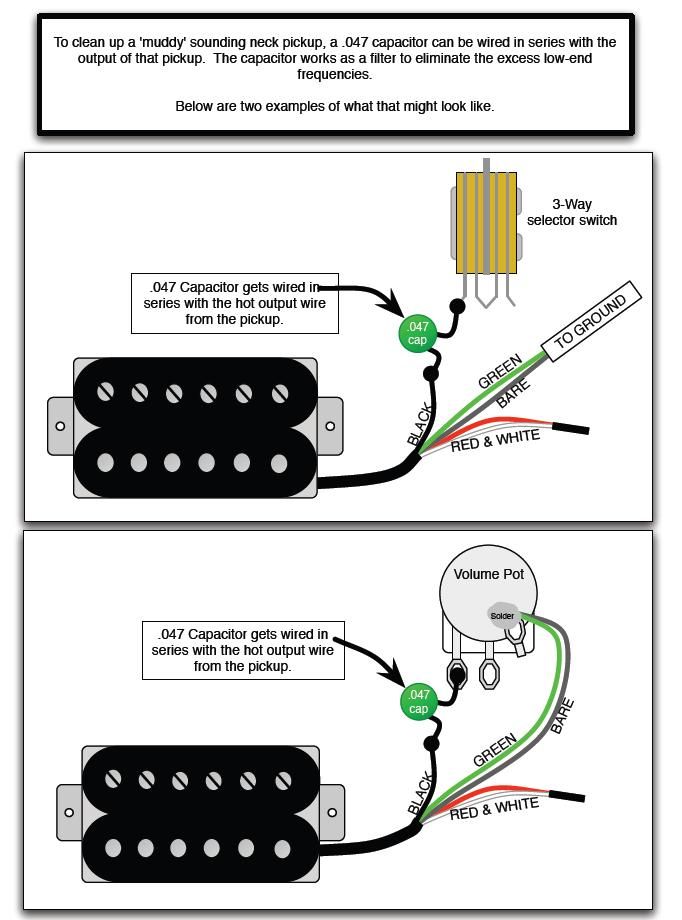
It’s nice when the yard-maintenance tools you’ve already got in the garage can serve another purpose. A leaf blower can make drying your cleaned-off Side-by-Side (SxS) a breeze. Drying your vehicle helps avoid water spots or even rust from occurring on your vehicle.
You can certainly use a garden hose with a spray attachment to wash and rinse your off-road vehicle (ORV), but a pressure washer makes the job even easier. You’ll want to be mindful of the settings when power washing your UTV, as you can blast away decals and graphics if you’re not careful. You can use either an electric or gas-powered pressure washer; the latter will usually be the more powerful option.
A pressure washer is useful at more than one stage of the SxS cleaning process. It’s a good first step for dislodging mud and dirt clods, and to wet more caked-on dirt so it’s more easily scraped or scrubbed off.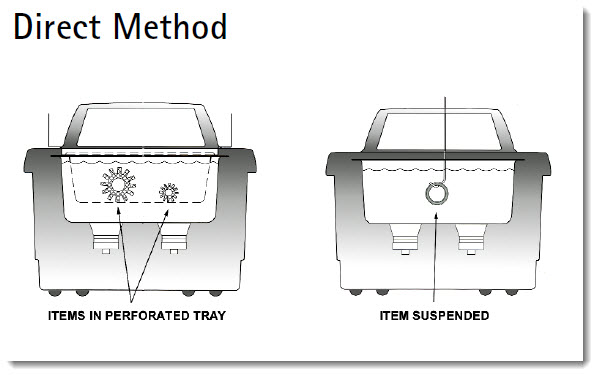 Spray down the side-by-side, let things soak for a few minutes to soften up hardened dirt, and repeat as necessary.
After you’ve lathered up your ride, you can use the pressure washer to rinse off the suds.
There are a lot of options for soap or detergent for UTV cleaning, including specially formulated cleansers for ORVs such as bike wash. The soap/detergent you use should be tough enough to tackle the grime and mud that comes with off-roading, but not corrosive enough to damage your machine’s body or mechanics. Mild washers are the name of the game. A degreaser may also be used in conjunction with the gentle cleanser, though not on plastic parts.
Some components of your SxS require their own kind of wash. If your vehicle has a polycarbonate windshield, don’t use a regular window cleaner, which can damage it. Instead, opt for hand soap, liquid dish soap, or some other analogously easy cleanser. Fabric cleaner, meanwhile, can freshen up your UTV’s seatbelts.
Let’s talk about the best manual tools for cleaning SxSs. A plastic scraper helps you take on those mud clumps with gusto. Use a microfiber cloth/shammy and/or a washing mitt for washing and scrubbing without damaging the UTV body. Use a soft cloth or towel for drying; a sponge can be handy for blotting a polycarbonate windshield.
Speaking of those windshields, remember to lather with your cloth using a gentle side-to-side pattern, not a circular one.
Articles
08 Feb
After a long wait for rides, the last thing you want is to face a breakdown in the middle of the forest, and then spend part of the season for repairs. Therefore, it is very important to properly service the ATV after the winter - change the oil, lubricate everything you need, make sure there are no backlashes and smudges, check the tightness of the bolts and nuts. We will talk about everything in more detail in the article.
This is important, because over time the oil loses its properties - because of this, heat is less efficiently removed and friction between parts increases. All this leads to accelerated wear.
Please note that the ATV engine can only be filled with special oil for motorcycles - this is due to the clutch in an oil bath. And it is advisable to use what the manufacturer recommends, as it guarantees stable operation under increased loads. For example, for CFMOTO there is a special line of CFMOTO G-Motion oils.
Two things are checked:
The air filter prevents dust and small particles of dirt from entering the engine, so it is important to keep it in good condition.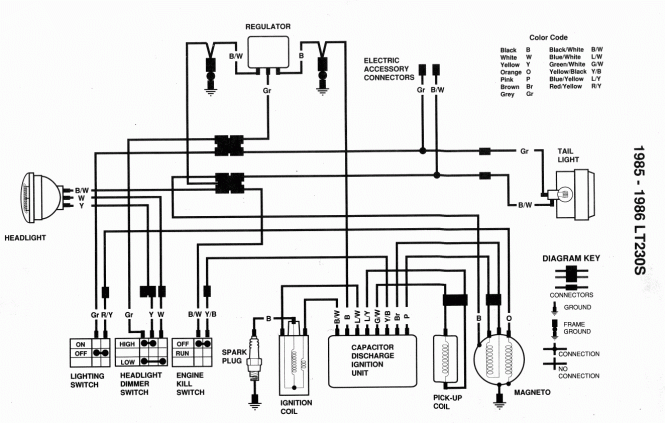
To clean the foam filter, wash it in warm water with Fairy or in a special agent, wring it out a little (do not twist it) and dry it. After that, impregnation with oil for filters is necessary.
When driving, the radiator becomes clogged with seeds, grass, lint and dirt. If you do not clean it, the next ride can turn into a test - a long road to the house with constant stops to cool the engine.
It is better to clean the radiator with a compressor by removing the protective grille. It is undesirable to use a pressure washer due to the risk of damaging the honeycombs.
It is best to move the radiator to the front luggage area - it is more convenient to service, you can safely overcome puddles and other water obstacles without fear of subsequent overheating of the engine due to stuck dirt.
Important: if you plan to dive deep into the water, it is obligatory to install snorkels, seal the wiring and remove the breathers - without this, it is highly likely that the swim will end tragically for the equipment.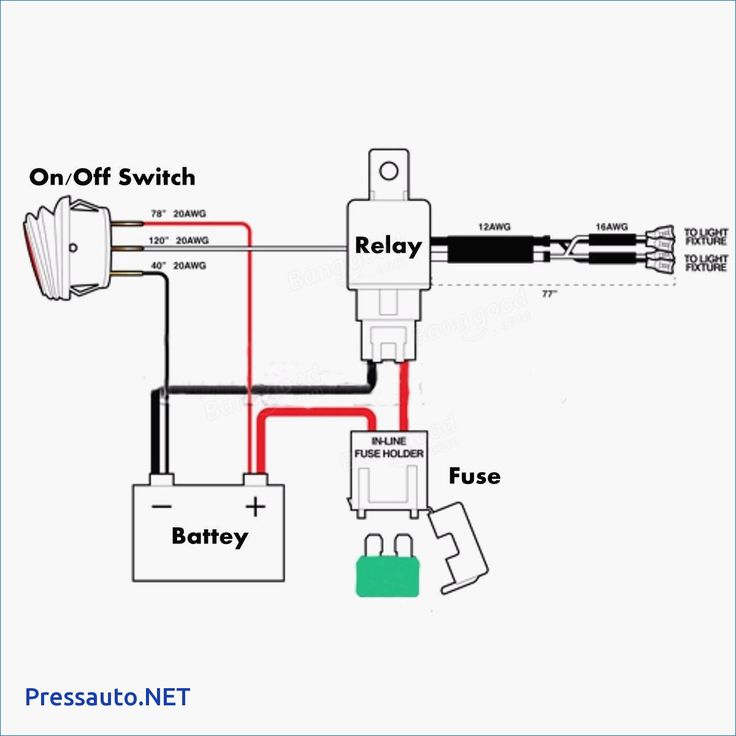
During long storage, gasoline deteriorates - fractions evaporate, the octane number becomes lower, oxidation and precipitation occur. If you drive on such fuel, the piston group and the fuel system may suffer, so it is better to fill in fresh.
There should be no play - try to shake all the rods and levers by hand. You also need to make sure that there are no oil smudges on the shock absorbers.
It is necessary to check the cardan shafts for play, make sure that there are no breaks or damage on the anthers of the CV joints.
It is also important to inspect the variator belt: if there are cracks or broken teeth, a new one must be installed. The variator itself can be blown out with compressed air. Lubrication of its individual parts is required only if it is indicated in the instruction manual (it all depends on the ATV model).
Timely renewal of grease will help extend the life of the components. Depending on the model of the ATV, the number and location of injection points may be different. Usually they are on the suspension arms, crosses and spline joints of cardans, steering knuckles.
To do this, take the wheel on the sides and shake it in different directions, jacking up the ATV. If there is play, the wheel bearings are most likely worn out, less often the bushings.
Check:
The recommended tire pressure for your ATV can be found in the owner's manual and also on the vehicle itself, usually near the left rear fender.
It is not necessary to be guided by the value indicated on the tires themselves - this is the maximum pressure that the tire can withstand.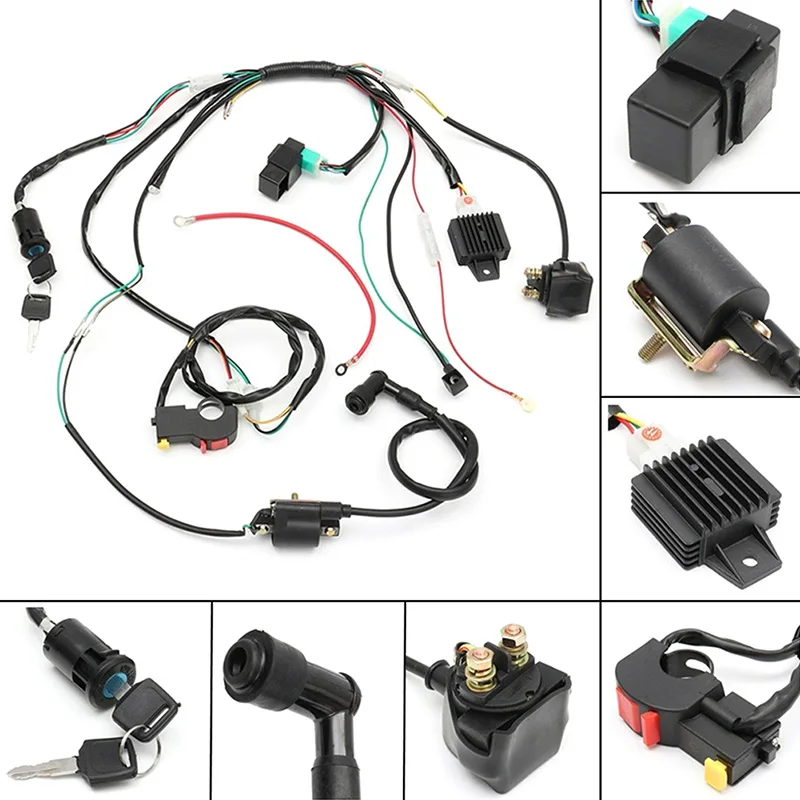
Apply a protective spray or electrical lubricant to pins and connectors to prevent moisture ingress and malfunction of the ATV.
Even before the season, you must make sure that the high and low beams, side lights, emergency alarm, power steering, turn signals, horn, winch and heating are functioning normally.
Normally, the battery charge is from 12.5 V. If it is less, it should be charged. Plaque on the terminals, cable lugs and the battery case itself can be removed with a sponge moistened with a solution of baking soda in water.
A new quad needs a break-in to get the piston rings to fit against the cylinder. This will ensure normal heat transfer and prevent serious damage - for example, burning or jamming of the piston.
Run-in is carried out in the first 500 km of run. Rules:
A new ATV must be broken in correctly.
close
ATV is a versatile off-road vehicle that can be used all year round. Even in winter, if properly prepared, the quad bike can deliver many joyful hours to its owner.
In order for the equipment not to cause trouble to its owner during operation in the cold season, it must be properly prepared. It is worth starting with general preparation and dealing with:
First of all, you need to change the oil - summer oil is not suitable for frost in terms of viscosity, for winter you need synthetic oil with a viscosity of 5W-40.
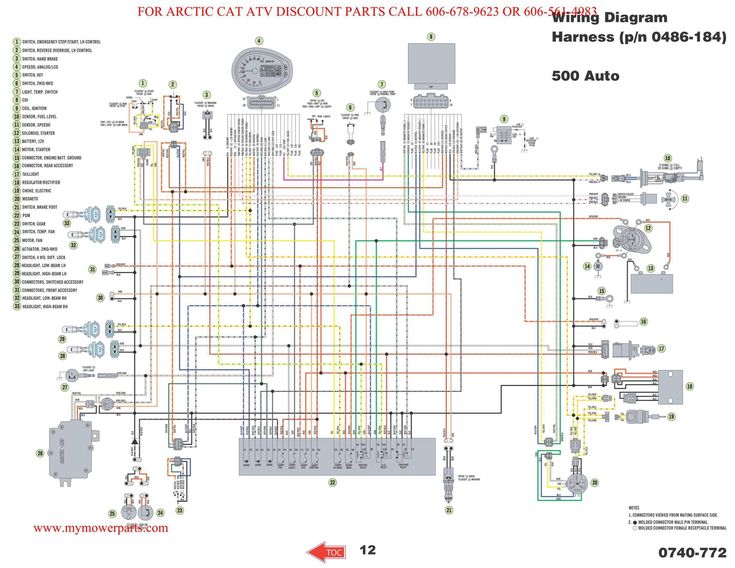
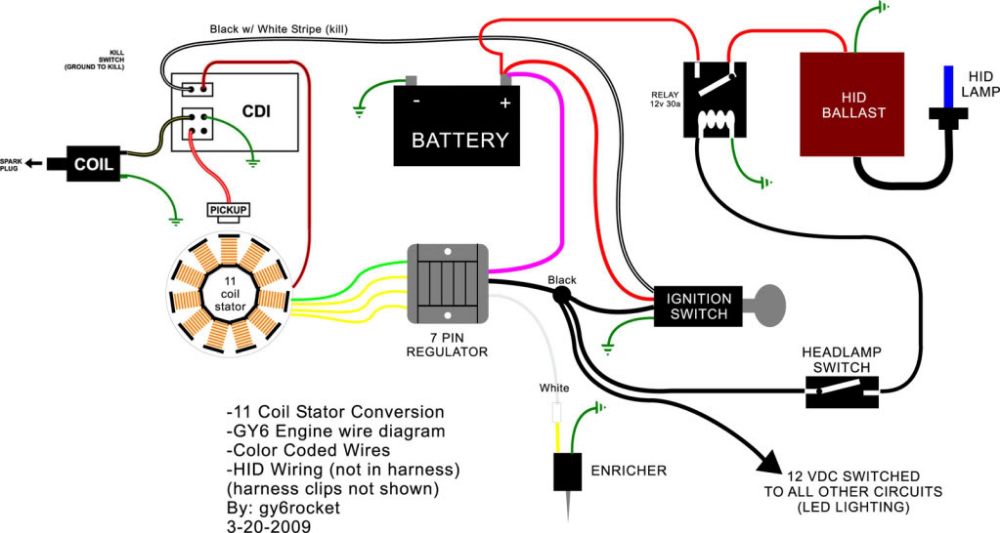
It's not much fun in cold weather to dig into wiring when some wire or chip comes off or loses contact. To avoid this, the wiring must be carefully reviewed.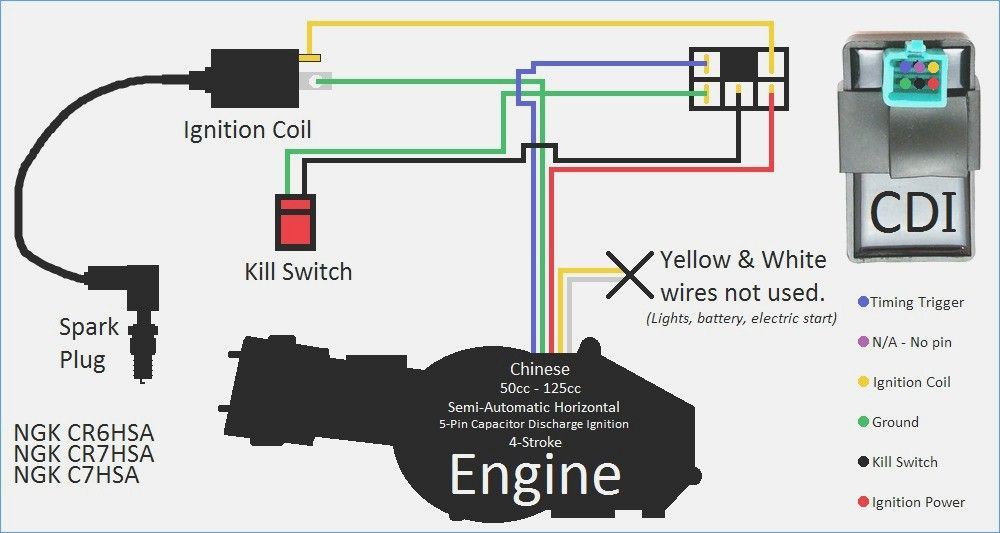 All contacts need to be checked, it is best to treat them with silicone grease or a special spray.
Antifreeze is usually not changed before winter, but if it is old, it is better to drain and fill in new coolant, the old one may lose its properties over time.
It is best to remove the additional arm guard to prevent snow and water from accumulating there. Additional protection is not anthers, they should never be removed!
If the battery has been discharged a couple of times in autumn, it is better to replace it with a new one. If the battery is almost new, but is discharging, you need to measure the voltage. If it is in the range from 12.5 to 13.2 V, then the problem is not in the battery, but in electrical equipment, you need to deal with it.
After the basic preparation, you need to conduct a thorough diagnosis of your vehicle, inspect it for any faults. Winter operation is the most difficult, so even minor breakdowns can lead to serious problems. It is advisable to eliminate all damage.
If sometimes the ATV did not start the first time, and its engine was unstable, you need to clean the carburetor, otherwise the problem will worsen in cold weather.
An important point is where exactly the transport will be stored in winter. If this is a cold and unheated room, then in cold weather you will have to remove the battery and take it to a warm room.
All cables and ignition lock must be treated with special lubricants or at least WD-40.
Before winter operation, it is advisable to change the tires to studded ones. As a rule, it is difficult to buy such a thing, and its cost is prohibitive. ATV owners usually buy studs and turn to truck tire shops, where standard tires are studded for them.
Before driving in winter, it is imperative to warm up the engine, the colder it is outside, the more it should idle.