Jeff Chen
I wanted to share some tips for mounting tubeless tires that I've learned from doing 4 tire comparison tests and mounting over 60 tires over the last year and a half:
Warnings:
Installation Process:
Clean the rim bed with alcohol to remove any trace of oil or grease. Tape tubeless-ready rims with tubeless tape and install valves onto the rim. Be as careful as you can to tape rims securely as losing air through improperly installed tape seems to be the most common cause of tubeless setups not being able to maintain tire pressure.
Check the tire for markings that indicate direction of rotation before installing.
Install the tire bead on one side of the tire onto the rim.
Install the other tire bead ending at the valve. (The valve tends to allow less room for a tire bead leading to a tighter fit if you end away from the valve.)
[If you only have a floor pump] Try to inflate the tire. If you can get the tire beads to form some level of seal with the rim bed, you'll be able to get the tire to hold air. From that point keep pumping fast(!) up to 35 psi. You'll generally hear a 'snap' as the tire beads seat at about 35 psi. I don't recommend going above 40 psi to reduce the risk of tire and/or bead blowouts. I've found that about 1/4 to 1/2 of tires install easily with just a floor pump.
See tips and tricks below for ways to help the bead seat with just a floor pump
See below for the tire brand/rim brand combinations that I've found install easier
Warning: Be VERY careful not to exceed 40 psi in the tire to reduce the risk of tire and/or bead blowouts.
[If you have access to a compressor or gas station air hose] The process of installing tubeless tires is a LOT easier with access to a compressor. The high pressure that a compressor can deliver quicker than a hand pump helps force tubeless tire beads against a rim bed from which you can then add air up to the tire pressure at which the tire beads will seat (about 35 psi).
Warning: Be VERY careful not to exceed 40 psi in the tire to reduce the risk of tire and/or bead blowouts.
Congratulations if you are up to this point. Getting the beads seated is the most challenging part of this process. To complete the installation you need to add sealant into the tire & distribute the sealant around the sidewalls of the tire.
Let the air out of the tire. Generally the tire beads will remain seated on the rim.
Remove the tire valve core. Generally tubeless valves will be of the presta variety, not the schraeder valves that are typically used with car tires)This is the top part of the presta valve that screws into the larger diameter base of the valve. You can do this by using a core removal tool such as the Stans NoTubes Core Remover Tool or an adjustable wrench if you don't have a core removal tool.
Inject about 4 oz of tubeless sealant into the tire through the tire valve with the valve core removed
Reinstall the valve core
Pump up the tire to about 35 psi
Shake the wheel/tire laterally to distribute sealant onto the tire sidewalls. Rotate the wheel/tire as you continue to do this around the entire tire.
Rotate the wheel/tire held horizontally to allow sealant to work its way into the junction between tire bead & rim. Set the wheel/tire down horizontally for 5-10 minutes. A cardboard box is a good way to keep the wheel/tire level. Flip the wheel over to the other side and repeat this process. Losing air due to tire beads not being adequately sealed against a rim is another common cause of tubeless setups not being able to hold pressure.
Adjust tire pressure based on your weight. This is a formula from Stans NoTubes that provides a starting point for matching tire pressure to your weight:
Rider weight / 7 = X
Front pressure = X -1 psi
Rear pressure = X -2 psi
Example based on a rider weight (with gear) of 160 lbs
160 lbs / 7 = 22.9
Front pressure = 22.9 - 1 = about 22 psi
Rear pressure = 22.9 + 2 = about 25 psi
Tips & Tricks:
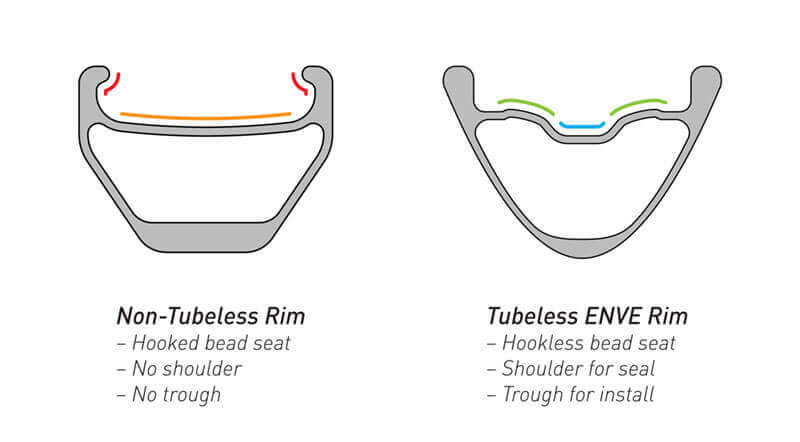
Use rims designed for tubeless use: Tubeless rims have a ridge next to the bead seat that will help to "lock" a tubeless tire's bead onto the rim after it is seated. I personally will not do tubeless "conversions" with non-tubeless rims. Non-tubeless rims that don't have the ridge to help lock in a tubeless tire's bead greatly increase the risk of burping (losing air in hard cornering) or rolling a tire off in corners.
Use tires designed for tubeless use: Tires designed for tubeless mounting have a casing that is more likely to be air tight as well as tighter fitting beads (keep reading for the benefits of tighter fitting beads for ease of tubeless installation).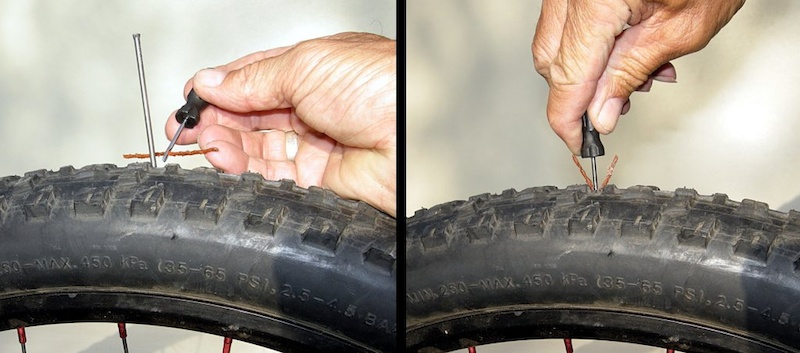
Seat the tire beads before adding sealant: Trying to seat a tire that already has sealant added just adds potential for messiness. The sealant does not help the initial bead seating process.
Seating the tire beads with just a floor pump: If a tire's bead fit snugly against the rim bed, you have a good chance of being able to just use a floor pump to get enough air pressure to seat the beads. An air tight seal between bead and rim allows you to gradually build up enough air pressure in the tire until the beads seat around 35-40 psi.
Tricks for seating tire beads when a tire doesn't start holding air pressure immediately:
Make sure the tire is covering the valve hole
Try to move the tire so that the beads press against the rim bed
Use an inner tube to strap the tire against the rim
Seating the bead without a compressor: A inexpensive way to get a high volume of air into a tire at high velocity is to use a gas station air compressor. If you have Presta valve, you will need a presta-to-schrader valve adaptor such as the Slime 23042 Presta to Schrader Valve Adapter. The high velocity of air that is delivered by this method or with a compressor pushes the tire beads against the rim allowing pressure to build up to seat the beads.
Add sealant via a tubeless valve that has a removable valve core: Many instructional videos will recommend removing one side of the bead at this time to add sealant. I don't agree with this approach. You've done a lot of work at this point to get both tire beads seated properly. Why would you want to undo part of the work you've done to seat the beads? Adding sealant through the valve core is by far the lowest effort way to add sealant.
For really hard to seat tires, pulling the tire bead on top of the rim could be worth trying: I just learned this new method of getting a better seal between tire and rim to do the initial inflation & seating of the bead if you don’t have access to a compressor or tubeless charger pumps that can deliver a high volume blast of air. The basis of this technique is that you pull the tire bead on top of the rim with a tire lever. When you get to about 40-50% of the tire bead resting on top of the rim. you put your thumb on the tire bead so it doesn’t slip off of the rim and gently pull out the tire lever. Repeat on the other side and pull the bead up on the rim as far as you can go. Proceed to inflate the tire. Once you are able to get some pressure in the tire. There seems to be at least some risk of having the tire bead blow off the rim when you inflate the tire, so be aware of that and try this technique at your own risk. You can see the technique being used at: https://youtu.be/tE3h5nmDdOo.
Easier to install tire brand/rim brand combinations
On Stans rims (Easton & DT rims have a similar diameter. Mavic & WTB have a slightly smaller diameter)
Schwalbe Snakeskin - Easiest
Maxxis Exo - Fairly Easy
Specialized 2Bliss - Fairly Easy
Continental Protection - Difficult to do initial seating of the beads on Stans rims
WTB TCS - CAN work but beads may be tight as the bead diameter is based on the tighter UST bead specification.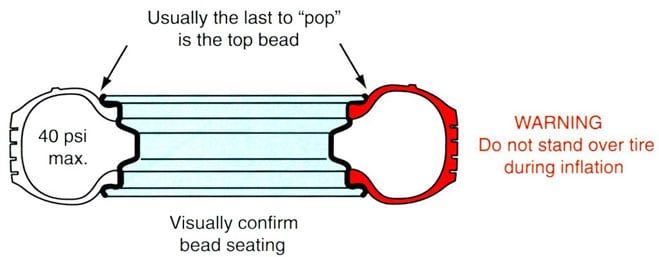 I have mounted 2 WTB tires on Stans rims, but have heard that others have had challenges with this. Works better on WTB and Mavic rims.
Michelin, Hutchinson - I don't have direct experience but I believe these brands will work better on WTB and Mavic rims.
This is a great video on installing difficult-to-mount tubeless tires:
You can help support Dirt Merchant Bikes’ product testing by purchasing through our retail partners.
Orange Seal Tubeless Sealant
Our experience is that Orange Seal seals punctures quickly and consistently. The amount of rain we get in the PNW makes sealants drying out less of an issue, but Orange Seal also resists water absorption well.
Stan’s Tubeless Rim Tape
Stan’s tape has a little stretch that helps in removing air bubbles when taping rims. It sticks well to most alloy rims and some carbon rims. It also removes cleanly unlike Gorilla Tape.
Stan’s Tubeless Valve Stems
Stan’s valves have a solid rubber base that helps reduce air leaks around the valve base. Tightening the locknut helps seal tape against the rim.
Diamondback Steel Core Tire Levers
It can be helpful to use a tire lever to get the last part of a tire bead onto a rim. Plastic tire levers don’t last long with that type of abuse. I like these better than the more expensive Park Tool TL-6.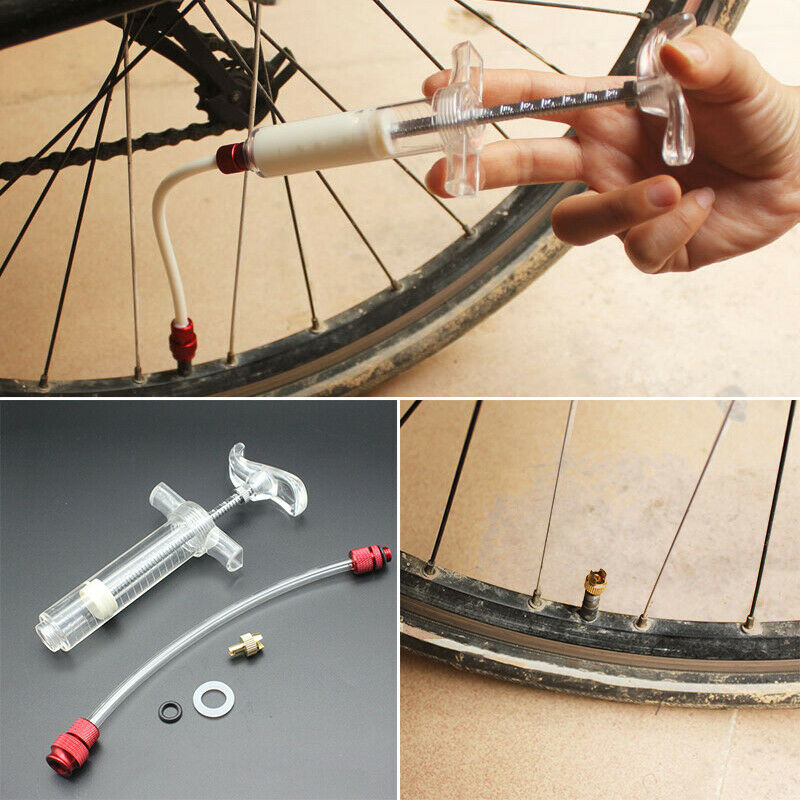 2 Steel Core Tire Levers because the entire tip of the lever is covered in plastic to reduce the chance of scratching a rim.
Orange Seal Sealant - 16 oz Refill bottle
Orange Seal Sealant - 32 oz Refill bottle
Stan’s No Tubes Rim Tape 60 Yards x 30mm
Stan’s No Tubes Rim Tape 60 Yards x 27mm
Stan’s No Tubes Rim Tape 60 Yards x 25mm
InTires TagsTires
Tubeless bicycle tires are in wider use than ever before. Installing them (especially at home instead of in a professional bike shop) can be a hassle - difficult, time consuming, and sometimes impossible.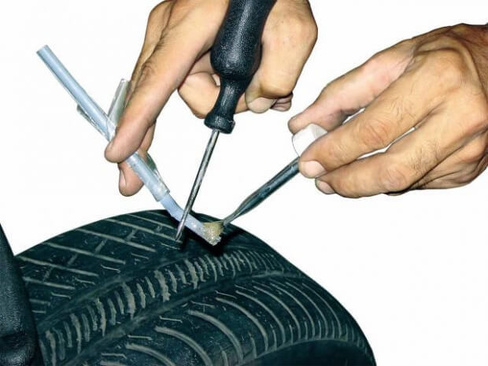 With these tips, you can tame your tubeless tires, making installation faster and easier.
The right tools and the proper technique make all the difference. Here we go:
Tires which have been stored folded and kept in a cold basement will be tough to seat and inflate tubeless. With tubeless, we don't have the advantage of the inner tube forcing the tire beads into the right spot as the tube inflates. You can run into a similar challenge when you're on-site at a Winter cyclocross race - tubeless cyclocross tires will be much easier to mount and seal when they're warmed up first.
For more tubeless success, warm the tires up first, outside in the sun, or even with a hairdryer. If the tire has been folded, open it up into the hula-hoop shape and allow it to take the form of a tire again before you try to mount it up - preferably the day before.
Bike shops and pro mechanics don't struggle with floor pumps - they use air compressors and proper inflator tools designed specifically for bicycles.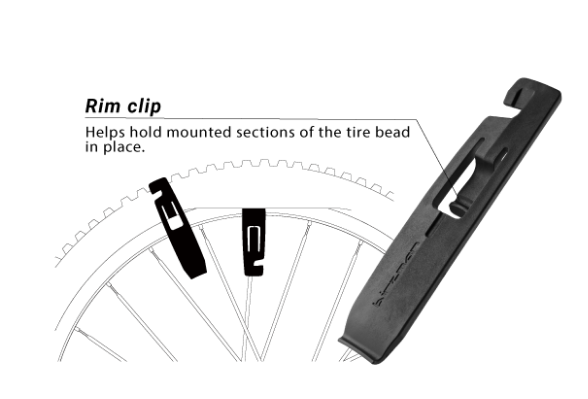 An air compressor is like the "easy button" for working with tubeless tires.
If you're interested in adding an air compressor to your arsenal, check out this article with complete step-by-step instructions: How to setup a home air compressor for use with tubeless bicycle tires. In addition to the compressor, you'll need an inflator tool that matches the tubeless valves on your bikes (presta or schrader.)
Regardless of whether you're using an air compressor or a floor pump, the core of your valve can actually get in the way, because it limits the total air volume that can pass through. We need a big blast of high-pressure air to seat tubeless tire beads. If needed, you can remove the valve core, then try again to seat the bead. Sometimes with the valve core out of the way, a little bit more air volume can get through - and sometimes that little extra pressure is what you need.
All the air will immediately escape through the valve as soon as you remove the pump or inflator head, of course - you'll need to re-install the valve core (after the beads are seated) to make it airtight once again.
Once you've got the tire beads seated, let's not mess with it again! Using a good quality tire sealant means more time will pass before we have to repeat the process, since the sealant dries out through evaporation over time. The gold standard is Stan's NoTubes sealant. You might also want to add a bit more sealant than you think you need - check the sealant manufacturer instructions for guidelines on how much.
Once your tubeless tire is mounted, avoiding un-mounting it if possible at all costs. That includes when adding sealant. To reduce time in the shop, always top-off the sealant by injecting it through the valve if possible, instead of breaking the tire bead again. Inexpensive sealant injectors make this easy - remove the valve core, inject the sealant, and replace the valve core.
For a tubeless tire to seat properly and become airtight, we need the tire bead to slide into place - moving from the deep center channel of the rim, to the outer edge, where the tire bead can mate up against the hook of rim.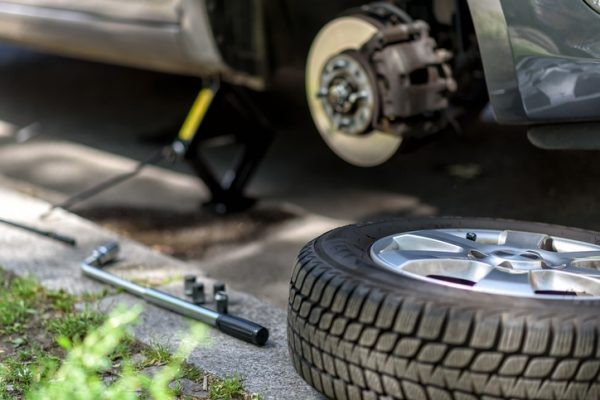 You'll know it happened when you hear the bead pop into place with a satisfying "snap" noise.
Sometimes the rubber of the tire bead sticks on the rim strip, preventing it from popping into place. If this happens, try lubricating the tire bead with a little bit of soap suds - just mix up some dish soap in a little bit of warm water. We really don't need the water, just the suds. Apply some bubbles with a sponge to ease the process of seating the bead.
Sometimes you get a tire/rim combo that just won't work, no matter your tools or technique. In this circumstance, remove the tubeless valve, install an inner tube, and inflate the tire normally.
After riding it around for a couple days, remove the inner tube (taking care to only dismount one side of the tire), re-install the tubeless valve, install your sealant, then mount the remaining side of the tire. With one side of the tire bead already in place, you'll typically find the one remaining side much easier to get working tubeless.
This trick works because the air pressure inside the tube forces the tire bead outward to where it belongs. Once it's in place, it tends to stay there, even after the tube is removed.
Back to blogBefore mounting a tubeless tyre, the wheel rim must be inspected and checked. It is recommended to check the rim profile with a special template.
The rim must be free of dents, dirt, rust, scratches, weld beading. The rim must be carefully painted. Particularly clean and even should be the shelves and flanges of the rim, mating with the tire beads.
Rust and irregularities on the rim are smoothed out with sandpaper or a file. Damaged paint must be restored by applying it in an even thin layer, without sagging.
Then install a valve on the rim, the hole for which must be clean and free of burrs. Cap 13, nut 10, metal washer 9 and rubber washer 8 are removed from the valve and the valve with rubber sleeve 7 is inserted from the inside of the rim into the hole. Then washers 8 and 9 are put on the valve and nut 10 is tightened, which ensures tight installation of the valve in the rim. Then the cap is screwed on.
Fig. Wheel with tubeless tyre:
1 — wheel rim; 2 - valve; 3 - sealing layer of rubber; 4 - wheel rim; 5 - sealing layer; 6 - balancing weight; 7 - sealing sleeve; 6 - sealing washer; 9- valve washer; 10 - nut; 11 - valve body; 12 - spool; 13 — cap key
The tire beads, as well as the shelves and rim flanges, must be washed with warm soapy water before mounting the tire. The tire is mounted with extreme care. Even slight damage to the special rubber layer on the seating surface must not be allowed.
It is very important that clean and smooth mounting blades are used, with well-rounded edges. During installation, it is necessary to moisten the blades with clean water. It is necessary to refuel the tire beads onto the rim, starting from the side opposite to the valve, and then gradually approach it from both sides. At the same time, the blades are moved over short distances, no more than 100-150 mm.
A tubeless tire is difficult to inflate at first, as it is necessary to ensure that the bead of the tire fits snugly on the flanges and rim flanges and that the tire retains the inflated air. Then, when the tire is under some pressure, its sides will press against the rim themselves and provide tightness.
Before inflating, raise the wheel and, while turning it, hit the tread on the ground several times so that the tire beads sit on the rim flanges. Then the spool is unscrewed from the valve and the tire is inflated with a compressor. It is difficult to inflate a tubeless tire with a hand pump, since it cannot immediately supply the necessary amount of air that would fill the tire quickly enough and tightly press its beads to the rim flanges.
Inflate the tire with a compressor to a pressure of about 1.5 kg / cm2, then remove the hose and quickly screw in the valve so as not to release much air from the tire. After that, the tire is inflated with a hand pump to a pressure of 2-2.5 kg / cm3 in order to firmly seat it on the rim. If the tire beads are not yet firmly seated on the rim shelves, it is necessary, while turning the wheel, to hit it several times with the tread on the ground. After that, you should check the tightness of the tire, that is, let the wheel go into the water or, laying it flat on the ground, pour a soapy solution between the tire bead and the rim. After checking the tightness, you need to bring the tire pressure to normal 1.7 kg / cm2.
If no compressor is available, the tubeless tire can be inflated with a hand pump using the following procedure. To do this, they tie the wheel with the tire with a rope along the middle part of the tread and tighten the rope, twisting it with a stick. Due to the compression of the harmful part of the tire, its beads diverge to the sides and are pressed against the rim flanges. Instead of a rope, you can use a special steel tie-down band. If enough air has been inflated to pre-compact the tire, the rope or tape should be removed.
A tubeless tire sticks to the seat of the rim and is therefore more difficult to remove than a tube tire when removed. For this purpose, a special shoe is attached to the driver's tool kit. The deflated wheel is placed on the ground under the car body. Then, putting the shoe on the side of the tire near the rim, they put a jack on it and, placing the paw of the jack in the socket on the body, raise the car. Under the weight of the vehicle, the bead of the tire under the shoe will move away from the rim. After that, the tire can be easily separated from the rim but the entire circumference. Turning the wheel over, in the same way separate the tire from the rim on the other side. The tire is removed from the rim with mounting blades, being careful not to damage the seating surface.
TIRE SIDEWALL MARKING
Indicates the type of rim the tire is compatible with. Unless otherwise noted, should be used on rims with hooks.
Nominal profile width and suitable wheel diameter in millimeters according to ETRTO.
Country of manufacture.
Minimum and maximum pressure in bar and psi. inch.
Specifies the direction in which the tread pattern should be directed when the wheel is rotated forward.
Specifies that the tire should be installed with an inner tube only, not tubeless or otherwise.
TIRE TYPES
TUBE TYPE: A tire for use with an inner tube only.
TUBELESS: A tire for use on tubeless rims only, which can be fitted without an inner tube. Can be used with internal chamber.
TUBELESS READY: A special type of tubeless tire that requires a sealant inside to maintain pressure. Can be used with internal chamber.
TUBULAR: A fully enclosed, stitched or vulcanised, tire construction (tube) that requires a special tubular rim and is glued to it when mounted.
TIRE INFLATION RECOMMENDATIONS
Never exceed the recommended tire pressure.
Proper pressure affects the load, speed and handling of a bike and is vital to performance and safety performance such as braking, maximum traction and tire life.
Inflate tires "cold", that is, not warmed up on the road.
Do not exceed the maximum pressure indicated on the tire sidewall.
Insufficient tire pressure causes excessive creasing and rapid wear.
Excessive pressure causes discomfort when driving and reduces the contact area of the tire with the road surface, which impairs handling and traction.
Before every ride, it is essential to check and maintain the correct tire pressure (while the tires are “cold”), especially on tubeless systems, which are more prone to sudden pressure loss.
WARNING: Driving with tires with incorrect air pressure is dangerous! This can lead to an accident, accident, serious injury or even death.
TIRE CHECK
The condition of the tires and the air pressure in them should be checked before each trip, and also, and even more carefully, after hitting any object on the road. If the tread is worn and the body material (cord) becomes visible, bulges, cracks, cuts, holes, uneven wear appear on the tire, or the tire shows signs of any other damage, it is recommended to replace it immediately.
Over time, the condition of the tire will in any case deteriorate under the influence of external forces, such as contact with the road, punctures, improper repairs, mounting-dismantling, inflation-deflation, heating-cooling, excessive exposure to ozone, improper storage conditions, etc., etc. . To reduce the impact, tire manufacturers add anti-ozonants and antioxidants to their products.
Since it is not possible to accurately predict what external forces a tire will be subjected to, there are no scientifically based limits on the life that a tire can be given. It is recommended that the condition of the tires (as well as tubes and rim tapes) be checked regularly by a bicycle specialist who can assess their suitability for further use.
As for tubeless systems with liquid sealant inside, it is necessary to check the condition of the sealant itself and change it regularly in accordance with the instructions.
To avoid cosmetic damage, use low-pressure tap water to clean and wash the tire sidewalls. Never use cleaners to improve the appearance of the sidewall, otherwise you will remove antioxidants, which can degrade the quality of the rubber and lead to cracking of the sidewalls. Using hydraulic sprayers with high water pressure can also cause damage to the sidewall.
Avoid excessive mechanical stress on tires and tubes (for example, do not brake by blocking the wheel, do not run into sharp objects, do not drive with insufficient or excessive tire pressure, etc.).
If your bike has rim brakes, the rim is subject to constant wear and tear, which over time can lead to tube failure and puncture. In any case, if you have any doubts about the condition of the tires, consult a bicycle specialist.
High tire pressure can damage the rim, so check the maximum pressure allowed for the specific rim before installing the tire (check with the wheel dealer or rim manufacturer for information on whether the rim can withstand tire pressure).
CHANGING TIRES
PREPARATION
1. Before installing or removing a wheel, read the bike manufacturer's instructions and make sure you know how to handle the wheel mounting mechanism.
2. Verify that the rim, tire, and tube are compatible with each other by checking the instructions for each component manufacturer. A mismatch between tire and rim can cause the tire bead to come off the rim or damage to the inner tube, resulting in a rapid loss of air pressure. If you're unsure, be sure to check with a bike specialist.
3. Make sure that the mounting area of the tire is clean and that foreign objects do not get into the tire, as they can damage the tube, rim tape, the tire itself, or contaminate the sealant (in the case of a tubeless tire).
4. Make sure the rim is in good condition. If it is damaged, then it must be replaced.
5. Check the condition of the rim tape, if used. If it is damaged or does not completely cover the spoke holes in the rim, it must be replaced. Poor quality rim tape is very often the cause of a sudden loss of air pressure.
6. Check the maximum allowable pressure for the given rim type. It must be equal to or higher than the tire. Tires that allow a pressure reduction equal to or greater than 3 bar (43 psi) must be mounted on lug rims.
7. A tire capable of inflating more than 5 bar (73 psi) must be mounted on a lug rim. Hooked rims are marked with a "C" in the size label. If you have any questions, please contact a bicycle specialist.
8. In the case of installing a tire with a tube, talc helps to properly place it in the tire. For latex cameras, its use is mandatory, but it is also recommended for butyl cameras. It is also recommended to install a new tube each time a new tire is fitted or after a puncture.
9. When installing a tubeless tire (Tubless), always check the condition of the valve (nipple) and change it if it looks damaged or if air pressure is lost.
10. When installing a Tubeless Ready tire, always check the sealant and change it if it is dry. Also read the sealant manufacturer's instructions carefully to make sure it's right for your tire.
TIRE REMOVAL PROCEDURE
1. Unscrew the valve cap (nipple) and locknut, completely deflate the tire.
2. Peel off one side of the tire all around from the edge of the rim by applying pressure starting from the area opposite the valve. Tubeless tires may require more effort for this.
3. Position the tire pryer next to the valve and carefully insert it between the tire and rim, being careful not to pinch the inner tube (if any). Then, using a lever, lift the sidewall of the tire off the rim. To make the job easier, always make sure that the other bead is in the rim bed.
4. While holding the first rig in this position, insert the second rig about 10 cm from the first and repeat the above operation. Then run the pliers around the circumference of the tire to completely separate one bead from the rim.
5. Remove the inner tube, if present, or liquid sealant, if present and still liquid, and then remove the second tire bead from the rim with your hands.
TIRE INSTALLATION PROCEDURE
1. If installing a tubeless tyre, make sure the rim is sealed, tubeless tyre-compatible, or tubeless-compatible. If the rim is tubeless compatible, you will also need a tubeless rim tape that will completely cover the spoke holes.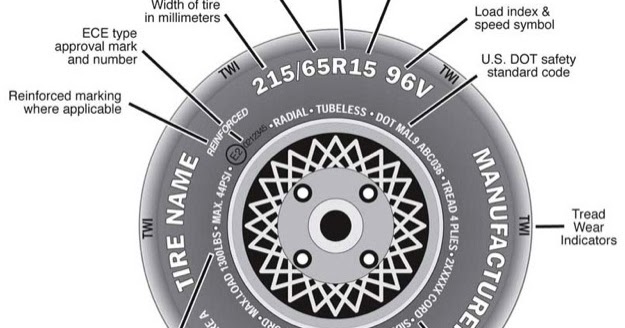 It is possible to lubricate the entire circumference of the rim with a special tubeless lubricant (do not use oil or grease) - this will facilitate the installation procedure and the correct positioning of the tire on the rim.
2. Insert the first bead of the tire into the rim, observing the direction of rotation of the tire indicated on its sidewall, starting opposite the valve.
3. If installing a tire with a tube, slightly inflate the tube, but only so that it becomes rounded, and gently insert into the tire, starting at the valve and completely carefully placing it in the rim.
4. Starting on the side opposite the valve, press the other bead of the tire into the rim and push it around the rim in both directions until it fits properly in the rim. For tubeless installations, add the recommended amount of sealant before inserting the last bead piece. If the tire bead becomes difficult to push into the rim, or the last part of the bead does not snap into place, make sure that the bead around the entire circumference of the rim is in place. If necessary, squeeze the sidewalls of the tire into the rim with your hands.
5. If fitted with a tube, make sure it is not pinched between the tire and the rim or valve, and then secure the valve to the rim with a locknut.
6. Inflate the tire to the maximum allowable pressure using a pressure gauge pump so that the beads are properly seated on the rim. Tubeless tires click into place with a characteristic popping sound. Rotate the wheel by hand at low speed and at an angle to check that the beads are correctly positioned and also that the liquid sealant is spread inside (if the installation is tubeless).
7. The tire is properly seated when the thin line above the side of the rim is equidistant from the edge of the rim all around. Then reduce the pressure to your preference (within the markings on the sidewall of the tire) and close the valve. Do not exceed the manufacturer's maximum pressure for tire, rim and rim tape.
8. When inflating a tubeless tire for the first time, a strong jet of air is required, so you may need a compressor.
9. Before each ride, check the air pressure, tire bead fit, wheel-to-hub attachment, and brake pads (disc or rim).
10. Before using newly installed tires, be sure to first brake test and do a few test maneuvers.
USING TIRES WITH FULLY SEALED CARBON AND ALUMINUM CLINCHER RIM WITHOUT RIM TAPE
Fully sealed carbon and aluminum rims, such as tubeless rims, usually don't have spoke holes in the rim, so manufacturers don't mandate the use of rim tape.
However, keep in mind that in the case of bikes equipped with rim brakes, the heat generated during braking directly enters the tire system, significantly increasing the thermal load on all components, such as the tire, the inner tube (if any) and the rim itself. In the event of prolonged braking, riding without a rim tape can cause the tires to deflate quickly, with the risk of losing control of the bike.
This becomes even more relevant in the case of latex and lightweight tubes, as well as tubeless installations. In order to minimize the chance of failure due to overheating, it is recommended to use rim tape for any installation, and to avoid continuous, prolonged braking when descending a mountain, if possible.
USING CLINCHER TIRES WITH CARBON RIM
Carbon rims sometimes pose a risk of tire edge damage due to sharp rim edges. Therefore, before mounting the tire, it is recommended to make sure that there are no sharp edges on the rim hooks. To verify this, carefully run your finger along both edges of the rim - there should be no nicks, sharp protrusions or excessive roughness on it. If there are, then the rim needs to be replaced.
If in doubt, please consult a bicycle specialist.
TIRE STORAGE
Tires should be stored in a cool, dry place at 10°C - 21°C, avoiding contact with heaters.