Proper maintenance is a major aspect of the smooth running of your ATV. You can’t expect to have an ATV in good condition without proper maintenance. The better you take care of your ATV the longer it will last and less money you have to spend on repairs in the long run. The same applies to both the two-stroke and four stroke engines.
When it comes to the proper maintenance of an ATV, the timely changing of oil is one of the most important aspects. If the oil is changed on time and as per the manufacturer’s manual, you can enjoy hassle-free rides all year round.
The engine will have more life and it runs to its fullest potential. You don’t need to spend
much on repairs. However, some people don’t give much importance to this crucial maintenance task. They will go for the oil change either at the last moment or only when
the ATV starts giving them trouble. By then, you could have done more serious damage to the engine.
If you wish to change the oil for your ATV 2 stroke or your 4 strokes, you can either go to the mechanic or you can do it on your own. In fact, this oil changing is not a very difficult task. If you follow a proper process with a bit of care and bit of patience, you can do it easily on your own. However, you need to have the right tools to get it done.
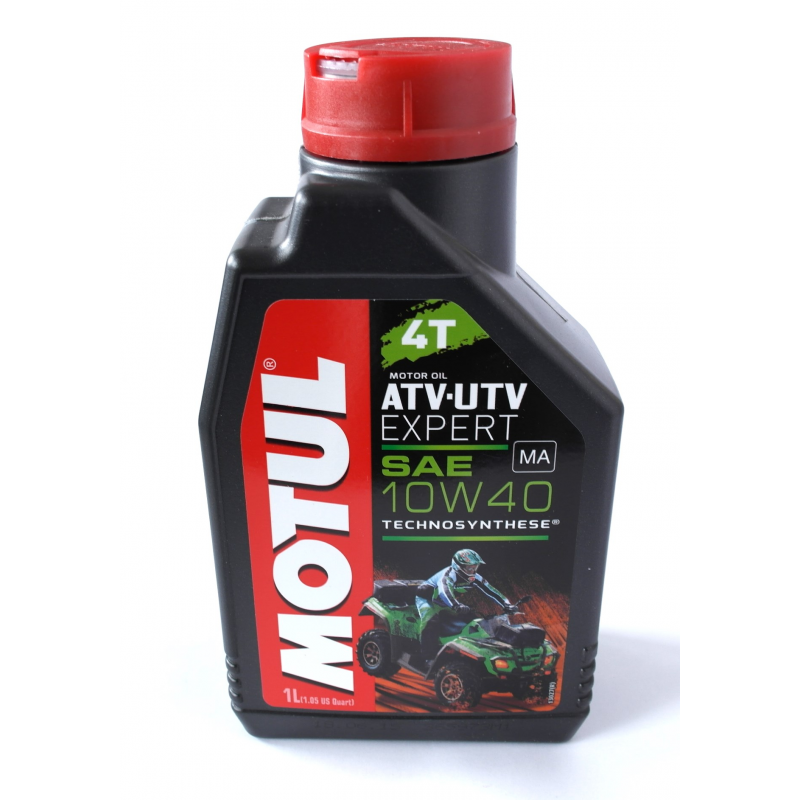
You also need to use the right brand of oil recommended by the manufacturer. If you don’t use the recommended brand of oil, there is a possibility that more damage to engine will occur.
So, to change the oil in your ATV 2 stroke or your 4 stroke, you have to follow a process. Also, note that there is a bit of difference in changing the oil in the 2 stroke and the 4 stroke engines. We will first discuss the oil change for the 4 stoke engine and later, we will cover the process for the 2 stroke engine.
Changing oil in an ATV 4 strokeThe process of oil change includes three aspects, which includes knowing the frequency of oil change, keeping the tools required to change the oil, and following a series of steps.
Frequency of oil changeKnowing how often the oil has to be changed is one of the very important things in the maintenance of an ATV.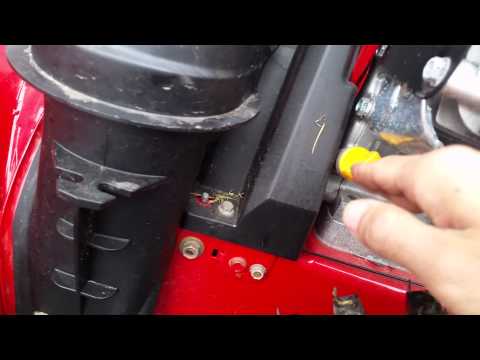 However, the frequency of oil change is not the same for all four wheelers. It depends on the manufacturing company and it varies from one ATV to another.
Generally, it’s a good idea to change the oil at least once a year. I usually do this at the beginning of the riding season as part of my yearly maintenance of the machine. However, it is always advisable to refer to the manufacturer’s manual, which gives you helpful information on when and how often you need to change the oil.
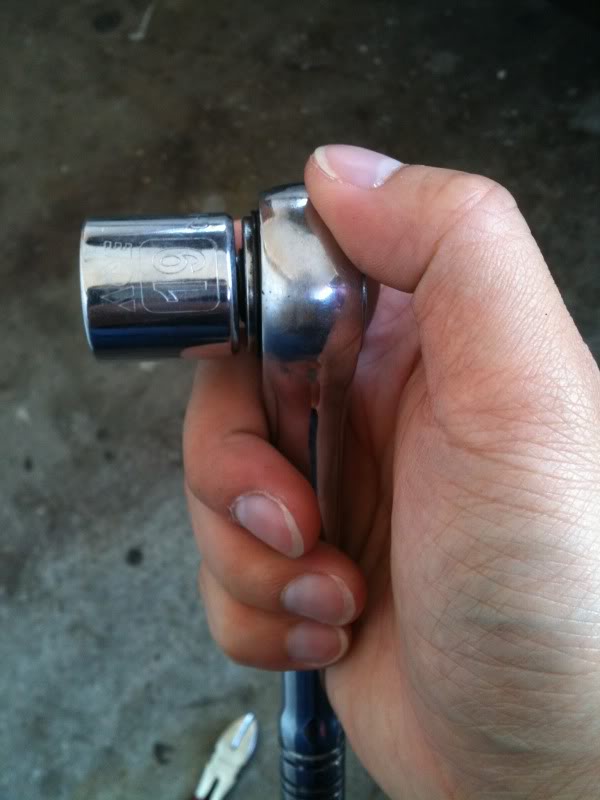
Tools requiredThe following are the tools required for changing the oil in your ATV 4 stroke
I like to get an entire oil change kit or maintenance kit every year to do the yearly maintenance on my ATV. Here is an example of an
ATV Maintenance Kit found on Amazon.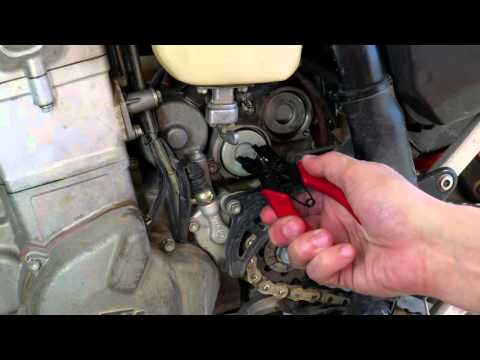 This probably wont be the exact model you have but it gives you an idea of what to look for.
These steps are the actual process of changing the oil in your ATV 4 stroke. If you follow these steps, you will find it very easy to change the oil.
Run the engineTo begin with, you need to run the engine. Let the oil get warm. The reason for this is – when you run the engine, the remaining oil that is there in the engine becomes hotter, flowing seamlessly, and all the impurities will come out. Do not let the oil get hot though. Just run it enough to get things moving around a bit. Once this is done, you can go to the next
step i.e. draining the oil.
Note: If required, you can use your bike stand at this stage.
Drain the oilStart by putting the oil pan under the the quad to catch all the oil as it drains out the ATV. Remove the drain plug and wait for all the oil to drain completely out of the engine.
Once the oil is drained completely, you need to do the following tasks:
Note:
Before replacing, try using some new oil around the rubber edge of the filter. This makes a better seal and helps with removing it next time. In case, the oil filter is a reusable metal type, just wash it properly and let it dry properly. If possible, you can use compressed air for drying it.
So, with this, you have drained the residue oil and replaced the oil filter and ready for the final step i. e. adding new oil.
Before getting into adding new oil, you need to double-check whether the entire residue is drained out completely. Once you are ready to change the oil, have a look at the guidelines mentioned below:
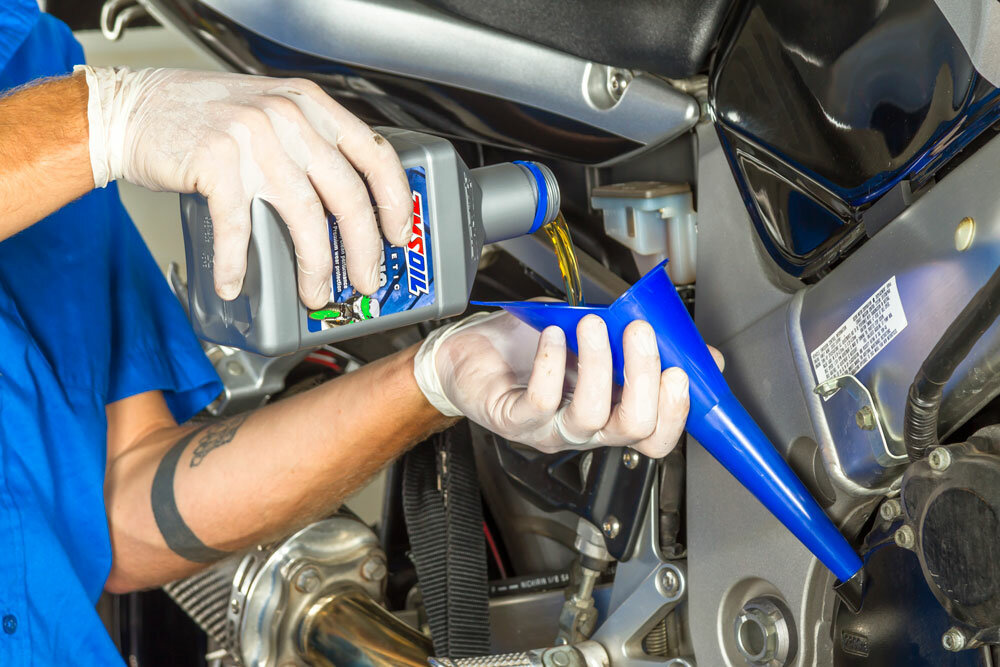
Just fill the engine back up with oil and you are good to go. Make sure you don’t overfill or underfill. There is usually a marking that will tell you the right amount of oil to put in.
That’s all. You now know how to change the oil. You will certainly agree with us that the process of changing the oil is not a very big task and you can do it on your own too.
Now let us see how to change the oil in your ATV 2 stroke engine.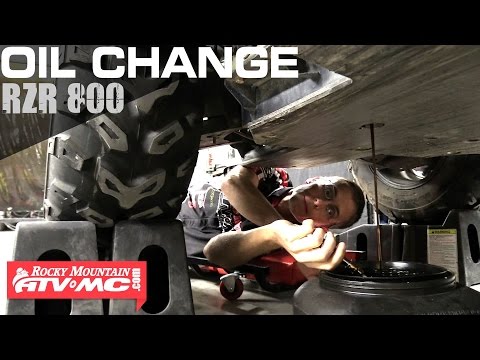
Changing oil in ATV 2 stroke
Usually in my two stroke engines I never change the oil. The oil gets mixed with the gas and and just needs to be refilled every so often. Kind of like refilling the gas tank, you should keep an eye on your oil level in a two stroke and refill when needed.
I can see wanting to change the oil out anyway if the ATV has been sitting for a long time. If that’s the case, the steps are very similar to a four stroke engine, except your filter may be different. If there is a filter at all. Also, make sure you get 2 stroke engine oil. It’s different from 4 stroke oil and you can’t mix the two or it will cause you problems.
That’s all the process of changing an ATV 4 stroke and 2 stroke engines oil.
To sum upMaintenance plays a vital role in keeping your ATV 4 stroke or 2 stroke vehicles in good condition. As part of maintaining your vehicle, you need to first know when to change the oil and then change it as per the recommendation is given in the manufacturer’s manual.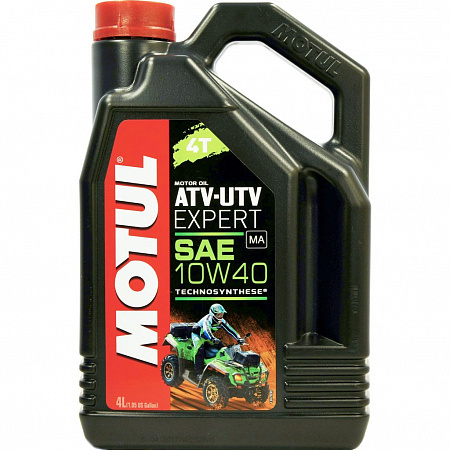
You can change the oil on your own. In order to change it properly, you need to follow a process, which includes a series of steps. As part of this oil change process steps, you need to first run the engine to make the oil warm thereby the impurities will come out in the residue.
Once this is done, you need to drain the oil completely. As a next step, you have to
replace the oil filter, and finally replace the oil with a recommended brand.
Sharing is caring!
When you change your oil depends on how often you use your ATV and the quality of the oil that you have inside it. Owners who ride every day and use $1.00 per quart "big box" oil will be changing oil once a week. Others who ride less frequently and use a high grade petroleum or synthetic oil may go an entire season before needing a change.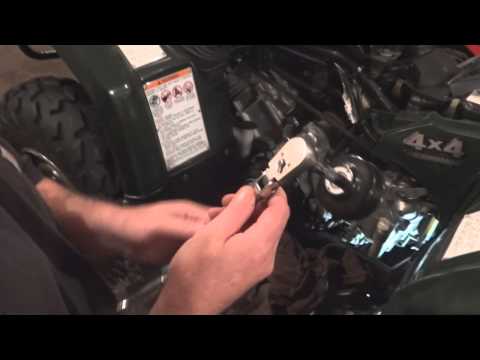
The best way to determine if you need a change is to pull the dipstick at the end of every trail riding session and check out the color of the oil.
An oil change is a great opportunity to take a few minutes and get rid of the dirt, weeds and other debris from beneath your ride. The oil is actually going to drain through a hole in the skid plate and if that hole is clogged you're going to have your very own BP spill to deal with.
In some ATV models, access to the drain and filter are pretty easy but in some models you will need every mm of clearance to reach a plug or a filter. If those spaces are clogged with debris your oil change can become a level 5 out of 10 pretty quickly.
The process we list here is specifically for a Yamaha Grizzly 660 but the steps are the same for just about any model.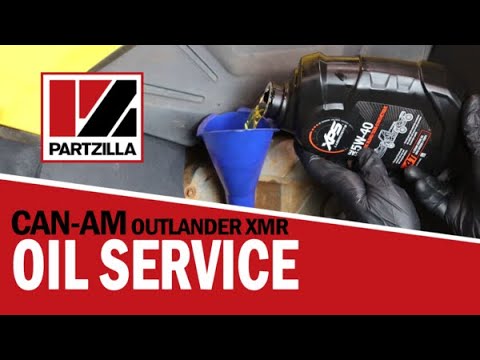 What will be different is the location of the drain plug and oil tank as well as the oil filter. Refer to your owner's manual for the specific location of those items.

 You can start this installation using your hand but you will have to finish it with the filter wrench.
That's it. Remember to recycle/dispose of the old oil responsibly.
- End of Procedure -
Return to all Repair & Install Guides
When you change your oil depends on how often you use your ATV and the quality of the oil that you have inside it. Owners who ride every day and use $1.00 per quart "big box" oil will be changing oil once a week.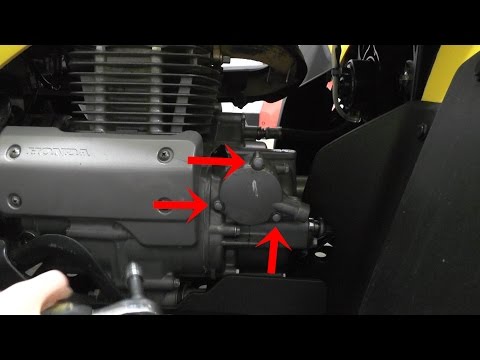 Others who ride less frequently and use a high grade petroleum or synthetic oil may go an entire season before needing a change.
The best way to determine if you need a change is to pull the dipstick at the end of every trail riding session and check out the color of the oil.
An oil change is a great opportunity to take a few minutes and get rid of the dirt, weeds and other debris from beneath your ride. The oil is actually going to drain through a hole in the skid plate and if that hole is clogged you're going to have your very own BP spill to deal with.
In some ATV models, access to the drain and filter are pretty easy but in some models you will need every mm of clearance to reach a plug or a filter.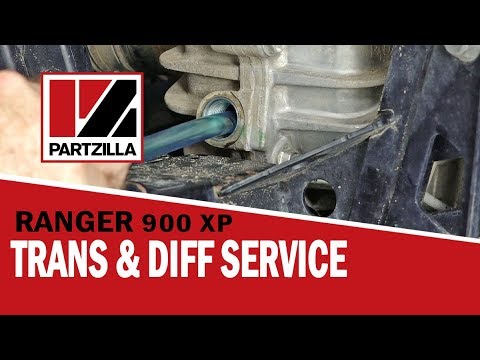 If those spaces are clogged with debris your oil change can become a level 5 out of 10 pretty quickly.
The process we list here is specifically for a Yamaha Grizzly 660 but the steps are the same for just about any model. What will be different is the location of the drain plug and oil tank as well as the oil filter. Refer to your owner's manual for the specific location of those items.
 This has about 7 bolts that need to be removed. With the cover off you now have easy access to the filter and the dipstick.
That's it. Remember to recycle/dispose of the old oil responsibly.
- End of Procedure -
Return to all Repair & Install Guides
ATV oil change is one of the most important factors in the proper operation of an ATV, its durability. The engine and other components of an ATV consist of moving and rubbing parts, gears, gears rotating at high speed, and experiencing very high loads and temperatures. A good, properly selected oil allows you to avoid the rapid wear of mechanisms, their destruction.
Synthetic oil is prepared by synthesis from organic substances. Synthetic molecules are the same size. Synthetic oil has the best chemical and thermal stability. But it is the most expensive, so it is recommended to use it in new engines.
Mineral oil is made from petroleum products, it is cheap, but it does the job, although its performance is worse than that of synthetic oils. Accordingly, the cost of mineral oils is lower than synthetic ones. Therefore, if the engine mileage is high, and in the region the winter temperatures do not exceed 15 degrees below zero, then it is even preferable to use mineral oil.
Semi-synthetic consists of mineral and synthetic oils, where the proportion of mineral is 30-50%, and is intended for modern engines with high mileage. The characteristics of this oil lie between fully synthetic and mineral oils.
One of the main characteristics of engine oil is viscosity, the ability to remain on friction parts and maintain fluidity under given temperature conditions. Referred to by SAE abbreviation, e.g. 75W90. Subtract 40 from the first digit and the result will show the temperature at which the engine can be started and its cranking, since the oil thickens with decreasing temperature and it is more difficult for the starter to crank the engine.
The second digit shows the viscosity at high temperature engine operation 100‒150 degrees. The higher this number, the higher the viscosity. But this does not mean that the higher the viscosity, the better it is for a particular engine. If this is good for a powerful and sporty engine, then for a conventional engine it threatens to lose power and threaten to quickly “screw it up”.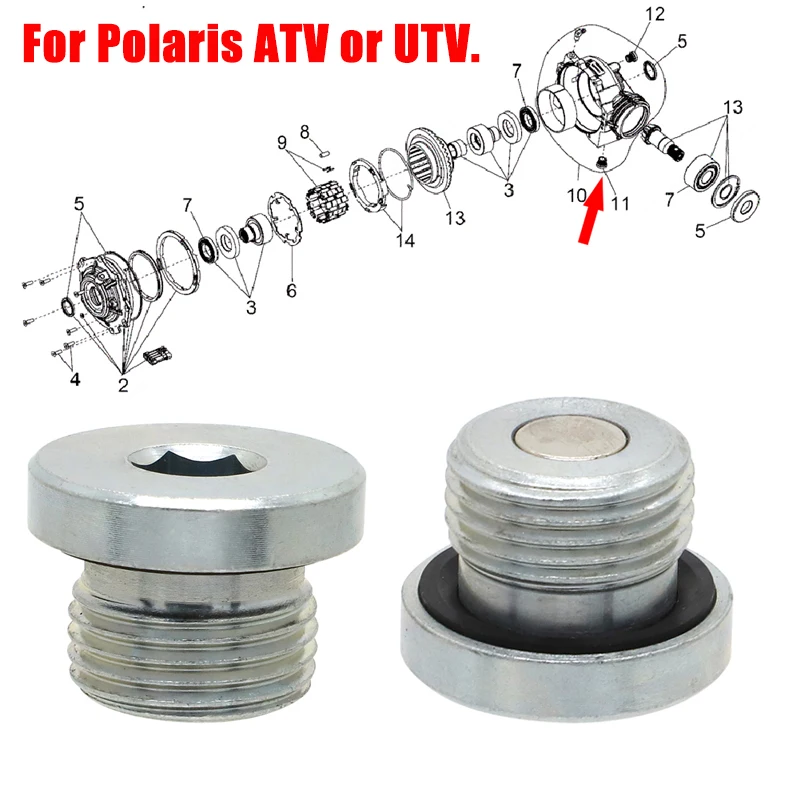 Therefore, the best choice here is to pour the oil indicated by the manufacturer of the ATV.
The next node, where it is necessary to change the oil from time to time and monitor its level, is the gearbox. Gearboxes in ATVs are mechanical, automatic and semi-automatic. Automatic transmissions are installed on low-power and children's ATVs, mechanical ones are used mainly in sports models, and semi-automatic in utility ATVs, where it is possible to connect all-wheel drive under certain road conditions.
Viscosity grade
There are different opinions about what kind of oil and what viscosity is needed for the gearbox. If for mechanical gearboxes it is recommended, without further ado, to pour engine oil, then for automatic gearboxes, transmission oil is required. In addition, there are different opinions about what viscosity the oil should be. Here it is necessary to build on the specific gearbox model and remember the principle that more thermally loaded elements require a more viscous oil.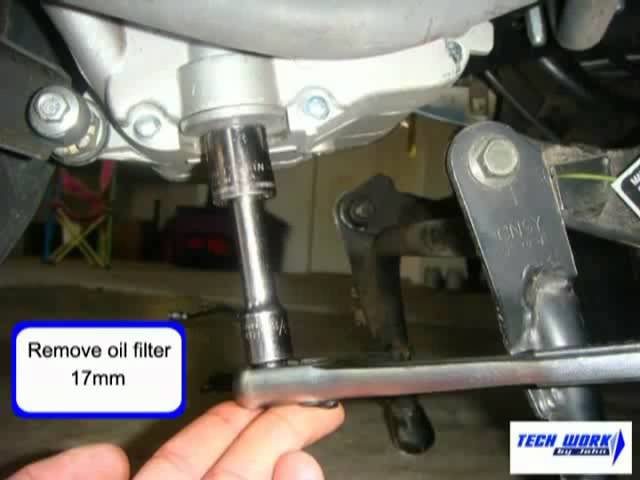
ATV oil must be changed within the time specified in the instruction manual. It is permissible to roll up to 500 km, this is the so-called break-in period. This is if you purchased a completely new ATV, and if it is used, then it is advisable to do this as in the case of buying a used car, right away.
The subsequent regulations must be made every 1000 km, of course, with the change of oil, filter elements, inspection and maintenance of other components of the ATV. But there are situations when it is necessary to do unscheduled maintenance, for example, if the ATV has been in the water. Accordingly, it must be disassembled, removed and dried moisture, drained oil from all nodes. After bringing the ATV back to normal, it is necessary to fill in new oil.
To change ATV oil, you must first drain the used oil, as described in the corresponding article. Then it is necessary to tightly close the drain hole, pour new oil in the required volume, while it is desirable and even necessary to replace the oil filters. For a more complete guide, see the instruction manual for a specific model, which describes in detail the procedure for changing the oil in an ATV. Or see this article.
Summing up the above, it should be remembered that changing the oil in an ATV on time is the main procedure that affects the durability of components and mechanisms. And besides this, it is necessary to use the right brand, otherwise the effect of its use will be negative.
Other related materials:
Children's ATVs: types, characteristics, safety, disadvantages
Tips for choosing an ATV
Do I need to install a snorkel on an ATV?
Choosing protection for the ATV
How to adjust the valves on the ATV?
All ATVs have their own "term" of life. This applies even to expensive branded devices that cost tens of thousands of dollars. There is nothing to be done about the fact that key components of equipment gradually wear out and fail. But you can increase the life of the components by using quality oil. Even if you decide to buy an inexpensive ATV, you need to find the right lubricants for it. Therefore, let's figure out which oil is better to choose for an ATV.
It should be noted right away that a special oil is used for each of the units of the apparatus. The lubricant composition is poured into:
It is not recommended to save on oil, as it not only reduces friction, but also removes excess heat. Due to this, the mechanisms work correctly, do not overheat and “live” an order of magnitude longer.
Refer to your ATV documentation for information on lubricant formulations.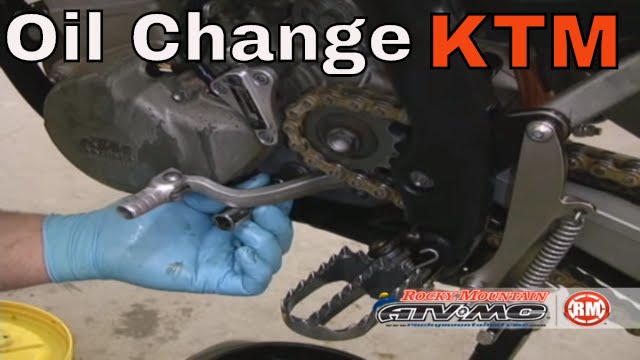 Each device has its own requirements, so be sure to study them.
Although it is worth following the manufacturer's recommendations, this does not mean that you need to buy the first suitable composition. All oils consist of a base and special additives. And it is on the basis that their operational features depend. There are 3 types of oil:
It is up to the rider to decide which oil to put in the ATV. However, experienced motorists are advised not to save on lubricants, since repairing an engine or gearbox will cost many times more.
There are several oil characteristics that a rider should pay attention to. The first step is to determine the viscosity of the liquid. To do this, look at the label. If it has the letter W (winter), then the liquid is designed for low temperatures. The following numbers show what weather conditions the composition is intended for (0 - mild winter, 25 - severe frost).
The situation is similar with summer liquids. There are 5 classes of compositions (by viscosity) from 20 to 60. There are also universal oils that are used both in winter and in summer.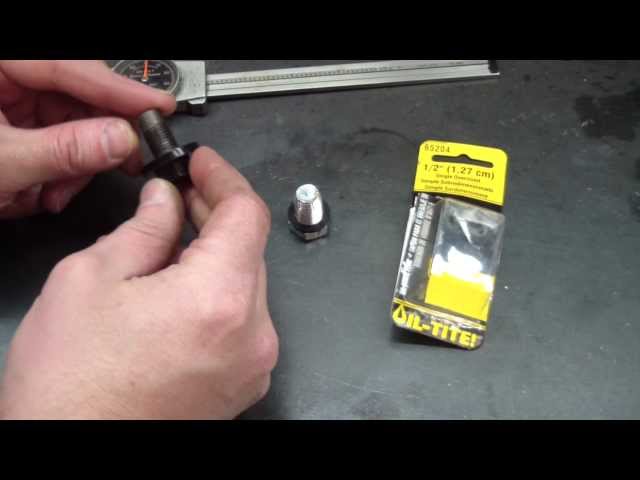 You can recognize them by special markings, for example: "20W40"
You also need to pay attention to:
The API system is used to classify oil by quality. The marking looks like this: S (common name) + A, B, C, D, etc. The lowest quality is marked with the letters "SA", and the highest quality is marked with "SL".
When deciding which oil to fill in an ATV engine, you need to take into account the characteristics of the vehicle itself. Because the ATV is subjected to considerable stress, the engine becomes very hot. This means that the oil must be resistant to high temperatures and conduct heat well.
Plays the role and basis of the composition.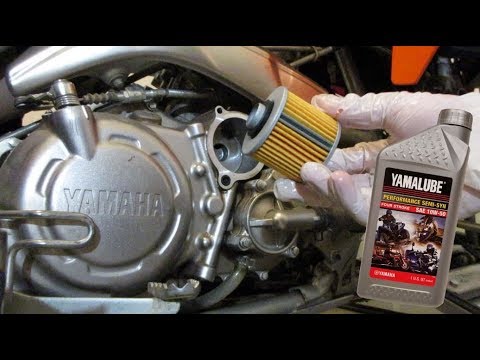 Ideally, you should use only synthetic or semi-synthetic fluid. You need to pay attention to the labeling: the country of origin, season, quality standard.
Important: For gearboxes and gearboxes, you need to use special compounds that differ from engine oil in a set of additives.
The first thing a rider needs to figure out is how often to change the oil in an ATV. Each manufacturer has its own recommendations, but experienced motorists advise filling in new fluid every 160 hours. In this case, the first replacement is performed during the break-in, after the device has worked for 20 hours.
To change the oil you need: