Table of Contents
1026 shares
Step by step instruction on chaining up a big rig.
If you are a truck driver, there may be times in your trucking career, you ‘may’ be required to chain up your truck.
If you run in areas that don’t get snow or icy conditions, consider yourself fortunate!
However, as a professional truck driver, you may wish to acquire this skill as you may find yourself in another job someday and it maybe necessary to chain up!
For example, there could be chain laws posted in an area where you’re traveling or your truck could be stuck.
This is how to ‘hang chains’.
This method involves the driver actually draping the chains over the wheels.
If your chains are very heavy, you may wish to use the second method.
Related > CDL Skills + Knowledge Every Professional Driver Should Know
When I’m satisfied the chains are in good working order, I pick up the chain on the side further away from me.
Spread the chains evenly over the surface of the tire. You already know they fit, as you dry fitted them.
I advocate for dangling an inch or two to one side of the tire, front or back and tucking the rest to the other side.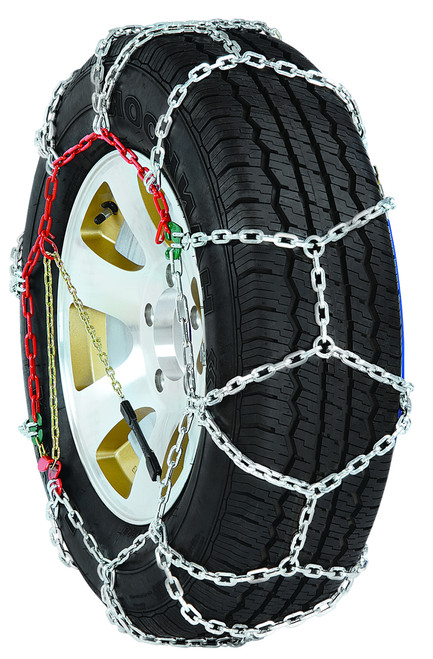
I pull and move the chains across the tread to get it centered as much as possible across the tread face and worked into the grooves of the tread. Tug hard.
Do both sides and make sure that you match which end has the short chains as this is the direction that you will move the truck.
You may have a tool that you like to do this job. But, I find the fifth wheel hook a handy tool for this step. I use it to hook the inside clip, between the tires.
The great thing about using the fifth wheel hook, is it’s a handy tool that most truck drivers have with them.
The cams are a simple configuration and they are relatively easy to hook up.
The purpose of the cams is to fasten the entire chain down at the end of the process.
 The wrench is inserted into the cam and turned to increase the tension in the chain.
For extra security and tension for the chains, you can use regular bungee straps.
However, I bought a specialized set of tire straps, in Wyoming at a truck stop. They are very handy for securing them.
This method is where the driver lays the chains out, and installs them without actually picking them up and draping over the wheels.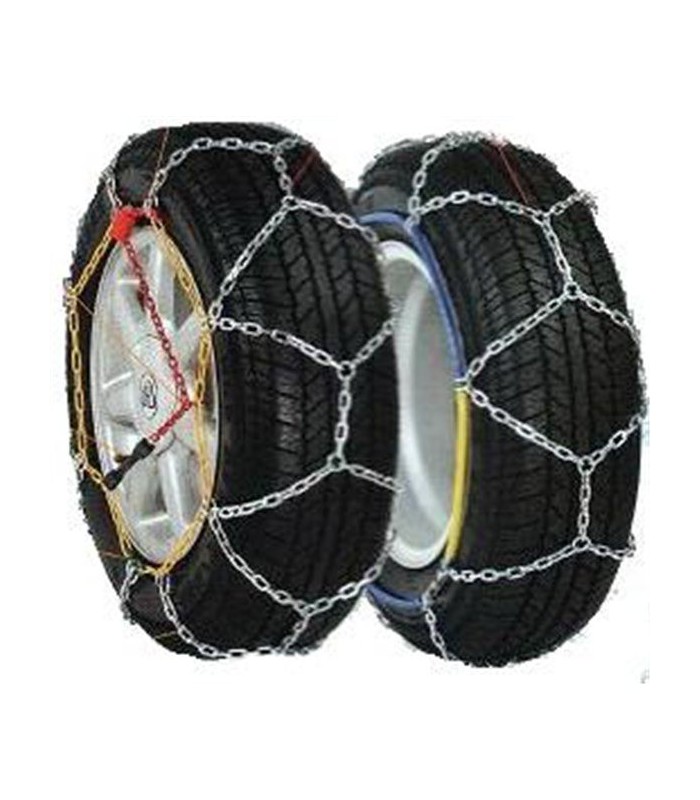
However, don’t park in a chain up area, unless you are chaining up.
Pull in, select your spot, being courteous to others.
Do a couple of back and forth maneuvers to pack down the snow/move the slush. If you’ve been on the highway in snow, stop, kick off your mud flaps then pull forward or back a bit out of your snowpile.
If you have a snow shovel, clear off a bit ahead and beside the tire/axle you are chaining, or a runway to lay your chains.
NOTE: Pay special attention to the cross chains near each end of the fittings. These get easily twisted (like a knot) where you need to spin one end thru the other to undo the twist. This is easier to spot on V-bar or studded than on regular cross chains.
Note that cams on singles should be to the outside.
On most triples, you have cams on the inside and the outside rail (not the center).

On my chains that means the round part of the half moon faces towards the hub/center of the wheel.
If you want your chains ‘upside down’ (v-Bar or studs down) or right way up. You will either be flipping the cam onto the tire (from upside down) or draping it over (from right way up).
For triples, the easiest way to do them is to lay them with the traction side up, then fold the inner side of the chain over the outer, so it is only one tire wide. Drop the double up chain over the outside tire and flip the top chain over the inside. This is far neater and easier.
If you have test fitted the chains, you should have an idea of which link you need to hook to initially.
Note that tire wear will lengthen your slack in the chain.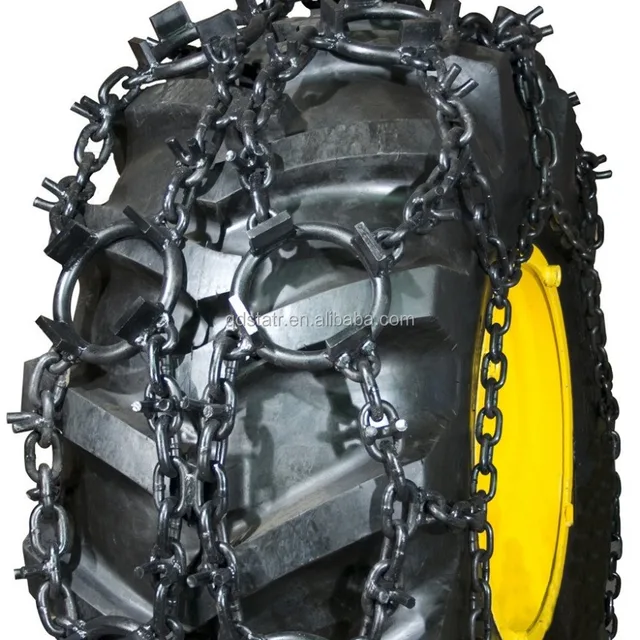 New tires will shorten the slack and open should tires have more slack than closed shoulder.
There’s 2 ways to deal with slack chain.

Note: This is much easier and safer to do than stopping again in another aread than where you are alread set up.
Jump back out and go back and forth and look at the chains.
Pull on them and see if there is any slack either across the cross chains on the face of the tread or in any of the side chains (inside, outside and middle if appropriate). If there is, tighten any remaining cams or if you can undo an end, and take one more link out, do it.
It may mean undoing all of the cams to loosen them up, take out a link and then re-tighten them all again.
The goal here is to get the chains as tight as possible.
Well -maintained chains will only break if they are loose, or if you abuse them.
When I initially hook up my chains, I already know which link I need on the inside (or middle and inside) and loop any excess chain at that point.
On the outside cam, I leave all the links loose until I have re-tightened after pulling forward and back to seat the chains in the tread.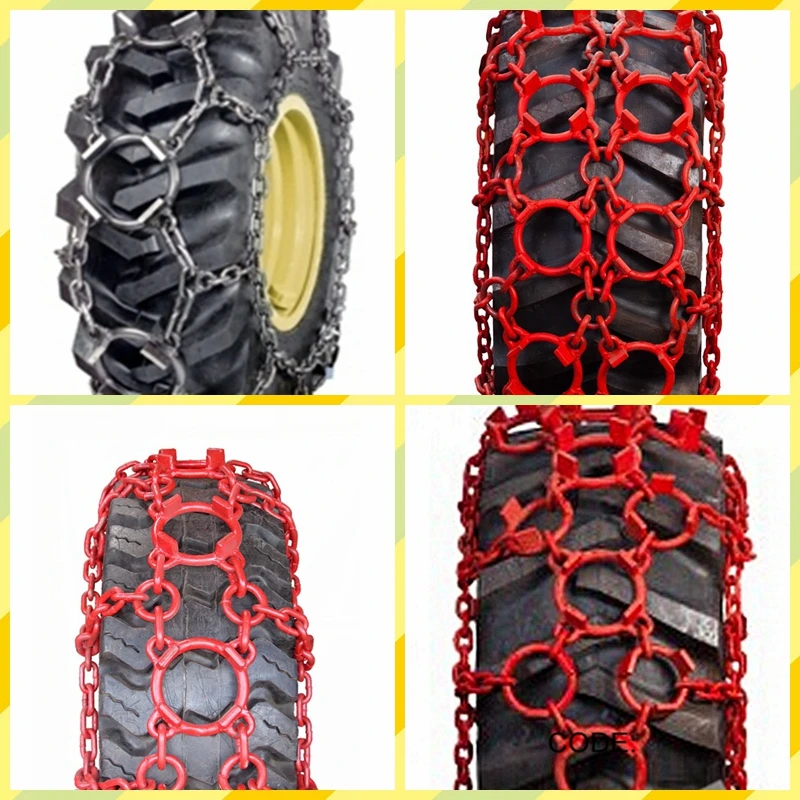 Zip ties or looped through the hook/boomer is good. This means that nothing will flail around and tear out a rub rail, fender air line, brake line or do other damage.
I use good cam chains, which fit my tires, so I don’t need spiders or bungees. If you do need them, use them. The goal is to take as much slack out of the chain as possible. Make sure the rubbers are in good shape or they become useless scrap on the roadways.
 This is bad either way.
So assuming you’ve made it up or down the slippery hill.
Use a chain off area, parking lot or other safe spot, with 4 ways on.
Jump out and remove any bungeess/spoders that you used for tension.
Undo the cam. Sometimes you don’t need them all to unchain. Just undo the hook or boomer on the outside, and hook on the inside. Pull the loose ends of the chain to the side away from the tire and path of travel on both sides.
Move the truck forward or back to come off the chains.
** Examine the chains NOW before putting them away.
Knock whatever you can off the chains, snow , slush etc.
There are different grades. Cheap, regular steel, plated and alloy. Regular steel is preferred although they will rust. This is fine as long as it does not wear through the chains.
Alloy lasts longer, but they are expensive.
 Not recommended.
 When I have all the tire chains installed that I require and well secured, I’ll drive perhaps an 1/8th of a mile.
I then stop the truck, get out and double check everything to make sure the chains are secure and properly in place.
By driving slowly for a short distance, it’s a good way to test the security of the chaining job you just did.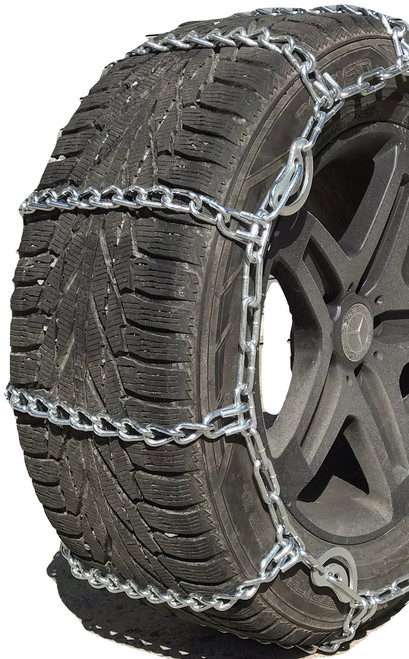
The last thing any truck driver wants is for the chains to come off while driving. They can cause serious damage to the truck if they come loose.
Related > How to Slide the Fifth Wheel on a Big Rig
For truckers who get regular runs in the mountains, here’s something to consider.
I would not recommend half fenders on the truck. Quarter fenders are easier to deal with when chaining up.
It’s much easier to drape the chains over the wheels with 1/4 fenders rather than squeezing the chains up under the half fenders.
Tire chains are designed to run on snow. Once you hit wet or dry pavement, it’s time to stop and remove them.
A truck with chains installed isn’t meant to travel fast.
They are meant to get the truck through slippery and dangerous spots.
At excessive speeds, over 30-40 m.p.h., they can break away, fly loose and do serious damage to the equipment.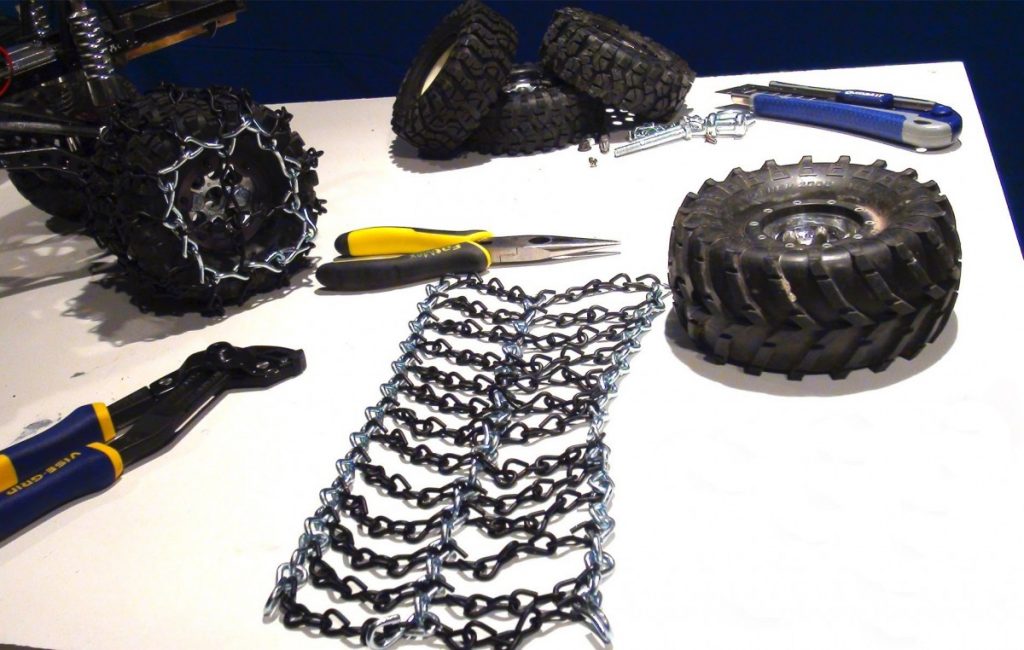
They can also break loose and do damage to other vehicles around the truck.
Each state and province has their own specific requirements for their chain laws. Be sure to check where you are traveling ahead of time, in order that you are prepared, in case the chain laws are in effect.
Be aware of what the requirements are, or else you’ll be forced to wait out the road closures.
Related > The Best Trucking Companies to Work For – U.S.
The maximum number of tire chains to carry is 6.
However, six tire chains for a tractor trailer can add up to a lot of weight.
When you put them away in your truck storage box, be aware that you’ve potentially gained almost 1000 pounds in weight as a result.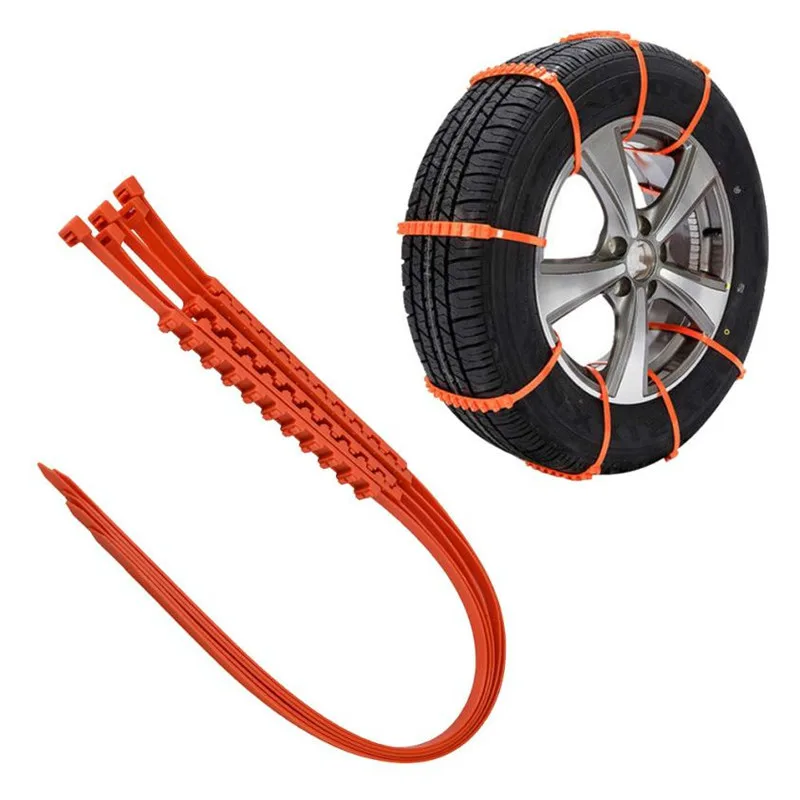
Remember this adds to your gross vehicle weight, so be aware of that before you pick up your next load.
These bad boys (in the demo) are very heavy.
They are also awkward to install, store and handle.
The welded cleats on the cross-links gives them great traction, but also adds to the weight.
When you’re carrying a full set of triple chains, you’re carrying a lot of weight. It makes the truck difficult to maneuver, and they’re especially tough to install.
Unless you do lots of mountain driving, you’re often better to just to wait it out.
If you’re in California for example, I-80, you’re better to sit in Boomtown and wait it out.
CalTrans does a good job of cleaning off I-80. By the time you invest the time and effort into chaining up your rig, you’d be better to just go in and have dinner and spend the night.
Attempting to go over the hill at night with a full set of chains, can be quite an adventure!
California sometimes requires chaining when the road is only wet. Remember, that’s hard on your chains. In this situation, I’d recommend sitting and waiting for the road to reopen to regular traffic.
Running the Coquilhalla and other more northern routes, as well as some FST’s and occasionally residential type streets. When I tighten down my chains, I know that I’m good for 40-50 kmh on bare pavement, usually the start of the bottom of the Coq based on my chain material and the fact that I have them TIGHT.
I can go up to 70 kmh in the snow if it’s either companct or fluffy.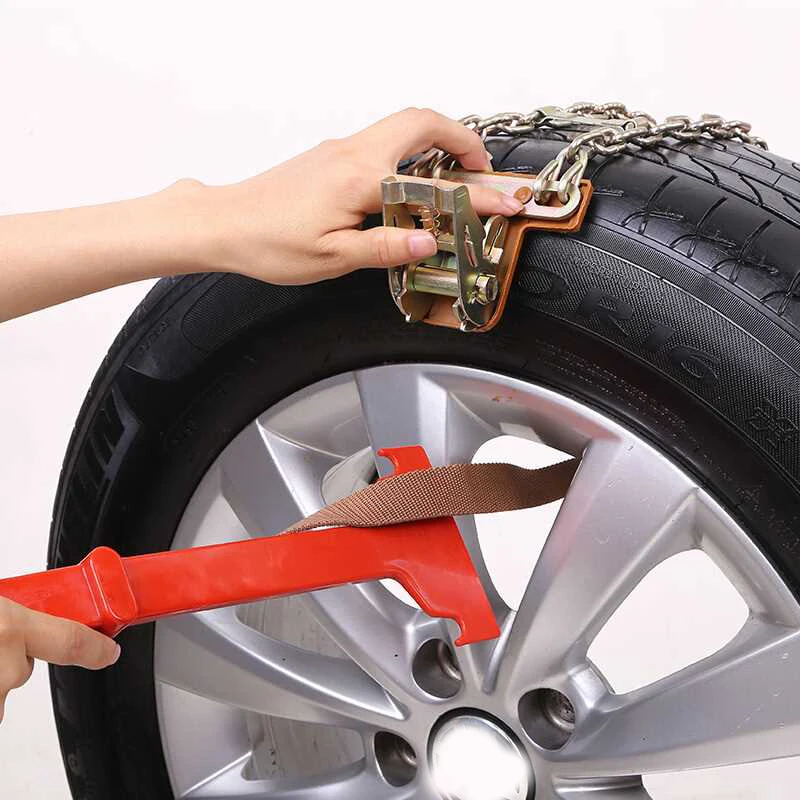 I don’t recommend these speeds for anyone that doesn’t know that they are doing or doesn’t have experience in bad weather or with their truck , chains etc.
Everything needs to work right. I run with the radio off, window cracked open when I do this because you can ‘hear’ a problem.
Chaining up a big rig, is by no means one of the fun things about being a truck driver.
However, it can be a handy and necessary skill to know. Kind of a necessary evil.
Chaining up a truck looks difficult and complicated. Is it hard?
The secret to any task as a professional truck driver is to educate yourself on the proper procedure no matter what the task. It can save you time and keep you (and others) safe.
Is now a good time to become a truck driver?
There are many advantages to becoming a truck driver.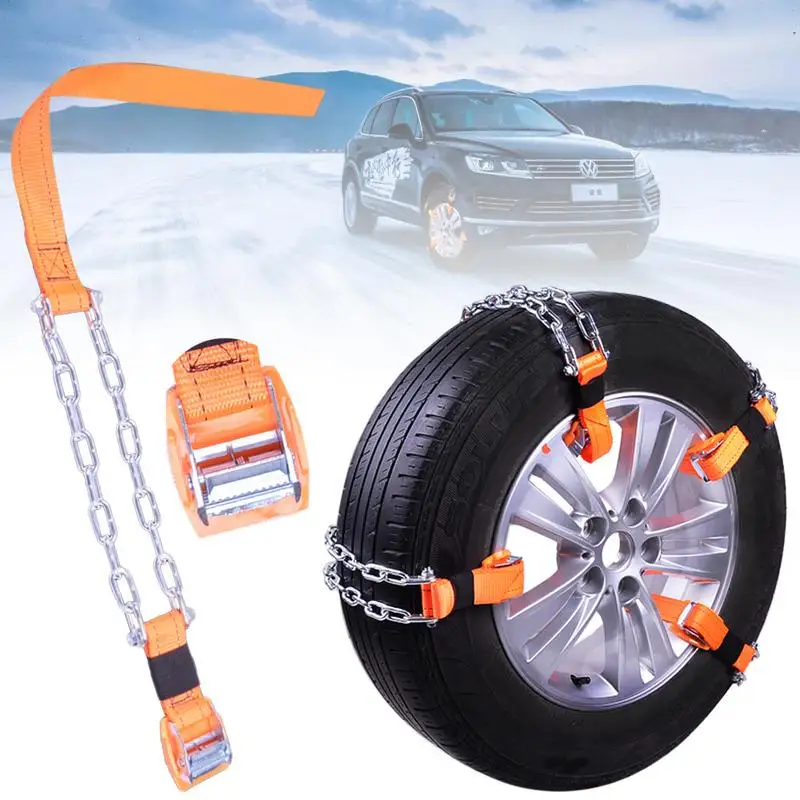 There are also downsides to a trucking career. Much depends on an individual’s expectations of the job. The face of the trucking industry is changing now and changing for the benefit of the truck driver, as the shortage of qualified professional drivers grows exponentially.
How much is the fine for not carrying chains when it’s mandatory?
The fine varies depending on which state or province.
Are all trucks in truck driver training schools automatic?
The move in the trucking industry is toward automatic semi trucks, but there are still some training schools and trucking companies which have manual transmission trucks.
Is ‘over the road’ trucking the best truck driving job?
Over the road or OTR trucking is not for just any truck driver. It can be difficult, grueling work, depending on what trucking company the driver is employed by.
How long does it take to throw on a set of singles?
In moderately adverse conditions, it should take about 10 minutes to hang a set of chains, once you’ve had some practice.
FREE
SHIPPING
ON ALL ORDERS
Sold in pairs (two pieces)
$1,904.02
 com
com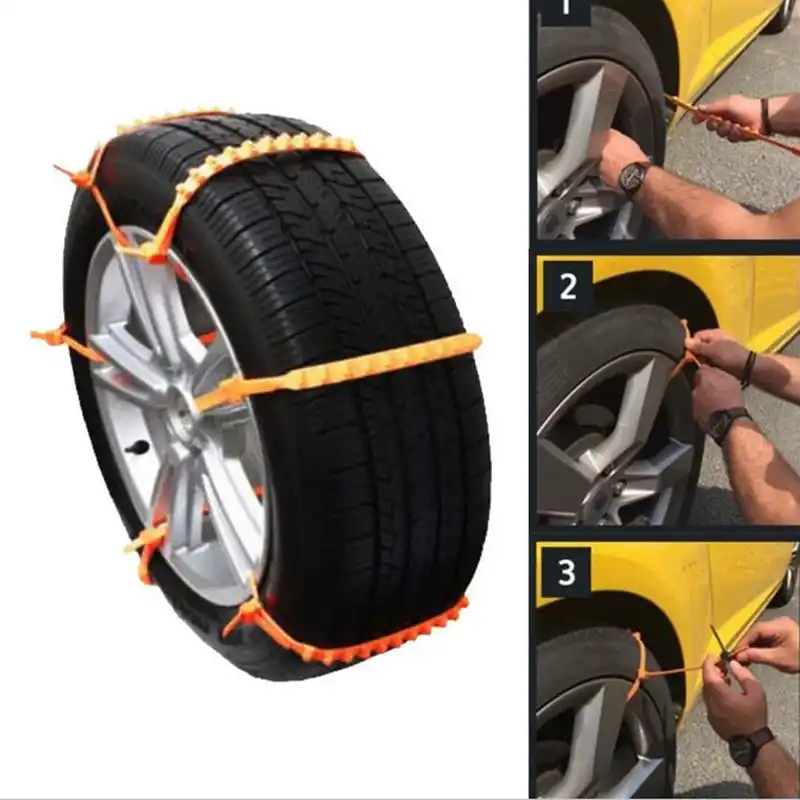 Optional Tensioners are recommended.
Similar to the Duo-Grip style but with addition of a Ladder cross chain between each Duo Grip cross chain. This style provides more consistent traction by filling the gap between the Duo Grip cross chains. The Duo-Ladder is the ultimate traction chain for deep lug treads. V-bar are great on hills, ice and hard packed conditions.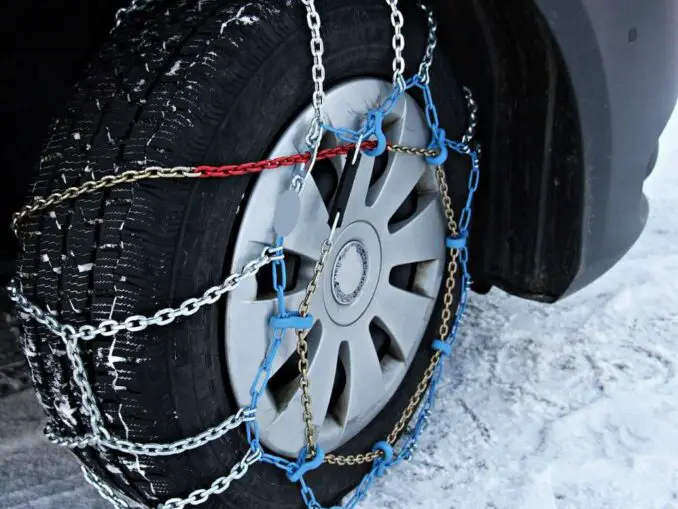 The v-bars are also known as a wear bars, since they significantly extend the life of the chains. They are not recommended on pavement since they can damage the surface if the tires begin to spin. “Recommended for Off-Road Use Only"
Big T Lumber installs new tire chains from Tirechain.com on the Zetor 6245 tractor to improve traction for plowing and logging with help from Nate the new Director of River of Life Bible Camp in Maxfield. Then the chains are given a test run to see if they can help open up the logging road after a big snow storm. New Maine Rough Lumber Sawmill.
Total Price:
Add All to CartPlease choose options for all selected products
This Item: 480/80R38, 480 80 38 Duo Ladder V-Bar Grip Tractor Tire Chains, Priced Per Pair.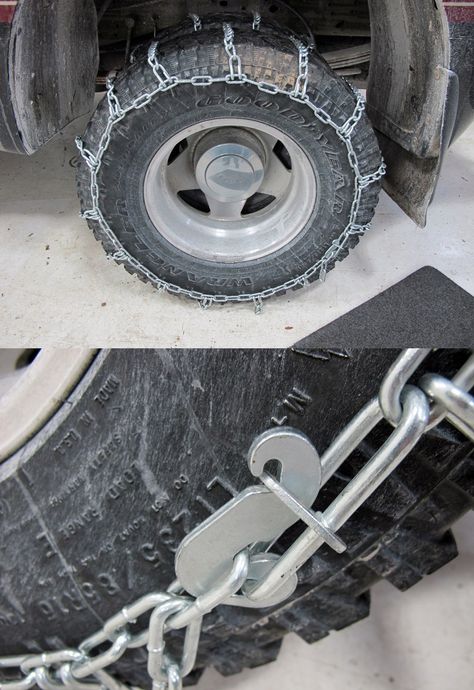
Now: $1,904.02
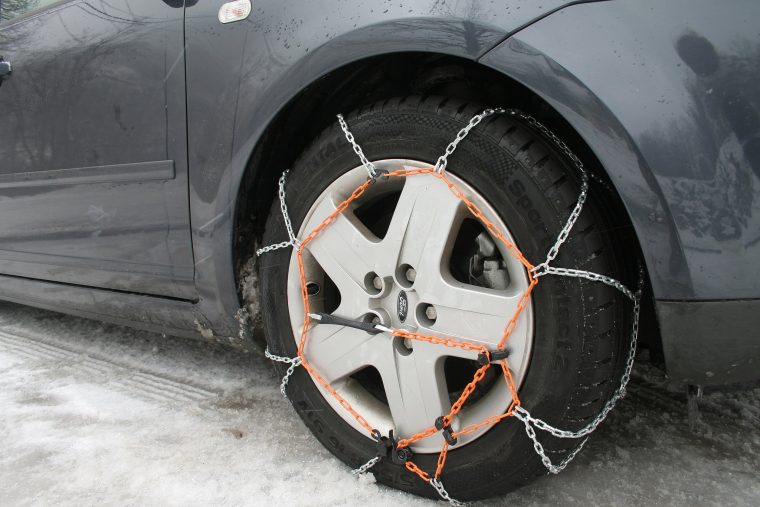
Sometimes there are cases when for a certain overcoming of a section of the path, the capabilities of the vehicle are not enough. Such areas can be icy slopes, heavily polluted areas, or a simple section of the path that is covered with snow. In such situations, plastic bracelets and snow chains come to the rescue. Thus, even an elementary tire, which is intended for simple driving on asphalt roads, acquires high impressive technical characteristics through these devices.
When putting on this kind of bracelets on the wheels of your car, the driver will get a high level of cross-country ability in deep snow, improved grip properties by an order of magnitude, as a result of which the controllability of vehicles on ice will be much improved. In addition, muddy road sections will no longer pose a particular threat. Many fans of off-road travel post videos and photos on various forums where you can be completely convinced of how a car that is put on snow chains will be transformed.
Of course, such devices have a certain number of disadvantages, through which their use is limited. The first thing to consider is that the steering and suspension of the car will be subject to increased loads, which will lead to wear. The steering rack will suffer more if the devices are mounted on the front wheels. The second important factor is that causes rather strong wear of the tire and its reduction in service life. In addition, to a lesser extent, of course, the variable gearbox will also suffer. The speed of the vehicle will also be limited. In conclusion, it should be noted that the circuits will emit a rather unpleasant loud noise.
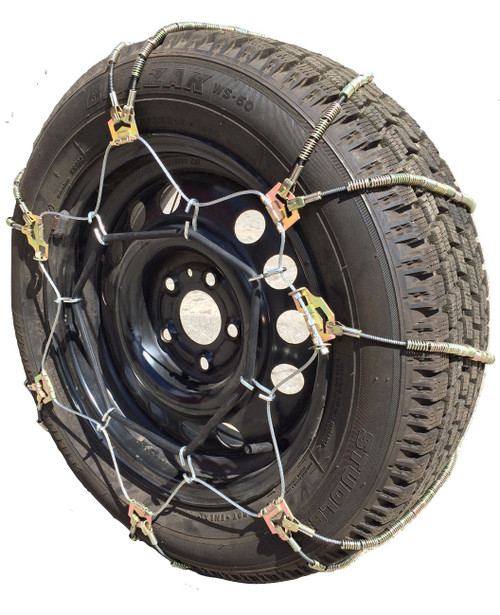
Of course, manufacturers have come up with an analogue, which will be plastic and rubber snow chains. Of course, their off-road qualities will look a little worse, however, all the above shortcomings will be minimized.
Wheel snow chains are conditionally divided into soft and hard. Both the first and second are two longitudinal chains or cables that are stretched around the entire circumference of the wheel. Peppered and rubber (plastic) lugs are stretched between them.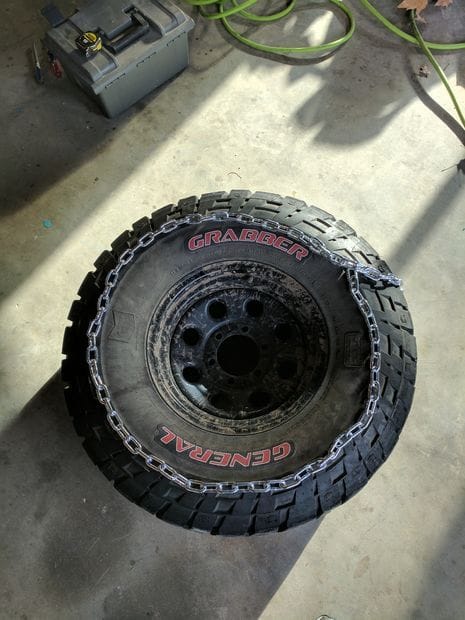
Crossbars can be located both in the form of rhombuses or honeycombs, and a short flight of stairs. Each of the proposed options has in its arsenal certain positive advantages and disadvantages. Ladder has improved rowing ability. That is why this device is best used to overcome various kinds of areas with high pollution. However, a wheel that is fitted with this kind of snow chain also has certain disadvantages, as it is prone to burrowing.
Therefore, driving on such shod wheels is only possible with "pull-in". There are other dangers that can negatively affect a motorist's vehicle in a certain way. First, there are conditions for increased tire wear. In addition, when driving on such wheels, the lateral stability of the vehicle will be very low. And in conclusion, in the most negative way, these devices affect the steering and gearbox. This is due to the fact that the use of snow chains involves huge loads on these systems.
Snow chains with a honeycomb pattern are more versatile and have an order of magnitude less negative impact. In addition, the components of the car will not succumb to such high loads, and the tires will last much longer. Unlike ladders of this kind, bracelets are able to provide excellent lateral stability of the vehicle, since there is constant contact with the surface during movement.
No matter how many trials and tests have passed, it is impossible to unequivocally say which snow chains are better. Each of the above types has its own advantages and is suitable for certain road conditions, therefore, choosing one universal option is impossible. The device of rigid chains for the most part is preferably used for total off-road. It is precisely because of the pronounced rowing abilities that these devices can make it possible to overcome all the difficult sections that have arisen with the least difficulty.
Soft devices such as plastic or rubber bracelets will be suitable for those motorists who do not storm off-road, but who sometimes have to overcome such difficult places.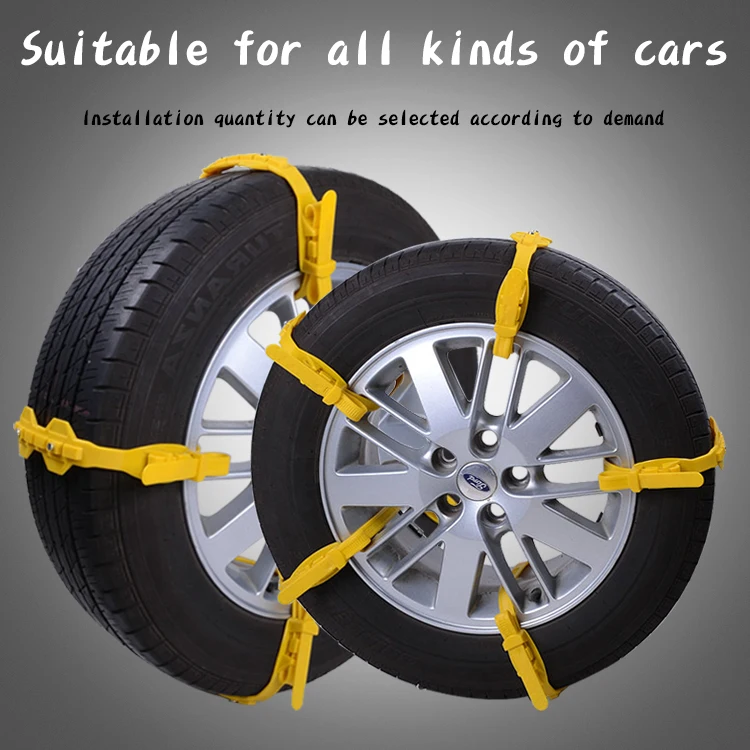 The main advantage of this variant is that there is no urgent need to replace the plastic bracelets after the vehicle has passed a certain difficult road. Thus, it will be possible to continue moving the car at normal speed, and the risk of damage to the tires, steering and gearbox is reduced by an order of magnitude.
If the motorist, when choosing this kind of chains, prefers rigid chains, then you should pay attention to what section and size of the links of this device. The larger such elements, the better the rowing ability of this device will be, as a result of which there will be increased wear on tires, gearboxes and steering. In a square section, all links will also provide the best rowing ability of the car.
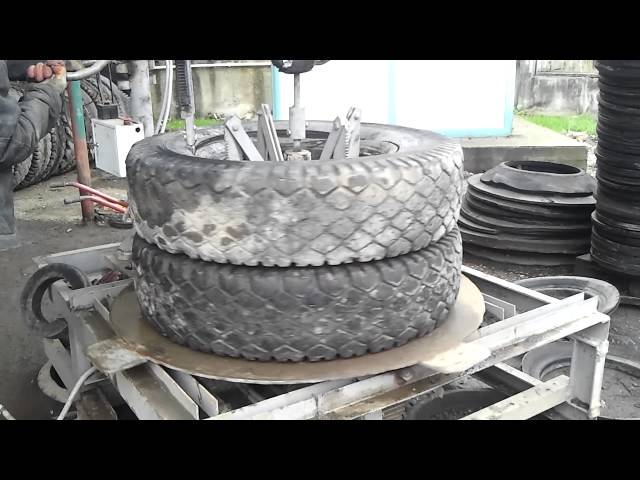
It is important to note that the cost of a fairly good set of this kind is quite high. Therefore, many motorists who want to save money and get special benefits prefer to make snow chains with their own hands.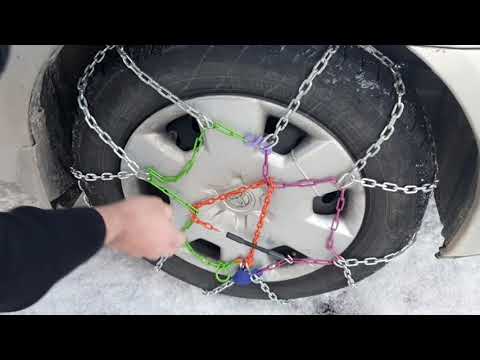 This process is not particularly complicated, and all the necessary components for this can be found in the nearest hardware store. It is important to note that this kind of home-made chains will have several times lower cost, while their quality will not differ in any way from branded store products. The Internet is the omniscient Korop. It is here that there are many different kinds of manuals, where there are both videos and photos of how to build such a device yourself.
The easiest way to build a ladder is with your own hands. This requires almost nothing. First, you should measure two identical segments of the chain. This should be done in such a way that their length is slightly less than the circumference of the wheel. Between them, at equal intervals, by means of rings or S-shaped hooks, all transverse segments must be attached, which will have the same length. Their length should slightly exceed the width of the tire.
The longitudinal sections will have ends, which as a result will need to be connected to each other by means of carabiners.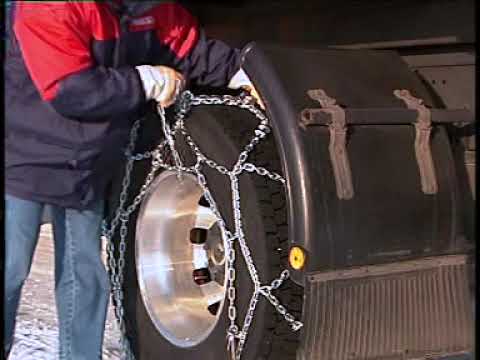 In the middle of each individual longitudinal chain, it is necessary to install a tensioner device, which will be attached to the carabiner itself by means of a hook at the other end. Using this kind of device, you can quite simply and securely mount home-made snow chains on the wheels.
Of course, DIY chains that will have a diamond pattern will be somewhat more difficult. However, this task is also subject to the motorist. Nevertheless, in this case, there are two options for the development of events: either invite a person who understands this; or do everything in accordance with the video and photo instructions of experienced motorists.
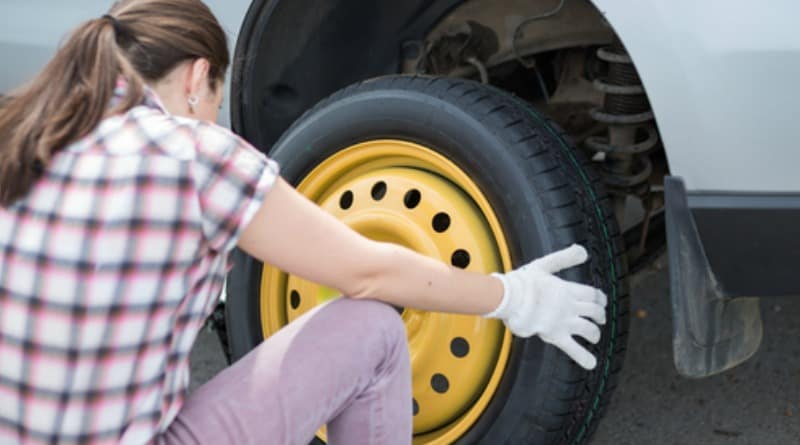
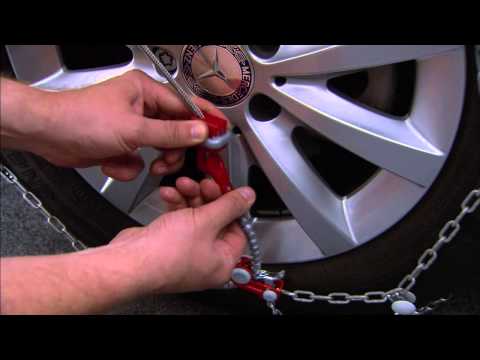
In this procedure, everything is exactly the opposite, as in most similar processes. The installation method will not depend on which snow chains will be put on the car - factory or home-made. There are two methods to put plastic bracelets or snow chains on the wheels of a vehicle.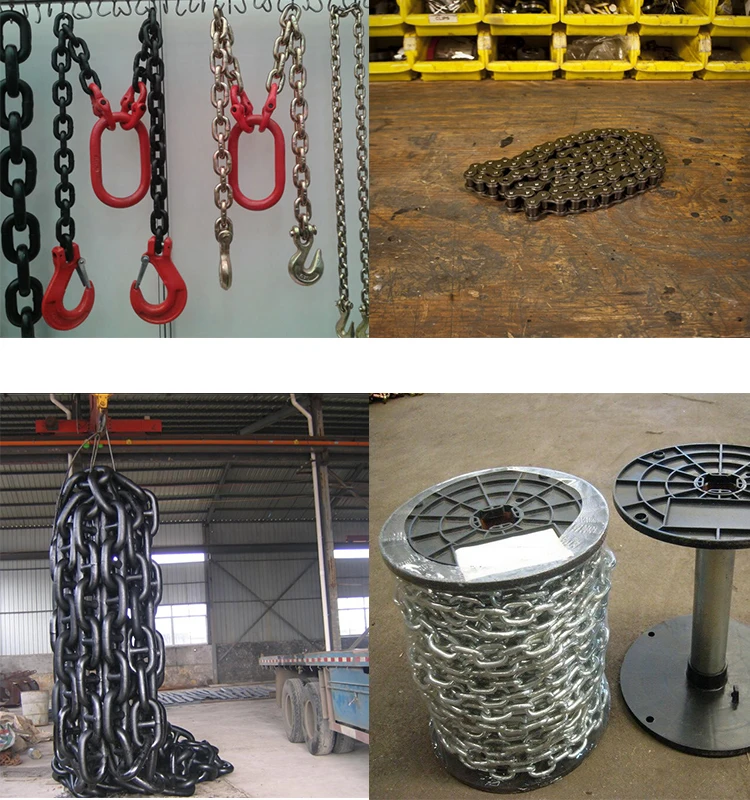 The first option will be used by beginners, as it is quite simple, although it takes a slightly longer period of time. In this case, the car will be jacked up, and a bracelet will be put on the already hung wheel.
The second method will be faster, but it will be more suitable for experienced motorists, as it will require certain skills. First you should lay out all the bracelets or chains on the ground, straightening them very carefully. After that, the most difficult thing is to run over them in such a way that about thirty centimeters remain until the end. After that, the remaining long part of the chain must simply be put on the wheel. From the inside, this chain must be crocheted, all links must be straightened, as a result of which the outer part must also be fixed. The chain itself will be tightened by means of an adjusting cable.
There is absolutely nothing left - to make a test drive. Before starting off-road driving, you need to drive up to 100 m on the road, so you have to tighten the chains again. This is what will increase the life of the tire. It is important to note that wearing plastic bracelets and snow chains on all wheels is not required if the car is not all-wheel drive. For a conventional type of vehicle, this kind of chain should be put on only those wheels that are driving.
For cars
For SUVs
For trucks
FOR LOADERS, TRACTORS, SPECIAL EQUIPMENT
Functionally, snow chains are, in fact, a removable tread that allows you to turn an ordinary road tire into an off-road wheel.
The purpose of the anti-skid chain is to significantly increase the grip properties of the wheels (and, accordingly, the vehicle's cross-country ability) on ice, loose snow, deep mud, etc. In practice, it may look like this. You go fishing - you drive 100 km along the asphalt surface on ordinary tires, and then turn into a country road, where the very “hard off-road” begins. Then snow chains are put on - and you can go further, having much less chance of skidding or getting stuck in the mud.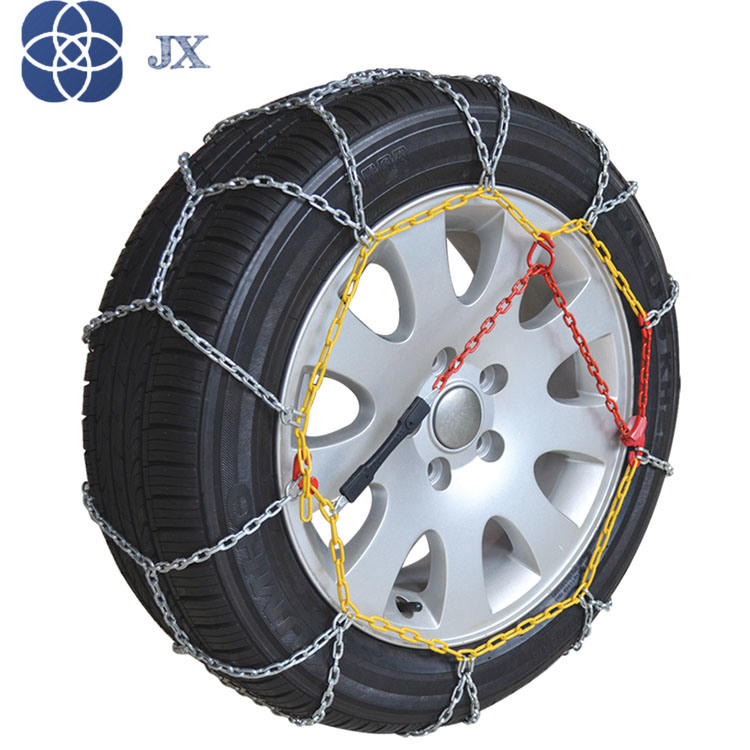 And places such as, for example, icy steep climbs, without snow chains, it is very problematic to overcome even on studded tires.
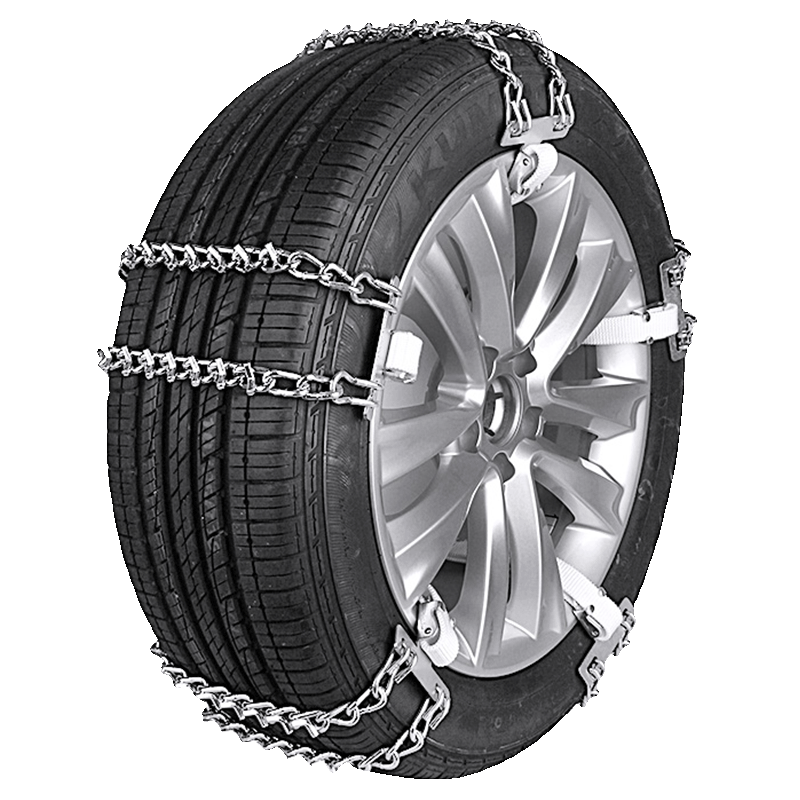
First of all, snow chains are divided into two classes: "hard" and "soft" . The former use the actual chains as cross members, while the latter use reinforced rubber “lugs”.
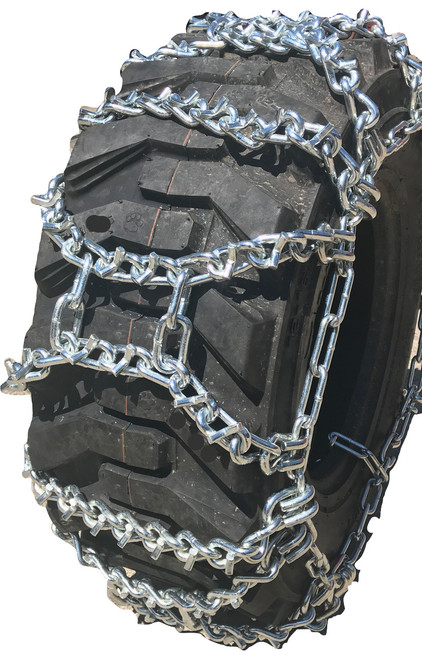
There are two basic patterns (see picture): Ladder and Diamond/Honeycomb.
In the first, the longitudinal chains / cables are connected with straight transverse pieces, in the manner of a rope ladder.
In a "rhombus" they are connected obliquely, getting a "spider" pattern. Chains also differ in size and shape of the link (or lugs).
Different materials are used for chains - steel, titanium (expensive), aluminum and reinforced plastic. Sometimes chains are additionally reinforced with metal spikes.
It is impossible to say unequivocally which snow chains are better. Everything is individual and depends, first of all, on driving conditions.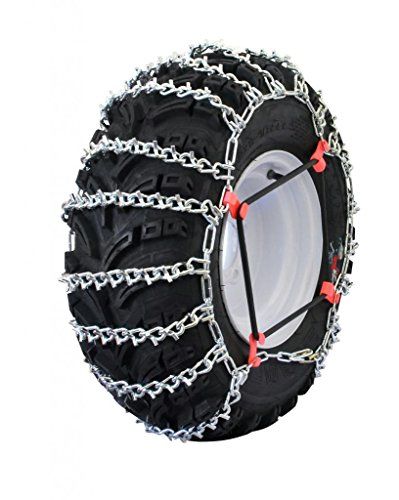
So, “hard” chains are better suited for off-road than “soft” chains, but they do not allow you to move at speeds over 40 km / h. “Soft” ones make it possible to drive at speeds up to 80 km / h and wear out rubber much less than “hard” ones. Therefore, for those who left the highway and went to knead deep off-road, the “hard” option is better. For those who drive in a way where sections of flat roads and muddy country roads constantly alternate (for example, in the region), “soft” ones are more suitable.
The same can be said about the dimensions of the chain links. The larger the link, the more “off-road” qualities, but the more weight, the worse the ride on a flat road and the higher the wear of the rubber.
When it comes to cars, snow chains can be used on just about any car. Except, perhaps, some sports cars (and hardly anyone would think of going hunting in a sports car). When it comes to tires, it’s safe to say that “hard” chains are not suitable for ultra-low profile wheels that are 50 inches or smaller. But a “soft” model can be found even in this case.
Chains are graded for cars, SUVs and trucks. But here the wheel size plays a role, first of all: the chain covers from two to four standard sizes along the radius. In addition, for SUVs and trucks, chains are made with large links, often with additional spikes.
It is not necessary to install snow chains on all wheels of the car - only on the drive axle. This is useful when driving on not very “steep” off-road, when used from time to time “according to the weather”, as well as for overcoming problematic sections of a country road.
In order to put snow chains on the wheels of a car, the chains are laid out in front of the wheels of one axle exactly along the axis of motion, so that the locks on the outer side chain are on the outside (along the side) and “look” forward. The hook of the rear side chain must be on the inside (towards the bottom). Next, you need to drive the wheels on the chain so as to stop 20-30 cm from their end.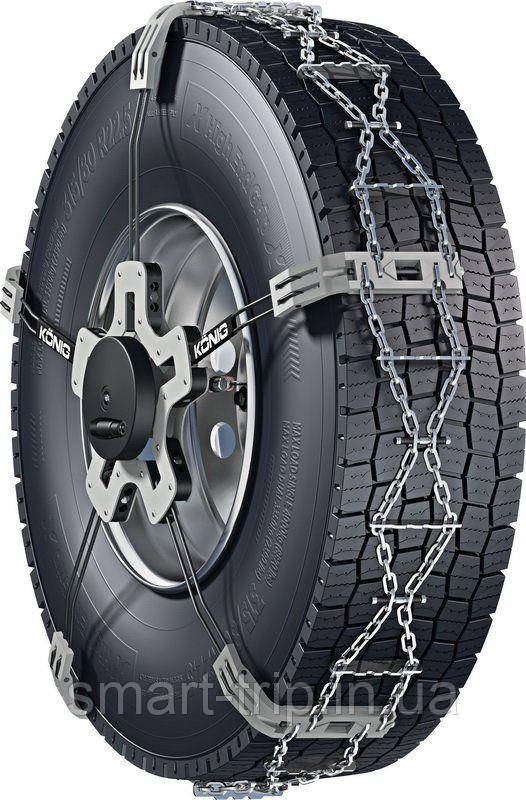 After that, put most of the chain on the wheel and hook the hook from the inside. Then you need to straighten all the links on the wheel (for “soft” ones, put on the adjusting cable / chain), and then hook the lock of the outer side chain. Then you need to do a “rolling”, after driving 10-50 m, so that the chain settles down, and then tighten the locks again. Experienced SUV owners put on chains with a bang, and for them it is no more difficult than tying their shoelaces. But for many motorists, especially at first, putting on snow chains turns out to be the main “stumbling block”, and there are many who refuse to use them precisely because of this procedure. In any case, before using the chains, you should first practice putting them on somewhere on the site - it will be easier on the road.
As for tires, we can say right away: all chains wear out rubber. “Hard” more, “soft” less. Wear also depends on the frequency of use of snow chains. The rubber actively begins to “eat up” during prolonged driving “in chains” on a hard road, sudden braking and acceleration, with too little contact with the wheel.