Posted by Matthew C. Keegan Know How
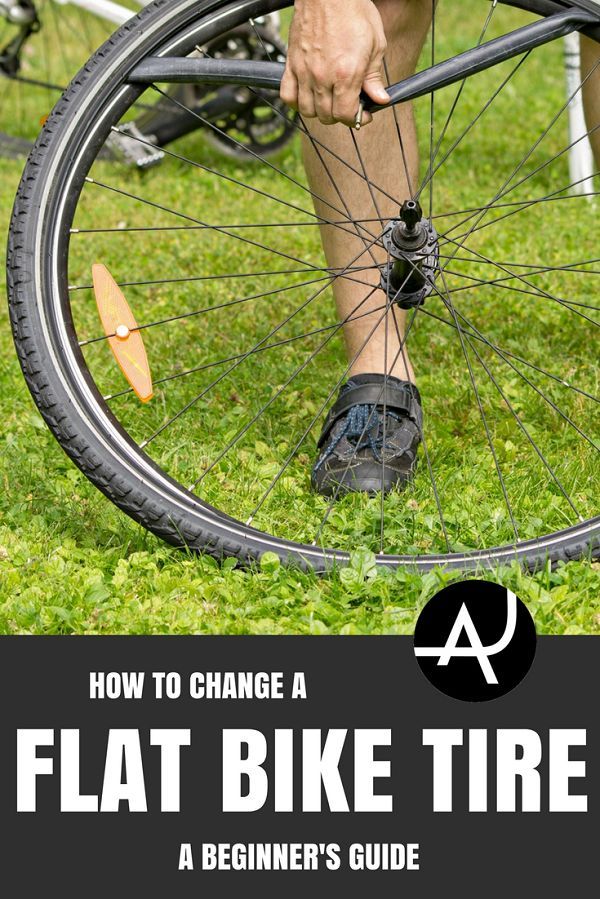
Continually losing air in the same tire is a certain sign that a leak is present. If you find a hole, then it’s a simple matter of plugging it, adding air and going on your way. Unfortunately, not every tire leak is easily found, making it all the more difficult to resolve a persistent problem. Here are some steps you can take to identify and fix a leak.
1. Add Air to the Affected TirePut sufficient air in your tire according to the pounds-per-square-inch (PSI) recommendation listed in the owner’s manual, on the placard found on the driver’s door jamb or on the inside of the glove box. The tire should be cold when inflating to ensure an accurate reading. Inflate each tire on your car and the spare accordingly.
2. Observe CarefullyIf the affected tire continues to lose air faster than the other tires, then you have a leak. You’ll find most leaks by visual inspection — a protruding nail, a hole or a cut are obvious signs — and by listening to or feeling around the tire for air release. Remove nails and fill holes, but any puncture in the tire shoulder or sidewall areas means you’ll have to replace the tire.
Some leaks are imperceptible under normal observation, but there are two ways to find a leak. First, cover the affected tire with a solution of soap and water. If a leak is present, the impacted area will bubble up, revealing the leak. Second, you can always remove the tire from the car, then submerge it in water. Bubbles will soon form, making it easy for you to identify the source of the leak.
5. Identify the Affected ComponentNot all leaks can be directly attributed to the tire. The tire itself may be in top condition, but there are two other ways a tire may leak.
First, a bad valve stem can cause a tire to lose air through the valve base or body.
Second, the wheel-mounting surface may be defective. It can be damaged by hitting a pothole or through corrosion.
These two hidden problems become visible through the soap-and-water test or by submerging the tire.
6. Replace or SealYou can resolve a tire leak in two ways.
First, if the leak is due to the tire itself, then a tube sealant kit can handle most small leaks.
Second, for leaks not involving the tire directly, replacing a worn valve stem or a damaged wheel should provide a comprehensive fix.
Check out all the driveline & wheel parts
Photo courtesy of Flickr.
Categories
Know How
Tags
car care, flat tire, flat tire causes, tire care, tires, wheels
Matt Keegan has maintained his love for cars ever since his father taught him kicking tires can be one way to uncover a problem with a vehicle’s suspension system. He since moved on to learn a few things about coefficient of drag, G-forces, toe-heel shifting, and how to work the crazy infotainment system in some random weekly driver. Matt is a member of the Washington Automotive Press Association and is a contributor to various print and online media sources.
By Conor Fynes
Updated on Apr 27, 2022
Reviewed by Carrie Adkins, VP of Content.
While making the usual provisions and getting protected with
car insurance
are important, knowing how to find the exact source of the leak is a vital skill.
Tires are inherently designed to take a lot of abuse. After all, even the best-maintained highway will have potentially sharp debris around. As a driver, it's likely that you'll have to deal with a
punctured tire
at one point or another.
So, here's how to find a slow leak, with a little help from
car insurance
comparison and broker app
Jerry
.
RECOMMENDED
No spam or unwanted phone calls · No long forms · No fees, ever
ZIP Code
ZIP Code
Find insurance savings (100% Free)
Make a regular habit of maintaining and inspecting your tires
Check your
tire pressure
regularly, at least once per month. A
gauge pen
is remarkably quick and easy to use, and checking all four tires should never take more than five minutes at a time.
Giving your tires a regular
visual inspection
is worthwhile as well. You never know if there are any shards embedded in a tire, and it's far safer to deal with when the car is parked as opposed to risking the tire blowing while out on the road.
Do this on a monthly basis; it barely takes any time and could nip a problem at the root before it's allowed to grow.
It should be noted that tires will naturally lose their pressure over time, punctures or not. This is especially true during the colder months when air contracts. If you are regularly gauging the pressure, you should pump up the tires whenever they drop below the recommended threshold.
It's important to keep
tire sealant
,
a gauge pen
, and
an air pump
in the vehicle with you. They may be easy to overlook before problems occur, but you'll miss them dearly if they're ever needed.
Train yourself to spot the signs of a leaking tire
First off, you should check to see that the pressure valves have been shut tightly enough. Air may be escaping because the valve wasn't put back on tightly enough after the last time the pressure was checked. If you are still sure there's a leak, you should pump up the tire again.
Having a full set of air to work with will make it considerably easier to spot the leak.
Tire leaks fortunately give off several signs that reveal their whereabouts. The distinctive hissing whistle of leaking air is arguably the biggest tell, and you may be able to pinpoint it by ears alone.
Giving the affected tire a visual glance over with a flashlight can help reveal visible damage or objects embedded in the tire. Lastly, by running your hand closely over the tire, you may be able to feel the gentle gust of air on your hand.
If the natural clues aren't helping, give the tire the "Bubble Test"
The "Bubble Test" is a neat trick if the regular cues aren't helping much. Create a solution of water and soap, with enough soap to give the mix a bubbly froth. Apply the soapy mix all over the leaking tire, so that it's covered in soap bubbles. If there is a leak, it should be disturbing the bubbles around it, making the leak far more apparent than it would have been before.
In terms of soaps, using a 20% detergent ratio is recommended for the fact that it is very bubbly. Needless to say, the Bubble Test is suited for a home environment, and may be difficult to pull off in a highway situation.
Patch a minor leak, leave anything more severe to the professionals
Once you have properly identified where the source of the tire leakage is, you should make a quick appraisal whether or not it is severe enough to forego self-repair. As a general rule of thumb, a puncture that is any greater than 1/4" across in diameter is probably going to be too much for you to fix yourself on the road.
In the event you have found the leak before it got too big, you can use a tire sealant spray to effectively fill in the puncture. Applying a spray is a temporary solution at best, but you can at least extend the tire's life long enough to attend the matter on your own time within reason. This quick fix is a far cry from needing to change tires or enlist the help of roadside assistance.
In the case that the leak is bigger,
roadside assistance
can come to repair or replace the tire for you. Although this can be quite costly out of pocket, many insurance policies will include this service. To find the one that will cover roadside assistance the best, try using the
Jerry
app. A licensed broker, Jerry does all the hard work of finding cheap quotes from the top name-brand insurance companies and buying new car insurance. Jerry will even help you cancel your old policy.
And to ensure you always have the lowest rate, Jerry will send you new quotes every time your policy comes up for renewal, so you’re always getting the coverage you want at the best price.
RECOMMENDED
Judith switched to Progressive
Saved $
725
annually
Alexander switched to Travelers
Saved $
834
annually
Annie switched to Nationwide
Saved $
668
annually
Slow leaks occur when a tire punctures after driving over a sharp object that is stuck in your car's tire. Common culprits include nails and screws. Air slowly leaks out at the puncture site, reducing pressure and causing your tire to lose performance.
Contents
Determine which tire has a slow leak. The tire may be noticeably smaller or softer to the touch due to the reduced amount of air inside. Use a pressure gauge to determine if the tire pressure is lower than the other tires, if necessary.
Break a vehicle tire that is diagonally across from a slowly leaking tire by placing a wood block or wedge behind it. Blocking or stabilization prevents the vehicle from moving. If you have a manual transmission vehicle, apply the emergency brake for added protection.
Try to find the object causing the slow leak. If you can see it and can reach it safely, you don't need to lift the car. If you cannot see the object, read your owner's manual and raise the vehicle.
Inspect the wheel for foreign objects or puncture marks. If you can't see anything, spray the tire with the soapy water you made by adding liquid soap or cleaning spray to the water. You should see visible bubbling at the site of the slow leak.
Remove the source of the leak, such as a nail or screw, with pliers or a screwdriver. If you find the puncture site but the sharp object is not removed, the object may have fallen out while driving. Continue your renovation.
Insert a plug into the end of the insertion tool included in the repair kit. The cork is a thin rubber cylinder, and the insertion tool is similar to a screwdriver with a "T"-shaped handle.
Grasp the T-handle and align the plug with the puncture site. Insert the plug into the puncture site by pressing down on the T-handle, leaving about half an inch of the plug protruding from the tread.
Carefully pull the T-shaped insertion tool out of the tire. Now the fork is in place.
Add air to your tire using an air pump such as the pump at a gas station and fill to the recommended pressure. Find the recommended pressure inside your car's door jamb, if you're not sure - look for a number followed by "psi" which means pounds per square inch. Pay special attention when adding air in extreme weather conditions, but never over- or under-inflate tires depending on temperature.
Lower the vehicle carefully if you raised it and remove the jack.
Check the tire pressure again using a pressure gauge. If the pressure is held at the desired level, you have successfully fixed the wheel. Cut off any excess cork protruding from the tire using a razor blade.
Your tires are exposed to a lot of road damage to keep your ride smooth, quiet, comfortable and safe. Tire maintenance is essential in order to get as many miles on them as possible before you have to change them.
Tire pressure should be checked regularly (at least once a month) to avoid many problems that can result from uneven or low tire pressure.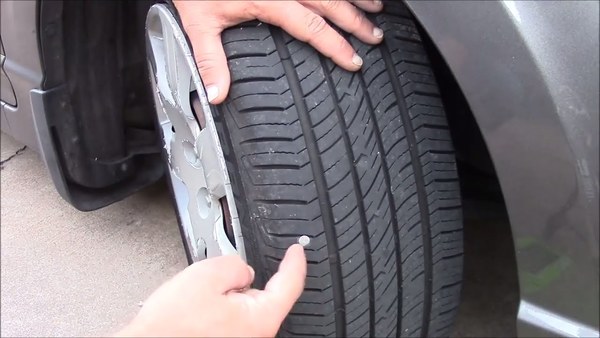 When uneven tire wear occurs, it results in uneven tread wear and can lead to rapid tire wear, forcing you to buy new ones. It also requires more frequent tire rotation and even more frequent wheel alignment.
In addition, low tire pressure can cause irreparable damage to wheels, which are expensive to replace. To make matters worse, low tire pressure is one of the main causes of flat tires, which is inconvenient at best and potentially dangerous as you could lose control of the vehicle.
Although it is normal for tires to leak air (so you should check the pressure every month), you may notice that the pressure fluctuates more than usual. In this case, you may have a puncture or some other problem that is causing them to leak faster than usual. Luckily, there are a few home steps you can take to determine what's wrong with your tires and get them fixed before you hit the side of the road. Follow the instructions below to learn how to check for leaks in your tires.
Materials Needed
Step 1: Check tire pressure . You will first need to check your tire pressure with a pressure gauge to get an initial tire pressure reading. The optimum tire pressure for a particular weather is usually indicated on the tires themselves, printed on a panel on the inside of the driver's side door, or in the manual. Fill tires according to these specifications.
Step 2: Look for leaks . Look and listen for a leak in the suspicious tire. If you hear a high-pitched hiss, then you definitely have a leak.
You can find an object, such as a nail or a piece of wood, stuck in the tread. Look closely and closely as the color of the object may be similar to the color of a tire.
If you hear air coming out, try to feel with your hand where it is coming from.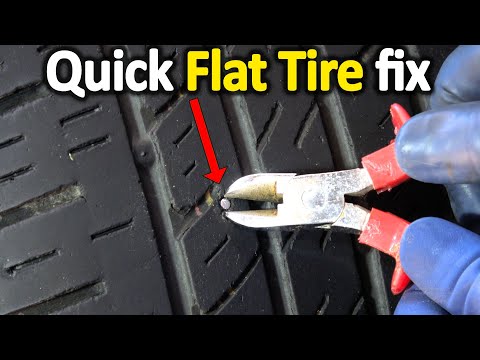
If you find a foreign object stuck in the tire, carefully remove it with pliers and clearly mark the place with a Chinese marker so that it can be easily found again. Go directly to step 5.
Step 3: Remove tire . Alternatively, if you don't hear or feel a leak, but are pretty sure the leak is in a particular tire, use a car jack and pry bar to remove the tire.
Thoroughly check the tire on the inside and outside of the sidewall and along the entire length of the tread, following the steps above. If necessary, do this for all tires with a suspected leak.
Step 4: Pour soapy water onto tire . Use soapy water to find the leak.
Prepare soapy water in a bucket and apply it to the tire with a sponge, or pour it into a spray bottle and spray on suspicious areas.
Coat about one sixth of the tire at a time and carefully inspect the tire area. If you see bubbles constantly forming on the tire, you have found a leak.
Dry the area and circle the leak with a Chinese marker.
Step 5: Seal leaks with tire plug . Once you find all tire leaks and they are small punctures (less than a quarter of an inch in diameter), you can temporarily repair them with a tire plug.
If you have already removed the item lodged in the tire, use a tire reamer to make the hole smooth and even, and insert the plug, making sure it fits snugly.
Use a Chinese marker to create another circle around the hole.
Step 6: Get internal patch .