Biketoworkday is supported by its audience. When you buy through our links, we may earn an affiliate commission. Learn more
Written by Gary Johnson / Fact checked by Henry Speciale
Did you notice that your wheels wobble while biking? If yes, that may be a sign of a flat tire. Let’s say that you got it fixed for the next trip, and the same thing happens. This time, you start to wonder “why does my bike tire keep going flat?”
It could be because of a tiny fixable hole, things trapped in the tire, or you have to change your internal tube.
Check out this article to quickly determine if you have a faulty tire. This way, you can easily avoid it in the future.
Table of Contents
I will go directly to the common reasons why a bike tire keeps going flat. So, take a look at this list:
Now that I’ve introduced the common causes that make a bike tire flat, it’s time to thoroughly discuss some of these and fix them.
If a sharp thing is stuck in the bike tire, the first thing is to remove the object that pierced the bike tube. Do this immediately before installing a new tube, as any sharp item can poke through the new tube if left unchecked.
If you got flat bicycle tires, I highly suggest examining the tire’s exterior and interior while wearing gloves. Remove any bits of glass and other sharp objects that are lodged inside the wheel. You may want to shake the tire to dislodge debris and small rocks as well.
2. A Worn-Out TireOld tires are often prone to shredding and ruptures, and their tubing usually expands beyond its average size. In this case, the fibers that serve as the wheel’s backbone become exposed. These circumstances make flatness more likely.
The best thing to do when the fibers are exposed is tire replacement. One sign to look for is when the bike’s rubber at the peak begins to crown and lose its round structure.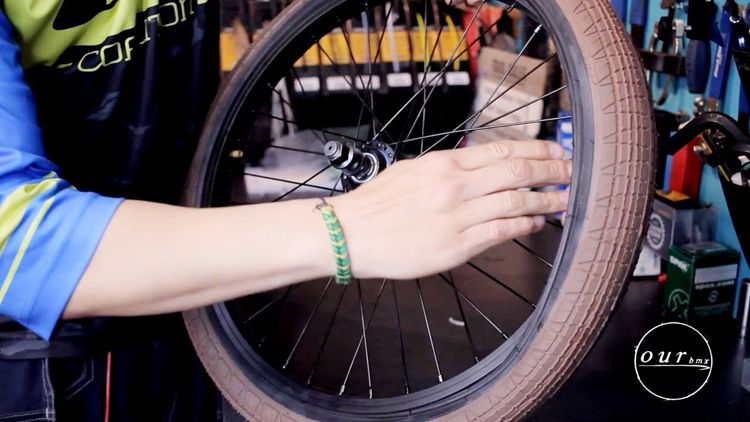
Even if your back and front wheels are not equally worn out, replacing the two simultaneously is the best thing to do.
3. Tubing is Pinched While Being ChangedIf your tire is pierced with a lever or becomes entangled between the wheel and the braking system, it will go flat after inflation.
If this happens, the best option for bikers like us is to pump up the new tubing enough to keep it round before putting it on the tire.
Transfer the valve through the valve hole, then insert the tubing between the brake track walls to place in the tire. While reinstalling the wheel, ensure that no tubing part is outside the brake circuit.
Once the tubing is seated in the bike tire, manually snap the tire to the wheel rather than using a lever. This should prevent damaging the bike tube.
4. Biking With Low Tire Pressure or Bumping against an Object on the HighwayAnother reason for tire deflation is snakebite flats. Snakebite flats happen when bikers ride on rough surfaces with pebbles or potholes and low tire pressure.
To avoid this problem, check the pressure of your tire and inflate this part if necessary. If you tend to under-inflate your tires, you should use broad wheels, as they don’t require much air pressure.
Another solution is to approach road obstacles slowly. When you ride at high speeds, it’s difficult to avoid bumps and other sharp objects.
5. Visible Spoke Holes Due to Insufficient Rim Tape CoverageThe sharp corners of the spoke holes can poke against the bike tubing, eventually causing a puncture if they aren’t fully coated with rim tape. Spoke holes can also damage bike tubes if your rim tape is too old.
I recommend using two rolls of rim tape to cover the spoke holes. Pick tape with strong adhesion and a sturdy, thick construction.
Other Things to Remember If You Have a Flat TireI always take note of these valuable tips, especially if I keep getting flat tires on my bike. It gives me a hint on what to do during flat tire incidents.
If you want to know how to diagnose the cause of your flat tire, here is a great video tutorial.
ConclusionBeing able to answer “why does my bike tire keep going flat?” is important. You can address the cause and quickly get on with your journey. If your tire frequently loses pressure, keep in mind the following:
Gary Johnson
“I ride my bike to work for years, but is that enough? Our carelessness towards our surroundings has taken a toll on the environment. And now, everyone is responsible for changes; even the most minor contribution is counted. With this hope and spirit, I started with my partner to establish Biketoworkday to help more individuals commute to their work sites on their bikes.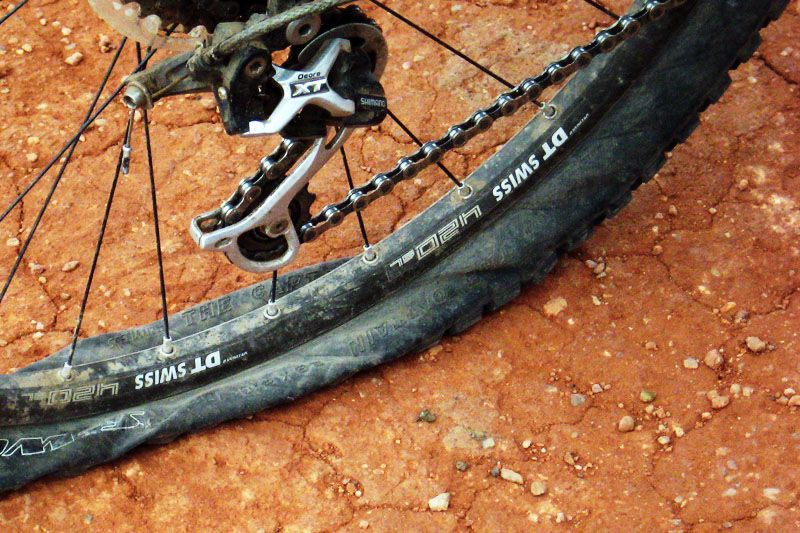 ”
”
For access to all of our training, gear, and race coverage, plus exclusive training plans, FinisherPix photos, event discounts, and GPS apps, sign up for Outside+.
We’ve all been there before: It’s over halfway through your long ride, you’re out of cell service, and you get a flat. It’s raining (it’s always raining when you get a flat, right?), you get your kit and hands filthy, but you use your spare to finally get rolling again. A minute later, it feels like you’re hitting a wall as your speed crawls lower, and you suddenly feel like you’ve got front or rear suspension on your often-too-stiff road bike. It’s another flat, it’s on the same wheel you just finished fixing, and you’re out of spare tubes. Yup, your tire keeps going flat. You could hitchhike and end up in a scary movie plotline, but hopefully the story goes another way.
There’s nothing more frustrating than multiple flats on a ride, and nothing more horrifying (hopefully not literally) than finding yourself stuck without any recourse but to walk or ride our your rim. Fortunately, there are ways you can help prevent that dreaded second (or third or fourth) flat. We can help with advice and a few products you should always have.
RELATED: It’s Time to Learn to Fix a Flat Tire
If you don’t remove the object that poked the hole in your first tube, it will probably poke through the replacement tube as well.
After getting a flat, inspect the outside of the tire for the offending object. Pull out any shards of glass or other sharp things that are stuck in the tire. Next, run your hand along the inside of the tire to check for small items that are poking through. The tire is ready for a new tube once you have removed all the sharp things from it. Check out below for a few products that can help.
If the tire rubber is extremely overused, the threads—fibers that make the backbone of the tire—can be exposed. When that happens, the tire is much more susceptible to tearing and puncture. If the casing does tear, flat protection is reduced and the tube can stretch beyond its usual dimensions. Both of these cases can lead to flats.
A tire is dead once the threads are exposed. Switch it. You will be better off changing the tire well before it gets to that point. Swap your tires when the rubber at the crest starts to crown and loses its round shape. Your rear tire will always wear faster than the front, but swapping them both at the same time is the best practice. Scroll down for some advice on new tires and our favorite pick.
If the tire gets poked with the lever or caught between the tire and the brake track, it can puncture before it is even inflated.
Inflate the new tube a tiny bit so it holds its round shape before you put it on the wheel. Pass the valve through the valve hole and then press the tube in between the brake track walls so it sits in the wheel. Do not allow any part of the tube to rest outside the brake track while reinstalling the tire. Once the tube is seated in the wheel, use your hands, not a lever, to snap the tire back on the wheel. If you use a lever to lift the tire onto the wheel, the lever itself can swing around and poke a hole in the tube by pinching it against the metal sidewall. Reseating the tire with your hands eliminates that possibility. If you can’t reseat the tire with your hands, scroll down for a cool tool solution.
Pinch flats. If your tire is under-inflated and you slam into a pothole or other object in the road, the tire will bottom out against the rim and puncture from the impact between the wheel and the road.
Inflate your tires regularly. Wide wheels and broad tires can run a lower pressure–down to 80PSI or so depending on rider weight–but standard narrow wheels with 23c tires (check the label) need to be inflated higher, typically 100PSI or more. And keep an eye on the road. Avoiding potholes and other obstacles is the best way to prevent pinch flats. If an object is unavoidable, lift the front wheel off the road slightly to hop over the object or stand on the pedals and lift your weight off the saddle to use your joints as suspension to absorb the blow. Still want to run low pressure? Scroll down for more on a tubeless solution.
RELATED: Ask a Gear Guru: What Bike Tire Pressure Should I Use?
The spoke holes’ sharp metal corners jab against the tube and can cause a puncture if they aren’t completely covered with rim tape. Old rim tape can depress into the spoke holes even if they are completely covered, again creating a sharp edge that can puncture the tube.
Get two new rolls that are wide enough to stretch across the entire tire bed. Lay it flat in the wheel and make sure it covers the spoke holes entirely. Check out our pick below.
To help reduce the potential for that first flat and to help you if it does happen, we’ve compiled a few of our favorite flat-solution products:
Starting at $35, orangeseal.com
If you don’t have tubeless-ready wheels or aren’t ready yourself to go tubeless, you can still get the peace-of-mind that liquid sealant provides without the tubeless commitment. Orange Seal’s kit provides you with everything you need to basically bombproof your tire setup. While you’ll still need to be wary of pinch flats, small punctures and cuts won’t be an issue anymore.
$50, rei.com
Replacing a worn-out tire (or tires) can be nerve-wracking. Do you go with what you’re used to? Follow the car paradigm and make sure they match? In cycling, matching tires is much more of an aesthetic choice, and you don’t necessarily need to replace both tires if only one is worn out (usually the rear, especially if you use a wheel-on trainer often). But for sure it’s a good idea to buy the newest model of tire you can, as tire tech actually changes at a pretty quick pace. Unlike running shoes where you might want to stick with an old legacy favorite, simply go with the newest and latest/greatest. Better yet, just go with Conti’s GP 5000s if you want something that hits the sweet spot of puncture protection, rolling resistance, and grip.
$6, rei.com
For those who think tire levers are tire levers, they’ve never seen anything like this set. With a unique shape that not only protects your hands when removing stubborn tires, but also prevents pinch flats, the Speedier tire levers even have written-on instructions on which side to use for removal or installation.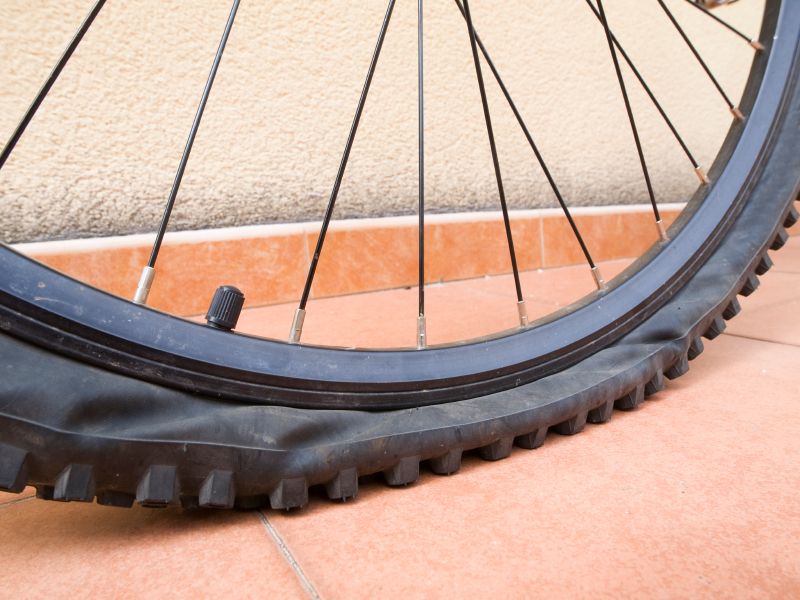 Ensure you don’t pinch your last spare tube when out on the road with this unique tool.
$60, amazon.com
If you really really really want to make sure you don’t get a flat the first (or second) time, then use this kit to convert to a tubeless setup that will use liquid inside the tire to seal up small cuts and punctures—and it’ll allow you to run a lower pressure and completely eliminate the possibility of pinch flats. Check out this story to see if a tubeless setup is right for you, and then say goodbye to flats pretty much forever. You’ll also need tubeless tires alongside this kit, and check to be sure your wheels are tubeless ready.
$6, amazon.com
A tried-and-true rim tape that’s been around for nearly a century, Velox’s cloth rim tape is a standard for most shops who want to ensure that their customers don’t get flats. With an adhesive backing and a fairly thick cloth surface, this rim tape isn’t quite as light as some other options, but it’s impressive when it comes to puncture protection.
Portions of this article are by Aaron Hersh, who wrote on this topic back in 2014.
RELATED: How to Tune-Up a Bike: A 5-Step Checklist
Contents
Problems that are associated with wheels are constantly accompanying outdoor enthusiasts. If professionals have a whole staff of employees involved in servicing bikes, then amateurs have to decide on their own the question of why they flatten a wheel on a bicycle.
An annoying nuisance that seems impossible to avoid. But this is only at first glance. Often we ourselves are to blame for the flat tire of the bike. What is this about? Read on.
There are at least five reasons that can spoil your mood before a bike ride or during a bike ride:

Let's look at each problem separately and find out what's wrong.
The most common tire on a bicycle is a flat tire that has outlived its useful life. The surface of the tire becomes more viscous, collecting various debris, small glasses, and so on. All the little things gradually penetrate inside, up to the camera. As a result, another puncture.
In addition, holes are formed on the used rubber, through which the bicycle tube is visible when inflated. It can simply come into contact with the road when driving. This will inevitably lead to another unpleasant situation.
They sealed the tube after a puncture using a flipper tape, but the working element still constantly deflates. Perhaps there was a piece of glass in the tire. It is difficult to detect and constantly creates problems for the cyclist.
Note!
Before beading, carefully check the wheel for small stones, glass and other foreign debris.
Beading and disassembling the wheel, you need to use a special tool - beading blade. Avoid screwdrivers, wrenches, and so on.
In this case, there is not enough shock absorption. You can get a puncture by running into, for example, a pointed pit.
Another reason why a flat tire on a bicycle. On the inside, the rim is glued with a flipper tape. It is she who guards the camera. An overfilled element may tear the flipper or burst.
It's true that protective tape can be a problem. It is tough with sharp edges. If installed incorrectly, the chamber can be cut.
Please note! Continuous use of the anti-puncture chamber reduces the wear resistance of the tire.
A bicycle first aid kit or repair kit is available from retailers and specialist shops. "Technical treatment" after finding a puncture does not take more than 5 minutes.
Camera needs to be removed. Pump it up and grease it with glue. Then apply on the patch. Wait for the glue to set, and after 5 minutes the camera can be mounted.
To prevent a flat tire, it is important to follow the manufacturer's recommendations. Tires are marked with (min/max) recommended pressure range.
If you follow the inflation instructions, the number of unpleasant surprises will be drastically reduced. Proven in practice. Good luck!
content
29: Benefits
A favorite option for mountain bikers who are looking for long trails that aren't too difficult. Ideal for tall cyclists. Tires have better grip on soft or slippery surfaces.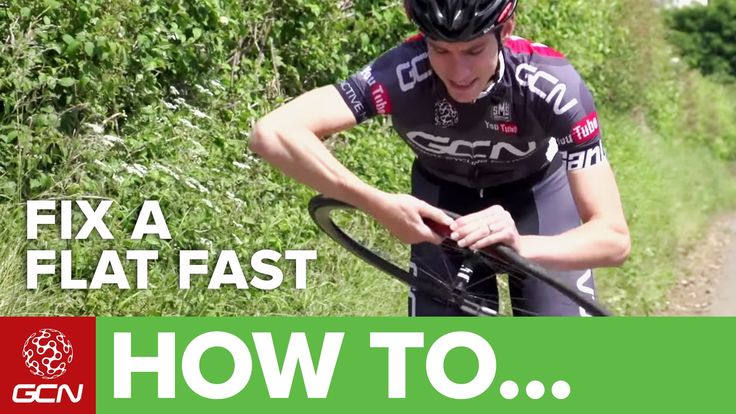 They are more comfortable than 26s as they require less suspension and less tire pressure.
The regulation states that tire repairs must be carried out within the central three-quarters of the drawing, called the “small repair area”. It is also not allowed to repair the tire if the puncture is equal to or greater than 6 mm in diameter.
How to fix a bike puncture in 7 easy steps
How much does it cost to fix a flat tire? While you might think that puncture repair can be expensive, it is actually one of the cheapest auto repair services. The price usually ranges from 6 to 20 euros, although they are usually around 10 euros.
Materials needed:
The best thing in these cases is to put the vulcanized patch inside, a quick and safe repair, that is, in a workshop, that after a while the tires can lose air and be damaged, of course...
What are vulcanized plasters? If there is a small puncture or superficial cut that does not compromise the safety of the wheel and therefore the vehicle, a vulcanized patch can be used, a method that is more durable and cheaper than a complete wheel replacement.
To apply bicycle patches, first use vulcanizing adhesive to seal the gap. Make sure you apply enough and wait a few minutes for the glue to dry.
Next, we detail the prices for the main events: Bicycles. Wheel trim costs $200 to $300, brake repairs are $200, and a patch is $80.
The answer is simple. It's just a matter of physics. Bicycle tire pressure is reduced due to the composition of the air containing nitrogen and oxygen. Be aware that a flat tire is not always synonymous with a puncture.
In fact, continuing to drive on a flat tire means inexorably damaging the tire itself, which can be repaired at little cost. But that's not all: in addition to rubber, after a short time, the rim, on which the weight of the car will be unloaded, will also be damaged.
Driving with a flat tire. Drive slower. Avoid driving faster than 24 to 32 mph (15 to 20 km/h) with a flat tire. You can cause irreparable damage to the metal wheel under the tire and even lose control of your vehicle.
The cost of the patch is 50 pesos; vulcanized varies from 100 to 150 pesos.
Xiaoling Tire Adhesive 20g Ultra High Quality Tire Repair Adhesive Tire Repair Tool Waterproof Patch Adhesive Patch.
The critical decision after applying the solution is to let the area dry for at least one or two hours, especially if it is hot and humid, because if we let it dry for just a few minutes and apply a patch, it will most likely dry.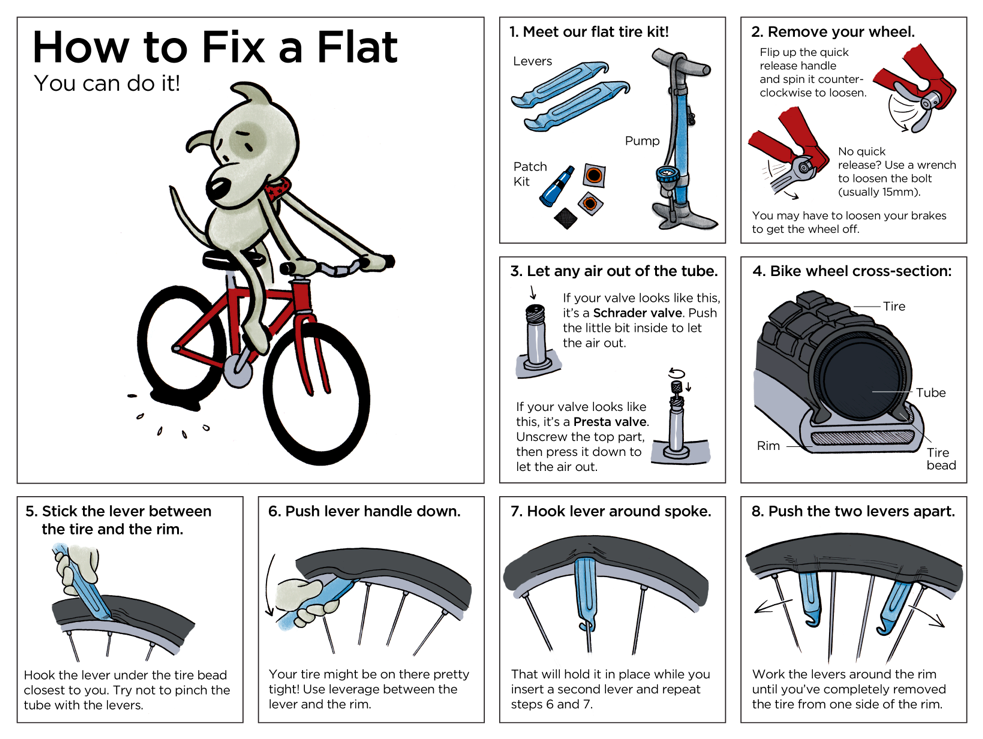 take longer or finish peeling early.
According to tire manufacturers such as Michelin, the average is around one puncture every 50.000 km, however everyone knows a driver who has never had a puncture and a driver who loses air from his tires every two to three .
This is a patch with great flexibility. The upper part has a layer of butyl rubber, hence the name of the extra-hermetic lining; They have excellent heat resistance and adhesion to cushion rubber, allowing us to hot vulcanize them.
Engine mounts, also known as engine mounts, are rubber parts with a metal base. Inside the car, they are extremely important elements, as they act as a link between the engine and the chassis.
Tire curing consists of heating the rubber and sulfur on the surface of the tire and applying pressure to either install a new tread band or repair tire damage.
A new tire tread can last up to 100,500 miles, but if the carcass is in good condition, you can potentially go up to 500 miles by vulcanizing it before you can't do it anymore.
According to experts, the typical temperature used for this procedure is between 150 and 170 degrees Celsius and the exposure time is about 10 minutes.
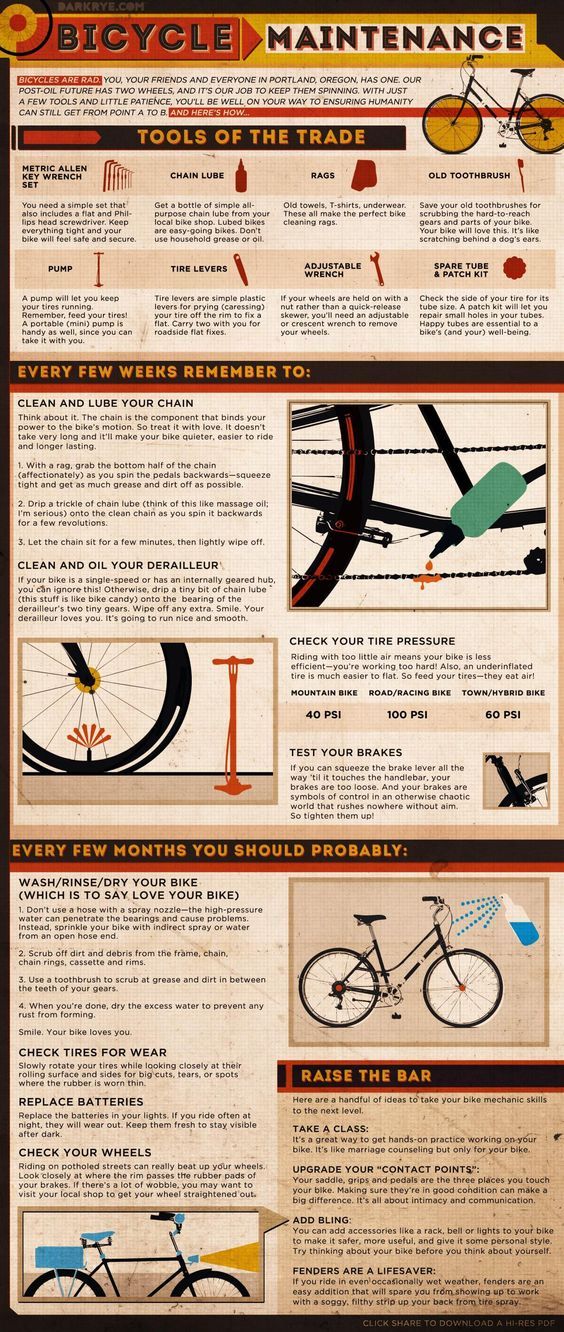
STEP BY STEP HOW TO APPLY A PATCH/APPLIQUE ON A CAP?
These are adhesives based on phenolic resins. These adhesives instantly react to interaction with the surrounding air and dry quickly.
patch | Definition | Spanish Dictionary | RAE - ASALE. 1. tr. patch (‖ install patches).
If this is your first bike, it's best to start with something assembled. With a little knowledge, it's very easy to screw up things like stem size, handlebar type, or how to combine hubs/gears/brakes, plus it's a lot more expensive.
Total**
| Painting | painting type | box price |
|---|---|---|
| in one color | metal | 115 € |
| in one color | hard | metallic | 115 € |
| Two or three colors | hard | metallic | 170 € |
Frame in one color, fittings in another.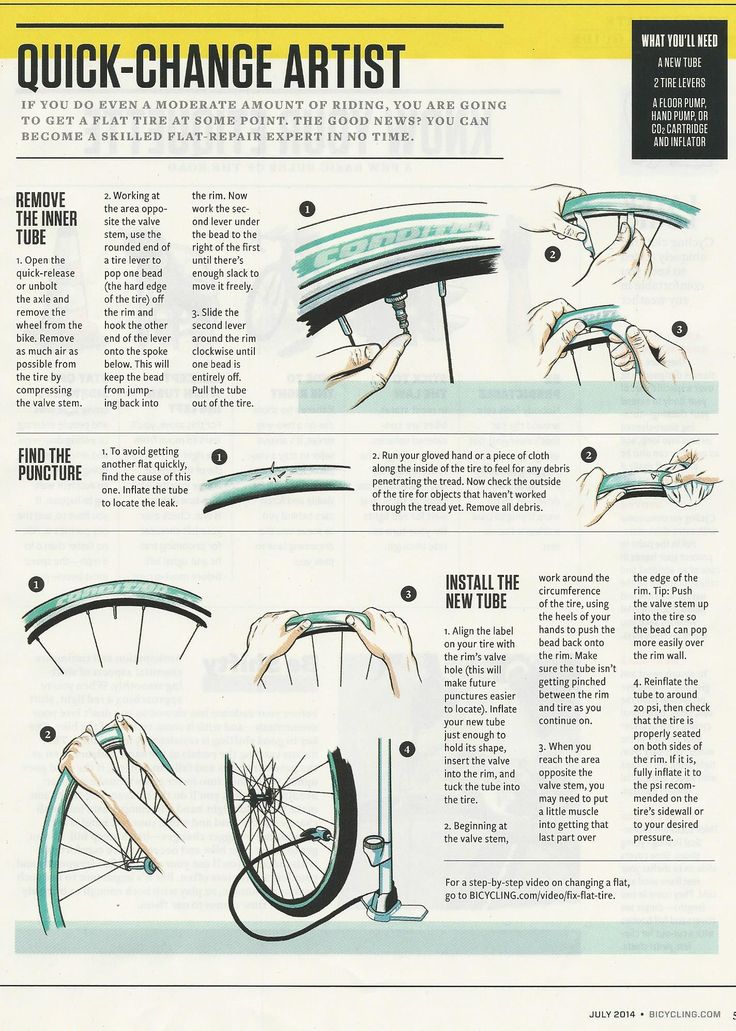 | hard | metallic | 240 € |
Bicycle customization price may vary depending on the design. Prices range from 160.000 pesos to 350.000 pesos.
Insufficient tire pressure.
Too high pressure reduces tire grip; too low pressure allows the tube to pinch on impact (on a pothole, on a step), and rubbing the rubber against itself often causes holes in the tube.
It usually takes about a year for a tire to lose its minimum safe pressure, but if our car has been exposed to extreme temperatures and the situation suddenly changes, the porosity can increase and lose more air than usual.
You will notice how it wears, especially if it takes time at less pressure than recommended. Transportation of a tire in a flat state increases the wear of its outer edges, the shoulder areas of the tire.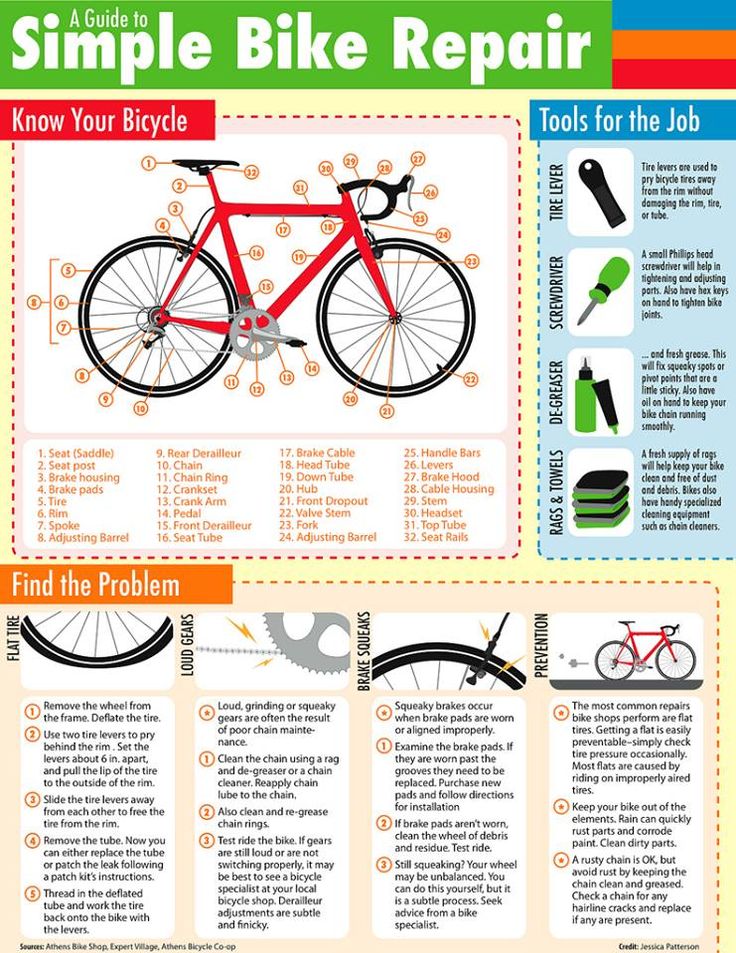 You will also notice that the tire is hotter than the others.
We tend to think that the wheel explodes because of too much pressure or because we step on something sharp while driving. However, most bursts are due to poor tire maintenance, especially low tire pressure.
Typically, tire problems can be caused by too high or too low air pressure. However, it is the low pressure that tends to cause tires to burst more often.
Make. After you have been exposed to a needle stick or cut, wash the affected area with soap and water. If splashed into nose, mouth or skin, rinse with water. If such exposure occurs in the eyes, flush them with clean water, saline, or a sterile irrigator.
Driving with an incorrectly inflated tire can cause a fatal accident. Insufficient pressure also leads to increased tire wear, reducing their service life to one year.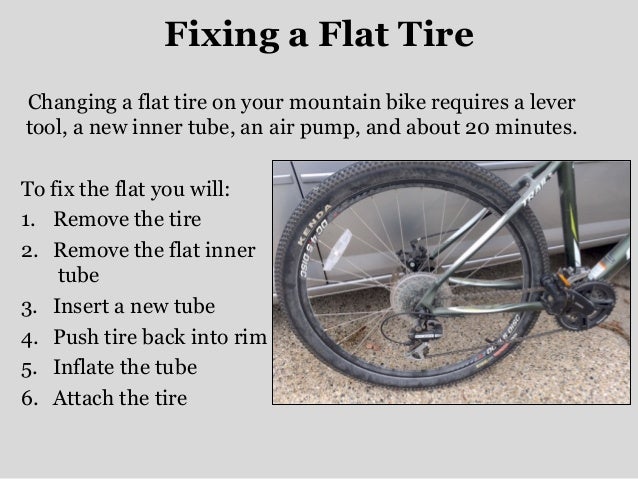 Another major problem is fuel consumption.
Be aware that tires can lose air due to differential pressure, this effect is called the permeation process and affects all tires, regardless of type or application, since the joints that make up the tire are not completely sealed, and their porosity allows ...
Low tire pressure also affects the vehicle's behavior when cornering. In cases where the front wheels are flat, the car tends to understeer; that is, it cannot maintain the desired trajectory and tends to lose the line outward.
Rubber vulcanization process
Rubber vulcanization is an irreversible process in which raw rubber is heated together with sulfur to make it harder and more resistant to cold, as confirmed by Goodyear in 1839.
Vulcanized hard rubber, sometimes sold under the brand names ebonite or vulcanite, is used to make hard objects such as bowling balls and saxophone mouthpieces.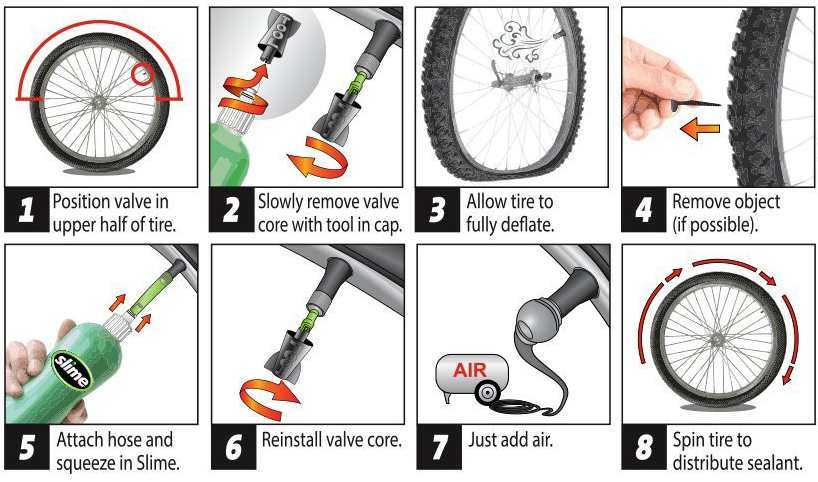 Uncured natural rubber is sticky, deforms easily when hot, and becomes brittle when cold.
What is a vulcanizer? Basically, it consists of two heavy metal strips, which are placed one on each side of the pre-prepared joint and firmly held together. Each strip heats up and this combined application of heat and pressure completes the bond over time.
The patch is usually applied to the skin once every 7 days. Every time you change your patch, change it around the same time. Follow the directions on the prescription label carefully and ask your doctor or pharmacist to explain any part you don't understand.
Bicycle mechanics service and repair various makes and models of bicycles.
A derailleur hanger, also called a derailleur dropout, is a bicycle component that screws into one end of the frame to connect to the derailleur.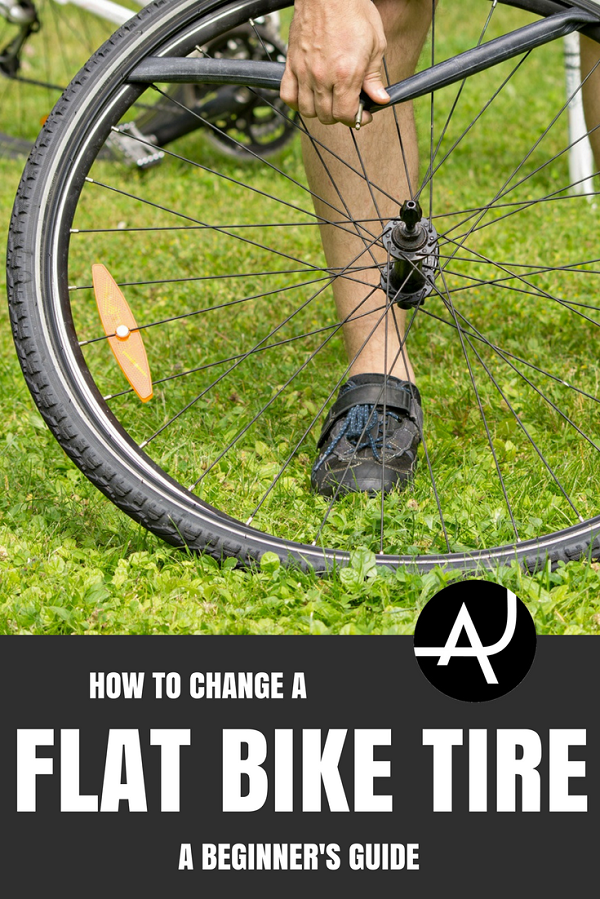 Its function is very simple and at the same time very important: it serves to hold the switch and prevent it from breaking in the event of an impact.
Patch: This is the most common method recommended by professionals because it is a quality solution. After examining the tire, the specialist puts a mushroom-shaped patch on the inside of it, which hermetically closes the cut.
The best thing in these cases is to put the vulcanized patch inside, a quick and safe repair, that is, in a workshop, that after a while the tires can lose air and be damaged, of course...
When cuts are deeper than ¼ inch from the rim to the wheel, or the sides of the rim have been cut, patching is not recommended because it can be dangerous to drive.