Electric drills work under very dirty and dusty conditions, which can result in a few common problems. We are here to help you diagnose what that problem is, and provide easy to follow repair solutions to get your electric drill back up and running again. DIY repairs are not only self-satisfying but much cheaper and efficient than hiring someone. Let us walk you through the process.
Won't turn on
Reported 40% of the time
If your electric drill won't turn on, not to worry, our experts have listed the most common parts that could be causing the issue. Use our repair guide to fix your drill yourself and have it running at peak performance again. Use your owner's manual for instructions on your model.
Excessive sparks from motor
Reported 11% of the time
Are you experiencing excessive sparks from your motor? This can be alarming, but it is actually a common symptom. Let us walk you through the repair process by first narrowing down which part is causing the problem. Check the carbon brushes, holder, armature, springs, and field. Once you have the part figured out, read our expert technician's advice on how to complete the repair. Refer to your owner's manual for detailed information on your model.
Motor spins but chuck doesn't
Reported 10% of the time
When the motor spins but the chuck doesn't in your electric drill, you'll want to inspect the gears, spindle, and shaft. Save on time and money and diagnose the issue using our expert repair guide. Reference your owner's manual for information on your particular model.
Bad vibration
Reported 7% of the time
If your electric drill is experiencing bad vibration, this can make it very uncomfortable to handle. You will want to inspect the following parts for wear and tear: the bearings, spindle, gear, and drill chuck. Follow our repair guide for helpful tips on how to fix the problem yourself. Refer to your owner's manual for detailed instructions for your model.
Chuck won't hold bits
Reported 7% of the time
If your chuck won't hold bits, check the following parts: the drill chuck, keys, and chuck screw. This should be an easy repair that you can do on your own, with some help from us. Once you know which part is causing the problem, check out our expert tips on how to complete the repair. Check your owner's manual for detailed instructions on your model.
Chuck is stuck open or closed
Reported 6% of the time
If your chuck is stuck open or closed, check the drill chuck, key, and chuck screw for any obvious malfunction. Once you have pinpointed which part is causing the problem, take a look at the corresponding repair advice for instructions on how to complete a DIY repair. Check your owner's manual for complete instruction for your model.
Grinding or squealing sound
Reported 5% of the time
If your electric drill is making grinding or squealing sounds, check these parts: the carbon brushes, gears, and bearings. This is a common problem, and we have provided a few simple solutions and repair advice to help you through your own DIY repair of this issue. Refer to your owner's manual for more specific advice regarding your model.
No reverse
Reported 4% of the time
If your electric drill has no reverse, check the switch and actuator. Read on for repair advice and tips for how to fix your tool on your own. It might actually be a simple fix, and we can walk you through the process. Refer to your owner's manual for detailed instructions for your model.
No variable speed
Reported 3% of the time
Does your cordless drill have no variable speed? Our experts narrowed down one of two parts as being the issue. Check your switch and carbon brushes for signs of malfunction. Once you have determined which part is causing the problem, take a look at the repair advice for how to fix it. Refer to your owner's manual for advice specific to your model.
Trips the power source circuit breaker
Reported 3% of the time
If your electric drill trips the power source circuit breaker, check these parts: the power cord, switch, carbon brush, and extension cord. A circuit breaker trips, or shuts off, the electrical flow to protect the circuit from overheating and causing damage. This can also lead to an electrical fire. Before you turn the switch back on, take a moment to determine what is causing the breaker to shut off. Most common reasons are: overloaded circuit, short circuit, or a ground fault. If the drill keeps tripping the circuit breaker after checking the drill for a short circuit or a bad ground, then it is a good idea to use a different circuit or unplug an item on that circuit so you are not overloading it.
Smoke from tool
Reported 3% of the time
Seeing smoke coming from your electric drill can be concerning, but not to worry, we have listed the most common parts associated with this problem.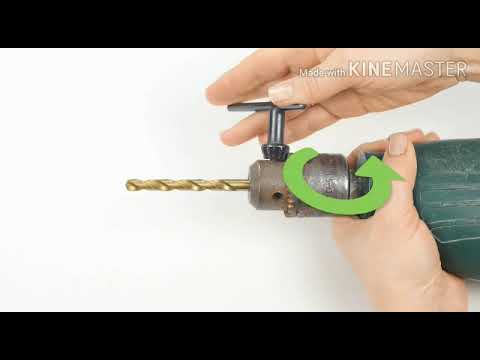 Check the following parts for signs of wear and tear: the carbon brushes, armature, motor, switch, holder, and field. Use our repair guide to do your own DIY repair. Your tool will be working at peak performance before you know it. Check your owner's manual for detailed instruction.
Motor gets hot
Reported 2% of the time
If you notice your electric drill's motor gets hot, check the carbon brushes, armature, field, power cord, and bearings. Once you have determined which part needs to be replaced, check out our expert repair guide for tips on how to complete your own repair. Refer to your owner's manual for information specific to your model.
Copyright © 2022 eReplacementParts.com Inc.
eReplacementParts.com
7036 South High Tech Dr.
Midvale, UT 84047
If your cordless drill is performing less than perfect, we are here to help. Take a look at the common symptoms listed below and select the one that applies to your cordless drill. Review the parts we suggest investigating. Use our expert advice to repair your tool yourself, fast and accurately.
Won't turn on
Reported 29% of the time
If your cordless drill won't turn on, it's not the end of its life. This is a common problem that can be fixed with help from our troubleshooting guide. Inspect these parts: the carbon brush, switch, charger, battery, motor, and holder. Once you know which part is causing the issue, read on for repair advice written by our experts. Refer to your owner's manual for advice tailored to your model.
Chuck won't hold bits
Reported 15% of the time
When the chuck won't hold bits in your cordless drill, check the following parts: the drill chuck, ball bearing, key, and chuck screw. Use our repair troubleshooting guide to walk you through your own repair, and have your cordless drill up and running in no time.
Smoke from tool
Reported 11% of the time
Seeing smoke coming from your cordless drill can be alarming. We have a list of parts that are most commonly to blame when this occurs. Luckily, this can be a quick and easy fix that you can do on your own. Check out our repair guide for tips on how to fix your tool and have it performing smoothly again. Refer to your owner's manual for instructions regarding your model.
Chuck is stuck open or closed
Reported 10% of the time
If your chuck is stuck open or closed, inspect these parts: the drill chuck, key, gear case and chuck screw. No need to hire a costly service when you can do it yourself with the help of our repair experts. Always reference your owner's manual for specific information on your model.
Excessive sparks from motor
Reported 7% of the time
Seeing sparks from the motor may cause concern, but luckily this is generally an easy fix that you can do on your own. Once you have determined which part is causing this, you are just a few steps away from reviving your cordless drill. Read on for our suggested parts that are most commonly to blame. Reference your owner's manual for detailed instructions on your particular model.
No reverse
Reported 6% of the time
if there is no reverse on your cordless drill, check either the lever or the switch. Once you have determined the part that needs to be fixed you can now use our expert guide to repair it yourself. Check your owner's manual for specific advice regarding your model.
Motor gets hot
Reported 4% of the time
If the motor gets hot in your cordless drill, check the following parts: carbon brush, armature, holder, and bearing. Once you have determined the part that is causing the issue, read our repair tips to help complete the repair yourself. You might be surprised how easy it is to fix. Check your owners manual for detailed instructions for your model.
Bad vibration
Reported 3% of the time
If your cordless drill is experiencing bad vibration, this can be hard on the user and the drill itself. Inspect the housing, drill chuck, bearing, and gearbox. Once you have established which part is the problem, use our repair tips to fix it yourself in no time. For advice specific to your model, please refer to your owner's manual.
Grinding or squealing sound
Reported 3% of the time
If your cordless drill is making grinding and squealing sounds, it might sound alarming, but it can actually be an easy fix. Use our list of common parts associated with this issue to determine where the problem is coming from. Our expert technician has provided solutions that you can do on your own. Always refer to the owner's manual provided by your manufacturer for information on your specific model.
No variable speed
Reported 3% of the time
If your cordless drill has no variable speed, check the switch or the carbon brush. Save on time and money and use our repair guides to fix your tool yourself. Always refer to your owner's manual for more complete instructions regarding your specific model.
Motor spins but chuck doesn't
Reported 2% of the time
If the motor of your cordless drill spins but the chuck doesn't, check these parts: the transmission, gear, gear case, speed selector, and pinion. Now that you have the part narrowed down, use our repair guide to help you fix it yourself. DIY repairs will save you on time and money, and we give you the information you need. Refer to your owner's manual for specific advice regarding your model.
Copyright © 2022 eReplacementParts.com Inc.
eReplacementParts.com
7036 South High Tech Dr.
Midvale, UT 84047
The drill is considered one of the most popular tools for home craftsmen and is used in many types of work. Due to intensive use, parts of the tool can break, which disables the device. Do not rush to the service center: it is quite possible to repair the drill yourself and save a lot of money.
Contents
9,00029,00029,00029,0002 the device of the drill and the principle of operation of the tool, then self-repair of the product will not make it difficult for you.
Regardless of model or manufacturer, all these power tools consist of a common set of basic components.
 The cord breaks easily during operation, its frequent breaks are the entrance to the handle of the device and the place where the contacts are soldered on the start button. The defect often occurs due to the mobility of the entire button block.
  Frequent problems - a wad of dust between the brush body and the rotor.
  Its collet mechanism for clamping a drill or various nozzles can be of a quick-clamping type or clamped with a special key.
 Any do-it-yourself drill repair must begin with a visual inspection of all parts. The principle here is simple - from simple to complex, that is, first we check the cord, wiring, contacts, various fasteners, then we begin to test the blocks and the engine. It does not always come to a complete disassembly of the product, but in practice one must be prepared for such a development of events. How to disassemble a specific model, the instruction manual will help.
Regardless of the build quality and manufacturer, the following faults occur quite often:

If you decide to repair the electric drill yourself, you must first diagnose and find the problem. It is rarely possible to repair a failed part on your own, as a rule, it is simply replaced with a new one.
Before disassembling the drill, make sure it is unplugged from the mains. Any disassembly begins with the removal of fasteners. Then we unscrew the screws and self-tapping screws, remove the upper part of the product - all the components remain in the lower part. The electrical circuit of the drill is quite simple - there is no need to separately describe all the elements, everything is already intuitively clear.
Naturally, for models with electronic adjustments, it is much more difficult, but it is unlikely that it will be possible to repair a drill with such nodes on your own, it is better to entrust this to specialists from the service center.
When the power fails, you only have to change the position of the product - the reason lies in the cable, most likely one of the wires has broken . It is necessary to disconnect the drill from the mains and check with a multimeter cable. You can use the simplest option - a light bulb and a battery in the same circuit.
Attention! It is strictly forbidden to pull the cord when the drill is plugged in, in order to avoid a short circuit, you will have to rewind the motor winding.
After checking, you can bend it as you like to find the break , then part of the cable is cut off, the wires are stripped and new contacts are created for connection. When a break occurs in the middle of the cable, it must be completely replaced with a new one. True, economical users prefer to connect broken wires by soldering, followed by reliable insulation of the repair site, but there is no longer full confidence in such a wire.
This part has a very simple design, but if a problem occurs, it will prevent the drill from turning on. Its work is simple: the key slides in a special block, and closes the contacts with a pusher finger. From long operation, dust is stuffed inside block , which prevents the button from moving and blocks it, preventing the contact circuit from closing. The defect is easily eliminated - open and remove dust with a brush.
Important! Never try to lubricate the sliding surfaces of the button - the dust mixes with the grease and wear occurs, as a result, the entire block must be replaced.
To repair the drill button, you need to remove the side wall, check the integrity of the contacts. When soot has formed, clean the contact with fine sandpaper. In case of burnt contact, we change the entire unit.
Not all users know that mains power is transmitted to the rotor by means of brushes made of graphite - during normal operation, constant sparking occurs between them and the rotor. There are times when a wad of dust has accumulated between the armature and the brush, and since the dust is a dielectric, the drill will not work until we remove the dust and restore contact.
During operation, the brushes gradually become smaller, because their lower part is erased. Periodically, they need to be inspected and changed - this is not difficult to do, you just need to have a new set in stock.
When you notice a strong spark in the area of the brushes, and changed them recently, this may be due to malfunctions in the rotor or its collector.
Carefully remove the rotor from the stator for a thorough check. Contacts can be charred or have scale - you need to clean them with sandpaper strictly in the direction of rotation. Reason the appearance of scale may be prolonged operation at maximum speed. How to check the rotor for serviceability? Ring the adjacent lamellas with a multimeter - their resistance should be identical.
Do not forget to check the winding - whether there was a short circuit with the magnetic circuit housing. If a breakdown is detected, the faulty winding is rewound independently or taken to a service center.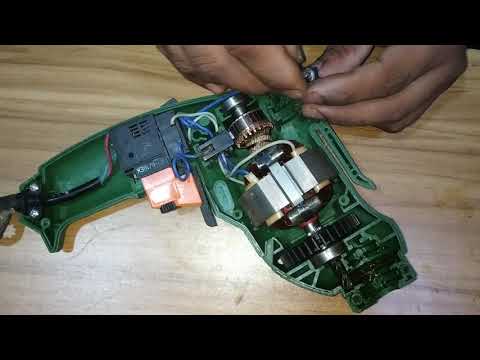
Visual inspection must be done periodically: if overheated, when the product worked with maximum loads, the protective varnish could melt and interturn short circuit . The winding in this case will burn out, and the electric motor is unsuitable for further operation. The check is done in the same way as in the case of the rotor - we check the windings with a multimeter. If a breakdown is detected, the stator winding must be rewound.
Leading manufacturers of impact drills pay special attention to the protection of winding wires, because their products operate in a special mode.
Why is the device still not working, if you checked everything and ruled out breakdowns in the electrical circuit of the drill? There can be only one answer - the non-working state of the product arose due to the presence of mechanical malfunctions.
 Dust gets into the lubricant due to the breakthrough of the stuffing box, so they wear out quickly and can jam at some point. It is easy to eliminate: we wash the bearing in kerosene, change the seals, fill in new grease, better than a special composition for products with high rotational speeds.
During operation, drilling waste often gets into the inside of the chuck, it mixes with the lubricant, which jams the inner jaws. The cartridge must be disassembled, all parts are washed and lubricated before assembly. If extreme wear is detected, then the part must be replaced; if the base or sleeve is heavily worn, the entire unit should be replaced.

We have tried to tell you about all the failures encountered during the operation of electric drills. Remember that self-repair is always much cheaper than buying a new product.
Table of Contents
One of the main tools used in construction and repair is an electric drill.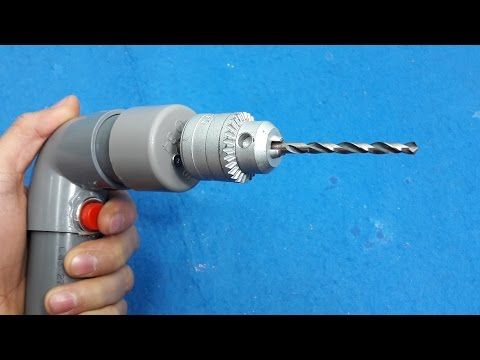 Even children know what it is, but few of the owners of this tool know how to repair it. Breakdowns happen with all tools, and if a drill breaks, then you can repair it yourself with your own hands. A step-by-step description of not only repair, but also diagnostics of the drill is described in the material.
An electric drill is a type of tool that is designed for drilling different types of materials, including concrete and reinforced concrete. Only for this you need to use a tool with a hammer drill function or a hammer drill. How the tool works, you can find out if you disassemble it. Briefly about the design of the electric drill of Soviet and foreign production, is described below.
It should be noted that the design of modern drills of domestic and foreign production differs from the design of Soviet tools. These are only minor differences, which consist in the absence of a reverse on an electric drill, as well as impact drilling. So, structurally, an electric drill consists of two main parts - electrical and mechanical. The basis of the mechanical part includes the following structural elements:
The electrical component of any corded electric drill consists of the following elements:
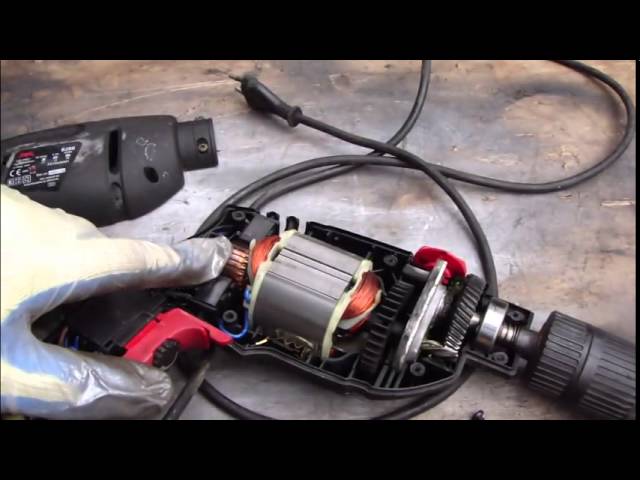
 The brushes are a consumable item and when they sparkle it means they are worn out
 The photo above shows the design of the drill with the main components. Sooner or later, it becomes necessary to repair the drill due to the failure of its individual components and mechanisms. To do this, it is required to initially inspect the instrument, identify the cause of the malfunction, and eliminate it. In more detail about what types of breakdowns of drills are, how to identify and eliminate them, is described in the material.
This is interesting! The old Soviet drills do not have a reverse mechanism and an electronic speed control. Instead of an electronic regulator, a mechanical one is used, consisting of gears of different diameters and the number of teeth. This method of regulation is more reliable, since lowering the speed does not affect the power. However, this method of adjusting the speed is expensive, since it requires the additional use of a pair of gears. If one pair of gears is worn out, you can continue to use the tool. Below are photos showing the design of the mechanical speed controller of an old Soviet drill.
Where should I start troubleshooting an electric drill? Of course, from the first signs, by which it becomes clear where the breakdown is hiding, and which part needs to be repaired. It is easy to identify the mechanical malfunctions of the drill, but with the electrical part everything is much more difficult. Here you will need the appropriate tools, by which you can draw conclusions about the malfunction of certain components, parts and mechanisms of the tool. To identify breakdowns in the electrical part of the electric drill, you will need to prepare the following tools:
To diagnose the mechanical part, you will need to perform the following manipulations:
 If the device jams or fails, the tool will only work in one mode
In a drill, like any other type of power tool, various parts and mechanisms fail. The whole drill cannot break completely, but in any case, even when the mode switch is faulty, the operator will not be able to use the tool to its full capacity. That is why it is necessary to learn how to repair a drill with your own hands. This is not at all difficult to do, even if you have no experience. Therefore, you should not buy a new tool at the first malfunction, since the malfunction is sometimes easy to fix even without the need to replace parts. What types of breakdowns occur, how to fix them and what needs to be done for this, is described in detail in the publication.
Electrical faults are the most difficult not only to identify, but also to eliminate. This is due to the fact that it is impossible to see the principle of the flow of electric current, but you can understand how the drill works. Based on the principle of operation of the electrical part, it is possible to draw appropriate conclusions about possible malfunctions. The working principle of the electric part of the drill is as follows:
The rotor starts to rotate at a certain speed. This speed depends on the magnitude of the voltage. To reduce the speed, regulators are used that work on the principle of increasing resistance. The greater the resistance, the lower the voltage value, and, accordingly, the lower the rotation speed. Knowing the principle of operation of the electric part of the drill, we will consider the main types of breakdowns and their elimination.
When connected to the network, there are no signs of instrument life. Masters with experience had to deal with such a phenomenon more than once, but what if such a phenomenon happens for the first time? Disassemble, diagnose and repair the drill. Troubleshooting, when the drill does not turn on, begins with detecting the presence of voltage in the network. Trite, but true - often the reason for the inoperability of the tool is the lack of voltage in the network. The reasons for this may be scheduled repairs at the transformer substation, the operation of circuit breakers or damage to the power cord of the outlet. Take a multimeter and measure the voltage in the network.
If the outlet is OK, then the next suspect is the network cable. Yes, it is also not eternal, and can be damaged during the operation of the tool. Do not try to find a breakdown visually, as this is a waste of time. Take the tester, and turning on the dialing mode, check the integrity of both cores. To do this, you need to disassemble the case, and alternately touch one probe to the contact on the plug, and the second to the wire connected to the button. The conductors are serviceable when the device "beeps".
If the preliminary check showed that the mains wire is OK, then it is necessary to continue troubleshooting along the current flow circuit. The next item in the troubleshooting queue is the button. On Soviet drills, such buttons are a simple mechanism by which contacts are closed. On modern tools, a round regulator is placed in the design of the trigger in the form of a washer with resistors, with the help of which the speed of rotation of the cartridge is regulated.
If the drill button does not have a regulator, then troubleshooting and troubleshooting is quite simple. To do this, you should disassemble it, inspect the integrity of the contacts and clean it with fine-grained paper sandpaper.
If an additional reverse switch is connected to the button, then it must also be checked by ringing. If it is determined that the failure is related to a button malfunction, then it is easier to replace it than to look for a malfunction and try to fix it.
If you disassemble the button, you can find that in addition to this part a capacitor is connected (yellow or black block). Can this unit cause a malfunction or inoperability of the power tool? No, the capacitor is used to smooth out noise that occurs in the network. It serves as a filter element. If you disconnect it, then the drill and other types of power tools will work as before. However, it is not recommended to operate the tool without a capacitor, since its absence (or malfunction) leads to the failure of semiconductor elements.
This is interesting! There are two ways to check the health of the drill capacitor - with a multimeter and visually. If the capacitor on the drill button is inflated, then it should be replaced with a capacitance similar in terms of parameters.
There is an opinion that the capacitor is designed to create a phase-shifting effect. This is an erroneous opinion, since this element does not affect the operation of the tool in any way, but only excludes the ingress of radio interference back into the network.
Experience shows that in 60% of cases, a drill malfunction is associated with a malfunction of the shutdown button. Often an attempt to replace this element leads to the fact that all the wires get tangled, and the question arises - what to connect to in order to connect everything correctly.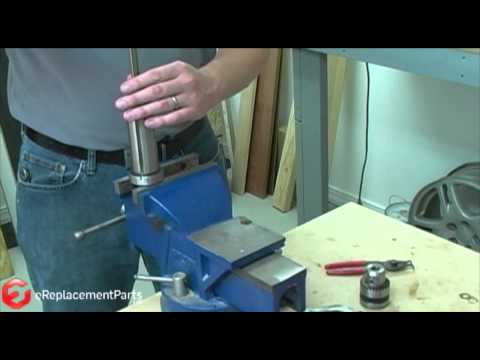 This is exactly what it is worth understanding so that the wires connected at random do not lead to a short circuit.
It should be noted right away that the buttons on drills can have a different design, however, there are three types of their devices:
One of the most difficult connection schemes is the last option. However, if you look, then there is nothing difficult in connecting all types of buttons. The following diagrams for connecting the buttons of different drills will help to understand this - Bosch, Interskol and others.
This scheme is also found in another design, as shown in the photo below.
The difference between these circuits is the connection of wires from the reverse to the rotor and stator. Both options are correct and will work. It all depends on the instrument model. Observing the sequence of connecting the buttons of the drill, it will not be difficult to restore the tool to work. Below is a diagram in the form of an illustration of connecting a drill button to an AC commutator motor.
It is worth noting that the drill button fails not only due to the burnout of the contacts, but also due to the wear of the expanding spring. With a large output, the spring breaks, which ultimately leads to jamming of the device.
Brushes fail on the drill, which are consumable items. The brushes are made of graphite, and with their help, the current is transmitted to the rotor through the collector assembly. During operation, the brushes wear out, burn out, wear out and require replacement. The resource of brushes depends on various factors:
You can identify a malfunction of the brushes by such a sign as excessive sparking. If before the drill stopped starting, its excessive sparking was observed with signs of soot, then with a high degree of probability it is necessary to replace the carbon brushes. To replace, it is necessary to remove the elements from the brush holders, pull out the worn parts and install new ones in their place.
This is interesting! If the brushes are worn more than 60% of their original length, they must be replaced.
In addition to a malfunction of the brushes, it is necessary to pay attention to the condition of the copper lamellas of the collector. If signs of soot are observed on the copper base, as well as chips and other defects, then all this should be eliminated. If you can’t fix it yourself, then you should replace the anchor. The causes of carbon deposits on copper plates are excessive sparking from a power tool. In addition, with severe wear of the collector, there is a connection (short circuit) of the plates to each other, which is also unacceptable.
The commutator-type electric motor on the drill and any other tool is the heart of the equipment, which costs 60% of the total amount of the device. If the malfunction is related to the electric motor, then there are two ways to restore the malfunction of the drill - replace the entire engine or perform diagnostics, identify the malfunction and fix it. It should be noted right away that diagnostics can be done independently, but it will not work to fix the malfunctions with your own hands. Here you will need to give the faulty assembly to a specialized workshop, but practice shows that it is easier to buy a new rotor or stator than to repair them.
This is interesting! It is also rational to take the engine in for repairs when it is impossible to find spare parts for it.
Consider the principle of checking the health of the stator and rotor of a do-it-yourself drill motor:
 A resistance difference of more than 10% is unacceptable, and indicates the presence of a break
 Stator failures are less common than rotor failures, but in any case, if the drill has recently worked in high load mode, then the engine fails in it.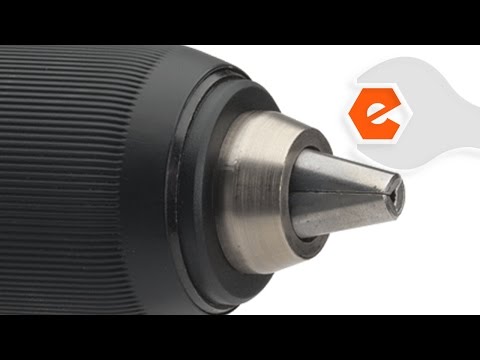 If it is determined that the motor on the drill is faulty, then it is easier to replace it than to repair it, and sometimes it is better to buy a new drill. The video below describes in detail how to find and fix electrical problems with a drill.
While electrical faults are difficult to detect, mechanical faults are much easier to deal with and cheaper. It is possible to identify mechanical defects even without the need to disassemble the instrument. If the drill cracks or the cartridge does not rotate, but the characteristic sound of the engine is heard, then there is a breakdown in the gearbox. When the nozzle does not hold in the drill, then there is a malfunction in the clamping cams. Bearings that cannot be repaired and require a comprehensive replacement can also fail.
Consider each type of malfunction, and the features of their identification with subsequent elimination.
 Bearings typically last a long time and the main reason for their rapid failure is lack of lubrication or running out of lubrication. There are two types of failures in bearings - the complete destruction of the balls or wear. In case of complete destruction, the part must be replaced. When replacing bearings, there are no difficulties, so be sure to check their serviceability
  Consists of a two-piece construction resembling a friction clutch. Shocks are created by moving a gear with notches. Notches on a rotating gear engage with teeth of a similar design on the body, and as if jumping, clicks are created - they are also blows. Malfunctions of the impact mechanism of the drill are as follows - licking of the notches, which ultimately leads to a decrease in productivity. More often, the notches are licked off on the movable gear, which must be replaced. Another breakdown can be when the shock mode of the limiter is not turned off. The reason is the wear of the metal ball, which, when the switch is moved, goes into the end of the shaft, thereby limiting the possibility of contact between the notches of the gear and the protrusions on the housing. To eliminate the malfunction, replace the ball in the design of the impact mechanism
 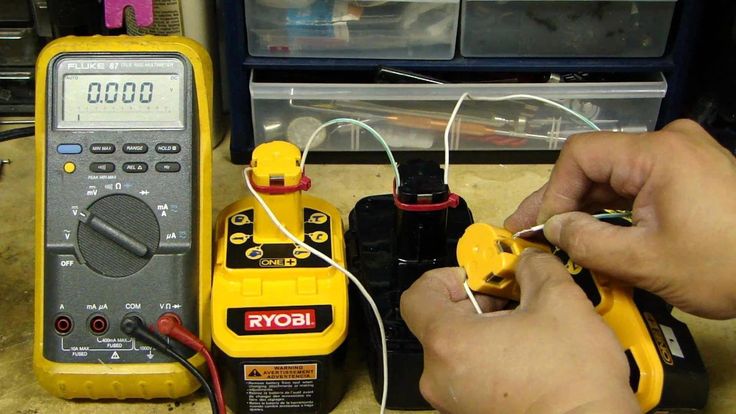 Drills use key chucks for increased reliability and efficiency. The clamping jaw on this part may fail and should be replaced. Detailed instructions on how to remove, repair and replace the drill chuck
 Bearings and chuck are minor mechanical failures and failure should be handled accordingly. Even if the diagnostics showed that the gearbox does not need repair and replacement of parts, then it must be dismantled, washed in gasoline and new grease added. Such manipulations must be performed regularly, depending on the frequency of use of the power tool. A detailed description of how to repair the impact mechanism of the drill is described in the video report.
In order for the purchased power tool to serve for a long time and not let you down at the most inopportune moment, it is necessary to ensure proper care for it from the very first day of purchase. This care includes doing the following:
Keep in mind when buying that drills are for domestic and professional use. If you choose a cheap household option, then you need to understand that such a tool is intended only for infrequent home use.