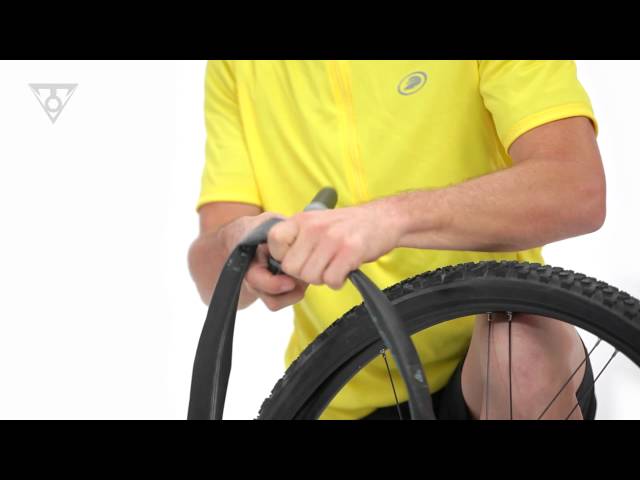
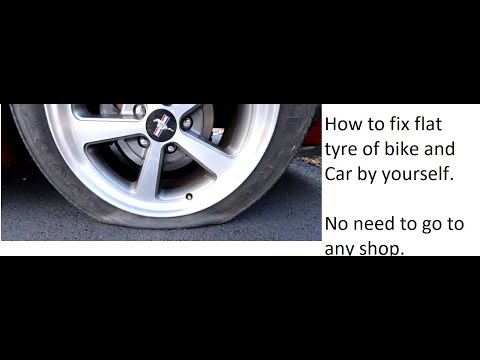
None of us ever enjoy getting a flat, but you can often tell how experienced an Adventure Rider is by the way they react to a puncture on tube-type tires. New Adventure Riders tend to throw their fists up in the air and curse the motorcycle gods. Veterans just get down to business because they know that a motorcycle puncture repair is just 15 minutes out of the day if you’re in practice, 25 if you’re a little rusty.
Here are five tips that will help take the pain out of the inevitable flat. We’ll assume that you know how to remove the wheels from your bike and are carrying the proper tools for the job.
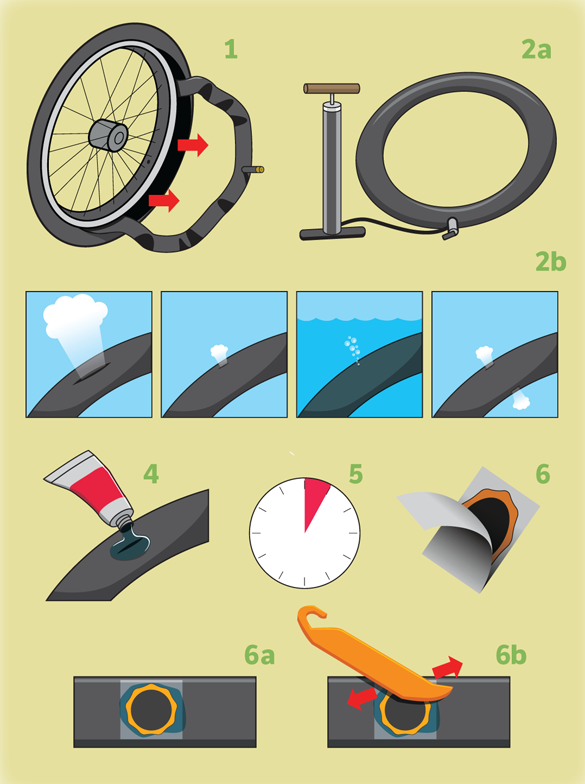
Position the tire bead in the drop center and you’ll have more room on the opposite side to spoon the tire on.
Motorcycle tires, like car tires, have steel wires embedded in the sidewalls to keep the tire stiff and on the wheel. Think of the wires as hoops, and remember that they will not stretch no matter how hard you try. If you pull one side out, the opposite side will go in.
ADVERTISEMENT
Note also that the circumference of the tire’s bead is smaller than the outer lip of the wheel it has to go over. So how is it even possible to get the tire on the wheel?
The secret is in the center of the wheel. This section of the wheel goes by several names, but we’ll call it the drop center, because it “drops” away toward the hub. The wheel’s circumference is smaller in the drop center. Get the tire bead in the drop center and you can more easily pull the opposite side of the bead over the outer lip of the rim. Moral of the story: If you’re breaking a sweat, you’re doing it wrong.
Your kickstand can double as a built-in bead breaker if your bike has a center stand.
Some adventure bikes, and quite a few dual sports, have rims with safety beads, which is a raised area near the inner lip of the rim designed to keep the tire in place in the event of a flat.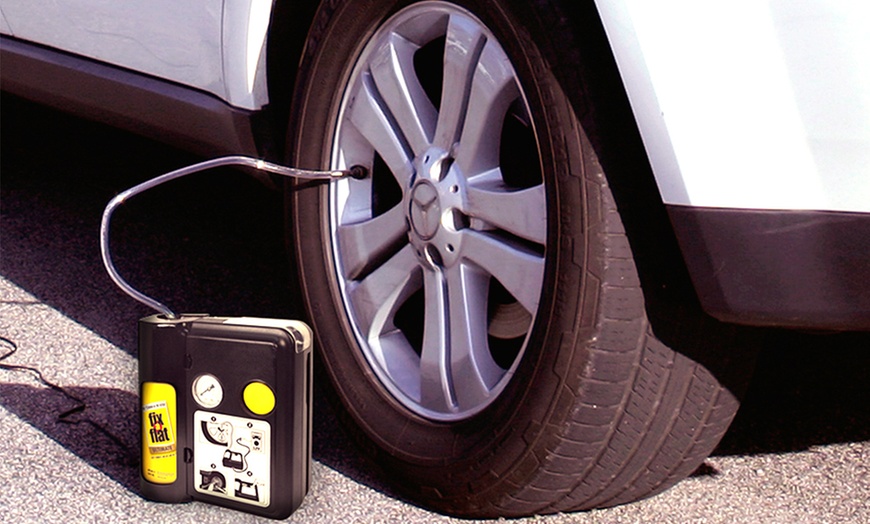 They improve safety, but can make getting the tire bead away from the rim a real chore.
The first technique to try is simply pushing down on the bead with your hands. Often that’s all it takes. If that fails, try stepping on the bead with you boot. Put your full weight on it (make sure the brake disc is up or you could damage it). Jump up and down. Use both feet.
Another method is to use your bike as a bead breaker, provided it has a center stand. First make sure to secure your center stand in place by strapping it to the front wheel so that it doesn’t accidentally roll forward. Next, extend the kickstand, place the tire under it so that the kickstand foots is resting on the edge of the bead, then lean the bike over until the bead pops. Flip the tire over and do the other side.
You can also use your tire irons as bead breakers for stubborn beads. Work them between the tire and the rim, facing up at first, in a small area. As you create a gap, turn the spoons around so they face down and can squeeze between the rim and the tire.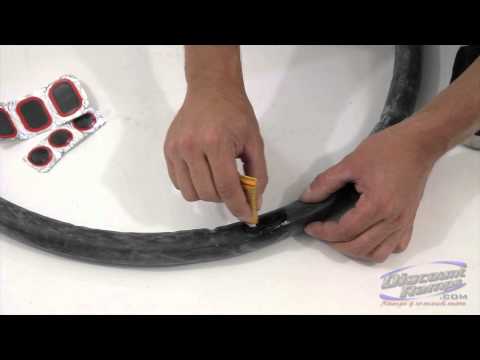 Continue working them around and the gap will grow. It’s a lot of work but eventually, the bead will pop off. Motion Pro also makes a set of tire irons with a built-in bead breaker that simplifies the task.
If all else fails, there’s the “nuclear” option: ride the bike, very slowly, for a bit. A flat tire generates a lot of friction and heat. The tire will start to squirm around which will work the bead loose. Note: This is only recommended for rear flats. It’s extremely difficult to control a bike with a flat front tire.
If you lube the bead of the tire with soapy water, it may make it easier to slide the tire over the rim, but lube also makes it easier for it to slip right back off.
The conventional wisdom is that lubing the tire bead makes it easier to get on and off the wheel. And that is correct; the bead will slide along the outer lip of the wheel much easier with tire lube, soap and water, Windex, etc.
But that also means the bead can just as easily slip back off when you are trying to put the tire back on the rim. You’ll get one section of the bead on, and the side about 90 degrees away will slip right back off. Unless you have a Bead Buddy, or something similar, you’ll feel like you need three hands to get the job done. What if you don’t have a Bead Buddy, or you run out of lube on the trail?
The answer is to practice your technique until you can quickly change a tube with just two tire irons, nothing more. Stand on the edge of the (flat) tire 180 degrees opposite of where you are working the tire irons to make sure the bead is in the drop center of the rim. Get it right and moderate pressure with the irons will move the bead right over the rim, without lube. In fact, the bead is more likely to stay put if it isn’t slippery.
There’s no need to take the tire completely off the rim to repair or replace a tube.
If you’re changing or patching a tube, there’s no need to take the tire completely off the wheel. Break the bead on both sides of the tire, then lever just the disc side off the wheel.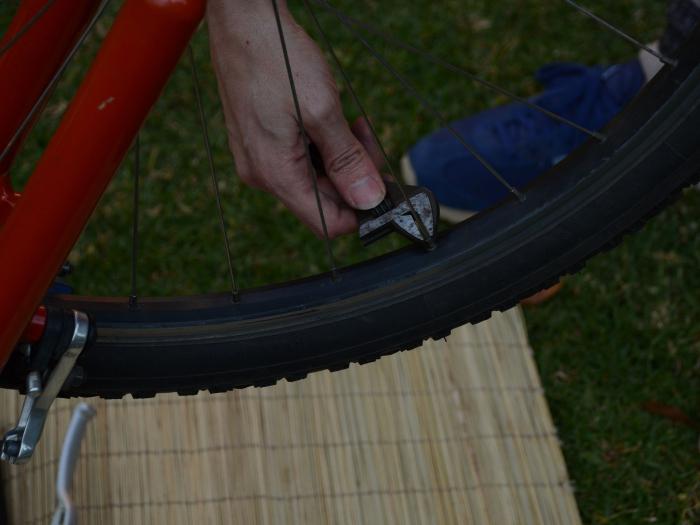 Keeping the disc side up while you lever off the tire helps ensure it doesn’t get scratched or bent in the dirt. Once you get the tire off on one side, put your foot on the disc and lift up the tire bead with one hand, then pull out the inner tube with the other.
And don’t forget to run your hand around the inside of the tire and rim once the tube is out. Check for nails, stones or any sharp points that may have caused the flat. Debris can also get into your wheel bearings while you are working on your tire puncture repair, so it’s a good idea to put a rag under the wheel and store your axle and spacers in a clean area.
You want to make sure you keep all of your wheel parts clean, organized and out of the dirt. On some bikes, the exhaust pipe can be used as a handy axle holder.
Bonus Tip: It’s possible to patch a tube without taking the wheel off the bike. Some riders break the bead and lever one side of the tire off, then just pull the tube out with the wheel still in place. Of course, this method assumes you are patching the tube, not replacing it.
Make sure you push that inner tube down away from the edge of the rim. A little extra precaution can help you avoid re-puncturing a newly repaired inner tube with your tire irons while reinstalling the tire.
The tube is patched or replaced, the tire is back on the wheel, everything looks good. Then you air it up and … it leaks. It’s the dreaded pinch flat and it happens to the best of us.
Somewhere in the process of levering the tire back on, you managed to grab the tube with your tire iron and put a hole in it. Or the tube got twisted inside the tire and damaged when you aired it back up. Either way, it’s coming off and you have to start over again.
One trick for reducing the likelihood of pinch flats with tire irons is to put a couple of pounds of air in the tube before putting it back in the tire. You only want enough to keep the tube free of twists and allow it to roll out of the way of tire levers.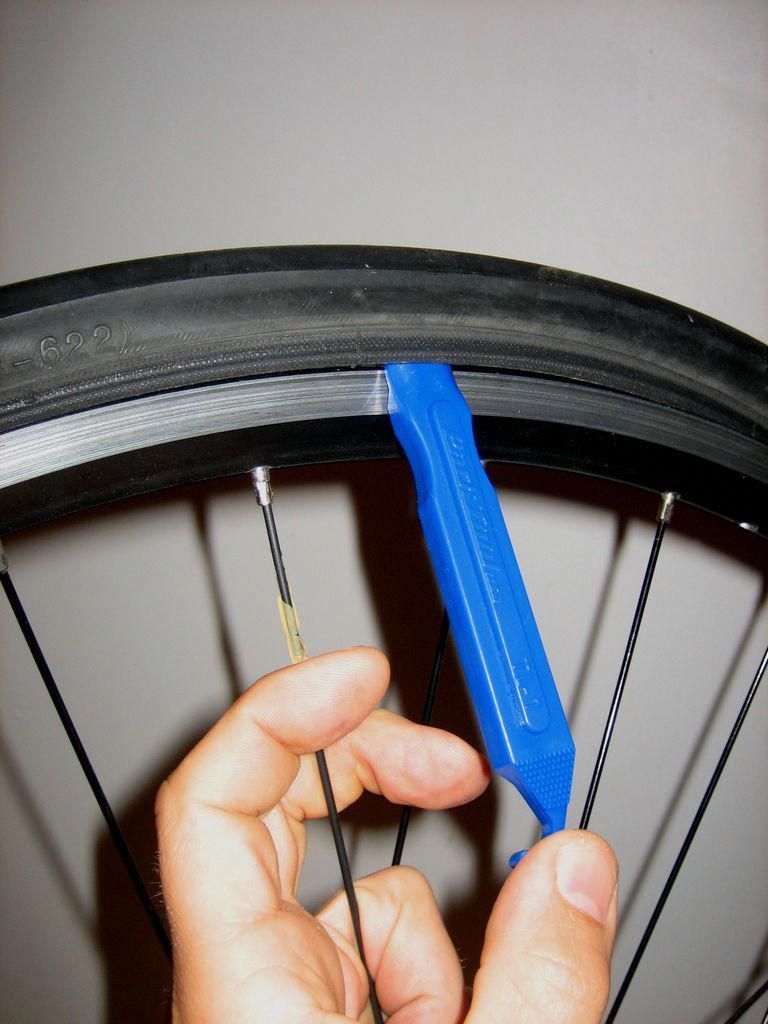
Put a couple of pounds of air in, then hang the tube on your extended index finger. If it creases about halfway up the tube, you’ve got it right.
Another trick is to remember not to over-rotate your irons. Don’t push the levers past 90 degrees, or perpendicular to the rim. At that point the bead should slide on the rim and you’ll have less of a chance of catching, and damaging, the tube.
Bonus Tip: After reinstalling the tube, use the levers on the bead to guide the valve stem into the hole. With a little air in it, the tube will hold its shape and you can manipulate it by moving the bead, which is much easier than trying to get the valve stem seated with your fingers. A valve stem fishing tool is also handy for getting the valve stem pushed through the hole.
Got some useful tips for fixing flats of your own? Tell us your best tips in the comments!
Photos by Spencer Hill and Bob Whitby
Bob has been riding motorcycles since age 19 and working as a journalist since he was 24, which was a long time ago, let’s put it that way.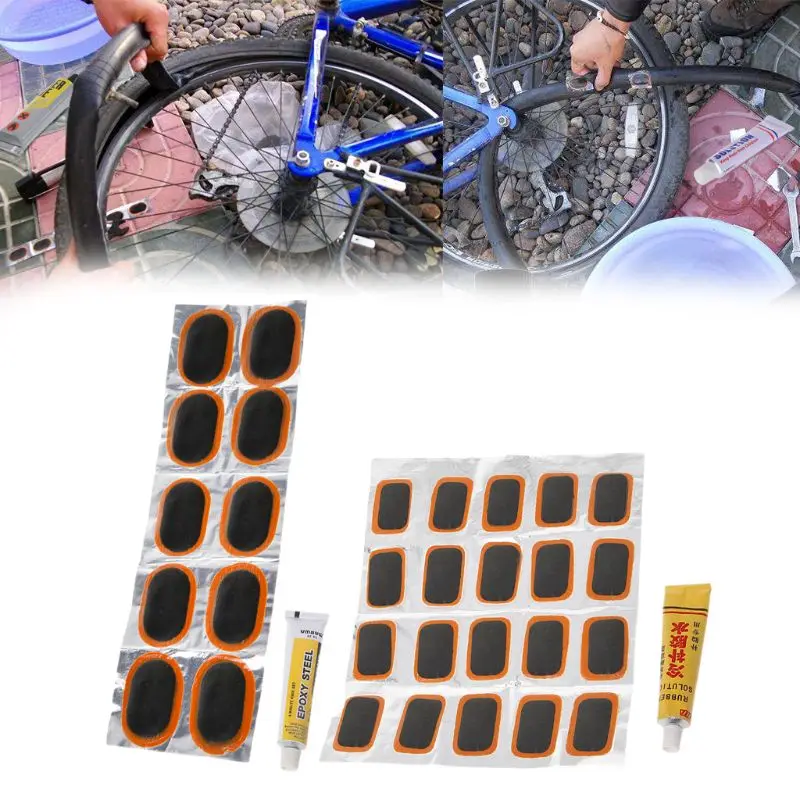 He quit for the better part of a decade to raise a family, then rediscovered adventure, dual sport and enduro riding in the early 2000s. He lives in Arkansas, America’s best-kept secret when it comes to riding destinations, and travels far and wide in search of dirt roads and trails.
I got a flat tire on my Honda XL100s the other day. I took a few photos as I went through the process of changing the tube and tire. The following is the procedure I used to fix the flat. I hope this is helpful for someone out there!
The tube sprung a leak, and the tire itself was pretty old and cracked, so I decided to change both at the same time.
Note: PracticalMechanic.com is reader-supported. If you buy through links on our site, we may earn an affiliate commission – at no cost to you. Thank you for your support!
First step is to remove the tire from the motorcycle.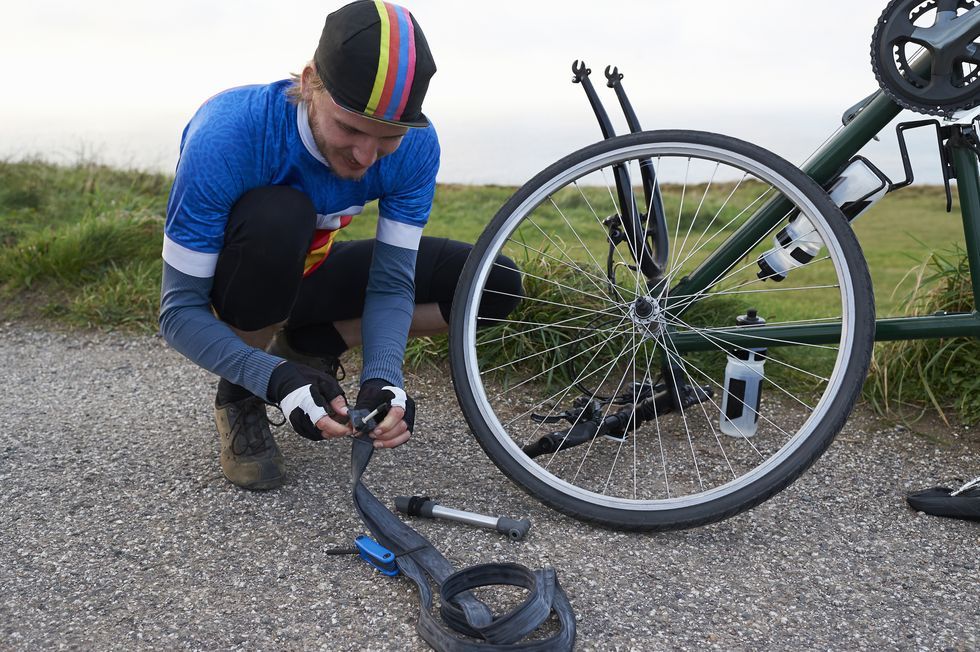 In my case it required a 14mm and a 17mm wrench on either side of the axle. It also required a 12mm wrench to remove the brake linkages.
I ended up changing both the front and rear tires and tubes, since the front tire developed a leak several weeks later, so the following photos are a combination from both of these tire changes! I hope that’s not confusing, anyway the process isn’t too complicated, there were just a couple of things (tips and tricks, I’ll call them “Pro Tips”) that helped me a lot along the way, and those are the most important things to spell out.
I opted to replace the tubes altogether since they were quite old. If you decide to repair the tubes instead, I recommend this repair kit.
The front tire on the Honda XL100s is a 2.75-19, so I bought this 2-pack of tubes because the price for two was only slightly more than the price for one, so why not. For the tire itself I went with the dual-purpose road/trail tire. I really like the tread pattern on the Shinko 244 (19″), so that’s what I ended up getting.
The rear tire is a 3.00-17 (rim width of 3.00 inches and diameter of 17 inches). I bought this tube which can be used for 2.75 – 3.00. And the tire was the Shinko 244 (17″) in order to maintain the same tread as the front tire.
Pro Tip #1: The trick is to heat up the tire before attempting to take it off. Also, heat up the new tire before trying to put it on.
One method for doing this is to put the tire out in the sun if it is a hot sunny day, or in my case, I put it by the fireplace for a while. Don’t go overboard and melt it, but it is best to get the tire nice and warm so that it is more pliable for the next step when you need to pry it onto the rim.
This tip ended up saving a lot of headaches because I had done a tire on a different motorcycle and didn’t do this and struggled like crazy to pry the new tube onto the rim.
To get the old tire off, get a set of tire changing spoons or a tire iron set. Or like me, use a set of poor-man’s tire changing spoons – 3 long-handled, flat-bladed screwdrivers.
Caution: The hard part about using screwdrivers is not puncturing the tube, so take care if you go this route. Also, screwdrivers have a tendency to mar up the rim, so try to minimize the scraping action as much as possible.
First, if the tire isn’t already, deflate it by pressing the core of the valve stem to release the air.
Next, slide the changing-spoon (screwdriver) in between the rim and the tire, and pry the tire off the rim, as shown. Leave that spoon in place, and use another one about 6 inches away from the first, pry it off there, as well.
Pro Tip #2: The rim has a groove down its center. Have a partner stand on the tire (not the rim) on the opposite side that you are prying out, so that the bead goes into the groove. This will give a little more space for the tire to stretch over the rim.
Repeat the process, working your way around the tire until the entire bead is outside of the rim on one side.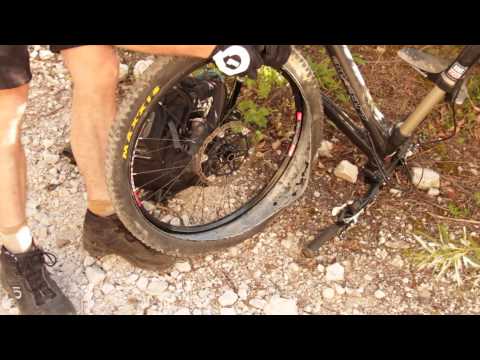
Once one bead is out of the rim, pull out the old tube. You will need to remove the 10mm nut holding the valve stem in place.
If you are going to repair your tube by patching it instead of replacing it, this is the best repair kit you can get. Lots of people swear by those Rema patches. If you do a lot of repairs, get the 100-pack and the can of vulcanizing fluid.
Pro Tip #3: In order to find the leak in the tube, fill it with air, then submerge the tube in a tub of water. Look for bubbles coming up when you squeeze the tube.
My tube ended up having a hole around the valve stem. These are the toughest to patch, though it can be done by using a hole-punch to punch a hole in the patch and putting it around the valve stem.
Pro Tip #4: Before putting the new (or repaired) tube into the tire, put a few tsp of talc or baby powder into the tire. This will prevent sticking and chaffing of the tube on the tire.
Pro Tip #5: Put the tube into the tire BEFORE putting the tire on the rim.
Next, put the tube into the tire, and partially inflate the tube, just to the point where it can hold its shape, and not more than that.
Now place the rim and the tire side-by-side and line up the valve stem to where it fits through the hole in the rim. There will be 2 nuts on the valve stem. Leave one on, that will go inside the rim. Take the other one off, that will go outside the rim in a later step.
Press the valve stem through the hole in the rim. The tire will overlap with the rim on one side to get the valve stem through the hole, as shown.
Put the nut on the valve stem loosely to hold the valve stem in place while you get the tire back on the rim.
Use your tire spoons to work your way around the tire, prying the first bead onto the rim. This one is relatively easy. The bead will naturally settle into the groove of the rim on the opposite side of where you are prying.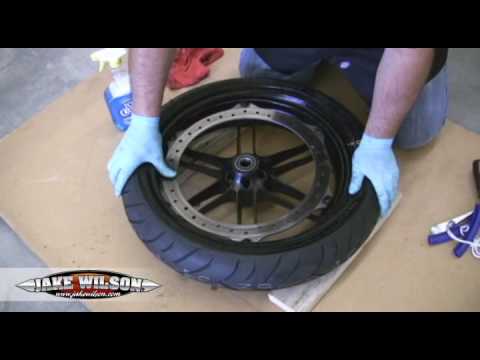
Now, insert your tire spoon between the rim and the tire, and begin prying the second bead onto the rim. This will be more difficult.
Use two or 3 spoons to begin working your way around the tire.
Notice in this view, I am stepping on the tire on the opposite side in order to press the bead down into the groove in the rim. Use your 3 tire spoons to continue prying the tire onto the rim. (It will be much easier if the tire is warm.)
P.S. I have no idea why I had a hammer out for this picture. If you need a hammer for this step, you are doing something wrong!
As you get toward the end, take smaller and smaller ‘bites’ with your spoons as you work your way to getting the tire fully on the rim. Don’t get greedy, small bites of 1-2″ are normal toward the end.
Once the tire is fully seated, you are almost done. Make sure that the valve stem is straight, and if not, pull or push on the tire to straighten it out. It should stick straight out through the rim. Then tighten the nut onto the valve stem — DON’T OVER-TIGHTEN IT! It is just there to hold the valve stem straight, don’t strip the threads, which is easy to do.
After that, you can inflate the tire to the proper PSI and install it back on your motorcycle.
Happy riding! Thanks for reading practicalmechanic.com!
There is not always a way to call a tow truck, and driving on a flat tire, “chewing” the rubber and killing the rim is at least uncomfortable.
The very first replacement of rubber on a motorcycle or scooter gives reason to think - what is better in terms of quick repairs: tubeless ones that do not require wheel disassembly to eliminate a puncture, but leave the rider helpless if, along with damage, it “led” and flattened the edge of the disc? Or chambers - allowing sealing almost ring breaks (if only there were enough patches), but requiring the removal of rubber from the rim for this? The unequivocal answer is no.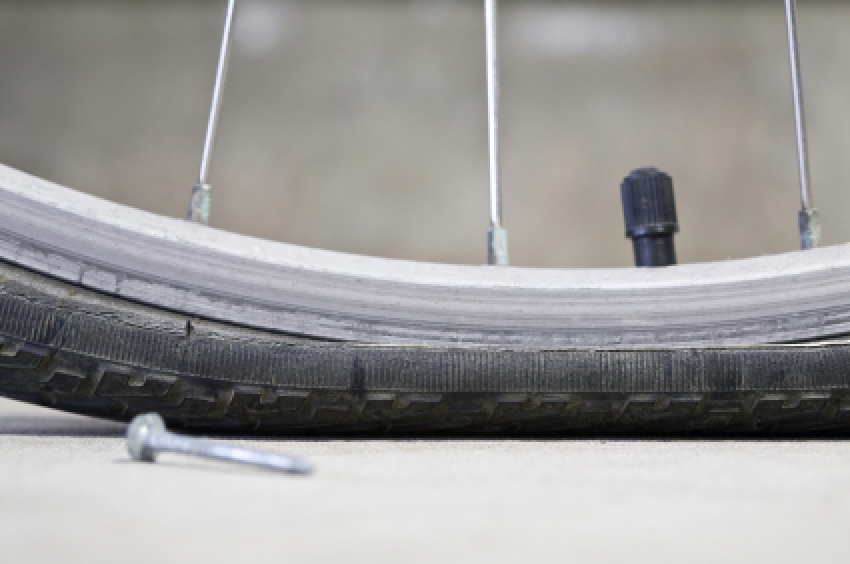 Few classics, straights or tourers today remain "loyal" to tube rubber models: tubeless tires are lighter, softer, warm up and cool down faster thanks to simplified heat transfer. In sports, more precisely - enduro and motocross, chamber - on the contrary, prevail: only spoked wheels can "play", withstanding strong alternating loads during landings and impacts.
The nuance is that a tire with a chamber can be put on any spoked or cast disc, and a tubeless one can only be placed on a cast one, because only it can ensure tightness. Tube – can be installed in a tubeless tire as an emergency measure. In case of major damage to the sidewall, cracks or curvature of the edges of the rim, this will make it possible, after pumping up the wheel, to reach the nearest tire service (and there already - straightening, balancing and other maintenance according to the rules). True, for such a focus, it is advisable to take a camera with a face value one less than the diameter of the disk, otherwise it will create folds inside that will rub for a couple of hundred kilometers. The resource of such a “treatment” is large - until the next puncture, like a new one.
It depends on the magnitude of the damage whether it will be possible to eliminate it on your own, or whether you will have to “surrender” to the motorized tow truck. In tubeless - holes up to 5–6 mm are patched, in chambers - as much as there is enough glue and patches, the main thing is the condition of the tire. To determine the extent of the disaster - find a place where you can safely stop without violating traffic rules (where it is prohibited - you will have to sacrifice tires and drive on).
If the wheel deflates slowly, and the object that pierced it is still inside, you can try to carefully drive to the tire shop. A completely deflated "pancake" will have to be resuscitated on the spot, or - remove the wheel and take it to the service.
To find a hole in a tubeless tire, if it is very thin and not immediately visible, the wheel must be pumped up, slowly pouring water - bubbles will go. In place, tubeless tubes can be “harnessed”, or filled with sealant inside, without removing from the motorcycle.
With the second type of tires - more difficult. A torn balloon must be removed from the tire to detect a defect and seal. In a good way, the wheel must be removed from the motorcycle and disassembled on a clean, flat, hard base. Suppose such a “patch” can be provided even off-road, but how to remove the wheel on a motorcycle if it does not have a central stand? And shooting is not required. The motor must be carefully laid on its side, after making sure that the faucet is closed, gasoline does not flow out through the tank cap (antifreeze does not flow from the tank if the motor is “dropsy”), and removing the plastic or wardrobe trunk with fragile contents (if any).
You will have to unscrew the wheel from the motorcycle only if you need to replace the tire, or it is decided to patch the tubeless tube with a “fungus”. In the absence of a central stand, this will also have to be done on a lying bike, or - make this stand from improvised materials (bricks, stump, car jack), placing them under the crankcase protection from below, the central tube of the frame, the duplex jumper (but not under the plastic, itself engine crankcase or attachments!), under both footrests - if they are not folding, or - under the pendulum. Before removing the rear wheel on a motorcycle, the front fork must be loaded with something, or an even higher lining is made.
In a motorcycle tire fitting shop, tubeless tubes are repaired by cold vulcanization. They are removed, disassembled, the puncture site is cleaned from the inside, degreased, lubricated with glue and a calibrated “fungus” patch is inserted into the hole from the inside. The fungus itself is a thin plate of rubber with a “leg” tube in the center. The leg - by the guide wire is dragged through the hole of the damage, and the "hat" seals it.
After half an hour - you can put the tire back. The reliability of such a repair is high, the patch does not cause a significant imbalance, the service life of a sealed tire does not decrease.
This method is also applicable on the road, the main thing is to have the necessary equipment and materials with you:
The fungus repair procedure does not require much experience. The main thing is to keep it clean, fully clean the place where the patch fits, let the glue dry slightly to a dull finish and press (roll) the surface of the fungus with high quality, expelling all the air between the layers. If necessary, you can degrease the place before gluing with gasoline, but without the rest of the above, it will not be possible to fully carry out repairs.
The compressor is sometimes replaced by a small cylinder of compressed air or carbon dioxide. Unlike a mechanical pump, it will immediately create a “throw” of pressure, pressing the tire beads against the rim flanges (in emergency cases, even a fire extinguisher was used to pump flat tubeless wheels). When connecting the compressor, start the bike's engine before you start inflating the tire - let it idle. Otherwise, the motor can "land" the battery, and you will not start.
Manometer - needed for control. It is undesirable to pump over the repaired tire. It is recommended to "inflate" 0.2 atmospheres less than the nominal value. Inflating too little is also bad: a flat tire has a larger contact patch with the road, so the place of a fresh patch will deform more.
“Burning” a tubeless tube and sealing its internal cavity through a nipple are quick, simple methods that do not require special skills. To repair the damage, you only need the materials themselves, and how to pump up the wheel.
Now in Moscow, and not only, 6-5 varieties of cans with a sealant are sold - a quickly hardening "liquid rubber", with a volume of 800 to 250 ml.
Applying "Anti-Puncture" is simple: put a tube with a fitting on the nipple of the camera, turn the can over, and hold the button according to the instructions.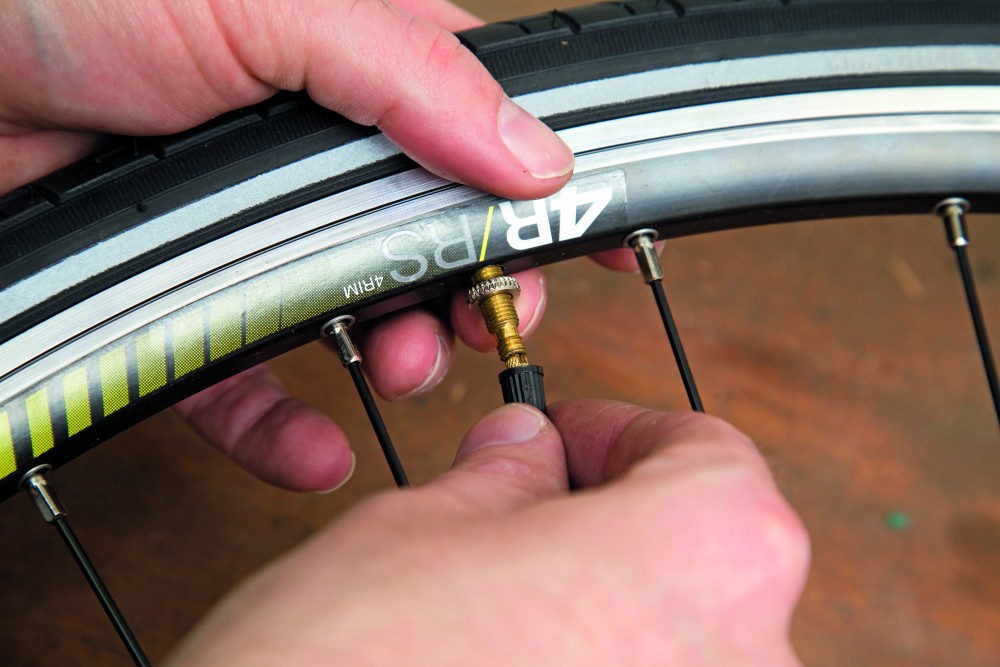 Then - pump up the wheel, cleaning the nipple from the foam, roll it, making a full turn to distribute it.
The sealant is blown out with air into the puncture hole and clogs it, solidifying. After 20 minutes - you can go. Reliability of repair is high. Resource - until the next puncture.
If you have a compressor, start immediately pumping up the wheel, so it will be easier to work with a puncture, insert a patch, and it will swell faster.
Procedure:
You can go in 5 minutes, you just need to make sure that it doesn’t descend anywhere else.
Outwardly identical, repair kits for harnessing wheels can differ in price by almost half. This variation is explained by different configurations - one will have only three items, the other - six or seven.
A complete tubeless tire repair kit contains:
Regardless of the cost, you need to choose a kit in which the harnesses will be reinforced, and the awl - with a deep spiral winding (notch), and not a “needle file”. Inserting a flagellum is sometimes easier with a regular thin screwdriver. If there is no glue in the kit, or it has dried up, the flagellum is moistened with gasoline.
At motorcycle service stations and car services, holes in the chambers are closed by hot vulcanization: a layer of raw rubber is applied to the cleaned, fat-free puncture site and, after squeezing it well, it is heated with a special “iron”. Iron - burns, layers - are fused into a single whole. Reliability of repair is high. The resource will be almost like a new one.
Cold vulcanization (patching) - used if the workshop is not equipped with a vulcanizer. In this case, the quality of the service and the reliability of the repair will depend on the accuracy of the master. For the convenience of gluing, the camera is completely removed in the service, but, I repeat, this is not necessary. It can be repaired on the spot in the same way (there are no other options except for replacing the camera), but without removing it from the motorcycle.
This can only be done if you have two metal mounting blades. At least one, the second can be replaced with another flat tool. You can still disassemble the wheel with a wide screwdriver and a “family” key wrapped with electrical tape. But this is only as a last resort, otherwise you can damage the cord.
Sequence of work:
 Let the glue dry for a minute.
 The fencing must be carried out twice as carefully and more slowly than dismantling, lubricate the side with water or soap, “help” more with your hands, otherwise there is a risk of picking up the edge of the chamber with a spatula and tearing it.
Important! If the wheels of the motorcycle are equipped with tow bars - before pressing the tire bead from the rim, you need to loosen this tow bar! But do not unscrew the nut completely, do not disassemble to the end.
A standard “first aid kit” (a set for repairing classic motor rubber) contains only patches and glue, so it is advisable to supplement it yourself with a piece of “skin” or a needle file. You can degrease with gasoline, or apply a little glue first and wipe off immediately, rolling up the dust with it.
Now there is no shortage of specialized motorcycle workshops not only in Moscow - in all major cities there are motorcycle helpers who help motorcyclists directly on the track, or tow to where you can quickly change the camera, or patch the tubeless correctly, so that there is no trace left. Where there is a guarantee.
Self-replacement of a tire on a motorcycle requires a certain physical condition, and for the first time - a “kilometer of nerves”. At the service station, instead of you, automation will “sweat”, which will not lock up the board and will not scratch the disc coating with a spatula. The main thing is to do it quickly (if you need to go urgently, the price sometimes does not matter).
Repair at the service - may be the only possible one if, due to driving on a flat tire, the tire nipple is turned and torn off. Especially if he flew off and got lost, but there is no spare. In mototiremontazhke - there is always a set of consumables for any wheel diameter. In the same place, in extreme cases, you can buy a new tire, or a used dokatka.
In addition to the patch, for normal operation of the wheel, balancing must be ensured. This is generally a useful procedure during any change of rubber, otherwise if there is a strong imbalance, the wheel bearing will inevitably break due to vibrations, and the hands will quickly get tired and “buzz” after long rides.
The first couple of tens of kilometers - do not drive, go at the speed of the flow.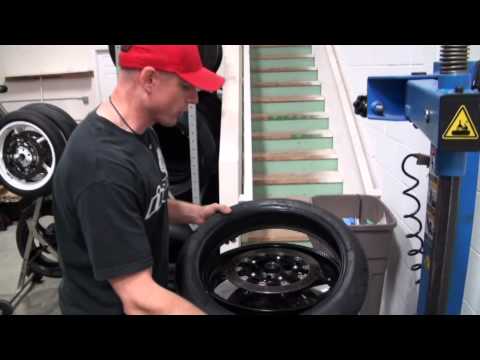 Stop, check for a flat tire. If the patch is not of high quality, it will manifest itself almost immediately. Parking will tell about the long-term perspective: if the cylinder has not lost volume in the first day or two, then everything is in order, you can drive as before.
Knowing what to do if a flat tire is on the road is important not only “for yourself”. To help a newbie or a fragile girl is to earn an important “plus in karma”, which will later return at the right moment. But, I hope, this knowledge will be useful to you only in theory. Good luck on the roads, no nail, no wand!
Contents

There are situations on the road when you accidentally punctured a wheel, and there is no service station, no tire fitting, nothing. What to do in such a situation? You have to repair yourself.
First, let's divide all tires into two types: chambered and tubeless. We share them not because they are used on different classes of motorcycles, but because the approaches to quick repairs have some difference.
For both types of tires, the first step is to identify the puncture site. In order not to lose it later, try to mark this place in some way. Ideally, with a marker or a piece of chalk, but a pebble that will leave a mark on a black tire is quite suitable.
Since both the tubed tire and tubeless are inflated with air, you will need a pump. It is very difficult to carry a device of such dimensions on a motorcycle, although now you can find small, compact ones. Compressed air cans, if available, are even more suitable! They will require a special adapter to connect to the spool, otherwise the contents of the cylinder will certainly want to reconnect with the earth's atmosphere, and not get into the chamber or tire as intended.
An ingenious invention - a spray can with a special spray, the so-called wheel reballon. He will not only close up a small hole, but also pump up the wheel. Car cylinders are most often not suitable, as they do not have a sufficiently long “proboscis”. Remballon is suitable for both tube and tubeless tires.
The first option is a tire with a tube:
Such a tube is easier to throw away than to seal. But sometimes there is no other choice
Well, I must say that the owner of a motorcycle with this type of tires simply needs to carry spare tubes with him. It is the cameras, because rims, as you know, have different widths and, sometimes, diameters.
To take off and put on a tire with a new inner tube, your portable tire changer needs to be equipped with two bead vanes. Those who like to save money can be advised to carry a repair kit with a special patch, rubber glue and a piece of sandpaper. The sequence of work is as follows: sand the surface of the chamber around the puncture with sandpaper, degrease and seal, following the instructions on the tube of glue.
Before reinstalling everything, do not forget to remove the cause of the chamber puncture from the tire, otherwise the procedure will have to be repeated again. Even if the process of "treatment" of the wheel was completely successful, we advise you to contact the nearest tire service for a thorough tire repair.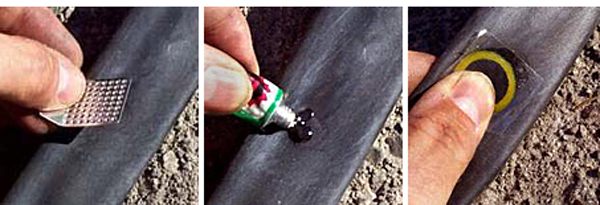 You never know.
Tubeless Option 2:
The entire tire repair kit fits in a bag the size of a thick wallet
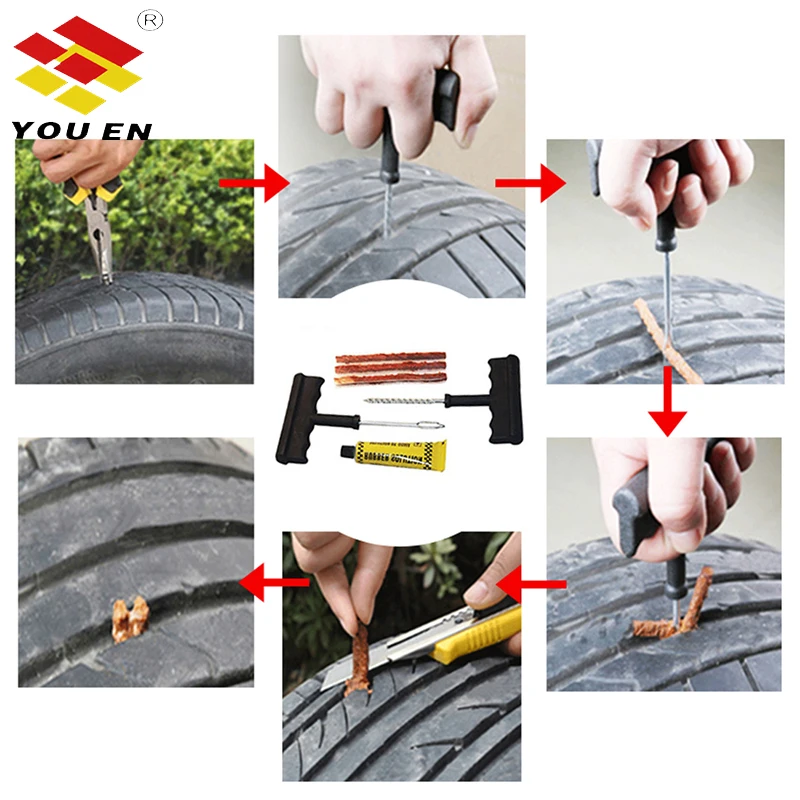
For this type of tire, the repair kit should include a spiral awl, a special needle with an eye, harnesses and the same rubber adhesive.
Tire repair requires special care. The most difficult thing in this situation is to determine the angle of inclination of the hole on the inside of the tire. For this, a spiral awl is included in the first aid kit. It must be entered slowly, along the path of least resistance, otherwise a second hole may appear, which you have already made yourself. If threads stick out at the puncture site, they need to be cut off.
Then, for convenience, it is necessary to inflate the wheel to 0.2-0.3 atmospheres. Take a repair harness, smear it with glue and use an awl to insert this device into the hole until the handle stops against the tread. Rotate 90° and pull out sharply. A loop should form inside the tire. The protruding part must be cut off, while leaving a 2-3 mm tail. The entire repair process is detailed below.
Kit includes two different awls. Don't mix it up!
We begin to “treat” the wheel. With a threaded awl at the puncture site, with confident movements, we make a hole of a standard diameter. We insert a sticky thread of an unpleasant brown color into awl No. 2 with a forked point. Align it in the center.
If everything is done carefully and according to the instructions, after such a repair, you can not call in for a tire fitting
We smear the brown substance with glue from the kit from all sides. We push the awl into the puncture hole. It is necessary that the twin thread is about half inside the tire. Turning the awl 90 °, pull out the awl with a sharp movement, the thread should remain in the hole. We cut off its remains culturally with a knife.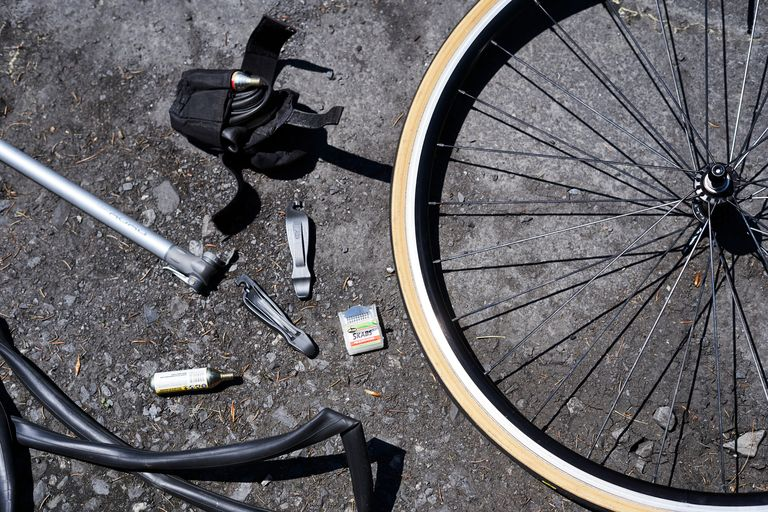
Final tire repair. Pumping up with air cylinders - and you can go!
After 10 minutes, first screw the adapter into the nipple, and then the CO2 bottle into the adapter. This must be done quickly so that the gas does not evaporate into the atmosphere. Three cylinders that come with the kit are enough to reach a pressure of 1.5-2.0 atm. If there is a glove box on your motorcycle, be sure to take a similar repair kit with you, at least for long distances.
In especially critical situations, when there is no repair kit at hand, the following method helps: screw the screw stuck in the tire deeper and drive carefully to the nearest tire service, periodically pumping up the wheel
What to do?
Many of us have punctured the tires on our two-wheeled friend more than once. What this threatens the motorcyclist at speed, I think, is not worth explaining. A sharp pull to the side, wobble of a punched wheel can lead to a complete loss of control of the motorcycle and a fall.
What should be done in the event of a sudden puncture? In no case do not panic. Slowly release the gas and try to keep your balance, as well as try to keep the bike in a straight line with the steering wheel. Brake smoothly with a non-punctured wheel and stop the motorcycle. Braking with a punctured wheel can result in the tire falling off the rim and the further behavior of the motorcycle will be unpredictable.
Well, finally, all the thrills are over and you are alone with your problem. Depending on the brand of motorcycle and the experience of the owner, further actions may be something like the following.
Do you have a heavy motorcycle with a tubeless tire and a puncture that prevents on-site repair? There is only one way out - to call a tow truck, and transport the motorcycle on it to the nearest tire shop.
Some types of tubeless tires sit very tightly on the rim and, with proper care, allow their own power to get to the place of repair.
Many people carry a spare camera with them, which can help out in this situation.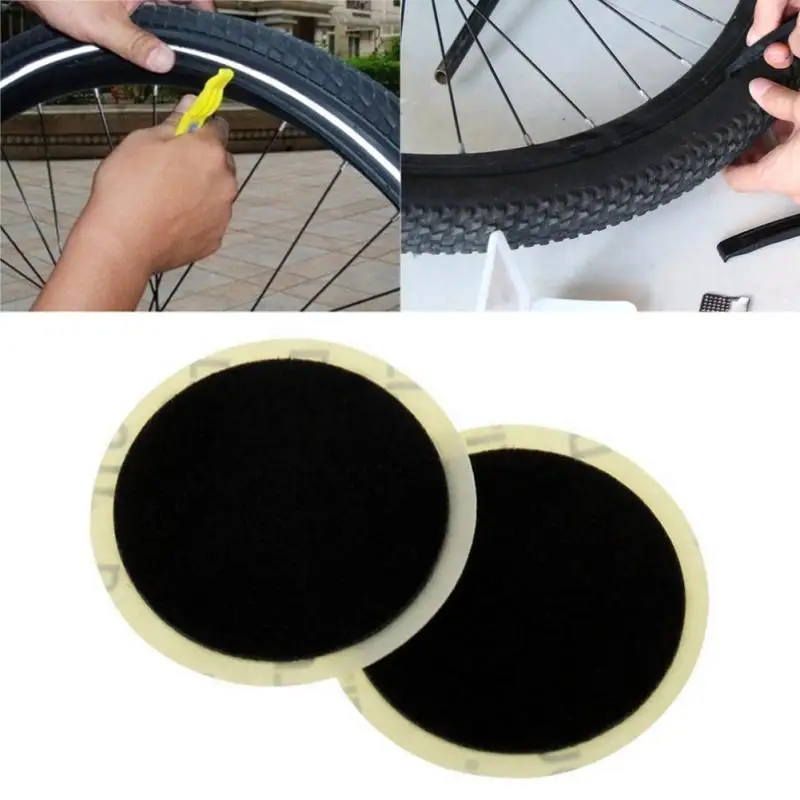
Camera repair kit, consisting of several patches, sandpaper and self-vulcanizing glue, takes up less space than a camera, but won't help if your camera nipple has come off.
To repair tubeless tires, there are kits of flagella and fungi on sale, but you can use such a kit only if you have experience, otherwise you can completely ruin the tire with inept actions.
Also, if space permits, it's a good idea to carry a pump or a small compressor with you, so that if necessary, you can pump up the wheel. This is especially true for those who love to climb into the jungle alone, where it is almost impossible to find help.
A can of compressed air can also help inflate the tire.
To remove the wheel, it must be hung out. If your motorcycle does not have a center stand and you can’t hang the wheel with the help of improvised means, you can lay the motorcycle on its side, after removing the battery from it, so that the acid does not leak out. Pay attention to the tank, gasoline may leak from it.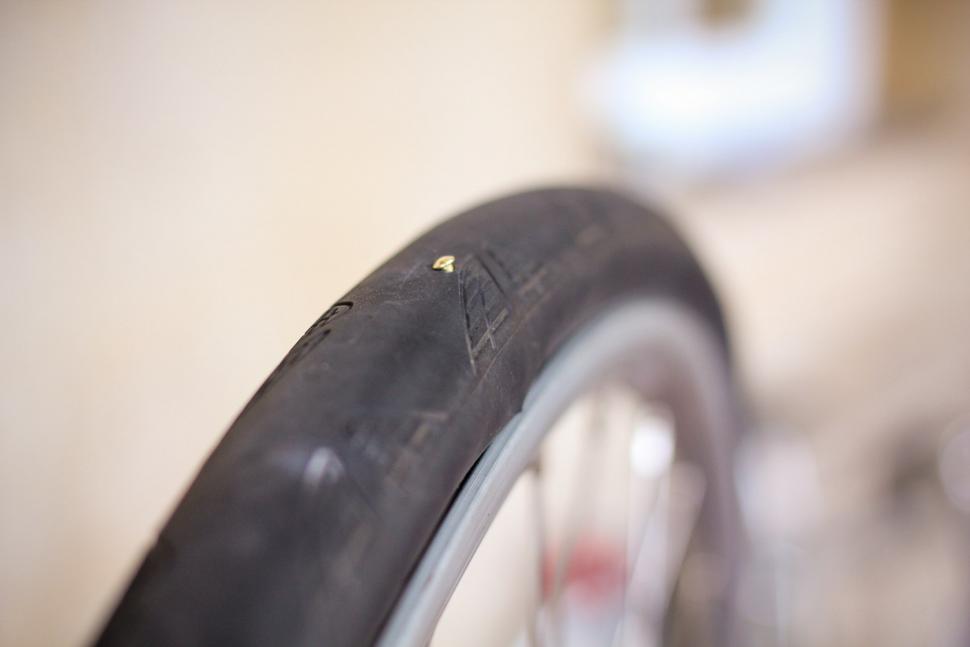
Some tips for repairing a punctured wheel.
The chambers are glued simply, the surface around the puncture is cleaned, a thin layer of glue is applied, the protective layer is removed from the patch, and then the patch is firmly pressed to the puncture site. Stand one - two minutes, and the camera is ready.
In order to quickly patch the tire and get to the tire fitting place, flagella are used.
Before installing the harness, the hole in the tire must be enlarged with a special tool to 5-6 mm or with the part of the file where the handle is put on.
When installing the flagellum in a tubeless tire, it is necessary to moisten it with gasoline (then it is easier to push it into the tire).
A more reliable way to patch a tire without damaging the cord is to glue the patches onto the inside of the tire. Patches are the most common, as for repairing car cameras. First you need to sand the surface around the puncture site, then follow the instructions that come with the kit.
Large punctures up to 15 mm are glued with mushrooms. The same patch as the regular one, only with a mushroom stem. The technology is the same, clean the place around the puncture from the inside, apply glue, insert the leg of the mushroom into the hole, then pull the leg from the outside until the patch is pressed against the inside of the tire. By the way, repairing a tire with a mushroom is considered the most reliable way to repair. Since only in this case the hole itself is filled and the access of moisture and dust to the internal structure of the tire (cord) stops.
And finally, our advice.
Tires should be regularly and carefully inspected for damage and wear. A motorcycle is not a machine that has four wheels and stable stability. In case of detection of cracks in the tire, severe wear of the tread in the central part, frequent repairs due to punctures, it is better to replace the old rubber with a new one. Don't forget that your life depends on it!
Source
THREE SIDES OF THE ONE MEDAL. Any tire is a more or less successful attempt to combine the incompatible. Or, in other words, the conscious deterioration of some tire properties for the benefit of others. This is precisely the difficulty for designers when creating a tire. This is also the complexity of the choice for the consumer. Here are the three main properties that a road tire should have.
The first is to provide reliable grip. On asphalt, soft rubber has the best grip (which is especially important in corners). But it wears out quickly, losing its properties. Moreover, tires with a soft compound are very demanding on their own temperature and seriously lose when cold.
The second (for the rear wheel) is to implement a large torque. It is because of this that the rear tires on modern motorcycles are at least thirty percent wider than, say, motorcycles twenty years ago. But again there was a minus - due to the increased width, the maneuverability of the motorcycle worsened.
The third (more for the front wheel) — informative.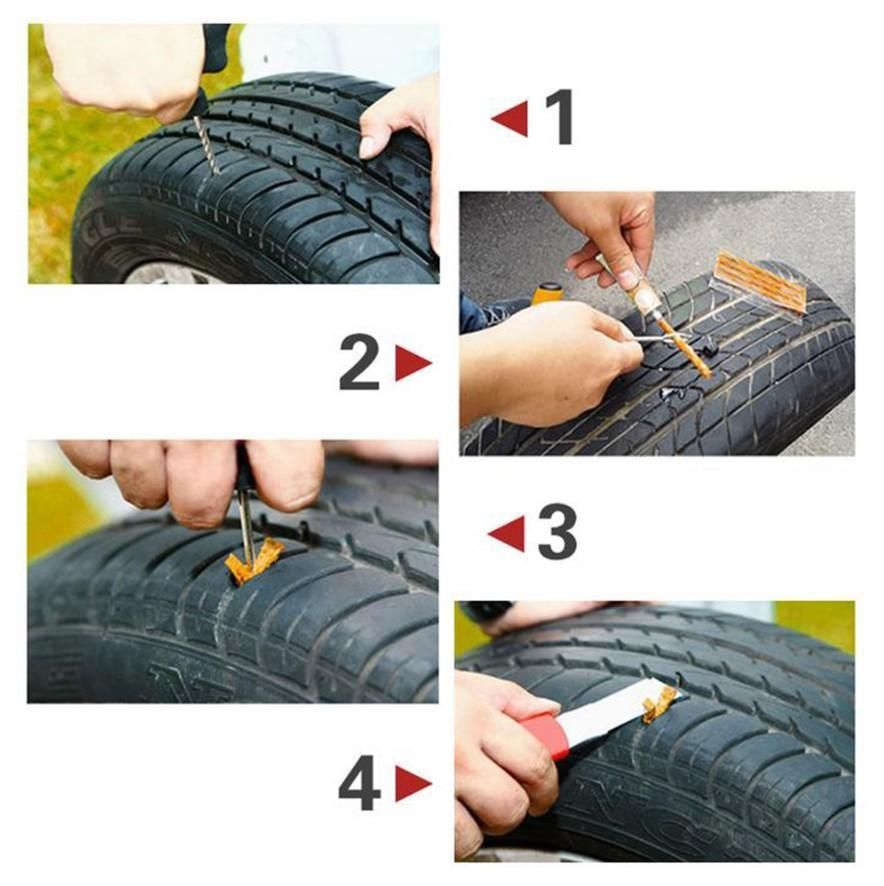 The tire should “inform” the driver about the condition of the roadway, which is especially important for fans of fast driving. The disadvantages of "detailed information" are an excess of vibrations transmitted from the road and discomfort. The choice of a specific tire for a particular motorcycle depends on many factors - the rider's riding style, his skills, and finally, the budget. Practice shows that the more experienced and skillful the driver is, the less attention he pays to a particular brand (all world-famous manufacturers mainly offer products of a similar level) and more to the condition of the tire and the pressure in it. Of course, if you are the owner of a sportbike, you should not install purely tourist tires on it, but sports pseudo-slicks for driving on wet city streets will not work well.
Road and sport bikes mainly use radial (RADIAL TYPE) tires. They are the most resistant to deformations that occur at high speeds and loads, provide a more regular contact patch and lower internal rolling losses.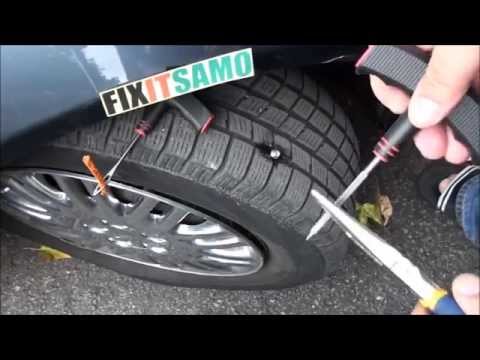 The threads of the carcass of a radial tire are located in planes passing through the axis of rotation of the wheel and, accordingly, do not intersect. Above the frame is a strong, as a rule, multi-layer breaker with a base of steel or synthetic threads, which perceives and distributes loads. A radial tire has less internal friction, hence less heat.
Bias (BIAS TYPE) tires are much simpler and therefore cheaper to manufacture than radial tires. They are more durable on bad roads, but heavier and have greater internal friction losses than radial ones. "Diagonals" have proven themselves well on enduro and motocross bikes.
In a bias tire, the carcass threads are at an angle to the direction of travel and cross, in contrast to a radial tire. The number of plies in the carcass is often indicated on the tire label (usually 2 to 6). The larger it is, the more load the tire can withstand. There are also BIAS-BELTED tires. They have an additional reinforcing belt on top of the carcass, just like radial tires.
TIRE FIT AND DIMENSIONS. It is believed that rubber stored for more than a year loses its hermetic properties. In fact, the layer is not. Thomas Bischoff, Market Development Manager for Eastern Europe at Metzeler, explained that in the past, rubber did crack quite quickly when exposed to sunlight. But for more than twenty years, thanks to special additives, the tire can be stored without loss of properties for at least five years. Even on the street. The only type of tire that this does not apply to is racing slicks. It is believed that they do not stand on a motorcycle for a long time, and there is no sunlight in the warehouse. Therefore, “extra” components are not added to the composition of their compound.
HOW MUCH TO DOWNLOAD? On any production motorcycle you will find a plate that will indicate the pressure when riding alone and with a passenger. In everyday life, you can safely follow these instructions. But in some cases, the recommendations will have to deviate. First of all, this applies to multifunctional motorcycles - enduro. Typically, the indications for them refer to road tires. When replacing tires with off-road tires, the pressure is usually lowered. As a rule, it should not exceed 1.8–2 atm (for light enduro there are hard tires in which it is recommended to maintain 1 atm). Off-road tires with a pressure above 2 atm behave disgustingly both on asphalt and on a country road! But on them you can carefully get to the place of repair and in case of a puncture - if the tire does not turn on the rim.
When using sports bikes on the track, the pressure must also be reduced. A "stove" for light vehicles can be considered 2.0 atm in the front and 1.8 atm in the rear wheel. Reducing the pressure allows you to increase the contact patch of the tire with the road, which is especially important in corners. And don't forget to inflate the wheel after your track workout! Driving with low pressure on the motorway will lead to increased tire wear and can be unsafe (because on the track the tire heats up, due to which the pressure still rises). When traveling on a loaded road bike, the pressure in the rear tire can be increased to 3 atm to increase the life of the rear tire. But don't do this if your route is through winding mountain roads or if you're traveling in cold weather.
WE REPAIR A TUBELESS TIRE. Flat tire. If this happened while driving at high speed on the highway, you will not notice that the pressure has dropped. Centrifugal force at speeds over 160 km / h will not allow the tire to squeeze through to the rim. (On the other hand, the same force can release air from the wheel by “squeezing” the nipple valve inward. Make sure that a cap with a sealing rubber gasket is always screwed on the nipple!) Trouble will show up at the most inopportune moment - during braking. Most often, the culprit of a puncture - a nail, a screw, or a piece of glass - gets stuck in the tire. If you don't have a special kit for repairing tubeless tires with you, it's bad, but do not rush to remove the self-tapping screw from the wheel.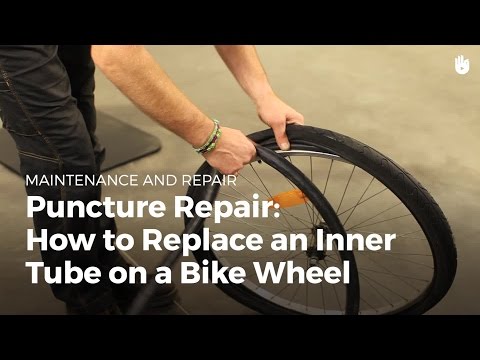 All is not yet lost. You can try to ask a good car enthusiast for a pump, pump up the wheel to maximum pressure and rush to the nearest tire service. (You need to find out about his whereabouts before you start pumping a leaky tire, because you will have no more than seven minutes on the road.) Focus failed? We call a tow truck.
If you did not hope for a chance and stocked up on a repair kit, there is a chance to leave on your own.
They need to be carried at least two, since one is not enough for the rear wheel. Remember, when the tire is inflated, the balloon cools - do not touch it with bare hands. In Europe, it is generally accepted that a repair with a flagellum does not give a 100% guarantee, since under the action of centrifugal force at high speeds, the flagellum can leave the tire. And despite the fact that in practice I have not seen this, I advise everyone to listen to the opinion of European colleagues. Take a look at the service and ask to change the tourniquet to a “fungus” or a patch that is more securely fixed from the inside of the tire. But a puncture with a diameter of more than 5 mm or in the side of the tire, or a "hernia" is useless to repair. It's a shame, you have to part with such a tire.
HOW TO BALANCE? When picking up a motorcycle from a tire shop, it is worth checking the work of the master. First of all, make sure that the arrow drawn on the side of the tire corresponds to the direction of rotation of the wheel. At the same time, the type and shape of the tread should not confuse you in any way. It is also important that the marking of the lightest part of the tire (usually a bright circle painted on the sidewall of the tire) is near the valve. Otherwise, the wheel will have to be weighted with additional balancing weights that spoil the look of the motorcycle.
Too many motorcyclists torment tire workers in an effort to achieve perfect dynamic wheel balance. In vain! First of all, the width of the motorcycle rim (even the rear one) is relatively small, as is the possible dynamic imbalance. Moreover, it has been experimentally verified that a motorcyclist cannot feel a weight less than 50 g on the rear and 25 g on the front wheel. That is why in many motorcycle factories, regular weights are attached to the middle of the rim, and not to the rim, like in cars. Moreover, even in world-class competitions such as WSBK, tires are manually balanced by spinning the wheel in special cones and gluing a weight against the rim that is below. An imbalance of 10–15 g can be considered the norm and the balancing should be stopped at this point.
REPAIRING A TUBE TIRE. A tire puncture should not confuse a true endurist. After all, he has with him everything necessary “for autonomous navigation”, including the tool needed to remove the wheel and tire fitting, as well as strength, dexterity and experience. In the absence of the latter, this article will be of help. In addition to the tool, you will need a spare chamber (if you take one, it is better to take the front one - it can also be used in the rear wheel, but the opposite will not work) and a pump. On a long trip, it is better to take patches and glue, and now special patches are sold that are designed for a long service life (cut out from the camera are considered temporary, that is, not very reliable, especially at high loads and temperatures). There are also special cans for tire repair, including tube ones, on sale. Their advantage is that they seal the damage and inflate the tire at the same time. Cons - "disposability", the inability to repair a large puncture and the price. Sometimes the water poured into the chamber allows you to do without tire fitting (50-100 ml is enough). With luck, you can drive this way for several hours. And if a rigid diagonal tire is installed on the rear wheel, then on a flat road it allows you to move with a puncture, especially for one driver on a light motorcycle.
 You just need to balance the speed with the heating of the tire - otherwise it may exfoliate from overheating. From the front, such a trick will not work - the motorcycle will be uncontrollable.
To remove the rear wheel, we need a wrench for the rear axle nut; the second key (to hold the axis) is usually not needed. Sometimes the nut sticks to the thread or is simply tightened with a long wrench, and you can’t shake it with a frail regular tool. When tightening the axis, do not overdo it - a moment of 8–10 kgcm is sufficient. By dragging, instead of getting a reliable connection, you will simply ruin both parts. It is not necessary to loosen the chain to remove the rear wheel on an off-road motorcycle, but it is still a good idea to have wrenches with you to tension it (on some motorcycles, the chain is tensioned by a “snail” that does not require keys). When collecting a set of tools on the road, try to do the procedures for which you take them in the garage. Indeed, in an open field (or a dirty swamp) there is nowhere to wait for help!
Source
Website for cars and repairs.
Any motorcyclist can have trouble with minor breakdowns and the most common of them, perhaps, is a breakdown of the camera. A lot of sharp rubbish is often lying on the roads: it’s so short to run into broken glass and nails. Of course, you can contact the auto repair shop, where specialists will help fix the problem by sealing the punctured chamber. But there is another option. We will tell you how you can glue the camera for a motorcycle yourself. What to do and how to deal with trouble?
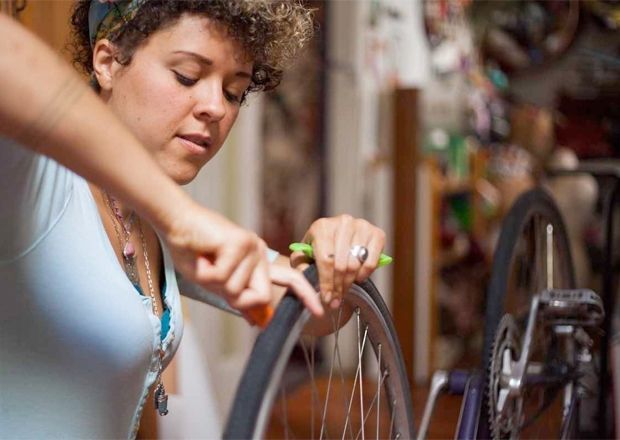
Removing the inner tube is not that difficult. But sometimes certain difficulties can still arise. They are solvable.
If you are working in a garage, it is better to carry out the "boarding" on cardboard or plywood. Rinse the wheel of dirt or at least clean it off the rim and sidewalls of the tire. All the tools that can come in handy for removing the camera are mounting blades.
First unscrew the spool, unscrew the retaining nut. Then remove the tire bead from the rim - do this on both sides. In this case, tarpaulin shoes are very suitable. Pressing firmly on the bead of the tire with the heel of your boot (do not trample!), Move around the circle until you reach the goal - the bead should move away from the rim.
Repeat the same after turning the wheel over.
If everything is carefully done, the first step in the question of how to properly seal the motorcycle inner tube has been completed.
When starting work, it is necessary to determine where the hole may be. How to do it?
If the external examination did not give any results, do the following:
If the whistle of the escaping air is still not audible, then you will find small punctures in this way: by a cold short stream of air that escapes after passing the camera over wet lips or the very eyes. You can also inflate the camera and place it in a basin of water or even a puddle. You will see a puncture by emerging bubbles.
Even if you know exactly where the puncture occurred, you should completely inspect the chamber, do it carefully, without missing a single centimeter. It often mistakenly seems that there is only one damage, but in fact, during the diagnostics, several of them can be detected.
Having dealt with this, proceed further.
If the tube is supposed to be glued, it should be placed on top of the tire in the same way as it was placed inside. So it will be easier to understand after examining the damage to the tire, where the camera itself was damaged. Now you need to remember, and even better - mark the pierced area, let out the air, put the camera on something solid, so it will be more convenient to process the affected area. This can be done with a rasp, a piece of medium-sized sandpaper or sandpaper. Work directly at the puncture site and near it (within a radius of up to 3 cm; such sanding with a margin is important, otherwise your work may be in vain and the patch will fall off), then degrease the area from dirt with a piece of a rag soaked in gasoline, clean it from rubber dust .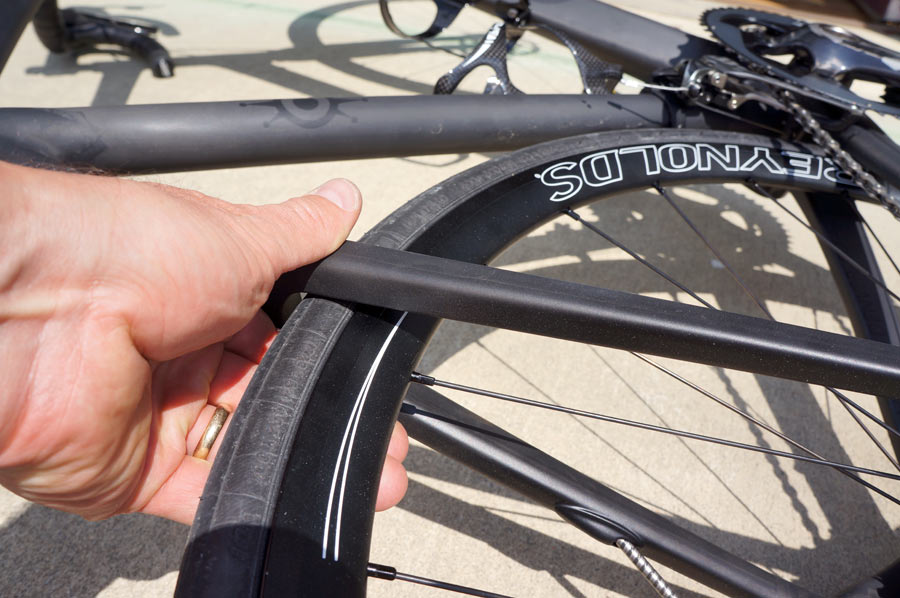 After processing, this place should become rough and acquire a matte color.
Next, inspect the hole in the chamber again to see if it should be sealed. For example, if this is still not a hole, but a crack formed from old age, it will not be possible to operate such a camera for a short time after gluing.
If you understand that it is worth repairing the camera, we continue to work. If you are interested in this topic, then here, if you wish, you can learn more about choosing a camera for a motorcycle https://www.tvoymoto.ru/catalog/motorezina/kamery/. Use a special kit for the corresponding repair activity: it can be purchased at any market that sells auto parts.
After the puncture area has been treated and cleaned, do the following:
Now it's time to check the chamber, for which it will need to be pumped up and then placed in a container of water: this way you will understand if there is any siphonite applied somewhere patch.
Before inserting the already repaired tube, be sure to feel the inside of the tire, inspect it, check if there is a nail sticking out there, if a small, but sharp pebble or a piece of glass is stuck. The cause of the puncture is also important: it is not enough just to eliminate it. If the tire is torn, for example, with a piece of glass, and the shard remains inside, problems cannot be avoided again in the future: after the repair work has been carried out, the hole will reappear.
Insertion of the chamber is also carried out starting from the nipple.
The mounting spatula may only be needed initially. Further, it is better to refuel the bead, helping with your heels: press it into a special groove on the rim, approach the camera nipple evenly, trying to do it from both sides. However, if you are dealing with a “hardened” tire that has not been elastic for a long time, you will most likely have to flang with mounting blades.
After inflating the wheel, be sure to pay attention to whether the tire sat evenly on the rim.
By following all the recommendations exactly, you will certainly solve the undoubtedly important question of how to seal the camera on a motorcycle.
Broken glass, nails and a lot of other sharp rubbish are scattered on the road, so a flat tire is one of the most common problems on a bike ride. If there is a car repair shop nearby, then you can resort to the services of craftsmen and ask them to seal the punctured camera. But what if such a nuisance happened in the forest or in the field? Consider how to seal the camera yourself.
Every cyclist has a clip-on first-aid kit containing the tools necessary for repairs. Let's consider how to seal the bicycle chamber using a repair kit.
The easiest option is to purchase a ready-made repair kit, which includes:
But sometimes you don't want to spend money on a new repair kit if the glue is used or dried. The adhesive composition can be purchased separately, but it is worth remembering that the adhesive for cameras must meet the following requirements:
The following brands are suitable for repairing a cycle tube at home or in the field:
Going on a bike trip outside the city, you should check if the tube of glue in the repair kit has dried up. This will eliminate the need to look for alternative ways to urgently seal a punctured wheel and “reach out” to the house.
To glue a wheel on a bicycle, you must first remove it. Consider the main stages of repair.
For ease of use, turn the bike upside down on the handlebars and wheels. Next, you need to do the following:
The punctured wheel is dismantled, you can proceed to the next step.
Now you need to remove the tire and remove the damaged inner tube. It's not difficult:
After all the manipulations, you can remove the camera.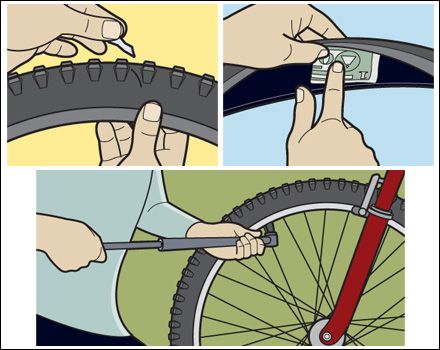
There are several ways to find the damaged area:
When damage is found, circle it with chalk.
Helpful advice. Visually or by ear, it is not always possible to detect a puncture site, and it can be difficult to find water in the field. You can make your work easier if you put a piece of foam sponge, a remnant of soap and a small vial of water in the first-aid kit. Soap solution will greatly speed up the search.
To seal the damage and keep the patch firmly in place, follow these steps:
In addition to the special patch sold in the repair kit, you can glue the camera with thin pieces of rubber.
Once the patch is applied, it is recommended to inflate the chamber and check for additional damage. In addition, you need to carefully inspect the tire. It is not uncommon for nails, needles, or other small sharp objects to become lodged in the tire, causing re-damage after the tube is installed.
The chamber is sealed and must be replaced. To do this, all the operations described earlier are performed in reverse order:
It remains only to inflate the wheel and install it in place.
If you don't have a repair kit on hand, making it impossible to fix the wheel yourself, it's important to prevent air leaks to get home. There are several ways to do this.
Temporarily seal a puncture using airtight materials:
After the impromptu patch has been applied, quickly inflate the wheel to press the patch as close to the hole as possible. This method of repair does not guarantee 100% tightness, but it will allow you to get home.
You can go to the nearest car workshop, where they will seal the chamber with raw rubber.
In this case, do the following:
Such a connection is characterized by increased strength, but this cannot be done with improvised means.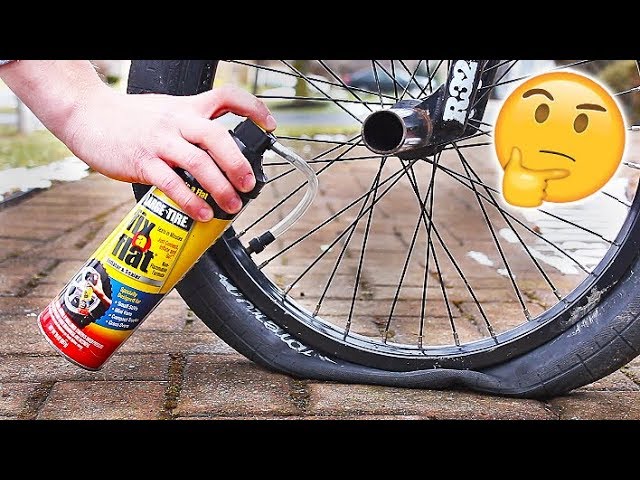
Small home vulcanizing machines are commercially available, but they are expensive. It does not make sense to buy such equipment to seal the bicycle chamber.
Taping the camera on a baby stroller is easy. Repair operations are similar to those carried out on a bicycle. To carry out repairs, you need:
After that, the wheel is assembled and then installed in place. The stroller can be used.
A crack in a tire can be repaired with patches from a car repair kit. It costs much less than buying a new tire, and after repair, the wheel will last a long time.
The easiest option is to put on a spare tire, and take the damaged wheel to a car repair shop, where the craftsmen will find and seal the damage. But this is not always possible. The reasons may be different: two tires are punctured or there is no spare wheel.
Cameras on cars are now rare, tubeless is more commonly used.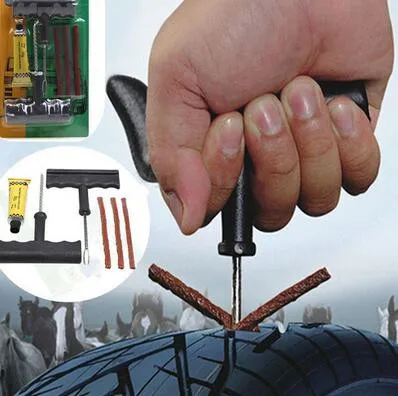 But if you are “lucky” and not only the tire, but also the tube is damaged, then you will have to spend a little time to seal it:
How to glue the tube is described using the example of a bicycle. But the car is much heavier, and attention should be paid to damage to the tire.
Small punctures and cuts can be sealed with a tourniquet. To do this, you need:
Next, the sealed chamber is put in place, the wheel is assembled, inflated and installed on the car.
But only small damages on the tire can be sealed in this way. A large lateral incision with a tourniquet cannot be eliminated.
To repair major damage, the tire must be completely removed from the rim and proceed as follows:
Once the tire is sealed, the wheel can be assembled and mounted on the vehicle.
Another problem is a herniated tire. A bulge on a tire disturbs the balance of the wheels, making it difficult to drive at high speeds. There is no universal way to eliminate a hernia on a wheel.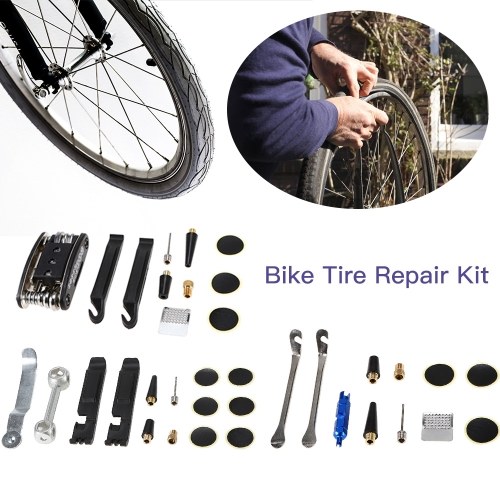 Small protrusions to extend the life of the tires should be sealed, as described in the repair of cuts and large punctures - with a fungus patch, and large ones cannot be removed - the tires will have to be changed to ensure safety.
It is impossible to drive with a damaged tube, so the wheel will need to be glued. But for women who ride a scooter on a par with men, such an operation is not always possible. Later we will consider the repair of tubeless, and now - quick repair methods that will allow you to get to the service station or at home.
Self-tapping repair. To do this, you will need:
It is not necessary to remove the wheel, it is enough to turn the scooter over, placing it on the steering wheel and seat. After a hole is found, the damaged area is cleaned, and a self-tapping screw lubricated with sealant is carefully screwed into the puncture site. After the glue, you need to pump up the wheel. This measure will allow you to get to the auto repair shop or return home.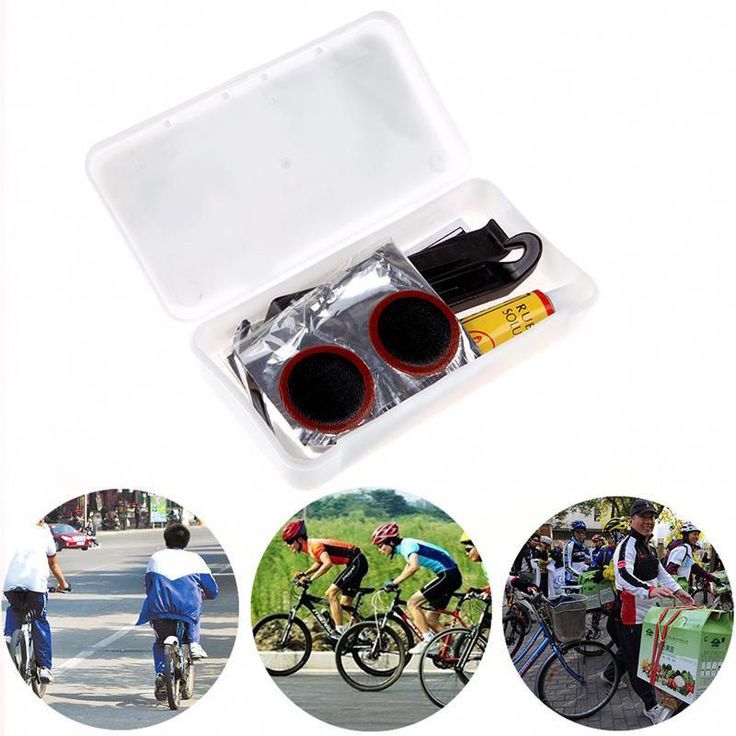
If the damaged area has a large incision, then another way to quickly repair is universal patches. It will take a few minutes to clean and seal the tire. But it is not recommended to ride on such a wheel for a long time.
To seal a tubeless tire, use:
How to patch a puncture in a tubeless tire using a tourniquet or patch is shown using the example of a tire with a tube. The only difference is that on the tubeless one you need to seal the hole so as to ensure complete tightness.
But motorists call the use of a spray a way for lazy people, but this method does not lose its popularity. A can of sealant can be purchased at an auto shop.
In the event of a puncture, the following must be done:
After the “repair” with the spray, there is no need to go to the workshop. You can ride on such a wheel for a long time. The only drawback of this method is that only minor damage is repaired.
Tips on what to do in case of a breakdown help many people.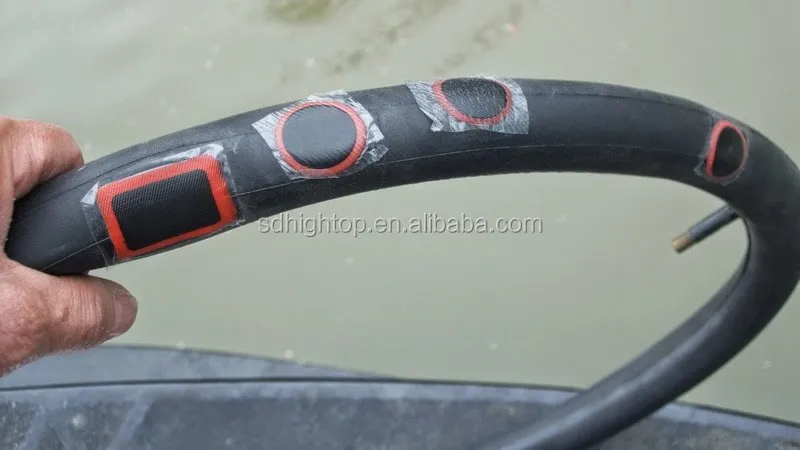 But it is better to try to avoid such trouble. Recommendations for cycling enthusiasts, but scooters or car enthusiasts can also learn useful information for themselves:
You should also check the condition of the brakes on your bike (this rule is even more important for a car or scooter). Timely braking at a puncture at high speed will help to avoid injuries.
Bicycle shops offer anti-puncture tape that is placed between the tire and tube, but it does not always protect against damage. In addition, during prolonged use, the tape falls apart into pieces, sticking into the camera, after which it has to be changed. Whether or not to use a new device is the personal choice of the cyclist.
Sealing the camera is relatively easy if you have the right tools on hand. Repair kits are inexpensive, so you should take care to have this kit in your bike kit or car trunk. Perhaps such foresight will help when a tire goes flat in a forest or on a desert road.
I got a small piece of material on how to stick a motorcycle wheel chamber with my own hands. In principle, sealing a motorcycle chamber and sealing a bicycle chamber are absolutely identical processes, so many of you probably remember how this is done from childhood. But, all of a sudden, someone didn’t have a bike. I’ll post it, maybe it will come in handy for someone.
Today's article closely echoes the article on replacing motorcycle tires with your own hands. Read about disassembling and beading motorcycle wheels there. Here we will only glue.
To seal the camera of a motorcycle, we need a kit that you see in the first photo. This is a Soviet repair kit for repairing tires for cars and agricultural machinery, which is sold in almost any spare parts store for Zhiguli.
In a good way, it is enough to have only one instruction for this repair kit to do everything right.
Do you think my motorcycle can be classified as a tractor or agricultural equipment?
First we need to determine where the hole is.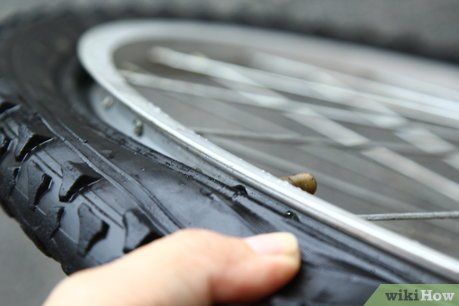 To do this, we take the camera, inflate it and lower it into a basin of water. Where the bubbles come from - there is a hole.
We look at the hole in the chamber and evaluate whether it is worth gluing at all. In my case, this is not a hole at all, but a crack that has formed from old age. I still sealed it, but it only lasted three hundred kilometers.
Then, as indicated in the instructions, we clean the puncture site with a special grater, which is attached to the first aid kit, or with a piece of medium-sized sandpaper.
It is necessary to sand a little with a margin, otherwise the patch may fall off.
Of course, I never had any liquids with the abbreviation BHZ in my household, so I just applied a layer of glue, waited for it to dry, peeled it off, then applied two more layers.
Next, we need to stick a patch and iron it properly. If there is an option to clamp in a vise - this is only a plus.
Then we wait until everything dries, peel off the top inelastic layer from the patch, inflate the chamber and check in a basin of water whether our patch is siphoning anywhere.
Well, that's all, now I'll tell you a couple of important things that are not listed in the instructions for the camera repair kit.
1) It is important to understand that when using tube rubber, when replacing or repairing the tube, we first need to find the cause of the puncture. If you ran into a nail, and then he flew away somewhere - half the trouble. Now, if a piece of glass is pierced, and the shard remains inside the tire, this is a big problem, because after the repair the hole will appear again. Therefore, we carefully check with our hand whether there are any solid particles left inside the tire.
If you have a compressor on hand, or even a regular pump, it will not be superfluous to blow out the tire from the inside. Then I highly recommend wiping the tire from the inside with a damp cloth.
2) A hole in the chamber can be formed not only as a result of a puncture with something sharp. If there is a crack in the tire, the camera can chew and grind while driving (inquisitive - my torment on this topic). Such a crack can be seen as follows. It is necessary to press on the tire from above so that the lower part “spreads” a little and perform such an operation along the entire radius. The crack will be clearly visible.
If you find a crack, don't despair. It, if it is not on the floor of the wheel, can be patched up with a patch from the same first-aid kit for cameras, but you just don’t need to rip off the upper, inelastic layer from the patch. In my case, the tires were enough for about 4,000 kilometers, so if you're lucky, you can get home this way.
3) Be sure to assess the general condition of the camera. The camera that we glued in this article was so old that three hundred kilometers after gluing it completely cracked in another place. This is because rubber naturally dries out over time. It would also be nice to assess the condition of the nipple and nipple. The inside of the nipple often rusts, causing the chamber next to it to rupture. It is often simply impossible to seal such a puncture.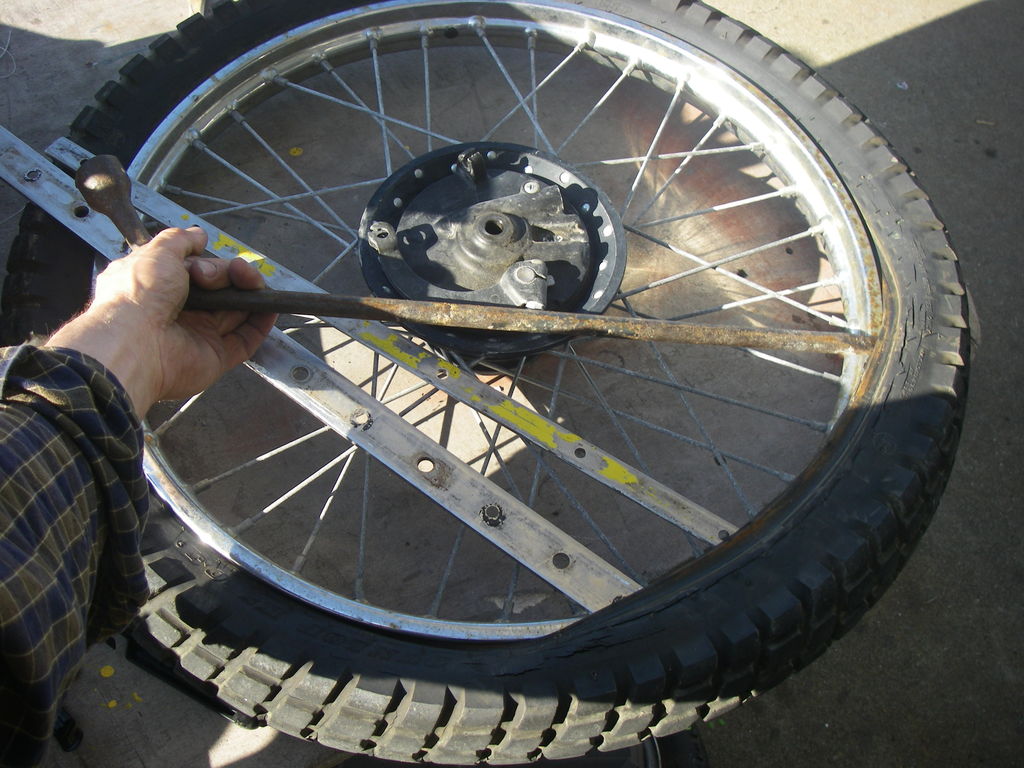
Share “Do-it-yourself sealing of a motorcycle wheel chamber.”
There are situations when, for some reason, it is not possible to replace or seal a punctured chamber, and sometimes there was no whole spare tire with you either. If the hole is small, that is, the wheel deflates in at least a minute, then proceed as follows:
Repair of the chamber with molten polyethylene
During my school days, I rode a classic road bike from the Minsk Motor Bike Plant during a summer holiday in the country. Naturally, there were minor breakdowns, of which, of course, the most frequent was a breakdown of the chamber (nails, wire, etc. are not uncommon on country roads). In the end, the patches ran out and another breakdown of the rear wheel forced me to look for some simple solution “on the knee”, because the replacement of the camera did not shine for me in the next few days. A solution was found quite quickly, although it raised doubts about its effectiveness - I filled the chamber with melt from a burning plastic bag. Oddly enough, the camera held. Over the next month, two chambers were pierced four more times and filled in exactly the same way. The old "patches" cracked along the edge, but they held.
Subsequently, the same long-suffering wheel received a rupture along the cord in a section of 10-15 cm. That bike is still lying in the country and, although not used, is still on the move - with the same tube and tire.
Camera repair with coin
In this way, not only a pinhole, but even a puncture of several millimeters can be reliably eliminated in 5 minutes. an ordinary coin is taken, preferably of a medium or larger diameter, placed on the edge of a stone and, with the help of another stone, bent almost in half. a camera puncture is placed between the bent sides of the coin, and the whole thing is held with the left hand. with the right hand, with the help of a stone or something heavy, you need to hit the coin several times properly so that it bends as much as possible, pinching the rubber in the puncture area. of course, if you have pliers and a hammer, then this will be easier to do. we tried the method not only on a bicycle tire, but also on a motorcycle tube - it works! Moreover, the camera is not damaged - when you arrive home, you can remove the coin and put on a rubber patch!
Repairing the camera with a thread
It's amazing how quickly the distance scale changes in case of breakdowns: just 20 km to the house was just a stone's throw away and then a puncture - and 20 km turn into an insurmountable gigantic distance for a pedestrian.
so there is no first aid kit, I don't want to go, the old but effective method helped: in the nearest dwelling, a piece of strong thread was obtained from some grandmother. the puncture site on the camera is pulled to the side as much as possible with one hand, and with the other hand it is pulled with a thread of 10-15 turns as tightly as possible. the resulting pimple is not very aesthetic, but the air does not poison. if you inflate the wheel without fanaticism, you can drive for a week, the main thing is not to forget to seal it up later!
Camera repair with adhesive tape and a condom
It was in the Crimea.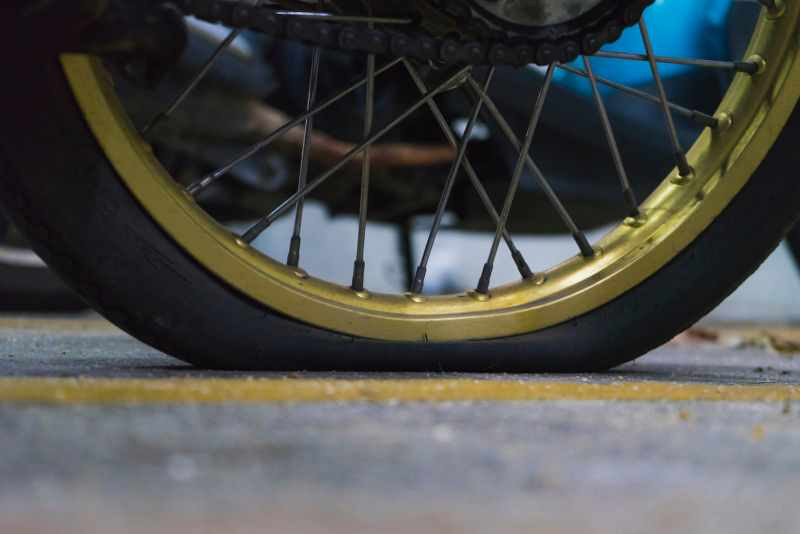 My wife and I rested there, and although we lived in a small boarding house near Feodosia, the bikes were with us, and we even rode every now and then, looking around. And then one fine day we went to the Sea of Azov. We rented a house there for a day, and in the evening we went to see the Arabat Spit. And the road on this arrow is a primer with protruding stones. And on one of these stones on my wife's bike, a wheel broke through. Apparently, it was pumped up weakly. I rummaged through the pockets of my backpack - there was no first-aid kit, I left it in the boarding house. And how to get back there - it’s not clear, not to stomp on foot? The next morning they began to think about how to fix the camera. And what kind of rubber products can you get at the resort? In a word, we got hold of a band-aid and. yes, it was him, they cut out a patch, glued it with a band-aid, pumped up the wheel - it doesn’t let go! So we drove all the way back, only had to pump up a couple of times.
Any motorcyclist can have an unpleasant situation on the road, so no one has yet canceled a breakdown.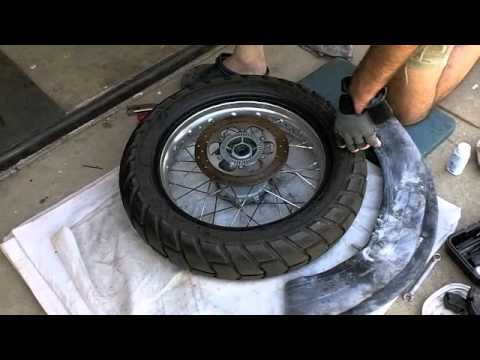 And one of these situations is a breakdown of the camera, because there is enough garbage lying on the roads. Of course, you can contact the nearest service, and there they will quickly seal the camera for you. But today we will not consider this option, since there are not always service stations nearby, and not everyone wants to spend their savings. In this article, we will tell you in detail how to properly seal the camera of a motorcycle.
The process of dismantling the camera from the wheel is not that complicated, so if you follow our instructions, you will definitely succeed. If you are interested in this topic, then here, if you wish, you can choose a camera for a motorcycle https://www.tvoymoto.ru/catalog/motorezina/kamery/. Before starting to disassemble the wheel, lay a sheet of cardboard on the floor, the wheel should first be washed. In this case, it will be more comfortable to work. Different spatulas and other tools should be placed nearby for ease of use.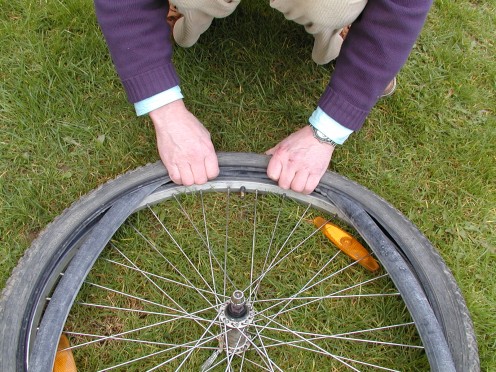 The camera is removed as follows:
Before you start sealing the camera, you need to localize the puncture site, you can do this in the following ways:
When you find the puncture site, it is better to circle it with chalk or a felt-tip pen. Since if you do not, you will have to spend a lot of time looking for this place.
If the camera for a motorcycle already has a lot of punctures, and microcracks have appeared from time to time, then it is better to buy a new one.
Feel the inside of the tire before installing the tube. This way you can make sure that sharp pieces of metal, nails and other debris do not stick out inside. A common problem with punctures is that pieces of glass remain in the tire and are hard to find. Therefore, after installing a new camera, it will soon be pierced again.
Install the inner tube in the wheel in the following order:
Now you know how to seal the inner tube of a motorcycle at home.