The Sixity XTA Axle is a severe-duty, OE-replacement ATV/UTV Constant Velocity axle (also known as a CV axle shaft or CV joint axle shaft) that dominates extreme trail and off-road terrain. With Sixity XTA axles, go beyond versatility to the ultimate in Sixity Axles offered at a fraction of the cost of OEM axles. The Sixity XTA axle defeats terrain vibration and harshness while ensuring riding agility and maximum torque. When it comes to 4-wheelers or side-by-sides, axles are one of the most important components, and depending on the rider, terrain, engine, and machine, they, like any other part, can fail. Before failure, there are signs and symptoms of a worn and damaged axle or CV joint to watch for including loud clicking noises when making a turn, a clunking sound when accelerating or decelerating, humming or growling noises, or a shudder or vibration when you accelerate. If this sounds all too familiar, it might be time to consider an axle replacement.
Whether looking for a left or right CV axle, rear or front CV axle, rely on Sixity and our years of powersports expertise, along with our incredible selection, to help you find the exact severe-duty axle for your particular ATV/UTV vehicle application.
 High-temperature and high-load-bearing moly grease packed into the boot helps to ensure long-lasting CV-joint life
| SKU | 2001100015 |
|---|---|
| Brand | Sixity |
| Part Type | XTA Series Axle |
| Part Interchange Manufacturer | Sixity |
| Part Interchange Number | 0402-365 0402-987 |
| Pack Size | 1 |
| Condition | New |
| Part Placement | Front Left |
| Vehicle Type | ATV / UTV |
| Vehicle Year | 2002, 2003, 2004 |
| Vehicle Make | Arctic Cat |
| Vehicle Model | 300 |
| Vehicle Submodel | ALL 4X4 |
| Vehicle Engine | Various |
We’ve made it our mission to help diehard ATV, motorcycle, and snowmobile riders like you find affordable—and awesome—replacement parts for their machines. With our in-house brand, Sixity, you’ll find precision-made powersport parts built to exacting specifications, including the industry-leading Sixity XT and XTA Axles. Since 2006, the Sixity brand has become a popular choice for our value-conscious powersport customers, with proven durable and reliable performance across our entire product line.
All our Sixity-branded parts come with a 100% Fitment Guarantee and include a limited 1-year warranty to help riders shop with confidence and find the parts they need to repair their machines. Sixity-branded parts include ATV All-Terrain and Severe-Duty Axles, Motorcycle and ATV Brake Pads in Ceramic, Organic, and Sintered materials, and ATV Wheel Spacers. Additionally, our components cover all of the most popular vehicle makes including Polaris, Arctic Cat, Yamaha, Honda, Can-Am, Kawasaki, and more.
Shopping with Sixity goes far beyond our online retail store. Besides our premium products, we also offer how-to guides in article and video formats to continue to assist you through the part-installation process.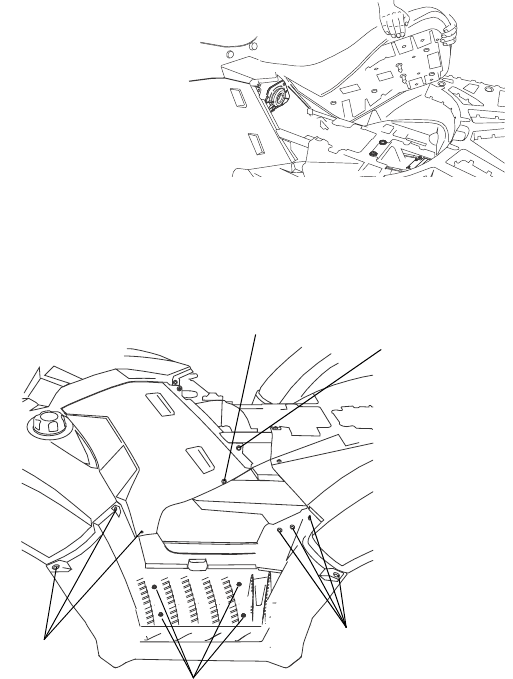 You can access these guides at anytime, making it easier than ever to finish repairs and get back to carving out new terrain (with money to spare).
The Sixity brand launched in the powersports industry in 2006 with all-terrain and severe-duty Sixity ATV Axles and quality Sixity Motorcycle/ATV Brake Pads. By 2013, the brand had expanded to include a line of automotive replacement parts sold on SixityAuto.com, eBay, and Amazon. Recently, the Sixity brand became part of Proximity Group™, an American-owned manufacturer and online retailer (and proud member of the Better Business Bureau).
As we continue to grow, our goal is to provide our customers with the best possible shopping experience through unsurpassed value, convenience, and selection. We strive to deliver on our core tenets for our value-conscious customer base including free* and fast shipping, a 100% Fitment Guarantee, a U.S.-based Customer Service Center, and a limited 1-year warranty on Sixity-branded parts.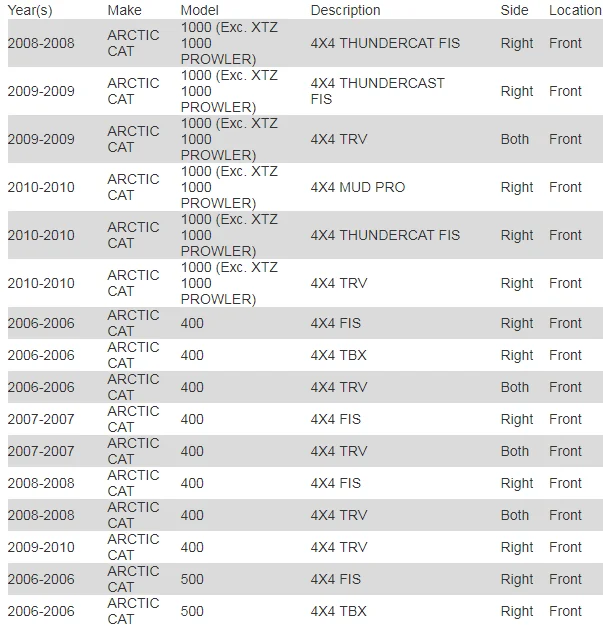
Warranty Term: 12 Months
Click here to read warranty details, terms, and exclusions.
Most ATV riders will at some point need to replace their machine’s axles. This how-to guide is intended to show you that this repair can be done as a DIY project, saving you professional labor costs and even enhancing your overall ATV experience.
The steps we provide below are general in nature and are not meant to replace the instructions found in your OEM owner’s manual. Different brands may have different torque specifications and axle mounting configurations. When in doubt, follow the OEM instructions.
Please read these instructions thoroughly prior to working on your vehicle to prevent damage and/or injury from occurring. These axles come with a sure-lock mechanism designed into the inner joint which requires special handling in order to be properly removed and installed into the casing.
If all goes well, this procedure should take an hour start to finish, even if it’s your first experience.
Do not use any form of mechanical force when removing the inner joint from the gearbox or damage may occur. We recommend that sure-grip work gloves be worn while working on your vehicle.
Front Axle Removal & InstallationRear Axle Removal & Installation

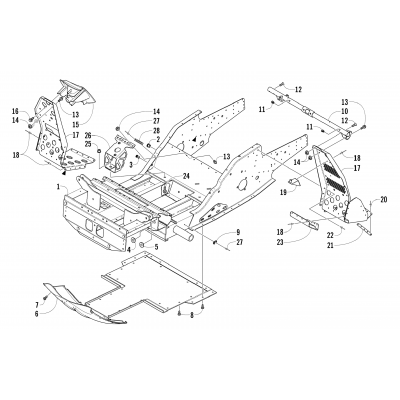
 Remove the upper steering knuckle joint from the bearing carrier to free the lower carrier assembly. Swing the carrier assembly down and back, carefully working the axle from the spindle. Since models vary, consult your service manual for their recommendations.
Note: Depending on the make and model of your ATV (and the extreme angle of the axle), you may prefer instead to remove the upper sway link connection and lower shock mounting bolt to move the shock up out of the way and swing the carrier assembly up rather than down to gain enough clearance to free the axle. Or you may choose to remove both the upper and lower ball joints, along with the tie rod end to remove the knuckle completely.
Remove the upper steering knuckle joint from the bearing carrier to free the lower carrier assembly. Swing the carrier assembly down and back, carefully working the axle from the spindle. Since models vary, consult your service manual for their recommendations.
Note: Depending on the make and model of your ATV (and the extreme angle of the axle), you may prefer instead to remove the upper sway link connection and lower shock mounting bolt to move the shock up out of the way and swing the carrier assembly up rather than down to gain enough clearance to free the axle. Or you may choose to remove both the upper and lower ball joints, along with the tie rod end to remove the knuckle completely. You may need to push in first. There’s a snap ring holding the axle into place, so it could take a little force to remove the axle.
 Give the axle a slight tug to make sure the clip is locked into place.
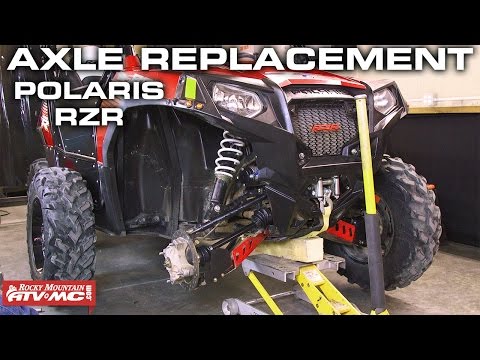
We encourage you to use caution on your first ride to ensure your axle has been properly installed. Happy riding!
 Remove the cap. Then use needle nose pliers to remove the cotter pin on the axle nut securing the hub. To remove the axle nut, you may need to have someone press and hold the brake to provide the resistance you need. Use a socket wrench (typically 27 mm) to loosen the nut. Remove any washers as well.
 You may need to remove the lower shock bolt to allow the trailing arm to move out far enough.
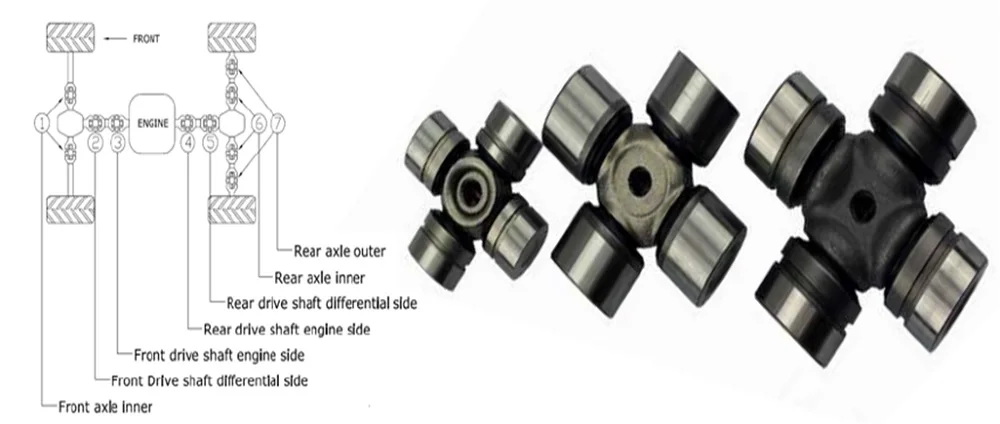 Put some grease or anti-seize on the inner splines. Then, insert the axle into the casing, lining up the splines.
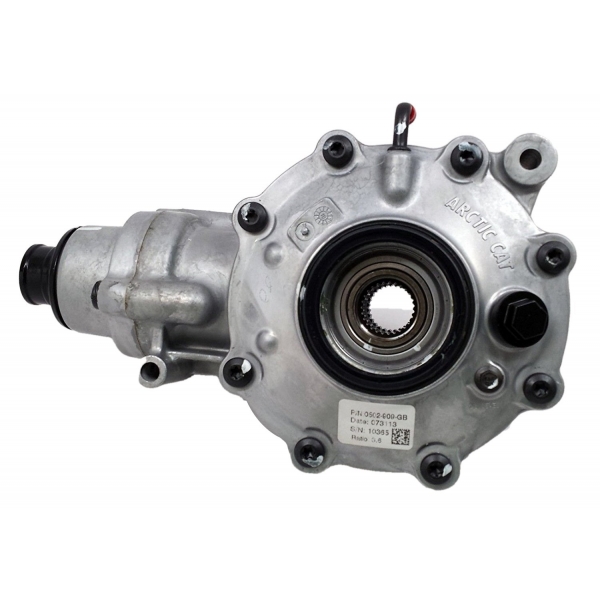 Reinstall the brake caliper onto the rotor and thread in the new fasteners.
We encourage you to use caution on your first ride to ensure your axle has been properly installed. Happy riding!
Our axles are designed and intended for use as OE-replacement axles only. These axles are not warranted if installed improperly, a modification has been made to include a lift kit, the installation of over-sized tires, or if racing or performance enhancements are made to the engine other than the OE design. Read our full warranty policy here.
- End of Procedure -
Return to all Repair & Install Guides
Most ATV riders will at some point need to replace their machine’s axles. This how-to guide is intended to show you that this repair can be done as a DIY project, saving you professional labor costs and even enhancing your overall ATV experience.
The steps we provide below are general in nature and are not meant to replace the instructions found in your OEM owner’s manual. Different brands may have different torque specifications and axle mounting configurations. When in doubt, follow the OEM instructions.
Please read these instructions thoroughly prior to working on your vehicle to prevent damage and/or injury from occurring. These axles come with a sure-lock mechanism designed into the inner joint which requires special handling in order to be properly removed and installed into the casing.
If all goes well, this procedure should take an hour start to finish, even if it’s your first experience.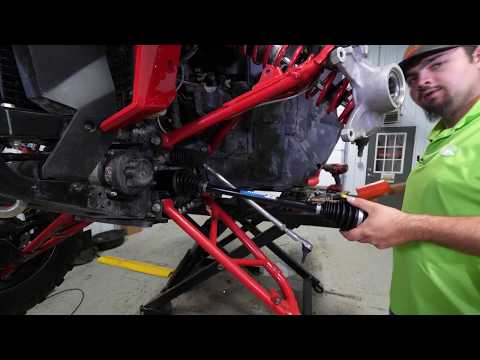
Do not use any form of mechanical force when removing the inner joint from the gearbox or damage may occur. We recommend that sure-grip work gloves be worn while working on your vehicle.
Front Axle Removal & InstallationRear Axle Removal & Installation

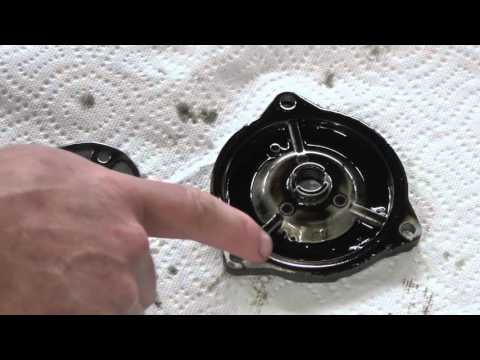
/photo/2020/09/30/4051659161.jpg) Remove the upper steering knuckle joint from the bearing carrier to free the lower carrier assembly. Swing the carrier assembly down and back, carefully working the axle from the spindle. Since models vary, consult your service manual for their recommendations.
Note: Depending on the make and model of your ATV (and the extreme angle of the axle), you may prefer instead to remove the upper sway link connection and lower shock mounting bolt to move the shock up out of the way and swing the carrier assembly up rather than down to gain enough clearance to free the axle. Or you may choose to remove both the upper and lower ball joints, along with the tie rod end to remove the knuckle completely.
Remove the upper steering knuckle joint from the bearing carrier to free the lower carrier assembly. Swing the carrier assembly down and back, carefully working the axle from the spindle. Since models vary, consult your service manual for their recommendations.
Note: Depending on the make and model of your ATV (and the extreme angle of the axle), you may prefer instead to remove the upper sway link connection and lower shock mounting bolt to move the shock up out of the way and swing the carrier assembly up rather than down to gain enough clearance to free the axle. Or you may choose to remove both the upper and lower ball joints, along with the tie rod end to remove the knuckle completely. You may need to push in first. There’s a snap ring holding the axle into place, so it could take a little force to remove the axle.
 Give the axle a slight tug to make sure the clip is locked into place.
We encourage you to use caution on your first ride to ensure your axle has been properly installed. Happy riding!
 Remove the cap. Then use needle nose pliers to remove the cotter pin on the axle nut securing the hub. To remove the axle nut, you may need to have someone press and hold the brake to provide the resistance you need. Use a socket wrench (typically 27 mm) to loosen the nut. Remove any washers as well.
 You may need to remove the lower shock bolt to allow the trailing arm to move out far enough.
 Put some grease or anti-seize on the inner splines. Then, insert the axle into the casing, lining up the splines.
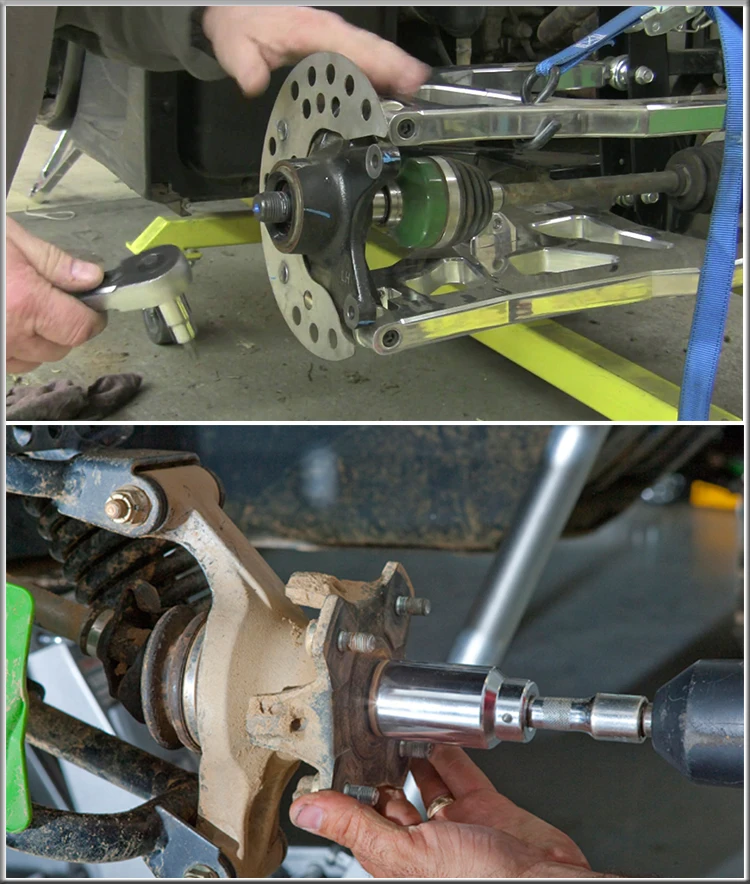 Reinstall the brake caliper onto the rotor and thread in the new fasteners.
We encourage you to use caution on your first ride to ensure your axle has been properly installed. Happy riding!
Our axles are designed and intended for use as OE-replacement axles only. These axles are not warranted if installed improperly, a modification has been made to include a lift kit, the installation of over-sized tires, or if racing or performance enhancements are made to the engine other than the OE design. Read our full warranty policy here.
- End of Procedure -
Return to all Repair & Install Guides
With the development of the quadrosphere all over the world, more and more fishermen, hunters, travelers, extreme sportsmen and just lovers of outdoor activities, make their choice in favor of purchasing motor vehicles.
You have seen this technique with friends, look at You-Tub, how popular quad bloggers spend their leisure time, maybe even you were given a ride on an ATV and you decided to buy it no matter what. But, as expected, YOU are faced with the choice of which ATV to buy?
TvoyGarage.RU experts often face such questions from future owners. Based on these appeals, we decided to write a manual for those who decide to purchase an ATV.
This article will not tell you “buy this particular ATV”, it is aimed at ensuring that you understand what types of ATVs exist, why they are needed and for what conditions they are intended.
Where does the history of quadro-creation begin?
The progenitor of the ATV in all its understandings was a three-wheeled trike. In 1967, Honda R&D LTD received an order from an American company. The order was as follows: “American dealers sell motorcycles in summer, snowmobiles in winter, but what to sell in the off-season”? Honda accepted what they thought was a logical order. The company found a suitable engineer, Osama Takeuchi, he was given several promising engineers to help him and was instructed to lead the project. In fact, Osama became the Father of the first ATV.
The result of fruitful work was the world's first ATV Honda US90. At that time, due to the fact that it was a trike and more like a motorcycle, the name contained the abbreviation -ATC, or All Terrain Cycle (Off-road motorcycle).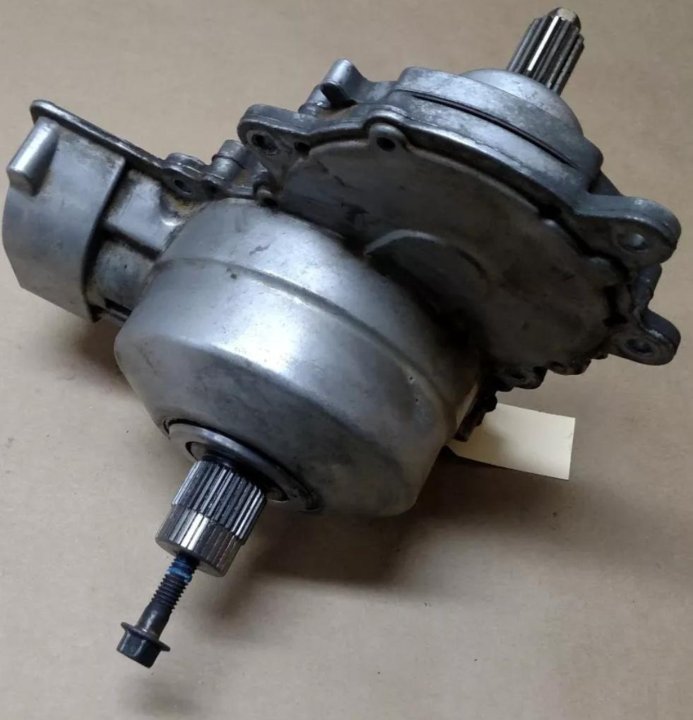
A new base was developed for the US90, in which they placed a time-tested motorcycle 4-stroke, single-cylinder, 90 cc engine with 7 hp, equipped it with a 4-speed 2-mode gearbox with automatic clutch. At the back, a pendulum lever was used with an axle fixed to it, designed for 2 wheels. Early on US90 installed volumetric rubber with a tractor tread, but as practice has shown for such a small and light vehicle, rubber does not work very well. Especially on loose and loose surfaces: snow, sand, mud. Motorcycle tires didn't fit either. And only when Osama Takeyuchi received a 6-wheeled amphibian Amphi-Cat from the USA did things get off the ground. The US90 was fitted with 20" low pressure wheels with high flotation and buoyancy. But they did not stop there, it was decided to develop their own tires. The result was 22-inch wheels, inflated to 2.2 psi, they were ideally suited to this model.
During the tests, having wound many kilometers on impassable roads, sands and hills with a surface slope of up to 35 degrees, quite a few improvements were made to the chassis. In order for the new car to be good not only for off-road rides, but also for work in the field, quite a lot of improvements had to be made in the forest. All improvements Osama Takeyuchi patented.
One of the important improvements was the change of the classic motorcycle throttle to the accustomed throttle for all of us. The fact is that the motorcycle throttle was difficult to control when making maneuvers. Installing a gas trigger instead of it, under the thumb, allowed the driver to move his own weight when maneuvering, while not losing control over the trigger.
The suspension, at that moment, was also abandoned. The fact is that low-pressure tires themselves dampen bumps very well. Moreover, they are good for agriculture, because they do not "plow" the soil, do not spoil plantings or lawns.
The premiere of the new, for the global industry, Honda US90 vehicle took place in 1969. in the USA. In 1971 it was renamed the Honda ATC90.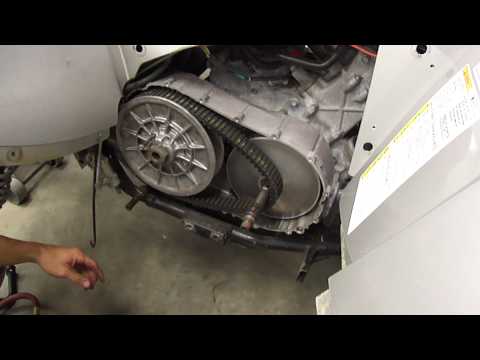
In the same year, a new, 7th in a row, Bond series - 007 "Diamonds Are Forever" (007: Diamonds Are Forever) was released. In this film, the new ATC9 just demonstrated their capabilities0. This scene from the movie served as a great promotional video for a new vehicle. ATC90 instantly became a popular entertainment on the beaches of California, until the end of the 70s, no one even thought of using this novelty for utilitarian purposes, for which this tool was developed.
It so happened that the American vision and Hollywood showed a slightly different path for the development of this technique and in the first decades no one thought about the utilitarian use of ATC90. But the same American users, in the end, by their own example and experience, showed the range of use of such equipment, which ultimately gave rise to its development in different directions.
For eight years, Honda R&D LTD has been a monopoly in this market, but as it happens, competition cannot be stopped. In 1979 Yamaha introduces its first all-terrain vehicle, the YT125. In the USA, the novelty appeared in 1980 and was called the Yamaha Tri-Moto. The all-terrain vehicle was equipped with a 2-stroke, 123 cc engine and was equipped with a 5-speed gearbox.
The ancestor of Honda all-terrain vehicles did not stand still, and already in 1981. released the first sports model Honda ATC250. In this unit, developments from motocross were used. They used a powerful 2-stroke 248 cc engine, installed adjustable suspension front and rear, front disc brakes, manual clutch.
The appearance of the suspension made it possible to switch to “normal” wheels, equipped with a tread with pronounced lugs.
In 1981 and Kawasaki launches its first all-terrain vehicle, the KLT200. Unlike competitors from Honda and Yamaha, the Kawasaki introduced an electric engine starter, a manual clutch, and a dual-mode (locking) differential.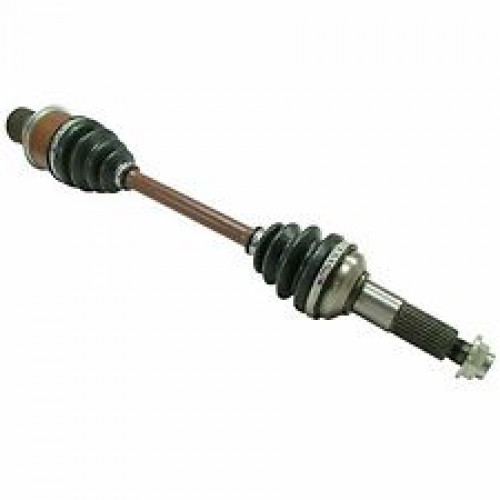
In 1982 Honda introduces the first utility model, the Honda ATC 200E Big Red.
The package included a telescopic suspension, a front and rear trunk, a 192 cc engine with an electric starter, a 5-speed semi-automatic transmission and a number of additional equipment for various purposes. This model was popular in the USA with farmers and hunters.
In 1982 Suzuki has applied for a patent for a 4-wheel ATV, which, in fact, became the FIRST ATV!
The patent was accepted and Suzuki launches the first, in our understanding, normal 4-wheel ATV, the Suzuki ATV-QuadRunner LT125. This model was positioned as a "entertainment vehicle for beginners", that is, it was designed to educate inexperienced owners, for this a more stable four-wheel layout was used. In the future, these riders had to transfer to more powerful 3-wheeled ATVs. In the world community, at first, not everyone liked the idea with 4 wheels - this meant a heavier structure, complication, as a fact of a rise in price, but soon significant advantages were revealed, for example, such as improved balance of the vehicle.
In 1983 Honda releases its most successful 3-wheel sport model, the Honda ATC200X. It had a 4-stroke engine, front and rear suspension and lightweight aluminum wheels with motocross tires.
In 1984 Suzuki releases the small, 4-wheel Suzuki LT50, which is becoming very popular with novice ATV riders. In the same year, Yamaha released its first 4-wheeler, the YFM200 Moto-4. It is equipped with 196cc, 4 stroke engine.
In the same year, Honda presents its first 4-wheeler, and not as competitors, starting with children, but as a full-fledged adult ATV for utilitarian purposes. Honda TRX200- is equipped with a single-cylinder, 4-stroke engine, 5-speed gearbox with reverse, cardan transmission, front and rear luggage racks.
In 1985 Kawasaki releases the Bayou 185(KLF158-A).
Thus, all Japanese companies on the market have switched to 4-wheel ATVs.
American manufacturers, having failed to compete with Japanese manufacturers in a 3-wheel version, decided to launch their product on the market.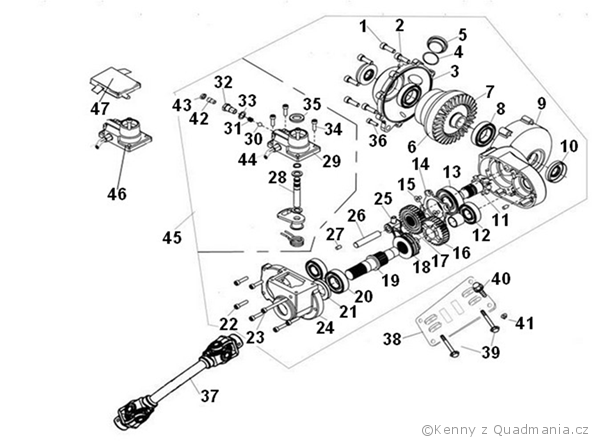 And so, in March 1985. American company Polaris Industries enters the ATV market.
The company entered the market with a bang. As a successful snowmobile manufacturer, Polaris Industries is introducing the Polaris Trail Boss. In which the best of what was possible at that time was assembled: Automatic Polaris Variable transmission (PVT), rear and front suspension with large strokes, MacPherson type front suspension, disc brakes on all four wheels, large (solid) steps.
In addition to the aforementioned 4-wheeler, Polaris decided to play it safe and released the 3-wheeled Polaris Scrambler. In a couple of years, 1,700 of these ATVs were produced, and after 1986. Polaris Scrambler began to be produced on a 4-wheel base.
The arrival of Polaris Industries on the market significantly revived competitors, new models began to be released at an increasing speed. So, all in the same 1985. Yamaha releases the progenitor, but still on 3 wheels, of the now famous Raptor model. The model, called the Yamaha Tri-Z YTZ250, was equipped with hydraulic disc brakes, gas front shock absorbers, rear swingarm suspension with a single gas shock absorber, fuel tank under the seat for a lower center of gravity, and a powerful 250cc, 2-stroke, liquid-cooled engine.
After the release of this model, the time will come for other big names Warrior and Banshee.
In 1985 sales growth led to an increase in accidents on ATVs, which was the reason for the investigation of this issue by the Consumer Product Safety Commission (CPSC). In most cases, emergencies were created by the owners of the ATVs themselves. As practice showed, it was drunken youth driving along the beaches of California. For some reason, the public was outraged not at the drivers, but at the manufacturers of equipment. At 1986 CPSC statistics showed that all accidents are the result of improper operation.
Honda was the first manufacturer to react to this situation by launching special operating manuals and warnings.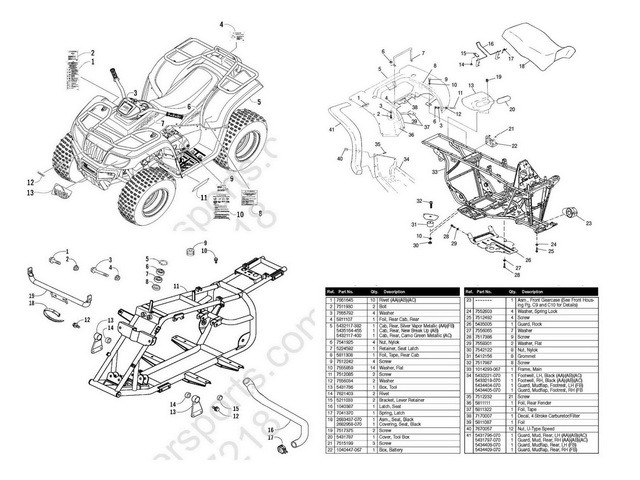 They were placed as labels on ATVs to instruct the owner on the safe operation of his ATC or ATV. New CPSC statistics in 1988 showed that with the use of the manual, the accident rate was reduced by 33%. But nevertheless April 28, 19In 1988, American ATV distributors entered into a 10-year agreement with the CPSC called the Final Consent Decreet. Following this agreement, the ATV industry committed to invest about $100 million to expand safe driving programs. In the same agreement, it was said that the companies undertake to discontinue production of 3-wheeled all-terrain vehicles, withdraw from their distribution networks and buy out all their unsold products from intermediaries.
It was a significant blow to Honda, but at that time a 4-wheel model was already in development and at 19'86 Honda releases the first ATV Four Trax350 4x4 all-wheel drive ATV. This model will become the most successful in the history of the company.
4-wheel ATVs began to win back the market from 3-wheelers, completely forcing them out of the market.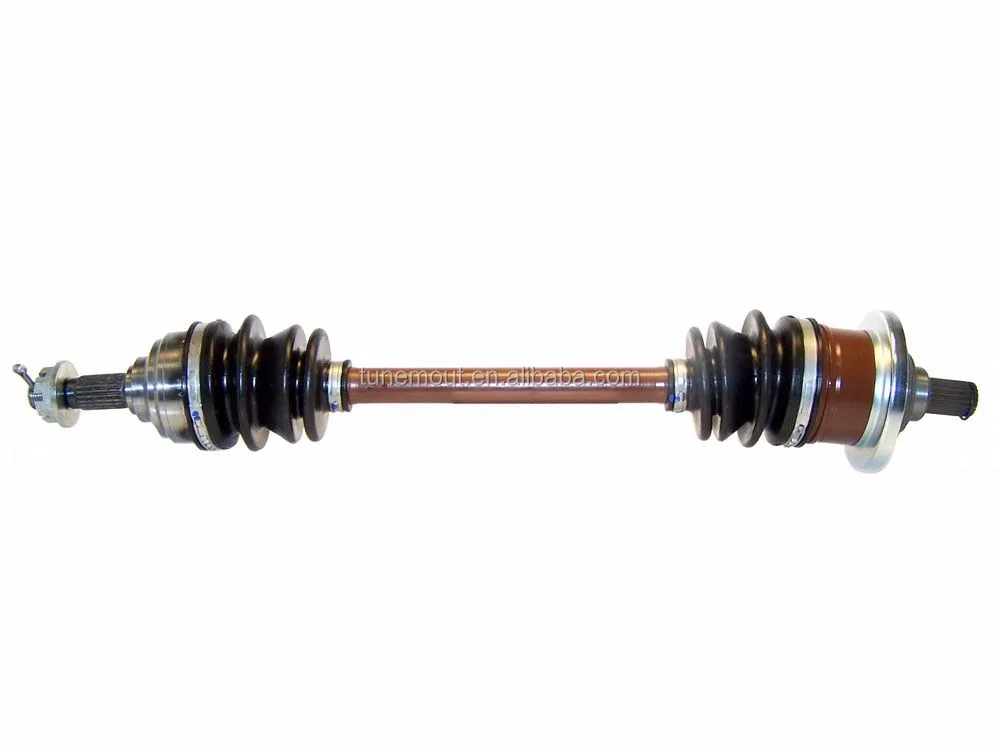 Thus ended the era of 3-wheelers.
In 1989 Kawasaki introduces its first all-wheel drive model, the Bayou300 4x4 with a 290 cc engine, 5-speed manual transmission with reduction gear, reverse and drivelines to the rear and front axles.
In 1991 Suzuki releases its legendary Suzuki King-Quad ATV. It is equipped with a single-cylinder, 4-stroke engine with a volume of 280 cubic centimeters, independent multi-link suspension, as well as a 5-speed manual transmission with a choice of 3 low gear options: High, Low, Super Low and that's not all! The ATV was not deprived of four-wheel drive modes: full, full with a locked differential.
In 1995, Polaris introduces the Sportsman 500 4x4 ATV. This ATV was equipped with a proprietary automatic transmission, a ground clearance of 280 mm, and an independent rear suspension. The ATV turned out to be quite popular. Several specialized publications recognized it as the best ATV of the year. And then another North American manufacturer could not stand it.
ArctCo, a well-known snowmobile manufacturer, in August 1996, under pressure from more than 1,200 of its own dealers, changed its name to the more resounding and popular Arctic Cat Inc. and proceeds to the production of its own ATVs. Arctic Cat BearCat 454 4x4 (introduced at the end of 1995) and the 300 series were the first models.
By 1997, there were already six major manufacturers on the ATV market: Honda, Yamaha, Suzuki, Kawasaki, Polaris, Arctic Cat. And everyone was waiting for the emergence of a new major player, one of the most influential companies in the snowmobile market - the Canadian Bombardier Recreation Product Inc. And that happened in 1998.
Bombardier Recreation Product Inc. introduced the Traxter all-terrain vehicle to the market. The quad turned out to be very successful. At 1999g. this model won the ATV of the Year award from the respected ATV Magazine.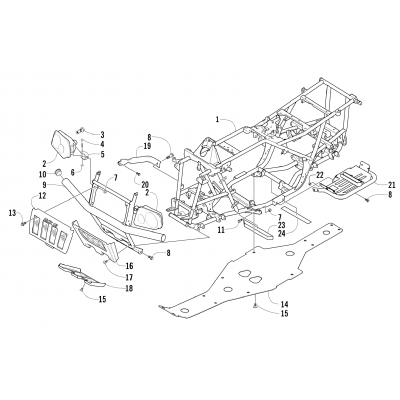 Not wanting to stop there, in 2000 Bombardier released the sports model DS650.
In March 2002, Bombardier, together with Rotax, launches an advanced 2-stroke engine with SDI (Semi direct injection) technology. The Rotax 800 2-TEC SDI was originally developed for snowmobiles, but SDI technology has since migrated to ATVs. In the same year, on July 6, a more significant event took place, Bombardier opens a new milestone in the history of ATVs. The TRAXTER MAX ATV is introduced to the market, the world's first ATV for two with a tandem seating.
In November 2002, Bombardier presents another novelty, and several versions of the ATV with different motors were presented. Outlander 330 H.O. all-wheel drive 4x4 and monodrive 2x4. Outlander 400 H.O. XT 2x4.
In 2004, the company underwent a rebranding. A new logo appeared, and the name Bombardier Recreation Product Inc was shortened to BRP. The BRP line of ATVs never had a name, although all other directions were named: Ski-doo / Lynx (snowmobiles), Sea-doo (water transport), Evinrude (outboard motors). In 2006, BRP named ATV as Can-am.
In 2005, the class leader Outlander 800 H.O. EFI V-Tvin, powerful and beautiful ATV. January 16, 2006 Juan Manuel Gonzalez, Antoine Morel, Alan Morel took the first three places in the Dakar Rally in the ATV class.
It was a great start to the glorious Can-Am name.
In the future, BRP will release such well-known and sought-after models as the Renegade and various variations of the Outlander.
Other manufacturers also did not stop there and continue to produce popular models of ATVs.
Nothing dies without a trace, to this day in the United States there are many fans of 3-wheeled ATVs. They set up a fan site (www.3wheelerworld.com). Three Better Than Four rallies are held (three is better than four). 3-wheelers have become a rarity, but are still in operation and sold at auctions. The price for some, well-preserved specimens, exceeds the price of new, modern models.
By 2017, the following manufacturers firmly established their positions in the Russian market: BRP, Stels, Polaris, Honda, Suzuki, Yamaha, Kawasaki, Arctic Cat, Baltmotors, Cectek, Hisun, Irbi, Kazuma, Lifan, Nissamaran, Polar Foks, Stormbringer, SYM , ZID, Russian Mechanics.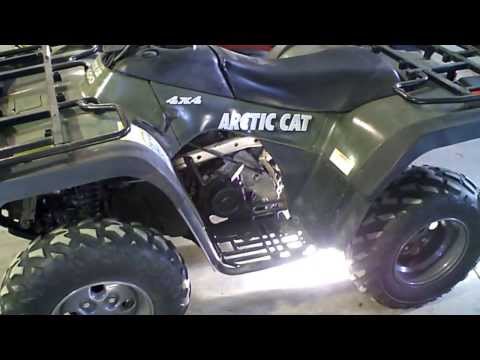
The main types of ATVs:
- Utility (widely used for agricultural needs, in demand among hunters and fishermen, great for leisurely family walks, in demand among travelers, used in the armed forces and civilian special units. There are single, double and with a 6x6 wheelbase with a cargo platform.
- Sports utility (this is a very narrow focus). ATVs of this type are needed for aggressive driving over rough terrain, gravel areas, and specially prepared tracks. This type is designed for you to overcome the off-road at full throttle, getting the maximum adrenaline. The leaders in this form are BRP Renegade and Polaris Scrambler.
- Sporty (designed for prepared trails, light, powerful, with long suspension travel). As a rule, these are rear-wheel drive models of ATVs with a chain drive, in rare cases, with a cardan. A striking example of a sports ATV are: Yamaha Raptor 700, Yamaha YFZ450, Honda TRX450, Honda TRX250R, Yamaha Banshee, Honda 400EX.
- Baby. At the moment, a huge range of children's ATVs from various companies is presented on the Russian market. All well-known brands offer children's ATVs with a cubic capacity of 50 cubic meters or more. Today, there are electric ATVs for very young users and versions with internal combustion engines for those who are older. The pricing policy is very different. Brand models often cost like adult ATV models of Russian or Chinese production. The choice mainly falls on Russian and Chinese manufacturers. the price of this ATV is not too high and you will be able to change the ATV for a more powerful one in a year or two. A good example is STELS with their reliable 50C and 100RS models.
Motors are two-stroke (running on a mixture of gasoline + oil) and four-stroke (running on gasoline).
As you may have noticed from the history of the creation of ATVs, the first models were equipped exclusively with two-stroke engines. They are easy to manufacture and the principle of their operation does not require any auxiliary systems. With a smaller cubic capacity, good power is achieved. Cons - not durable, require frequent repairs.
A more complex motor in production and operation - is a four-stroke . Currently, all known ATVs are equipped with such motors. They last longer, are much more economical than two-strokes, have a cleaner exhaust, and do not require mixing gasoline and oil. Cons: Difficult to manufacture.
In modern ATVs, both two-cylinder engines (V-shaped, V-Twin) and single-cylinder (single-barrel) engines are used.
If you are faced with the question of which engine is better? The answer is simple. If you need a more powerful ATV, then it is better to choose an ATV with a V-twin engine. But keep in mind that the price tag for an ATV with such an engine will be higher than with a single-cylinder engine.
Each manufacturer determines for which model this or that motor is required. For example, the Canadian company BRP equips its entire line of ATVs for adults with Rotax V-engines, the Japanese company Yamaha uses only single-cylinder engines, and the Russian company STELS completes its ATVs with both single-cylinder engines and V-engines. For example, from 50 cubic meters. see up to 600 cu. see equipment is equipped with "single-barreled", more than 650 to 850 "double-barreled".
The operation of a four-stroke engine is perfectly demonstrated in this video:
Two-stroke and four-stroke engines require cooling.
It is of two types:
- air (used on two-stroke and four-stroke engines with a small cubic capacity from 50 to 125 cubic meters)
- water (“dropsy” is a figurative name, of course, no one pours water anymore, antifreeze is used. Water cooling is required for more cubic engines from 150 cubic meters, especially two-cylinder engines, because they are “hotter” than single-cylinder ones).
The design of fuel systems is divided into two types:
- carburetor (easier to self-maintenance, requires frequent carburetor settings)
- injection (difficult to self-maintenance, does not require adjustments, more unpretentious, due to the supply of fuel under pressure, an increase in power is noticeable, it is used in most new models of ATVs.
The suspension of an ATV is one of the most important elements that is responsible for the maneuverability of vehicles in difficult off-road conditions and directly affects the control and handling of an ATV.
There are two types of suspensions: independent and dependent.
Let's consider them in more detail.
Independent or multi-link suspension designed for better flotation and comfort. For cross-country ability, it is important that when passing irregularities, the wheels do not lose contact with the surface, in other words, they do not hang out during critical suspension moves. Constant contact with the surface gives better off-road performance, because each of the wheels has a hook with the surface and the equipment does not get up. Also, an independent suspension has a much higher ground clearance than an ATV with a dependent suspension. In other words, your ATV will not sit on the "belly".
Dependent suspension or axle (axle) is used in sports quad bikes designed for quadcross, inexpensive Chinese models with small cubic capacity and children's quad bikes. This type of suspension is more durable in operation and has a better transmission of torque from the box to the wheels. But it has a number of disadvantages:
- not so comfortable suspension
- easily hung out on bumps, thereby losing contact of the wheel with the surface
- Not suitable for serious off-road use.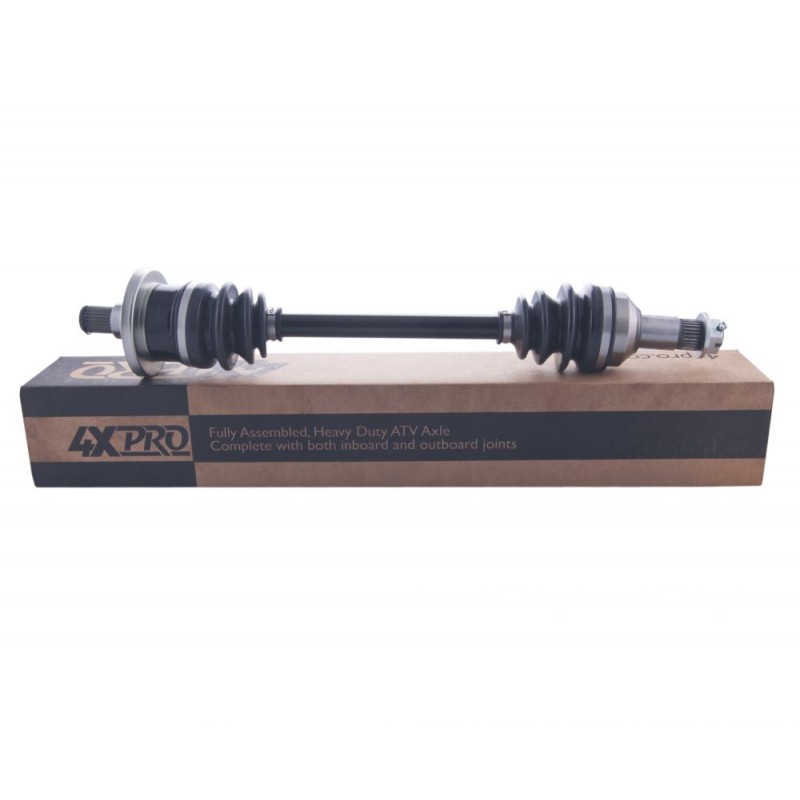
Despite its disadvantages, this type of suspension is used on sports ATVs. Ease of execution and reliability became the basis for choosing an ATV for serious multi-day marathon rallies such as Dakar.
There are several types of transmissions. The installation of one or another type on a certain model is determined by the pricing policy of the model.
Let's look at the main types of transmissions.
Transmission with automatic centrifugal clutch.
Used on low-power and budget models. From the STELS line - this is ATV 50C, 100RS, 300V.
This circuit is simple and inexpensive to manufacture, designed to work with low torque.
Gear shift modes:
L - low gear (for towing cargo or heavy off-road)
H - working gear (for movement, including on light off-road), gear shifting up / down is not required
N - neutral
R - reverse
P - parking
CVT type transmission.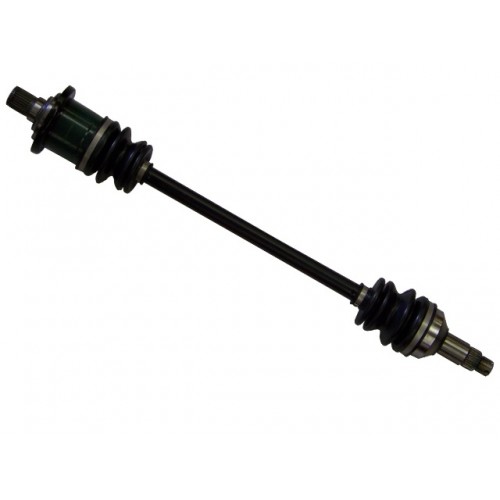
It is used on powerful models of ATVs and UTVs. In the STELS line, these are ATV 600Y Leopard / 650 Leopard Efi, Guepard 650/800/850/1000. In the line of other brands, these are utility and sport-utility ATVs with a volume of 500 to 1,200 cubic meters. cm.
This scheme is difficult to manufacture, relatively more expensive than centrifugal clutch and is designed for motors with high torque.
Gear shift modes:
L - low gear (for towing cargo or heavy off-road)
H - working gear (for movement, including on light off-road), gear shifting up / down is not required
N - neutral
R - reverse
P - parking
Mechanical transmission (manual transmission) .
It is used on sports ATVs with high-powered engines that have a huge torque. As a rule, mechanical gearboxes (manual transmission) are installed in five or six speeds.
A prominent representative of this scheme is the Yamaha YFZ450R, YFM700 R, better known as the Raptor.
This scheme is classic, it differs from its competitors by a huge margin of safety.
This type of transmission is chosen exclusively for racing, where reliability, rigid connection of the engine with the wheels, instant reaction of the gas trigger to the wheels, or in other words, excellent dynamics are important. Also, the mechanics allows the pilot to select a certain mode of movement for a dynamic high-speed corridor.
Gear shift modes:
- 1,2,3,4,5,6 (forward gears)
- reverse (reverse)
Automatic transmission
The rarest type of transmission today.
Used on utility quad bikes, the gearbox is fully integrated into the engine body, it is one whole unit with one oil sump. This scheme is difficult to manufacture, but at the same time unpretentious and durable. It is installed on high-capacity engines with high torque. The disadvantage of this scheme is the maintenance of the automatic box, in the event of a malfunction in the engines or the box, the entire assembly must be opened, which is quite labor-intensive. A prominent representative of this scheme is the HONDA TRX700.
Cardan drive transfers the torque from the gearbox to the gearbox (front or rear), in turn, two drives come out of the gearbox and the moment is transmitted directly to the wheels. This torque transfer scheme is used on utility ATVs and sport utility. The circuit is reliable and durable. Of the minuses, one can single out the considerable weight and complexity of servicing numerous nodes (cardan crosses, gearbox, constant velocity joint (CV joint), CV joint anthers).
Chain drive, is made on the principle of a motorcycle drive, a leading star is installed on the gearbox, a driven star is installed on the axle, two stars are interconnected by means of a chain. This scheme is used in small-capacity children's ATVs or in sports ATVs. It is lightweight, the moment from the engine to the wheels is transmitted through a smaller number of nodes, thereby losing less power and improving responsiveness to the gas trigger.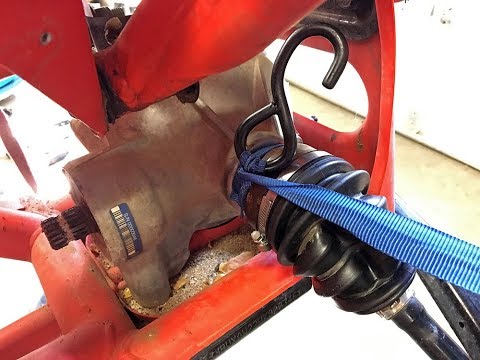 Of the minuses, one can single out the fragility of this scheme, limited use in conditions of severe pollution, low ground clearance, periodic replacement of the leading stars and constant maintenance, and periodic replacement of the final drive chain.
All-wheel drive connection modes also apply to the transmission.
ATV transmission modes :
2WD - rear-wheel drive mode of operation of motor vehicles with a hard-locked differential or with an unlocked one with the possibility of blocking (depending on the manufacturer).
4WD - all-wheel drive mode with unlocked front differential
4WD Lock - all-wheel drive mode with a locked front differential.
These modes are used only in utility and sport utility models.
All ATVs are designed in such a way that the rear wheels (bridge) are the main driving pair.
Most brands use a locked rear axle in their models - this increases off-road patency, but on hard ground it puts an extra load on the transmission, accelerates tire wear and increases the degree of wheel slippage.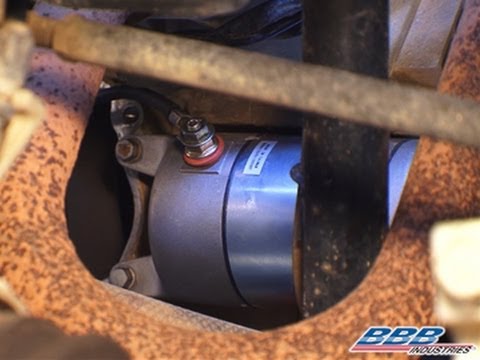 But no matter how many disadvantages of this scheme, an ATV is, first of all, a motorcycle designed for serious off-road.
It is worth noting that some manufacturers such as Polaris decided to move away from the classic axle scheme and introduced a lockable differential into the rear axle. This scheme has proven itself well for owners of all-terrain vehicles in conditions of hard soils and asphalt.
Russian manufacturers of STELS equipment dispensed with this option, arguing that this unit tends to fail from time to time, and the repair of this unit is labor-intensive.
The electrical system of ATVs is designed in such a way as to withstand serious off-road conditions, work in conditions of 100% moisture and heavy pollution.
All ATV wiring is protected by a special "jacket" from chafing the wires on the frame elements and physical impact when overcoming off-road.
Connectors are also provided with proper protection, have a rubber seal and water-repellent grease.
Tire manufacturers produce models for use in certain conditions and for various purposes.
Let's look at what purposes tires are for:
- mud
- utilitarian
- cross
- highway
The mud tires are designed for heavy off-road use on soft ground. They have a high lug and are used in the maximum possible size from R27 to R36. Not recommended for use on hard ground and asphalt, tk. a high lug does not provide a proper contact patch on asphalt and transmits vibration to the steering, which in total leads to unsafe movement on asphalt.
The utility tires are designed for use in soft and hard ground conditions. They have a medium grouser. This type of tire in most cases is installed on stock versions of utility ATVs. I would like to note that on Stels ATVs on the Guepard 650/800/850/1000 model, mud tires are installed from the factory.
The cross-country tire is designed for use on hard ground and prepared cross-country trails.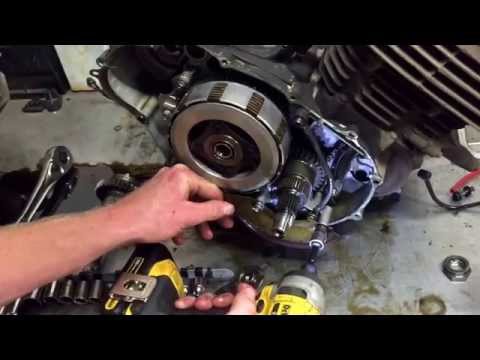 They have a small grip. Used on sports ATVs or sports utility.
Road tires are designed for use in asphalt conditions only. They do not have a grouser. The tires have notches (tread) necessary to divert water from the contact patch with asphalt.
Just like rubber, many disc manufacturers produce their products for various purposes.
Let us consider in more detail what types of disks exist and for operation in what conditions they are intended:
Stamped discs - installed on budget versions of ATVs. As a rule, this is a model in the simplest (budget) configuration in the line of a particular brand. Stamped discs are designed mainly for measured ATV riding, without serious loads.
Alloy wheels - are installed on more expensive versions of the brand line or as a tuning kit to replace stamped ones. They have better performance, better appearance, designed for tougher operation.
Alloy wheels are with one (external) beadlock ( Beadlock) or with two beadlocks (Dual Bedlock), external and internal. The beadlock is a ring that, by means of bolts, attracts the bead of the tire to the disc. The essence of the beadlock is to prevent the tire from disassembling when operating in harsh conditions.
The assembly of a wheel with a beadlock is different from the usual one. The rubber bead does not go over the side of the disk for subsequent landing, but, on the contrary, is left outside the bead of the disk, and with the help of a beadlock ring, it is tightly attracted to the disk. Thus, the rubber bead is clamped between the beadlock and the bead of the disc. Such an assembly scheme does not poison the air, it can work at low tire pressures and the moment of disassembly on the track is impossible.
This type of disc is designed for serious off-road or is used for athletes participating in cross-country races or rally raids.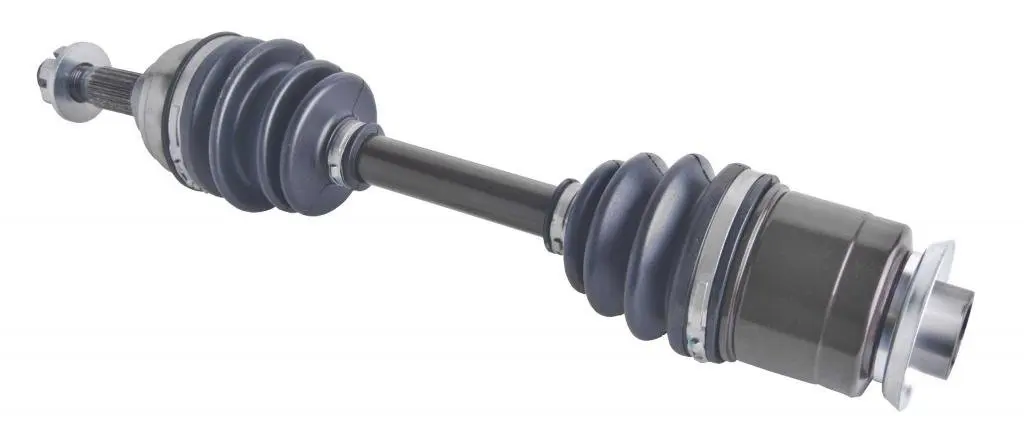 This type of disk perfectly tolerates lateral loads and does not allow the rubber to be disassembled.
The history of the company began in 1996 with small wholesale sales of domestic bicycles. And in 2003, the first Velomotors plant for the production of bicycles was built in the Moscow region. The company, thanks to the impeccable quality of its products, quickly conquered the Russian market and won the sympathy of the domestic consumer. A competent marketing policy and continuous improvement of production cycles have become the basis for the rapid development and recognition of manufactured products by reputable specialists and ordinary customers.
To individualize the manufactured products on the market, the concept of the successful STELS brand was developed, which today has gained quite wide popularity both in the Russian Federation and abroad. Bicycles and scooters "STELS" have become symbols of the revolutionary breakthrough of the domestic manufacturer in the sector of European quality. The use of automated and robotic lines in the production process made it possible to launch the production of a large volume of STELS bicycles and scooters. Velomotors is currently the largest bicycle manufacturer in Europe.
In 2009, the trade line offered for sale was replenished with modern ATVs manufactured under licenses from leading Asian manufacturers.
With the appearance of a line of utility ATVs in the product range, Velomotors holding has reached a fundamentally new level of production of ATV equipment for work and entertainment. Attractive price and reliability are two key points that allow the STELS brand to dominate the domestic market, offering models and developments that are fundamentally new for the Russian segment and successfully compete with Japanese and American counterparts.
The availability of any spare parts and accessories for STELS equipment is another strong argument for the Russian buyer offered by Velomotors. The availability and adequate price for any spare parts allowed the owners to feel for the first time the advantages of a civilized European service for the sale and maintenance of bicycles, ATVs and snowmobiles. Service support with a factory warranty for all manufactured models is the corporate style of Velomotors, which ensured dynamic promotion and a serious sales volume.
The idea of an affordable price for high-quality competitive equipment, successfully implemented by Velomotors, has formed a serious prospect for the progress of this industry, which, of course, will develop in the very near future.
The group of companies "VELOMOTORS" has certified its own production in accordance with the international standard ISO 9001:2011
The group of companies "VELOMOTORS" has certified its production plants according to the international system of quality standards ISO 9001:2011.
This work was carried out as part of the implementation of a long-term strategy, including the optimization of business processes, the improvement of quality standards not only for manufactured products, but for all production processes in general.
Thus, technological processes at factories in Zhukovka (Bryansk region), Kubinka (Moscow region) and st. Krylovskaya (Krasnodar Territory), which includes the design and development, production, sale, maintenance and repair of mopeds, motorcycles, quadricycles, snowmobiles, snow scooters, bicycles, spare parts and accessories for them, meet the requirements of ISO 9001:2011 and allow the consumer to receive products and services of the required quality.
In connection with the entry of manufactured equipment to the EU market, European certification of manufactured products has begun.
At the moment, the following snowmobiles have been certified: STELS S600 Viking and STELS V800 Viking.
from three hours on a turnkey basis in Moscow and the Moscow region
Tow truck for
ATV
in Moscow
1000 rubles
2000
Tow truck for
ATV
in the Moscow region
1500 rub.
2500 rub.
Schedule an ATV diagnostic or repair for
right now!
Your name:
Your telephone *:
Identification of the "diseases" of your motorcycle at an early stage will allow you to avoid later expensive repairs
We inform you about real malfunctions, rather than inventing a whole “list” of problems
We eliminate real problems, rather than changing all components and parts in a row, “inflating” the order/work order bill
Official diagnostic card for technical inspection in 30 minutes, accredited maintenance operator-mechanic
10 qualified mechanics with real experience in repairing motor vehicles from 3 years will ensure the minimum terms
Sign up for diagnosticsRepair ATLY
Maintenance of AEON
Technical Engineering AIE
ARCTIC-Cat
Repair ARMADA
Motics BaltMotors
Tax0005
Motorcycle repair Tgb
Tramp ATV maintenance
Yamaha equipment maintenance
Zid motorcycle maintenance
Didn't find your brand? Ask the master!
Ask a questionOur addresses:
 Tvardovskogo, vl.24
 8 (495) 151-00-19 - spare parts store
Our service center offers high-quality repair of ATVs of any configuration, model and equipment. Our specialists have extensive experience in servicing motorcycles, so we guarantee high quality repairs, reliability and stability of work after the intervention.
Years of accumulated experience allows us to carry out repair and maintenance of ATVs of any complexity, even if the malfunction was identified by other craftsmen and, according to them, is impossible to fix.
Our specialists can quickly and efficiently fix any defect, no matter how complex. At the same time, the cost of repairing ATVs with us is much lower than in any other company. We offer a full and high-quality service for the effective removal of any breakdowns, even if they require disassembly of all equipment to the ground.