A constantly flooded ATV is a real pain in the ass, not to mention it’s bad for engine health. Flooding causes gas to dilute the engine oil and that over the long term can be terminal. Anyhow you are in the right place, I’m a mechanic and I think we can get this puzzled out right now.
ATV gas flooding is a symptom closely associated with the following common ATV issues:
In this post, you’ll learn why your ATV floods with gas, you’ll learn how to diagnose the root cause and how to un-flood your bike quickly. In addition, you’ll learn some mechanics tips for avoiding flooding in the future.
Page Contents
I think you have this one covered. The symptoms are obvious to most but there may be a few in the list below that are tangential to flooding.
In many cases, an ATV floods because the engine needs a tune-up, and so if you haven’t serviced your ATV in more than twelve months. A full tune-up now is a great place to start.
Generally, a flooded ATV is a symptom of an underlying problem, it is not the root cause. In this section, we’ll look briefly at some of the more likely root causes of ATV flooding.
They include:
 These types of carburetor faults are associated with hydro-locking.
As we’ve seen in the previous section, the list of possible causes is wide-ranging. In this section, we’ll attempt to diagnose the root cause. It makes sense to check the most common and also easy to check items first, before checking the less likely issues and harder to test. And so that’s what we’ll do next.
Go ahead and check the following:
 Adding a gas stabilizer helps keep gas fresh for twelve months.
When it comes to clearing a flooded ATV engine, we have three options:
1 Open throttle – Fully open the throttle, but leave the choke off, now crank the motor over. The open throttle increases airflow to the engine and helps dry out the cylinder. If the engine doesn’t clear and start after two or three attempts, I’d try one of the other strategies below. Excessive cranking will run the battery down.
2 Wait – Simply walking away and allowing time to dry out the cylinder usually works. Waiting anywhere from fifteen minutes to a half-hour does the job.
That said if there is an underlying problem causing the flooding then you may be visiting this problem again before long. Remember when starting a flooded engine, don’t add any choke.
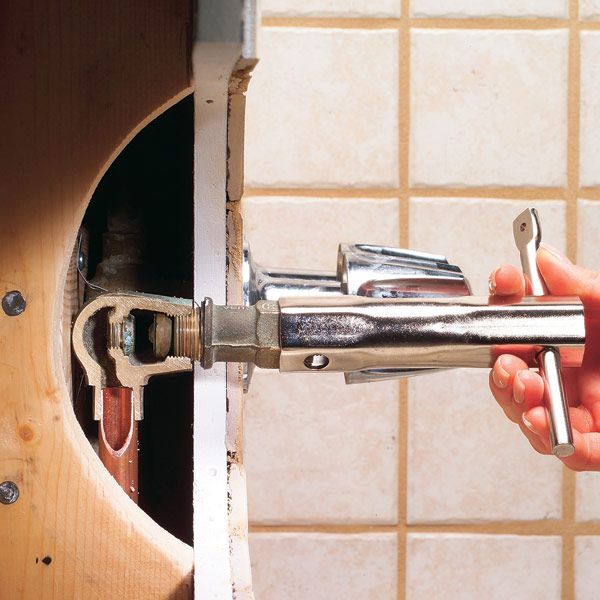
3 Clear cylinder – Clearing the cylinder will require a few tools and a little effort. You’ll need a plug wrench and a shop rag.
The process is as follows:
Now go ahead and clean, gap the spark plug, and refit.
Here are my top tips for keeping your ATV in great shape and free from flooding
When storing your ATV, it pays off handsomely to pay particular attention to the fuel system.
You may find the following posts helpful:
ATV carburetor flooding
ATV won’t start after washing
ATV won’t jumpstart
Whether you are stuck with the misfortune of sending your ATV through the ice on a frozen lake, or if you’ve sunk it into a bottomless mudhole, there are some crucial steps you need to take to save your bike from the junkyard.
I know exactly how you feel right now, but fear not! The bike is not necessarily trashed; you can most likely salvage it without breaking the bank.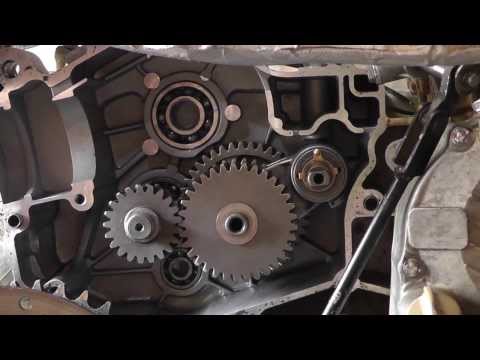
If you are somewhat mechanically inclined, you should have no problems performing this recovery on your own. If there is no engine damage, your bike has a good chance of getting back in shape without any permanent damage.
All you have to do is to follow the steps in this guide.
Yes, there are a lot of steps, but not all are too time-consuming. Time-vise you should set aside the better half of a day to do this properly.
If you skip some steps or parts of the steps, you may find yourself paying the consequences later, so take your time to do it properly.
Page Contents
Before I get into the actual steps, I’ll address why water sometimes may enter your engine. Because it is not only when you sink the bike to the bottom of the ocean this may happen.
If you ride fast through deep water, it may splash up into the air intake, sucking water into the engine. Riders who intentionally ride in waist-deep mud install snorkels to prevent this from happening, but you are not safe even then.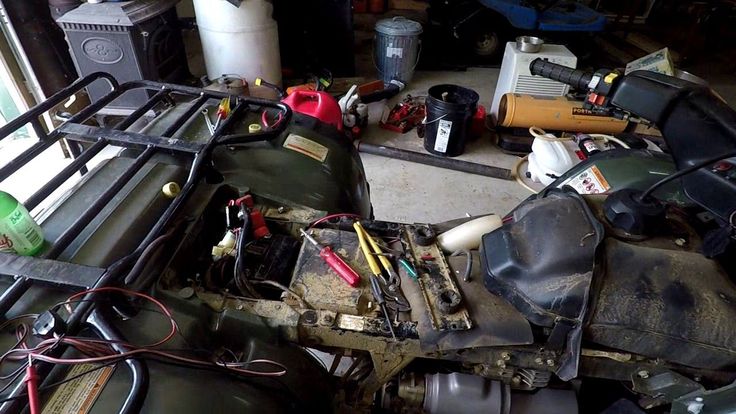
When adequate amounts of water enter the engine, it will hydro lock. And it actually takes a surprisingly small amount of water for this to happen.
I won’t get too technical as I’m not claiming to be a trained mechanic. But basically, what happens is that when the piston goes up in the cylinder, it compresses the air above the piston just as it is supposed to.
But unlike air, water cannot be compressed, at least very little. So if you get more water inside the cylinder than the volume above the piston, when it is at its highest point (not very much!), the excess water has nowhere to go.
The piston cannot complete its travel. It’s like trying to fit 2 liters of water inside a 1-liter bottle. It cannot be done.
When this happens, one of two things will occur:
If you are lucky, all that happens is that the engine stops; it dies out instantly when the piston cannot travel any further. This is a more likely outcome if the hydro lock happens when the engine is idling or when you are not using too much power.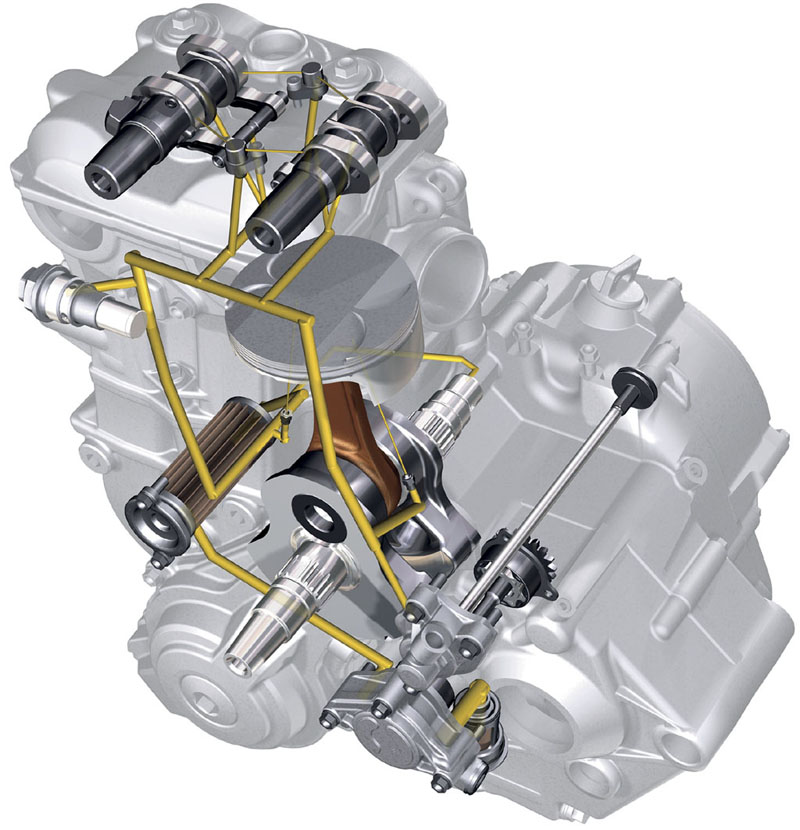
The engine can also die out before any damage is done to the engine if it chokes out because of water entering the air/fuel mixture.
If you are not so lucky, you will get one or more mechanical failures like bent or broken piston rods, fractured crankcase, engine head or engine block, damaged bearings or valves.
All this because the piston tries to neglect the laws of physics. Keep in mind that damage to the engine is more likely when the hydro lock happens at speed.
If you hear any abnormal metal sounds when the water enters, you may be out of luck. You may be able to bring back to life a damaged engine after a substantial rebuild, or in the worst-case, you may need to replace the whole engine.
If you have completed this guide, including installing new spark-plugs, and the engine still won’t run, or it runs rough, it’s time to start thinking of calling your favorite mechanic.
A simple compression test may give you a good indication if everything is as it’s supposed to be.
But now you have quite a lot of work ahead of you, so let’s start recovering!
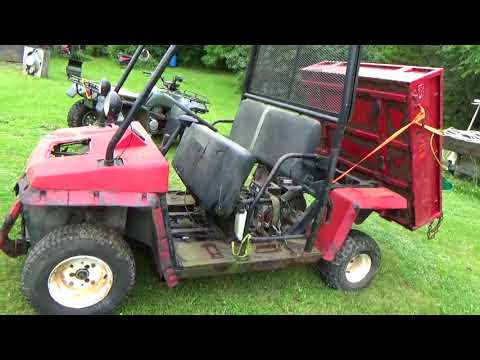
As soon as you get water into the engine, hit the kill switch and get a buddy. The bike needs to get out of the water as soon as possible to prevent more water from seeping in everywhere.
You will need a winch, or a tugboat, depending on how deep of a mess you’ve gotten yourself in.
Turn off the key. Please put it in neutral and tow it on shore.
At this point, you are your own worst enemy. You are panicking and may be acting irrationally.
Doing the wrong things now will only make the situation worse.
So before you move on, you need to make sure you are thinking clearly. Now is not the time to do anything hasty.
Whatever you do, DO NOT try to start the engine at this point. It is most likely hydro locked, and trying to start it may cause or worsen any damage that already has occurred.
Your air filter box will likely be full of water at this point. The box needs to be cleaned to prevent more water or dirt from entering the engine.
Get help from a buddy or three and tip the bike 90 degrees backward until water stops running out of the motor and the exhaust. Then set it back down again.
Now you are done with the initial “first-aid” and should get the bike to wherever your tools are.
Tow it, put it on a trailer, or airlift it with a helicopter. But do not ride it at this point!
When you get home, your goal will be to get the water out of the engine as soon as you can.
Clean out the air inlet if there is any mud, muck. Ensure there is no mud left so that you don’t suck in any additional debris into the engine when you start it.
Do not forget to clean the breather tubes. Disassemble them, rinse them in water and let them dry before you reassemble them.
Depending on how long your bike was submerged, water may have entered the stator housing. Remove the stator cover, and some water will likely pour out.
Use an air compressor to blow from all angles to get most of the water out. Then use a hairdryer or any hot air blower to dry out the rest of the moisture.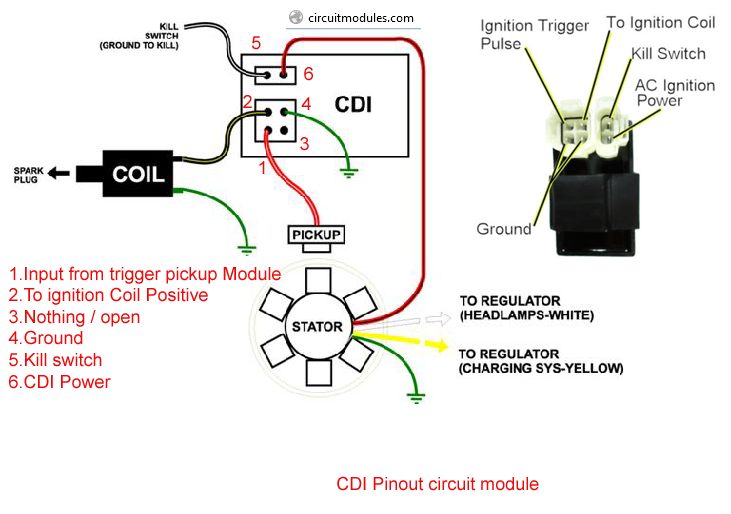 Be careful, so you don’t melt anything, keep some distance with the blower.
If you don’t have these tools, you need to wait longer for the stator to dry out. But make sure the stator housing is completely dry before reinstalling the cover.
If your bike has a belt-driven transmission, you need to drain out all of the water. Most bikes have a drain plug at the bottom that you can open. If your bike doesn’t have this, you need to open the belt housing cover.
If you were riding in some muddy water, you should preferably open the cover in any case to clean the inside and the pulleys. Let dry before you reassemble. If you ride with a wet belt, you may get belt burning.
If your bike was completely submerged, you need to flush the cooling system to remove any contaminated water. Water may have entered through the overflow.
Drain it. Run it with clean water for some minutes. Drain again and fill up with the factory spec coolant.
Again, if the bike was completely submerged, you will likely have gotten water inside your gas tank. Drain the tank and also the carburetor or the throttle body which holds the injector.
If you are lucky, you will find a small screw at the very bottom of each of these components for easy draining. If not, you have to be creative.
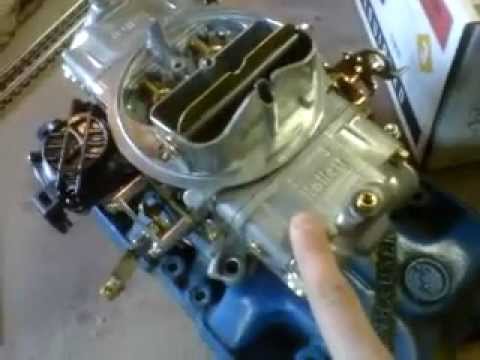
If the carburetor does not have a drain screw, you can alternatively drop the float bowl (the bottom part, held in place with 4 screws).
Also, disconnect the throttle body/carb air duct inlet tube and dry out.
If your bike has a carburetor and you want to do an extra thorough job, you should consider cleaning the carburetor inside to be completely certain you got rid of any remaining moisture or dirt.
Take the carburetor out of the bike and disassemble it. You can leave the floater in place, but it’s best to remove the jets for better access.
Use compressed air to blow in any hole and angle to get as much of the water out. Spray it with carb cleaner. Then let it dry completely before reassembling.
If the bike was submerged for some time, the gaskets may also be soaked in water and need drying or replacing. They are only a few bucks, so a re-pack is recommended.
With the carb off, use a paper towel to clean both the intake manifold and the reed valve area (outlet).
Then refit the carb to the bike.
Now it’s time to start the engine to blow out any remaining water from the engine. You will also lube it to prevent the internals of the engine from rusting.
Remove all spark plug wires and spark plugs (or the injectors if the bike is fuel injected). This is done to create an opening for the water and pressure to escape when the cylinder is moving.
Do not skip this part because failing to create an opening at the top of each cylinder will possibly lead to hydro-locking and damage to the engine! Consider yourself warned.
Turn the engine several times until it stops squirting water out of the holes where the spark plugs or injectors were. Use the kick starter if the bike does not have a starter. A good 5 minutes of kicking should do the job.
Put everything back in place and start the four-wheeler. Don’t rev it. Let it idle for some minutes to let it clear the exhaust.
While it runs, spray some WD40 into the air inlet to lube up all of the motor’s insides and displace any water. Some think seafoam is better, but be aware that it may gum up your carburetor.
If you spray too much, you will choke out the motor, so spray just short bursts at a time until you have gotten a general amount of lube inside the engine.
It will smoke like crazy because of the water evaporating and the wd 40 burning but don’t be alarmed; this is normal. At least for the first couple of minutes.
If your bike has plugs, they were likely fouled when the bike hit the water and needs replacing before you will be able to start the bike.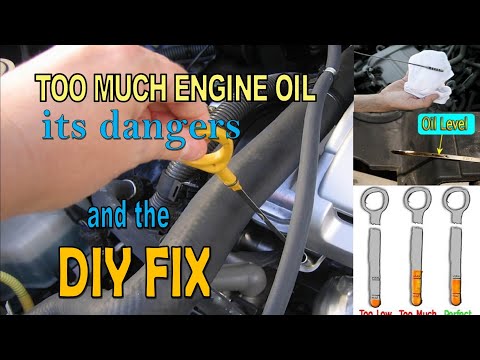
Then it may start and run for some seconds before it dies again.
Expect to go through about 3-4 plugs before you get the bike going. A minimal amount of water left in the engine will be enough to foul the plug when initially trying to start it.
Be patient, and check for a spark. Using starter fluid or even trying to jump-start the bike is not recommended as this will only result in more fouled plugs.
As long as the bike runs rough, try replacing the spark plugs as they are likely gone bad.
You may have been lucky and avoided getting water into the engine oil, but it’s not worth risking it if you are not sure. You may be able to see the water mixed with oil by pulling out the dipstick.
You will get a definite answer as soon as you drain the crankcase. If the oil got water into it will not look black (or clear brown if it was new). It will look light brown and mushy, almost like creamy coffee.
After draining the contaminated oil, fill up with ordinary diesel to flush out any bad oil and water.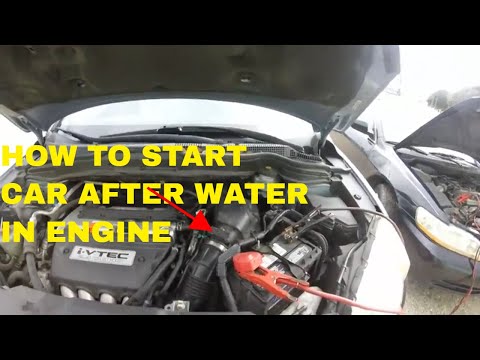 Because of the diesel’s limited lubing abilities, you should not ride the bike or rev it with diesel in the engine.
Don’t even bother with installing a filter, as it will need replacing anyway. Just put the cover back on with no filter. If the bike cannot be started without a filter installed, just use a cheap one.
Start the engine and let it idle for a couple of minutes. Stop the bike and drain the diesel. Repeat one more time, or until you see only clear diesel.
The final time, let it drain for 30 minutes to get most of the diesel out.
Then you should fill up with some cheap engine oil to the maximum mark on the dipstick. You can skip the diesel altogether, but then you will need to use more oil, which costs more.
Start the bike and let it idle for 10 minutes to allow the oil to mix with any remaining water or diesel. Drain and repeat one more time.
After draining the second time, you can install a new filter and quality oil according to factory spec.
Now you are done!
Start by opening the cap where you would normally fill oil. Stick your little finger in and dip it in the oil. If the oil is clear, you are OK and can move on to the next step.
If it is creamy white, like the engine oil, water got in, and it needs replacing.
Drain all of the oil. You may need to tilt the bike to both sides to get it all out. If you have access to an air compressor, you will get even more oil out by blowing air into the filler hole on top.
Fill up with some cheap oil as you did with the engine. Ride the bike for some minutes and immediately drain out the oil again. Repeat until the oil looks clear.
Then fill up with the manufacturer-specific oil according to the specs in the manual (usually until oil runs out of the overflow/fill hole with the bike on a level surface).
Really? Arent the brakes a sealed system, you may ask. How can water get in?
Well, the reservoir at the master cylinder will have a vented cap that allows air to enter or escape any time the cylinder is depressed or released. And if this cap ends up below water, water will enter the brake system.
Get some new brake fluid that matches your user manual’s requirements (usually DOT3/4). Start flushing the system by bleeding the brakes while you top of with new brake fluid regularly.
DO NOT let the reservoir tank level drop below the minimum mark, as air may enter the system, and the whole job will take much more time than necessary.
Continue until clear brake fluid starts to appear at the nipple.
This step is mostly done to prevent any issues down the road.
Disconnect all accessible electrical connections and inline fuses and blow them out. Give them a shot of WD40 before you reconnect them.
This will prevent any corrosion and bad connections later on.
Simply because it deserves it; after all, you’ve put it through! This will also prevent rust.
When traveling on an ATV, you often have to overcome water obstacles. ATV drownings happen quite often, and the consequences of these drownings can sometimes be very deplorable—from electronic failure to engine water hammer.
The fate of a drowned person can befall everyone, from a beginner to a professional, and absolutely no one is immune from emergencies. Sometimes a harmless 3x3 puddle can turn out to be up to one and a half meters deep, or the ice on the reservoir turns out to be not the thickness that we expected, the situations are different. That's why it's always better to go on a trip, fishing or hunting with a partner, it is he who will help you retrieve the vehicle that has gone under water and tow it home. And, of course, it’s not worth taking risks in vain, if there is an opportunity to go around a water obstacle, believe me, it’s better to do it.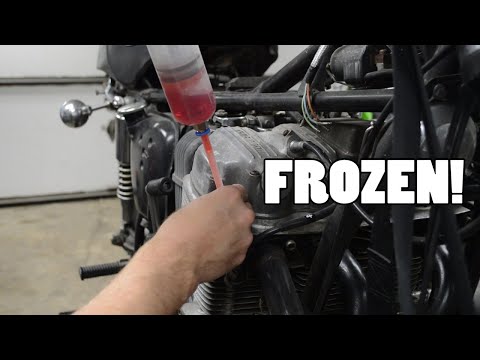 nine0003
Water ingress into the CVT is not so bad, the ATV temporarily stops moving, but removing water from the CVT is a simple procedure and then after running on neutral, the remaining water will evaporate and movement can be resumed. But the ingress of water into the engine of an ATV is much more unpleasant.
But all this can be avoided if all measures to restore the ATV after drowning are carried out competently and in the shortest possible time.
After the ATV is out of the water, the first step is to disconnect the battery, thereby de-energizing the electrical circuit and protecting expensive electronics from short circuits. nine0003
Never attempt to start the ATV, as this could lead to irreversible damage and costly repairs.
It is advisable to deliver the ATV to the garage by tow and carry out the necessary set of measures as soon as possible:
1. Unscrew the air filter cover, drain the water, wipe the body dry from the inside, dry the filter, soak it with oil and put it back;
2. Thoroughly flush the carburetor with clean gasoline or flushing fluids and blow out the passages; nine0003
3. Completely drain the gasoline from the gas tank and rinse with clean gasoline, change the gasoline filter;
4. Unscrew the exhaust pipe, drain the water, clean and dry if necessary;
5. Disconnect all electrical wiring connectors and spill them with silicone grease, it is also necessary to do with the dashboard;
6. Drain the water from the variator, be sure to unscrew the variator cover, you may have to rinse and clean the plates, and also dry the belt;
7. Check the presence of water in the engine. We take out the oil dipstick and evaluate the condition of the oil: when water enters the engine, the oil reacts with water, and the so-called “emulsion” is formed, on the oil dipstick it looks something like this:
8. If an emulsion is found in the engine, immediately drain the oil and wash the engine, for this you need to stock up on 10 liters of the most common motor mineral water M 8. We unscrew, dry or change the candle, as well as the oil filter; nine0003
9. Fill in M 8 oil, connect the battery and turn the starter a couple of times without a spark plug;
10. Next, install the spark plugs and start the engine for 2-3 minutes, then turn off the ATV and drain the oil. The cycle sometimes has to be repeated up to 6-7 times, until the traces of oil completely disappear. As a rule, the first drained oil contains the largest amount of emulsion and looks something like this:
11. As the wash cycles go through, the oil will return to its normal color, after that, replace the M 8 oil with the one you use constantly, it would be good to temporarily upgrade oils to please a flooded engine; nine0003
12. Change the oil in the front and rear gearboxes, you may have to change the oil in the gearboxes twice. After the first change, give a small load on the gearboxes, hanging the back and front of the ATV in turn, then change the oil again;
13. Syringe the ATV's suspension and all parts that are equipped with grease guns;
14. Dry the seat, thoroughly inspect all components of the ATV and eliminate any traces of moisture found.
Upon arrival home, it does not hurt to conduct a complete audit of the ATV (electrics, connectors and contacts, fuel system), especially if it drowned not in clean water, but in a dirty swamp.
Normally, after following the above procedures correctly, the engine starts, but if it still fails to start, then the problem is deeper and it is better to evacuate the ATV to the workshop for a complete revision. Long and unsuccessful attempts to start the engine without understanding the cause of failure can lead to subsequent costly repairs! nine0003
Source
Source
Other related materials:
Children's ATVs: types, characteristics, safety, disadvantages
Tips for choosing an ATV
Do I need to install a snorkel on an ATV?
Choosing protection for the ATV
How to adjust the valves on the ATV?
You left your ATV in the garage on a trip or out of town, and when you return a few weeks later, you can't start it anymore. Common situation? Even after adding a spark and fresh fuel, the engine only stops for two to three seconds. What could be the effect? After all, before the ATV, he had no problems: it was enough to pass a periodic thorough inspection. nine0003
Don't panic: in this case, you can say with almost 100% certainty that the problem is only in gasoline, and not in ATVs. Like any hydrocarbon gas, Gasoline mixture is volatile and should not be relied upon for long periods of time. Some of its fractions evaporate, and the remaining gasoline liquid loses its ability to ignite and is no longer a fuel mixture. So your ATV didn't want to ride after a long break. nine0003
No response starter after turning the key

Bendix is broken or after inspection the starter turns in the wrong direction in the wrong housing, the latches are connected upside down: have the mechanics check the starter (they will do this without removing it from the motorcycle).
ATV stalls : Starter relay clicks but engine does not start
Loose starter cord or short circuit due to broken wire: check connection, remove rust, check current with multimeter. nine0003
 Make sure that all air intake holes are not blocked and that air flows freely into the engine.
 Insert new valve stem seals.
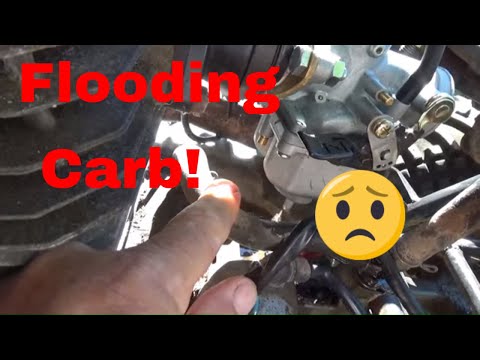
 What needs to be done to improve the situation? At the bottom of the carburetor there is a screw that is screwed in horizontally (the guide can serve as a return pipe with a fitting next to it). This screw must be unscrewed so that the old gasoline drains.