Cracks and scratches on your ATV plastics are bound to happen sooner or later. You could maintain and clean your ATV after every use, and still, you’ll end up with faded or scratched up plastic eventually.
To some people, scuffed up plastic on their quad is not a big deal. I mean, it’s not like it affects performance, handling, or anything important anyways. But there’s just something about the way it makes the machine look that I don’t like. So I went ahead and found the best ways to fix some of the most common ATV plastic damage you’ll encounter.
It’s a good idea to know why plastic fades to help you understand why the methods here work for restoring faded plastic. Basically, plastic starts to look faded because the oils in the plastic evaporate over time. The evaporation of oils in the plastic is sped up when the plastic sits in the sun for long periods of time.
Plastic is made from refined oil, and as the oil in the top layer of the plastic evaporates, the plastic is weakened and looks faded. Your plastics become more prone to cracks too the more you let it fade and weaken.
You could simply sand down the top layer of plastic, until you get to the part where the oil hasn’t evaporated yet. Then buff it out until it looks nice and new. But with this approach, you’re still weakening the plastic because you are actually removing layers of the plastic each time you do this.
Another method I’ve tried, is using a heat gun to help bring the oil in the plastic to the surface. This does work pretty good and makes the plastic look nice. But again, you’re not actually restoring oil to the plastic so over time, the plastic is getting weaker and weaker.
My preferred method, and what I recommend you try first. Is to get this Premium Plastic Restorer From Car Guys found here on Amazon. This way you’re not removing plastic, oil, or anything else from your ATV parts. In fact, this stuff is actually adding additives to the plastic to help get them to the condition they were in when they were brand new.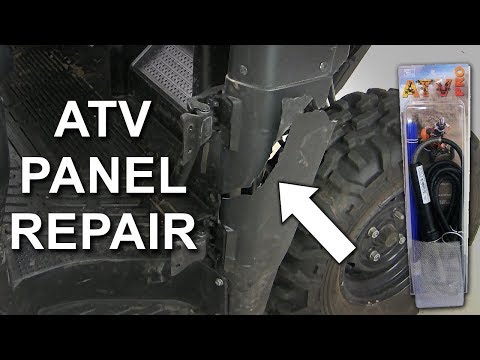 This particular plastic restorer also has some nice UV protection to help keep the plastic from drying out and fading in the future.
Keep in mind, this is not to repair scratches or anything like that. It is specifically to restore dry faded plastic. There are some other brands out there that will do the same thing, I’ve just had the most luck with this one. To be honest, this is way easier than sanding or using a heat gun anyway, and I don’t have to worry about the structural integrity of the plastic being compromised.
There are two types of scratches you’ll encounter most often, light scratches or deep scratches. Light scratches are the ones caused by branches or bushes hitting the plastics and leaving little visible marks. A lot of people don’t even bother with these types of scratches, and just chalk it up to wear and tear. But for someone spending a lot of money on a quad or ATV, I can understand wanting to remove even the littlest of scratches.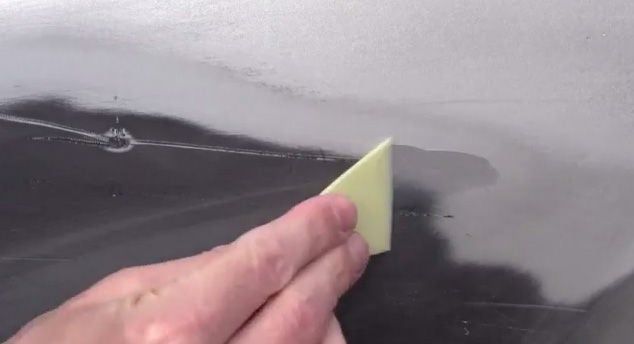
The best way I’ve found for removing light scratches is to go with some 1500 Grit Wet Sandpaper. Just use the sand paper over the areas with scratches and buff it out when you’re done. You could finish up with a coat of the plastic restorer I talked about above to make it look brand new.
Using wet sand paper could even work for medium to deep scratches, but I don’t like removing that much plastic from my ATV parts. For the deeper scratches you end up having to start with 400 grit or worse, and work your way up to 1500 grit to get a smooth surface. For me, it’s not worth all the time and energy sanding to just end up compromising the integrity of the plastics. Don’t forget, the more plastic you sand away, the easier they will crack.
So for deeper scratches I’ll use a plastic bonder/filler. My go-to is this JB Weld Plastic Bonder Gap Filler found here on Amazon. I’ll use this to actually just fill the scratches. It’s pretty easy to use, you push out some of the goop from each tube.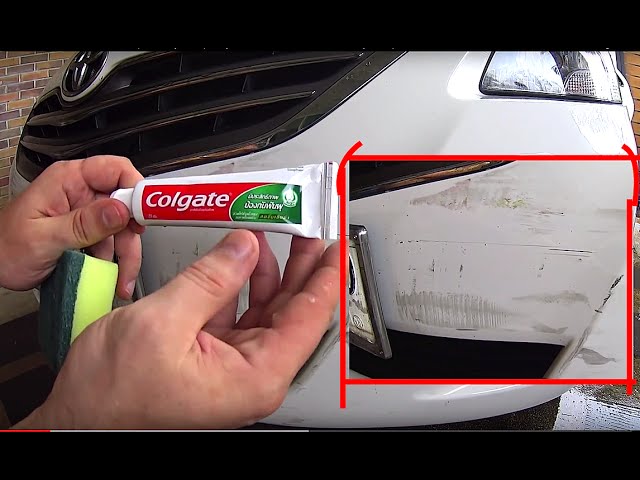 It’s a 1 to 1 ratio and comes out at the same time. Mix it together and fill the deep scratches with it. The stuff sets in about 15 – 20 mins and you can sand it down after a half hour.
If you use a putty knife to clean off the excess after filling the scratch, it makes the sanding after much easier. This does set in a black color, so if you don’t want to have to paint afterwards, don’t use this method. I don’t paint after, and I don’t mind having the black filler here and there on the plastics. It’s better than having deep gouges in your plastics just asking to be cracked.
If you haven’t taken care of your ATV plastics, they could dry out over time and eventually crack and break. Or the more likely option, you hit something didn’t you? That’s ok, cracked plastics can usually be fixed without too much trouble. If you don’t want to spend the money buying new plastic parts, you’ll need to do it yourself.
For small little cracks you could try using the JB Weld I talked about above, but that only really works for cracks less than a few inches.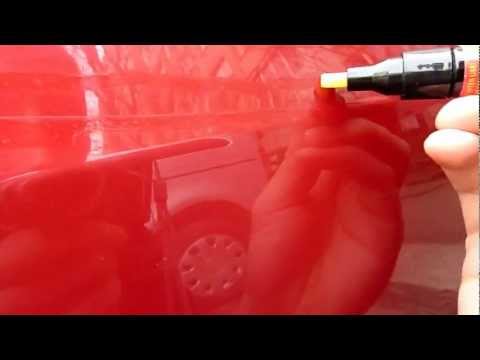 But, you probably really messed your toy up bad, and for that, you’re gonna need something better.
I recommend using what’s called a hot staple gun. Like this Astro 7600 Hot Staple Gun Kit found here on Amazon. This thing is amazing and I’ve used it on more than just my ATV. It works by heating up these specially designed staples it comes with. The staples get set into the plastic making a nice strong bond, but still allowing the plastic to be flexible.
You just line up the pieces you want joined, and use the staple gun to staple them together. The staple is heated to it can sink into the plastic a bit, making a super strong bond. I always do the stapling on the underside of the plastic, that way you don’t see the staples. If you use this method, you will still see the crack on the upper side of the plastics. You can then use the JB Weld to fill in the crack, and then sand away any excess making a nice smooth surface.
Sometimes a piece of plastic from an ATV gets bent but doesn’t crack.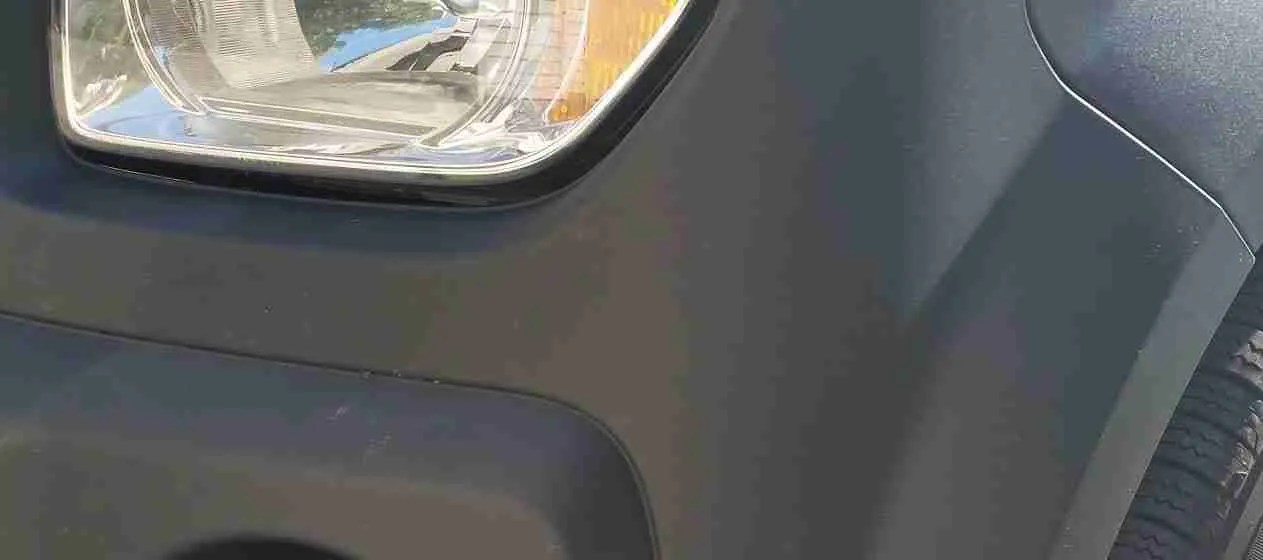 That’s good, you don’t have to repair any cracked plastics now. But it can leave a discolored looking area on the plastic that doesn’t look right.
For fixes like this, I like to use a heat gun. It’s really kinda cool how well it works, you can watch the plastic change color as you hold the heat gun to it. Be careful though, too much heat can melt the plastics and there’s no coming back from that. Hold the heat gun a few inches away from the plastic and keep it moving side to side the whole time.
Any old heat gun will work for something like this. Heck, I’ve seen people use a propane torch with success. If you’re unsure what type of heat gun to use, check this Heat Gun from Amazon for starters.
That’s all there is to it. If you want to paint your ATV plastics a new color, check out this article: How To Prep And Paint ATV Plastics.
Sharing is caring!
I was washing my four wheeler the other day and seen fine scratches all over the fenders and wondered how I could remove them safely and effectively, so here is what I found out.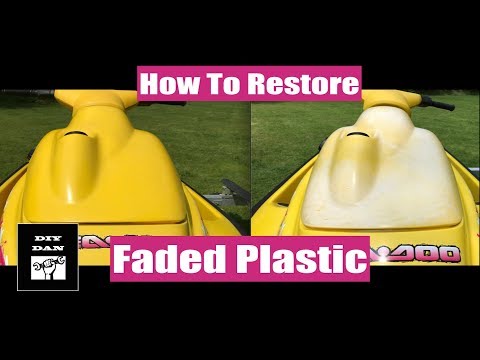
How to remove scratches from ATV plastics? In order to remove scratches from your plastics, you will need a heat gun. If you plan to remove all of the scratches from all of your plastics, then, you will need to first remove your plastics to prevent the heat gun from damaging the paint or materials of other objects that may get in the way. First, clean the plastic with rubbing alcohol. Then, turn the heat gun on high and slowly remove the scratches by applying the heat in a circular motion while moving the gun up and down, side to side, etc. DO NOT apply heat directly to one spot. Keep the heat gun moving. This will prevent melting your plastics.
If you are interested in removing all of those annoying fine scratches from your ATV’s plastics, I have more information on this topic below.
Using a heat gun to restore your plastics is a great option. The heat gun will remove all of the fine scratches, some of the deeper scratches and can also remove some of the faded areas caused by your plastic getting bent or damaged by the sun. Here are the steps to removing scratches with a heat gun.
I prefer a heat gun over sanding and buffing because it is just faster and less costly to get near the same results. Also, when you sand your plastics, you have to ensure you are using the proper grit sand paper and then you have to buff out all of the new scratches you just added. Not to mention, the cost of a descent buffer.
At the end of the day, this is an ATV we are talking about. Scratches are just inevitable on the trials and especially mudding.
How to restore faded ATV plastics?When I first got my Yamaha Big Bear 400, the previous owner had it sitting in the weather for years. The plastics were faded and scratched. At the time, I did not know what I was doing so I took some gritty sand paper and some WD-40 and began sanding. Let me tell you… those plastics got so scratched up, it was unreal. It was only a small section but, on the other hand, the WD-40 ended up fixing most of the faded areas. It surprised me.
Along with applying WD-40 with a wrag, you can also remove faded areas with a heat gun using the same procedure for removing scratches.
Will a heat gun remove deep scratches on my ATV’s plastics?I do not recommend trying to remove deep scratches with a heat gun.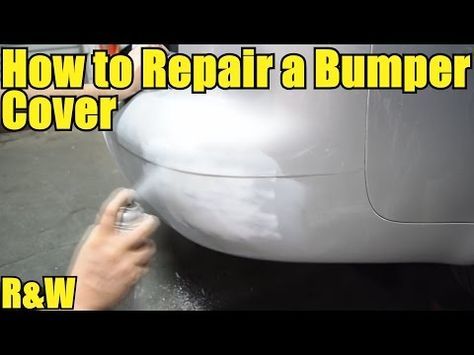 In order to remove a deeper scratch or gouge, the heat gun would end up causing more damage to your plastics than just a deep scratch.
If you have an older ATV like mine and do not care if the plastics get damaged anymore than they already are, give it a shot. Just make sure you keep your gun moving and allow the surface to heat up evenly.
What causes those fine scratches on your ATV plastics and how to prevent them?If you have ever owned a brand new ATV, I bet there was probably a scratch or two already on the machine before it even had its first owner. Scratches blow my mind some times. Just makes you wonder, “How did that happen?”… “There’s no way.”
Most scratches come from getting on and off your four wheeler. You throw your leg around and your boot barely touches the plastic. Boom, some type of scratch or scuff. Especially if the plastic has mud and dirt on it when your boot hits it. Your boot pushes the dirt across your plastics creating those beautiful scratches.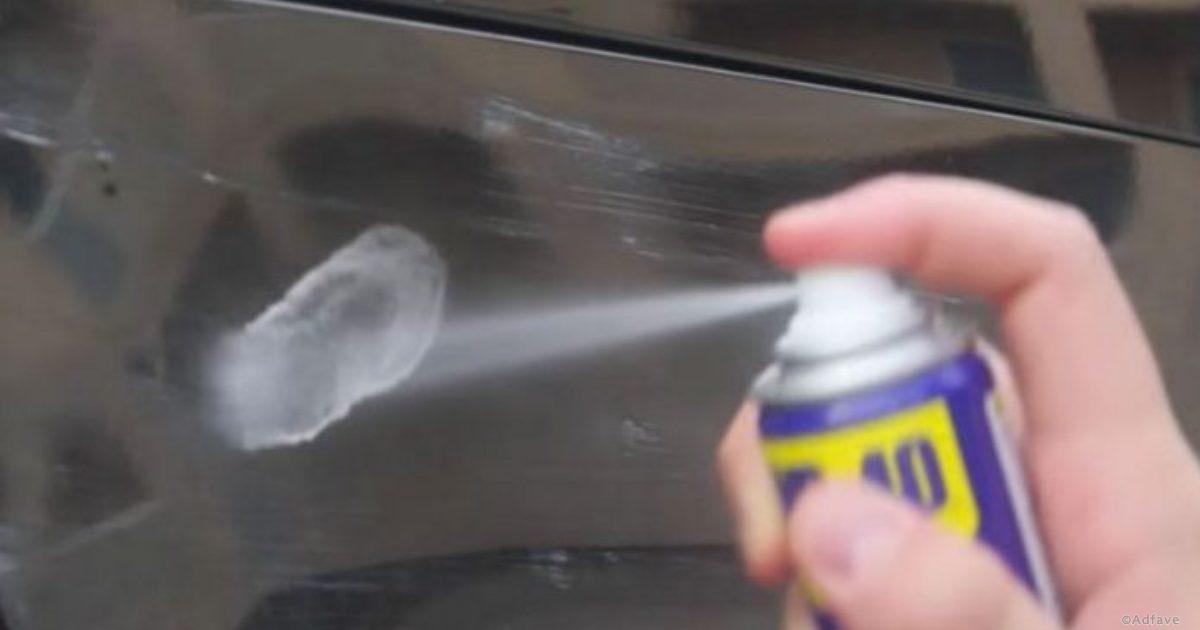 I cringe whenever someone writes on a dirty vehicle with their finger. Nooooo!!!!! Scratches everywhere!!
The best way to prevent scratches is to not touch your plastics at all whenever they are dirty and too pressure wash your ATV before hand washing to ensure you are not sliding dirt across your plastics with your wash wrag.
Contents
ATV
Set of socket tools
Electric hand buffer
Plastic spray paint
plastic filler
Floor wax
gauze
ATVs, also known as ATVs, are prone to scratches. These scratches reduce the value of the car and can make it difficult to sell at a reasonable price. The solution is to either replace the plastic fenders or repair the scratches yourself. Scratch repairs are cheaper and the results look like new.
Remove the scratched plastic from the ATV using a socket set. Some vehicles require screwdrivers. The bolts will be located along the edges of the plastic. Find a socket that fits snugly on the bolt. Place the socket on the wrench and turn the bolt counterclockwise until it is removed. Repeat until all bolts are removed.
Place the removed plastic on a work bench and wash off any dirt with warm water and dish soap. Dry it completely.
Fill in scratches with plastic filler. Use a gloved finger to flatten the filler so that it is even with the rest of the plastic. Once all scratches are filled in, leave the fender to dry overnight. The filler must be completely solid before proceeding.
Use an electrical buffer to smooth out any bumps or rivets on the dried plastic filler. The filler must be completely flat with the plastic. If necessary, repeat the filling process until the scratch is gone.
Paint the fender with a spray paint designed for plastic. Stand 4 feet away from the plastic and spray it evenly using wide strokes. Depending on the paint, three to five coats will be required. Let each layer dry completely before applying the next.
Apply floor wax and rub it evenly over the wing with gauze. Once the wax has been evenly applied, use an electric soft-mount buffer to polish the plastic. Move the buffer in a circular motion and use it at low speed.
Attach the fender back to the ATV with the removed bolts and wrench. Tighten them by turning the wrench clockwise. Make sure all bolts are used otherwise the wing may come loose during use.
When dry, place the plastic in a dust-free and warm place. Plastic filler can be purchased at any hardware store and most ATV stores.
Be sure to wear safety goggles when using the buffer. Use only paint designed for plastic, otherwise the fender will be destroyed.
ATV plastic polishing
We know from advertising: “If your TV screen has lost its former brightness, just wipe the dust off the screen. ” Something similar can be done with the details of the ATV.
If the plastic lining of your ATV has a lot of small scratches (this method is not suitable for deep scratches) and began to look unpresentable, do not rush to the store, you can try to polish it. This process is long, tedious and painstaking, if done correctly, the place of cloudy abrasions will be taken by an even gloss. Similar technologies are used to remove scratches from mobile phones and laptops, polishing car headlights. The plastic of the vast majority of ATVs acquires its color already at the stage of its production, and not during painting, thus it is an ideal candidate for "resurrection".
Before starting work, the plastic element must be degreased and removed as much as possible from stickers and fasteners. It is important to maintain cleanliness during all stages of restoration and to prevent dirt from entering the restored area.
Estimate the depth and nature of the scratches by eye, you will need this when choosing the appropriate sanding paper (the deeper the scratches, the “angrier” the sanding paper should be).
The sanding process takes place in several iterations with a gradual change in the grain size of the sandpaper according to the principle from larger to smaller. For the best effect, water the "sandpaper" and plastic with water. The last few approaches are performed with a gentle "zero". The surface of the plastic will become smooth, but still cloudy.
This is where polish comes into play. A specialized polish for motorcycles on the domestic market cannot be found in the afternoon with fire. The loss is not great - automobile and other analogues are no worse and much cheaper. Apply polish to a soft non-abrasive rag, sponge, napkin or piece of felt (all this can be found in an ordinary car shop), rub the substance over the surface of the plastic in a circular motion with light pressure. After 10-15 minutes (the polish should dry and absorb), apply another layer. The procedure must be repeated until an even gloss appears on the entire surface of the part.