Punctures are a real pain, and can be potentially dangerous, particularly when they happen at speed. This guide will help you to identify a puncture and provide advice about the next steps that should be taken to get back on the road and how to decide whether the puncture should be repaired or the tyre replaced.
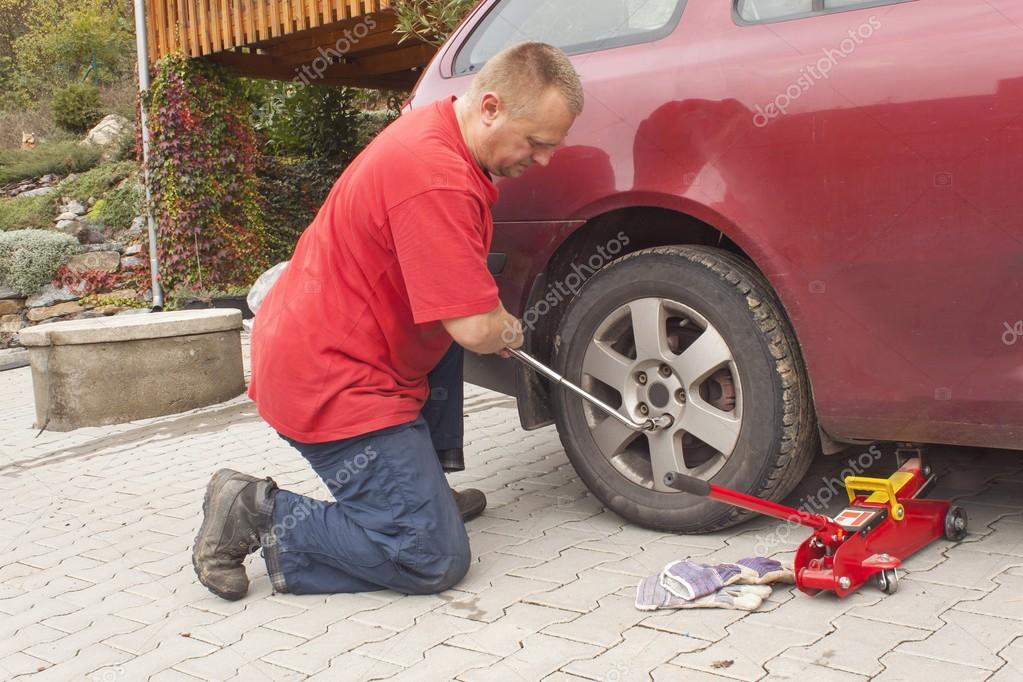
Depending on the nature of the puncture and the location of you and your vehicle, it may be possible to continue with your journey by either replacing your tyre with your spare, or administering a temporary puncture repair kit. Please read your owner’s handbook to find out how to use either of these and remember this is only a temporary and not permanent puncture repair.
If you experience a puncture while driving, the advice from Highways England is not to change a tyre by the side of the road, especially in the age of Smart motorways. Instead, find a refuge, get out of the vehicle to a safe place behind the barriers and call a breakdown recovery company. They will typically use the equipment in the car or tow you.
Sometimes, tyre punctures are not always immediately obvious and occur over a period of time. These are known as slow punctures. Slow punctures are caused by tiny holes in your vehicle’s tyres, which release air very slowly. Unlike larger punctures, slow punctures can often occur without the driver’s knowledge, and can take days or weeks to become obvious, either gradually via your TPMS or by visibly deflating the tyre on your driveway.
Most of the time, slow punctures are the result of driving over a sharp object, commonly nails, screws or other debris in the road. Slow punctures can also be caused by driving over potholes or hitting kerbs, damaging the sidewall of the tyre or the wheel rim.
Sometimes your tyre valve is the culprit for your slow puncture. If the valve cap isn’t doesn’t create a sufficiently tight seal or the dust cap is missing, air can escape.
Your vehicle may drift or pull to one side. (note – this could also be because of poor wheel alignment)
Steering wheel vibration – this is more likely to happen at higher speeds, such as when driving on a motorway. You may experience a shuddering or hear a noise, indicating reduced pressure in one of your tyres.
Continual loss of tyre pressure – if you are having to frequently top up one of your tyres with air, this is a strong indication of a slow puncture.
Changes in vehicle handling. Anything from your suspension feeling different to changes in steering and cornering could indicate a slow puncture and should be checked by a professional.
It can be difficult to tell just be looking if you car’s run-flat tyres are in a deflated condition. This is because run-flat tyres have a reinforced sidewall.
Run-flats are designed only to be used for 50 miles at a maximum speed of 50 mph.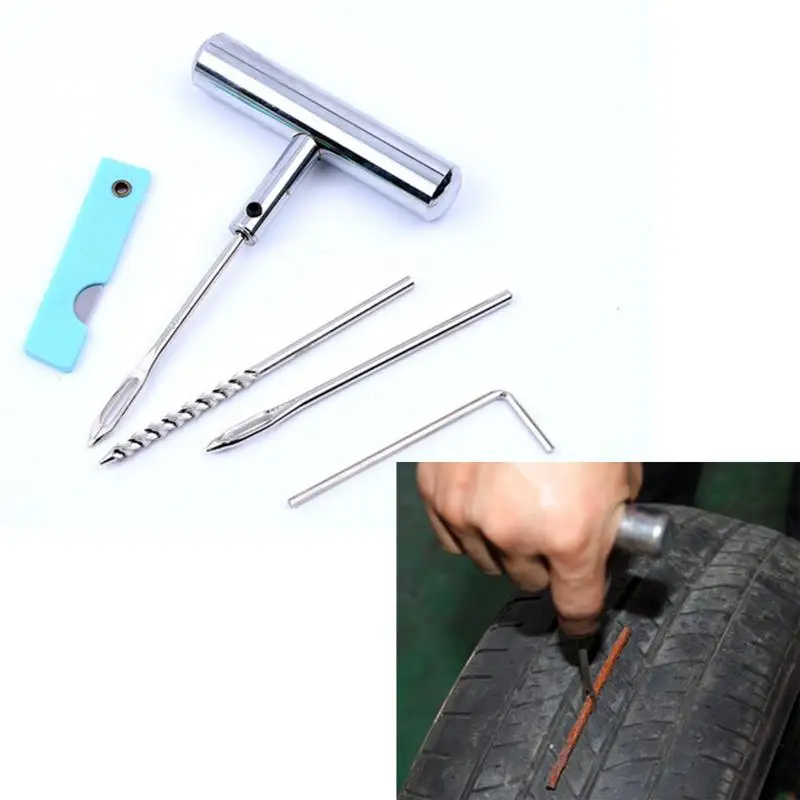 They contain emergency technology to get you to your destination safely.
When driving on a punctured or deflated run-flat, the tyre structure is subjected to high stresses and therefore may become weakened and permanently damaged rendering the tyre both unsuitable and unsafe to repair.
A fully qualified tyre repairer may struggle to detect under inflation in a run flat, which is why the British Rubber Manufacturer’s Association (who represents the major tyre manufacturing companies) does not recommend repairing a run-flat tyre.
Punctures should always be examined by a tyre professional immediately. Even in the case of slow punctures, which may seem like a small issue, ignoring the puncture can lead to major problems including leaks and tears causing catastrophic tyre failure, loss of vehicle control and tyre related incidents.
In some cases, punctures can be repaired, however it largely depends on the cause of the puncture, and where on the tyre the puncture has occurred.
If there is a nail or screw in the tyre, a tyre professional MAY be able to remove the debris and repair the hole. However, this should always be assessed and carried out by a tyre professional.
If the puncture has caused damage to the tyre sidewall a repair may not be possible, and the tyre and other components will need to be replaced. Your repair centre will advise you on the best way to get your wheel and tyre back to full working order.
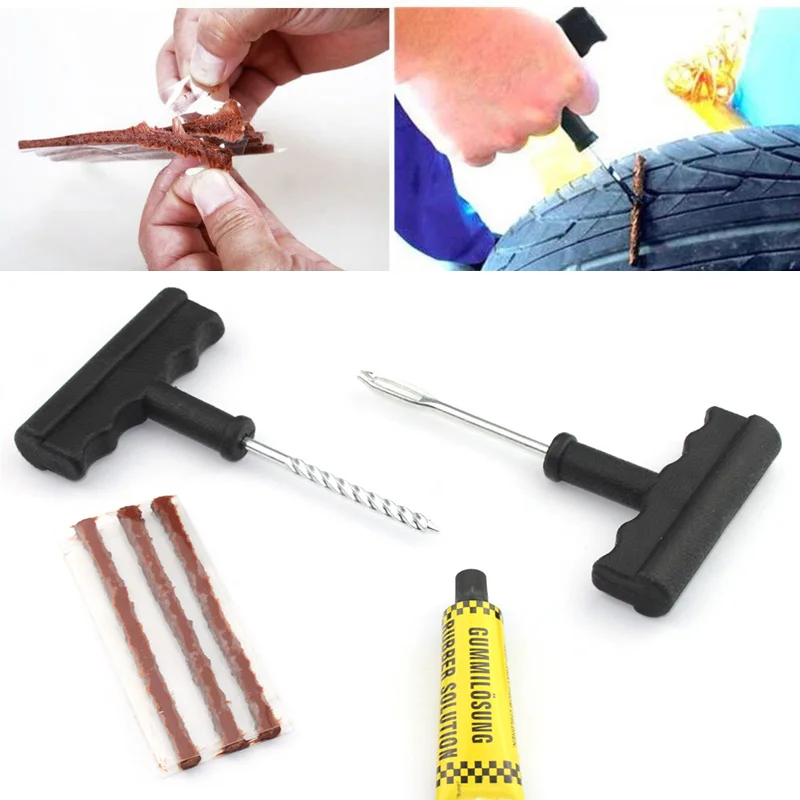
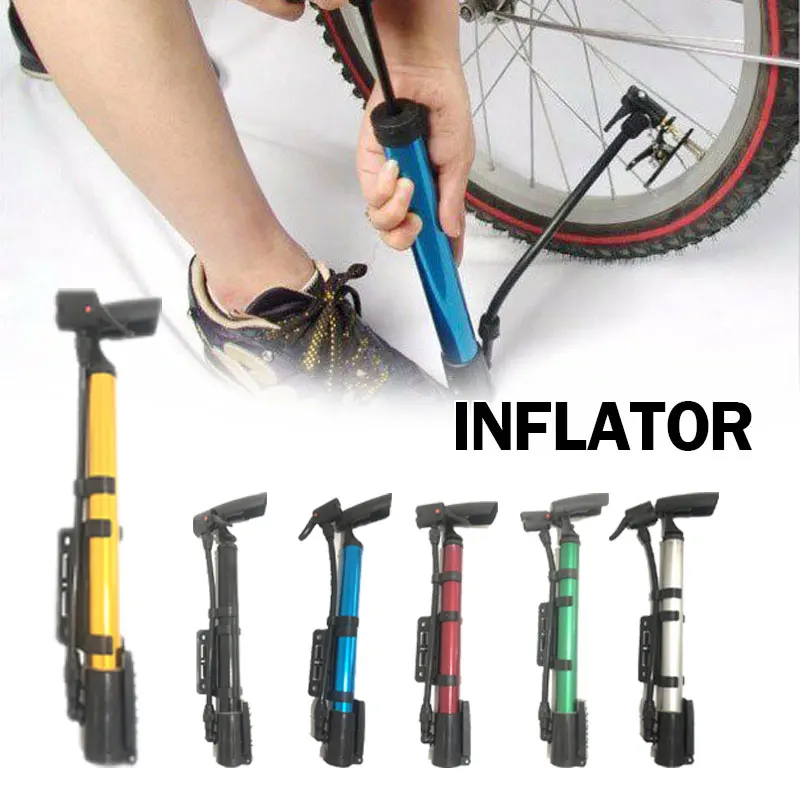
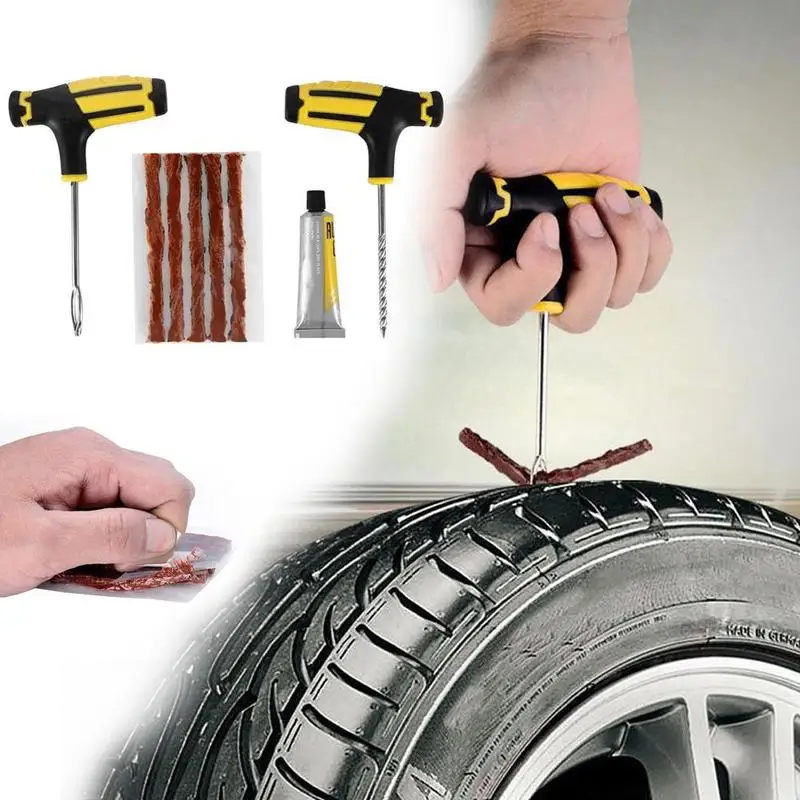
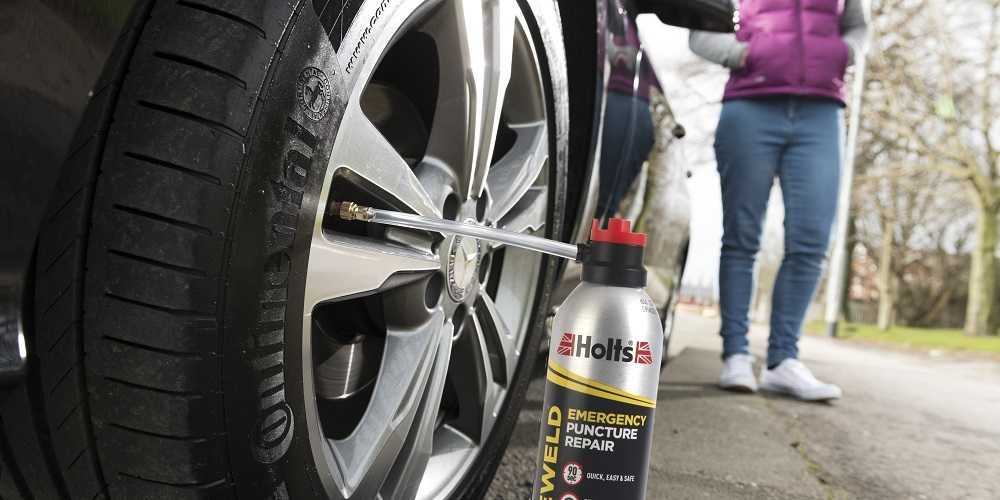
If you experience a puncture, you may be able to get moving again using an emergency puncture repair kit.
Do not try and fix a tyre on the side of a road, make sure you turn off and pull over away from traffic, and tell any passengers to get out of the car and wait away from the road.
You can find out more about using emergency puncture repair kits here:
No. Home DIY repair kits are designed to be temporary measures only, until you can seek professional assistance.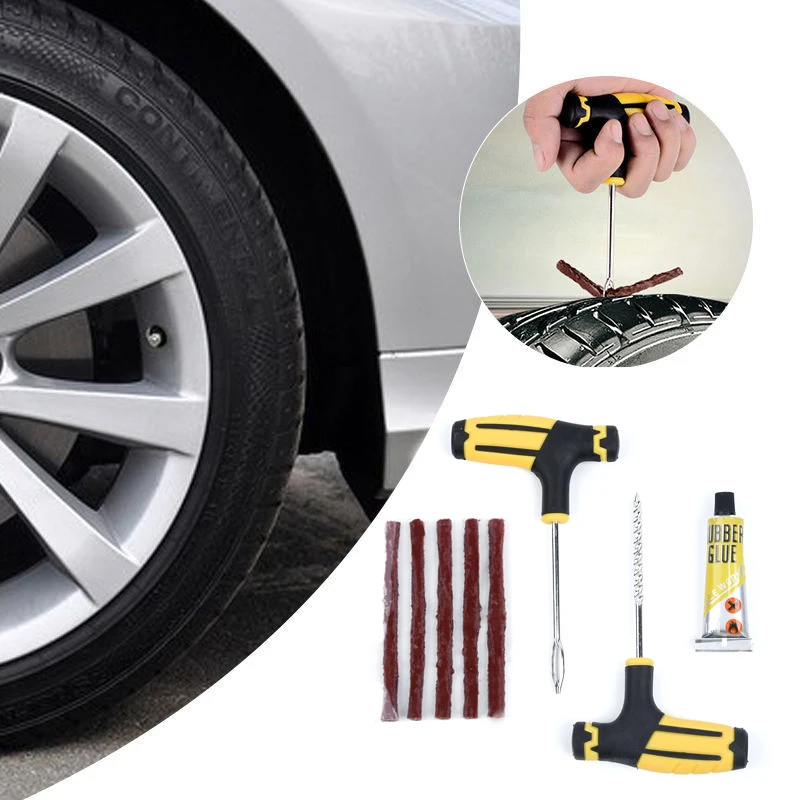 The substances in home kits do not last, and the tyre will need professional attention anyway, and in the meantime presents a risk to you and other road users.
We recommended that you always call in a professional. They can detect issues including damage to the sidewall and remaining foreign objects.
Repairs to car tyres must only be carried out by a tyre specialist and in accordance with the current British Standard AU159. Permanent repairs can only be carried out following removal of the tyre from the wheel to allow a thorough inspection internally as well as externally to ensure there is no hidden damage which could result in a catastrophic failure.
According to the Japan Automobile Association (JAF)1, the most common reason for requesting roadside assistance in FY2017 was "flat battery", and the second common reason was "a tire problem (puncture, etc. )". When a tire is punctured, the punctured tire becomes underinflated, which may cause steering difficulty or may weaken the brake performance. When a tire loses air pressure drastically, the car may lose control, which is very dangerous.
There are roughly two ways of responding to a flat tire. One way is to do emergency repair by yourself so that you can drive your car. Another way is to use roadside assistance (e.g. JAF's road service). There are two kinds of self-repair: replacing a flat tire with a spare tire or repairing a flat tire with an emergency puncture repair kit (hereinafter called "emergency repair kit"). How to repair depends on equipment on a car. Recently, there are many cars equipped with an emergency repair kit instead of a spare tire.
In the five years starting from FY2013, PIO-NET2 received 40 inquiries related to emergency repair kits or spare tires (data registered through the end of November 2018). Some of the inquirers complained that although they repaired a flat tire with an emergency repair kit, the repaired tire became unusable.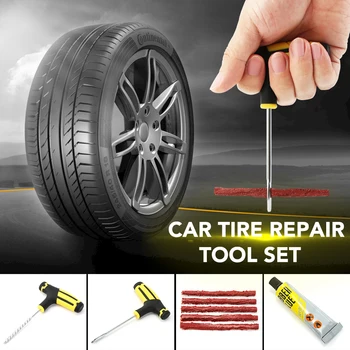 Others complained that they intended to replace a flat tire with a spare tire, but the repair tire was underinflated and unusable.
Then, NCAC decided to conduct a questionnaire survey about response to a flat tire among consumers and automobile manufacturers and to introduce how to respond to a flat tire to provide consumers with relevant information.
Photo1 : Emergency repair kit attached to a car (example)
Photo2 : Assembled repair kit (example)

 Check equipment attached to your car to prepare for emergency. If you are unsure about self-repair or your car is in a dangerous place, use roadside assistance.
News
Back to Top
02/22/2018
Despite the objective importance of the spare tire, not all drivers always have it with them. Some do not carry a spare tire out of hope or belief that their tires are invulnerable. Others deliberately take this step, as they stocked up with a special tool in advance, which, if necessary, can eliminate a tire puncture along the way.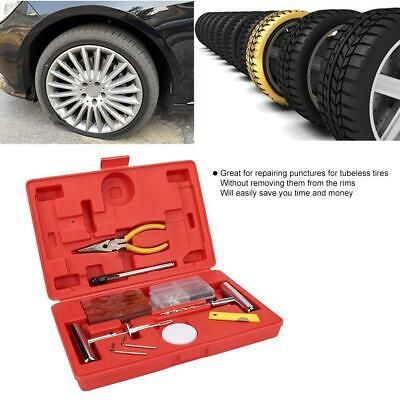 What else can be used and how to do it right? Let's figure it out.
Contents of :
Conventionally, all methods for express tire repair can be divided into two categories:
Consider ways to restore a damaged tire on the road. The first three methods are temporary. The latter, with the right approach, allows you to completely restore the tire.
 This method is relevant if you have a long trip under time constraints.
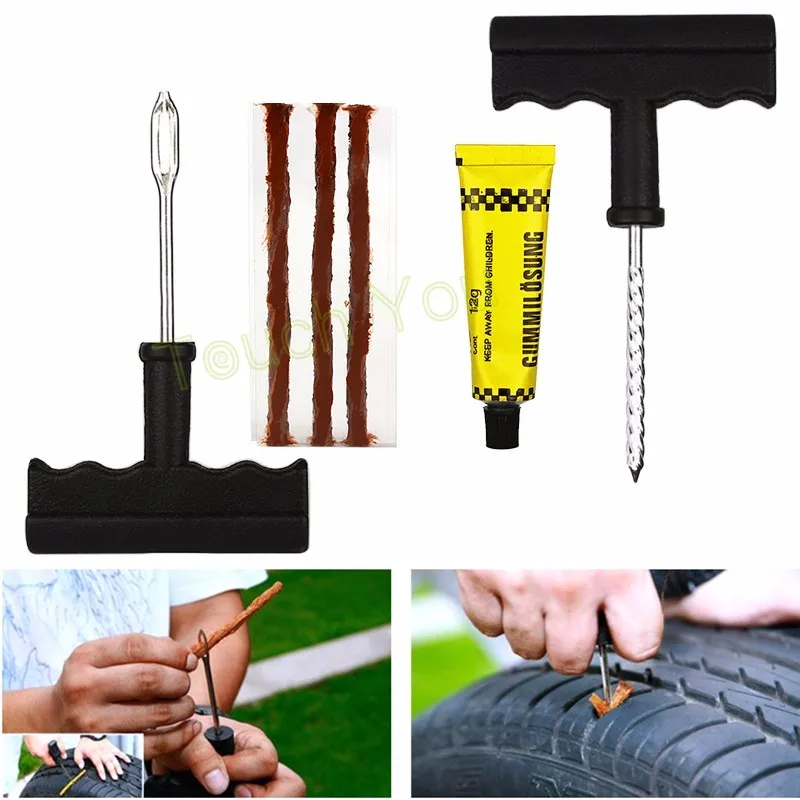
 A simple screw or self-tapping screw (preferably larger in diameter than the size of the puncture) is taken and screwed into a hole on the surface of the tire. The self-tapping screw can be borrowed from the fender liner or plastic interior elements. This method will not eliminate the air leak, but will allow the car owner (perhaps with several swaps) to get to the nearest tire service.
 After removing the foreign object, the hole is processed with an awl with abrasive edges: this tool must be inserted into the puncture and cleaned and developed with intensive reciprocating movements several times. Then the raw rubber tow is removed from the package and inserted into the eye of the second awl so that both ends are the same length.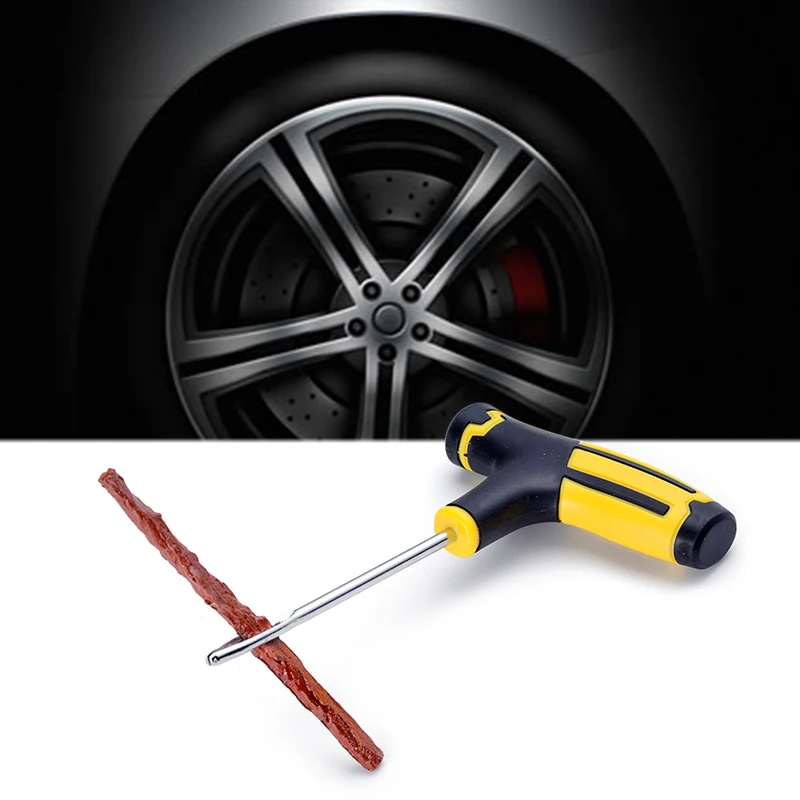 The hole in the tire and the raw rubber is treated with an activator. Next, the awl is inserted into the puncture in such a way that small ends of the tourniquet, about a centimeter long, remain outside. After 5 minutes, the excess remaining on the surface is cut off. This method can also successfully eliminate small side cuts.
There is a technique that allows using wire and several bundles of raw rubber to get rid of even extensive side damage to tires. However, it is quite difficult to implement and not every driver will be able to implement it.
Consider a few well-known tools that are most widely used to repair punctures:
 The maximum diameter of the repaired hole is 4.5 mm. This is almost always enough to repair punctures caused by nails and screws.
Our online store offers a wide range of tire repair products. You can order them through the TopDetal.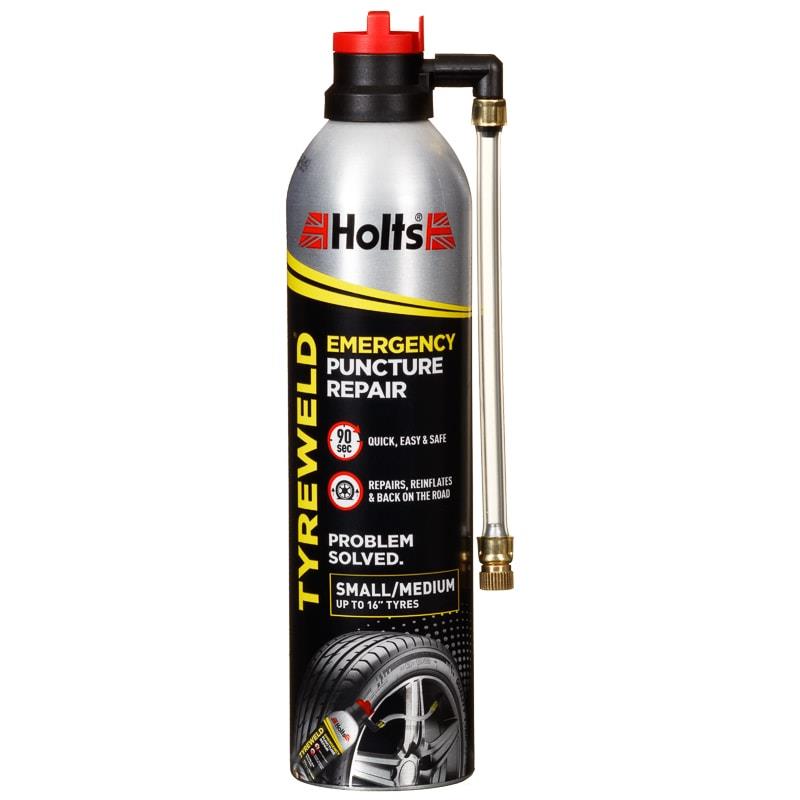 ru website or by calling 8 800 444-75-16.
Also read on our website about the best liquid rubbers.
Return to the list
According to history, one day in 1888, an English veterinarian and cyclist, John Dunlop, tired of shaking through the countryside of Britain on molded rubber tires, glued a piece of water hose with a ring and pumped it up with a football pump - this is how the first pneumatic tire appeared.
History is silent when it was pierced for the first time - but most likely it happened in the same year. So the need for tire repair appeared simultaneously with their appearance.
Puncture required cut with burr Over the past 124 years, tire repair technology has been brought to almost perfection.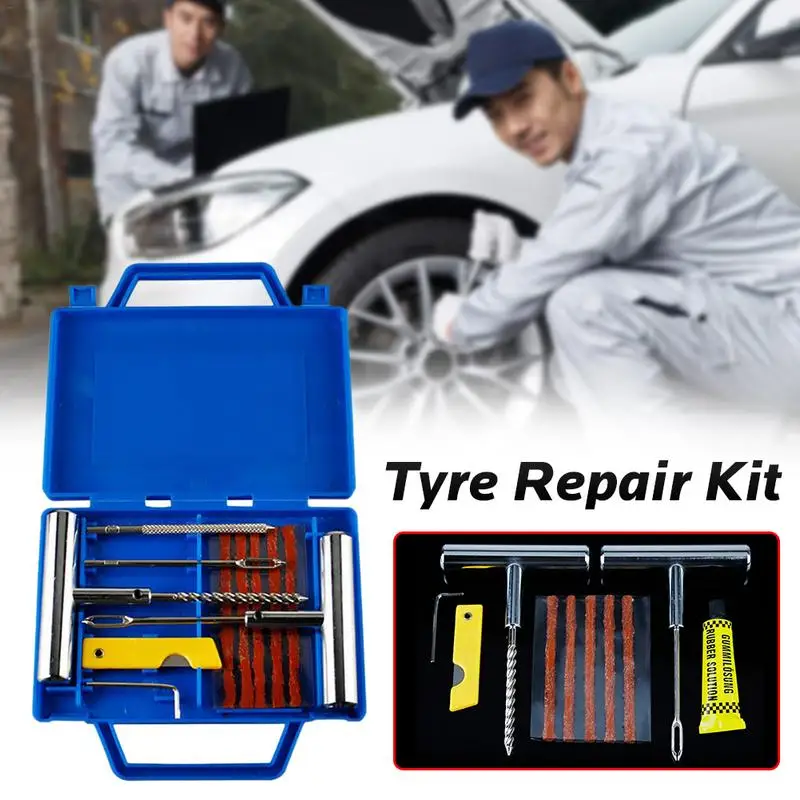 For several decades (after tubeless tires in the vast majority gave way to tubeless ones), the procedure for repair has practically not changed.
This procedure is outwardly quite simple - and car owners (as well as some of the workshop workers offering this service) have the false impression that it is not particularly important to follow the prescribed technology exactly - they say, "it will do." And many "specialists" do not really know the technology. And therefore they sincerely believe: why do we need all sorts of "extra" actions? Why take the tire off the rim when you can keep the wheel off the car at all? The client is in a hurry - so you can plug a puncture (and a cut) with a cord, as they say, “on the go”. Does not poison the air, and everyone is happy. By the way, some workshops that promise “repair of punctures and cuts” do not have anything at all, except for cords and an awl for their installation.
In fact, each stage of tire repair technology, as they say, is "written in blood" - like military regulations and safety instructions. And this is not an exaggeration: what threatens a sudden rupture of a wheel at speed is not worth saying - if people do not die, then they are very lucky ...
We asked our expert, one of the heads of the Russian representative office of the German company REMA TIP-TOP GmbH, Alexander Akhapkin, to talk about tire repair technology and those common mistakes (or even outright hack work) that car owners have to face.
- Tire repair, in general, comes down to a simple and understandable action: you need to plug the resulting "hole" in it. It sounds simple - like the instructions for skydiving: stepped out of the plane and pulled the ring. Only now, no one jumps with a homemade parachute, especially one packed according to rumors and advice from neighbors. Although the consequences of such a jump and improper tire repair are quite comparable.
So let's go in order: how to do it!
So, the first step: determine the type of damage - is it a puncture or a cut?
The difference, of course, is in size.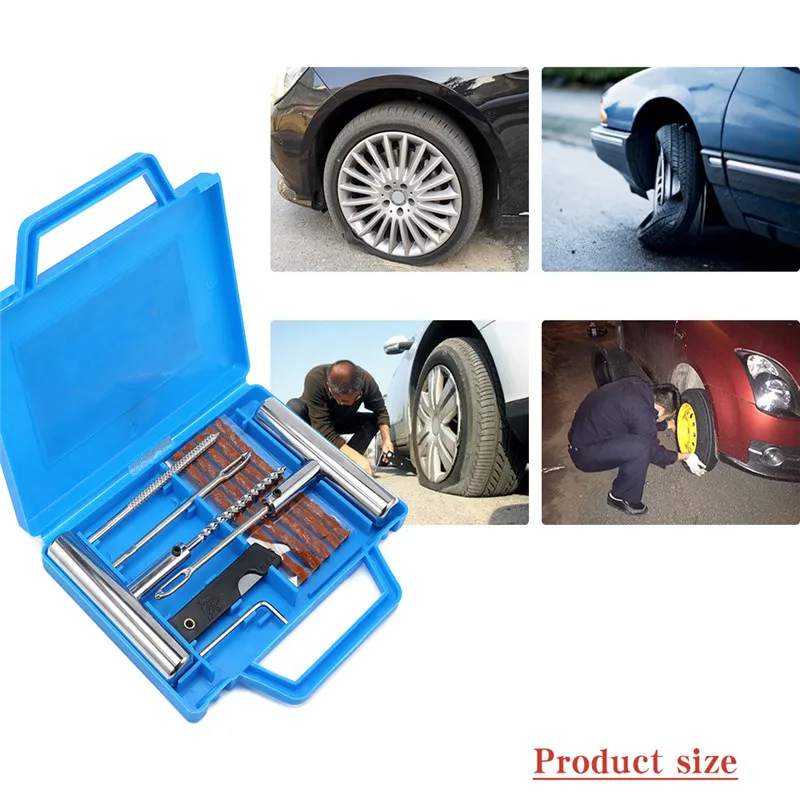 Roughly speaking, if no more than 1-2 cord threads are damaged, then this is a puncture. Anything more is a cut.
If it is a cut, it is important to determine its size. Tires have speed categories - and the higher it is, the smaller the amount of damage that can be repaired. For example, it is allowed to repair the tread of a category Q tire (not higher than 160 km/h) if the damage is not more than 20 mm. If the tire category is S (up to 180 km / h), then the size of the permissible damage is not more than 12 mm. And on a category H tire (up to 210 km / h), only a puncture with a diameter of not more than 3 mm can be repaired.
In general, damage limits depending on their location, size and speed category of the tire are given in special tables RemaTipTop, compiled according to the results of tests and tests.
When repairing with a cord, it is necessary use adhesive For example, regarding damage to the shoulder of a category Q tire (up to 160 km/h), repairs are allowed if the “injury” does not exceed a diameter of 8 mm. And damage to the sidewall can be repaired if it is no more than 35 mm long (along the side height) and up to 20 mm wide.
Second step: what kind of repair is needed? To get there - or capital? The fact is that the most common repair of a puncture with a cord is actually exclusively temporary - just to get to the station and overhaul the tire. And often the car owner asks to fix an expensive tire with a cord, which he puts on an expensive car - and stops there. And at the stations they “go forward” to him: they say, the consequences are at the expense of the customer ...
But even with such a repair, some "masters" manage to cheat. The cord, before placing it in the puncture, is not even smeared with glue. There is a category of cords made of "raw" rubber (they are also called "snotty"). And it is mistakenly believed that glue is not needed for them. No - it's a must!
In addition, when repairing with a cord, it is necessary to form a hole with a burr to enter the repair material. And this is very often not done (on the principle - and so it will do!). For ten kilometers, maybe it will “get off” ...
Step three: puncture overhaul, after which the tire will reach its physical wear.
Fungi are installed at "vertical" puncturesHere the choice of repair tactics depends on the location and area of damage. If the puncture axis runs perpendicular to the tread surface, then it is preferable to seal it with a fungus. If the puncture axis runs at an angle of more than 12 degrees from the surface, then a plug must be used.
Tire repair fungus is preferred, but if the puncture is at an angle, the fungus head will not be able to fit snugly against the inside of the tire. And over time it can come off - which, of course, is unacceptable.
In principle, all actions of the wizard when using both fungus and cork are the same. The puncture is drilled with a burr with a diameter of 3 mm or 6 mm. The repair area from the inside of the tire is processed with a roughening tool - this is done so that the glue applied to the fungus cap or patch (if cork is used) firmly adheres to the surface of the tire.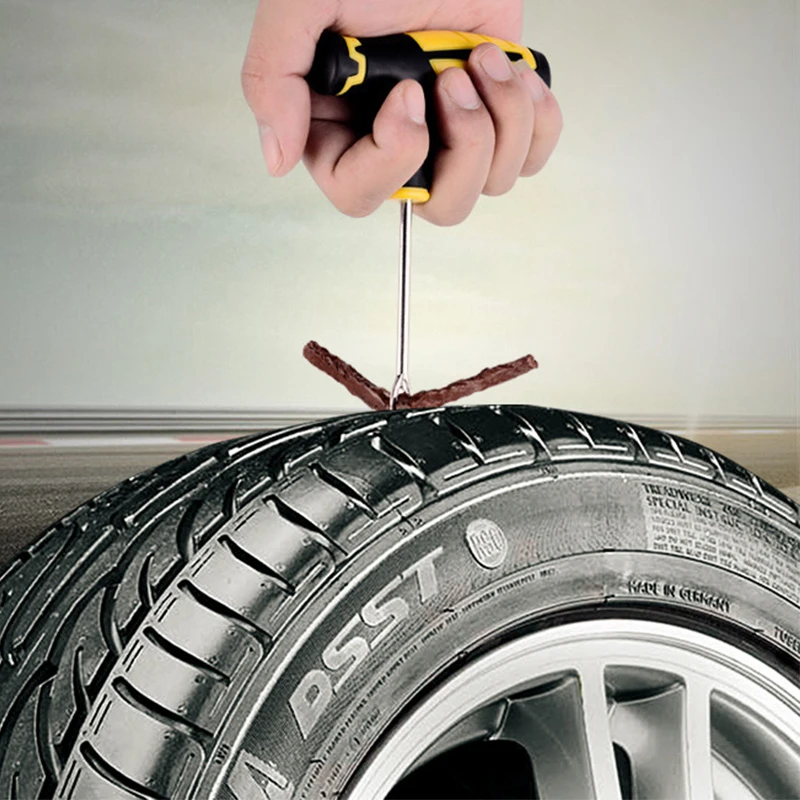
But this is followed by an outwardly simple but obligatory operation - the dust formed after drilling and roughening is carefully removed with a brass or coconut brush, and then vacuumed. Moreover, simple “blowing” or brushing with a rag is unacceptable!
Processing with a special solution - required!Then the repair area is smeared with glue (the Germans call it "cement" - as it is written on the containers with it. In fact, this is a high-tech adhesive system) and a fungus or cork is introduced into the hole - from the inside of the tire! Moreover, until the moment of installation, it is impossible to remove the packaging from the fungus or cork - it can be easily removed when they are introduced into the hole to be sealed. After installing the cork, its excess is cut off - and the repair area is smeared with glue. A patch is applied on top.
Next, the fungus cap or plaster is rolled on. And it remains only to cut off the excess fungal stem or cork from the outside of the tire.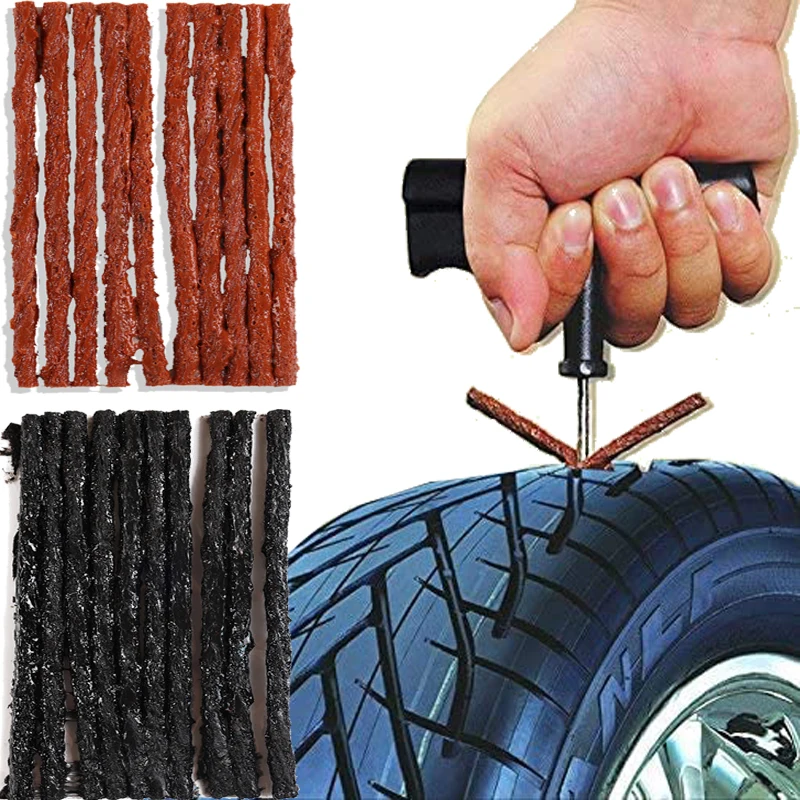
It is very important for temporary repairs with a cord and a major fungus or cork to use materials from only one company! The fact is that the adhesives themselves are spilled: there are those produced on the basis of hydrocarbons, and there are those based on trichlorethylene. In addition, adhesives from different companies, even on the same basis, differ in composition. And therefore, in case of confusion, a reliable connection will not work - at best, it will last for some time. But - a little time ...
Fourth step: overhaul of large damage. Let me remind you that damage that exceeds a puncture, but does not exceed the maximum allowable, is considered large. With such damage, the tire is only scrapped - it is no longer possible to achieve the necessary reliability.
The technology of such a repair is simple - but there are no "extra" steps and steps in it. Outside, the place of damage is cut "under the funnel" - part of the damaged rubber is removed, the remains of the cord.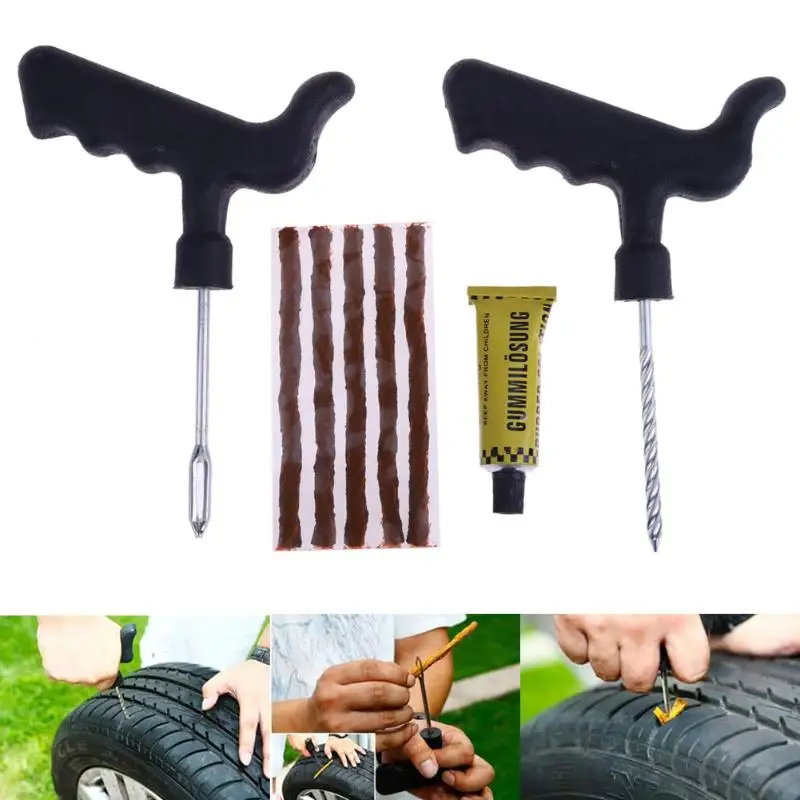 From the inside, the place under the patch sticker must be roughened.
Then the dust must be carefully removed after processing with a vacuum cleaner - and this operation must not be skipped!
Further, the “funnel” is treated with a special solution: in the case of using the “Tip Top” technology, this is “MTRThermopress”.
And filled with raw rubber of the same brand as on the tire - heated strips or a special extruder. Raw rubber is treated with the same solution. And immediately closed with insulating foil for subsequent vulcanization.
Please note - do not skip a double treatment with mortar, nor cover the vulcanization site with foil!
A plaster is applied from the inside of the tire to the damaged area. And be sure to roll with a special rolling - this stage also cannot be skipped.
Something about band-aids: don't try to save money by replacing the "branded" band-aid with a piece of rubber! In fact, a patch is a rather complex rubber product reinforced with synthetic or steel threads that coincide with the direction of the tire cord threads.
Patches are produced separately for bias and radial tires. For their correct orientation (it is very important!) Arrows are applied on each of them, which are directed to the sides. You cannot cut the patch "to size" - it cannot be cut at all due to the complex internal construction of the cords. Companies produce several sizes of patches - and you need to choose from them using the Type Top damage table.
There are also inexpensive vulcanizers - for example "Junior"Naturally, the use of patches and adhesives with which they are glued, produced by different companies, is unacceptable - “cement” is applied to the surface of the patch, which needs to be smeared on the surface from the inside of the tire: only in this case the connection will be reliable and durable.
Step five: vulcanization. In order to vulcanize a “sandwich” of raw rubber, a tire and a plaster, it must be heated. But the problem is that vulcanizers, whose power allows you to warm up the entire volume of the repaired area, are expensive and consume a lot of electricity.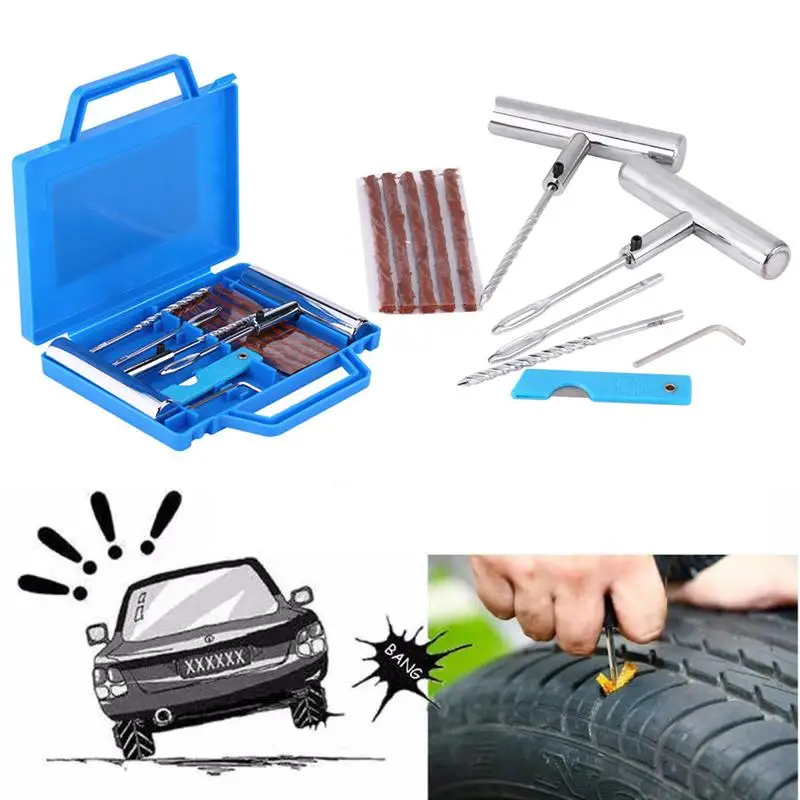 In addition, they are bulky - the area of \u200b\u200bthe heating plate must exceed the size of any patch. So not every workshop can afford such a vulcanizer.
There is another solution - the so-called "two-stage" repair method. This is when a vulcanizer that is more affordable and consumes less electricity is only the site of damage. Its size is not enough to vulcanize the connection of the patch and the tire.
But it's okay - there is an effect called "cold vulcanization". Glue BL and the coating of the plaster from Tip Top are just capable of such a "cold" vulcanization.
However, if after a one-stage - “hot” - vulcanization, the tire can be mounted on wheels and installed on a car, then after a two-stage one (when only raw rubber warms up, and the patch is glued “cold”), you will have to wait at least 24 hours before mounting. It is these days that constitute the second stage - the time is required for the cold polymerization of the connecting layer to be completed.