Jim’s Tech Talk
By Jim Langley
Since tires are the biggest trouble-makers for roadies, let’s follow last week’s story on tire seating, with another for putting them on in the first place. Even complete beginners can get tires most of the way on, but getting the last tight section on can seem impossible.
That’s when people understandably reach for tire levers or worse, some other leverage tool. But that can lead to rim, tire and tube damage. So to help, I’m going to explain how to put on that tight final section of tire with only your hands.
Please read to the end for advice on dealing with defective tires – a relatively new issue to be aware of and understand.
I call what I’m describing “my technique,” but it’s actually bike shop owner Bruce Anderson’s. He mentored me when I first went to work at Andy’s Bike Shop in 1973. Over the years I’ve taught the technique to hundreds of cyclists at camps, as a presenter at bike club meetings, at my bike shops and while I was a college professor teaching bike repair. I’ve even used it to win fastest-flat-fix contests.
So I know it’s a game-changer that works for most people. Again, I’m assuming that you can already get the first side of the tire on, the tube inside the tire (if you’re using one) and get 3/4s of the second side of the tire on the rim. Those steps are pretty straightforward. It’s when you get to putting that last tight section on that the fun begins.
My technique works for tubed and tubeless tires and for road and mountain bike rubber. The wheel and rim don’t make a difference, either.
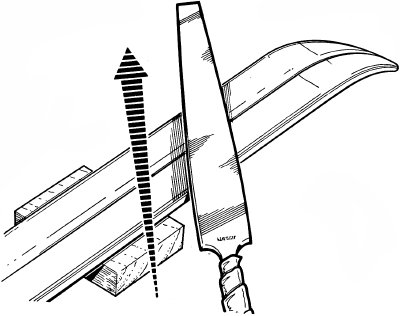
 The beads should end up next to, not on top of the valve.
Most of what I’m describing next is explained in the photo so please study it. The six key things are:
 You should feel the beads as they find center. You may need to switch hands to go all around the wheel. But keep one hand gripping the tire firmly at the tight spot so it doesn’t start coming off the rim again.
That’s all there is to it. I’ve seen that with a little practice, even pre-teens can install road tires with this technique. I hope it works for you, too.
Coincidentally, RBR reader John Jauss offered a tip for seating (last issue’s topic), that is also a great trick for installing tires. He wrote:
“I’m an old roadie, riding since the 80’s and just stumbled on an almost unbelievable solution for installing my Continental Grand Prix. I’ve tried heating the tire with a heat lamp, using a Tire Jack type tool https://amzn.to/31QGTgB and sometimes it turned into an hour project. Even sometimes get one on 99% and come back the next day to fight with it..
Then one day I put on some cheapy work gloves (rubberized fronts, cloth backs https://amzn. to/33hNQYx ). They grip the tires so well ya think your hands are 5x stronger! I’m 76 and I do suffer from arthritis in my hands but now I can usually install a couple tires in 15-20 minutes. A pair compresses down pretty small and I carry the gloves in a baggie in my bike bag now.”
Thanks, John!!
There’s one more important issue related to putting on tires that I want to bring to your attention. The issue is undersized tires that can actually be impossible or almost, to mount. If you’re unlucky enough to run into one of these tires, even the best technique won’t get the tire on. Because the tire is actually defective.
As best as I’ve been able to figure, these misfits are the result of tire makers ignoring long held sizing standards. Instead they essentially shrink their sizing from fear of their tires blowing off hookless rims. When confronted with the issue, the tire makers blame the rim makers saying it’s the rims that are oversize. But, in my tests, every time I’ve run into this issue, you can find tires that go on that same rim easily. So the blame rests on the tire makers.
I ran into one of these this weekend and surprisingly it was a Continental Grand Prix 5000 Tubeless tire, which I paid the princely sum of $95 for at my local bike shop (that’s for one tire!). It was easy to find lots of online comments about how impossible others say these are. It surprises me because I’ve used Conti’s GP4000s forever and they’ve been great. Unfortunately, the Continental engineers totally blew it with their first tubeless tire, the 5000.
I called Continental and complained and was told they stand behind their tires and to bring it back to the shop for a replacement. However, they did not promise that the new tire would go on and admitted that they’d heard from others about the tire’s awful fit.
My advice to avoid the hassle of getting a defect like this is to do your research before purchasing a tire you haven’t tried before. If you’re buying from a shop, ask a mechanic at the shop if you’ll be able to put the tire on with your hands. Not if they can, but if you can. If they can’t confirm, ask if you can try one in the shop before buying it.
If you’re buying tires online, the best you can do is make sure they have a return policy that allows returns, no questions asked.
And, finally, if you run into one of these defective tires, the best solution is to get a different tire. If you force a defective tire onto the rim with a friend and multiple tire levers, etc., you risk damaging the tire and it could fail on the road. And, you could find it impossible to fix a flat out on a ride, plus it’s unlikely you’ll be able to return a used tire.
The best reason to return these tires, though, is to get the message across to the tire makers that we won’t accept defective tires and they need to make tires that go on by hand.
Ride total: 9,424
Jeff Chen
I wanted to share some tips for mounting tubeless tires that I've learned from doing 4 tire comparison tests and mounting over 60 tires over the last year and a half:
Warnings:
Installation Process:
Clean the rim bed with alcohol to remove any trace of oil or grease.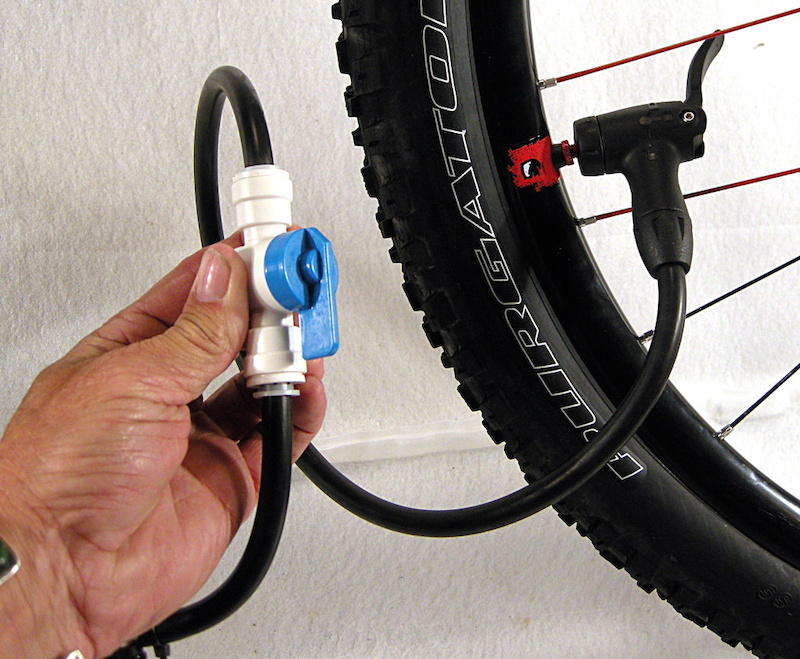 Tape tubeless-ready rims with tubeless tape and install valves onto the rim. Be as careful as you can to tape rims securely as losing air through improperly installed tape seems to be the most common cause of tubeless setups not being able to maintain tire pressure.
Check the tire for markings that indicate direction of rotation before installing.
Install the tire bead on one side of the tire onto the rim.
Install the other tire bead ending at the valve. (The valve tends to allow less room for a tire bead leading to a tighter fit if you end away from the valve.)
[If you only have a floor pump] Try to inflate the tire. If you can get the tire beads to form some level of seal with the rim bed, you'll be able to get the tire to hold air. From that point keep pumping fast(!) up to 35 psi. You'll generally hear a 'snap' as the tire beads seat at about 35 psi. I don't recommend going above 40 psi to reduce the risk of tire and/or bead blowouts. I've found that about 1/4 to 1/2 of tires install easily with just a floor pump.
See tips and tricks below for ways to help the bead seat with just a floor pump
See below for the tire brand/rim brand combinations that I've found install easier
Warning: Be VERY careful not to exceed 40 psi in the tire to reduce the risk of tire and/or bead blowouts.
[If you have access to a compressor or gas station air hose] The process of installing tubeless tires is a LOT easier with access to a compressor. The high pressure that a compressor can deliver quicker than a hand pump helps force tubeless tire beads against a rim bed from which you can then add air up to the tire pressure at which the tire beads will seat (about 35 psi).
Warning: Be VERY careful not to exceed 40 psi in the tire to reduce the risk of tire and/or bead blowouts.
Congratulations if you are up to this point.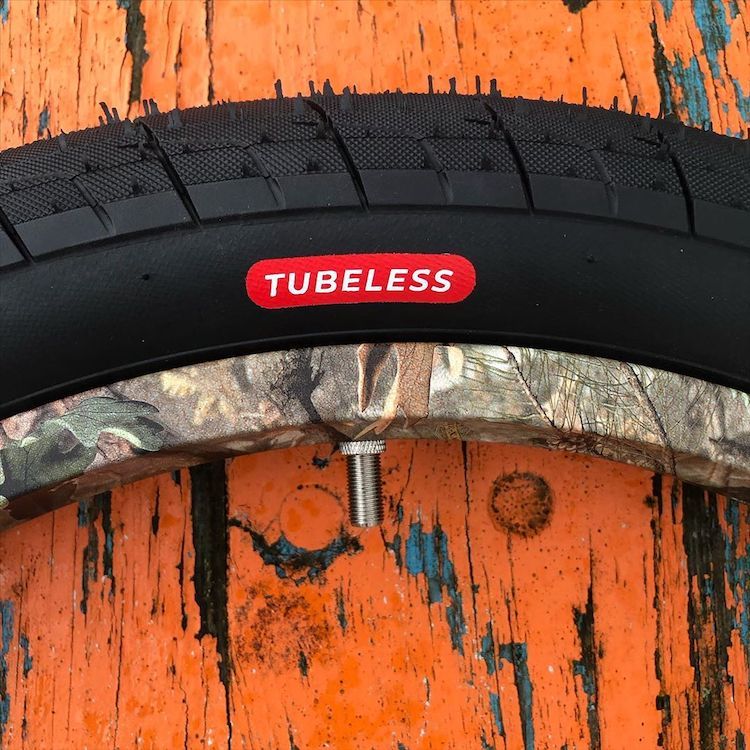 Getting the beads seated is the most challenging part of this process. To complete the installation you need to add sealant into the tire & distribute the sealant around the sidewalls of the tire.
Let the air out of the tire. Generally the tire beads will remain seated on the rim.
Remove the tire valve core. Generally tubeless valves will be of the presta variety, not the schraeder valves that are typically used with car tires)This is the top part of the presta valve that screws into the larger diameter base of the valve. You can do this by using a core removal tool such as the Stans NoTubes Core Remover Tool or an adjustable wrench if you don't have a core removal tool.
Inject about 4 oz of tubeless sealant into the tire through the tire valve with the valve core removed
Reinstall the valve core
Pump up the tire to about 35 psi
Shake the wheel/tire laterally to distribute sealant onto the tire sidewalls.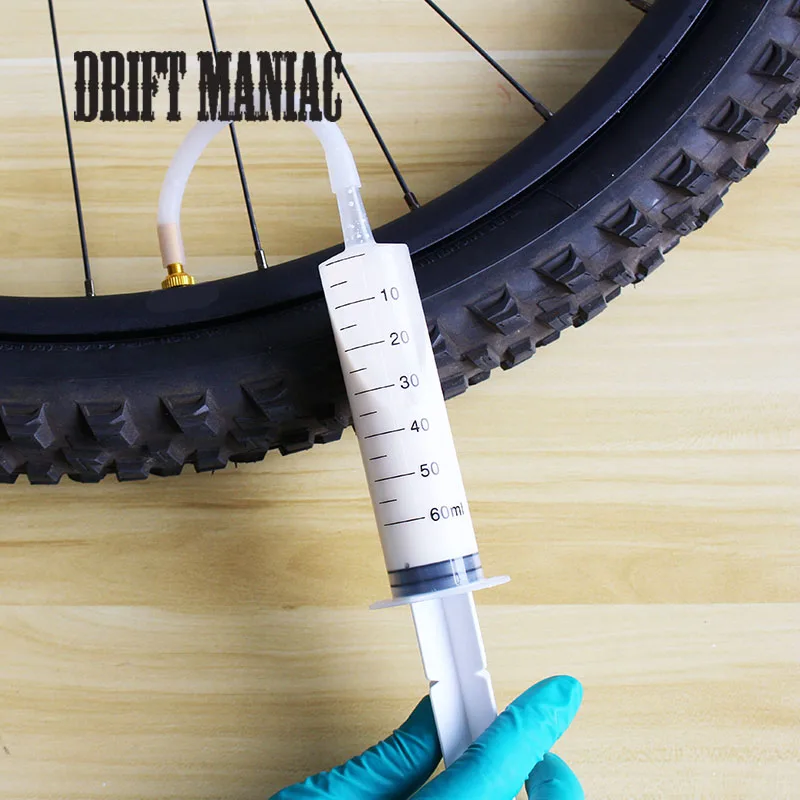 Rotate the wheel/tire as you continue to do this around the entire tire.
Rotate the wheel/tire held horizontally to allow sealant to work its way into the junction between tire bead & rim. Set the wheel/tire down horizontally for 5-10 minutes. A cardboard box is a good way to keep the wheel/tire level. Flip the wheel over to the other side and repeat this process. Losing air due to tire beads not being adequately sealed against a rim is another common cause of tubeless setups not being able to hold pressure.
Adjust tire pressure based on your weight. This is a formula from Stans NoTubes that provides a starting point for matching tire pressure to your weight:
Rider weight / 7 = X
Front pressure = X -1 psi
Rear pressure = X -2 psi
Example based on a rider weight (with gear) of 160 lbs
160 lbs / 7 = 22.9
Front pressure = 22.9 - 1 = about 22 psi
Rear pressure = 22.9 + 2 = about 25 psi
Tips & Tricks:
Use rims designed for tubeless use: Tubeless rims have a ridge next to the bead seat that will help to "lock" a tubeless tire's bead onto the rim after it is seated.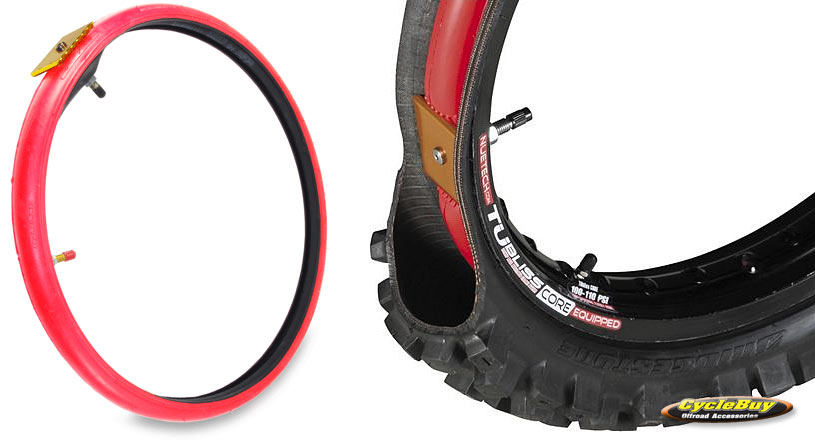 I personally will not do tubeless "conversions" with non-tubeless rims. Non-tubeless rims that don't have the ridge to help lock in a tubeless tire's bead greatly increase the risk of burping (losing air in hard cornering) or rolling a tire off in corners.
Use tires designed for tubeless use: Tires designed for tubeless mounting have a casing that is more likely to be air tight as well as tighter fitting beads (keep reading for the benefits of tighter fitting beads for ease of tubeless installation).
Seat the tire beads before adding sealant: Trying to seat a tire that already has sealant added just adds potential for messiness. The sealant does not help the initial bead seating process.
Seating the tire beads with just a floor pump: If a tire's bead fit snugly against the rim bed, you have a good chance of being able to just use a floor pump to get enough air pressure to seat the beads. An air tight seal between bead and rim allows you to gradually build up enough air pressure in the tire until the beads seat around 35-40 psi.
Tricks for seating tire beads when a tire doesn't start holding air pressure immediately:
Make sure the tire is covering the valve hole
Try to move the tire so that the beads press against the rim bed
Use an inner tube to strap the tire against the rim
Seating the bead without a compressor: A inexpensive way to get a high volume of air into a tire at high velocity is to use a gas station air compressor. If you have Presta valve, you will need a presta-to-schrader valve adaptor such as the Slime 23042 Presta to Schrader Valve Adapter. The high velocity of air that is delivered by this method or with a compressor pushes the tire beads against the rim allowing pressure to build up to seat the beads.
Add sealant via a tubeless valve that has a removable valve core: Many instructional videos will recommend removing one side of the bead at this time to add sealant. I don't agree with this approach. You've done a lot of work at this point to get both tire beads seated properly. Why would you want to undo part of the work you've done to seat the beads? Adding sealant through the valve core is by far the lowest effort way to add sealant.
For really hard to seat tires, pulling the tire bead on top of the rim could be worth trying: I just learned this new method of getting a better seal between tire and rim to do the initial inflation & seating of the bead if you don’t have access to a compressor or tubeless charger pumps that can deliver a high volume blast of air. The basis of this technique is that you pull the tire bead on top of the rim with a tire lever. When you get to about 40-50% of the tire bead resting on top of the rim. you put your thumb on the tire bead so it doesn’t slip off of the rim and gently pull out the tire lever. Repeat on the other side and pull the bead up on the rim as far as you can go. Proceed to inflate the tire. Once you are able to get some pressure in the tire. There seems to be at least some risk of having the tire bead blow off the rim when you inflate the tire, so be aware of that and try this technique at your own risk. You can see the technique being used at: https://youtu.be/tE3h5nmDdOo.
Easier to install tire brand/rim brand combinations
On Stans rims (Easton & DT rims have a similar diameter. Mavic & WTB have a slightly smaller diameter)
Schwalbe Snakeskin - Easiest
Maxxis Exo - Fairly Easy
Specialized 2Bliss - Fairly Easy
Continental Protection - Difficult to do initial seating of the beads on Stans rims
WTB TCS - CAN work but beads may be tight as the bead diameter is based on the tighter UST bead specification. I have mounted 2 WTB tires on Stans rims, but have heard that others have had challenges with this.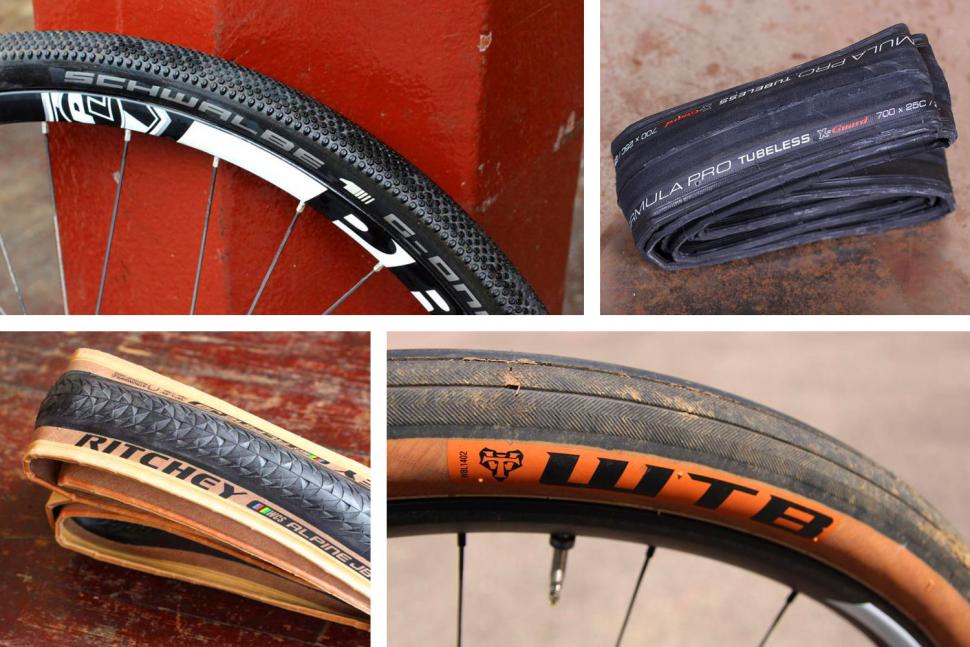 Works better on WTB and Mavic rims.
Michelin, Hutchinson - I don't have direct experience but I believe these brands will work better on WTB and Mavic rims.
This is a great video on installing difficult-to-mount tubeless tires:
You can help support Dirt Merchant Bikes’ product testing by purchasing through our retail partners.
Orange Seal Tubeless Sealant
Our experience is that Orange Seal seals punctures quickly and consistently. The amount of rain we get in the PNW makes sealants drying out less of an issue, but Orange Seal also resists water absorption well.
Stan’s Tubeless Rim Tape
Stan’s tape has a little stretch that helps in removing air bubbles when taping rims.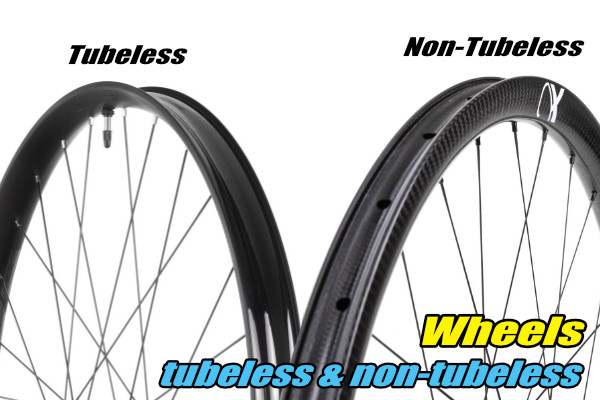 It sticks well to most alloy rims and some carbon rims. It also removes cleanly unlike Gorilla Tape.
Stan’s Tubeless Valve Stems
Stan’s valves have a solid rubber base that helps reduce air leaks around the valve base. Tightening the locknut helps seal tape against the rim.
Diamondback Steel Core Tire Levers
It can be helpful to use a tire lever to get the last part of a tire bead onto a rim. Plastic tire levers don’t last long with that type of abuse. I like these better than the more expensive Park Tool TL-6.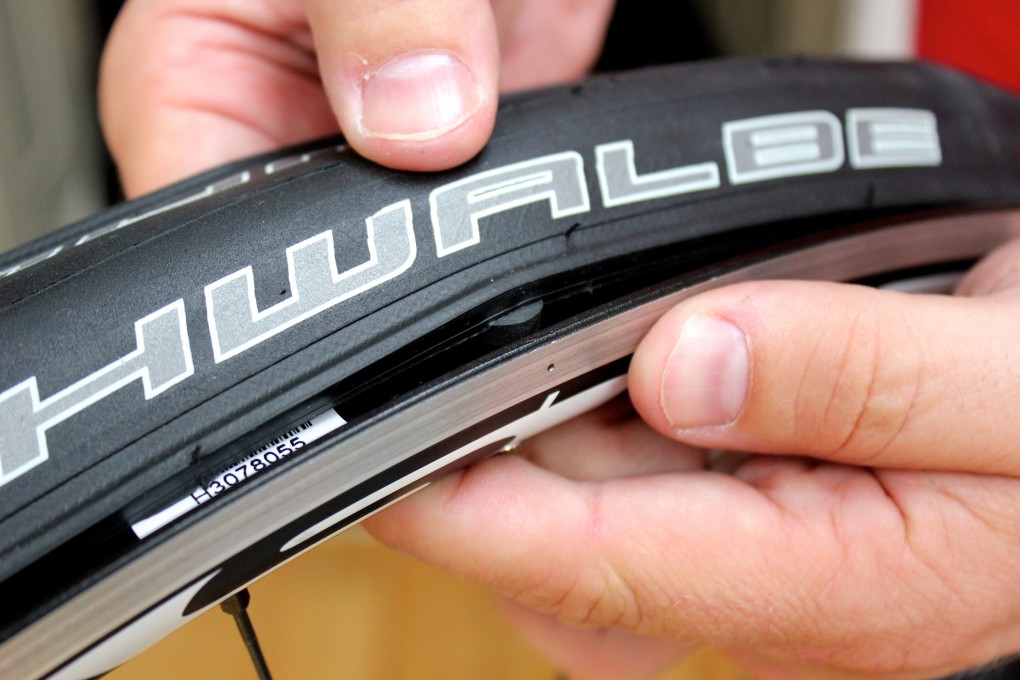 2 Steel Core Tire Levers because the entire tip of the lever is covered in plastic to reduce the chance of scratching a rim.
Orange Seal Sealant - 16 oz Refill bottle
Orange Seal Sealant - 32 oz Refill bottle
Stan’s No Tubes Rim Tape 60 Yards x 30mm
Stan’s No Tubes Rim Tape 60 Yards x 27mm
Stan’s No Tubes Rim Tape 60 Yards x 25mm
InTires TagsTires
Many cyclists are used to the telltale hissing sound coming from tires. At any moment, your high-tech mountain bike can be put out of action by a simple thorn or a small piece of pebble.
Since the advent of pneumatic tires, this problem has haunted cyclists, tiring with the frequency of punctures and the amount of work needed to fix them. And only recently, bicycle tire and rim manufacturers have decided to create a universal tubeless system (UST).
This system is a sealed rim in which the holes for the spokes and the nipple are completely airtight. Also, the non-porous rim sidewalls have improved grip on tire walls that are thicker than conventional tires. During tire inflation, the air presses the tire bead (lower edge of the sidewall) into the corresponding groove in the rim flange, thereby sealing the contact between the tire and the rim.
Theoretically, the advantages of a tubeless tire include low weight (due to the lack of a tube, although tubeless tires are heavier than conventional tires), less pressure (providing better grip) and the absence of pinch punctures (also known as "snake bites"). If you add some sealant to the system, then penetrating punctures will also be a thing of the past.
But what about a cyclist with conventional rims without sealing? Just buy a conversion kit, tubeless or Tubeless Ready tires and he can send his bike tubes to the dustbin of history.
Of course, you can only add sealant to a conventional chamber. In this case, you won't gain any weight or grip advantage, just add a little weight to the wheels, but it will help you avoid punctures and not spend money on new tubeless tires and a tubeless conversion kit. Read our guide to using Gremetic in chambers.
Remove the wheels, tires and tubes from the bike. If the wheels are old, greasy and dirty, clean them with hot soapy water or alcohol. The rubber tape will need to be taped to the spoke bed of the rim, so the rim needs to be clean and free of dirt so that the tape is snug against it.
 Check the rim tape.
 Take the rim tape and unfold it so that the nipple is on the inside of the tape. Run your fingers around its circumference and check it for cuts, nicks, bulges, and proper molding that could cause air to leak. Even if the tire drops a few psi in a day, it can be very annoying.
Position the part of the rim tape with the nipple in the spoke bed, gently push the end of the nipple through the hole provided for it and pull it out the other side. The piece of tape near the nipple is slightly thicker and therefore difficult to install correctly, but it is important to install it correctly now so that you do not have to look for the source of leaks later.
Next, you need to install the remaining section of the rim tape in the spoke bed. This is easier said than done as the tape is tight against the rim. The easiest way to install it is with a screwdriver with a long thin handle. Position the screwdriver perpendicular to the rim between the rim and the rim tape. Slowly moving the screwdriver around the circumference of the rim, set the rubber band evenly in the spoke bed.
First of all, make sure you have a working nipple that does not let air through. Most nipples have a special threaded lock washer that screws onto the nipple body. The nipple usually comes with a rubber o-ring that needs to be installed between the lock washer and the rim. By flattening the O-ring, you will create an additional seal on the outside of the hole.
Now that the rubber rim is in place and lying in the center of the rim, you need to check the uniformity of its tension throughout the entire length of the rim. Air can leak between the rim and the rim tape if there are loose or tight areas on the tape. Again go around the rim with a screwdriver and equalize the tension of the tape. This will take a few minutes.
Tires from different manufacturers or even different models from the same manufacturer differ in installation complexity, quality and other characteristics.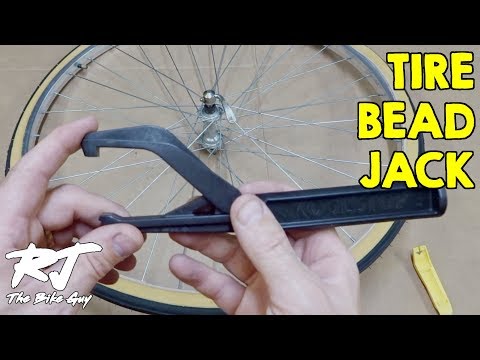 If the tires were not installed on the wheel, then first install them as usual with tubes, inflate to the maximum recommended pressure and leave them overnight. After that, they will be much easier to install and pump.
Place the wheel on your feet so that the nipple is at the highest point of the wheel (at 12 o'clock). First, place the tire beads near the nipple, then walk with both hands around the circumference of the tire (in different directions), loosening the bead over the rim wall along the way. Once you get to the very bottom of the wheel, leave an 8-inch section.
Some sealants can be applied without removing the nipple core, the spring-loaded piece that screws into the nipple body and allows air to enter the tire without escaping, but most cannot. Sludge Sealant can be injected without removing the core of the nipple. Removable core nipples are included in many conversion kits, but not all. The core must be unscrewed and removed. Be careful not to lose it as it can easily roll over furniture on the floor. If you have a nipple without a core to be removed, then immediately go to step 12.
Now that you have completely seated the tire on the rim and removed the core of the nipple, you can inject the required amount of sealant into the tire using the narrow line nozzle. Shake the sealant bottle well before doing this.
After the sealant has been poured through the nipple, screw the nipple core back. Before screwing in the core, it is recommended to lubricate its threads with petroleum jelly, which will reduce the likelihood of jamming of the core or difficulty in turning it.
If you don't want to or can't apply sealant through the nipple, leave a small section of the tire bead exposed on the rim and pour sealant through it. Use a bottle with a nozzle to infuse the sealant, as a natural rubber tire is difficult to keep its shape. Suspend the wheel carefully so as not to spill the sealant from the tire.
To install the last section of the tire, carefully rotate the wheel so that the uninstalled section is on top. Now you can let the sealant spread all over the tire. Do not worry if a little sealant still leaks.
Start inflating the tires with the car pump until the tire beads press against the rim. When the pressure is too high (about 60 - 80 psi for UST tires and Tubeless Ready tires), the tire beads should click into place with a characteristic "clicking" sound. Be careful when handling this high pressure. Your tires are now tubeless.
Air can escape between the rim and tire. Raise the wheel, take it by the tire like you are holding a tray. Shake the wheel well so that the sealant spreads throughout the tire, reacts with the air and creates a thick sealing layer. Even if you skip this step, over time, the sealant will still spread on its own. Leave the wheel for 15 minutes, then repeat this step again. Air leakage should stop.
Hold the wheel up to your ears and listen carefully for air leaks. If a leak is found, then it is most likely a microscopic hole. Repeat step 15 and/or add more sealant.
The carcass of the UST tire is impregnated with special rubber to retain air. Tubeless Ready tires have thinner walls, which means they are lighter and less airtight.) They have a dockable bead needed to install them as tubeless. At the same time, Tubeless Ready tires can only be used as tubeless tires in conjunction with liquid sealant, but we still recommend buying UST tires. Theoretically, with the help of sealant, you can use both tubeless and conventional tires, but you can only install them correctly by trial and error.
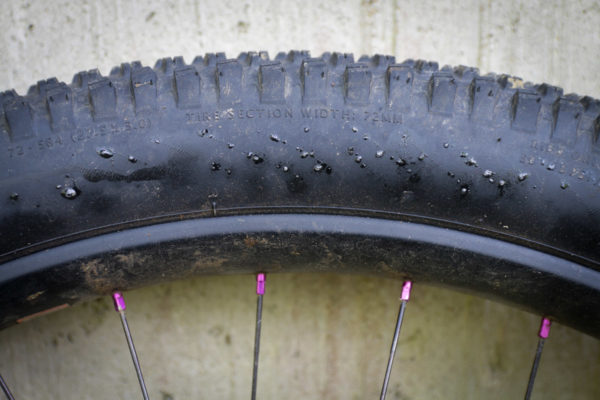
TIRE SIDEWALL MARKING
Indicates the type of rim the tire is compatible with. Unless otherwise noted, should be used on rims with hooks.
Nominal profile width and suitable wheel diameter in millimeters according to ETRTO.
Country of manufacture.
Minimum and maximum pressure in bar and psi.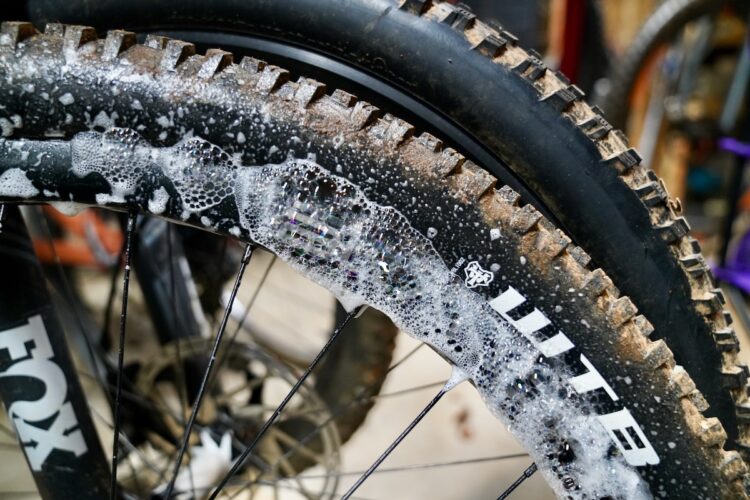 inch.
inch.
Specifies the direction in which the tread pattern should be directed when the wheel is rotated forward.
Specifies that the tire should be installed with an inner tube only, not tubeless or otherwise.
TIRE TYPES
TUBE TYPE: A tire for use with an inner tube only.
TUBELESS: A tire for use on tubeless rims only, which can be fitted without an inner tube. Can be used with internal chamber.
TUBELESS READY: A special type of tubeless tire that requires a sealant inside to maintain pressure. Can be used with internal chamber.
TUBULAR: A fully enclosed, stitched or vulcanised, tire construction (tube) that requires a special tubular rim and is glued to it when mounted.
TIRE INFLATION RECOMMENDATIONS
Never exceed the recommended tire pressure.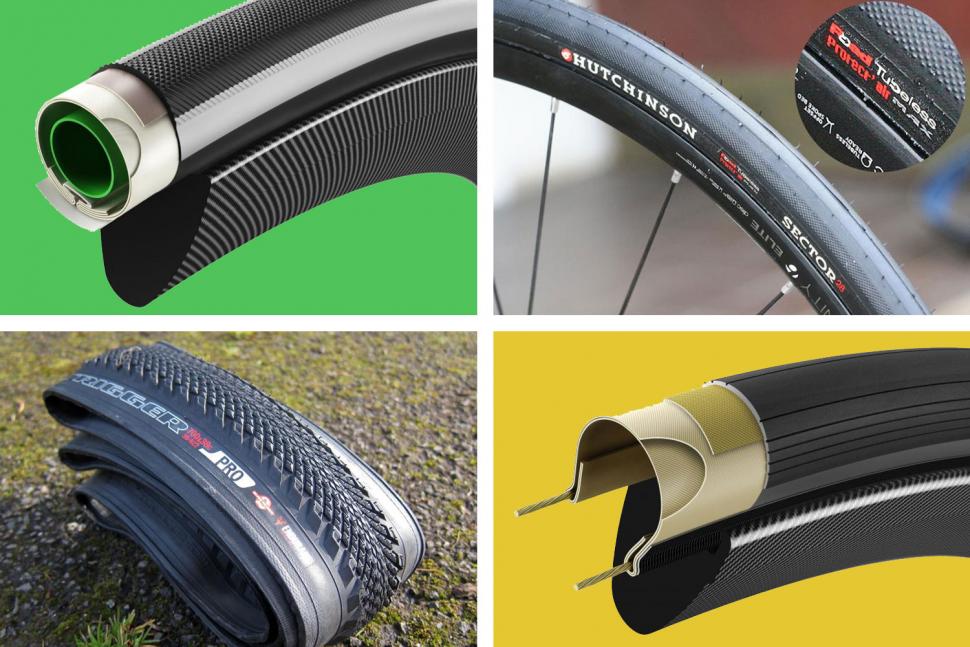
Proper pressure affects the load, speed and handling of a bike and is vital to performance and safety performance such as braking, maximum traction and tire life.
Inflate tires "cold", that is, not warmed up on the road.
Do not exceed the maximum pressure indicated on the tire sidewall.
Insufficient tire pressure causes excessive creasing and rapid wear.
Excessive pressure causes discomfort when driving and reduces the contact area of the tire with the road surface, which impairs handling and traction.
Before every ride, it is essential to check and maintain the correct tire pressure (while the tires are “cold”), especially on tubeless systems, which are more prone to sudden pressure loss.
WARNING: Driving with tires with incorrect air pressure is dangerous! This can lead to an accident, accident, serious injury or even death.
TIRE CHECK
The condition of the tires and the air pressure in them should be checked before each trip, and also, and even more carefully, after hitting any object on the road.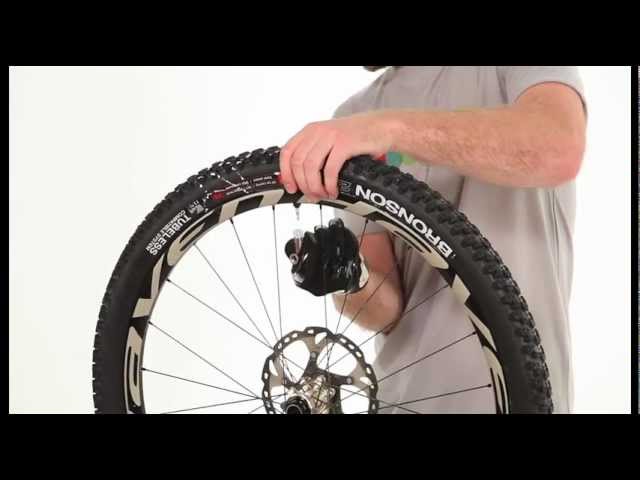 If the tread is worn and the body material (cord) becomes visible, bulges, cracks, cuts, holes, uneven wear appear on the tire, or the tire shows signs of any other damage, it is recommended to replace it immediately.
Over time, the condition of the tire will in any case deteriorate under the influence of external forces, such as contact with the road, punctures, improper repairs, mounting-dismantling, inflation-deflation, heating-cooling, excessive exposure to ozone, improper storage conditions, etc., etc. . To reduce the impact, tire manufacturers add anti-ozonants and antioxidants to their products.
Since it is not possible to accurately predict what external forces a tire will be subjected to, there are no scientifically based limits on the life that a tire can be given. It is recommended that the condition of the tires (as well as tubes and rim tapes) be checked regularly by a bicycle specialist who can assess their suitability for further use.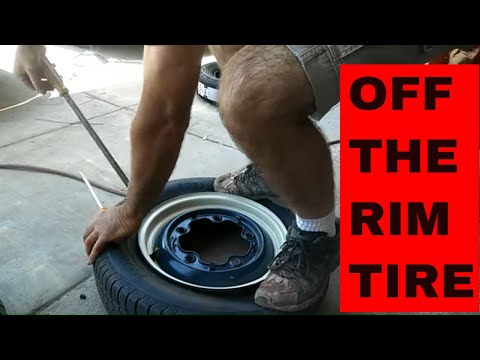
As for tubeless systems with liquid sealant inside, it is necessary to check the condition of the sealant itself and change it regularly in accordance with the instructions.
To avoid cosmetic damage, use low-pressure tap water to clean and wash the tire sidewalls. Never use cleaners to improve the appearance of the sidewall, otherwise you will remove antioxidants, which can degrade the quality of the rubber and lead to cracking of the sidewalls. Using hydraulic sprayers with high water pressure can also cause damage to the sidewall.
Avoid excessive mechanical stress on tires and tubes (for example, do not brake by blocking the wheel, do not run into sharp objects, do not drive with insufficient or excessive tire pressure, etc.).
If your bike has rim brakes, the rim is subject to constant wear and tear, which over time can lead to tube failure and puncture. In any case, if you have any doubts about the condition of the tires, consult a bicycle specialist.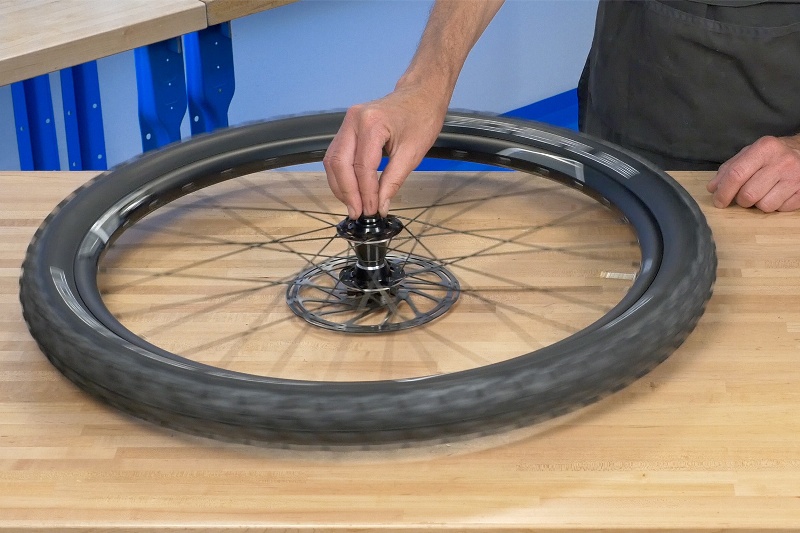
High tire pressure can damage the rim, so check the maximum pressure allowed for the specific rim before installing the tire (check with the wheel dealer or rim manufacturer for information on whether the rim can withstand tire pressure).
CHANGING TIRES
PREPARATION
1. Before installing or removing a wheel, read the bike manufacturer's instructions and make sure you know how to handle the wheel mounting mechanism.
2. Verify that the rim, tire, and tube are compatible with each other by checking the instructions for each component manufacturer. A mismatch between tire and rim can cause the tire bead to come off the rim or damage to the inner tube, resulting in a rapid loss of air pressure. If you're unsure, be sure to check with a bike specialist.
3. Make sure that the mounting area of the tire is clean and that foreign objects do not get into the tire, as they can damage the tube, rim tape, the tire itself, or contaminate the sealant (in the case of a tubeless tire).
4. Make sure the rim is in good condition. If it is damaged, then it must be replaced.
5. Check the condition of the rim tape, if used. If it is damaged or does not completely cover the spoke holes in the rim, it must be replaced. Poor quality rim tape is very often the cause of a sudden loss of air pressure.
6. Check the maximum allowable pressure for the given rim type. It must be equal to or higher than the tire. Tires that allow a pressure reduction equal to or greater than 3 bar (43 psi) must be mounted on lug rims.
7. A tire capable of inflating more than 5 bar (73 psi) must be mounted on a lug rim. Hooked rims are marked with a "C" in the size label. If you have any questions, please contact a bicycle specialist.
8. In the case of installing a tire with a tube, talc helps to properly place it in the tire. For latex cameras, its use is mandatory, but it is also recommended for butyl cameras. It is also recommended to install a new tube each time a new tire is fitted or after a puncture.
9. When installing a tubeless tire (Tubless), always check the condition of the valve (nipple) and change it if it looks damaged or if air pressure is lost.
10. When installing a Tubeless Ready tire, always check the sealant and change it if it is dry. Also read the sealant manufacturer's instructions carefully to make sure it's right for your tire.
TIRE REMOVAL PROCEDURE
1. Unscrew the valve cap (nipple) and locknut, completely deflate the tire.
2. Peel off one side of the tire all around from the edge of the rim by applying pressure starting from the area opposite the valve. Tubeless tires may require more effort for this.
3. Position the tire pryer next to the valve and carefully insert it between the tire and rim, being careful not to pinch the inner tube (if any). Then, using a lever, lift the sidewall of the tire off the rim.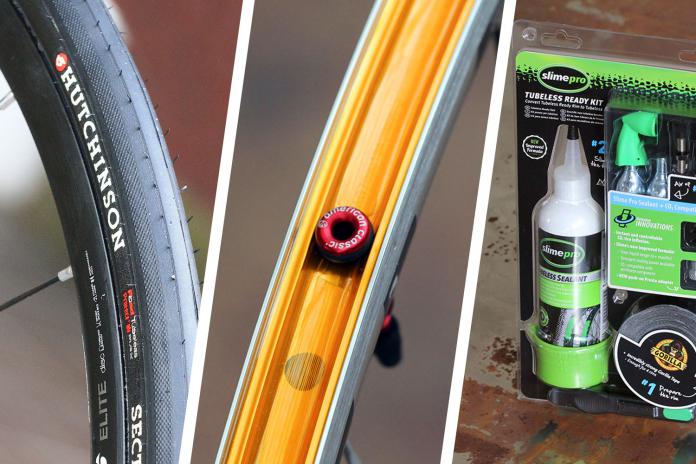 To make the job easier, always make sure that the other bead is in the rim bed.
4. While holding the first rig in this position, insert the second rig about 10 cm from the first and repeat the above operation. Then run the pliers around the circumference of the tire to completely separate one bead from the rim.
5. Remove the inner tube, if present, or liquid sealant, if present and still liquid, and then remove the second tire bead from the rim with your hands.
TIRE INSTALLATION PROCEDURE
1. If installing a tubeless tyre, make sure the rim is sealed, tubeless tyre-compatible, or tubeless-compatible. If the rim is tubeless compatible, you will also need a tubeless rim tape that will completely cover the spoke holes. It is possible to lubricate the entire circumference of the rim with a special tubeless lubricant (do not use oil or grease) - this will facilitate the installation procedure and the correct positioning of the tire on the rim.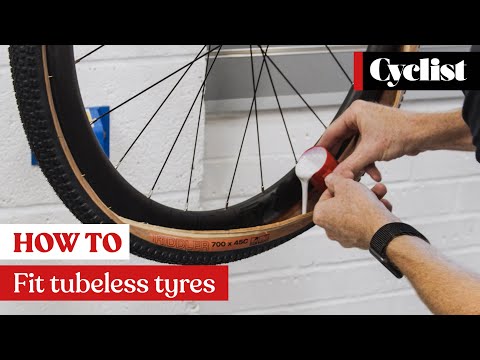
2. Insert the first bead of the tire into the rim, observing the direction of rotation of the tire indicated on its sidewall, starting opposite the valve.
3. If installing a tire with a tube, slightly inflate the tube, but only so that it becomes rounded, and gently insert into the tire, starting at the valve and completely carefully placing it in the rim.
4. Starting on the side opposite the valve, press the other bead of the tire into the rim and push it around the rim in both directions until it fits properly in the rim. For tubeless installations, add the recommended amount of sealant before inserting the last bead piece. If the tire bead becomes difficult to push into the rim, or the last part of the bead does not snap into place, make sure that the bead around the entire circumference of the rim is in place. If necessary, squeeze the sidewalls of the tire into the rim with your hands.
5. If fitted with a tube, make sure it is not pinched between the tire and the rim or valve, and then secure the valve to the rim with a locknut.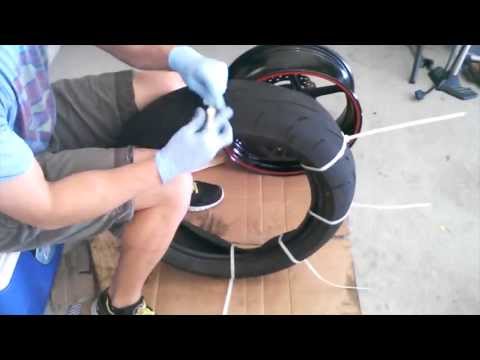
6. Inflate the tire to the maximum allowable pressure using a pressure gauge pump so that the beads are properly seated on the rim. Tubeless tires click into place with a characteristic popping sound. Rotate the wheel by hand at low speed and at an angle to check that the beads are correctly positioned and also that the liquid sealant is spread inside (if the installation is tubeless).
7. The tire is properly seated when the thin line above the side of the rim is equidistant from the edge of the rim all around. Then reduce the pressure to your preference (within the markings on the sidewall of the tire) and close the valve. Do not exceed the manufacturer's maximum pressure for tire, rim and rim tape.
8. When inflating a tubeless tire for the first time, a strong jet of air is required, so you may need a compressor.
9. Before each ride, check the air pressure, tire bead fit, wheel-to-hub attachment, and brake pads (disc or rim).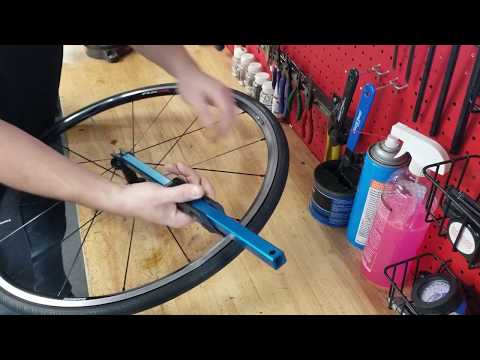
10. Before using newly installed tires, be sure to first brake test and do a few test maneuvers.
USING TIRES ON FULLY SEALED CARBON AND ALUMINUM CLINCHER RIM WITHOUT RIM TAPE
Fully sealed carbon and aluminum rims, such as tubeless rims, usually don't have spoke holes in the rim, so manufacturers don't mandate the use of rim tape.
However, keep in mind that in the case of bikes equipped with rim brakes, the heat generated during braking directly enters the tire system, significantly increasing the thermal load on all components, such as the tire, the inner tube (if any) and the rim itself. In the event of prolonged braking, riding without a rim tape can cause the tires to deflate quickly, with the risk of losing control of the bike.
This becomes even more relevant in the case of latex and lightweight tubes, as well as tubeless installations. In order to minimize the chance of failure due to overheating, it is recommended to use rim tape for any installation, and to avoid continuous, prolonged braking when descending a mountain, if possible.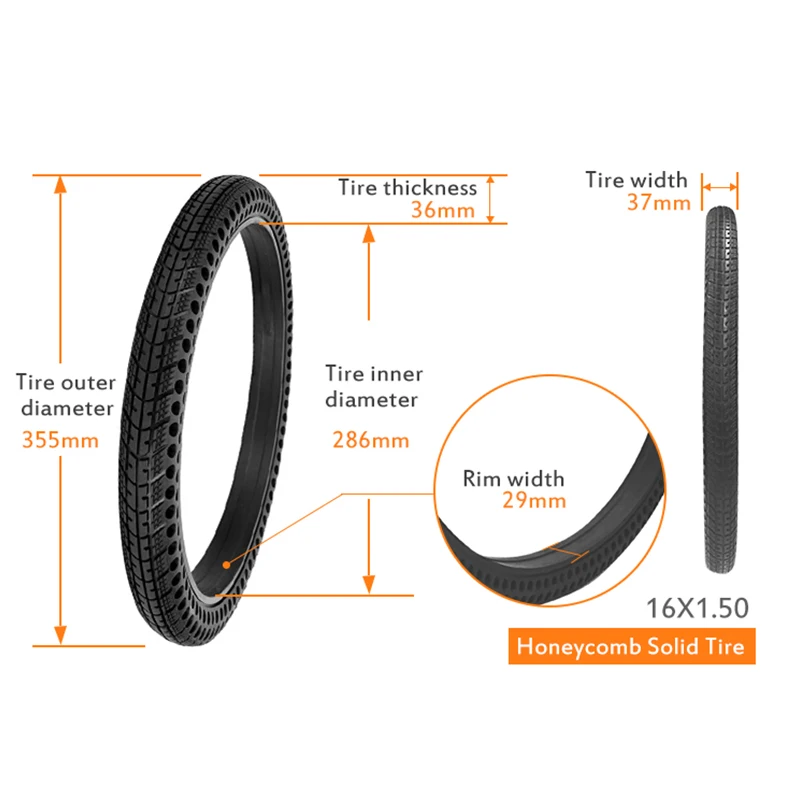
USING CLINCHER TIRES WITH CARBON RIM
Carbon rims sometimes pose a risk of tire edge damage due to sharp rim edges. Therefore, before mounting the tire, it is recommended to make sure that there are no sharp edges on the rim hooks. To verify this, carefully run your finger along both edges of the rim - there should be no nicks, sharp protrusions or excessive roughness on it. If there are, then the rim needs to be replaced.
If in doubt, please consult a bicycle specialist.
TIRE STORAGE
Tires should be stored in a cool, dry place at 10°C - 21°C, avoiding contact with heaters.
Storage temperatures that are too low are not harmful in and of themselves, but can cause tire stiffness. In this case, before unfolding the folded tire and mounting, it is necessary to keep it for several hours at a temperature of about 16°C.