Jet Kit Install | ||
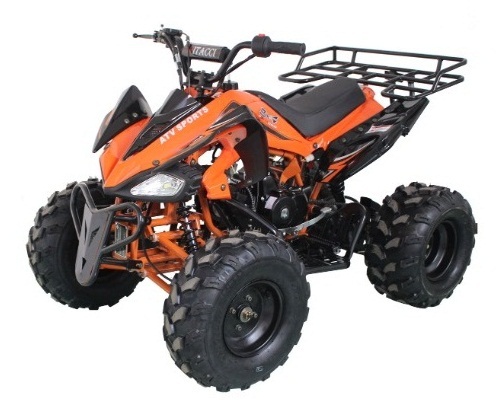
If you live anywhere near mountains, then one of the most beneficial things you can do to help performance without buying an EFI ATV, is to install a Jet Kit. The most popular, and definitely the most complete kit, is the DynoJet kit. I purchased mine at HotSeat Performance for $59. I noticed later that my dealer carried the kit, but they had one for another model. I'm sure your local dealer could get one if you asked. I've had my quad for a few years, and even though I live at around 250 feet above sea level, I rarely ride at that altitude. I finally got tired of dog performance in the Sierra's and decided to get the kit after seeing Jack's improved performance on his 600 with the kit. So, a couple Saturday's ago, Jack came over and we had "Tech Saturday" in my garage. Since MacGyver, er I mean Jack had installed it already, I knew it would go more smoothly if he was there. Tools Required (I may miss some) Note: There are some other, minor steps that will be obvious when disconnecting stuff. We took pictures of the main stuff. Example. We say remove airbox...but you have to disconnect and unbolt a few things to do it. They're obvious! Click on any of the below images to see it at 800 x 600. | ||
| ||
| ||
| ||
| ||
| ||
| ||
| ||
| ||
| ||
| ||
| ||
| ||
| ||
| ||
| ||
| ||
| ||
| ||
| ||
| ||
| ||
| ||
| ||
| ||
| ||
| ||
| ||
| ||
| ||
| ||
| ||
| ||
Congratulations. It's now time to put it all back together. You're done. Once you have it all together...fire it up! Even at 250 ft, mine ran with much better throttle response than it did before. Of course, some of that can be attributed to it being clean! I'm sure once I get my quad up to target altitude, that it will run even better. Update: I ran at 5800-6300 feet on February 19, 2006. It was a HUGE improvement. Now granted, I had cleaned my carb, so some improvement was from the cleaning. However, besides better throttle response, it definitely had more power, with no bogging down.. I did have to adjust the idle, as it was too low when I got up to 5800 feet. | ||
| Recommended settings | |||
|---|---|---|---|
| High Altitude Setting | Low Altitude Setting | ||
| Recommended main jet | |||
| Clip position | |||
| Pilot jet | |||
*Manufacturers Stock Jetting can be found in the owners manual and is typically based on 70 at 0 Altitude
*Manufacturers Stock Jetting can be found in the owners manual and is typically based on 70 degrees at 0 feet of altitude. Stock clip position should be counted from the top of the needle down (Example: 1,2,3,4,5,6 or 7)
Posted By
Ed Merati, Director of Logistics, lifetime motorcycle enthusiast and garage guru. We currently don’t offer any custom jetting services or support as we are very busy shipping motorcycles. We developed this tool to assist our riders with jetting adjustments because we love riding as much as you do. Thanks. [email protected]
 We’ve created an instant online tool to calculate the perfect jetting for your bike. Take the guesswork out of selecting the right-sized jets for your motorcycle or ATV. Support us! Motorcycle Shippers may earn a small commission from affiliate links in this article
We’ve all heard those painful sputtering noises coming from another bike sitting near us in traffic. But now, those sounds are coming from your own motorcycle. And come to think of it, you have been noticing a loss in performance on your last few rides.
If you find yourself in this situation, your motorcycle’s carburetor could be the culprit. Those spitting, sputtering noises are often its way of telling you that it needs a little TLC—aka, a rejet. Rejetting the carburetor can be a bit complicated to do yourself, but it’s necessary to keep your motorcycle performing as it should.
You may need to adjust the main jet, pilot jet and/or clip position on the needle for your motorcycle to run at peak efficiency.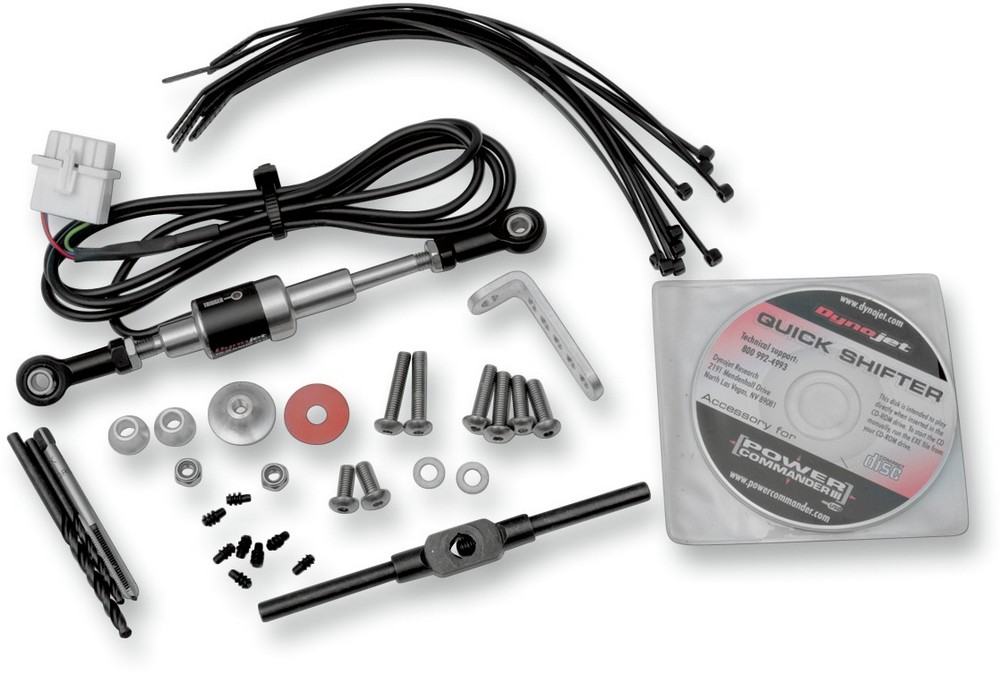 You can use our calculator to find the correct settings for your carburetor by simply entering your stock jetting configuration and desired elevation with temperature.
To simplify the process for you, we’ve written this quick step-by-step guide, complete with a free rejet calculator to take the guesswork out of selecting the right sized jets for your motorcycle. Once you have determined what Jets you need for your motorcycle you can buy them here (10% Off Your First Order at JPcycles.com w/ code: TAKE10
) and get a discount.
When you jet your motorcycle’s carburetor, you’re setting the optimal ratio of air-to-fuel that goes into your engine. (This mix is called the stoichiometric ratio, which is 14.7 parts air to one part fuel. In reality, your motorcycle probably performs better at a slightly richer ratio.)
Carburetors contain tiny nozzles—these are the “jets”—that have holes. Fuel passes through these holes to mix with air. This creates mist, which then travels to the combustion chamber, where it’s used as energy to run your engine. The smaller the holes in the jets, the less fuel in the air and, as a result, less explosion and less power to run your engine. By replacing your current jets with ones that have different sized holes you can add either more fuel or air to perfect your motorcycle’s fuel-air ratio.
A number of factors can impact whether your motorcycle needs a rejet: humidity, altitude, upgrades to your engine or exhaust system, and even the weather. Basic routine maintenance or lack of proper winterizing also comes into play here.
If your motorcycle is having carburetor issues, you’ll notice that your engine feels like it isn’t getting the fuel it needs. If you’re also hearing popping or sputtering sounds, check your spark plugs to determine if your motorcycle needs a rejet. A clean spark plug means you can skip the rejet. A black, sooty-looking spark plug means you’re running rich with too much fuel in your mix. If you see white residue, that means you’re running lean with too much air. In both cases, you need a rejet.
Before you start with your rejetting, it’s helpful to understand the parts in your carburetor and how they control your fuel level.
Want to dive deeper? Watch this video on the parts of the carburetor.
Once you’ve checked your spark plugs and have determined you need a rejet, it’s time to drain your carburetor. Start by shutting off the petcock, which stops gas flow from the tank to the carb. Unscrew the drain plug and let the gas run out into a pan. If you prefer, you can also accomplish this by running your engine in neutral for a few minutes—but if you go this route, make sure your motorcycle is on its stand.
With either method, the engine will eventually use up all the gas in the carb before starting to sputter and stall. This signals that your carb is as dry as possible.
Now, it’s time to remove the carb. Keep in mind that this process is going to be different for every motorcycle. If you’re uncertain how to remove your bike’s carburetor, refer to the service manual. (Can’t find it? You can purchase service manuals for most motorcycles on eBay.)
Remove any hoses that are still hanging onto your bike. Take a photo of where each of them goes to avoid nightmares when it comes to reinstall them. After this step, your carb should be fully free from your engine.
Not sure what size jets you need to purchase? Consult your manual first to find the stock size.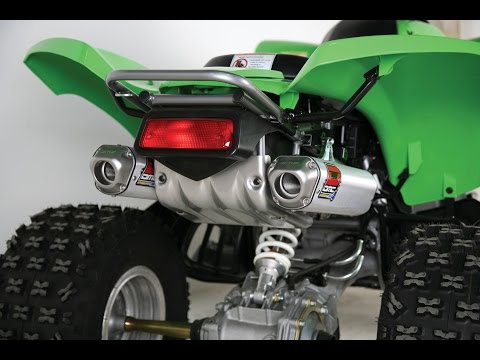 Also pay attention to the numbers on the side of your old jets, which you’ll be able to see in the steps to come. A larger jet number means a bigger hole and more fuel. A smaller jet number has smaller holes and should be used if your engine needs to run leaner. Whether your machine is running too lean or too rich is a good starting point for choosing your jets, but using a jet calculator minimizes trial and error later.
(Use our free jet calculator above to determine the correct settings for your carburetor. You’ll simply enter your stock jetting configuration, desired elevation and temperature.)
Now, it’s time for the main event. Remove your float bowl and its gasket; you should be able to do this by taking out the screws that hold it onto your carburetor. With those two pieces removed, you’ll see the main jet, which is located in the center of the carburetor, and the pilot jet, which is located directly next to it.
Unscrew the main jet and pilot jet and replace them with your new ones.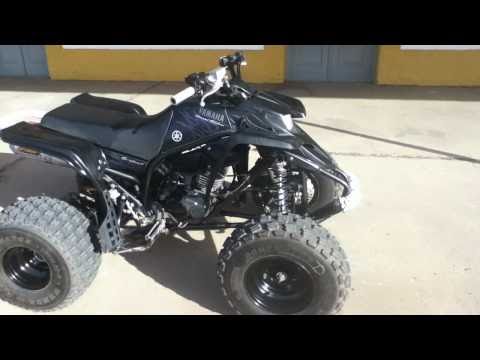 Once you’re done with this step, close up your carb.
To access the jet needle, you need to remove your carburetor’s diaphragm, spring and top cap. Doing this will allow you to access the jet needle. Push the jet needle out of the diaphragm and find the clip attached to the notches; it will be near the top of the needle.
Adjust the jet clip based on your motorcycle’s needs. If you’re running rich, move the clip up one rung toward the top of the needle. If your engine needs more fuel, move the clip down one rung, toward the bottom of the needle. Slide the needle back into the diaphragm, put the diaphragm back on the carburetor body and re-attach the cap.
Reattach the carburetor to the engine. Refer to the photos you took in Step 3 to put hoses back in their correct place.
Now it’s on to the fun part: taking your motorcycle out for a test ride. As you’re riding, pay attention to how the engine sounds and how your throttle feels. If you used our jet calculator, the spitting, sputtering noises should be gone and you should notice an improvement in your bike’s performance.
If you’re still hearing those unhealthy noises and feel like not enough fuel is getting to your engine, you likely chose the wrong jet size. If this is the case, run your engine for a bit and then check the spark plug. A clean spark plug means you’ve installed the correct sized jets. If the black or white color persists, you need to install different sized jets until your engine is receiving the right fuel-vs.-air ratio. This involves going back through steps 1 through 7, testing and repeating until you find the correct jet size.
If you happen to be buying a motorcycle, we have some more tips for you in our guide to buying a used motorcycle. Want to receive more helpful motorcycle tips? Sign Up for our Newsletter below.
What tricks do ATV owners use to teach their technique to swim: they tie inflated tubes from car tires to luggage racks, hook special wheel covers - the so-called J-Wheelz .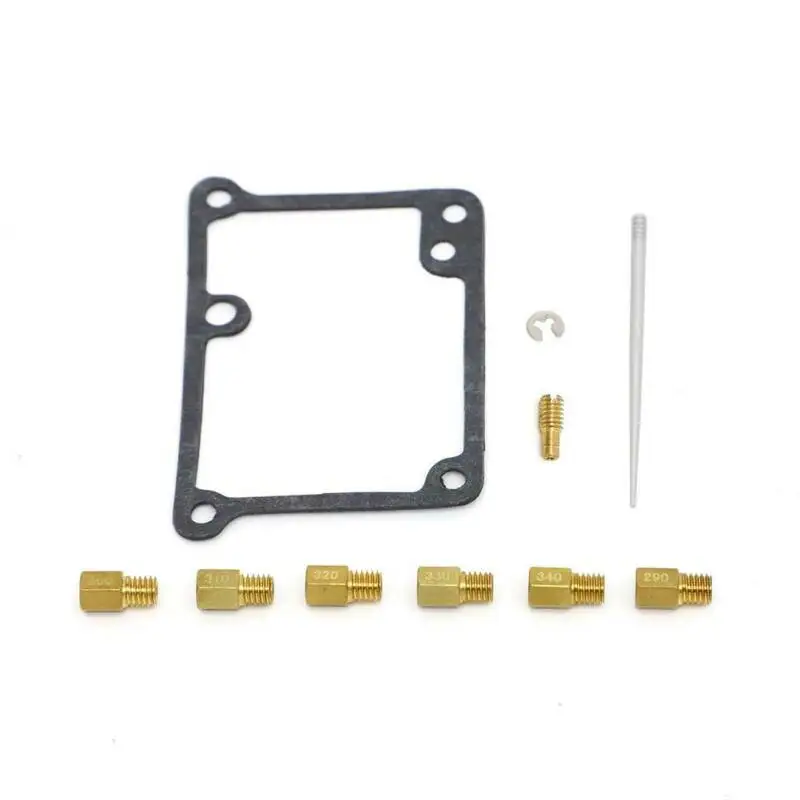 .. But all this is more a perversion than a solution to the problem. And why reinvent the wheel if the waterfowl quadric already exists? Meet the amphibious Quadski.
Dmitry Zlenko
This device can be an ideal choice for many hunters and fishermen, and just lovers of outdoor activities... Easily changing its "terrestrial" and "water" incarnations, an amphibian that is not inferior in speed to ATVs on land , and jet skis on the water, makes your favorite hobby even more exciting. And everything would be fine, if not the price of the issue. But first things first.
Quadski is certified as a snow and swamp vehicle in Russia. Therefore, in order to legally manage it, you need the “rights” of a tractor driver. That is, exactly the same as on the ATV.
The brainchild of the American company Gibbs Sports Amphibians Inc called Quadski (in Russian transcription it sounds like “Kvadsky”) is distinguished by the elegance of lines, ideal proportions, and the innovation of literally every detail. From the outside it seems that everything is simple: he took a jet ski, stuck wheels to it - and the amphibian gotoa. In fact, the birth of this hybrid was preceded by 15 long years of engineering research.
One of the main highlights of the car is a system that, when you press a specially trained button, hides the wheels deep into the body of the amphibian. As you might guess, this was done for the sole purpose of minimizing resistance when moving through water. By the way, it takes only 4-5 seconds to turn an ATV into a jet ski. The same amount of time will be required for the reverse metamorphosis. The maximum speed of the device on water is almost 75 km / h.
Under the saddle of the amphibian is a 140-horsepower 4-cylinder power unit with a volume of 1300 "cubes" from BMW, working in combination with the patented Gibbs water jet - a water jet of its kind, since it is an order of magnitude lighter and many times more compact than its counterparts.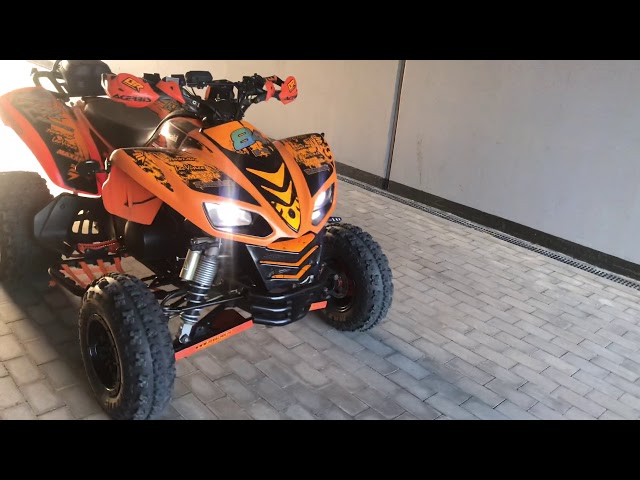 But at the same time, the performance of the “water cannon” is such that in a matter of seconds the amphibious glider goes out and stably cruising at 70-75 km / h. At low speeds, the water jet is also more than adequate: it provides excellent maneuverability both when moving forward and backward.
I especially want to note the correct design of the amphibian. Due to the low center of gravity and the correct weight distribution, it is very stable on the water. Even when you enter a turn at a decent speed, there is no feeling that you are about to be thrown out of the saddle or you will roll over. In other words, there was no difference between riding a modern jetski and Quadski. And as for the responsiveness of the device to the "gas to the floor", here the dynamics are absolutely on a par with the "hydraulic". If we talk about fuel consumption, then the tank of the car can hold 57 liters of AI-92, which is enough for about 1.5-2 hours of water rides. That is, the power reserve at an average speed of 55-60 km / h is 110-120 km. Well, did you ride on the water? Then we swim to the shore!
Lumps of dirt adhering to the suction port of the pump can instantly ruin the jet. In order to avoid accidents, Quadski has a water tank. Fluid from the pressurized reservoir cleans the channels vital to the pump from dirt.
While the owners of jet skis are suffering, trying to push their device onto a special trailer, you just press a button, thereby bringing the wheels into combat position and turning off the jet, and after 5 seconds you drive ashore on your own. However, in fairness, we note that not every bank is tough for this "amphibian". The civilian version of the amphibian has a drive only on the rear wheels, so if the coastline is not too hard or swampy, then a heavy car - and the device weighs 535 kilos - can easily sit on its belly. And in this sense, our hero, of course, is more of a hydro than an ATV.
But at the same time, it cannot be said that he is completely unadapted to land walks. Let's start with the fact that the body of the unique amphibian is made of high-strength composite plastic, which is resistant to impacts on stones and hemp. As tests have shown, in order to tear through the bottom or side of the Kvadsky, the “helmsman” needs to try very hard, because the plastic is not only durable, but also elastic. It is somewhat reminiscent of a good car bumper, which can be dented, but certainly not burst.
The ground clearance of the amphibian is less than on conventional four-wheel drive ATVs - 230 mm. That is, in principle, riding over rough terrain in the mode of an easy trophy walk is quite realistic, but it’s absolutely not worth it to “drill” where the paw of a wild beast is afraid to go. Firstly, because there is no all-wheel drive, and secondly, the leading rear axle is equipped with a differential without the possibility of forced locking.
Motor from BMW volume, as already mentioned, 1300 "cubes", develops a capacity of 140 "mares". On land, the maximum speed is limited to the same mark as on water - 75 km / h.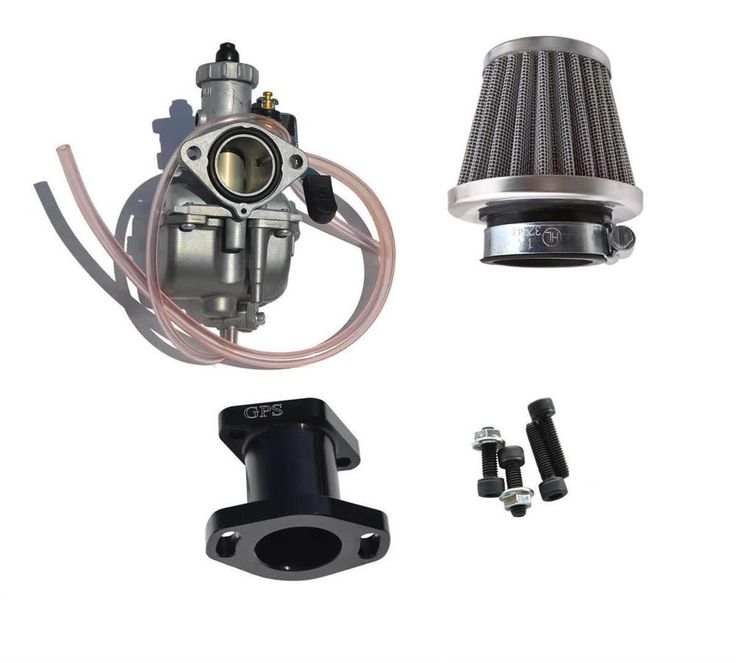 Of course, with such an engine, the jet ski should go faster, but the manufacturer limited the maximum speed to electronics for safety reasons. On land, the fuel consumption of an ATV hybrid with a jet ski is an order of magnitude lower. Judge for yourself: 57 liters that fit in a gas tank allow you to drive not 110-120 kilometers, as on water, but all 600! It is understandable, because the engine does not have to spend energy on the fight against water resistance and the operation of the water cannon.
The gearbox is a separate issue. Here is a 5-speed electromechanical transmission (by the way, like the engine - also from the motorcycle division of BMW). That is, without depressing the clutch, with the help of buttons, the “helmsman” decides for himself which gear at one time or another is best to use. The “semi-automatic” on the Quadski, like on many modern motorcycles, works so smoothly that you don’t even notice how the gears are shifting.
Suspension on our hero is spring-hydraulic, fully independent, the arms are made of forged aluminum (as are some of the supporting elements of the frame). Works for "five plus": perfectly swallows any bumps, does not sway, due to which the device is very obedient and predictable in control. Hodovka, as you understand, is not too simple (after all, it develops when we turn an ATV into a jet ski), but despite the complexity of the construct, it is durable, which was repeatedly proven during a test drive.
The hybrid is designed for one person, but if you press closer to the steering wheel, you can carve out a place for a passenger. The carrying capacity of the amphibian according to the passport is 120 kg. However, for those who like to steer in company and in comfort, the manufacturer has made an elongated, double version of the Quadski XL amphibian. Here, not only the seat is longer, but the load capacity is increased to 160 kg.
In a word, this is a very cool "wheelbarrow" that instantly produces a wow effect. After the first acquaintance with her, I want to immediately sign a onerous loan agreement, just to get ownership of this miracle of technology. However, when emotions subside, you understand that for this money - 72,000 US dollars - you can get a two-room apartment on the outskirts of Moscow. In a word, a toy for moneybags and nothing more.
...But who am I kidding? If I had the necessary amount in my pocket in the free balance, of course I would buy this thing without hesitation and not a bit of regret. And already in the coming weekend, armed with a spinning rod, I would have rushed to some body of water!
How to break the fast in the town of Yuri Dolgoruky, Alexander Nevsky, Ivan the Terrible and Peter the Great
19633
than to flare up in the town of Yuri Dolgoruky, Alexander Nevsky, Ivan the Terrible and Peter the Great
19633
Subscribe to the Autovzglyan channel:
ATVs, highway, auto -labor, tourism, tourism, tourism.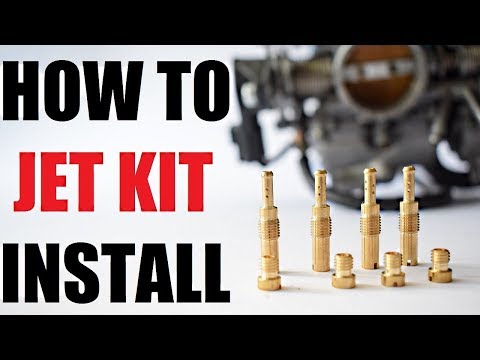 caravanning
Careless riding of an ATV, jet ski or snowmobile is fraught with consequences for others and the driver himself. To minimize accidents, the state only allows trained drivers to access them. Due to the design and management features, a separate category of rights is issued for it. How to get them, you will learn from the article.
To ride an ATV or snowmobile, you need to complete training and obtain a license as a result. For driving without a license, a fine of 10,000 - 15,000 rubles is threatened. GOST R 52008-2003 describes both vehicles as motor tractors. The purchase of such equipment requires state registration, as a result of which Gostekhnadzor issues a passport for a self-propelled vehicle. Owners of ATVs and snowmobiles must apply for a category A1 license (tractor driver).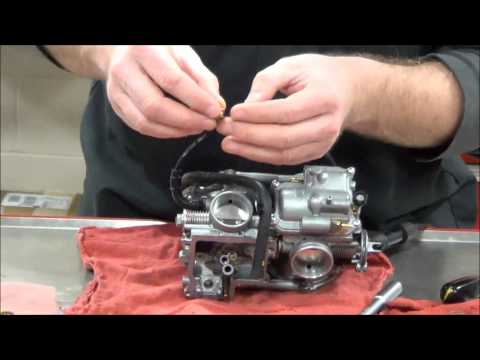 They are issued by Gostekhnadzor based on the results of a month of training and passing exams.
Tractor driver's license is issued to persons over 16 years of age. To obtain them, you need a permit based on the results of a medical examination. After passing the theory and practice, as well as passing the exam to the State Technical Supervision, they submit documents and pay a fee in the amount of 1,500 rubles. (the service involves the issuance of license plates).
The representative of the regulatory body checks the papers and, based on the results of the check, issues rights.
 and weighing up to 200 kg. Jet skis do not meet these criteria, so they need to be licensed. For driving without rights, a fine of up to 1 thousand rubles is provided.
A watercraft license is issued to persons over 18 years of age. To do this, the vehicle must be registered, learn to drive, pass an exam, and also pass a medical examination and pay a fee of 1,300 rubles. The rights do not need to be obtained by those who have a diploma of higher education in the specialties "Navigation" or "Management of water transport". The certificate gives the right to move only in areas permitted for swimming.
You can learn theory on your own or take courses. In person or in absentia, they study the rules of behavior on the water, the construction of ships and motors, signals and signs, and navigation of inland waterways. They also teach meteorology, administrative law and radio communications. In practical exercises, they work out the skills of maneuvering on the water.
The exam is taken in the presence of an GIMS inspector (State Inspectorate for Small Vessels). The theory can be taken several times. The practical part is held on special simulators - this time the number of attempts is limited. Following the successful completion of both parts, a paper is issued that gives grounds for issuing a water transport driver's license.
The validity of the rights to a jet ski is limited to ten years. After this period, you need to go through theory, practice and take the exam again. You also need to re-pass the medical examination and pay a tax in the amount of 1,300 rubles.
To drive an ATV or a snowmobile, you need to get the rights of a category A1 tractor driver - they are issued from the age of 16. The cost of the service is 1,500 rubles.
To drive a jet ski, you need to get a certificate for the right to drive a small boat - it is issued from the age of 18.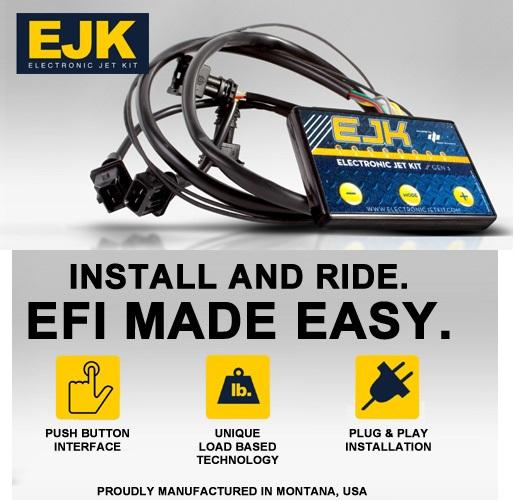

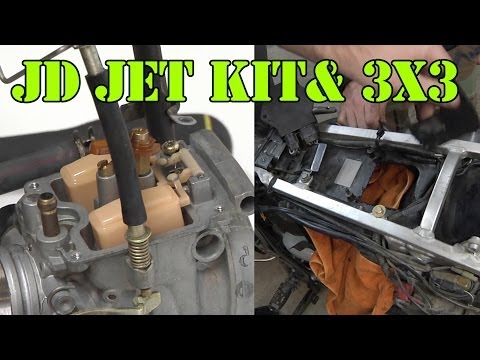
 Then unbolt the airbox and remove.
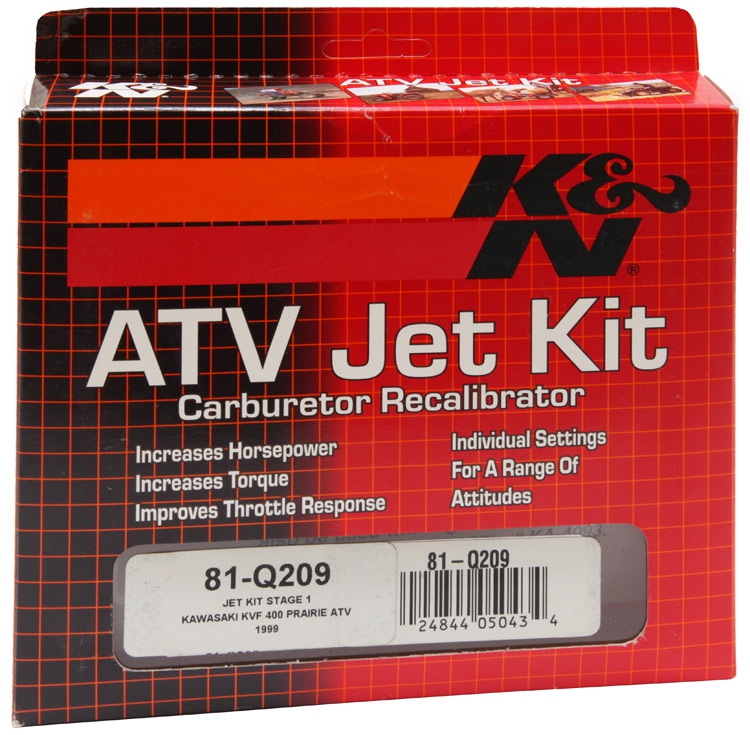 We got a Flat head screw driver that fit the notch perfectly, and the screw opened. You will physically hear them snap, when they break free.
  The DynoJet kit has a new one.
 As you can see, I turned the white rag into a black rag. Whip out the Berryman's B-12 Chemtool Carb Cleaner!
 Then turn accordingly. For our altitude, it was 1 full turn.