| THIS PAGE IS OUTDATED: XBMC v12 and higher no longer run on the original ATV OS. To use v12 and higher you must install a Linux-based OS on the Apple TV 1 |
Archive:Apple TV 1 (silver) is no longer available from Apple, but can be purchased from alternative sources (eBay, kijiji, craigslist, etc.).
It is highly recommended that you replace the WiFi card with a Broadcom Crystal HD to enable playback of HD videos.
It is also highly recommended that you consider installing a linux-based OS install with XBMC for various reasons.
Requirements:
NOTE: Just to be safe, unplug any other USB drives just in case (as you do not want to risk ATV USB Creator overwriting the data on any other USB drive you might have connected).
 "AppleTV version 3.x" should already be selected, and there should already be check marks for "ssh tools", "bin utils", "SoftwareMenu", and "XBMC/Boxee for Mac"
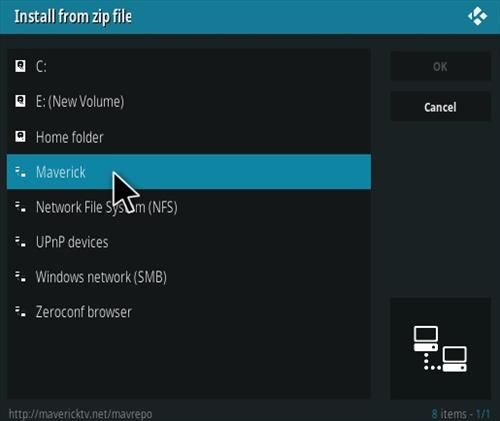
Newer versions of XBMC after v11 will no longer work on an ATV1 with the original OS. To use these you will need to install a Linux-based OS: Archive:Install XBMC on Apple TV 1 (Linux).
Just in case you were unaware, XBMC has finally released an Eden copy of XBMC for your old Apple TV (1st generation).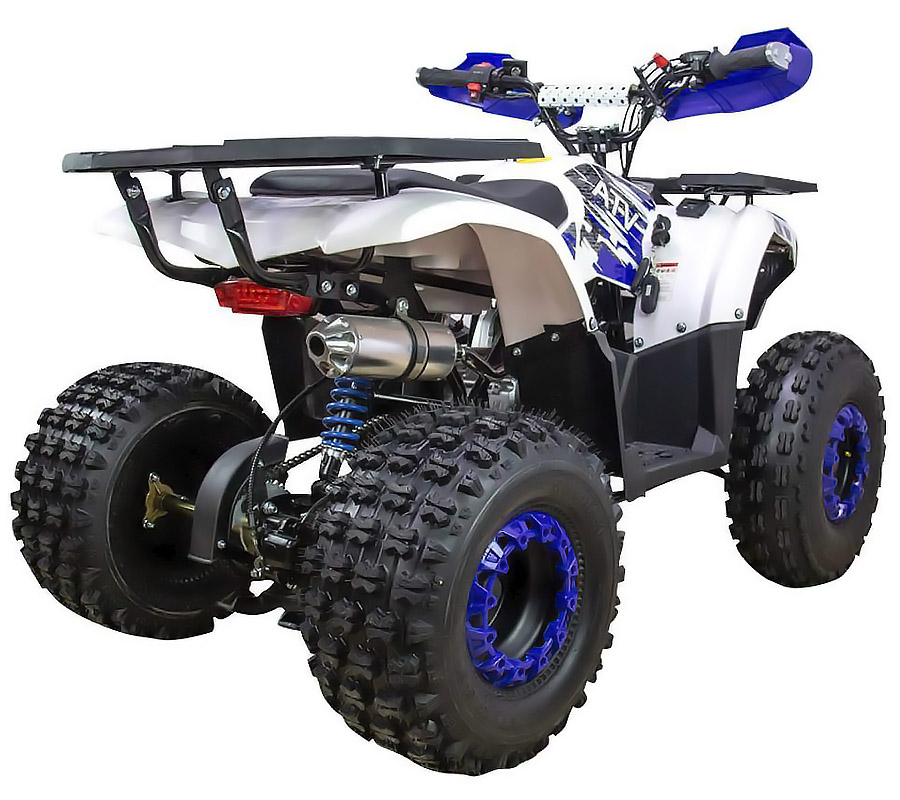 Though this 1st gen device is not the easiest to load XBMC on to, it is by no means impossible. If you simply follow these steps, from beginning to end, you will be enjoying unlimited multimedia goodness in no time.
Before we start, there are some basic requirements that are absolutely necessary for this installation process.
BE SAFE: To be on the safe side, make sure that you have unplugged all other USB drives from your computer before continuing. USB Creator does erase whatever drive you are using, so you want to make sure there is nothing vital loaded on any devices plugged in once we begin.
1. Download the ATV USB Creator and save it onto your system.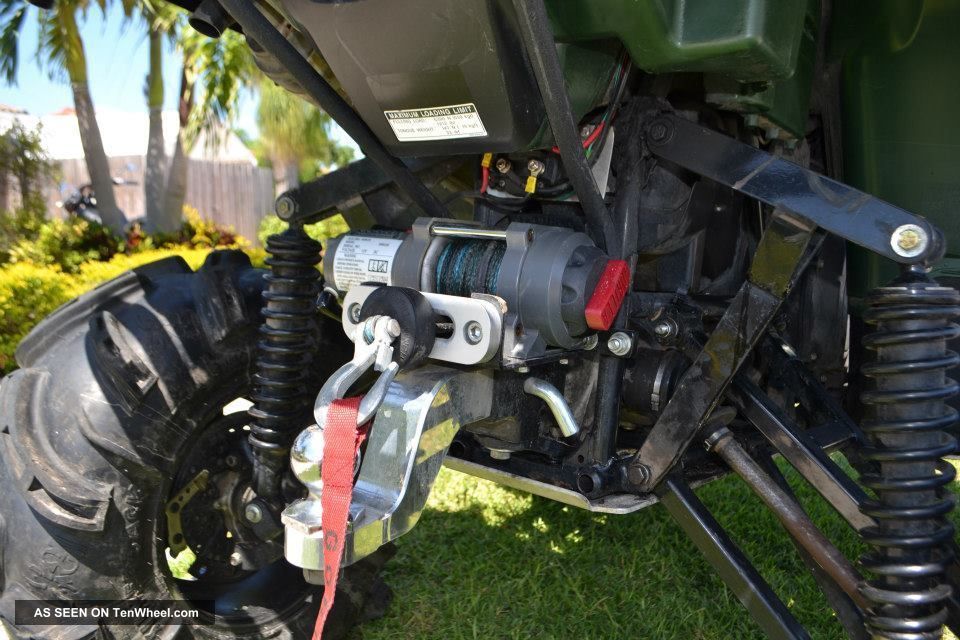
2. Insert your flash drive into your computer and format it to FAT32. Be aware that this step will erase anything located on your USB stick.
3. Open and run the ATV USB Creator software that we downloaded in step #1.
4. Once the software opens up, select the following options:
– Where you see “Choose an Installation” select “ATV-Patchstick”
– You don’t need to do anything for “Download AppleTV Update DMG or Choose a DMG”. ATV USB Creator will automatically download this file from Apple’s servers, so you don’t need to do anything there.
– For “Installation Options” you should not need to change anything. “AppleTV version 3.x” should already be selected, and there should already be check marks for “ssh tools”, “bin utils”, “SoftwareMenu”, and “XBMC/Boxee for Mac”
– For “USB Target Device” select the USB drive you plugged into your computer in step #2. You may need to hit the refresh button for it to show up. Now you can click on “Create Using ->”
– When the USB drive patchstick is done being created you can then remove it from your computer.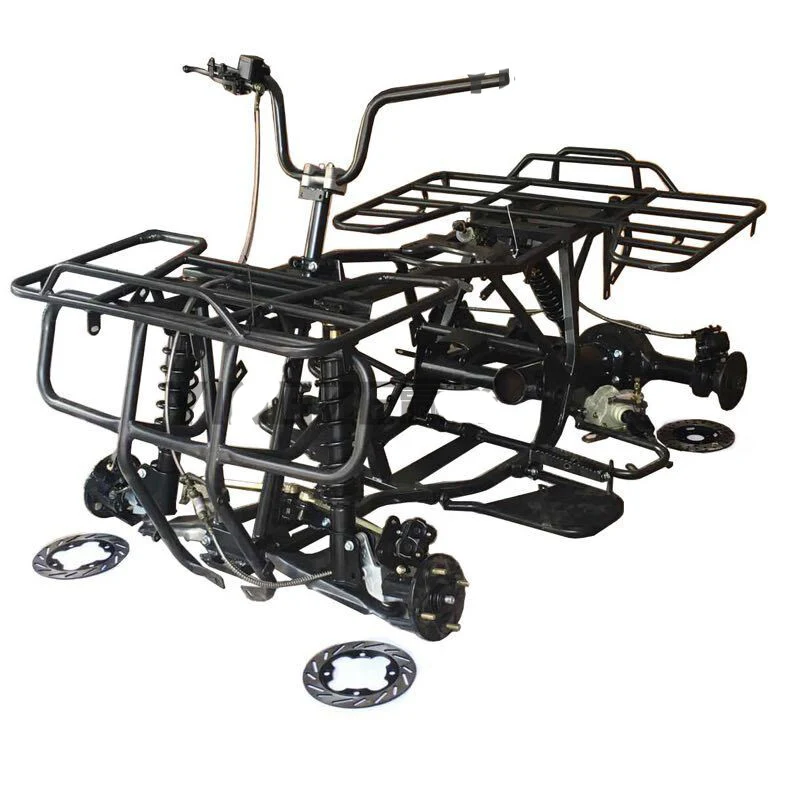
5. Unplug your Apple TV and insert the USB drive patchstick into the back of your device.
6. With the flash drive plugged into the back of your Apple TV, plug the power cable back in. As the Apple TV begins to power up it should now be loading from the flash drive. Now we will wait for the picture of a Penguin (Tux) sitting on an Apple TV. If you do not see this picture when you boot up, and the Apple TV 1 just boots up normally, you likely need to create a new USB drive patchstick using a different USB drive (preferably using a different brand). This problem isn’t often, but it does happen.
7. After the installation is finished, the screen will say that you can reboot. When you see this screen, remove the USB drive patchstick and then unplug (& then) re-plug the power chord to your Apple TV. This will reboot your device.
8. You now have ALL KINDS OF GOODNESS installed on your Apple TV. This is most noticeable in the fact that you now have a new option on your HOME SCREEN Menu Bar named “Launcher”
9. From your Home Screen, navigate to the option labeled “Launcher”. Once there continue to “Downloads”, and then select XBMC. This may show more than one entry for XBMC, if so, select the option that says “Stable”.
10. If you are one of the lucky people who have opted to install a new Crystal HD card you should visit stmlabs.com to get more information on Crystalbuntu. It is a different software… that is installed in the exact same manner as the steps listed above.
11. Finally, from the “Launcher” section, head “XBMC” in the sub-menu to start XBMC.
12. Enjoy some amazing new features.
umOuch (Andrew Brasher)
You may also want to read:
XBMC 11.0 Eden for Apple TV 2 5.0 (iOS 5.1) released (+how to install tutorial)
How to jailbreak Apple TV 2 5.0 (iOS 5.1) with Seas0nPass (tethered)
XBMC 11.0 Eden for Apple TV – Review
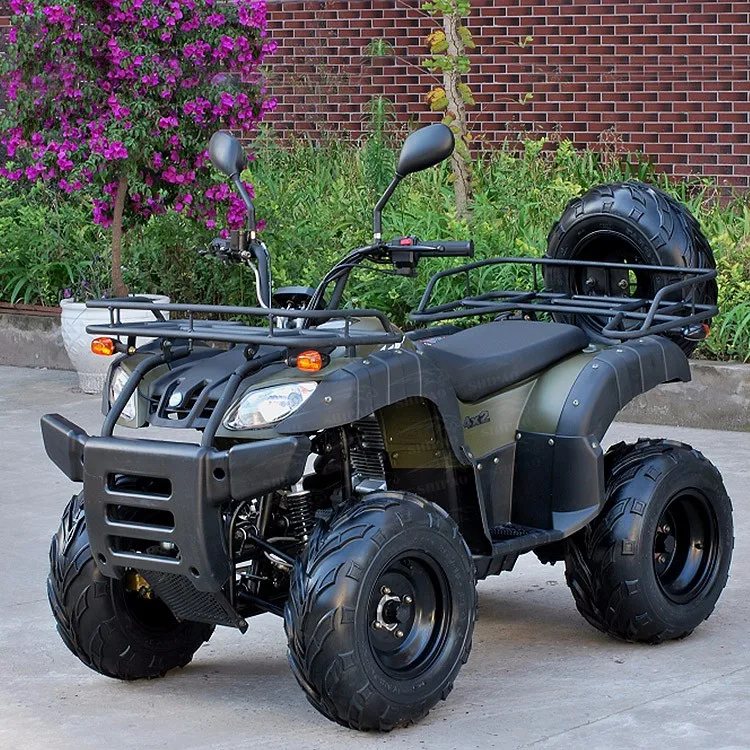
A winch is a must have for off-road riding. It allows you to pull a stuck ATV out of mud, water or deep ruts. Many models of CFMOTO ATVs and ATVs have a winch from the factory, for others it needs to be purchased separately. In this article, we will tell you how the winch works, what to look for when choosing, and also give useful tips on how to use it.
ATV winch is a drum with a cable. An electric motor is located on one side of the drum, and a gearbox on the other. Rotation from the electric motor to the gearbox transmits a shaft that passes inside the drum. The gears of the planetary mechanism are located in the gearbox.
Reducer reduces speed and increases traction. The rotation from the gearbox is transmitted to the drum, which winds the cable, creating traction and gradually pulling out the stuck equipment.
One of the key parameters to consider when choosing a winch is traction. It determines the maximum weight of the load that can be torn off the surface. With each skein of the drum, the winch force decreases.
Thrust is measured in pounds (labeled on winches as lbs), 1 lb = 0.45 kg. The force depends on a number of features: the diameter of the drum, the number of wound turns, the power of the electric motor, as well as the gear ratio of the gearbox.
It is not always necessary to choose the most powerful and fastest winch: the more powerful the mechanism, the more difficult it is to handle. Beginners can harm equipment and even their health - it is not uncommon for a broken cable or a broken hook to cause injury.
Matches the cubic capacity of the ATV:
Steel - cheap and easy. Requires work with gloves, not repairable. May cause injury if mishandled.
Synthetic - requires maintenance but is easy to use. It does not "shoot", and if the cable is damaged or torn, it can be braided on the spot.
Most experts believe that material choice should be based on personal preference: some riders lean towards steel over time, others towards synthetics.
The winch is installed on a special platform on the ATV frame. If there is no platform, you need to buy it and install it according to the instructions. The site has standard anchor points that fit classic winches up to 3,500 feet of pull.
When choosing a winch, pay attention to the width of the drum:
With certain skills, you can modify the fasteners and install almost any winch - the main thing is not to make the fasteners “to break” and not to strengthen weak points.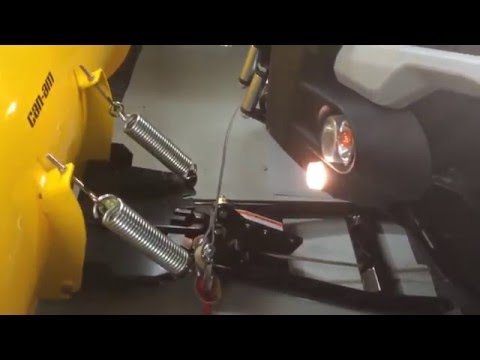 If the ATV is under warranty, it is advisable not to touch the frame and buy a standard winch.
Installing the winch is easy, but the connection will have to be tricky. To lay the wiring, it is advisable to remove the plastic from the ATV. The winch must be connected to the control unit and battery. It is recommended to keep the power cable as short as possible to avoid current loss. All wires must be hidden in the corrugation so that they do not come into contact with the frame and are protected from moisture.
 The attachment point should be as far away as possible - this will create a larger shoulder and increase traction.

If you have any questions or would like further advice on purchasing, installing, operating and maintaining an ATV or ATV winch, please contact your nearest authorized CFMOTO dealer.
Dealers CFMOTO
An ATV, unlike a snowmobile, is an all-season use technique. But in order for the all-terrain vehicle to faithfully plow the virgin snow all winter, it must be prepared for operation in the cold season. Otherwise, by the end of winter, or even earlier, the quadric can easily “die”. The AvtoVzglyad portal tells about the nuances of the winter use of "quadrics".
Maxim Stroker
Most often, ATV owners face the problem of difficult starting in cold weather. Perhaps the problem may be in poor contact between the power wires and the battery terminals. If there is oxidation in the connection, then the battery itself does not charge well and at the time of starting in the cold it simply does not have enough voltage to confidently turn the crankshaft with the starter.
The problem is solved simply: disconnect the wires from the battery, remove oxides with sandpaper, and so that they do not form in the future, we process the battery terminals with a special Liqui Moly Kontaktreinig contact cleaner. This combined action aerosol formulation removes metal oxides and grease in a single process. The special chemical formula almost instantly loosens and eliminates oxide salts, restores electrical conductivity, and also blocks leakage currents.
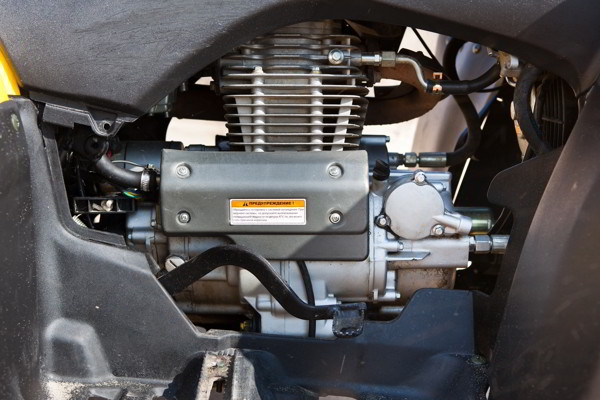
But much more often, engine oil becomes the cause of difficult start-up in cold weather. Most ATVs run on 10W-40 or 10W-50 lube during the summer. In general, such oil is considered to be quite all-weather, but if your “quad” is not in a heated garage, but on the street, then in severe frosts, difficulties arise with starting the engine, since the thickened oil provides excessive resistance.
But even if the engine starts, the first seconds after starting it can run dry, as it will be very difficult for the oil pump to create the necessary pressure due to the thickened lubricant and supply it to the rubbing surfaces. This is especially dangerous for motors assembled on so-called plain bearings, because due to oil starvation, main or connecting rod bearings can turn.
In order not to encounter such a problem, before the onset of severe cold, you should fill the ATV engine with oil with a viscosity of 5W-50. The Liqui Moly product line has a quality lubricant with the right characteristics, one hundred percent suitable for ATV operation in winter. Liqui Moly ATV 4T Motoroil 5W-50 HC-synthetic motor oil provides maximum performance and engine protection under all operating conditions.
Anti-wear additive package and base stock provide maximum ATV engine protection and trouble-free operation over a wide range of temperatures and loads. The oil guarantees easy start-up at low temperatures and high viscosity-temperature stability.
It is by no means a superfluous procedure before winter to change the oil in the gearboxes of the all-terrain vehicle. Despite the fact that there is no winter transmission for ATVs as such, it is still necessary to change the oil before frosts, because water from autumn puddles could well get into these nodes, through a breather or seals, which, mixed with oil, turns into an emulsion . And if you take into account that the gearboxes of modern ATVs have an electrician (someone has an electromagnetic clutch, someone has a servo drive), then there will be continuous problems from such a “slurry” in winter.
If there is any chance that the gearboxes of your "rogue" have taken a sip of water, then in addition to filling in new oil, they still need to be washed. Drain the waste from the gearboxes, tighten the bottom plug, and pour the quick cleaner Liqui Moly Schnell-Reiniger through the filler.
This agent is absolutely safe for electrics and rubber seals of the gearbox, but at the same time it will effectively clean the inside of the unit from the remnants of the emulsion. For best results, jack up the quad axle you are flushing and turn the wheels forward/back by hand to flush the remaining emulsion from the sidewalls as well. After that, unscrew the drain plug, get rid of the dirty contents and, screwing the plug back, pour in fresh gear oil.
ATVs most often use a transmission with a viscosity of 75W90. It is suitable for most ATVs and is poured into both front and rear gearboxes. The German brand Liqui Moly has in its assortment a synthetic gear oil for motorbike Gear Oil 75W-90. It is in a sense universal, all-weather, and equally suitable for transmissions and motorcycles, and scooters, and ATVs, and snowmobiles.
This oil contains polyalphaolefins and special additives, due to which the lubricant does not change its properties either at sub-zero or positive temperatures. Its thermo-oxidative stability and resistance to aging allow for extended drain intervals that are significantly higher than other similar oils of similar viscosity.