Photo illustration by Aurich Lawson
For me, acquiring new gadgets is painfully easy; offloading old ones is more difficult. The predictable result: a closet, garage, or basement full of aging but not quite obsolete tech. As an Ars reader, you can probably relate.
I recently ran into my first-generation Apple TV during a spelunking expedition into the depths of my home office closet. After upgrading to a second-gen Apple TV last year, I had actually forgotten the old one was in there. The rediscovery piqued my curiosity. Though I have long avoided performing jailbreaks on my Apple products, the old Apple TV gave me a chance to find out what else I could watch on this thing besides iTunes content.
You can actually watch all manner of other content on an old Apple TV if you're willing to tinker. The two most popular software interfaces are a version of Boxee and a version of XBMC, both designed for the original Apple TV. Here, I offer you a chronicle of my own experiences setting up these both solutions, and show you how to do the same.
Before watching all those movies you diligently ripped from your own collection, you have to get your electronic mise en place. Here's the minimum list of ingredients:
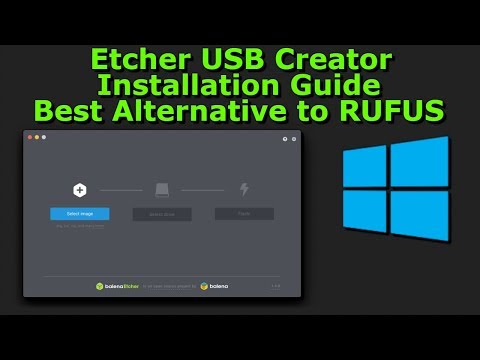
The ATV USB Creator is an open source project that, luckily for original Apple TV owners, remains alive and well. It lets you create a patchstick from your USB drive, which will then let you replace the Apple TV's existing operating system with a modified version.
Some instructions floating around the Web claim that you also have to download the latest version of the (old) Apple TV operating system, but if you are using the Mac version of the ATV USB Creator, you don't have to take this extra step. The tool (as of publication) can download its own copy of the latest Apple TV operating system, so it's unnecessary to dig up your own copy unless you are specifically aiming to install an older version of the OS.
In order to get the patched version of the OS onto your USB stick, plug the stick into an open USB port and fire up the ATV USB Creator. It will look a lot like this:
Make sure "ATV-Patchstick" is selected in the top left drop-down, then select "XBMC/Boxee for Mac" from the bottom drop-down under "Installation Operations." If the software can see your USB drive, it will show it in the drop-down along the bottom of the window under "USB Target Device." (If it's not seeing the drive, try clicking the refresh button represented by the blue arrows). If you want the tool to automatically download the latest Apple TV OS on its own, don't click the "Choose a DMG" button, but if you have another version of the OS that you've downloaded from somewhere, you can click that button to find the DMG file on your computer.
When done, click the "Create Using ->" button at the bottom of the window, which will then try to put a patched version of the Apple TV OS onto your USB drive.
I say "attempt" because, according to my own experience and to numerous accounts online, this may not work the first time. Or the second time. Or the third and fourth times. I actually had to try five separate times before the tool successfully created a bootable USB stick; apparently it's possible for some USB drives to simply not work with the tool, and the recommended course of action flip flops between "just try again" and "try a different brand of USB stick." For what it's worth, I never tried another stick; mine just failed four times before succeeding.
After a successful patch—you'll know because the ATV USB Creator will tell you it worked—you're ready to defile your first-generation Apple TV.
Congratulations! If you're anything like me, you've already wasted an entire day by this point. Still, success feels pretty good, doesn't it? The next major step is to put the modified version of the OS onto your Apple TV. Luckily, it's a relatively straightforward process.
Make sure your Apple TV is off (you'll have to unplug it, since there is no power button), then insert the USB stick into the port on the back of the device. Plug the Apple TV back in and allow it to boot. If the patchstick is successful, you'll see something like this on your screen:
Once the Apple TV claims it's finished with the installation, you'll have to reboot the device. The Apple TV will go through its normal boot video and once it gets to the main menu screen, you'll know for sure whether the installation was successful.
If so, you'll see new menu options across the board. You don't need to mess with most of these unless you want to dive down the rabbit hole of specific configurations or use the Console. But what you should do before proceeding is go into the new Software menu, then go into Settings, and then scroll down to "UpdateBlocker" and turn it on. This will block future Apple TV OS updates from coming down the line and wiping out all your stuff. It's an unlikely scenario, considering that the first-gen Apple TV is unlikely to see updates at this point, but it's the safe thing to do nonetheless.
Once you've done that, you're ready to set up the software. But first, make sure your Apple TV is connected to a WiFi network, because you still have to download the latest version of Boxee and/or XBMC before you can use them.
Go back to the Launcher menu and select Downloads. From there, select either Boxee or XBMC. This makes the Apple TV download the most recent version of either piece of software and install it on your device. You'll have to perform this action again if you want both Boxee and XBMC, but you don't have to (personally, I prefer Boxee.) Please note, however, that while the files are downloading, you shouldn't switch away from the screen—doing so will abort the download and you'll have to start over.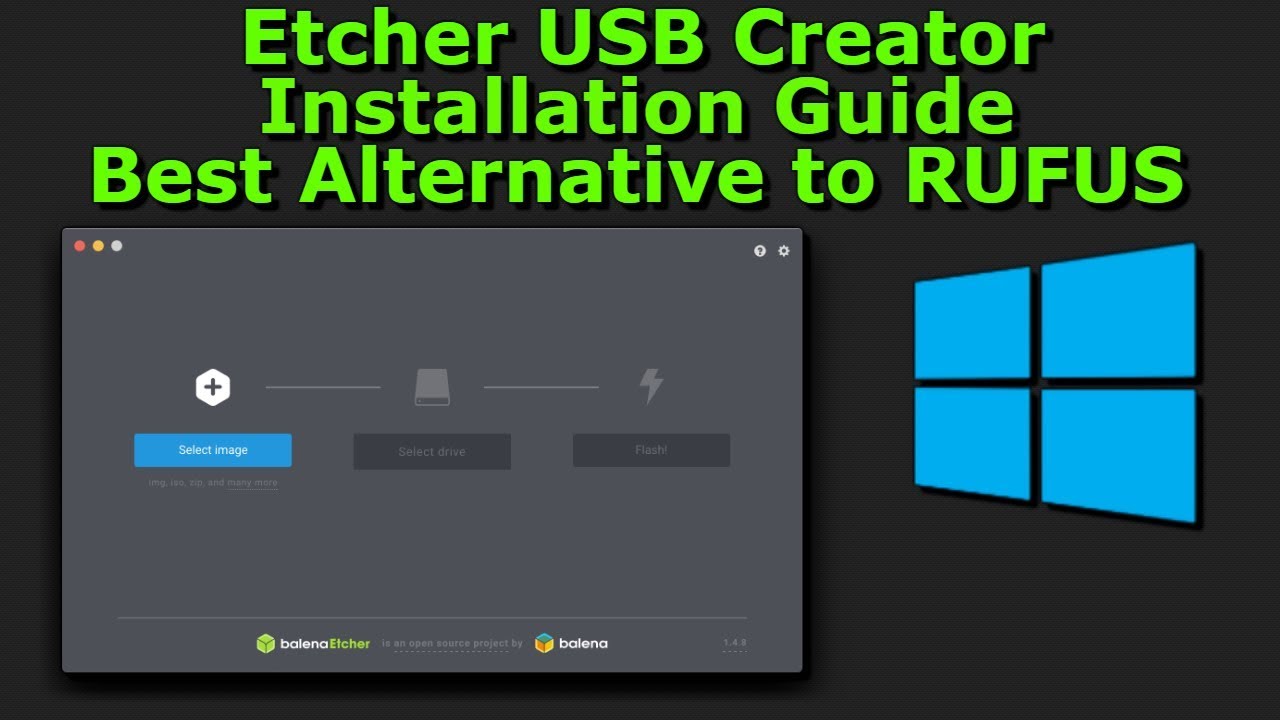
Once you finish downloading your media player software, you can then reboot the Apple TV into that software by going to the Launcher menu and selecting Boxee or XBMC. You don't have to unplug the Apple TV to do this; once you select the software, the device launches it automatically.
Voilà! Now you have Boxee or XBMC, or both, on your original Apple TV. If you have a Boxee login, you can then sign in with your username and password in order to access the various services that Boxee offers.
Sometimes it can be really useful to have an SSH connection into your AppleTV. If I need to explain why then you probably won’t want to do it. Unless of course, you’re just after getting something like Boxee running, which we’ll look at as well. Before we get into doing anything to your AppleTV, when we’re done I do not know how Apple will feel about your warranty moving forward, so do this stuff at your own risk (but that’s pretty much true for many articles on this site)… So first up, let’s install SSH. To get started, plug in a jump drive you don’t mind reformatting. Then run the df command and look at which filesystem that the jump drive was mounted as. In most cases this should be /dev/disk1s1 or /dev/disk2s1 or something like that. Note this location and while you’re at it, double-check that the data is trivial to you and that you really don’t mind reformatting the jump drive. Next, let’s download atvusb-creator, a little utility that will generate a new patchstick based on that jump drive (a patchstick being the term applied to usb sticks that will hax0r an AppleTV). Once downloaded, run the tool. Select ATV-Patchstick in the Choose an Installation dialog, and then select the version of the AppleTV OS you have (if you’re fully software updated then as of the date of this writing that would be 3.x). Next, choose ssh tools from the 3rd field in the Installation Options section, making sure that the box is checked. If you are just trying to get XBMC or Boxee running then you can check the boxes for those as well at this point.
 Next, set the USB Target Device field to be the filesystem you selected earlier and then click the Create Using button and wait for the process to finish. Once the patchstick has been created, plug it into your AppleTV and reboot the unit. You’ll see a bunch of code, similar to starting Mac OS X into verbose mode. When the screen tells you that you’re done, unplug the patchstick and reboot the device. Upon reboot it will be running SSH with a username and password of frontrow. If you’re not using a static IP address then if you open iTunes and connect to the device you’ll have an entry in your arp table for it. You can run arp and find the IP fairly easily. Once found, use the SSH command to connect to the device. For example, if mine is on an IP address of 10.0.0.100 then I would use the following command to connect to it:
ssh [email protected]
A 1 st Generation Apple TV that has been updated to the latest software, version 3.0.2! ATV USB Creator will automatically download this file from Apple’s.
Now you have an AppleTV running SSH. Even though this article isn’t meant to be about Boxee or XBMC, you can then install those by going to the new Launcher menu and then to Downloads and downloading those applications (otherwise if you try to access them you’ll get an error that the .app bundle can’t be found). Once those are in place it should open pretty easily. Now that you’re running SSH, let’s look at one of the uses. I want a web browser on the AppleTV (even though typing a URL in it is pretty painful unless you install a keyboard too). For this instance, I’m going to use CouchServer, ’cause I like the way the keyboard works and because there’s a silverlight that kinda’ sorta’ works with it. First, download the files for CouchSurfer here. Then copy the files that were downloaded up to the device (assuming the filename is CouchSurfer-Lite.tar) from your client computer:
scp ~/Desktop/CouchSurfer-Lite.tar [email protected]:~
 0.2 Download Mac
Next, SSH into the AppleTV and extract the tar file:
tar -xvpf CouchSurfer-Lite.tar
Then move the extracted data into the PlugIns directory (which will display the appliance similar to how Launcher would be displayed at this point:
sudo mv CouchSurfer.frappliance /System/Library/CoreServices/Finder.app/Contents/PlugIns/
(your password will be frontrow in case you have hard core add and have forgotten it already) We’re gonna’ give ownership to wheel:
sudo chown -R root:wheel /System/Library/CoreServices/Finder.app/Contents/PlugIns/CouchSurfer.frappliance
Then reboot the AppleTV. Upon reboot, you will then have a shiny new web browser making your AppleTV even more like a full fledged Mac with Front Row. Now you’re in pretty good shape. You’ve pretty much put more stuff on your AppleTV than you can possibly use, but you still probably just want NetFlix to work on it. For that, you’ll need to get Silverlight working with CouchSurfer and just browse to the movies in the web browser at Netflix.com as the Boxee implementation for AppleTV doesn’t yet work with NetFlix and there aren’t any native Plug-Ins that work with it yet either (that I’m aware of). Also, if you’re going to use any of the 3rd party media browsers, keep in mind that they’re sitting on top of the OS layer and that their resource utilization seems pretty poor compared to the native media browser on the device (given the abstraction there, it seems logical it would be so no complaints). BTW, another fun little app (to help make your AppleTV more like your iPad): http://code.google.com/p/weatherfront And the most intriguing one that I haven’t actually gotten to work yet (haven’t had time to get past the second or third step – busy) is: http://www.
 appletvhacks.net/2007/04/02/install-asterisk-on-apple-tv/#more-41 What I’d like to see – the ability to run my AppleTV as a Zwave controller… Or iPad… Or Newton… 🙂
Tested on Apple TV 3.0.2
Last Updated on 7/5/2010
These are instructions on how to create an SSH install patchstick on Mac using ATV USB Creator and use it to jailbreak your Apple TV.
Windows users follow this guide.
Screen shots are left for reference only. This method is compatible with the latest Apple TV version (3.0.2)
Before getting started you need a USB Stick that has been formatted to a single Mac OS Extended (Journaled) partition that uses a GUID Partition Table. You can find instructions on doing this here.
Step One
Download ATV USB Creator from here and place it on your desktop. (Check here for new software version)
Step Two
Double click to extract the atvusb-creator-1.0.b13.zip archive on your Desktop. A folder called atvusb-creator1.0.b13 will created.
NOTE***: Make sure there are no spaces in the folder name!
Step Three
Connect a USB Stick to your computer.
Step Four
From the atvusb-creator 1.0.b13 folder, double click the atvusb-creator icon
Step Five
You will be informed that the application was downloaded from the Internet. Click the Open button.
Step Six
From the Choose an Installation dropdown select ATV-Patchstick.
Step Seven
From the Installation Options dropdown select ssh tools
Step Eight
Make sure the correct USB stick is selected for use.
Step Nine
Press the Create Using --> button.
Step Ten
ATV USB Creator will now download the AppleTV Update DMG. If you prefer to select this file yourself you could click the Choose a DMG button.
Step Eleven
The program will inform you when your patchstick has been completed successfully.
Step Twelve
Notice that your USB Stick has been renamed and now contains files...
Step Thirteen
Eject the USB Stick and connect it to your AppleTV.
Step Fourteen
Hold down the Menu and - buttons on the AppleTV remote until it reboots.
Step Fifteen
Notice the Patchstick will now do its job and install SSH on the AppleTV.
Step Sixteen
When complete, remove the USB Stick from the AppleTV and unplug the device. Plug it back in to reboot.
Step Eighteen
You can now access your AppleTV via SSH to perform a host of functions and hacks.
Copied from:
http://www.iclarified.com/entry/index.php?enid=1959
New questions Unanswered questions Categories Ask a Question Look for answer
All questions
OSX Support Apple TV
So, what is it and why you can read in the next topic, we will not immediately grovel with preludes and immediately get down to business. Mac OS X
Download. Install.
Step two.
Turn on. Choose aTV-Patchstick.
We select the image of the firmware used for Apple TV, as well as the address of the flash drive to which all this will be written.
The side menu indicates the firmware version, and what exactly will be installed, I recommend marking everything, we'll figure it out there.
Step three.
Click Create Using. We wait. We get a successful log. Windows
Step one.
Downloading. Opening the Archive. We launch.
Step two.
We start. We choose where we have the FW image, or the firmware version for download.
We mark SHH and Launcher.
Step three.
Click Create Patchstick.
Finally we get the image.
Fourth step.
Deploying the image to a flash drive using the USB Image Tool.
Click Restore and select the path to the resulting image.
Step five.
We get our flash drive.
If everything is done correctly, it should turn out something like this.
We are patching our AppleTV.
Now we take the flash drive we received with the patched firmware, insert it into the AppleTV, hold down the Menu and buttons on the box itself until the iTV reboots. We are waiting for the flash drive to do its job. When everything is done, we take out the USB flash drive and reboot the AppleTV. We rejoice.
Section: OS X Support Author: JagdCrab
December 30, 2009, 07:56
Subscribe to question
Buy advertising
Makovod - Makovod. Issue 3: How to run an application on a Mac multiple times
Matt Reeves' new Batmobile is the brand new car of the new Batman
iGuides Blog Questions Answered (UPDATED)
Samsung Phone: Top Samsung Smartphones of 2019 Ranked
#jeronimos_tech aliexpress Android Essager macbook
mixer technique Household appliances
January 20, 2009 Adviсe
Don Joe
Apple TV has a modified version of OS X Tiger installed, which allows you to perform a number of manipulations with the set-top box. For example, add new codecs or enable support for external drives and network "shares". The disadvantages of this approach are obvious: some decrease in stability and performance due to the addition of garbage. Whether you need it or not - decide for yourself.
Fans of extreme sports (read hacks), and just curious, can be recommended as a basic source of Awkward TV wiki. This is perhaps the most complete collection of information about the prefix.
The most painless way to "hack" Apple TV is to install a patch from a flash drive created with ATV USB Creator. It is also not recommended for owners of crooked hands, although the probability of “killing” the prefix with the help of “left” patches or attempts to self-assemble them is even higher.
An interesting point: the patchstick, that is, the flash drive used to patch the Apple TV, is essentially a Linux distribution. However, porn lovers can try to put the “real” Linux on the console, having answered the question “why” beforehand. If you wish, however, you can try to install a full-fledged “makos” on Apple TV, turning it into an inexpensive mac. Although personally I would advise for these purposes to take a used "minicom".
What does the patchstick do? Access to the file system of the set-top box via SSH plus the ability to download plugins. By the way, about SSH. If you are not good friends with the command line (did you still climb the prefix to patch? take a ruler and beat your hands, saying “you don’t have to go where you shouldn’t”) Fugu or the MacFUSE / Macfusion bundle is perfect for file manipulations.
By and large, having a network connection and SSH access to the set-top box, it is enough to install NitoTV, the rest of the manipulations can be performed directly from the Apple TV interface. What gives NitoTV (almost all of this is downloaded and installed from the NitoTV menu item): at least a set of Perian, MPlayer codecs, support for USB drives. Theoretically, the functionality is much more, but not the fact that everything will work.