In the winter season, when the cold hits us hard, we quickly realize if we are missing something essential to prolong the rides during this kind of weather. Frostbite at the extremities of our body undoubtedly takes away the pleasures related to our outdoor activities.
It is at this precise moment that we realize the importance of having heated grips to enhance our rides. It is an inexpensive addition that can be done with very few tools and some basic experience.
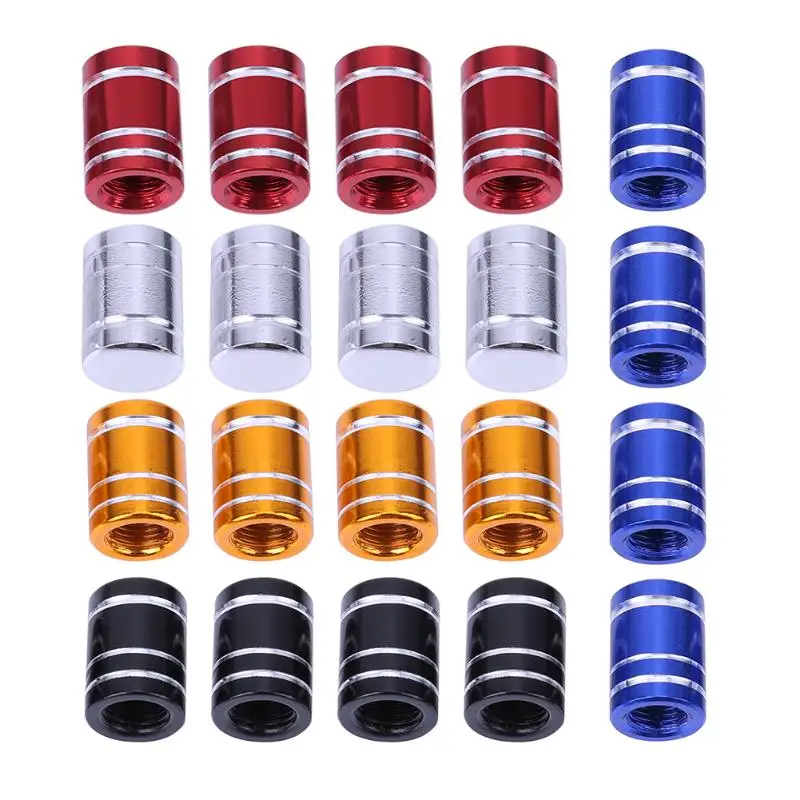
– The first, self-adhesive type, offers the advantage of keeping the original handle grip and is available at low cost. It requires that the original grips be removed with care if we wish to reuse them after the installation. On the other hand, as in the case of our Can-am Outlander, the use of glue during the factory installation of the grips makes recovering them almost impossible and requires the purchase of a new set. The heating elements of this option also have a limitation on the spread of heat caused by the thermal insulation property of the original rubber grips.
– The second option is more robust, but also more expensive because the heating element is integrated into the new handle grips. These complete sets allow us to proceed with the replacement of the original grips simply because they will no longer be necessary. This kit is the most efficient and has no interference to slow down the diffusion of heat. Therefore, they are more direct, efficient, and faster than the filament systems used in the past.
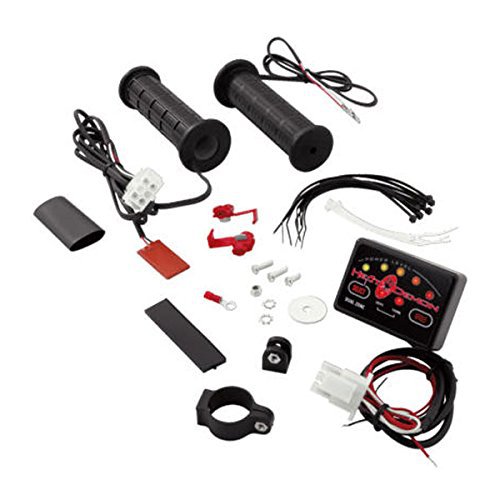
We decided to install the Kimpex Heated Grip and Thumb set. The main characteristics are as follows:
1- Neutralize the energy source. Your vehicle’s battery might seem harmless, but it is a potentially life-threatening storehouse of electrons looking for a way out at the speed of light.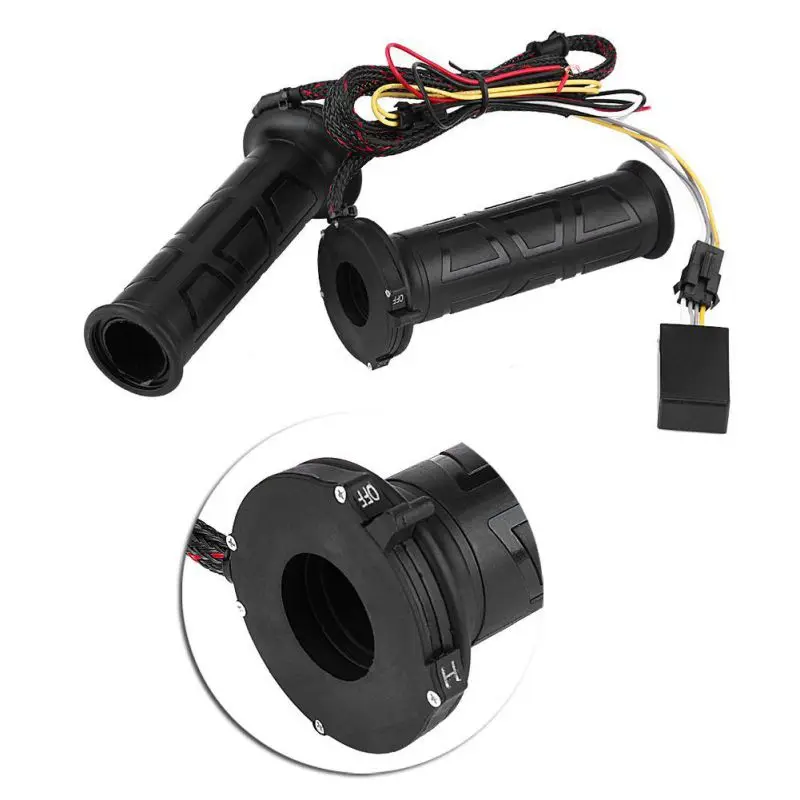 Therefore, always remove the terminal from the ground (negative) terminal first. This greatly reduces the risk of a battery short circuit. Second, remove the positive terminal.
2- Start to disassemble your existing handles:
Once the end caps are removed, you need to remove the existing rubber grip from the handlebar metal tube. These are usually glued and won’t come off easily. Slip a flathead screwdriver between the rubber and the bar and squeeze it left and right to break up the glue joint. You can also cut the handles using a sharp blade. Make sure to completely remove any adhesive deposits using sandpaper or such material.
3- Insert the new handles on the end of the handlebar:
Take care to insert the new Kimpex handles correctly. If they are difficult to insert, this is best, as they will firmly stay in place. On the other hand, the use of a lubricant is an option when the insertion is too laborious. The use of a rubber-tipped mallet can also be used to complete the installation.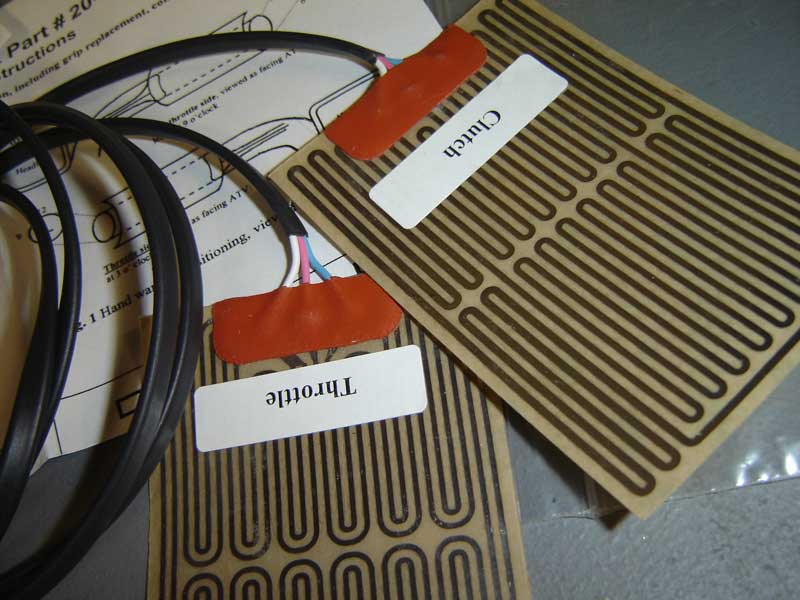
4- Install the heating surface on the throttle thumb:
Peel off the self-adhesive backing behind the heating surface and carefully place it on the thumb of the throttle. Insert the shrink band and use a heat gun for a perfect fit.
5- Installation of the switch:
Two installation methods are possible. First, it is possible to install it on the rounded surface of the handlebar using a clamping ring. For our part, we have opted for a self-adhesive film in a place that we have pre-selected.
6- Find energy for the wiring harness:
Now you need to find 12V power for your new heated grips. You can wire the grips directly to the battery, but it’s a bad idea because if you accidentally leave the heater on, you’ll kill your battery in a flash. What you want is to connect it to a switched power source which only turns on when the ATV is running. If your ATV is equipped with an accessory power source, this is essentially what we are looking for.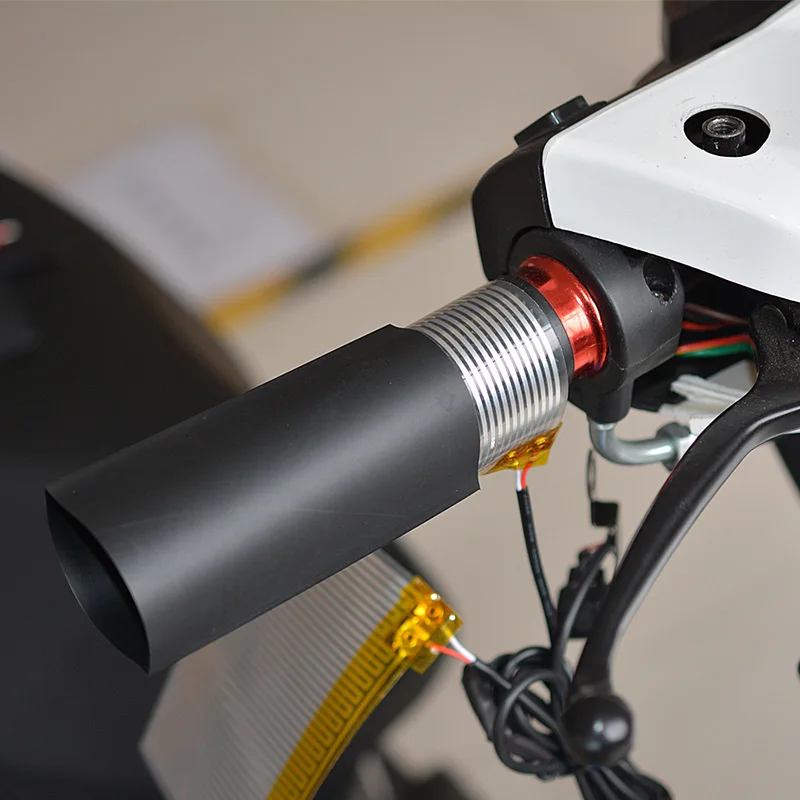
Our Can-am Outlander is equipped with a 12V accessory socket that we will use. We have therefore taken care to connect all the wiring near this source, taking great care to attach everything with zip ties to avoid friction and wear that could affect its proper operation. This Kimpex set also has the advantage of having quick connect fittings.
We connected the 2 wires to get our positive source (+) as well as our grounding (-). We have taken care to insulate everything to protect our connections.
7- Finally, reconnect first the positive terminal to the battery followed by the negative.
8- Test the operation: press the switch installed on the handlebars for a few seconds to activate it and to check the 5 levels of heat intensity. There you are! An easy addition that you will be proud of and that was installed very quickly.
In conclusion, the DIY addition of the heated grips and thumbs is a wise and beneficial decision. The result will allow you to make long rides in the cold season. The investment will quickly pay off thanks to the convenience that the heated grips and thumb will provide.
We sometimes realized that, despite the satisfaction of choosing our passenger seat, we always forget small details. Whatever the reason: the excitement of a new ATV purchase, budget consideration or otherwise, we sometimes subtract from the available equipment options what we thought unnecessary at the time of purchase.
Now that the cold weather has become a reality, ATV passengers quickly realize that they miss something essential to extend their rides without freezing their hands. A passenger who once suffers frostbite on his hands is almost sure to avoid the fun of ATV riding in winter. An ATV trip can rapidly turn from a beautiful sunny day to a very unpleasant ride. Now, good luck in trying to convince this person to go back for a ride!
You can purchase a passenger seat equipped with original heated hand grips.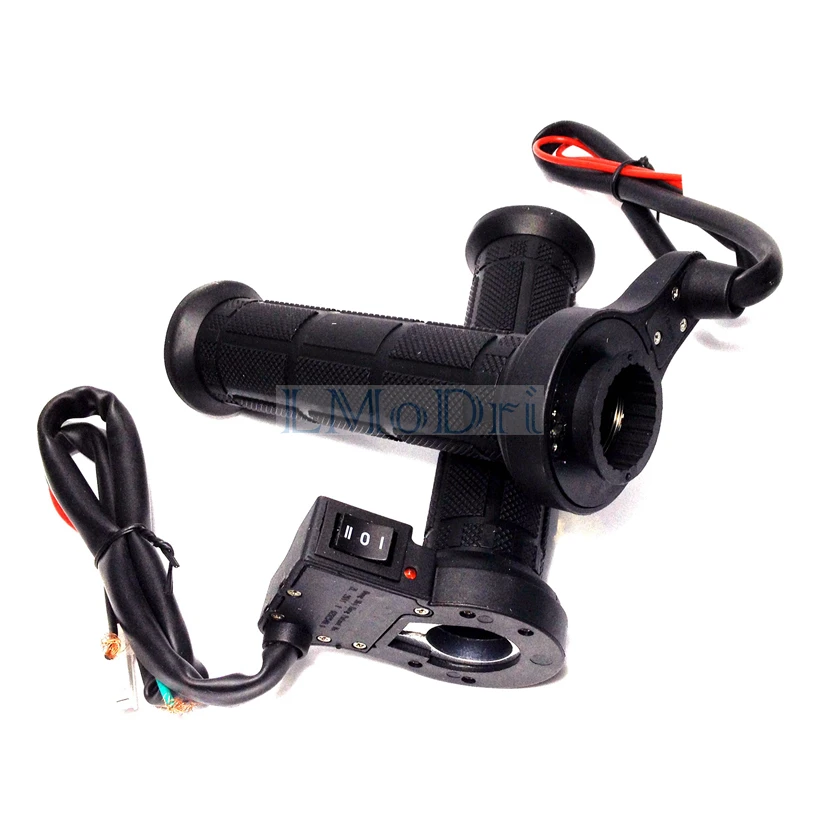 If you already have purchased your passenger seat and know that it was available with the heated grips option, it is sometimes possible to get the heated handles separately and install them afterwards. As for the other cases, with a bit of imagination you can install some heated grips that will give a very satisfactory result.
There are two types of installations available for this situation: self-adhesive element and integral heated handle. The performance is generally very satisfactory in both cases.
Installing Heated Grips on a Passenger SeatThe first type, with the self-adhesive element, offers the advantage of keeping the original handle in place and is usually more economical to purchase. In return, the installation requires much more attention to detail. Unfortunately they are also more at risk of breakage if the handle turns loose on the handlebars. Finally, this type of grips is not recommended if your seat is equipped with a foam handle. The foam has an insulating effect which will greatly limit the transfer of heat to the hands.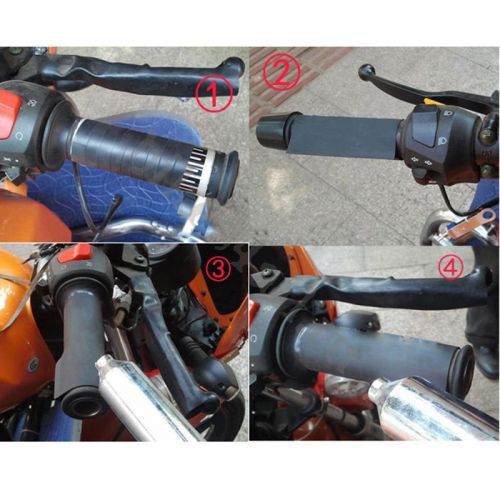
The second type of grips, the integral type, has a heating element built into the handle. It is stronger and slightly more expensive then the self-adhesive type. However, you will have to give up the original seat handles and put them aside.
For this particular installation, my choice stopped on an integral handle type, available from Importation Thibault, manufactured by Koso NorthAmerica model 006-10711F and purchased at a retail price of $ 124.99. The set contains all that is necessary for the installation and seems to me of very good quality. The temperature control on these handles comes with an LED display and features two installation options: handlebar mount or double-sided adhesive pad. A very interesting feature of this set of heated grips is that they feature self-diagnosis failure and protection mode. In the event of a fault, the temperature control LEDs will flash a code. There are different blinking sequences depending on the detected fault.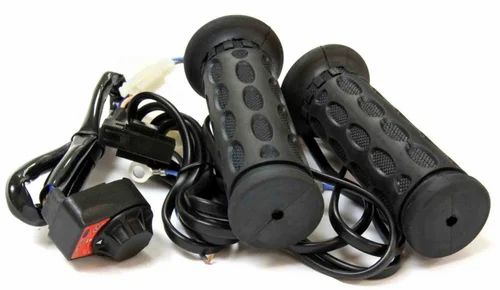 Koso NorthAmerica has even planned an auto-shutdown in case the available voltage drops below 12 volts to prioritize the battery’s voltage and current required for the ATV operation. When the voltage returns equal to or greater than 13 volts, the handles will restart.
What you will need:
A power drill, a set of drill bits up to 3/8 inch, a 7/8 inch hole saw, a rubber mallet, and your basic tools such as an Exacto knife, hex sockets and ratchet set, pliers and screwdrivers.
Installing Heated Grips on a Passenger SeatTo begin, check what type of installation and materials are made your passenger seat handles. It is best if they are on a metal tube. In most cases, an access cap will tell you in which direction they were inserted into the seat assembly. Remove this cap and slide the metal tube through the hole. Generally, the handle is well bonded to the tube and acts as a restraint to it. It may be possible to have to cut the handle in order to extract the tube.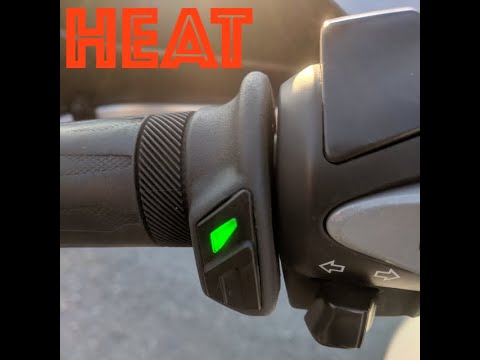
Wait before you get your heated grips
Once you have the handle metal tube in hand, measure its diameter. There are different diameters of heated handle available. Usually, the most popular diameters are 7/8 inch or 1 inch. Now you can purchase them with the right diameter.
Installing Heated Grips on a Passenger SeatInstalling Heated Grips on a Passenger SeatNow you are ready to reassemble. In our case of integral handles, we felt quite a good resistance to the insertion of the tube inside the handle. This is where the use of a rubber mallet is appropriate and effective. Once in place, place the power wire so that it does not interfere with the user. Pass the wire through the hole you have previously drilled. For the sake of a better aesthetic aspect, I first detached the terminals from the heated handle’s connector to allow me to drill a smaller hole in the trunk. Once inside the trunk, I reinserted the terminals into their respective connectors.
Installing Heated Grips on a Passenger SeatInstalling Heated Grips on a Passenger SeatThe installation of the temperature control requires finding a place the least troublesome while remaining easily accessible to his user. I chose the double-sided adhesive pad attachment option. For routing the wire and its connectors, I drilled a hole in the trunk with a 7/8 inch hole saw. The Koso NorthAmerica set provides handlebar end caps. I drilled one of these plugs at the diameter of the temperature control wire and made an incision from the hole to the edge to create a wire passage. Then all I had to do was to push and secure the grommet plug into the 7/8 inch hole.
Plug the connectors into the trunk and route your ground power lead to a good ATV frame ground. Your 12-volt source must not be directly connected to the battery. Use a power supply that is controlled by your ignition key. This will avoid draining the battery if you ever forget to turn off the heated handles.
A small advice
If you want to maximize the efficiency of your heated grips, wear gloves or mittens with a thin palm of hand surface. Mittens that are too well insulated on the inner side of the hand will block the heat and prevent it from reaching your hands.
The ability to add heated hand grips on your own booster seat is definitely an economic decision compared to buying a new booster seat with integrated heated handles. The final result may not be as visually refined, but depending on the ability of the installer, it can be very close to OEM. As for the performance, the heat is just as efficient.
At your mechanical workshop!
Buying an ATV for an adult means giving him joy and a little extra trouble. Such motorcycles can be safely used at any time of the year, however, it is necessary to take care of the rider's comfort in low temperatures.
An excellent solution would be to install heated handles, throttle trigger and seats on an ATV. You can perform this procedure both on your own and with the help of highly qualified motorcycle service employees.
Manufacturers of some bike models are already equipping them with heating elements. Of course, the presence of such modifications is reflected in the cost of the iron horse.
Before you start modifying an ATV, you need to take care of purchasing all the equipment and consumables required for this purpose. The cheapest way is to order heated handles and other elements of a motorbike on Aliexpress, in addition, this online store provides the widest selection of additional technical equipment for motorists.
Modern manufacturers are ready to offer heating with built-in sensors that allow it to be activated only while the vehicle is moving. Due to this, a high saving of the battery life of the motorbike is achieved. A smooth adjustment of the heating intensity allows you to adjust the operation of this component to environmental conditions.
Mounting the heated grips on the ATV is as follows:
 The easiest way is to just cut off the old handles with a knife, and not spend too much time and effort on it;
 Quite often a hand warmer for a quad bike comes with a trigger heater. Its installation is very simple, it is enough just to fix this heating component on the trigger with double-sided tape, and then install the heat shrink tube and process it with a special building hair dryer.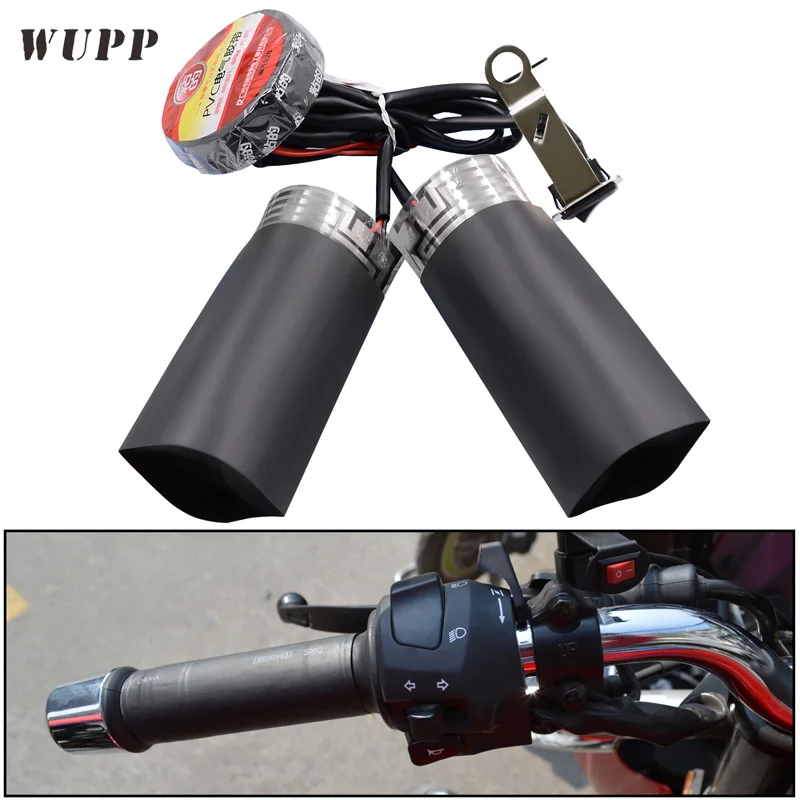
Next, you need to install a heater control on the ATV. As a rule, it is mounted on the steering wheel in any place most convenient for the rider. The final step is wiring. After that, test the heater on the ATV to make sure everything is working.
Installation of ATV seat heating can be handled by every motorcycle owner. This heating element boasts a high level of elasticity, and it is mounted immediately under the cover of the motorbike seat, and subsequently simply fixed with brackets. Modern heaters are equipped with wiring, a regulator and an indicator indicating the operation of this heating element.
A quality ATV seat heater from a trusted manufacturer boasts an impressive list of benefits:

When riding an ATV in cold weather, don't forget not only to install heating on its various components, but also to purchase the appropriate equipment.
Under extreme operating conditions, heated handlebars, trigger or seat can break and fail. This happens most often for two reasons:
If it's the wiring, all you have to do is replace it with a new one. If the heating itself is broken, then it must be dismantled and replaced. Although the heating components for an ATV with Aliexpress are quite cheap, their quality and service life are appropriate. It is good that the installation of such modifications of a motorbike is very quick and simple.
Along with ATV improvements, it is quite common for riders to use special heated insoles for additional insulation.
05/29/2021 1126
ATV has long been an all-weather means of transportation for many, and its happy owners strive to make riding it more convenient and enjoyable. The heated grips of the ATV can provide comfort and warmth for the hands of the ATV, which, accordingly, will allow you to get the most vivid impressions of the walks. In combination with ATV hand guards, heating gives the best results. The forums very often discuss the necessity and uselessness of this device, but we will not go into philosophical searches and will simply introduce you to the hand warmer device, how to install it, and also talk about how to make heated steering wheel handles with your own hands with a minimum investment .
Actually, the hand warmer is nothing complicated, the heating elements are placed in grips (rubber handles), connected by wires to the heating regulator (allows you to choose the degree of heating of the handles) and supplied with wiring in order to power the whole circuit.
We figured out the heating device, let's move on to installation.
If the ATV has hand guards, they must be removed first.
Next, you need to get rid of the old handles, but here sometimes there are small difficulties: as a rule, the old handles are very difficult to remove, and on many models they are tightly glued to the steering wheel.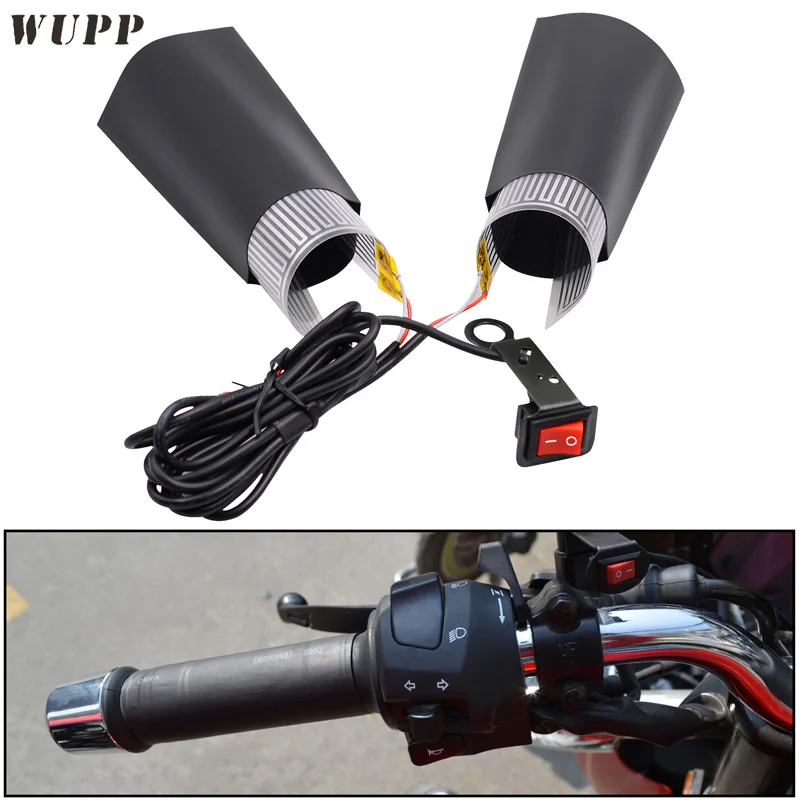 Therefore, it is more expedient to immediately cut the old handle with a knife and not waste time on this stage.
After the handle has been removed, it is necessary to clean the handlebar from adhesive and rubber residues.
In order for the heated grips to be put on the steering wheel without any problems, it is necessary to shed the inner surface of the grips with VD-40 grease, wait a couple of minutes, and the grips will go on the steering wheel without much effort.
After 15-20 minutes, you can check if the handles turn (turning handles are very dangerous and can create an emergency at the most inopportune moment).
Most often, the handles are tight, but if you notice that they are not well fixed, you should remove them, wipe off the remains of the "VD-40" and put them on the "Poxipol".
Do not use "Super Glue": over time it will dry out and the handles will turn.
Very often hand warmer comes with trigger heating, to install it you need to attach the heating element to the accelerator trigger with double-sided tape, put on heat shrink tubing and crimp it with a building hair dryer.
We install the heating controller on the steering wheel in any convenient place.
For reliability, all wiring can be wrapped in corrugation and lead to the power point, reinforced with plastic ties.
It is necessary to connect the heating with a positive wire to the positive that appears after the ignition switch is turned on (with this connection, if you forget to turn off the heating, the battery will not be discharged). As a rule, there is always a free connector under the hood, if you did not find a connector, you can connect to the cigarette lighter power supply, and connect the negative wire to ground.
Next, you should check the performance of the heating by testing it in different modes.
This completes the installation of the heated handles and the dismantled parts can be reassembled.
Manufacturers provide a huge selection of different heaters, and you can easily choose the option that suits you in terms of quality and budget, but if the thirst for experiment and hands that have grown from the right place do not give you rest, you can make ATV handle heating yourself.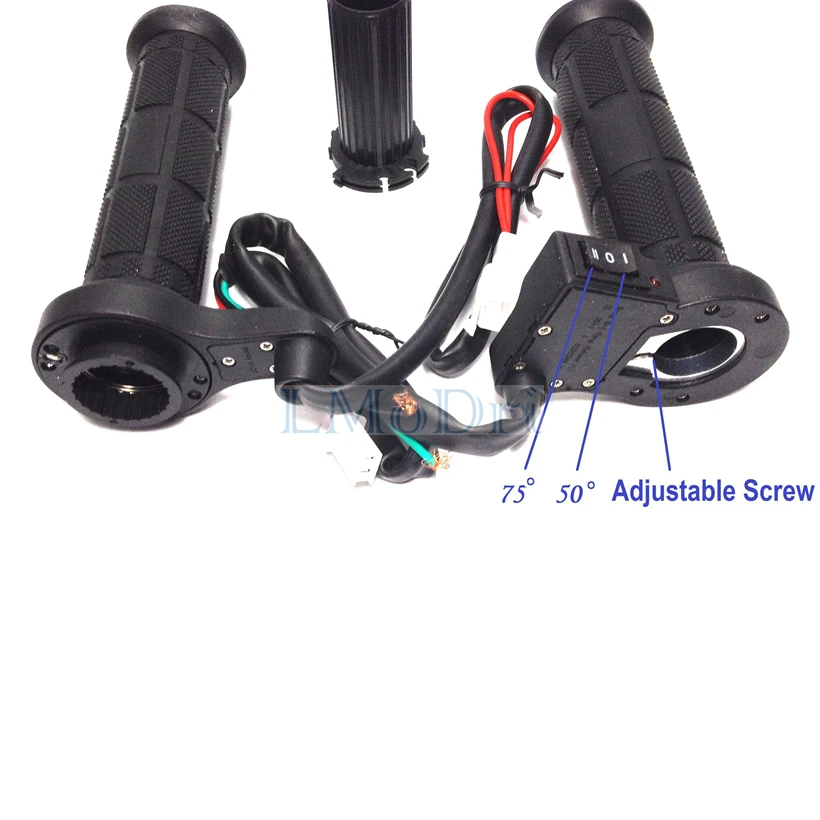
Do-it-yourself heated handlebars.
For the manufacture you will need MGTF wire in PTFE insulation with a cross section of 0.12mm and a length of 14 meters (7 meters for each handle).
Next, with a regular wire, solder to the end of the MGTF wire loop (for powering), insulate the connection with heat shrink.
We wind the MGTF wire over the handle of your ATV, avoiding twists and folds of the wire.
For the trigger from the MGTF wire, you can make just such a blank. The coils are fixed with "Super Glue"
The trigger heating is applied as described above, and is fixed on the trigger with heat shrink, heat shrink should also be put on the handlebars.
The heating controller can also be made independently according to the diagram below (firmware file is also attached),
You can also use the incandescent lamp controller (sold in electrical goods) as a heating controller, while taking care of moisture resistance.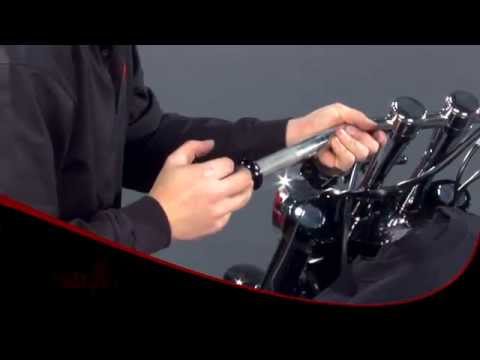
The two-channel thermostat shown in the photo above (responsible for adjusting the temperature of the handles and seat), you can use one channel or come up with your own solution.
Temperature controller circuit for heated handlebars:
And firmware file:
Fuses are standard.
:020000020000FC
:100000004FC018951895189518952CC018951895E7
:0200100031C0FD
:100020000DE901BF09B7026009BF05E003BF02E2A5
:1000300007B90FEC06B9B99A0FEF0DBD0FE30EBD6E
:100040000FE600BF0FE001BDA895C298BA9AC0980C
:10005000B89A0027112722276627552733274427D8
:100060007727089501E0300F00E0401F363309F490
:100070007160189507B10770023041F014B115B1E5
:10008000107F02E207B90FEC06B909C024B125B10F
:100007F2295269503E207B90FEC06B9189543
:1000A000BFDF7894A895203021F4103011F4C29865
:1000B0000CC070FD07C032FDC29832FFC29A50E0FA
:1000C00060E003C0C29A522F612FF894503021F0A3
:1000D000032F0770501710F4C09801C0C09A78948D
:1000E000F894603011F06EBD02C000E00EBD78944F
:0200F000D9CF66
:00000001FF
Whether you choose the factory heating option or make it yourself is up to you, and we hope that we have covered the topic of heating as fully as possible, and now you can comfortably ride an ATV even in the most severe frosts.