Having spent the better part of a year installing tires at the Pep Boys in Fredericksburg, Va., I thought I knew a thing or two about how a tire is mounted to a rim. It was my first job after graduating from college, and knowing very little about working on cars, I was an eager pupil. As I soaked up knowledge from my well-meaning teachers, I felt confident that following their directions would give me the power to mount and balance tires perfectly.
But 16 years later, while re-learning how to use the tire mounting and balancing machines at Brooklyn Motor Works– where, in case you were unaware, we're rebuilding a 1988 Toyota Land Cruiser – I discovered that I also had to re-learn the whole tire installation process. But that's nothing new. As Carlos, Brooklyn Motor Works' proprietor has pointed out, we learn many things as hobby mechanics that must be un-learned when there are schedules to keep and customers to satisfy.
Anyway, here's the correct way to mount tires. Now that I know these simple tricks, I'm wondering if any of the 12 tires on the three dilapidated beater cars I drive around on a regular basis are actually mounted correctly. Chances are, they're not (I had 'em mounted at Pep Boys).
1. Remove the valve stem core to deflate the tire. Set the core aside for later use (if you're installing new tires, pull out the stem and install a new one, removing the core).
2. Use the tire machine to remove the tire from the rim
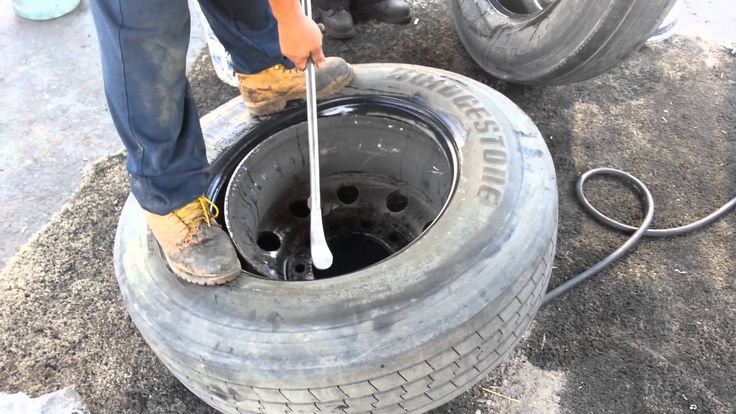
3. With the tire off, run your finger along the inside lip of the rim. Does it feel perfectly smooth? If not, it needs to be. Rust pitting can cause leaks, and will cause the bead of the tire to hang up when it's trying to seat on the rim (the beads are the really thick parts of the tire that come into direct contact with the inner and outer lips of the rim.
4. To remove rough patches, use several different grades of abrasive pads (I used coarse and medium Scotch Brite pads) to smooth out the inner lip of the rim, as well as the part of the rim the bead slides over as it seats on the lip.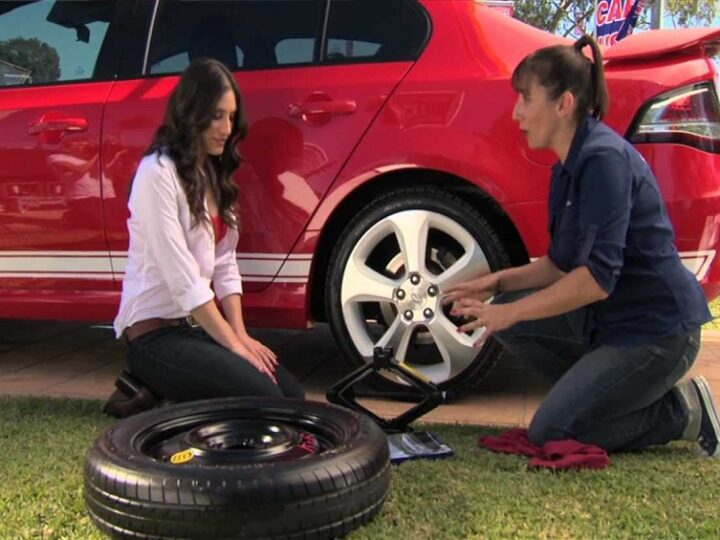 If there's too much damage, it may be necessary to get another wheel. You'll never be able to balance a wheel if the tire isn't properly seated upon it.
5. Before installing the new tire (or, if reusing the old one, the same tire, mounted the same way it was before), apply a generous amount of tire bead lubricant to the tire beads and the rim. Don't use soapy water (not enough slip) or grease (you'll never clean it all off and the bead could pop off the rim in hard cornering). Bead lubricant is slippery, but dries, allowing the bead to set.
6. Use the machine to install the tire. Then, remove the wheel from the machine mounts.
7. Spray more bead lubricant between the beads and the rim.
8. With the stem core still removed, inflate the tire to its maximum pressure (you'll see that number printed on the sidewall of the tire). The beads should pop onto the rim pretty quickly if the rim lips are smooth and you've used enough lubricant.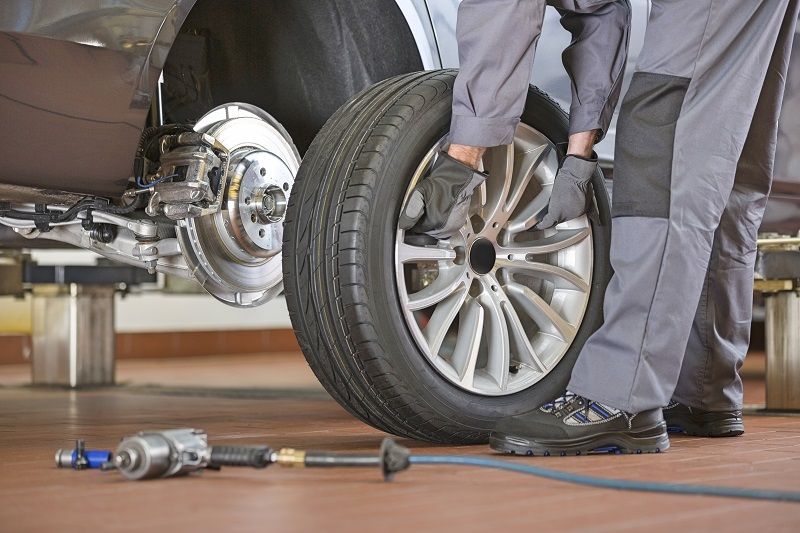 It'll go "POP.. POP!" as the beads seat.
9. Install the stem core and re-inflate the tire to its max pressure.
Assuming you followed all of these steps correctly, your wheel and tire are now ready for balancing. Then you'll adjust the tire pressure to the vehicle manufacturer's specifications when you mount the wheel and tire back on your car.
Now, I realize most people don't have access to a tire mounting machine, but being aware of what it takes to mount a tire will, at the very least, give you the tools to ask your tire installer if they're mounting your tires the right way. If the tire shop you're using is doing things the quick and dirty way (mounting tires dry on pitted rims), find a better shop! No one wants to feel a sickening shudder as the car passes 65 miles per hour on the highway.
Knowing how to change a tire is a necessary skill for all drivers. If you rely on a cell phone to save you in a roadside emergency, there’s always that chance you will forget to charge it, be out of range, or leave it at home. Flat tires can happen anywhere, and a cell phone is no substitute for knowing how to change a flat tire.
Thankfully, changing a tire isn’t all that hard! Just adhere to the following guidelines to be prepared in case you have a flat.
These items should have come with your vehicle:
Jack
Lug wrench
Fully inflated spare tire
Vehicle owner’s manual
If you have misplaced any of these items, or if your car did not come with these items, you should purchase new ones right away. And be sure you’re regularly inflating the spare tire to your vehicle manufacturer’s recommended PSI. You should check the spare’s air pressure every time you check your other tires. Remember to check pressure every month and before long trips or carrying extra load.
Here are some items that don’t come with your vehicle but that you should stow in your trunk or glove box in case you have to change a flat tire:
Flashlight with working batteries
Rain poncho
Small cut of 2"x6” wood to secure the jack
Gloves
Wheel wedges
 FIND A SAFE LOCATION
As soon as you realize you have a flat tire, do not abruptly brake or turn. Slowly reduce speed and scan your surroundings for a level, straight stretch of road with a wide shoulder. An empty parking lot would be an ideal place. Level ground is good because it will prevent your vehicle from rolling. Also, straight stretches of road are better than curves because oncoming traffic is more likely to see you.
Never attempt to change your tire on a narrow shoulder near oncoming traffic. Keep moving (slowly) until you find a safer spot. While driving on a flat risks ruining your rim, replacing a rim is better than being hit by an inattentive driver.
Make sure to consult your owner’s manual and review their specific steps on how to change a flat tire for your vehicle
Your hazard lights or “flashers” will help other drivers see you on the side of the road. To avoid an accident, turn them on as soon as you realize you need to pull over.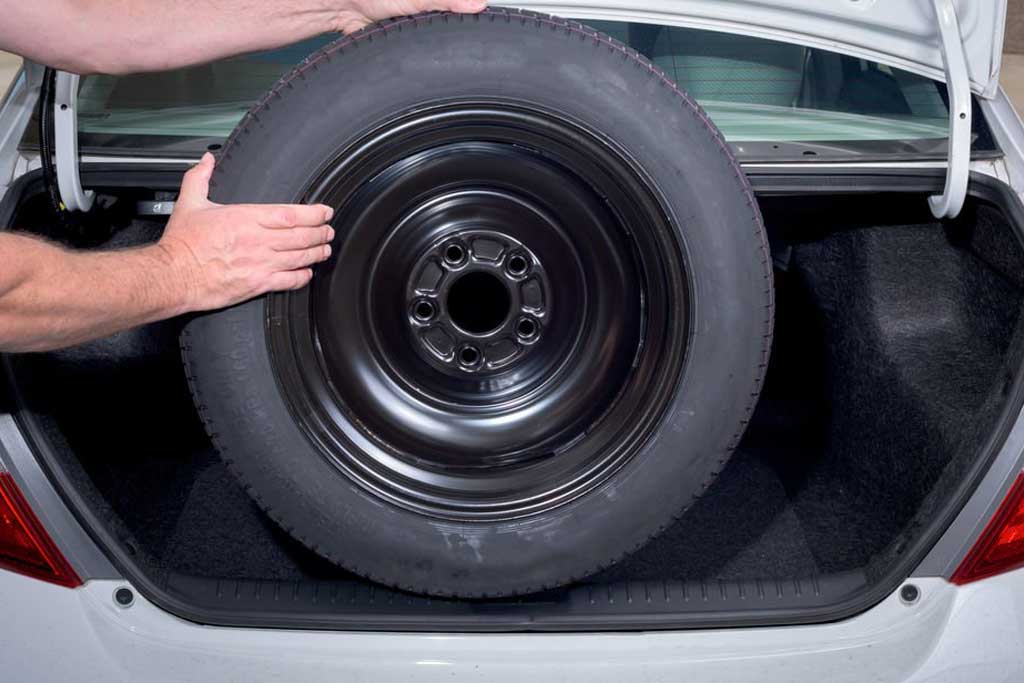
Once stopped, always use the parking brake when preparing to replace a flat tire. This will minimize the possibility of your vehicle rolling.
Wheel wedges go in front of or behind the tires to further ensure the vehicle doesn’t roll while you fix the flat tire. If you’re changing a rear tire, place these in front of the front tires. If your flat tire is at the front, put the wheel wedges behind the rear tires.
Bricks or large stones will work just as well as “real” wheel wedges. Just be sure they’re large enough to stop the car from rolling.
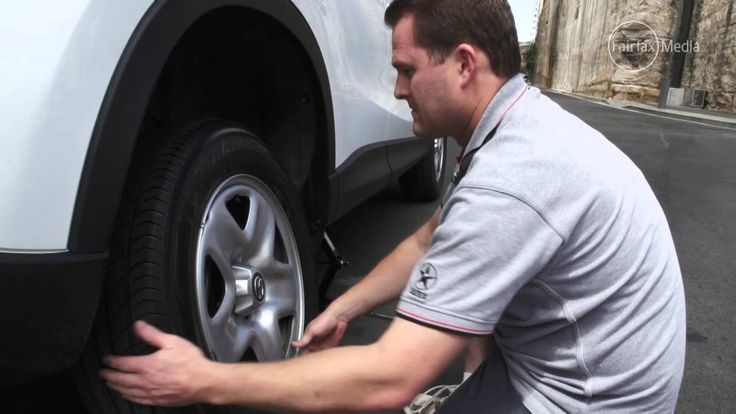
If your vehicle has a hubcap covering the lug nuts, it’s easier to remove the hubcap before lifting the vehicle with the jack. If your lug nuts are exposed, you can skip ahead to Step 6.
Use the flat end of your lug wrench to remove the hubcap. This will work for most vehicles, but some hubcaps need a different tool to come off.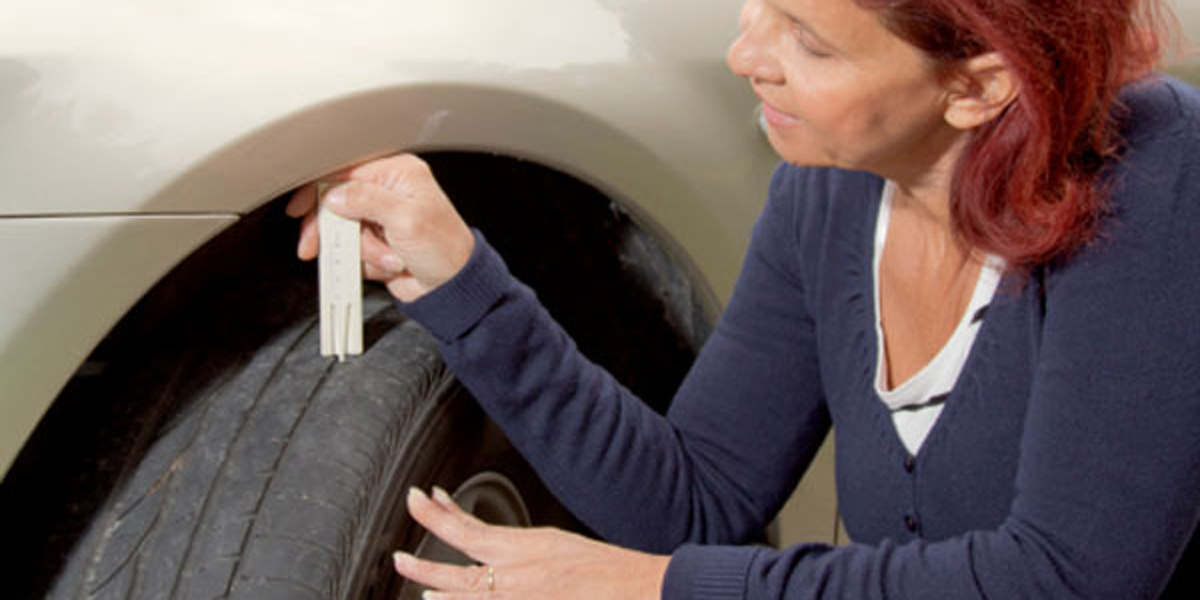 Consult your owner’s manual for proper hubcap or wheel cover removal procedures.
Using the lug wrench, turn the lug nuts counterclockwise until you break their resistance. You may have to use force, and that’s ok. Use your foot or all of your body weight if necessary.
Loosen the lug nuts about ¼ to ½ of a turn, but don’t remove them completely yet. Save that for when it’s time to remove your tire/wheel from the vehicle.
The right place for the jack is usually beneath the vehicle frame alongside the tire that’s flat. Many vehicle frames have molded plastic on the bottom with a cleared area of exposed metal specifically for the jack. To safely lift and avoid damage to the vehicle, follow the instructions for jack placement in your vehicle owner’s manual.
To prevent the jack from settling under the weight of your vehicle and coming off balance, place a small cut of 2x6” wood beneath it before attempting to raise your vehicle. This tactic is especially helpful on asphalt.
With the jack properly positioned, raise the vehicle until the flat tire is about six inches above the ground.
Never put any part of your body under the vehicle during or after raising the vehicle with the jack.
Now it’s time to remove the lug nuts all the way. Since you've already loosened them, you should be able to unscrew them mostly by hand.
Gripping the tire by the treads, pull it gently toward you until it’s completely free from the hub behind it. Set it on its side so that it doesn’t roll away.
Now place the spare on the hub by lining up the rim with the lug bolts. Push gently until the lug bolts show through the rim.
Put the lug nuts back on the lug bolts and tighten them all the way by hand. Once they are all on, check each one again, tightening as much as possible.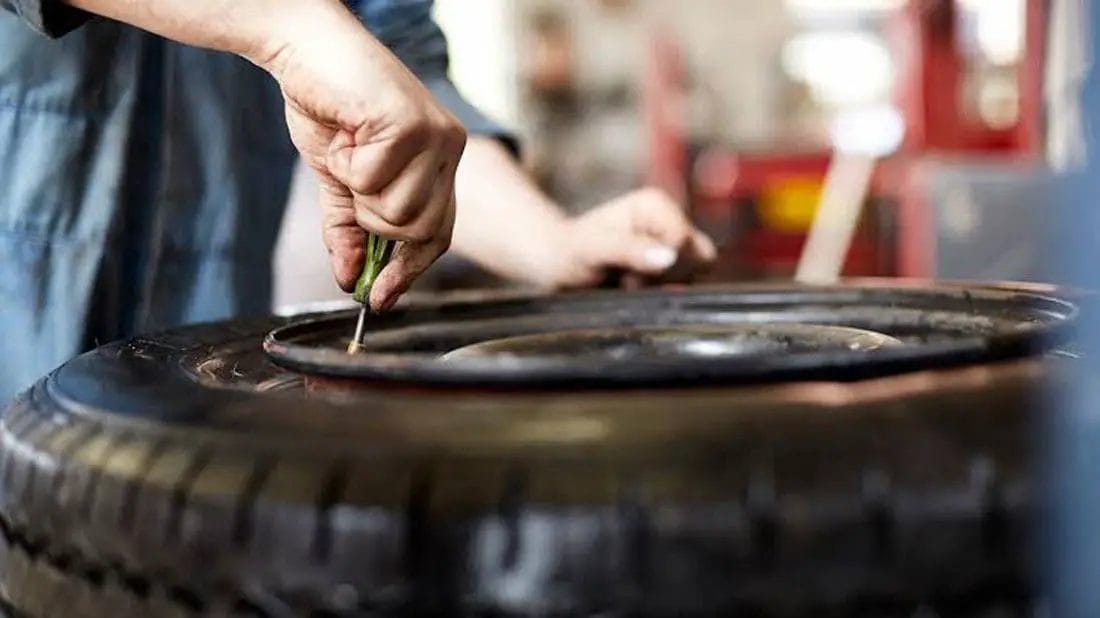 You will tighten them with the wrench after lowering the vehicle to the ground.
Use the jack to lower the vehicle so that the spare tire is resting on the ground but the full weight of the vehicle isn’t fully on the tire. At this point, you should tighten the lug nuts with the wrench, turning clockwise, as much as you can. Push down on the lug wrench with the full weight of your body.
Bring the vehicle all the way to the ground and remove the jack. Give the lug nuts another pull with the wrench to ensure they’re as tight as possible.
If the hubcap you took from the flat tire will fit your spare, put it in place the same way you removed it initially. If it doesn’t fit, stow it away with the tire when you stow your equipment.
You have before you a jack, a lug wrench, wheel wedges, your flat tire, and possibly a hubcap.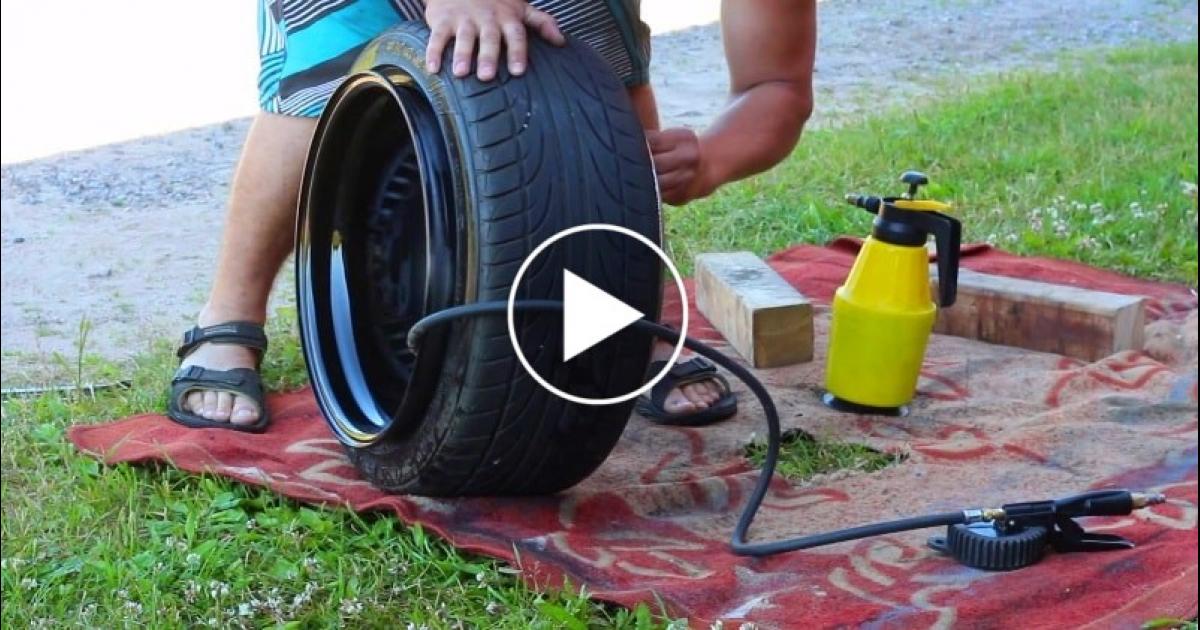 Don’t forget to put all of them in your vehicle before driving away.
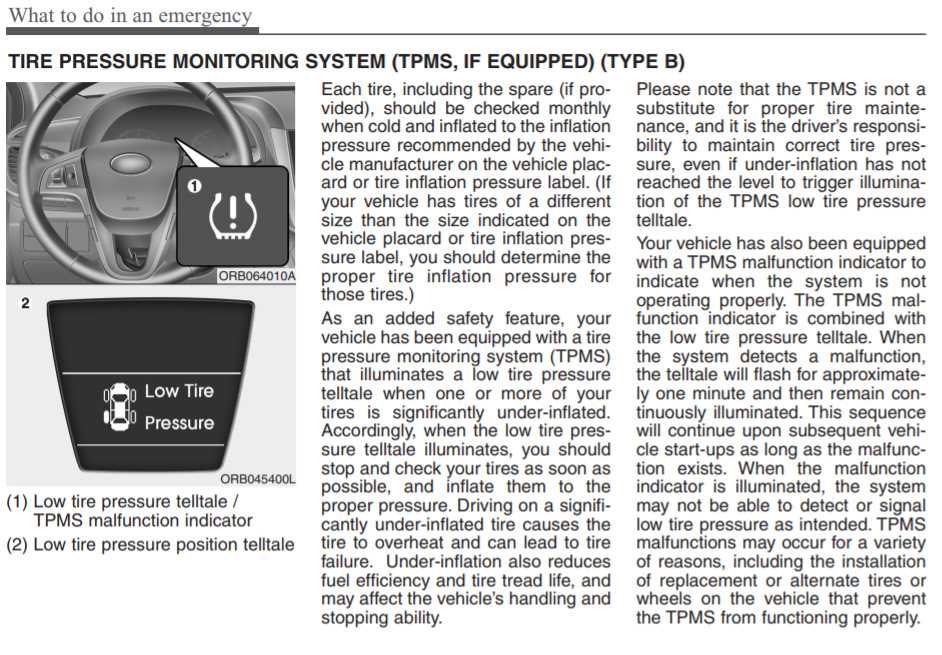
You should check the tire pressure of the spare tire to make sure that it is safe to drive on. “T-Type” temporary spares, also called “mini-spares,” require 60 psi (420 kPa). If the tire needs pressure, drive (slowly) to a service station immediately.
Temporary spare tires aren’t made to drive long distances or at high speeds, so drive cautiously until you’re able to visit a tire technician. A professional should be able to determine whether your tire needs a repair or if it’s time to replace it.
Aside from taking your tire to a professional, the above procedure shouldn’t take more than 15 to 30 minutes to change a tire. Just be sure you don’t leave out any steps.
It’s beneficial practice changing a tire in your garage or driveway to ensure you’re ready to handle this situation if it ever happens to you.
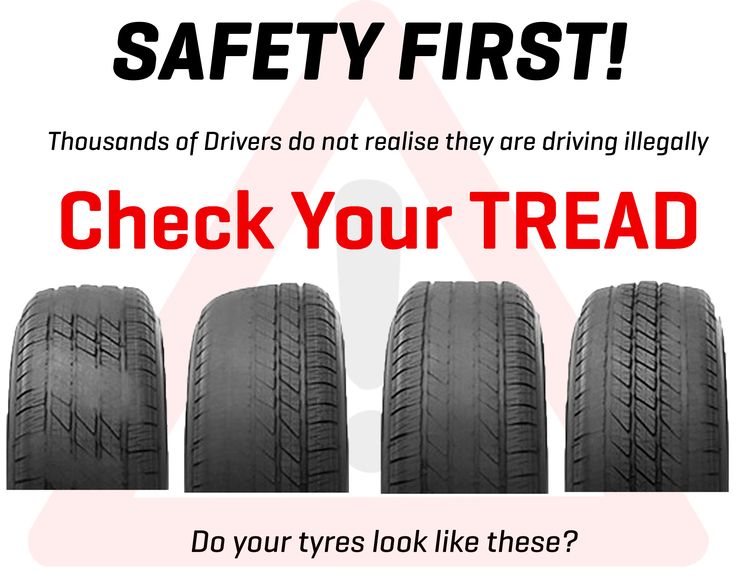
Knowing how to fix a flat tire is great, but regular tire maintenance is even more important. In addition to reviewing this guide regularly, remember to do the following:
Keep your tires properly inflated
Rotate your tires according to the manufacturer’s guidelines
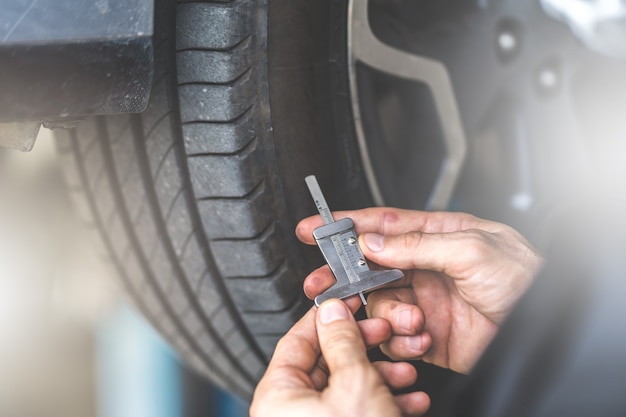
Monitor for tread wear
All of these precautions will extend the life of your tires and reduce the likelihood of a flat. While there’s no way to prevent flat tires completely, proper care can improve performance and ensure your tires last as long as possible.
There’s never a good time for a flat. That’s why Bridgestone DriveGuard tires are masterfully engineered to keep you moving for up to 50 miles at speeds up to 50 MPH without disruption.
There’s never a good time for a flat. That’s why Bridgestone DriveGuard tires are masterfully engineered to keep you moving for up to 50 miles at speeds up to 50 MPH without disruption.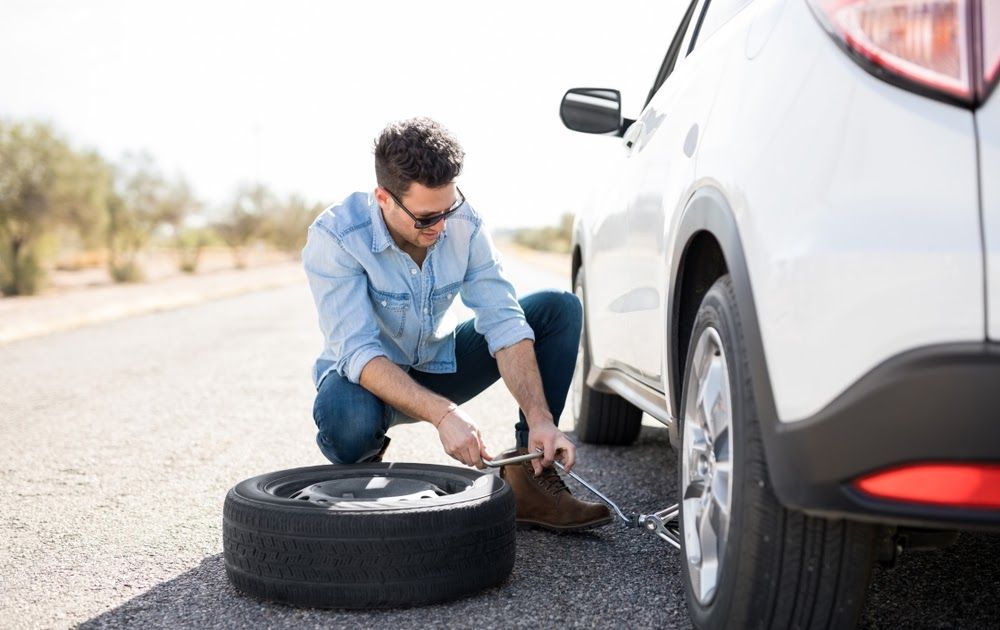
See Details Find Your Fit
Technical
Car tires are one of the most important and critical elements of a car, on which traffic safety directly depends. Therefore, the installation of tires on the car must be done correctly.
From this article you will learn:
- Tread pattern and direction of rotation
- Inner and outer side of tire
- "Right" and "left" sides of tires
- Tire balancing before installation
Despite the ease of mounting tires, in many workshops, out of ignorance or laziness, tire fitters manage to put tires on the car incorrectly.
Modern tires have several parameters that you need to find out before installing them on a car:
- tread pattern type
- direction of rotation
- where is the inside and where is the outside of the tire
- on which side of the car can the tire be installed - on the right or left
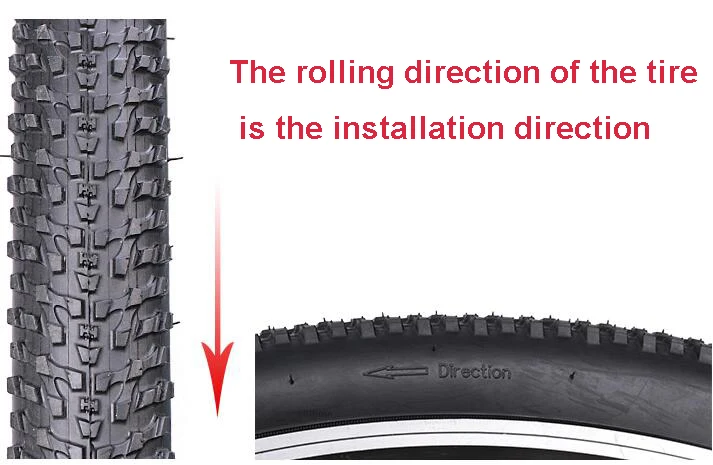
tread pattern, the direction of rotation of which is usually indicated by an arrow on the sidewall of the tire.
Therefore, the installation of tires in a directional pattern can only be carried out in a strictly defined position, which must be clarified before mounting them on a vehicle. nine0003
A minority of modern tires have a non-directional tread pattern. These tires can be installed on either side.
You can find out exactly the type of tire tread pattern and its direction of rotation from the seller in the store.
A tire can have an inner and outer side of the installation if its tread pattern is not symmetrical.
The inner side of the tire is indicated by the indication "Inside", this side of the tire must be installed inside the car in the direction of its movement. nine0003
The outer side of the tire is indicated by the indication "Outside", this side of the tire must be installed outside the car in the direction of its movement.
These mounting restrictions are due to the way the tire tread works, which only drains water most effectively when the tire is properly installed.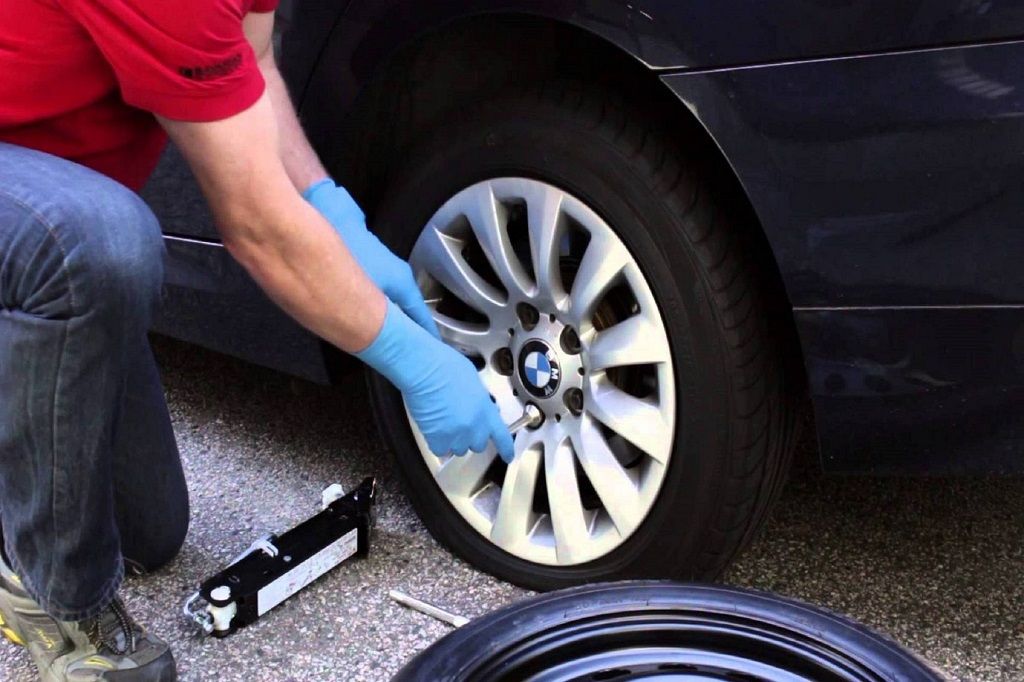
Some car tires are designed for a specific car model, or immediately for a group of identical models. nine0003
In this case, tire manufacturers can specify on which side of the car the tire can be installed "Left" - on the left, "Right" - on the right.
These limitations are also related to the most efficient operation of the tire tread installed on the correct side of the vehicle.
After mounting the tire on the rim, each wheel must be carefully balanced on a special machine.
The need for balancing is related to the difference in the weight of different parts of the tire (error), which is allowed by the manufacturer in the production of tires. This error is associated with the technological features of the production of tires. nine0003
The difference in weight is not noticeable when the wheel is stationary, but becomes very noticeable when driving at high speed - the wheel begins to "beat".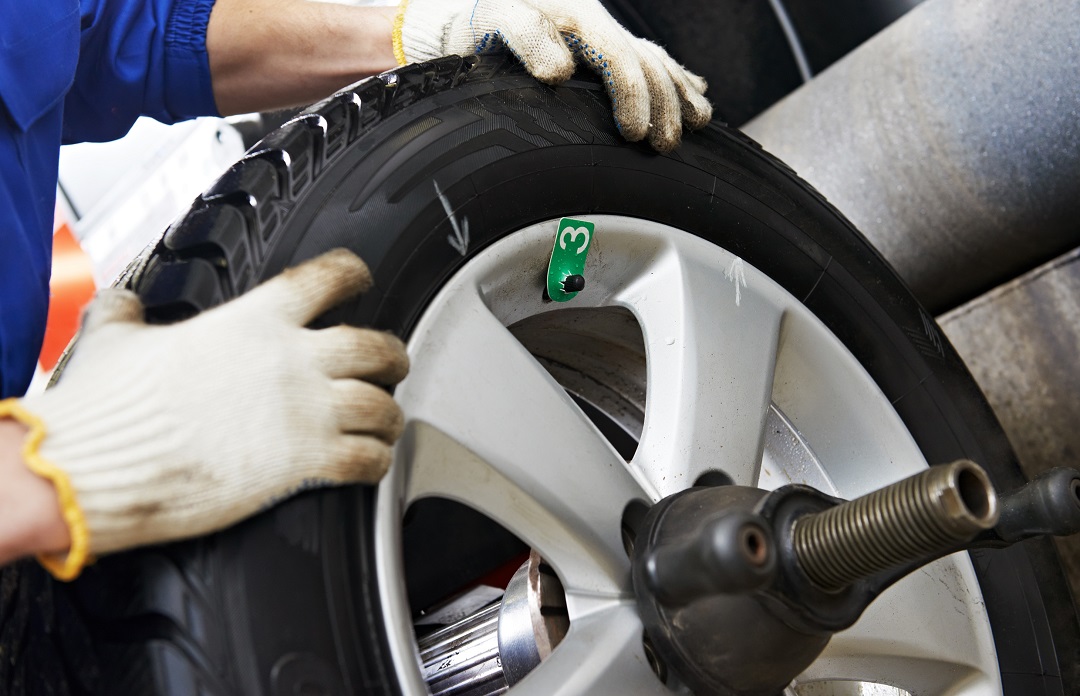
You can feel this “beat” on the steering wheel very well when the tire is installed in front.
For expensive tires made with state-of-the-art equipment, this difference is only a few grams and only a few balance weights are required for balancing.
For budget tire models, often produced on simple or outdated machines, the difference can be several tens of grams. nine0003
To balance such a tire, quite a lot of balancing weights may be required.
There are also cases when an inexpensive tire cannot be balanced “to zero” at all - in this case, this wheel is installed back.
When balancing a wheel, the pattern of tire manufacturing quality is most often manifested - the cheaper the installed tire, the lower its quality and the more difficult it is to balance.
Due to certain difficulties in balancing inexpensive tires, servicemen often do not complete the wheel balancing procedure, due to which the “beating” of the wheel may remain. nine0003
Therefore, it is best for the car owner to be personally present during the wheel balancing procedure right in the tire shop - then the likelihood that the workshop workers will want to cheat will be less.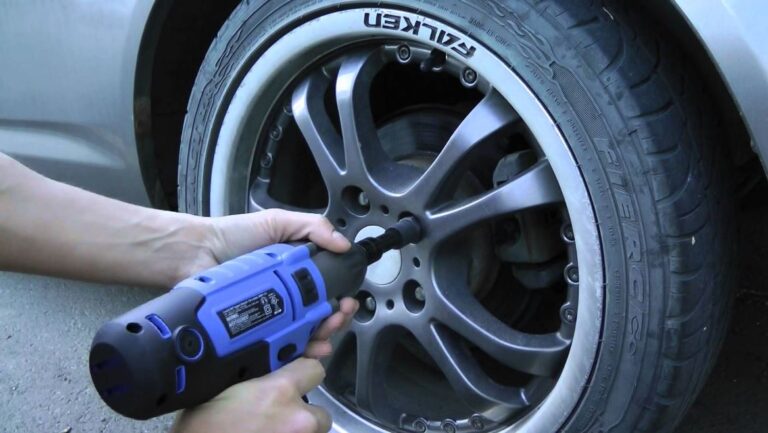
In order for the car to be a truly safe vehicle, the car owner needs to know how tires are installed correctly, and independently control all the actions of the masters who mount tires on his car.
You might be interested
Subscribe
5375 people already read this site! Read and you.
top
Adblock detector
Category: Operation and maintenance
Article reading time: 4 minutes
Save to bookmarks
The article provides information on the correct installation of tires and features of the direction of the tread.
A tire is a multi-layer shell of complex design that is attached to the wheel rim. The shock-absorbing part is rubber or polymer, with a printed pattern, which, as a rule, indicates the direction of rotation of the wheel.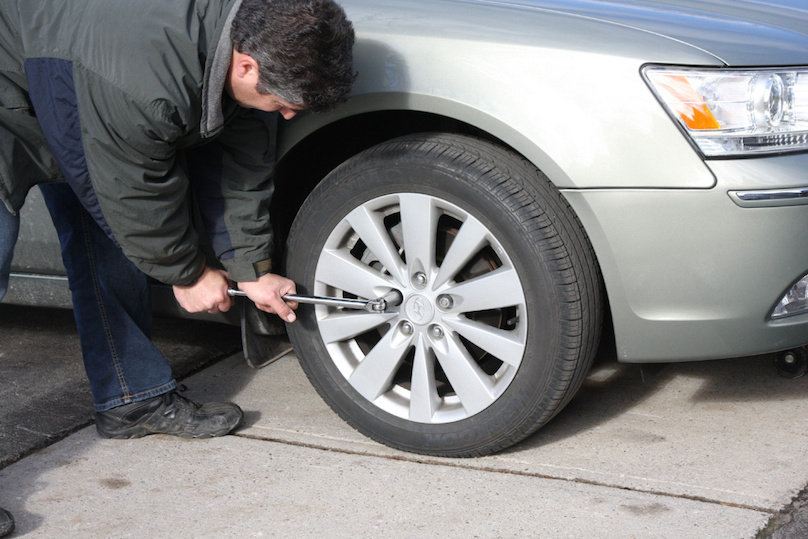 The pattern is applied to the protector. The tread is the working area that creates the grip of the car with the road.
Tires are classified according to the following criteria:
 nine0017
 Understand! Universal in reliability while driving are inferior to specialized ones. The directional ones provide better grip on wet roads at high speeds. If you correctly determine the direction behind the rotation of the wheels, the effect of aquaplaning disappears, which guarantees good rubber grip in puddles.
Rubber design features are distinctive features that improve the vehicle's driving characteristics. It is important to understand them for the correct choice of replacement rubber. nine0003
Tubeless, long lasting elasticity in case of puncture. The rubber tightens around the stuck object. It does not overheat when driving, due to heat dissipation by the open (metal) part of the rim. Unlike the chamber one, there are increased requirements for rims, the need to apply additional sealant at the junction of the rim and rubber, and the complexity of installation. Tubeless are used more often, properly mounted - high wear resistance.
The difference between bias and radial tires can only be correctly identified by the marking. Radial - r. Diagonal - do not have a letter index. You can understand the marking of the diagonal ones by the presence of the designation TT - operation with a camera. Those who care about speed need to understand the differences. nine0003
Winter Drive protection
Tires Goodyear UltraGrip Arctic 2 SUV
Winter Drive Protection Sound Comfort
Rating:
4.5
Tires Goodyear UltraGrip Ice 2
Winter Drive protection
Tires Goodyear UltraGrip Performance+ SUV
Winter Drive protection
Tires Goodyear UltraGrip Arctic 2
Winter Drive Protection Run On Flat Sound Comfort
nine0002 Tires Goodyear UltraGrip Performance+ Tire tread provides traction.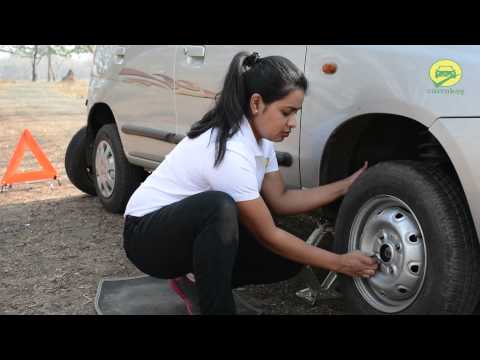 You can determine by the tread:
Asymmetrical tread pattern is larger on the outside. Do not purchase with even the slightest difference in the pattern - the tires rotate with a minimum lag - uneven grip with the roadway. Especially important for the highway, sharp descents. nine0003
Before determining the direction of a tire, it is important to know that Goodyear's tire direction marking for an asymmetric pattern is: LEFT; RIGHT - right; outside - outer side, inside - inner. install tires on the car according to the pattern on the tread or arrow. If symmetrical - navigate along a symmetrical pattern, its direction must coincide with the direction of movement of the wheel. If you need to install in the direction - the correct designation is ROTATION - rotation. nine0003
How to find out the direction if there is no marking - herringbone pattern? Rotate the tire in both directions - the top of the "herringbone" should be the first to touch the road. This is the correct way to install a wheel without a direction marking.
Recently, manufacturers have switched to symmetrical wheels, as it is impossible to know which one will fail. Correct replacement scheme:
It is also worth understanding that it is impossible to use anti-corrosion agents for processing fasteners on the road - imbalance.