Even though you may spend a lot of time and attention taking care of your ATV, you may still experience a dead battery from time to time. This happens to the best of us all the time. Usually it is in our car, truck, van or SUV, but just because you do not use your ATV as frequently as your bigger vehicles does not make them exempt from this unfortunate incident. A dead battery happens pretty similarly in and ATV as it does in larger vehicle. An ATV battery will most often die if anything that uses the electrical system is left on while the motor is not running. Personally, I am most guilty of leaving the lights on after I have parked my ATV for the day. Fear not though, even though you may have a dead battery, you aren’t necessarily stuck with it.
Jump starting an ATV is very similar to jump starting a car, only you usually want to jump an ATV battery from another ATV battery. There are, however, some key differences and warnings you definitely want to know that I will address below, as well as an alternative method to jump starting for where you don’t have a source to jump from.
Starting out with the basics will give you a lot of insight into what is happening with your battery. First, a battery powers the electrical system and helps power the motor on your ATV. Batteries, of all kinds, hold charges of positive and negative charges that work together to provide the power. Within the ATV, the battery is and integral part of the engine and without it, your ATV will not start.
Batteries of all kinds basically work the same, but motor vehicle batteries, like ATV batteries, are somewhat different than those used in a flashlight because they dispense power, but also simultaneously being refilled with new power to be used. This is accomplished by the alternator within the engine. When your ATV is turned off, the battery has an amount of usable energy stored within it. The ATV uses this stored energy to start the engine and continue powering it during use. While the engine is going, the alternator is being powered, which is refilling the battery as it empties. It is this process that allows ATV batteries, like those in cars and trucks, to last years rather than days or even weeks.
The mechanics of the battery are pretty simple and in theory the battery should always be able to start your ATV. However. there are several reasons that the battery may not be able to start your ATV that you need to be prepared for. One of the most common is that you have left on your lights or something else that is pulling power from the battery while your ATV is powered off. The lights and other purely electrical features of your ATV still work because the battery has stored energy that the alternator had filled it with during your last ride. There is a risk that whatever electrical source that is pulling for the battery store will pull too much of the stored energy from the battery and it will no longer be able to start the engine effectively. When this occurs you are able to restart the battery with a jump and let the alternator refill the battery with power once again.
It is important to note that it is common for a battery to fail because it has prematurely emptied, but eventually, like everything, a battery will meet the end of its useful life. It is important to note the difference between a non-charged battery and a battery that is fully dead.
The main difference between a battery that just needs a jump and a battery that is fully dead is the battery’s capability to hold power within it. The reason batteries are able to recharge is due to plates that both discharge the power as well as receive the new power within the cells in a battery. As the battery is used, those plates will eventually break down from use, they also develop a discharge which will reside within the battery corroding it faster. Basically, batteries die because nothing lasts forever. Batteries that no longer possess the capability to hold a charge are ones that need to be completely replaced with a new battery. If the battery is still able to hold a charge, but has simply dispensed of all the energy currently stored within it, there is hope that jumping it will solve the problem and you will be back to a fully functioning battery in no time.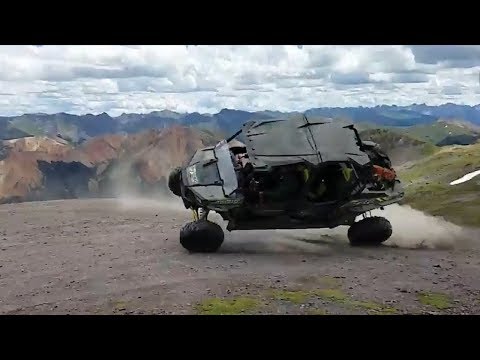
There is no easy way with only your eyes to distinguish between a battery that is no longer able to hold a charge and one that is simply DEAD. There are devices that allow you to test the charge of a battery and most mechanic shops have those and will let you use them if you are questioning what to do. Besides testing the battery, the best way to tell if the battery may be past its prime is by how long you have had it. The longer you use a battery, the more wear and tear the plates inside experience, so if it has been a while (think years not months) since you have replaced the battery and you have noticed the battery struggling to turn over, the battery probably needs to be replaced. If it has been replaced in the last year, then it is likely you will be able to recharge it to satisfaction again.
It is important to note that other problems do arise that may seem like a dead battery but are really unrelated. One of these situations is if something is wrong with the alternator and it is no longer functioning correctly to restore a charge to the battery. This may lead you to think that there is something wrong with the battery when the battery is actually fully functional. If the battery is tested and works fine or you have a new battery and the ATV won’t start, your next step is to take it into a mechanic unless you know what you are doing.
Despite whether or not your battery is able to hold a charge or past its prime, it doesn’t make a dead battery on the trail any more fun. If you are out and about and your ATV will not start, there are three methods you can try to get it restarted.
A compression start is where you manipulate your ATV into starting by making it really easy on the engine to turn over. To do this you will need to be able to get your ATV moving at close to 10 MPH. To try a compression start, first turn on the ATV and then put it in first gear. If it is unwilling to be put in first, you may want to up it to second gear. As you begin to push the ATV, you will want to pull in the clutch and get moving. Once you are moving at a good speed, about 10 MPH, try letting out the clutch and adding gas as the engine begins to try and turn over. This will hopefully trick the engine into starting and the battery, as long as it is still viable, will be able to charge while the engine runs.
Hopefully if your battery dies on an outing, you are with a friend or family member who also has an ATV because jumping an ATV using another ATV is probably the easiest way to get the job done. First, bring the ATV’s close to each other so that jump cables can reach each ATV’s battery. Then, attach the jump cables (typically red and black cables) to the good battery. Follow this process by attaching the other end of the cables to the empty battery. Turn on the first ATV, or the one with the full battery, and let it run for a little while, approximately 3-5 minutes. After that, try and turn on the dead ATV with the cables still connected. Typically, this will do the trick and your ATV will immediately start. You can now disconnect the jumper cables by fully disconnecting the cables from the previously-dead battery and then the full-battery ATV. Make sure to allow it to run for approximately 30 more minutes before turning it off to allow the alternator to fully charge the battery again. You may ride it during this time, or you can simply let it idle.
You may not always have someone with you that has another ATV to jump start your ATV, but hopefully you are able to reach a car or other vehicle. If you just drove for hours to try out a new riding spot and found your battery dead, you can use your car to jump the battery as long as you pay a little extra attention to what you are doing. First, connect the jumper cables to the car battery. Secondly, connect the second set of cables to the ATV. DO NOT TURN YOUR CAR ON. Make sure to leave your car engine and battery off. Car batteries are much more powerful than ATV batteries and putting that much energy into an ATV battery can deeply and permanently damage the battery.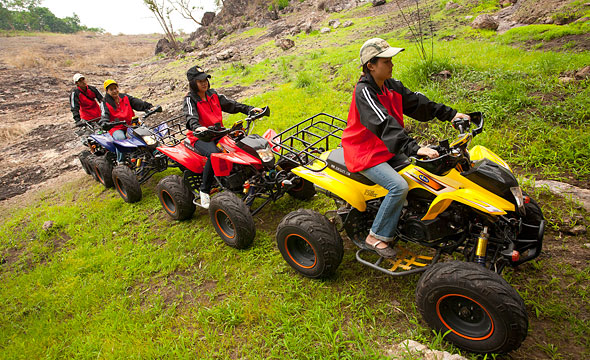 Even when the batteries are connected and both devices are turned off, enough energy can be siphoned to the dead battery to restore enough of a charge to help it start. After a little while, again approximately 3-5 minutes, try turning on the ATV. When the engine turns over, you are safe to disconnect the jumper cables, one vehicle at a time, as long as you let the engine run while the alternator refills the battery, again approximately 30 minutes.
If none of these methods work for you, you will want to get the battery tested. If you aren’t in need of a new battery, that is a good indication there is something else going on with your ATV and a trip to the mechanic may be in store.
ATV’s are a lot easier than cars, but they are a tricky and complicated of machinery that needs maintenance and attention, but that doesn’t mean that only professionals can handle every little thing. Understanding the ins and outs of your ATV battery can save you a lot of time, money and frustration as you enjoy riding the trails.
If your ATV battery is dead, your engine won’t turn over. If you’re home and have a charger, it’s not a big deal. But if you’re out on the trail, or don’t have a battery charger, dead batteries can be a real pain. Knowing how to jump start your ATV battery can save you a major headache while out on the trail. Most ATV batteries are 12 volts dc, like a car or motorcycle battery.
I’ve used the compression method I talk about below on my quad before, and it does work. I was a couple miles from camp and I shut my engine off to take in the scenery and walk around a bit. When got back on my quad to head back to camp, the dang thing wouldn’t start. I was able to get it started using the bump (compression) method, and I’m sure glad I knew how to do it rather than trying to push the quad all the way back.
First thing is to make sure the battery is really the problem here. Your battery will slowly lose power over time if it has been sitting. The longer the ATV sits without the battery on a charger, the more likely it is that the battery could have died. You really should be hooking the battery up to a charger if it’s going to be sitting for 3 months or more.
If you try your push button start (or turn key start) and nothing happens, the battery may be dead. Make sure your run switch is turned on and your machine is in neutral. If you have a key, the key will need to be in the run position also. Try turning your headlights on if you have them. This can be deceiving because the battery might have enough power to run the headlights but not turn over the engine. But if they headlights (or any other lights) don’t turn on, you can be more certain the battery is dead.
If your engine turn over but very slowly, it may be the battery. The battery might have enough juice to turn the engine, but not fast enough to get it started. You would hear the motor spin a little but then slow down and stop. If you hear just a clicking sound, but the motor doesn’t turn or do anything, it could be the battery. There could also be a loose connection between your battery and starter. Check and tighten the connections to the battery terminals and to the starter.
Once you’re fairly certain it is the battery, you can try jump starting it. If you’re home and have a charger, there may be no need to jump start. Try just charging the battery first. The charger I use is a Ctek Smart Charger found here on Amazon. It’s sold at a good price (around $60-70) and has all the connections for any brand of battery your ATV has. I chose this battery charger because of its price, and how easy it is to use.
Sometimes this happens out on the trail, where you don’t have a charger. Or maybe you don’t have a charger at home. Whatever the case, you could always jump start your ATV using jumper cables or the compression start method.
This method is commonly known as bump starting an ATV, or popping the clutch. You basically have to push the quad fast enough so that when you let the clutch out the engine turns over and starts. Most ATV’s are light enough to be pushed by a normal sized adult on flat ground. If you can get going downhill, it makes this a lot easier.
Your starter motor is usually what’s used to start the engine. It draws power from the battery to turn the engine over, which fires the spark plugs and gets the engine running. With the compression method, you are using the tires and momentum to turn the engine over.
Here is a step by step of how to do it:
That’s it! You should hear the engine turn over when you do this. If you’re having a hard time you can try giving it some gas as it starts to turn over. The engine should fire up, when it does, pull the clutch back in. That will prevent the machine from taking off on you as soon as it’s running. It might take a few tries to get it done this way, but it does work.
If the tires skid instead of turning the engine over, try going into 3rd gear and repeating the steps. If the tires still skid, try on more solid terrain or somewhere where the tires have better grip. Once the engine is running, it should charge your battery back up.
If your ATV is an automatic, you won’t have a clutch, and may not have a way to select which gear you’re in. The bump start (compression start) method won’t work the same for you. I have seen people put the ATV into neutral, get it rolling, and drop it into drive to start the machine. But I think doing it this way could damage the transmission. I would only do it that way on an automatic as a last resort.
This is pretty straight forward, and is the same method you would use to jump start a car. You can use another ATV battery or even a car battery if that’s all you have. It’s a good idea to wear rubber soled shoes when you work on anything with electricity. The voltage’s and amperage’s of car and ATV batteries aren’t enough to cause serious damage, but it’s a good idea to be careful around the terminals to avoid damage to your vehicle or ATV.
For this method all you need is a simple set of Jumper Cables like this one I found on Amazon, and another ATV. First, remove the seats to gain access to the battery. Some quads require that you also remove a battery cover. Connect the jumper cables to the good battery first, making sure the positive and negative of the other end of the cables aren’t touching. Then connect to the bad battery.
You should notice a plus sign or red flag on the battery indicating positive, and a minus sign or black flag indicating negative. Connect the negative (black) first, then the positive (red). You can hook the negative (black) end directly to the frame of the ATV, just make sure it is grounded. This can also help prevent a surge in the electrical system that could damage your machine.
Once you have both batteries connected with the jumper cables, you can start the ATV with the good battery. Let the ATV run for a few minutes. This charges your battery a little bit, and helps when you try to start it. Now you can try starting the other ATV. If it starts up, remove the red cable (positive) and then the black (negative), do this for both ATV’s.
You should leave the engine running for a while after a jump start. That will let the battery charge back up a little bit. If you immediately shut the ATV off, you will need to jump start it again. I’d let it run for a good half hour, I usually go ahead and ride it around for a little while, why not?
The hook up for this method is the same as ATV vs ATV or car vs car using jumper cables. Hook to the good battery first, negative (black) then positive (red). The car battery and charging system is much stronger than an ATV battery, and could cause damage to the ATV’s electrical system if you turn on the car. This is because the alternator in your car charges batteries at a higher rate than your ATV battery can handle. For this reason, Do Not turn on the car at any time during this jump start. The car battery should have more than enough juice to start an ATV.
After you have the jumper cables hooked up, simply wait a minute, and try turning on the ATV. If it starts up, then you know the battery was the problem. Once the ATV is started, remove the cables from the ATV first, positive (red) then negative (black), and then from the car. I have done this with my truck, just to make sure it will work for you, and it works well.
This is one of the simplest most straight forward methods. But it’s more expensive because you need to have a battery pack in order to jump start the ATV. This method is similar to using jumper cables except instead of hooking your ATV to another ATV or a car, it’s hooked to a pre-charged battery pack. If you don’t want to carry an extra battery pack with you on your quad all the time, this method may not be for you.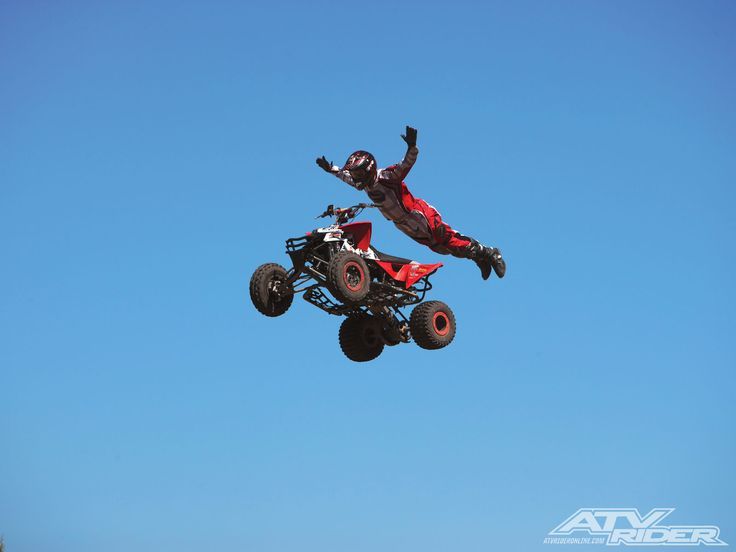
The battery pack we use can also charge our smart phones and tablets, so it’s nice to have on a camping trip anyway. And if my four wheeler’s battery ever dies, it’s a super convenient way to get back riding again. The battery pack I use is called a Portable Jump Starter found here on Amazon. It has a built in flashlight and USB ports to charge phones or tablets, or anything that can charge through a USB port. All the cables and things you will need to hook up to your ATV battery are included.
If you have the extra money, or go camping a lot with your four wheeler. This is the best way to get your battery charged again without needing to pop the clutch, or needing another ATV or car nearby. You simply hook the included alligator clips to your battery, and then hook the cable to the battery pack. Once everything is connected, try to start the engine. The engine should start right up. You may have to wait a couple minutes to let the battery charge a little bit.
It’s always best to never need to jump start your ATV, but it happens sometimes. Taking care of your batteries and keeping them properly charged will save you a headache in the long run. To learn more about how to charge a battery and keep it charged while not in use, check out my How To Charge An ATV Battery article here.
Sharing is caring!
Stels ATVs have long conquered the expanses of Russian off-road. If you ask any quad rider what he likes most about this sport, you will most likely baffle him, it is so difficult to choose one from the whole host of sensations. Someone will remember the indescribable feeling of speed, someone likes riding in the mud, and someone loves to fly over the dunes. However, for many, jumping on a quad bike is the most exciting experience. ATV jumps vary from taking off a little on a random bump to flying off a springboard, but it's definitely one of those hard-to-forget-feelings, just as hard to forget any feeling of free-flying. After all, the heart stops even for those who simply watch the flight from the side.
However, in order for the thrills not to have tragic consequences, it is necessary to prepare not only yourself, but also your device before flying. How to ensure your safety when jumping?
Of course, you shouldn't do extreme sports without protective equipment, make sure that your body is protected as much as possible and at the same time the equipment must be of high quality to provide sufficient freedom of action. Try to get a complete set from boots to a helmet and goggles and be sure to protect your body well, because you will be in the air with a device weighing several centners, in case something goes wrong you will need reliable protection.
First of all, you need to remember the basics of jumping, namely that when taking off and landing, your front wheels should be slightly higher than the rear ones, and you need to keep the ATV in the air in such a position during the entire flight. Then the rear wheels will touch the ground on landing earlier than the front wheels, which will soften the impact when touching the ground. Landing on the front or all four wheels takes most of the impact on the ground, which is enough energy to throw you out of the saddle.
The second rule of extreme jumping is not to sit while jumping. You have to stand in the ATV, or at least raise yourself in the saddle, only then your legs will act as an additional shock absorber, helping to soften the impact. Otherwise, having taken a hit on the fulcrum, you can easily fly out of the saddle at the moment when, after compression, the shock absorbers are again unclenched. Allow the craft to move under you in flight, and by lifting yourself off the seat, you will have more freedom to move your body and balance, which will allow you to adjust the angle of the entire craft-racer system.
There are two ways to achieve the desired angle, controlling the position of the body and using the accelerator. When approaching the liftoff point, lean back to lighten the load on the front wheels, control the throttle smoothly, preventing the ATV from tilting forward after the liftoff. If you understand that the speed for the jump is too high, slow down slightly, and just before the takeoff, release the brakes and squeeze the gas. It is important to choose the right acceleration so that it is not too large and at the same time too small. In general, the choice is determined by many parameters and is usually selected individually by the rider for his ATV. That is why you can move on to ski jumping only after preliminary training on small jumps. This is especially important if you are riding this ATV for the first time, before going into sharp turns, experiment on small obstacles.
When jumping on a quad bike, you may find that not everything goes as it was originally intended, and you usually notice this when you take off from the ground. Your ski jump might actually be steeper than you thought, you might yank the handlebars too hard or add too much throttle and the quad will become vertical in the air.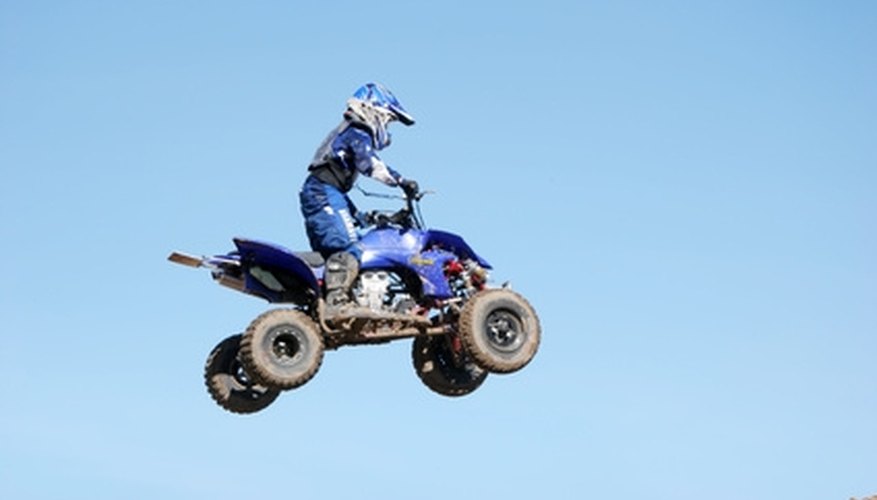 In this case, begin to shift your body weight forward by pushing down on the handlebars to lower the front wheels down. Release the gas and apply the rear brakes. Oddly enough, they can help you even if the wheels are no longer touching the ground. The fact is, stopping the rotation of the rear wheels causes inertia to lower the front wheels down. In order not to cut off the engine, do not forget about the traction when braking in the air. If you land with your front wheels up, slow down, shift your body weight forward, and be prepared for a sharp rudder jolt. One of the dangers in this case is to fly forward and get under the wheels of your own ATV.
If the rear wheels are up, shift the weight back and press the gas, this is one of the most dangerous situations that should be avoided as much as possible. However, if you do not get confused, you will be able to level the ATV in the air.
Remember that while jumping on an ATV is similar to jumping on a motorcycle, one of the main differences is the need to watch four wheels instead of two. Do not allow the ATV to skew, otherwise you run the risk of simply breaking the rear axle when landing. Remember that the wheels should touch the ground at the same time, if you feel the ATV lean to one side, you need to shift the weight to the opposite leg and try to straighten it in the air - this is another reason to stand rather than sit in the saddle when jumping.
What is the most exciting thing about riding ATV ? Someone will say that speed brings the most sensations. Some will advocate track racing or mud riding. Others will say that the most interesting thing is to ride in the dunes, participate in high-speed races, or just ride on the rear wheels. But don't forget about air. Nothing beats jumping, whether it's a small hillock, a huge diving board or a sand dune, nothing beats the feeling of free flight. If you have your own style, then you can impress your friends even more. How to do this, and stay safe and sound?
It goes without saying that protective equipment is absolutely essential. We recommend a complete set of protective equipment, including boots, gloves, long pants, a helmet, goggles and possibly also a torso protector. It is quite obvious that any action in which you, along with a car weighing several hundred kilograms, fly up into the air, requires good protective equipment.
The very first thing to remember when jumping ATV - jump and land in such a way that the front wheels of your car are slightly higher than the rear. It is very important to keep the ATV in this position. When landing, the rear wheels should touch the ground before the front wheels. This will allow you to land softer than if only the front wheels first touched the ground, or all wheels at the same time.
Another basic rule when jumping is that the pilot must be standing at the moment of the jump, or at least raise his torso slightly from the seat. In addition to the shock absorbers of your ATV , you will also need to use your own feet as shock absorbers. If you continue to sit, you may be thrown out of the seat the moment the ATV hits the ground - the shock absorbers compress and then decompress. The secret to maintaining control is to allow the quad to move under you a little. Preparing to jump in a semi-standing position will allow you to quickly move your body forward, backward, or sideways to adjust the angle of your car.
The moment you and your ATV take off from the ground, not everything can go as you expected. The springboard may turn out to be steeper than you thought at first glance. You can pull too hard on the steering wheel, or give it a little too much throttle, and your quad will take on a more upright position than you intended. What to do in this case? First, try to shift your weight forward while pushing down on the handlebars. You also need to release the gas and apply the rear brakes. Yes, your brakes can help you even in the air. When the rear wheels suddenly stop spinning, the momentum moves to the front of the ATV, causing it to drop slightly. Use the clutch when applying the brakes so that the engine doesn't stall the moment you land. When you land with your front end too high, release the throttle and shift your body weight forward, and be prepared for the handlebars to jerk forward. All this is necessary so that you do not fly out through the handlebars and do not fall under the wheels of your own ATV. There are two main ways to give ATV the desired angle of inclination: using body position and using the accelerator. As a general rule, when approaching the ramp, you need to shift your weight back a bit to lighten the front of the quad. Adjust the throttle smoothly so that the ATV does not "burry" its nose after it takes off from the ground. If you feel like you're going too fast for a particular jump, brake before it, then release the brakes and hit the gas just before the jump.
 Acceleration should not be too much, but not too little. For every ATV need practice and find the right spot. Therefore, you should always start with small jumps when you are riding a new or unfamiliar ATV for the first time.
Another problem may be that the rear of your ATV may jump up as you enter the ramp, causing your ATV to flip forward. This is the infamous "endo" - an accident that you must try to avoid at all costs. If you realize at the moment you leave the jump that your rear wheels are much higher than your front wheels, immediately shift your weight as far back as possible. At the same time, press the gas as far as possible. The sudden increase in rotation of the rear wheels will cause the front of the ATV to rotate slightly in the opposite direction. In other words, the rear of the car will drop a little, while the front will rise a little, which will increase your chances of landing in a more horizontal position.
Whatever it is, sometimes it does happen.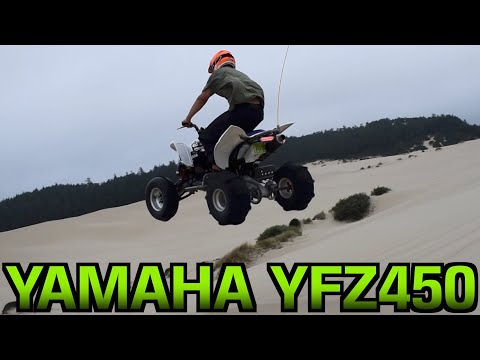 For example, right before the jump, the left wheel hits some kind of obstacle, while the right one goes straight. ATV bounces and leans to the right in the air. In this case, you need to correct your position in the air so that both rear wheels touch the ground at the same time. In this case, this can be done by moving your weight to the left. Here is another reason why it is better to stand up at the time of the jump than to continue to sit. It's much easier to shift your weight to your right or left foot when you're in a looser position. 9 Jump Technique0023 ATV strongly resembles the technique of jumping on a motocross bike. But there is one thing: unlike a motocross bike, an ATV driver must always keep an eye on the two rows of wheels of his car. In other words, the ATV must not be tilted at the moment of taking off from the springboard. Landing after such a jump can be very unpleasant for you, and most likely will damage the bridge of your ATV.
It may also happen that your ATV will turn a little while jumping. This is especially likely if you added a little extra gas before jumping. What to do in this case? First of all, point the front wheels in the direction that the quad would have been facing if you were jumping straight. Tilt your body in the direction opposite to where the rear end of the car turned, keep stepping on the gas and hold on tight. If you do everything right, usually the quad will have time to level off before the moment of landing.
When you see others jump several meters high, remember that they probably have many years of riding experience. Do not think that you can easily repeat the same maneuver just because you are riding the same ATV. If you're new to riding, be patient and practice more. The higher the ramp and the faster the speed, the more likely something will go wrong. There is nothing that can replace experience. Your skills and craftsmanship must first be worked out on small jumps.
The main thing to remember is the basic rules: always wear helmet and other protective equipment . See you on the track!.
Here are some more useful tips:
Never jump from a springboard that is higher than your skills!