Your dirt bike's cables control a large number of your bike's functions. Keeping your cables clean, lubed, and in good condition is a necessary part of dirt bike maintenance. Never skip cable maintenance, and never ignore any signs of damage to your cables. Learn how you can take care of your bike's different cables so that they can take care of you.
Why You Need to Take Care of Your Control Cables
All of your bike's cables are important, and there's quite a number of them to keep an eye on. Just to recap, you need to stay cognizant of your:
Issues stemming from any one of these cables can affect how your bike performs. Even if the cables aren't in disrepair, keeping them in good condition will make a noticeable difference in how your bike rides. Leaving these cables dirty or without lube can turn your bike into a dangerous liability if too much time passes by.
What You Need to Properly Lubricate Your Control Cables
All of your bike's control cables require similar care. To start, you should have a cable luber and some cable lube.
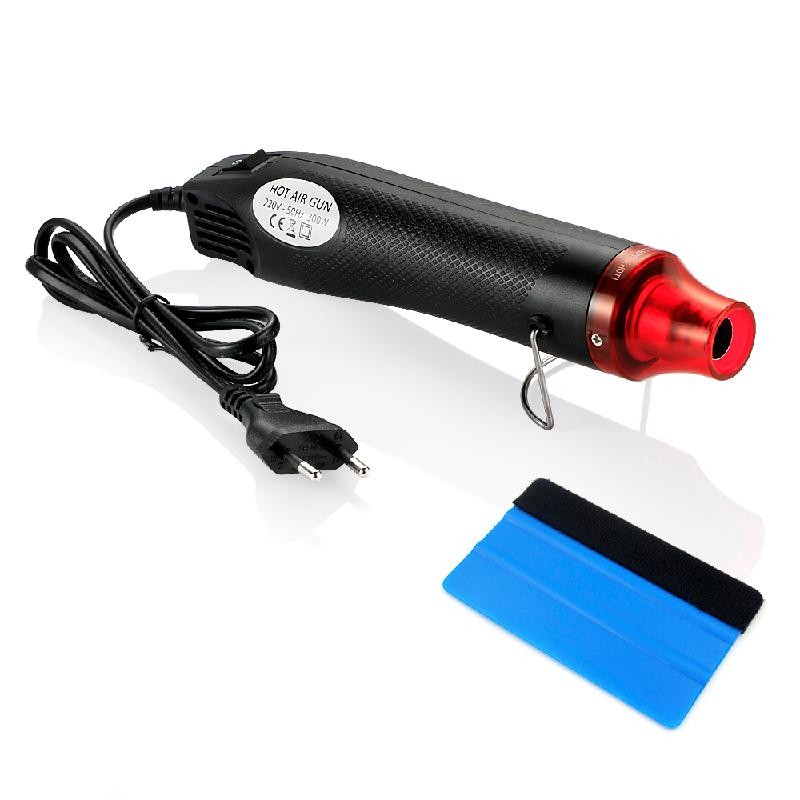
A Cable Luber
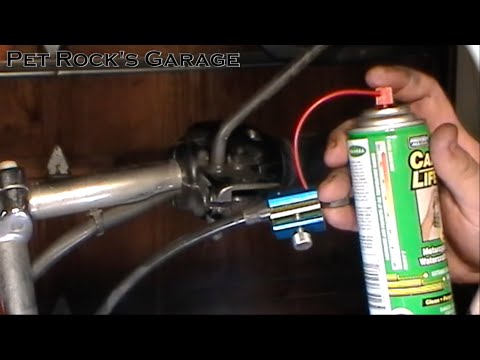
If you're not familiar with a cable luber, it's a small device that clamps onto the cable and housing. The luber will allow you to use an aerosol lube on and through the cable, as well as on the inside of the cable's sheath.
The cable luber will have a port on the side that allows you to spray the lube. The mechanism will force the lube into the cable housing and down the inner parts of the cable.
Cable Lube or Equivalent
You can use general cable lube or cable lube specifically advertised for dirt bikes. A silicone spray will do nicely. Avoid general or multipurpose lubricants or any unrelated oils, like motor oil. Do not use chain lube for your cables.
How to Maintain Your Throttle Cables
Cleaning and lubricating your throttle cables will help the cables last longer while preventing fraying or snapping. You can maintain or even improve your throttle action and avoid the dangers that come with jamming your throttle.
To start, remove the throttle tube assembly from the handlebars and open it up. Make sure that you wipe out any accumulated dust, grime, or debris inside the assembly.
For many throttle cables, the cable luber isn't necessary. If your throttle cable isn't compatible with your cable luber, you can squirt lube directly into the cable itself. When finished, reassemble the throttle tube, and you're done.
How to Maintain Your Clutch Cable
Your clutch cable requires more care than your other cables, as it receives a lot of constant abuse. As you shift and grind through the dirt, the clutch cable will accumulate a lot of wear, tear, dust, and grime.
You should check on your clutch cable after every couple of rides. Look for signs of fraying or other damage. If you notice anything out of the ordinary, you may want to preemptively replace the clutch cable rather than hold onto it.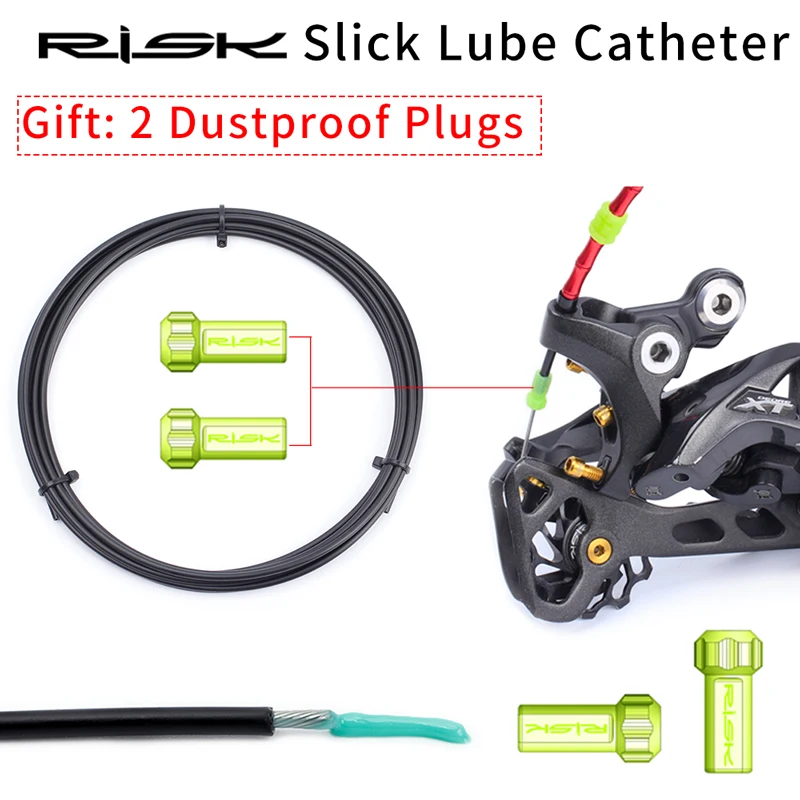
If your clutch cable looks operational, then you’ll just need to use your cable luber and lube. Follow these steps:
When you're done, you can enjoy smoother shifting and overall better performance from your clutch.
How to Maintain Your Other Cables
Hot start cables will require you to remove the cable from the carburetor before lubricating it. Always do everything you can to keep lube out of your carburetor. Anything foreign in the carburetor can adversely affect its performance.
If your dirt bike has front brake cables, you should lubricate those as well. Many bikes have braided steel or hydraulic hose these days, so lubricating the front brakes cable always come up. You can remove the front brake cable and inject the lubricant. This applies to rear brake cables as well, although you should completely remove a rear brake cable before lubricating it.
Different bikes have their own peculiarities that may require you to go about the lubrication process in a slightly different way. Before you begin maintaining your control cables, do a little research on how the process typically works for your specific model. If in doubt, always choose the manufacturer's instructions over any others.
No matter what you need, Bob's Cycle Supply has you covered. Check out our website for lubricants, replacement cables, and other accessories to ensure that your bike gives you a smooth ride.
November 22, 2018
Maintaining your motorcycle is an important job. Not only so that your bike will live a long life, but also so that it works at its optimum. Everyone knows the basic, really important tasks, like changing your oil, making sure your tires are in good condition, cleaning and oiling your chain, etc.
There is one very important maintenance task that a lot of people overlook. That's the process of maintaining your throttle, clutch and other control cables. Most people don't give much thought to the controls of their bike, but it is one of the most important parts of your bike, and well-maintained controls can make riding a lot more fun. On the other side, neglected controls can be downright dangerous, or leave you stranded with a broken cable.
Doing the work to maintain your controls and cables is pretty simple work; it just takes a small investment in time, and a little familiarity with some easy procedures. The frequency of maintenance will vary depending on the type of riding you do, what kind of bike you have, and what sort of conditions you ride in. A dirt bike that gets ridden hard in dirty or muddy conditions will need much more maintenance than a street bike that just gets ridden on sunny weekend days. A good rule of thumb is to at least start the riding season with a good maintenance overhaul. Start with the cables, and then go from there. A street bike may only need this work once a season, a dirt bike may need it every other ride, or maybe every ride!
These procedures also apply to new replacement cables. Most replacement cables are sold without any lubrication, it is critical for their proper function and long service life that cables are properly lubricated.
Remove the Cables
First thing you have to do is remove the cables from your bike. Always refer to the factory service manual for your model motorcycle for these procedures. Getting any part of the disassembly or assembly wrong could result in a stuck throttle or a non-functioning clutch, both of which are extremely dangerous.
You service manual will also have detailed specifications about cable adjustment and in some cases, proper cable slack, which is also critical to the proper and safe function of your motorcycle.
For all cables, the first thing to do is to clean up the housing, and inspect the cable for any wear. If the housing is worn to the coil winding, or one of the fittings is damaged or worn, this is a good time to think about some new cables. If they look good, the next step is to relubricate the inner wire.
Lubricating the Cable
Lubricating the wire inside the housing will make it slide more smoothly, and will also extend the life of the cable by reducing friction Motion Pro makes an excellent Cable Lube, and also a Cable Luber V3 to make this job as easy as possible.
Needless to say, lubing cables is extremely important and having the right tool makes the job less of a pain. Until now it was a messy job and lots of lubricant was wasted in the process. The Cable Luber V3 unique design seals all around the cable housing and the adjustable plunger ensures that lube is efficiently coating your cable inner wire.
That is the main job to be done with the cables removed, and if you want to short cut this process some, you can just remove the cables from the controls, and then lubricate them while they are still in place on the bike, but this will keep you from doing a thorough inspection of the cables.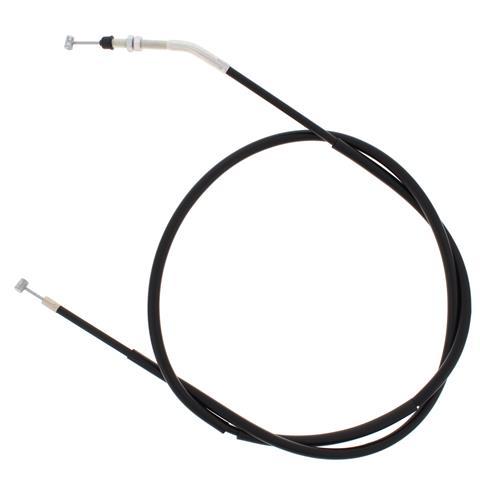
Re-install the cables
When reinstalling the cables, there are a couple of very important things to do. One of the most important is to properly clean and lubricate any pivot points, like the clutch cable barrel in the clutch lever on the handlebar, and the throttle cable barrels in the throttle tube. If these points are not clean and lubricated with high quality grease, they can bind, which will cause the cable to flex and prematurely wear and fail. Lubricating these points will also result in finer feel and control, making your interface with the bike more sensitive. While you are at it, remove the clutch lever, and regrease the pivot there also, so it is working at its smoothest. This also applies to the brake lever, so that it works as smoothly as possible.
When adjusting the cables, refer to your service manual for the proper free play adjustments, as a throttle cable that is too tight can cause engine revs to rise when the bars are turned, causing an unsafe condition. If a clutch cable is too tight, it can cause the clutch to slip, and if too loose, shifting can be difficult. A note on the adjusters on a cable: Don't over tighten the adjuster fitting. They are hollow, so that the wire can pass through, and only need about 8 ft-lbs of torque to properly secure them. Over tightening the adjusters can cause them to crack and fail.
On most bikes, all of these jobs should only add about a half an hour of work to your garage time. It's time well spent to make sure your bike is performing at it's best. It will also make your riding time safer and more enjoyable.
GET EQUIPPED!
SHOP LUBRICANTS
June 11, 2017
In order to properly lubricate the components and mechanisms of a bicycle, you need to understand how this can be done and what types of lubricants are available. And, of course, before starting this important process, the bike must be thoroughly washed and dried well.
The bottom bracket is the part of the bicycle where the pedals are attached.
Bearing axles - attachment points for bicycle wheels.
Lubricate the chain when shifting problems begin to appear and when it rattles or rustles. To lubricate it, you need to switch the speed to the largest sprockets (both front and rear). So the chain will be as tight as possible. Now it needs to be cleaned very carefully. You can use special brushes, but it's easier to take a piece of fabric, clamp it on any free part of the chain where you can grab it, and turn the pedal a little so that the chain makes at least one full turn (more is better).
Chain prepared for lubrication. A suitable lubricant is taken (for example, wax or simple machine oil) and one drop is applied to each link, without exception.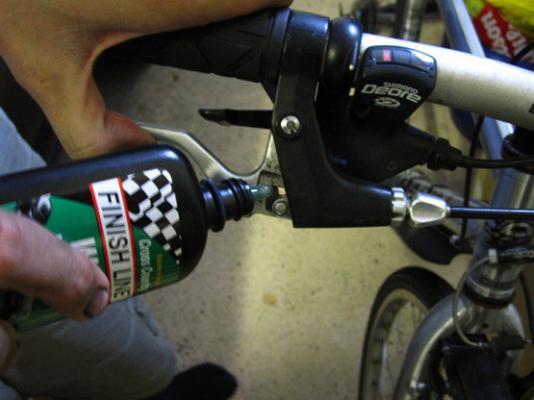 For convenience, the chain can be slowly scrolled. Once the lube is applied, spin the chain back (at idle) for about one minute, then shift to medium speed and make one full turn forward. At the very end, it is recommended to completely wipe the chain again, removing excess lubricant in the same way as during the initial cleaning. No need to worry that some of the grease will be removed, this is normal. Moreover, if this is not done, dust and small debris will quickly stick to the remnants of the lubricant.
In addition to the chain itself, you need to pay attention to the gears through which it passes, especially the rear derailleurs. They get dirty quickly. You can clean them with a simple screwdriver, literally digging out dirt and dried grease. The final stage is careful treatment with liquid lubricant.
Treat cables with oil. If they are hidden in the “shirt” (that is, the tube), you need to find the free end, carefully apply lubricant and press the handle on the steering wheel several times. If the cable is without a tube, then it can be lubricated along the entire length. For example, apply lubricant to a cloth and wipe the cable with it. This also applies to brake cables and shift cables.
If they are not lubricated, they will begin to stick, which may cause the brakes to not work or shift. At best, these elements will emit an annoying creak when working. For a better understanding of the lubrication process, you can watch the video:
A thicker grease, such as lithium, is used to process the bottom bracket and wheel bearings. First you have to remove the pedals and wheels. Then you need to clean the bearings and the inside of the carriage with kerosene. Only now can you start applying the lubricant. The easiest way to do this is with a regular cotton swab. It is very important that the layer is uniform.
An unlubricated bottom bracket will seriously hinder pedaling, and unlubricated bearings will prevent the wheels from turning at full speed. Moreover, this can lead to bearing failure, which can generally block the operation of the pedals or the rotation of the wheel. This is especially dangerous when driving at high speed.
The shifters also need to be lubricated, but this can only be done if they are removed and disassembled. Disassembly diagrams may vary depending on the type and model of switches used. It is better to look at the instructions for disassembly and dismantling on the manufacturer's website or in the documentation with which the switches were supplied.
Unlubricated switches stick, shift gears incorrectly, and react with delay. For clarity, it is recommended to study the video example:
Shock absorbers are not installed on all bicycles, but where they are, they must work properly. To do this, approximately every 200 km, you need to lubricate the “legs” of the fork (those steel elements that go inside the shock absorber when the bike is loaded).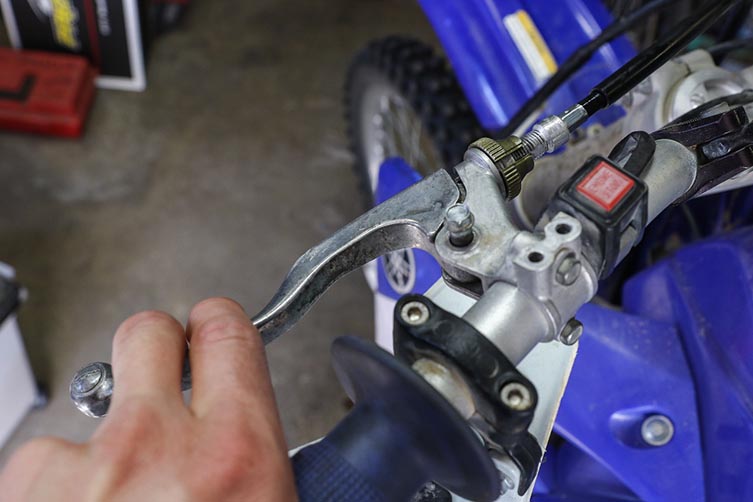 After another 700 km, you need to disassemble the shock absorber and lubricate its oil seals. In addition, it is recommended that the shock absorber be completely disassembled, cleaned and re-lubricated at least once a year or every 4000 km.
It should be remembered that not all elements of the bicycle need to be lubricated. Do not allow grease to get on the tires, this can lead to skidding. Grease should not get on the rim and even more so on the brake disc with pads. In these cases, the brakes may fail. The last point - the bicycle wheel chamber does not interact well with almost all lubricants, they can simply corrode it.
Let's summarize briefly: the individual components and mechanisms of your bike need regular lubrication, and with different compositions - chain, cables, bottom bracket and wheel bearings, derailleurs and shock absorbers. At the same time, there are parts whose contact with lubricant must be excluded (tires, rim, brake disc with pads and chamber).
Photo rollauto.ru
Many components and assemblies of a modern car need lubrication. It not only reduces the wear of rubbing parts and helps them move relative to each other, but also acts as a protection. Knowing this, many motorists are overly zealous and apply it wherever you can imagine. They even get to the throttle cables, handbrake and clutch. But is it really necessary to do this, the AvtoVzglyad portal figured out.
Efim Rozkin
To understand whether it is necessary to lubricate the clutch, gas and handbrake cables, it is necessary to understand the mechanism of the process due to which they begin to bite, and they cease to move easily in the sheath.
The root cause of the problem is a torn boot. Through cracks, dirt begins to enter the cable sheath, which the cable itself drags even deeper when it moves during operation with pedals or a handbrake.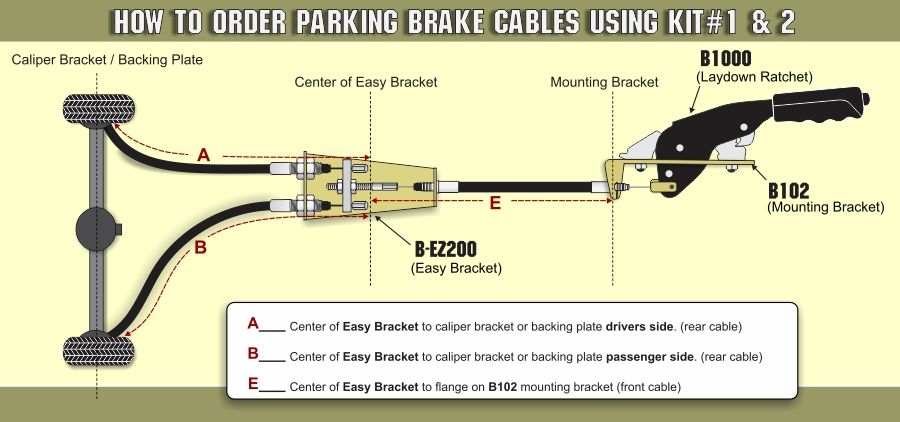 When there is a critical amount of dirt, it begins to prevent the cable from moving freely. And even the force of the return spring may not be enough. If nothing is done, then in the end the cable wedges.
Another cause of cable breakage may be cable damage. The steel wire from which the cable is woven frays, breaks and begins to cling to the braid, preventing the cable from moving freely. Also, weaving can lose its density. And in this place the cable will certainly thicken. There is some kind of hernia. As the cable runs, the problem only grows, and the end result is the same - the cable stops.
Photo avtovzglyad.ru
Mistakenly thinking that lubrication will help, some drivers came up with the idea of cajoling the cable, ignoring the torn boot, and, possibly, hidden problems. And the cable, indeed, for some time begins to work again. However, this is not for long. Dust and dirt begin to accumulate faster, forming an even denser layer, because the lubricant in this case acts as a link.
As a result, the unfortunate driver will still have to go to the store for a new cable. And it can be quite costly. And if the car is already elderly, then the necessary part may not be found. The price for a rarity can also reach decent amounts. What to do?
The "Skilled Hands" circle, as they say, to help. The cable will have to be reanimated on its own. First you need to remove it and pull it out of the braid. Then thoroughly rinse both the cable and the braid from the inside. You may even have to come up with some kind of microbrush, with which you can rub the inner walls. At the same time, the cable itself must be examined for thickening, hernias, and ruptures of the wires that make it up. If everything is in order, then you can proceed with the assembly. That's just the anthers will have to make their own.
100409
Photo avtovzglyad.ru
Such repairs must be approached with all responsibility. Because frank hack-work is fraught with new problems, which, believe me, will not be long in coming.