*DISCLAIMER: NO HOMEMADE MASK can provide the guaranteed protection of certified personal protective equipment (PPE)
Two layers of 100% cotton fabric
Pocket for inserting optional filter material
Features a single tie that rests on the back of neck for easy on/off
VIEW INSTRUCTIONS and PATTERNS:
Cotton Fabric Duckbill Mask with Optional Filter Insert
WATCH VIDEO INSTRUCTIONS:
Fabric Duckbill Face Mask.mp4
Hospitals and clinics use fabric-like synthetic materials (known as surgical fabric, surgical wrap, autoclave wrap, or sterilization wrap) to cover surgical instruments during sterilization.
This type of fabric is now being sewn into masks because it can block particles as small as some viruses.
These surgical materials are thicker than cotton fabric and are relatively stiff.
Sewn duckbill mask using surgical wrap
VIEW INSTRUCTIONS and PATTERN:
Surgical Wrap Duckbill Mask
"No sew" duckbill mask using surgical wrap
VIEW INSTRUCTIONS and PATTERN:
"Orikamo" - an origami-fold mask with 3D-printed plastic clips
VIEW FILES for 3D-printed components:
NIH 3D PRINT EXCHANGE
Many of the widely used homemade fabric mask patterns are based on:
1) pleated or “accordion-fold” style masks
2) styles with two smooth panels that join at the front
However, these designs have flaws with respect to FIT and BREATHABILITY
FAILURE TO SEAL ON ALL EDGES
Most fabric masks are NOT designed to make a complete seal around the face and mouth. Only respirators are designed to create an impenetrable barrier.
Pleated masks typically have gaps on the sides and under the chin. Masks made from smooth panels may eliminate gaps to a greater extent, but the fabric rests close to your mouth, which doesn’t allow for much air flow (see below).
LOW AIRFLOW & MOISTURE BUILD UP
When fabric is positioned close against your nose and mouth, there's little chance for the air and moisture in each breath to find it’s way out of the mask.
As a result, people feel the steamy discomfort of hot breath ... and moisture accumulation in the fabric can impede air flow even further.
On top of all that, people are adding filter materials to their fabric masks, creating an even bigger barrier for air exchange and water vapor release.
The DUCKBILL MASK:
CREATES A BETTER BARRIER by providing a secure fit like a respirator
good seal under the chin, as the chin straps pull the mask UP against your skin
tight fit on different face shapes
for optimal fit, gaps around the nose can be eliminated using adhesive weather stripping
INCREASES COMFORT by maximizing airflow and managing respiratory moisture
large interior surface area facilitates gas exchange and moisture dissipation
air flows throughout the mask interior instead of being blocked by fabric close to the mouth
comfortable breathing experience for hours on end -- with fabric alone or with a filter insert
With the world currently battling with pollution levels, volcanic eruptions, bush fires, smog and haze in cities, and now the Covid-19 virus, wearing a face mask will soon be the norm. Whether you want to use a face mask for a cold, while traveling outdoors, recovering from chemotherapy or other illnesses, work related reasons, allergies, cleaning, fashion statement or simply hiding from people you don’t like to talk to, I have tried my best to cover the many styles of designs available on the market.
Over the next few days I will be releasing a few face mask patterns for you to download to use for free. You will be able to make your very own washable, re-usable face masks. Great for gifts or just to make some money on the side. I have drafted these patterns with the help of designs I have seen out and about whilst shopping for face masks. I wasn’t happy with the fit or the design, so I have decided to make my own designs with improvements.
At present I am living in a city that is facing a shortage of face masks. There are people that cannot get hold of any. Some people resort to reusing masks that are meant to be used only once. While others try and make do with what they could find around the house, or simply people just can’t afford the prices shops are asking for.
People are getting desperate!
Duckbill Style Face Mask
This Duckbill Style face mask is a lot more street, modern and stylish compared to the surgical style designs available. The mask was designed to allow the top edge and the bottom edge to naturally wrap the face without having to insert a nose bar. The shape does not allow the mask to ride upwards to obstruct your sight. The sides are slightly longer than most masks on the market for more coverage around the face. The front of the mask has a little space so it does not sit next to your lips and will not obstruct your speech.
The patterns will be quite simple to sew together, but you might need help understanding the pattern if you have never made one before. I have tried to keep it quite basic without compromising on the design. A lot of tutorials out there covering the making of the masks are not intuitive enough or does not tell you how to properly cut out a piece of fabric.
Size & Design
My face masks will come in a minimal of 3 sizes. Some will have more depending on the style. I will be releasing at least 5 different styles to suit different people’s tastes and preferences. Some people will find certain designs fit their faces better than others. Since some people are finding it hard to buy face masks in the city. I have also designed a face mask cover with the intent of using a surgical mask on the inside for proper filtration and to prolong its use.
When printing (ideally on A4 International Paper) all patterns should be printed 100% scale with No Scale to Fit Page/Media. The envelope should be printed Landscape and fit Page/Media to not waste space on the paper.
All Sizes (No Seam Allowance) Small Medium LargeHere is a little gift for you to keep your patterns together and organised. Lookout for the other designs.
All you need to do is cut it out and dab a bit of glue to the sides, wait for it to dry and you are good to go.
The envelope should be printed Landscape and Fit Page/Media to not waste space on the paper.
I am not able to make the envelope into a PDF file because it will be too large and will cause my website to crash. This is because my web hosting company cannot handle the downloading traffic. Last time it caused my site to be down for 3 days! For now, it will be a JPEG file.
NEW Due to popular request, I have created an Extra Large pattern for those that have big face family members and friends! Sorry it has taken a bit of time. I don’t have any big guys here to model it onto.
Click on the image to download.
You might want to check out my other face mask blogs. They too have downloadable patterns for you to use. Remember to download the corresponding envelopes so you can keep your patterns together and organised. Follow me on Facebook or Instagram for updates.
Disclaimer/Please take note: My face masks do not replace medical/surgical face masks. These are also not designed to be used on babies or toddlers. Supervision is a must on small children.
These are face masks with basic filtration. It is good for dust particles and maybe blocking out some odours. Most of my masks requires only 2 layers of fabric, but you may consider making a 3 layer one by using water repellent/waterproof fabrics on the outer layer, a filtration layer in the middle, then an absorbent material next to your skin.
In some of my tutorials, I use the patterned fabric on the outside for obvious reasons, waterproof on the inside, then a breathable and absorbent fabric next to the skin. Please do your own mask research if you are planning to make and wear a mask for protection against particles smaller than dust, such as a mask to protect you from airborne viruses.
If you are in a country currently facing the Covid-19 virus, frequent cleaning of your hands with soap and water, not touching the face, not shaking hands with people, and basic hygiene is advisable. Masks can only help to a certain degree.
Recommended Fabrics:
Outer fabrics:
Double gauze
Cotton
Gore-Tex is probably the best. Water repellent/waterproof fabric, and allows you to breathe. Can be quite pricey.
Some Tafettas (Micro-Fibre) are water repellent/water proof, but also breathable.
Be careful when purchasing 100% waterproof fabric for making bags. They are great but you will sweat and can’t breathe!
Inner and absorbent fabrics:
Cotton
Jersey (Be careful it will stretch)
Double gauze
Flannel
You could use a lining fabric next to the skin. It is down to personal preference.
If you are living in Hong Kong and want to get your hands on some fabric and elastic supplies, I will put links to where I bought my supplies from. Click on the link to download the Map of Sham Shui Po 2020, where I will show you locations of shops. For the elastic, I bought these from my local stationery shop, but most stationery shops in Hong Kong will stock this in their craft section. Otherwise, just pop into the elastic shops/manufacturers located on my map.
Elastic locations: Red dots 1-7. Especially Wing Fung Industries opposite the temple. Red dot 17 is another elastic manufacturer. Blue dots 1, 4, 10. Green dot 4. Middle of Ki Lung Street opposite Pink dot 7. You might be interested in my Sourcing for Elastic in Hong Kong post for other types of elastics. Along the section of the road, Red dots 1-7, are shops selling mask making supplies. Please note: Waterproof fabrics do not allow you to breathe. You could be harbouring bacteria. I do not recommend such kits.
Fabrics
Most of the outer fabrics I have chosen to use are 100% cotton or 100% organic cotton. It is very sustainable, affordable, breathable, easy to sew, and comes in many colours and designs.
I bought my recent fabric stash from Modes4u.com. They also have a sister company called Kawaiifabric.com. If you aren’t sure about the fabric choice and don’t want to splash out too much on one style of fabric, Modes4u. com sell their fabrics in 1/2 metres. Recently I discovered they sell a lot of their fabrics in fat quarter sizes. Great for small projects like these. They ship internationally and they are pretty fast. Click the Modes4U banner on the right hand side bar.
Tools you will need:
Sewing Machine, Fabric, Scissors, Pattern Printout, Sewing Thread, Elastic, Ruler, Chalk/Pencil, Pins, Iron, Ironing Board, Card (Not essential), Hair Grip/Bobby Pin.
Light Weight Interfacing: If your fabric is a bit too light and you want to give it a little body/structure, I would suggest backing it with some light weight interfacing. If you have to use medium weight interfacing, then I will be guessing you are using very light weight fabric. The fabric may not be suitable for making face masks, so you might want to reconsider your choice. This is not an essential item, but it will help.
Make sure you pre-wash your fabric and interfacing before you cut and sew the mask.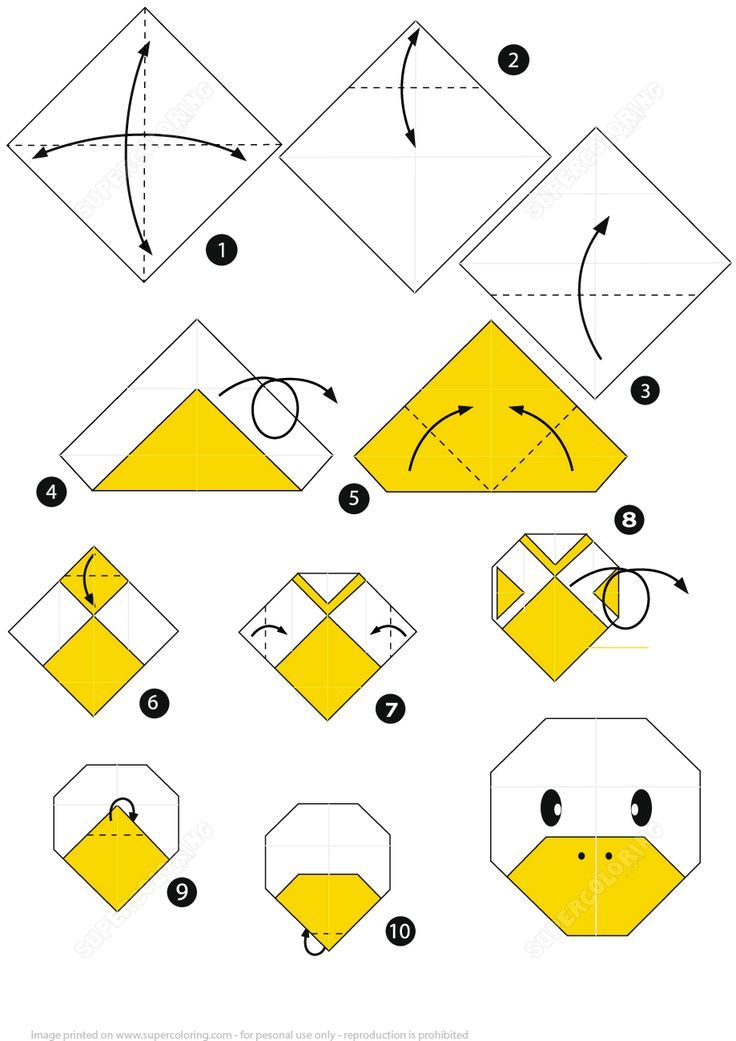 This will allow for any shrinkage. Remember this is a washable and re-useable face mask. The last thing you want to happen is it shrinks after the first use. Putting the fabrics into a netted wash bag will help stop any loose threads from making a mess in the washing machine.
You are watching the cut down version of the Duckbill Style Face Mask Tutorial. It has extra scenes cut out for those that want to skip to the making of the mask. If you have pattern cutting and sewing skills, then this is the tutorial for you. I will explain the most important part, then we move swiftly onto cutting and construction.
If you require a bit more than just a tutorial on making, please watch the extended version where I will be explaining and talk through pattern placement and construction. There will be extra scenes, tips and advice.
As promised, here is how to draft the pattern for the Duckbill Style Face Mask from scratch. It won’t be exact as the PDF pattern, but it will be close. You just need to refine it. I hope this will help you if you don’t have access to a printer or ran out of ink!
Next pattern is out already!
Remember to share. Sharing is caring!
Shan x
You are welcome to download and use my patterns to make items for friends, family, neighbours, or even to sell. I only ask of you to help me share or credit me and state where you got the patterns from.
Heading: Art projects
Adult washcloth
Rubber band
1/4" by 9" piece of satin ribbon
Hot glue
Hot glue gun
Two small eyes
Orange felt
Use a washcloth to make boo boo duck for your next baby shower.
When looking for a baby shower gift, homemade gifts offer options that deviate from traditional gifts. Washcloth ducks are attractive and functional. The duck's body allows you to place a real or plastic ice cube in it, allowing you to soothe the boo-boo without freezing your fingers on the ice. Boo-boo animals are sold in specialized boutiques. However, it is cheaper to make a shower gift and it will take a little time to create it.
Place an adult-sized washcloth on the work surface. Choose any color or pattern of washcloth.
Roll the bottom left corner to the top right corner to make a long rolled tube.
Fold the tubing in half with the bent end down and the free ends up. The folded end becomes the body of the duck.
Fold up the loose ends to form a rough "M". Fold it so that the loose ends are halfway down the body of the duck.
Wrap the rubber band around the "M" washcloth one third from the top. Make the rubber band as tight as possible. The rag over the rubber band becomes the head. The two free ends of the rag are duck wings.
Cut a 1/4" x 9" piece of satin ribbon. Wrap the ribbon around the elastic and tie it into a bow. Apply some hot glue to the back of the bow and press it against the washcloth to secure it in place.
Apply hot glue between the folds of the washcloth on the front and back of the head. Press the folds inward to create a smooth surface.
Apply hot glue to the back of the two small eyes. Press your eyes to the duck's head.
Cut out two 1/2" x 1/2" bills from a piece of orange felt. Apply hot glue to the back of the banknote pieces and press them against the duck's head under the eyes. Arrange them so that they form a V-shape with the center "V" point facing the duck's snout.
Cut two 1/2" by 1/2" webbed feet from the orange felt.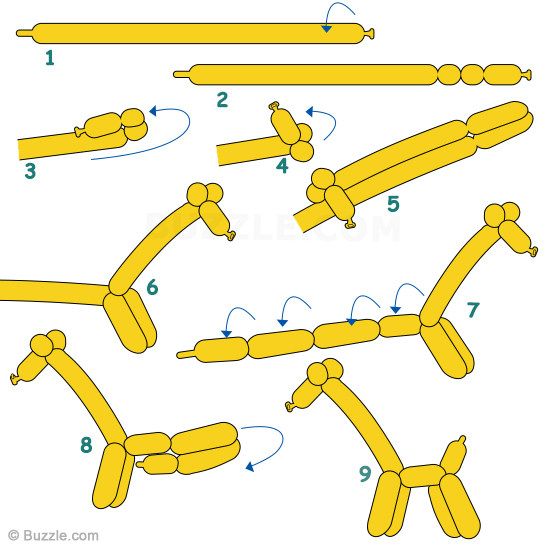 Attach the legs to the bottom of the duck while still using hot glue.
To use for boo-bo, place an ice cube in the center of the duck's body.
0
Did you like the article? Share with friends:
Many nations have long had a legend about a fiat coin or banknote that brings good luck and wealth. Many consider it a fiction, so few people know that such a talisman really exists and you can even create it yourself. Today you will learn how to find your personal fiat bill, how to activate it and, having settled it in your wallet, increase your income and start making good money.
Tags:
household magic
magic numbers
how to save money
magic
Fashion
Shutterstock
Tamara Khanum
clairvoyant
A banknote can be of any denomination, but the larger it is, the more powerful the talisman will be. Moreover, the financial value of money will be the first test for greed: a fiat bill got its name because it cannot be spent, the power of the amulet is accumulated in the wallet where it “lives”. And it is important to compare ambitions with the protests of the inner toad: if you want a really cool amulet, take the maximum denomination banknote that you can afford. The optimal color for creating a talisman is considered to be red, gold or orange, although the currency itself is also important: the growth will go like on the stock exchange - money will only come in the category that you specify as an asset. Simply put, you make a talisman out of euros, euros will stick, dollars out of dollars, and so on. Before you decide on a ceremony, think about what currency is close to you in spirit. The banknote should be beautiful, if possible new and clean.
When you solve the first problem, move on to the second.
There are only three search options and you can choose any one you like.
The first way is to calculate the banknote digital code based on your date of birth. To do this, take a pen and write on paper the time, date and full date when you were born. For example, it was 09/12/1972 at 16:27. These numbers are your lucky ones. If we consider Russian rubles for the ceremony, look for banknotes in the number of which there will be numbers 0,1,2,6,7 or 9(we first have a series of two capital letters, and then a seven-digit banknote number on each banknote). In an ordinary talisman, numbers can go in any order, for an enhanced one you will need a direct sequence, but it happens very rarely, so a combination of seven numbers will be enough. For example, it could be the series 1209197, 1291972, 1291527 or something similar.
ADVERTISING - CONTINUED BELOW
The second option for calculating lucky banknotes goes through calculating a personal number of luck and searching for a series of banknotes with this number. For this calculation, take the date, month and year of your birth and add up the numbers until one remains. Take the previous example and translate it into yourself: if the date of birth is 12.09.1972, so the calculation goes 1+2+0+9+1+9+7+2=31/3+1=4. The lucky number will be 4 and you need to look for series on banknotes that start with it or contain this number.
The third option is a little easier or, on the contrary, more difficult. Do the calculations in advance, as we said, and then look for your banknote: in the series, substitute the initials (the first letters of the first and last name), and in the number, a personal number of luck or a sequence of your lucky numbers. If we add to this the denomination of the banknote and the color of the banknote, we will have to reconsider quite a lot of money, but if everything works out, the result will exceed even the wildest expectations.
When a suitable bill is found, you will have to prepare for the ritual and charge the talisman. If you are not sure of your abilities or doubt that you have enough strength or time to carry out the ceremony from beginning to end, think about it in advance and seek help from the appropriate specialist. Of course, there is nothing better than the direct contact of the creator with his creation, but it’s better not to start something that you are not ready to finish than you will later restore strength after failure.
So, you have the treasured banknote and time to activate the talisman. To create a fiat bill, wait until the night before the full moon and put the money in a beautiful red envelope under your pillow, and then go to bed. Before going to bed, dream about how the bill grows and multiplies in your wallet, filling it with your fellows. Imagine in colors what material things you are ready to buy with this money, think over the details and feel joy, as if desires are already being fulfilled. At this moment, it is important to dream about material things and only for your beloved. No matter how unpleasant it may sound, but for a while forget about helping your neighbors, repaying debts and accumulating capital in offshore accounts. Money energy is alive, and it needs a place, it is a flow that fills a vessel, but not an end in itself. Money should not only come, but also work, and not just lie idle. And to help not someone, but you, but if you think about how you will distribute all the wealth to others or donate it, there will be no sense, and you will be left with nothing.
In the morning, take the envelope out from under your pillow, but don't take out the banknote. She should lie until night in a dark place without access to light. During the day, take a white sheet of paper and a red pen, write on it everything that you dreamed about before going to bed the previous night, and carefully edit the list. Each item should be an expensive material value only for you alone. Think of anything - and the more expensive, the better, but not the money itself. For example, a private jet, a luxury car, a suitcase of diamonds are allowed, but money for a sister to study or medicine for her mother is not allowed.