All-terrain vehicles improve access to the backcountry. ATVs and side-by-sides excel at carrying people, but their restricted cargo room limits the gear we can haul in, and the meat we can pack out. To better suit my outdoor adventures and projects around my homestead, I needed more space to haul the necessary gear. It was time to build a utility trailer!
Advertisement
In the spirit of any good DIY project, salvaged materials kept my costs down. I used as much repurposed metal as possible to create my ATV trailer. When using old metal, good prep improves weld quality, so I brushed or ground off rust and old paint.
Advertisement
I rate this project as intermediate both for its required skill level and time to complete. To tackle this project, you’ll need access to a welder and a compliment of workshop tools. I chose wood planks for the decking, so a method to cut wood to length helps too. I’m not a welder by training, so there was a steep learning curve.
Nevertheless, using a MIG welder and attention to detail, I achieved ‘professional’ results.
The hardest part of the project was coming up with a design. Plan considerations included trailer purpose, bed size, ground clearance, tires, hitch, load capacity and overall trailer weight. Some of decisions were easy, based on locally available materials – type of hitch, for example. Others crystalized after much deliberation. With my trailer specs and materials in hand, it was time to start cutting.
Advertisement
I cut the metal parts with a chop saw, a bandsaw and a special thin cutting blade on an angle grinder – any of the three will work well. The three-foot by five-foot frame was built using one-and-a-half-inch square tubing, which is strong and makes a superb platform on which to mount everything else. Simple butt joints to make neat square corners simplified welding for a beginner. Using two-inch square tubing for extra strength, I welded the tongue at 26 inches, allowing ample clearance between the ATV and trailer, even during tight turns.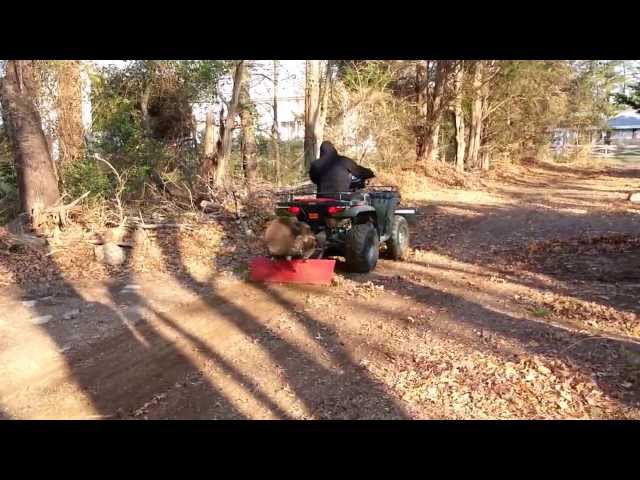 For frame strength and a place to secure the decking, I welded angle iron side to side across the trailer in strategic locations.
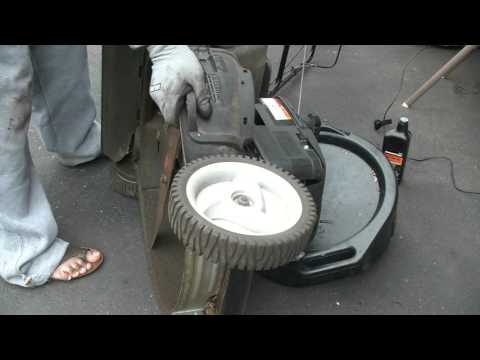
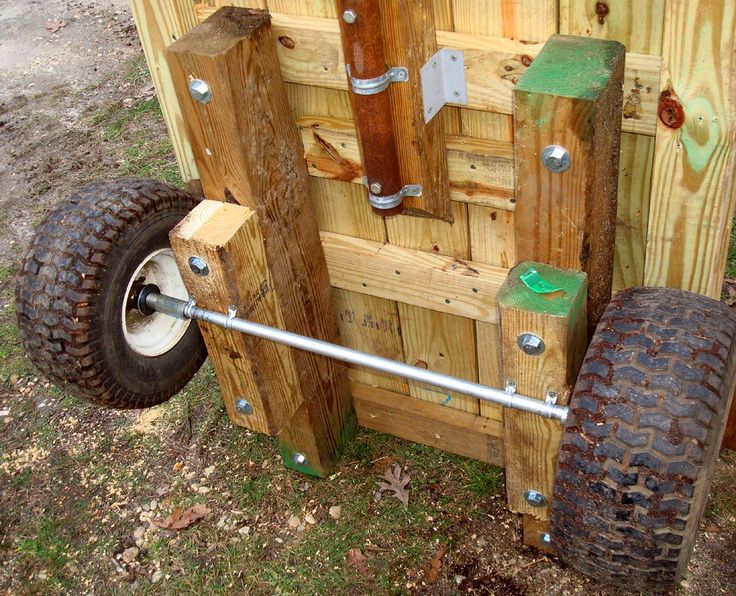
The wheel assembly is the most complicated part of this project. An online search returns several suitable ideas, from a simple straight axle with no suspension, to more complex walking axle designs. For me, design considerations included the type of tire. I opted for a standard 14-inch trailer tire and reduced the fabrication process by purchasing a pair of bolt-on equalizer torsion axles for a five-bolt rim. Swapping tire hubs to a four-bolt ATV style will accommodate off-road ATV-style floatation tires. I fabricated the axle supports using angle iron. Using the wheel assembly as a template, I marked and drilled holes to accommodate the bolts.
I used a wire wheel on an angle grinder to clean and rough up the metal surface of the trailer prior to painting. For paint, a rattle-can of spray paint for metal did the trick. To prevent slipping when wet, I plan to add a rubberized rocker guard paint on the tongue.
With the trailer still upside down, I bolted the axle assemblies to the frame and installed the tires. My wife and I easily lifted the trailer off the sawhorses and rotated it to sit on the ground right-side up. It wasn’t too heavy, yet!
Next was cutting the trailer decking – I used spruce 2x6s and 2x8s – securing them to the trailer using self-tapping metal screws into the angle iron supports. For longer life, I’ll paint the deck with a water seal. Treated lumber works well too, I just didn’t have any on hand at the time.
After the trailer frame and deck was built, it was time to focus on the sides. For now, I just needed a cart to haul logs and game out of the field, so I added arms that flare out from the trailer for more capacity. An alternative is quick-detach brackets and modular sides to slide in, to suit your adventure.
The last step was installing a trailer coupler. I used a standard part-store aluminum ball-hitch coupler, simply bolting the basic coupler through the tongue. I admit, I do admire the swivel hitch designs for safety considerations in rough terrain – if you misjudge your centre of gravity, your cart can tip without flipping the ATV on its side as well.
I had a great deal of fun researching and building this project. I learned new skills and created something that makes me proud to look at and use. Plus, I now have a custom trailer that is more solid and heavy-duty than most commercially made items of this size. If I wished to get it inspected and licenced, I could use it on the road behind my truck as well.
Have fun choosing your options and building your own utility trailer!
Step 1, plans and parts: I decided on the size, shape and parts specification for the trailer I wanted to build. I scrounged used metal where I could and purchased the parts and materials I needed.
Step 2, layout: Metal parts measured and marked in preparation for cutting.
Step 3, cutting: I used a chop saw to cut most of the metal parts to length.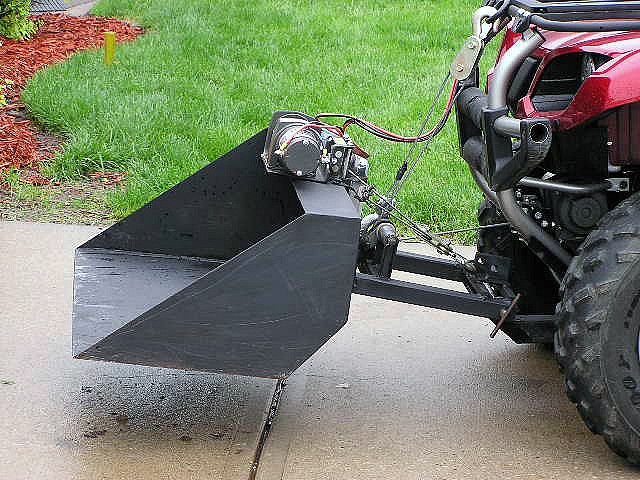 A metal cutting bandsaw is another method for cutting metal parts.
Step 4, metal preparation: Good metal preparation is crucial to good welds, especially when using recycled metal. Here, a wire brush on an angle grinder removes old paint and rust.
Step 5, welding: Magnetic clamps hold the workpiece while welding, keeping everything square. For the perfect fit, the axle assemblies were used as a spacer while the supports were tack-welded into place.
Step 6, painting: After welding the frame, the steel was painted before assembling.
Step 7A, assembly: The axel assemblies were bolted onto the frame supports, followed by tire installation.
Step 7B, assembly: The hitch coupler was bolted to the tongue to facilitate future upgrades or replacement.
Step 8, final details: Install side arms and pre-cut decking.
The final product, showing clearance, axel assembly and tires.
Utility trailers are handy for a variety of applications, from hauling your tools to the job, or your gear to the gig. Whether you're planning on building a trailer for your business, or just need one occasionally for the family camping trips, this article will give you the basic information to start building your own!
Determine the type of trailer you'll needA utility trailer should be customized to your specifications. You will need to decide on the length, the weight capacity, and whether or not it will be enclosed.
For example:
 You would also want to make it long enough to hold lumber and sheeting.
The vehicle that you will use to pull the utility trailer will also help determine the dimensions. For example, a utility trailer to haul groceries behind a bicycle will necessarily be much smaller than a utility trailer built to haul a table saw.
Decide the method of constructionIn order to build your own utility trailer, you can start from scratch or you can choose to assemble a kit. Either way, getting the right tools and materials are essential.
Search online websites for utility trailer kit plans or visit a home improvement store for ideas.
Confirm your level of abilityIn the planning stages, it's important to know your level of mechanical expertise and construction capabilities. Building a utility trailer from scratch will require
Following a utility trailer plan will help you gather the right components. Once you have located a source for the materials, check with the customer service representative to arrange delivery. If you are a skilled welder and have the equipment you'll need, follow the manufacturer's recommended safety and procedural instructions.
Most designs consist of a bed, a hitch, a "tongue" (the wedge shape that extends from the front), an axle with wheels, taillights, and a license plate frame.
Many of the components for utility trailers (tongue, hitch, axle, jack, and taillights) can be purchased fully assembled, making it easier to contruct.
Construct the trailer frameImage courtesy of Mechanical Elements
The frame will consist of 4 steel angle-iron rods, 2 for the sides, and 2 for the front and back.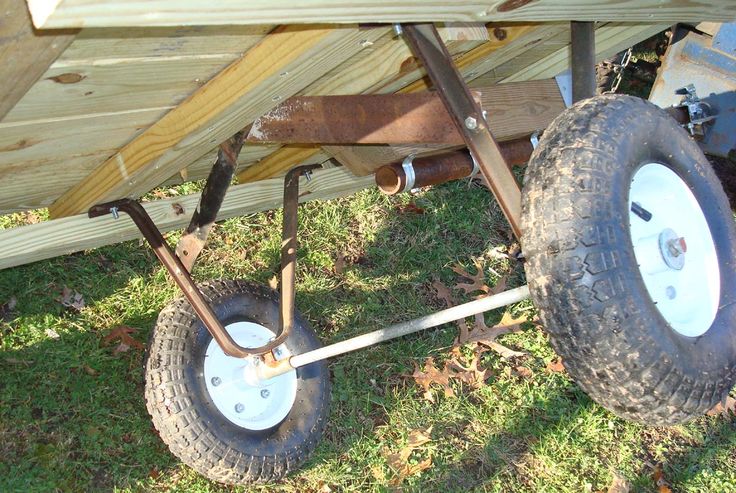 Depending on the length of the trailer, the sides will likely be longer than the front and back.
Use a hydraulic jack to raise the frame off the floor. Block all 4 corners to keep it elevated. Weld the axle under the framing. On a rectangular frame, the axle should be attached using a 60/40 ratio: 60 percent of the frame in front of the axle and 40 percent behind the axle.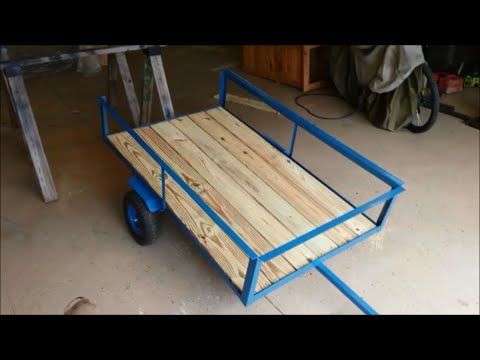
A trailer can be built with or without springs. Using a square-tube axle makes it easier to weld the axle directly to the frame. But an axle without springs produces a harsher ride.
Springs can be added to provide a softer ride for your cargo, but the center line of the axle should still remain in the same location specified in the above paragraph (60/40 ratio).
Install the spring mounts to ensure that the axle is positioned in its proper location. The fixed end of the spring should be toward the front of the trailer, and the part that is allowed to move should be toward the rear of the trailer.
Using the lug bolts and nuts included with the axle kit, install the predetermined sized tires on the axle.
There is an alternative trailer suspension that will not only soften the ride of your trailer, but give you better control – all without an axle! It’s called the Timbren Axle-Less suspension.
If you wish to retrofit 1 or 2 existing axles, the Timbren Silent Ride suspension offers you a softer ride, and – if it’s a tandem setup - provides you with a suspension that is fully equalized.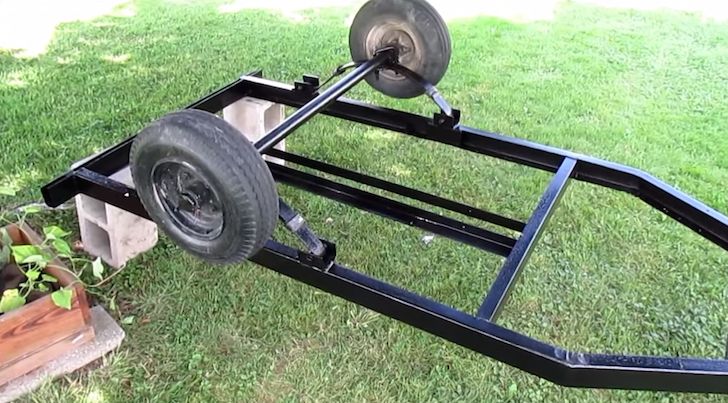
After welding the hitch to the tongue, weld the entire assembly to the front of the frame, making sure it’s centered on the frame.
Attach the jack behind the hitch on the tongue. Route the electrical wires from the front to the rear for the taillights. Make sure the taillight connector is in front.
The taillight assembly will consist of a combination of park, brake, and signal lights. The wiring harness should be secured under the trailer and the lights attached to rear with bolts on either side.
For more info about Timbren’s Axle-Less suspension, watch the video below which explains how to install it.
To buy an ATV for a child or an adult means to get a device that is distinguished by a high degree of reliability, excellent cross-country ability, and also unpretentiousness to operating conditions.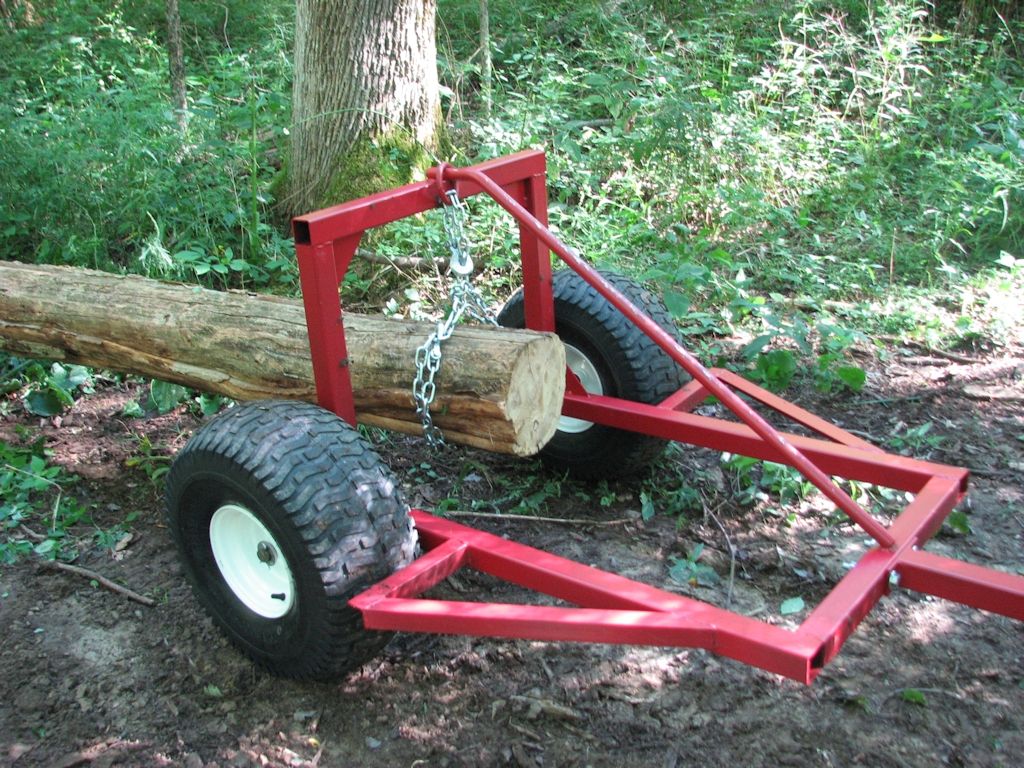 A trailer will help to significantly expand the functionality of this type of motorized equipment, which can either be purchased at a specialized store or made by hand. Many models of ATVs are capable of transporting even loads weighing a ton, and therefore a homemade trailer will be extremely useful in the household.
An ATV trailer is an auxiliary vehicle that is not equipped with an engine, and therefore can only be moved together with a motorbike. To connect motorcycles to a trailer, special fastening devices are used, for example, a hook-and-loop.
Please note that there are significant differences in driving an ATV with and without a trailer, namely:
When it comes to trailer maintenance, special attention must be paid to the coupling point. It is this that is subject to the most wear and tear.
The desire to build a home-made trailer for an ATV usually arises from a motorist for the following reasons:
On the net you can find ready-made diagrams, drawings and manuals on how to make a trailer for an ATV with your own hands. Therefore, you have the right to choose absolutely any option in accordance with your own preferences and budget. Do not forget to take all the necessary measurements from the ATV, if they are not indicated in the motorbike passport.
The assembly of such a transport structure consists of the following steps:
In order for the trailer to be easy to use and not greatly reduce the maneuverability of the vehicle, their dimensions must match. Before starting work, thoroughly consider the design of the structure. At the final stage of creating an ATV trailer with your own hands, be sure to cover the surface of the product with an anti-corrosion coating, due to this it will be possible to significantly extend its service life.
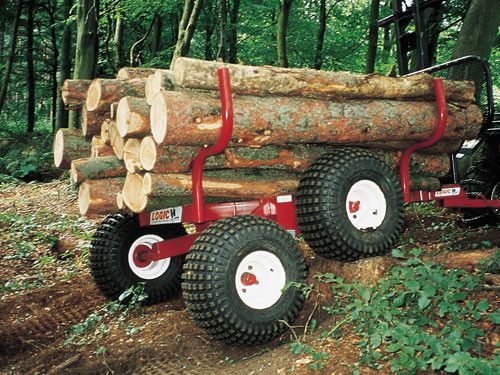
Trailer wheels can be chosen by the owner at his own discretion, unless it is necessary to make sure that they fit the type of axle being used.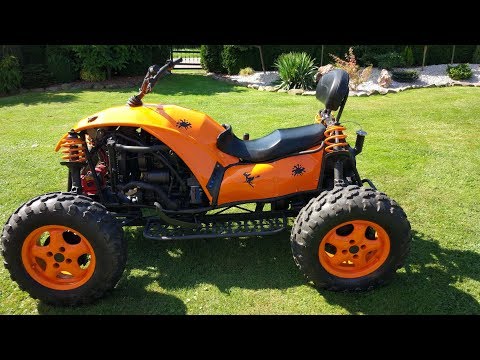 Often, heavy automobile wheels with a small surface diameter are used for this purpose. Otherwise, the trailer will turn out to be too bulky.
In the process of making your own ATV trailer, you will also need the following tools:
When assembling and manufacturing the components of the future trailer, give preference to high-quality and durable consumables. If desired, you can build both a small trailer for a children's ATV, and for full-size models.
In order to attach a purchased or home-made trailer to motorcycles, you will need to use a special auxiliary device called a hitch.
Installation of the towbar on the ATV is carried out in the following order:
After carrying out this simple manipulation, you can install almost any trailer on an ATV. Thus, buying an ATV will give you not only a lot of new experiences, but also the ability to transport various goods, thereby expanding the functionality of motorcycles.
05/29/2021 2130
Construction parts are available from a specialized automotive or other parts store. It is better to buy consumables separately, rather than using old spare parts from a trailer or walk-behind tractor that was previously used on the farm. In the photo above, you can see drawings of an ATV trailer and present a functional assembly diagram of the structure.
Do-it-yourself ATV trailer production at home begins with the axle - the main part in the trailer. It is purchased in a service where parts are sold in two variations: assembled or collapsible. It is better to take a model with suspension and maintenance-free hubs of the most common "classic" wheels. They differ in width up to 170 cm. In the case of constructing a trailer for an ATV with your own hands, you will need only 120 cm of the axle, so you will have to file the part. But this is not a problem compared to the need to dismember the trailer from the car in order to narrow it down.
So, armed with a grinder, you managed to saw the axle. Technically, it is necessary to remove a small piece from the middle part of the part so that when the two parts of the axle are joined and the wheels are mounted, the total length is no more than 120 cm.
Leaving the first stage behind, proceed to docking the axle halves. A pipe with a diameter slightly larger than the axis itself is selected so that the ends of the part are placed inside with almost zero clearance. Having installed all the details in their places, the pipe, together with the halves inserted inside it and fixed, is boiled in a circle, ensuring a secure fastening. The first stage of designing an axle for an ATV trailer with our own hands has been successfully completed.
Next, proceed to the manufacture of the drawbar. If you don't know what it is, we'll explain. The drawbar is what pulls the trailer. Steel rectangular profiles can be used as a material for production. The size of this structural element is determined taking into account the expected load on the ATV trailer.
Select the length by calculating the length of the load: the longer the load, the longer the drawbar. Although, as a rule, this is an arbitrary indicator. The center of gravity is on the axle. The fastening is reinforced by welding small plates of arbitrary shape.
The dimensions of the ATV trailer are arbitrary. Now we have to decide on the length of the site of the future homemade trailer. Since the owner constructs everything with his own hands, he can afford to choose the size himself, based on his needs. But do not forget that the trailer must be convenient for transportation and approximately the size of an ATV, otherwise it will not be maneuverable.
In pursuit of convenience and speed of docking, take a tow ball and a self-locking hitch ball. The ball is welded at the back, attaching it to the beam. The other part is bolted to the drawbar. If necessary, shorten the length of the bolts.
The frame must be suitable for the purpose of the trailer. Steel profiles are cut to the required length and welded. For sheathing use metal or thick plywood. Fastening to the frame is done with countersunk bolts or rivets. The surface is coated with an anti-corrosion compound in order to extend the life of the trailer.