Tubeless tire setups are becoming increasingly popular among mountain bike, gravel, and even road cyclists, and for good reason: a tire that seals its own punctures is pretty convenient. So if you’re going to run tubeless tires, you’ll definitely need the key ingredient that makes that magic happen—that is, tubeless tire sealant.
We spoke with Drew Esherick, team mechanic for Pivot Maxxis p/b Stan’s NoTubes cyclocross team, to get expert advice on how to use tubeless tire sealant and more.
(Haven’t jumped on the tubeless train yet? Here’s everything you need to know about tubeless tires to decide if they’re right for you.)
Tubeless tire sealant is the liquid that goes inside tubeless tires and automatically plugs punctures as they happen. Most sealant is made from a natural latex base that dries inside a puncture when it’s exposed to air. There are particulates suspended in the latex—different brands use different materials—which is what gives the latex something to stick to in order to clog the hole instead of seeping out.
→ No matter what you need to improve in your riding life, find it with Bicycling All Access!
Race sealant is a version that has more and larger particulates floating in the latex than regular sealant, allowing it to coagulate much faster and fix larger punctures more quickly. But it also requires replacing a lot more frequently, so it’s best for riders who race regularly.
Trevor Raab
It depends on whether you’re setting up your tires for the first time or just topping them off.
“The imperfections in a new tire are going to soak up some of the sealant,” says Esherick. So when you’re doing an initial setup, you use about double the sealant you would when you’re just topping it off.
For a brand-new gravel or mountain bike tire, use about four or five ounces, and use two ounces for a road tire. These are approximate measurements, so don’t worry about getting it exactly right. “There’s no such thing as too much,” says Esherick. But it’s very common to use too little then wonder why your sealant “doesn’t work,” so be generous with it.
$34 at Competitive Cyclist
Credit: Stan's No Tubes$10 at Competitive Cyclist
Now 15% Off
$34 at Amazon
Credit: Muc-Off$30 at Amazon
The least messy way to get sealant into your tires is through the valve stem.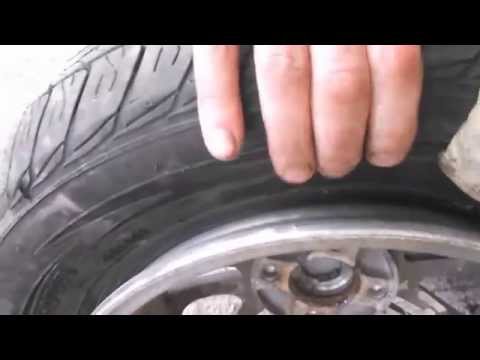 To do this, you’ll need a valve-core remover to remove the valve core and a sealant injector to measure it out of the container and squirt it though the valve, or a pre-measured bottle with an injector tip. If you don’t have either of these, you can separate a section of your tire from the rim and just pour it in.
Trevor Raab
Trevor Raab
If you’re pouring it in through an opening in the tire, Esherick suggests pouring the sealant in with the opening at the bottom of the tire, and then turning the wheel slowly to let the sealant run down inside the part of the tire that’s fully installed. This will allow you to finish installing that last bit of bead without making a mess. If you’re using race sealant, the larger coagulative particles are too big to fit through the valve without clogging it, so you’ll always pour it into the tire this way.
After adding the sealant, replace the valve core and inflate the tire to its specified pressure quickly to get the bead to settle in place on the rim.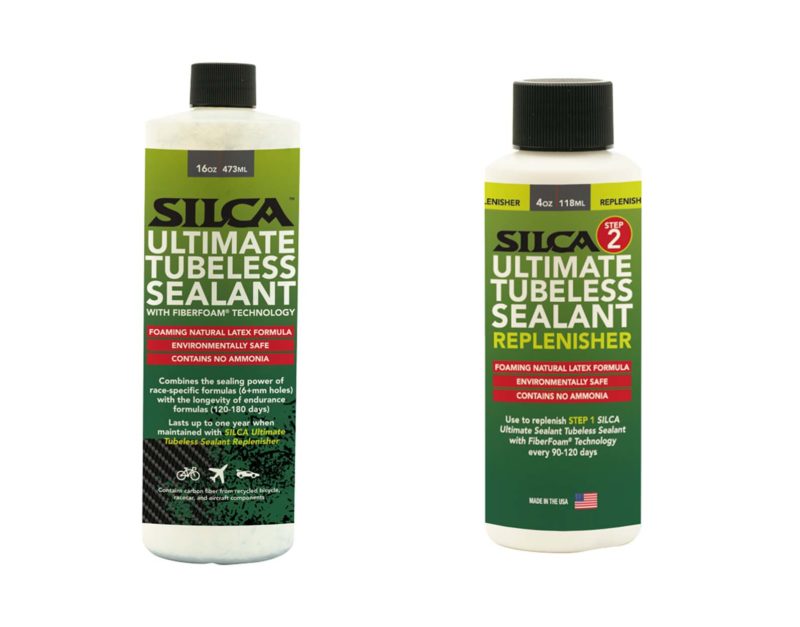 (Do not over-inflate; that can lead to explosions!)
If your sealant is leaking out of a larger puncture rather than filling it, you can plug it by hand using a tubeless tire plug. These are little rubber strips you poke directly into the hole with a needle. The rubber will get stuck in the tire and react with the chemicals in the sealant and expand to plug the hole. And yes, you can put a bunch in your tire if you have multiple holes.
If a puncture doesn’t seal you can use a plug kit to help seal the hole.
Trevor RaabIf you get a gash in your tire that’s too big for the sealant to handle or even to plug by hand, you can remove the tubeless valve and install a regular inner tube on the rim to get home. Another thing to keep in mind is that sometimes sealant takes a bit of time to fix larger holes: You might need to pull off the trail and let it pool around the puncture for a minute or two so it can do it’s thing.
“If your tire gets a puncture that just won’t seal, it’s possible you are riding with too much pressure,” Esherick says. “And if you’re doing that, you’re not getting the benefit of tubeless tires, which is to run a lower pressure that’s more comfortable and has better traction.”
$155 at Trek Bikes
Now 15% Off
$58 at Amazon
Keep It Clean
$10 at notubes.com
Precisely measure sealant and install with no mess.
Mid-Ride Repair
$60 at dynaplug.com
Brass-tipped plugs make fixing bigger punctures easy.
“Bicycle tires are really thin and porous, which makes sealant evaporate over time and dry out,” Esherick says. That’s why it’s necessary to top off your sealant about every two to three months, even if you haven’t gotten a lot of punctures.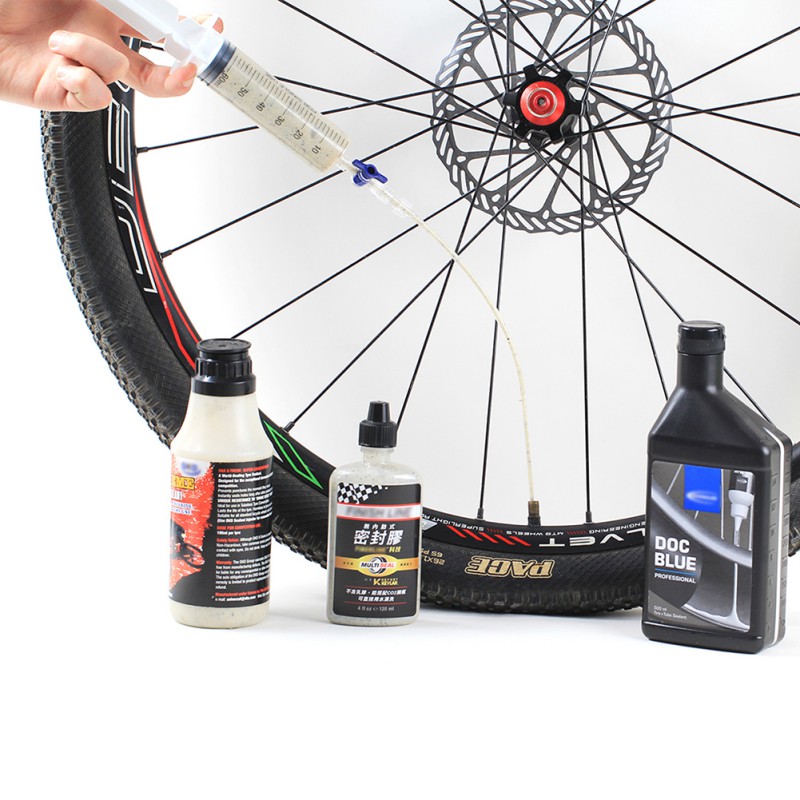
If your tire looks like this it’s time to clean it out and add some fresh sealant.
Trevor RaabAccording to Esherick, two ounces is the right amount of sealant for topping off gravel tires all the way up to 2.5-inch mountain bike tires. “If you’re up in the 2.5- to 2.6-inch range, you might want three ounces, and 2.7- to 2.8-inch tires require about four ounces,” Esherick says. “As you get a larger volume tire, you’re going to want a little bit more sealant in there.” Two ounces is enough for road tires for the first time, as well as plenty whenever you top them off.
Try to, at least once a year, take your tire completely off the rim to scrape out the dried sealant and start fresh. This preventative maintenance will keep your tires turning in time.
Riley Missel
Riley Missel is an experienced road racer, mountain biker, national champion on the track, and a former Bicycling editor.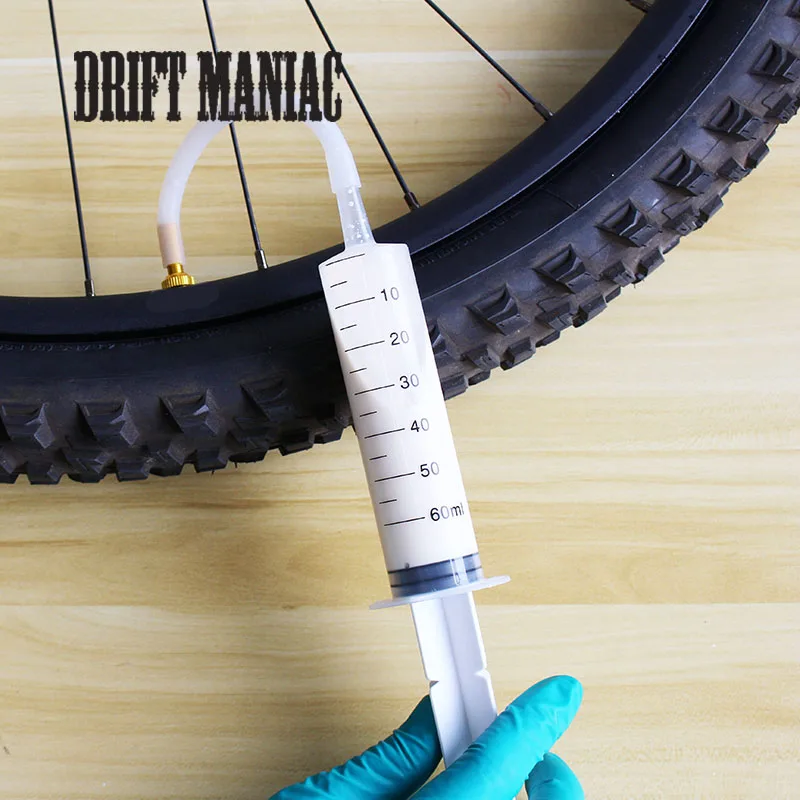 She is a USA Cycling-certified Level 1 coach, a loud and very stoked Spin instructor, and she will definitely stop the ride to pet that dog.
Tubeless tires are much, much better than the alternative, but that’s not to say they’re perfect. Sometimes, just getting a tubeless tire to hold air can be a challenge, and diagnosing the problem — let alone fixing it — can be frustrating. If you find yourself staring at a flat tire in the garage and muttering “why” over and over again, here are some tips for getting rolling again.
This article won’t cover mounting tubeless tires; we’ll assume the tire has been mounted successfully, but that it won’t hold air for more than a day or so.
No, we’re not celebrating yet, but this will get us closer to our goal by allowing us to zero in on the part that’s leaking.
Fill a spray bottle with water and some dish soap, or really any soap that forms bubbles.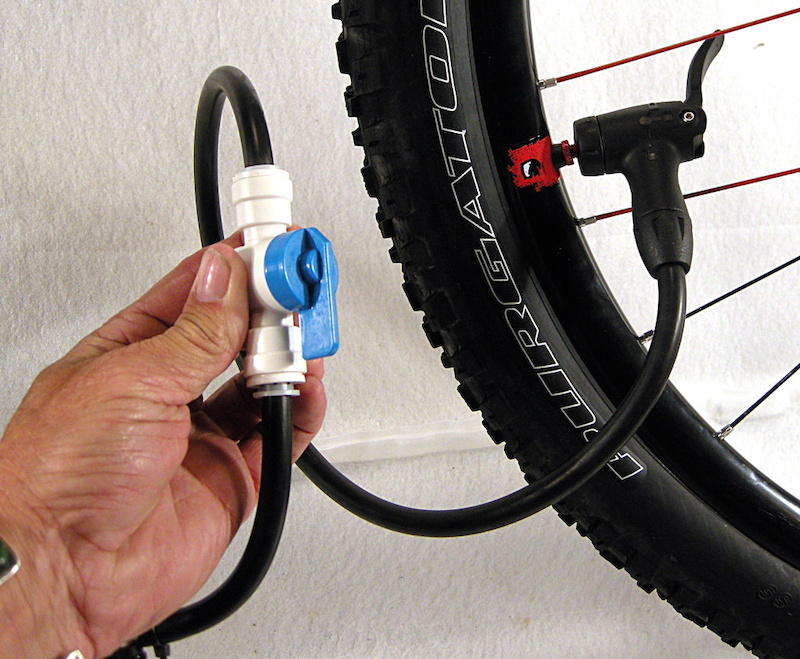 Next, inflate the tire to 30psi or so. Spray or just pour the soapy water all around the tire and rim, one section at a time. Note any places where air bubbles appear.
If there is a puncture in the tire itself that is leaking, this is generally an easy fix. Make sure you have plenty of sealant in the tire and move it around until the sealant pools at the puncture. Larger punctures may benefit from a tire plug.
With a sidewall leak, you’re usually better off replacing the tire. It might be possible to patch it, or if you’re really lucky, plug it, but in my experience sidewall repairs rarely last very long.
While rare, some tires have been known to absorb or even weep sealant. Tiny pores in the tire compound fill with sealant when it’s initially added, so you may need to add a bit more liquid to replace what’s been lost. If a tire still leaks through the tread or sidewall in multiple locations despite having good sealant coverage and no punctures, you may want to check with your local bike shop or tire manufacturer to see if the tire should be replaced.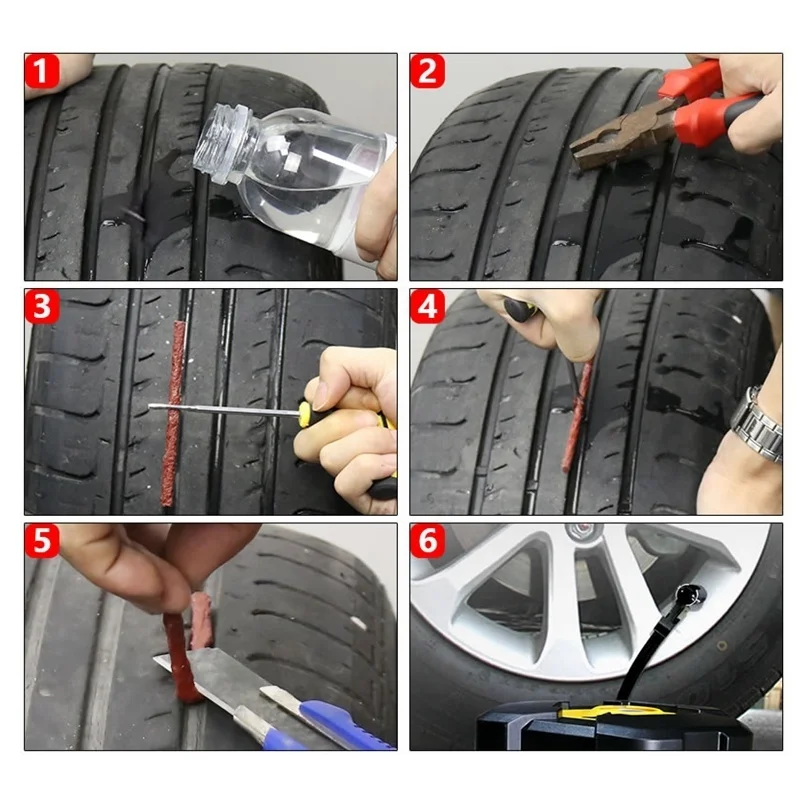
Check to make sure the rim wall isn’t dented. If it is, your tire won’t be able to seal. If you find your rim is slightly bent or dented, it might be possible to get things straightened out enough to hold air. According to Gerow, “a couple of small planks of wood, a vice, and a hammer will get you started.”
Even if the rim wall isn’t visibly dented or misshapen, there could be a small gap between the tire bead and the rim that’s leaking air. Make sure you have plenty of sealant in the tire, and hold it horizontally and tilted to allow the liquid to pool around the part of the rim where you saw the bubbles forming. Shake the wheel gently for a minute or so to let the sealant do its work.
In some cases, the tire-rim connection may not be tight due to buildup of old sealant. “Older tires can have a buildup of dry and hardened sealant at their bead that will create space between the rim and the rubber, causing air leaks,” says Gerow. “When mounting a tire that has already been mounted previously, be sure to remove as much dried sealant from the bead as possible.”
Sometimes a tire bead may not be fully seated in the rim. Try pumping the tire up to maximum pressure. The loud popping sound you’ll hear is the bead popping into place. If you didn’t hear that noise the first time you mounted the tire, chances are that is the issue.
After running through the checks above, try soaping the tire again and checking the same spot to see if the fix was a success.
In my experience a leaky valve is often the cause of air pressure losses over time. If the soapy water reveals bubbles at the valve, it’s time to investigate further.
Tubeless valve parts with a valve core remover tool (red, right).First, check the easy stuff: Is the core screwed in tightly? Is the inlet screw loose or bent? A dedicated valve core tool is helpful for proper tightening, and if your fingers aren’t getting the inlet plunger tight enough, needle nose pliers can do the job. Just make sure you don’t over tighten and break the valve, or get it so tight you can’t add air later. If any part of the valve is bent or broken, don’t try to fix it; it’s time to replace it.
If soapy bubbles are forming around the base of the valve, it may not be attached to the rim properly. Most valves have a nut at the base that tightens the valve to the rim. Get this as tight as possible with your fingers, and if necessary give it a slight turn with a wrench. Just be sure to avoid tightening too much because you could damage your rim, especially if it’s carbon fiber, and you may need to be able to remove the nut on the trail in the case of a puncture.
Check the gasket at the base of the valve to ensure that it’s properly seated, and that it sits flush in the rim channel. Add a bit of plumber’s/PTFE tape to seal things if the gasket is particularly troublesome.Next, investigate the valve from the other end, which means taking the tire off the rim. Most valves have a soft rubber gasket that forms a seal around the valve hole in the rim, so check to make sure the valve is seated properly in the rim channel. You can also add a bit of teflon tape around the base of the valve to seal things up.
Sometimes sealant can fill in small gaps around the valve. If you notice air leaking while on the trail, try rotating and shaking the tire so the liquid sealant can get to the valve.
If bubbles form around the spoke nipples, the good news is you’ve found your leak! The bad news is, there isn’t a quick fix. This generally means the rim needs to be re-taped, or at the very least the tape needs to be patched over. If the tape appears wrinkled, ripped, or punctured that’s probably what’s causing the leak. Tire levers can often puncture the tape while installing the bead, causing the tape to leak air through the rim.
There are many tutorials online for taping a tubeless rim, but in general, the idea is to get the rim as clean and as dry as possible before taping all the way around in one go. Be mindful of any gaps where air might be able to leak, keeping the tape flat and taut to avoid blisters or pockets.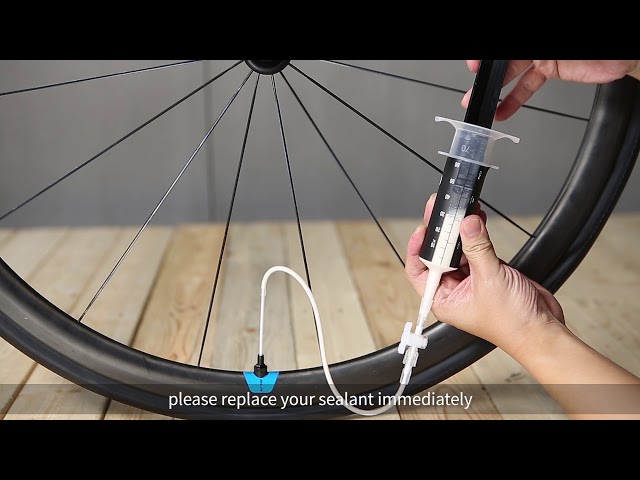
Sometimes, tires can be sneaky leakers. Pump them up and they’ll stay rock solid in the garage for weeks, but as soon as you roll in the parking lot, or take a turn, they go soft. You soap ’em up, and there’s not a bubble in sight. In fact, this has happened to me a couple times in just the past few months.
This is usually due to a small cut that only opens up when there’s weight on the tire, or if the tire is pumped up to a higher pressure. In your garage, you can try to simulate the effect of riding by adding pressure above what you normally ride, or by deforming the tire with your hands and looking for air bubbles as the tire squirms.
Gerow notes, “Some tires need to be ridden immediately after setup in order to hold air properly. A new tire that won’t hold air in the garage might be good to go after a short romp on the trail.”
Once you find the sneaky leak, getting sealant to the right spot can do the trick, though a plug may work even better.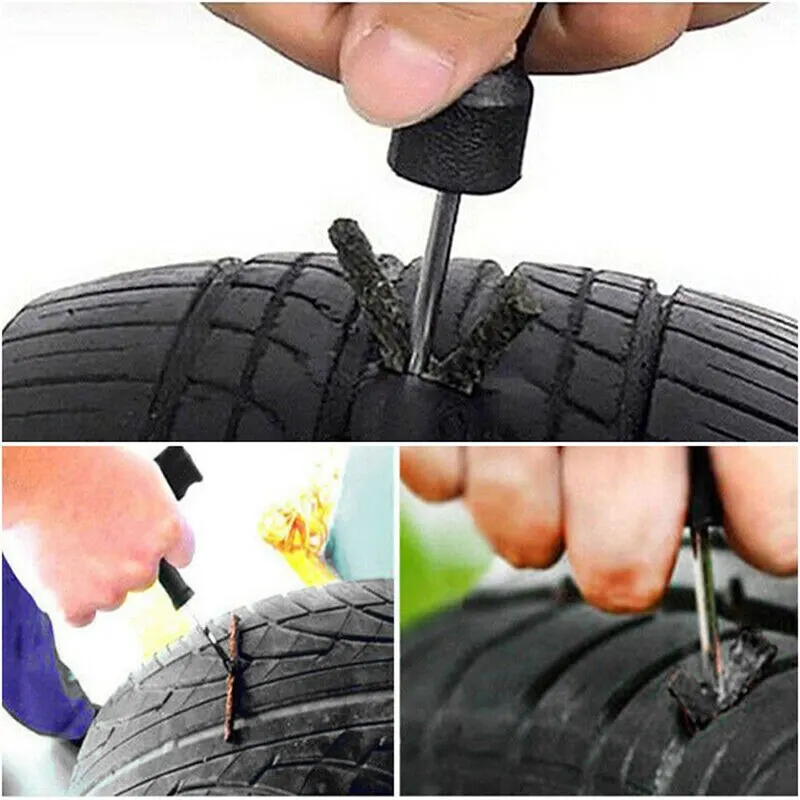
Ultimately, tubeless mountain bike tire systems are pretty straightforward and there are only so many spots where air can escape. Imagine that you’re the air inside the tire, and you’re looking for a way out. How would you do it? That’s exactly the mindset you need to solve this mystery.
Another season of changing shoes is approaching. And you may remember that on one of the tires after the last winter/summer there is a jamb - a small bump. I don’t want to run to the store for the sake of one new tire. We understand. Or maybe it looks even better if repaired?
Yes, not every wheel that has met with a nail, rebar sticking out of the ground or a sharp stone on the road is considered damaged. Everything, of course, depends on the scale of the damage and its location on the tire itself. Some are easily repaired, while others are simply impossible to do - the tire can only be sent to the trash.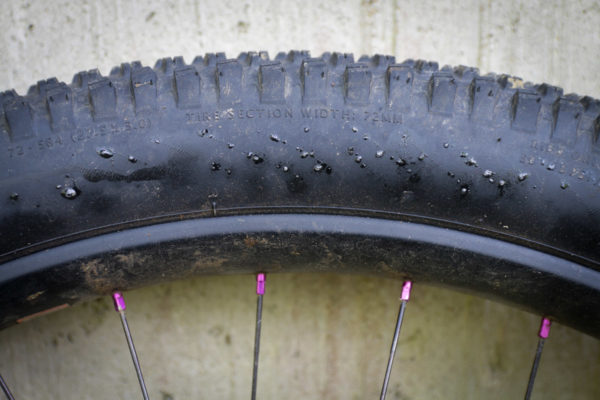
A bulge on a wheel, referred to by drivers as a bump or bulge, is the most common tire sidewall defect. It appears due to a collision with an obstacle or after falling into a pit, more often at high speed. The threads of the sidewall carcass are easily damaged by impact, and the tire at this point can no longer hold the load and air pressure - swelling appears. A small bump sooner or later turns into a big one, and driving with such a defect is dangerous - the wheel can shoot at any moment. At high speed, this is fraught with loss of control, departure from the road and a rollover.
The quality of roads in Kazakhstan contributes to the appearance of bulges on tires
Some types of bulges are repairable, although this is a temporary measure. Not a single patch can restore the factory rigidity. Ideally, change the tire.
Special cord patches can extend the life of a tire with a herniation, even if the swelling has appeared on the tread.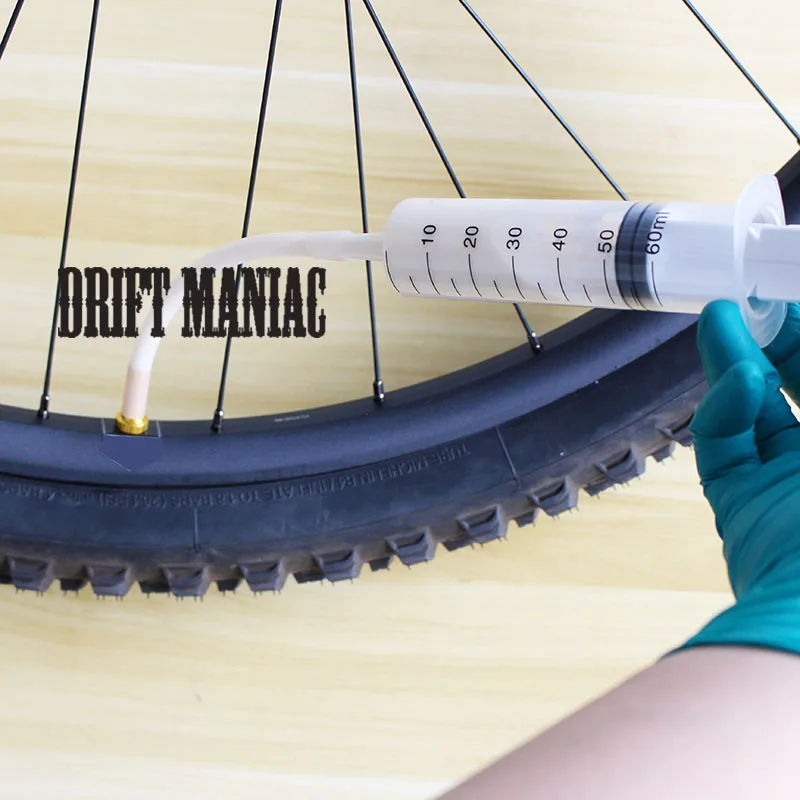 The sidewall is a different story. If the swelling appeared at a distance of more than 40 mm from the side, it can be repaired. If not, then the wheel needs to be replaced. Blisters on low profile tires are most often non-repairable.
For maximum safety when riding with a repaired bump, insert the tube. This is an inexpensive and reliable solution. On our market, you can find cameras made in China and Russia, the latter are slightly more expensive, but also of better quality.
The elimination of a side cut is a serious operation, therefore, as in the case of a bump, you will have to go to the professionals. We need cord patches, fortunately in our time they are of different sizes and with a different number of layers. And if you do it wisely, then you can't do without special tools and vulcanization.
A cut, by the way, cannot be healed in all cases. If the gap is in the shoulder area of the tire, it is unlikely that anyone will undertake to repair it, since no guarantees can be given here.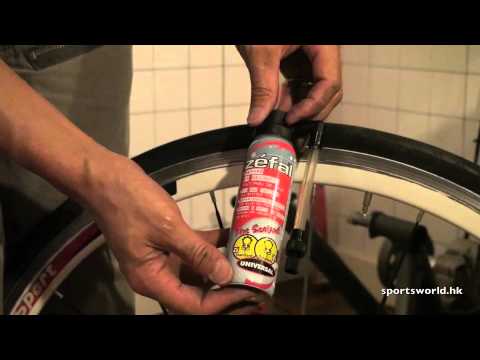 However, our Kulibins take on even the most difficult cases, cutting out parts of the sidewalls from the tires and even weaving the cord on their own.
Tire overhaul. We would not put such a wheel on ourselves
Low profile tires can be repaired, but more difficult. A tear in the sidewall is easier to seal on tires with a medium or high profile.
Sometimes a cut is confused with a pluck. This is when the outer layer of the sidewall caught on something sharp, a tear formed, but the frame itself remained intact. There is nothing wrong with that, although the drivers at the tire fitting company successfully repair the cut, for which they take it accordingly.
If a piece of rubber remains on the sidewall, then glue it with ordinary superglue (101st). If it came off, then it is better to cover it with raw rubber and vulcanize. Leaving the pluck bare is not recommended, because the tire carcass, often consisting of a metal cord, will quickly corrode.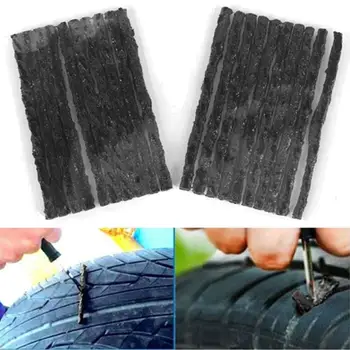
In Europe, defective or used tires are perforated before being sent for scrap to prevent their resale and possible operation. But they don’t know that we have such holes on the sidewall patched once or twice
Cuts and hernias are not the only possible damage to the side of the tire. You can also spoil the side ring, in the process of changing shoes, for example. If it’s for garlic, then such a tire is already dangerous. Sooner or later, the tire pressure and the load in motion will start to squeeze the rubber off the rim - a wheel explosion can occur.
This ailment is repaired if the wire ring - the base - is intact. There are no special technologies and materials to correct this particular problem, but most often craftsmen use a two-component composition for chemical (also called cold) vulcanization. After mixing, the mass is pressed into a fat-free damage. Compound manufacturers recommend waiting 72 hours before mounting a tire.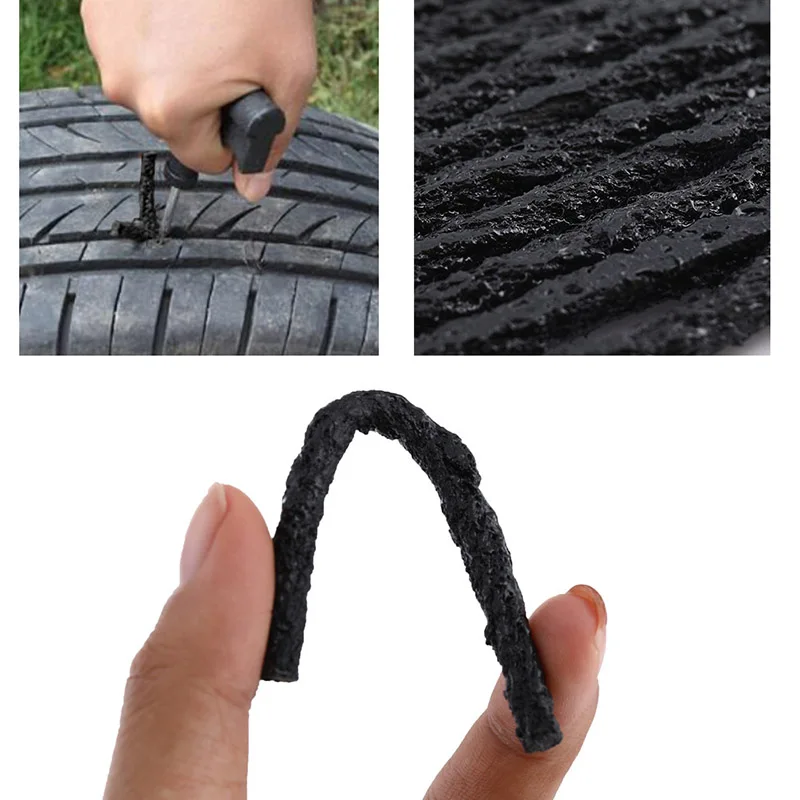 Of course, our masters do not pay attention to this condition - they put the tire right away. And it’s good if the wheel is flat because of this at night in the parking lot, and not on the road.
If the side ring tears are barely noticeable, but the wheel still deflates, then you can use a special liquid - a bead seal designed to seal a tubeless tire.
These seals have been used in motorsport for some time. In particular, in the American Formula D Drift Series, drivers used compounds to keep the tire on the rim even with minimal tire pressure. Now they are banned.
Pay attention to the left rear wheel of the Nissan Silvia S13. Due to too low pressure, it was literally taken off the disk under load
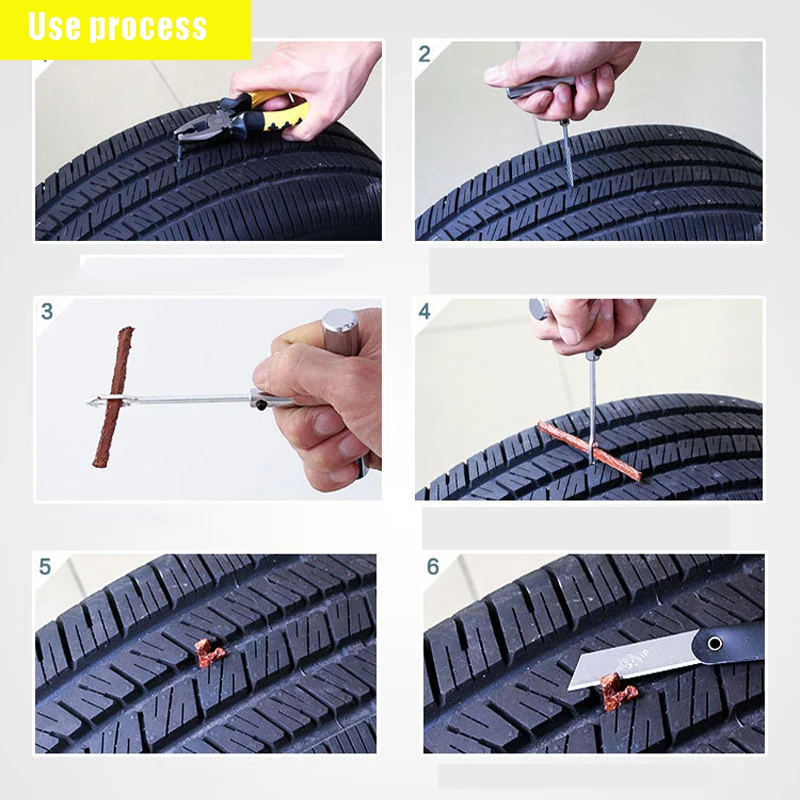
Every schoolchild has faced this problem when patching the inner tube of his bike after hitting something sharp. Repairing a car tire puncture with your own hands will also not be difficult even on the road. But for this you will need a pump (or compressor) and a universal tire repair kit with harnesses.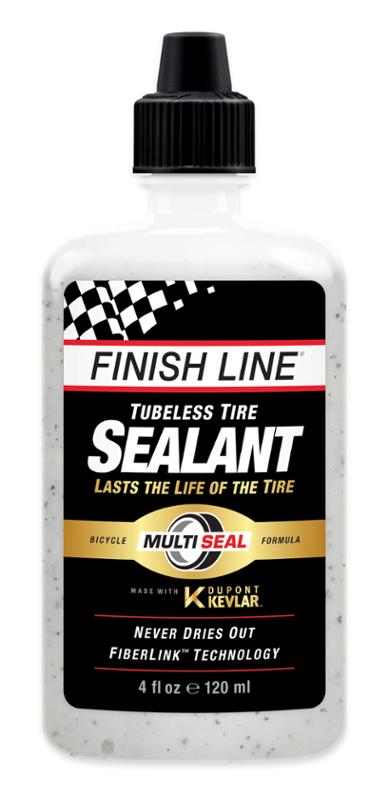 All this is sold at any car market or gas station.
Repairing a tire on the side of the road with harnesses
The process is simple. If we are talking about the front wheels, then in most cases the wheel can not even be removed, it is enough to turn the steering wheel in the right direction, find the puncture site and carry out repairs. First, the hole is cleaned with a helical awl from the set. The tourniquet itself is smeared with glue and tucked into the eye of the awl, after which it is inserted into the tire hole. With a sharp movement, the tool is removed, and the tourniquet remains in place and clogs the hole. The tails are cut with a knife, but not at the root, it is recommended to leave about 20 mm. The tire is inflated and checked.
Sometimes a nail or self-tapping screw clogs the hole by itself, remaining in it. If you see a hat in a tread, do not rush to pull it out. While the pressure is holding, move to vulcanize. And sometimes they drive with a screw in a tire for weeks.
Repair of a puncture at a tire shop
Punctures are also repaired with harnesses at a specialized service, although among professionals such repairs are not considered long-term. After a few months, the flagella dry out and can let air through. There are more advanced methods like cold and hot vulcanization. The latter is more reliable. In this case, the hole is sealed with an elastic patch, and the funnel from a foreign object is filled with a special compound. After that, a vulcanizer is put on the tire, it heats up the rubber and solders it.
In addition to the plaster, the puncture is also repaired with special cord fungi. Craftsmen process the puncture site: drill it and treat the surface with a tool to roughen it. Then the repair area is lubricated with glue (it is also called cement) and a fungus is introduced. This is done from the inside of the tire. The cap of the fungus is rolled, and the excess legs are simply cut off from the outside.
Puncture repair with sealant
With the advent of tubeless wheels, and later run flat tires, many automakers began to abandon spare wheels. Instead, repair kits with compressors are supplied with the machines. A repair kit is essentially a bottle of pressurized sealant. Later, such spray cans began to appear on the shelves of ordinary car dealerships.
This method has not taken root in the CIS, because the condition of the roads makes it necessary to have at least a stowaway in the kit, but it can also be considered as a method of repair on the road.
The car must be jacked up and sealant must be pumped into the damaged wheel through the nipple. Next, you should spin the wheel, then pump it up, lower the car and drive a few hundred meters. If the tire tightness has not been restored, repeat the procedure.
For commercial vehicles, cutting the tread with a special device (regrower) is a common thing. Moreover, such tire retreading is provided by the factory (marked REGROOVABLE on the sidewall) to increase the service life. But there are entrepreneurs who undertake to deepen the grooves in tires for passenger cars. But they are not intended for such an operation. Often used tires for sale are “refreshed” in this way. Be careful!
What is the threat?
The worst option is that the retreaded tire will shoot out on the road, as the master can damage the undertread layer when deepening the grooves. Such a tire will not be able to hold pressure at some point. There will be a boom! At best, the tire will indeed last a little longer, but is the game worth the candle? We think it's not worth it.
How is cutting made?
A regrower is used to cut the tread. Roughly speaking, this is a large soldering iron with interchangeable tips of various shapes.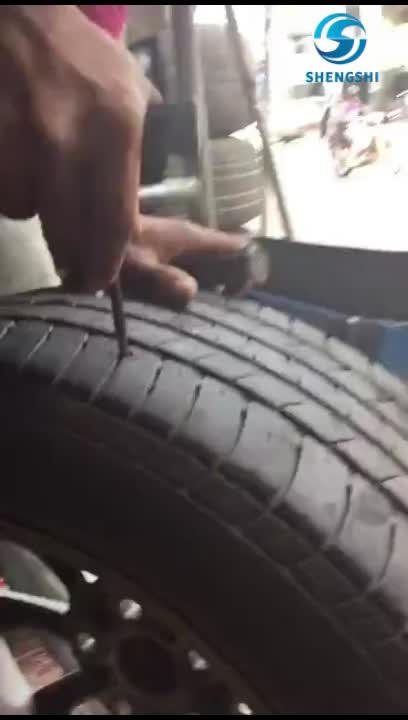 It goes through rubber like a knife through butter.
If the tire is for passenger cars, then it is worth taking on a regrower only in one case - when part of the tread pattern was welded with "new" rubber during repair. This is where threading comes in handy in order to restore the grooves and symmetry of the tread.
Vehicle operation is prohibited if:
- tires have a residual tread height of less than 1.6 mm;
- tires have punctures, cuts, ruptures that expose the cord, as well as delamination of the carcass, delamination of the tread and sidewall;
- tires in size or load capacity do not match the car model;
- tires of various sizes, designs (radial, diagonal, chamber, tubeless), models, with different tread patterns, winter and summer, studded and non-studded, new and restored, are installed on one axle of the car;
- Tires retreaded according to the second repair class are installed on the front axle.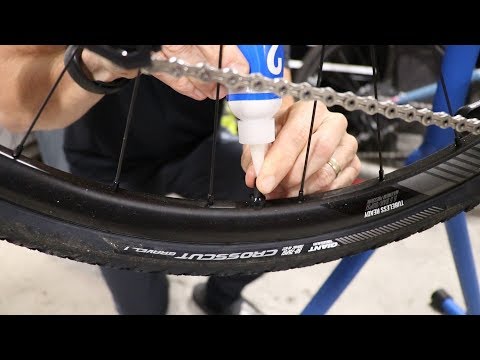
What is a second class repair?
This is the case when the carcass of the tire is restored after serious damage. A side cut (or tear) is a serious damage to the tire carcass.
5/5 - (2 votes)
Once you get the hang of fitting tubeless tires, you can change them almost as easily as tube tires.
Tires are one of the most important factors in determining how a bike feels and behaves. Not only do they make a huge difference when it comes to performance, but they are also an inexpensive way to upgrade. The right tires can provide more comfort, more speed, and more puncture protection, and tubeless tires take this concept even further. Switching to better tubeless road tires can result in lower rolling resistance, fewer punctures, and the ability to use lower pressures for more comfort. It also means learning a new skill and understanding how to install tubeless tires.
With the right tools and an understanding of what to expect, installing tubeless tires shouldn't be difficult. Keep reading for tips and tricks for fitting tubeless tires. Very soon, you will be changing tires as easily as traditional inner tube tires.
Contents
Everything you need to install tubeless tires
When it comes to installing tubeless tires, you need supplies and tools.
When it comes to tools, there is good news and bad news. The good news is that you may not need all of the tools we have listed below; with the passage of time and the spread of tubeless tires, they are getting better and easier to install. Higher quality wheels, along with better tubeless road tires, are often immediately inflated with a track pump, while others may require something more powerful.
The bad news, however, is that you won't know until you try a particular tire and rim combination, so it's good to have the right tools on hand.
Tubeless tires have a very tight bead that does not stretch, making it difficult to fit onto the rim in some cases. When buying levers, you need to be sure that you are getting something thin yet strong enough to work with the tire/rim interface. Look for rounded edges that will prevent damage to the rim. Some tire levers are reinforced with a steel core for added strength.
You need a way to quickly get enough air into the tire so that it sits properly on the rim. If you win, the pressure will rise and the tire will sit correctly. To facilitate this task, you can use a floor pump, which has a built-in reservoir for charging tubeless tires. First, before inflating, you will close the charging tank, which will compress the air in the tank. You will then immediately release all the pressurized air into the tire.
If you are buying a new pump, get one that combines the pump and reservoir. If you already have a favorite pump, it is possible to purchase the tanks separately. Another option is an air compressor, which is the most convenient way when you need to use one, but be aware that most inexpensive tankless electric pumps won't work as they don't move air fast enough.
Most new wheels come already sealed, but this is not always the case. If you're having issues with a tubeless setup, it's almost always due to a tape issue. To solve this problem, we recommend re-gluing the inner rim from scratch.
Also be aware that the tape comes in different widths, so make sure you order the correct one - it's always best to use the right size rim tape, as doubling a smaller width tape isn't always smart. The translucent tape will make it easier to find the valve hole in the right place.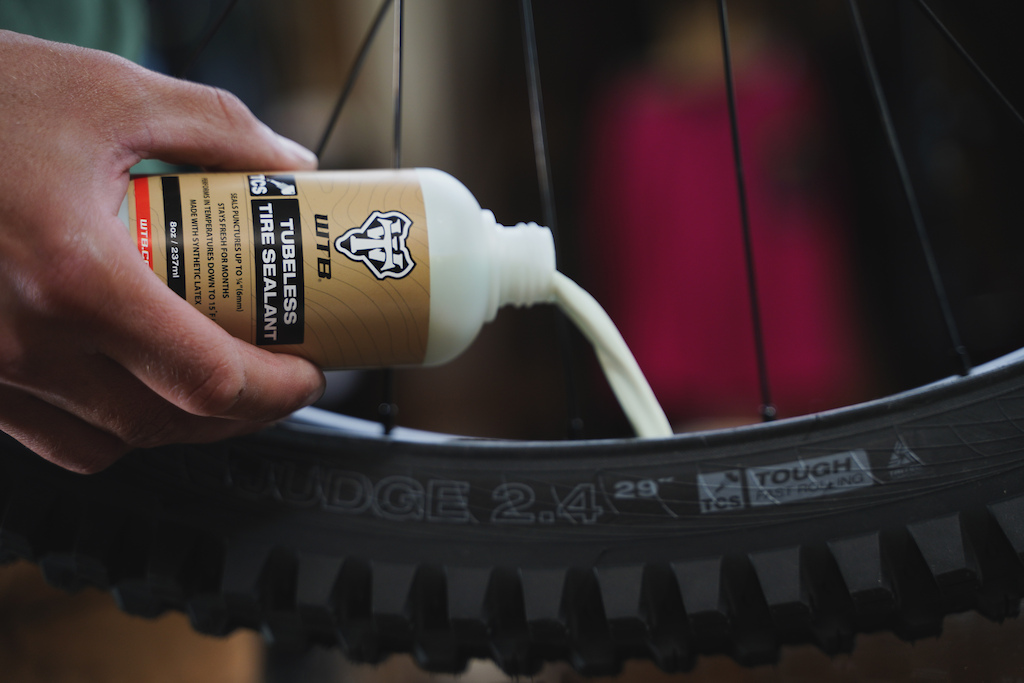
Again, these often come with new wheels, but not always. Make sure you buy something long enough to go through the rim and leave room for the pump mount. A little extra length won't hurt, so if you can't find the perfect length, don't be afraid to go longer.
You can get by with a pair of pliers, but it's not worth the hassle. The right tool is inexpensive and makes life a lot easier. It's a good idea to have an extra tool in your emergency kit, as valve cores can get clogged over time and you may need to fix one that's leaking slowly during your trip.
Again, you can do without it, but it's much easier if you have the right tool. You can see instructions for pouring sealant into a tire and then trying to install, which might work, but it can be incredibly messy. Instead, use a syringe and inject the sealant through the valve stem.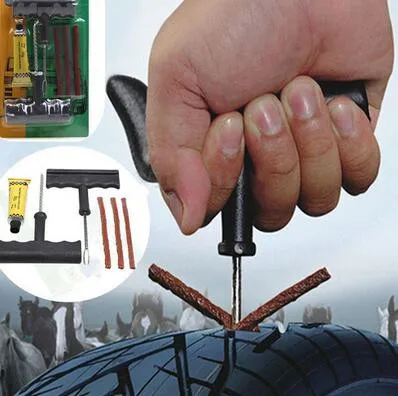 Some sealants come with a tube, but if you don't have one, we recommend adding one to your toolbox. The syringe is usually supplied with a valve tool and additional spools. It's also a convenient way to use just the right amount of sealant.
You probably already have these tools, but it's a good idea to prepare them. You will need scissors to cut the rim tape. A small towel will come in handy when sealing the rim. A soapy solution in a spray bottle will make life easier during installation. A small screwdriver or pen will come in handy to poke a hole in the rim tape to push the valve stem through.
A properly installed rim tape should be smooth and fill the channel.
The first thing you need to do is seal the rim. If the rim is already sealed, you don't need to seal it, but if you find you're having trouble sealing the tire, don't waste hours looking for it - just seal it.
Every time you rearrange things, there is a chance that you will open a leak in the tubeless belt. It also often happens that you seal the wheel perfectly and then make a subtle mistake when installing the valve core through the tape. If in doubt, reseal it.
Start tape about an inch before the valve hole in the wheel. You want to have enough space so that there is a good seal between the rim and the band up to the valve opening. Press the band against the rim with one hand, then pull the band out a little. Advance only as far as you feel comfortable holding the band, then gently lower it to the surface of the rim. You need to stretch the tape, and it's better to do it little by little, rather than trying to work the entire rim in one fell swoop.
After bringing the tape to the surface of the rim, hold it there. The tape is not very strong, so it will come off the rim if you don't hold on to it. Use a cloth or gloves so that the hand that you held the beginning of the tape with can slide over the rim tape.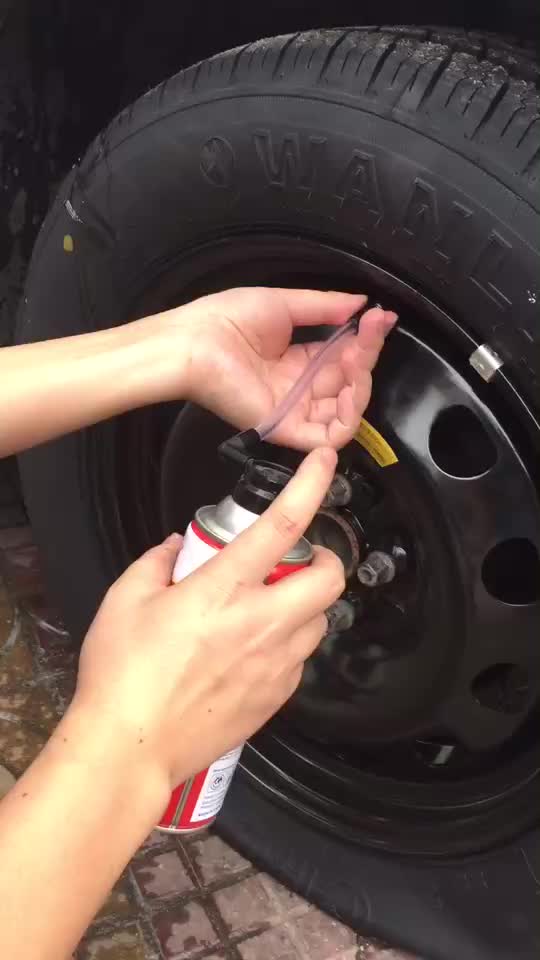 Press firmly on the rim to help the adhesive stick and move air bubbles to the end of the glued area.
When the two hands are together, repeat what you did from the beginning. Holding the tape against the rim with one hand, you are about to pull more tape from the roll. Stretch it out to the sides of the rim, then gently pull it back and repeat the process again. Continue these two steps until you have gone all the way around the wheel. When you get back to where you started, you should put tape over the vent hole by about the same amount as you started with. Then just cut the tape.
Some people and most bike shops make two layers of tape. If the tape is not wide enough, it is necessary to completely seal the space between the tire beads. Even if the band is wide enough, this needs to be done to increase the circumference of the wheel and create a tighter seal between tire and rim, but modern tires and rims are made to tighter tolerances so this is often not necessary. It can also make it difficult to fit the tire as it is very tight.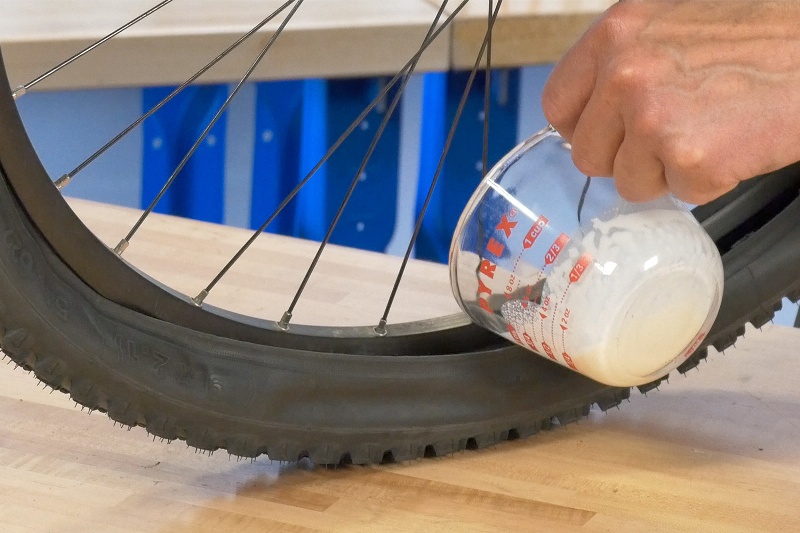 It's one of those things you can't know until you try it. If you prefer to play it safe, then do so.
Push the valve stem through the band.
Start by locating the valve hole in the rim. This will be easier if you can see through the rim tape, but it's possible otherwise if you find a hole in the inside edge of the rim. Once you know where it is, press down on it with your fingers and you can make a small mark outlining the edge of the hole.
Once you know where it is, poke a small hole in the tape. You can use whatever you have. Hex keys, small screwdrivers, knobs, even the sharp end of a valve stem.
Remember that you want this hole to be as central and as small as possible and you don't want to damage the wheel. Any sharp object you use can cause damage, so be careful. This is combined with the fact that you don't try to open the hole completely, you just open it for the valve stem, and when the hole is ready, let the valve stem stretch it.
Once the hole is punched, push the valve stem back into place. There should be some kind of rubber seal at the base of the valve stem that presses against the hole you just pierced and with enough pressure it will seal. On the inner edge of the rim, where the valve now protrudes, you need to install a rubber seal, and then the nut that is attached to the valve stem. You don't need to tighten everything all at once, as you may need to push the rubber seal inside the tire away from the rim to get the tire into place.
The extremely tight fit means you will likely need to use spudgers to fit each side of the tire to the rim.
The process is the same as for the tube tire. Don't forget to check the direction of rotation of the tire, and remember that it's fashionable to line up the logo and name so that the valve is in the middle (this also helps to find the valve when you need to inflate the tire).
Start at the valve and insert the washer into the space between the valve and the wheel sidewall. First on one side, then on the other. When you get to the other side, opposite the vent, things get more complicated.
The difference between a tubeless tire and a tubed tire is that the tubeless tire and the rim are closer together. Grabbing each side of a tire on a wheel is often a difficult task and the use of tire levers will most likely be necessary. To facilitate landing, moisten the edges of the tire with soapy water.
Soapy water helps everything slide. The tire will slide more easily over the tire arm and the tire arm will slide more easily between the tire and rim. Once the tire is in place, the soap solution will also help create a seal for the first inflation.
The tire should be in the center of the rim cavity but at the edges next to the valve.
The idea is to put the tire in the center of the rim. The less the tire will rise and fall from the edges, the better. However, it should be on the edges near the valve stem.
In reality, there is little you can do at this stage. Just look for obvious problems and do your best to fix them. A good way to get everything in proper condition is to roll an uninflated wheel with a tire on a carpeted floor, applying pressure on it. The pressure will help the tire sit properly in the channel.
Once you have the tire in place, make sure the valve stem nut is tight and the valve stem is in place.
If you are using a tubeless tire pump, it's time to pressurize the reservoir.
If you are using a standard pump, you need to pump quickly. If you are using a tubeless pump, then pressurize the tank before releasing the air in one shot. It's a good idea to inflate the tire, but be careful with the amount as tubeless tires and carbon wheels often have a lower maximum pressure than you'd expect.
You may or may not hear a pop as the sidewall snaps into place. This helps if the sidewall is wet and slips easily, but even then you may not hear anything. It's a nice sound when the bead clicks into place, but if you can't hear it, it doesn't mean it didn't work.
For initial inflation it may be useful to remove the spool. However, this is not always possible because depending on the pump you have, they do not always secure effectively if there is no valve core.
Using a sealant injector is the easiest way to add sealant to a tire.
If you have time to let the tire sit, this is a good idea. Sealant should not be needed to keep air in the tire. If you have time to let the tire sit with air, you can determine if it is losing air at a reasonable rate. If you left a tubeless tire inflated overnight and returned to a flat tire the next morning, then you need to troubleshoot. This almost always means new rim tape, and it's much easier and cleaner when there's no sealant. You can also check the tightness with a soap solution.
Once you've made sure the tire is installed correctly, it's time to add sealant.