Upgrading and customizing your ATV or UTV can be a huge part of the fun of owning a four-wheeler. There are so many components you can improve, tweak, and set to your personal liking. One of the most interesting upgrades is the sound system. Stock ATVs typically don’t come with great sound, and if you like listening to tunes when you’re out on the trail, a new audio system is just the ticket. It’s great for when you’re just relaxing with your buddies between rides, too.
Image from www.utvsportsmag.com
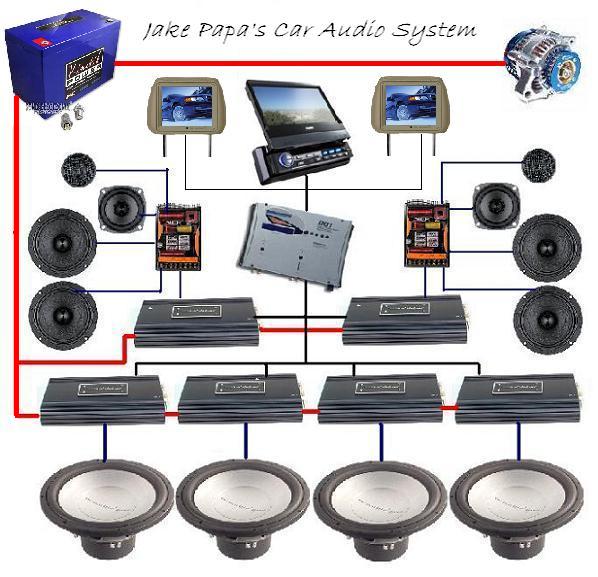
Every good four-wheeler sound system has several components:
Receiver – Also known as the head unit, the receiver is the brains of the operation. It takes the audio source you supply and converts it to a signal that can be sent to the speakers. Receivers on an ATV need to be compact and perform multiple duties, so it’s typical to find receivers with USB inputs, radio, built-in equalizers, and Bluetooth support.
We also highly recommend receivers that can function as a two-way radio so you can easily keep in touch with home base.
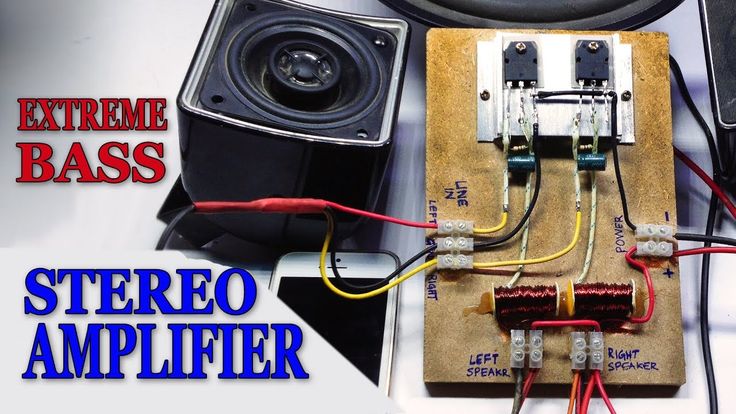
Amplifier – The electrical signal in a receiver lacks enough power to drive speakers, so it needs to be amplified by this unit. In many four-wheeler audio systems, the amplifier will be built into the receiver to save space. But if you plan on adding extra speakers, then you may need a separate amp to power high-output speakers.
Speakers – The sound must come out from somewhere, and that’s where speakers come in. ATV speakers are different from home theater speakers as they need to be rugged, weatherproof, and resistant to dirt, water, salt, and impact. ATV speakers also need to be mounted somewhere convenient on the vehicle, so there’s a whole range of different adjustable mounts and physical configurations.
Cabling – Every ATV sound system must have cables to connect power and to send signals between the components. Ensure you have waterproof cabling. Wireless sound systems can reduce the amount of wiring you need.
ATV are the core piece of riding gear for off-road riders
Find out the best look for you
ATV and UTV sound systems don’t need to be complex. The simplest system is an ATV/UTV soundbar or audio tube. This includes everything you need in a single soundbar—amp, woofers, mid-range drivers, and tweeters, and typically connects to your gadgets via Bluetooth or AUX. All you have to do is connect it up to power.
If you’re looking for the cheapest multi-speaker setup, you can pair a marine speaker with a set of marine stereo speakers for a simple stereo system. Additional sound isn’t difficult to add, either, as you only need to hook up a couple of extra speakers and a subwoofer, but you’ll probably need a secondary amp if you upgrade your sound system after the initial purchase.
If you have a popular model of ATV or UTV, you’ll be able to find custom audio kits designed particularly for your vehicle. These range from two-speaker + amp systems all the way to multi-woofer systems with four speakers.
Whichever system you choose, you need to consider how it will fit on your vehicle and how you can protect it from damage. Your ATV gets bombarded with water, salt, wind, and rain. Your ATV audio system should be corrosion resistant, include UV resistance, and be rugged enough to take a few knocks from time to time. Check the IP rating of the speaker system, which will tell you whether it’s only rated to take a few splashes from time to time or whether it can be completely submerged in water without issue.
Most audio kits are easily installed in your home garage. Audio tubes are the simplest, as they only require power. Wireless ATV audio systems are easy, too, as the speakers only need to be plugged into power. A wired speaker system with an amp and separate subwoofers is more complicated because there are more wires you need to hook up and hide on the body.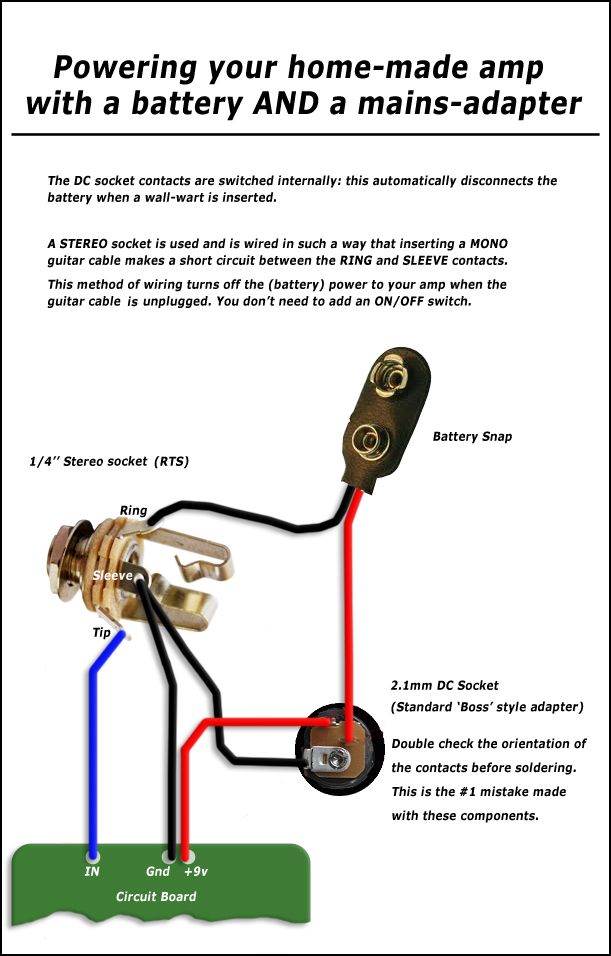 But as long as you plan installation in advance and know exactly where you’ll mount all the speakers, there’s nothing particularly difficult about installing an ATV sound system yourself.
SPORTSMAN
36 EUR
32.40 EUR
ENDURO
the most durable
577 EUR
AQUAMASTER-ZIP LIGHT
with central zipper
568 EUR
ENDURO LIGHT
the most durable
378 EUR
AQUAMASTER LIGHT
reliability & comfort
438 EUR
NEODRY
16 EUR
12.80 EUR
-10%
HIT
ENDURO
the most durable
229 EUR
206.10 EUR
AQUAMASTER
reliability & comfort
567 EUR
-30%
HIT
AQUAMASTER
reliability & comfort
259 EUR
181. 30 EUR
BELT
8 EUR
7.20 EUR
ENDURO BF
bootfoot waders
468 EUR
ENDURO BF
bootfoot waders
289 EUR
260.10 EUR
ENDURO
29 EUR
26.10 EUR
NEOSENSOR
14 EUR
MUDWAY
179 EUR
TARGET 20L
32 EUR
28.80 EUR
MUDRIDER
299 EUR
209.30 EUR
-10%
HIT
WADEMAN
lightweight waders
159 EUR
143.10 EUR
-10%
HIT
MUDWAY NEW
199 EUR
179.10 EUR
URBAN
79 EUR
71.10 EUR
Explore all
The roar of the engine, the wind in your hair, and the whoops and hollers from your buddies behind you—sounds like the soundtrack to a perfect weekend ride. There’s only one thing missing, and that’s an actual soundtrack blasting from your speakers.
What’s that? You haven’t installed a badass stereo system in your machine yet?
We have to ask—what are you waiting for?
If you’ve been thinking about bringing some tunes along for the ride, there’s no time like the present. The market is chock full of stereo system options for your ATV and UTV, and you can find some of the best right here at SuperATV.
If you’ve never shopped for an ATV or UTV stereo system before, it can be hard to know where to start. We’ll give you a quick overview of what you need to know before making a purchase.When you’re shopping for audio equipment for your machine, you’re not just looking at speakers. Audio accessories can be pieced out and sold separately (speakers, head units, etc.) or they can be bundled and sold as entire sound systems.
To help you understand what’s available and what you might need, here are some of the most common pieces of audio equipment you may come across.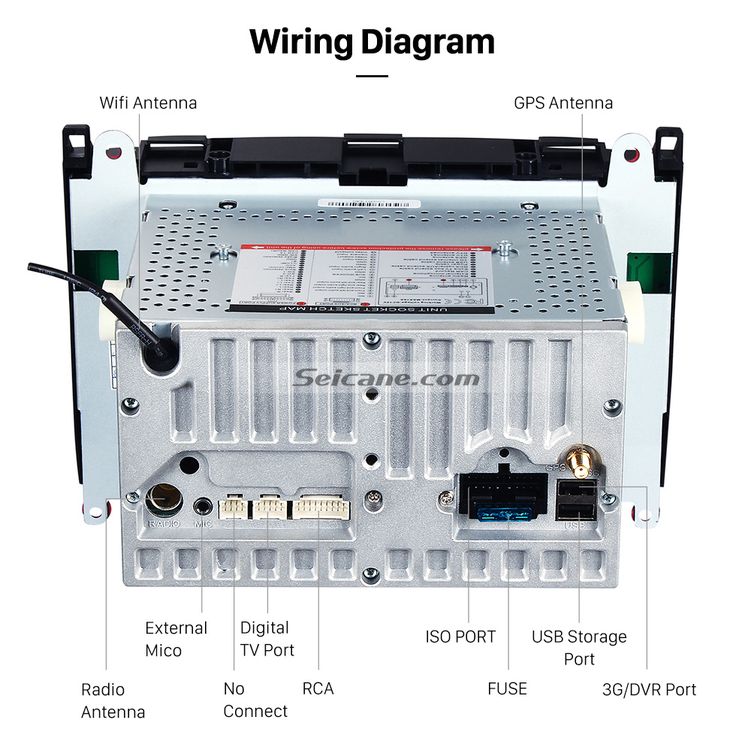
Think of this as the control center for your audio setup. The receiver takes the signal from whatever your audio source is (your phone, for example) and sends it to your speakers. Head units usually feature AM/FM capabilities, USB and/or auxiliary input, and Bluetooth capabilities. It also might have controls that let you adjust the bass and balance of your audio.
This is an obvious one—the speakers are where your sound comes from. They’re usually sold in various configurations. You might see speakers sold individually, in pairs, or in sets of four or more.
Sound bars are basically like longer, bigger speakers. Since your audio is projected from a bigger source, your music is louder. Sound bars can contain multiple speakers and most can connect to your phone via Bluetooth.
A sound system is a complete audio setup for your machine. These kits usually come with a receiver, multiple speakers, an amplifier, and cables.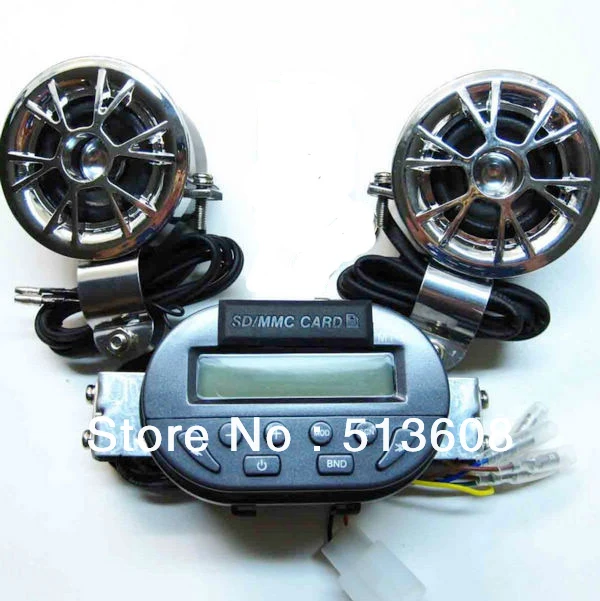 Some even include LED lights. Since there are more parts, sound systems are a little trickier to install. You get a more immersive audio experience out of it, though.
Even within those four broad categories, you’ll have decisions to make. Not all speakers and sound systems are created equal! Here are some other things to consider when deciding how to enjoy your favorite tunes while you ride.
Speakers and sound bars can be mounted in different locations, depending on your machine. Some are designed to mount to your ATV’s handlebars, and others can be secured at different spots on your side-by-side’s cage. Knowing where you want to put your speakers and also knowing the measurements of your machine’s components (like cage width) can help you figure out which sound system is right for you.
These speakers are going to spend a lot of time in the great outdoors. You want a sound system that’s durable and capable of withstanding water, dirt, sunlight, salt, and other elements. Most ATV and UTV speakers are weather resistant, but there are multiple levels of resistance. Some components are more durable than others.
Where is your music coming from? If you’re going to plug in your phone via USB or auxiliary cable, make sure the sound system you choose is compatible. If you’d rather go wireless and connect via Bluetooth, get a system with Bluetooth capabilities. Most sound systems these days will have all of these options, but it’s still good to double check and make sure you’re getting what you need.
This is where the fun stuff comes into play. (Who are we kidding? We’re talking about sound systems here—it’s all fun stuff.) Some people are OK with the basics, but other riders might want something a little extra. In that case, check out the sound systems that come with LED lights or subwoofers. These components cost a little more, of course, but they’ll make your off-road audio experience even more exciting.
If you’re not an audio expert, looking at sound system descriptions might feel like looking at another language. Those strange terms are pretty important and may even help you make a decision—if only you knew what they meant.
Here are some words and phrases you might see when shopping for your audio setup.
An amplifier is an electronic device used to increase a signal’s power. Within a UTV audio system, an amplifier makes it possible to run more speakers. The receiver or head unit of a sound system has an amplifier within it, but depending on how many speakers you want, more power may be needed.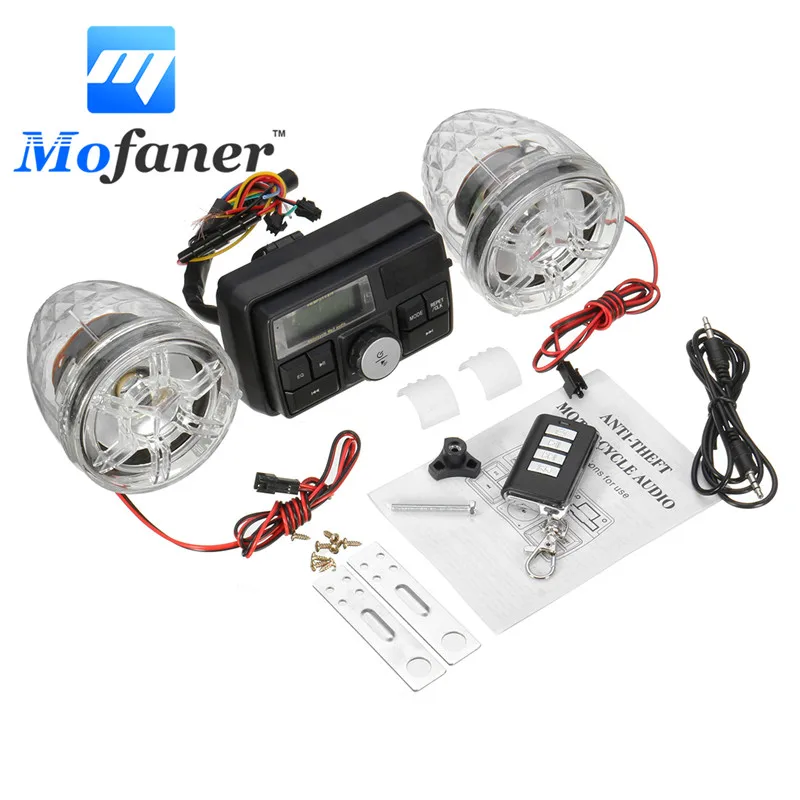
The auxiliary (or aux) port is a standard connection point for headphones, speakers, and other types of audio equipment. On most cell phones, the aux port is where you plug in your earbuds.
Bluetooth is a type of short-range wireless technology that can be used to connect cell phones, tablets, speakers, and other electronic devices. If your sound system has Bluetooth capabilities, it can connect with most cell phones or tablets without wires.
Amplifier output stages are broken down into classes, depending on how power is dissipated. Most ATV and UTV audio amplifiers fall into a Class D category. In the most basic terms, this means the amplifying devices operate like electronic switches, rather than in a linear manner. As a result, Class D amplifiers are more efficient than other types.
This type of speaker incorporates both a tweeter and a woofer (more on these in a bit). Coaxial speakers produce better sound quality than single-cone speakers.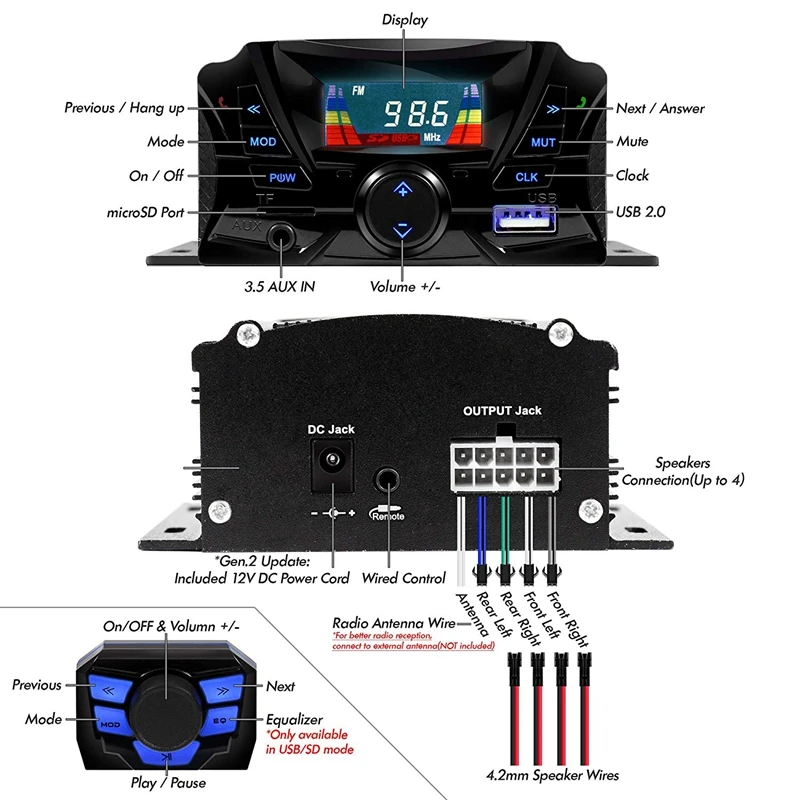 They’re also more affordable and easier to install than other options.
Some components in a sound system, like the circuit board, might be touted as “conformal coated.” This protective coating “conforms” (hence the name) to the circuit board to protect important electric parts from harsh environments.
The decibel, abbreviated dB, is a unit of measurement that describes the intensity of sound.
This rating indicates how resistant a product is against various elements—think water, dust, and sand. IP stands for “Internal Protection” and the two numbers that follow represent solid and liquid resistance. This IP rating chart can help you decipher what each of those numbers mean.
For example, let’s say you find a UTV speaker that has an IP67 rating. Based on the chart, we know that this speaker is protected from total dust ingress and from being submerged in 1 meter of water for up to 30 minutes.
A tweeter is a type of loudspeaker that produces high-frequency sounds.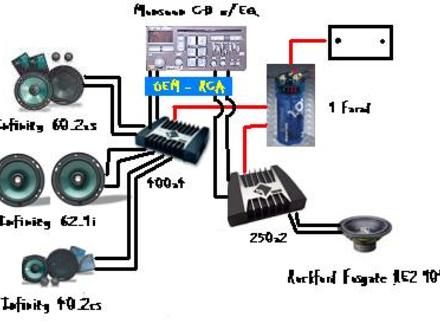 If you guessed that the name comes from the high-pitched sounds made by birds, you are correct!
Think of woofers and subwoofers as the opposite of tweeters. These speakers produce sound on the lower end of the audio spectrum, also known as bass. Just like tweeters were named after bird sounds, the name “woofer” comes from—you guessed it—dogs barking. The more you know!
Is It Difficult to Install Audio Accessories on an ATV or UTV?Stereo systems range from mild to wild, so you can expect the installation difficulty to vary, too. Some side-by-side speakers can be hooked up in a matter of minutes. Other setups, like big stereo systems, require more complicated wiring.
Knowing how your machine’s electrical system is set up can be helpful when wiring those complicated kits, but it’s not a total requirement! As long as you have some basic tools and a clear set of instructions, even the most novice off-roader can figure out how to install audio equipment on a quad or side-by-side.
The right audio equipment can completely change the way you ride. From ATV speakers to all-inclusive stereo systems, there really is something out there for everyone. Do you just need some tunes for you and a passenger to enjoy? Grab a pair of speakers and you’re set. Are you looking to entertain the whole crew on the trails? Treat yourself to a big ol’ sound system.
Whatever you need, you can find it at SuperATV. Check out our wide selection of audio equipment, from speaker mounts to amplifiers to multi-speaker sound systems.
And finally, you can’t forget about the music itself. Quality speakers are one thing, but a quality playlist is what takes things to a whole different level. If you don’t already have your favorite riding songs queued up, give ours a listen! The official SuperATV Spotify playlist is full of jams that you can’t help but sing along to.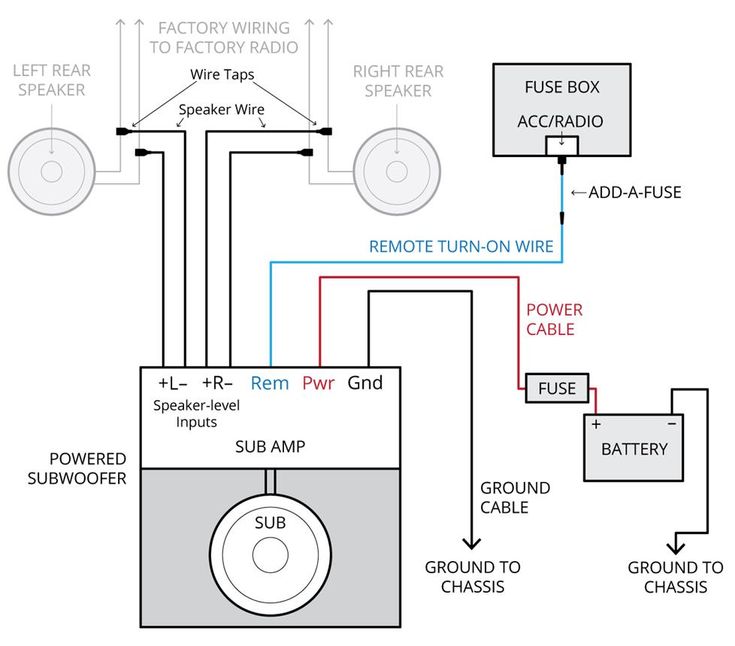
Hello to all DIYers, moto, auto and quad lovers. In this article, we will talk about how I made columns on a quadric. on the quadric there is a Chinese radio tape recorder (it seems to be waterproof) and with it small speakers that are not audible during trips, and even one barely worked. Decided to change the column and podzaparil this topic in earnest.
I bought pioneer speakers with a diameter of 13 cm. And I began to think about what to embed them in and how to install them. As a case, children's sand buckets came up. I specially went to a children's store and bought 4 buckets :) 2 for a quadric and one daughter each, so that everyone would be equally divided). Empirically, I measured the diameter so that the bucket fits snugly and accurately into the groove on the speaker grid. Marked and drank with a hacksaw. I started to try with a grinder, but I almost ruined it - the plastic melts and flies.
Here is a Chinese MP3 radio (AUX, CD card, USB and radio). As stated by the manufacturer, 10W is issued for 2 speakers
Such speakers stood and the left one almost did not work.
I removed the speakers and in their place I will make brackets for new large ones. It can be seen in the photo that the speakers are not fabric or paper, but plastic-rubberized (if you can call it that, I don’t know how to correctly :-))
The child is mastering the technique
To ensure the rigidity of the buckets, we take a sheet of aluminum and make inserts from it
We roll a little on the rollers
Then we cut out such plates from it, mark and drill holes for mounting the speaker. We drill holes slightly smaller than the diameter of the self-tapping screw.
We immediately cut the thread with self-tapping screws
Trying on the speaker with these plates, how it all goes into the bucket
Marking, drilling holes and riveting the plates
I also took a piece of rubber noise and glued it on the inside of the bucket so that it would not rattle from the sound.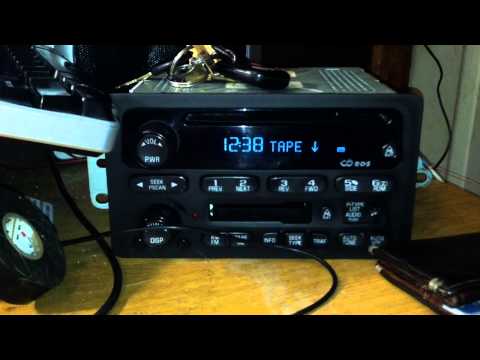
It turned out like this. Pretty weighty speakers
Next, I made the bracket for mounting the speakers on the quadric. Aluminum bracket 2 mm. Bent it as needed and tapped on the pipe so that it fits completely to the column
From the inside, I put a bent plate and riveted it.
On the same holes that we fasten the column, we pass the wire through one
At the bottom of the column near the grid, I made a hole in case water gets in to drain. Dynamics, by the way, are not paper and if water gets in, I hope nothing will happen to them. They are rubberized and the membrane is some kind of plastic.
When the loudspeakers are running at full capacity, you can feel the air coming out through these holes. There are two holes.
Speakers turned out solid, weighty. It's nice to look at them. The sound is also good. I'll post a video later so you can hear it too. Now at the moment I connect the phone via AUX to bring out the music, and if I start shooting a video, then the music is immediately cut off.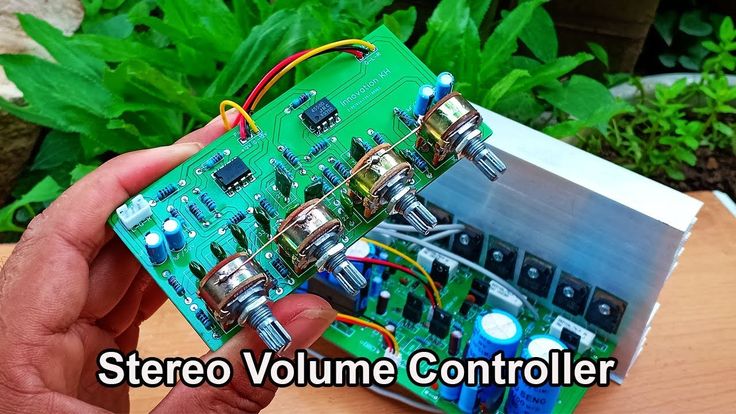
I will definitely take it off and post it
When traveling, the speakers themselves vibrate a little, you will need to come up with another bracket and firmly fix it to the metal frame.
I have a question for music lovers:
From the radio is issued to the speakers 10W (I think that 10 for each - I'm out). I set the speakers to such a value of 35W, maximum 230W. They don't sound bad at all.
Actually the question is: Is it worth it to take a steam bath and install an amplifier for them or not, what do you think?
Here is a video with sound.
Of course, the sound is slightly distorted through the phone, but still...0002 Posted by Updated ATVs0
ATV Music provides an extra dose of adrenaline for some. Others believe that using an audio system is a waste of money, because the sounds of nature and the roar of the engine are the best music. But most riders still agree that the speaker system brings a special mood to the walk.
You can buy an ATV speaker or build your own audio system. It is important to immediately determine what qualities additional equipment should have. High-quality acoustics for an ATV has the following characteristics:
 The device will be used when driving off-road. During hard off-road shaking can be very strong, so the system must withstand such loads.
ATV audio system is highly resistant to the adverse effects that inevitably occur during the operation of a four-wheeler. This is due to the special structure of the system.
Acoustics is in a shockproof case, which prevents dirt, water, dust from getting inside. All elements of the system are protected from the damaging effects of vibration. Mounting speakers on an ATV is not difficult, since this procedure takes no more than 5 minutes. Manufacturers supply strong straps for fixing the device on the ATV.
In most cases acoustics consists of two loudspeakers which are in the case from shock-resistant plastic. The package includes a cable for connecting to a regular battery, as well as a remote control for switching tracks, adjusting the volume.
Modern systems can be connected to a radio or player (including a smartphone), which is located in the driver's pocket. When buying, you should pay attention to the fasteners of the belts. They must be strong enough so that an unpleasant situation does not arise. With the help of fasteners and straps, you can set the acoustics in any position.
If you wish, you can make an audio system for an ATV with your own hands. There are many options for creating such systems. At the heart of any method of manufacturing homemade acoustics is the use of speakers. Most often, acoustics of well-known brands are purchased for these purposes, as they are characterized by decent quality. The housing for creating an acoustic system is sewer fittings with a diameter of 160 mm. The column will turn out to be quite budgetary, but you can’t save on the quality of components. For a homemade audio system you will need:
From two corners 90⁰ and one sleeve creates a frame for curved speakers. A radio tape recorder is attached to the center of the future acoustic system (on the clutch). It is closed with a waterproof frame. Between the frame and the pipe, the space is filled with mounting foam.
The inner cavity in the pipe, where the speakers will be installed, is glued with soundproofing material. When the glue dries, you need to cut out the rings from the plywood. Their outer diameter must correspond to the inner section of the pipe. The thickness of the rings is about 8-15 mm (depending on the size of the speakers). Fix the inserts with a colorless silicone sealant. Speakers connected to the radio are inserted inside the pipes. So that they stand firmly in their seats, plywood rings are installed.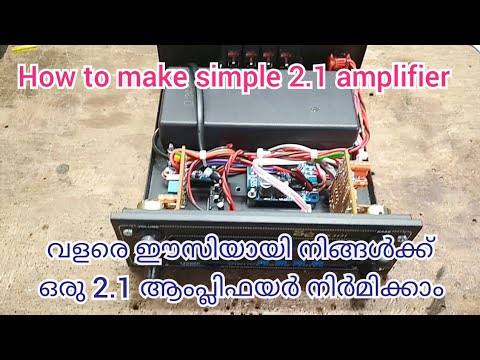
Then carefully remove the remaining foam. The surface of the pipe is ground, and then a layer of putty is applied. When the material is dry, the column is spray-painted.
To power the system, you will need a waterproof connector, a switch. To do this, a hole is drilled in the pipe. Its size corresponds to the dimensions of the switch. The waterproof connector is attached in the same way.
The column is fixed to the body of the ATV with plastic ties or soft straps made of synthetic material. The wire from the speaker must be run to the standard vehicle battery.
You can also make a similar system, but without a radio, but with a player. It can be a standalone gadget or a program installed on a smartphone. To make such a system, you will need to purchase a plastic diffuser instead of a radio, as well as a motorcycle amplifier, since the system will be powered from the cigarette lighter.
In addition to the speakers, an amplifier is also installed in the tube body.