Delivery options and delivery speeds may vary for different locations
Sign In
or enter a zip code
Email * Password *
REPAIR & HOW TO
MAINTENANCE
TROUBLESHOOTING
GUIDES
TIPS & TRICKS
ALL ARTICLES WATCH VIDEOS ABOUT US SHOP PARTS CONTACT US
There are three types of starters fitted to motorcycles, ATVs and side-by-sides, and the steps below detail how to test each one of them.
Tools Needed – How to Test StartersBefore bench testing a starter, make sure to:
The first type of starter has a starter motor and a solenoid incorporated into a single unit. The starter features a Bendix gear that engages with the flywheel in order to start the engine. This type of starter is commonly found on side-by-sides, utility vehicles and automobiles.
The second type of starter has a separate starter motor and solenoid, but still features the Bendix gear that engages with the flywheel to start the engine. This type of starter is generally found on larger motorcycles and ATVs.
The third type of starter also has a separate starter motor and starter solenoid, but this starter engages with a reduction gear and one-way clutch to start the engine. It doesn’t use a Bendix gear. This type of starter is generally found on sports motorcycles and ATVs.
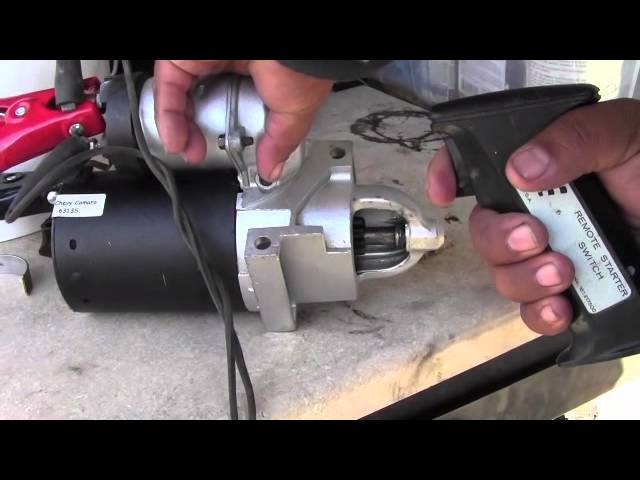
Testing a Bendix Gear Starter/Solenoid UnitThere are two nuts on the solenoid. The one furthest from the starter motor secures the wire coming from the battery, and the one closest to the starter motor secures the wire going from the solenoid to the starter motor. There’s also a spade terminal on the solenoid that connects to the wire from the ignition switch or push button, which triggers the solenoid to engage the Bendix gear.
Testing Only the Solenoid1. Connect a negative jumper cable to the negative terminal of the battery and the body of the starter motor.
2. Connect a positive jumper cable to the positive terminal of the battery.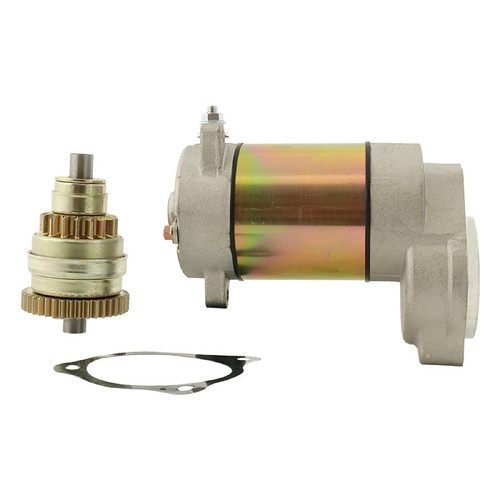
NOTE: The positive jumper cable is now live, so be careful not to touch the other end against a ground surface.
3. Touch the free end of the positive jumper to the spade terminal on the solenoid. You should hear a clicking sound from the solenoid, and the solenoid should force the Bendix gear out of the starter motor. If the solenoid makes no sound and doesn’t force out the Bendix gear, the starter/solenoid unit must be replaced.
Testing Only the Starter Motor1. Connect a negative jumper cable to the body of the starter motor.
2. Connect a positive jumper cable to the positive terminal of the battery, and the other end to the nut on the solenoid furthest from the starter motor that secures the wire from the battery to the starter motor.
3. Touch the free end of the negative jumper cable against the negative terminal of the battery. You should hear the starter motor spin but the Bendix gear will not engage. If the starter motor fails to spin, it must be replaced.
1. Connect a negative jumper cable to the negative terminal of the battery and the body of the starter motor.
2. Connect a positive jumper cable to the positive terminal of the battery.
3. Connect the free end of the positive jumper cable to the nut on the solenoid from the starter motor that secures the wire from the battery to the starter motor.
4. Connect one end of a test lead to the positive jumper cable attached to the solenoid.
5. Touch the free end of the test lead to the spade terminal on the solenoid. The starter motor should spin and the solenoid should force the Bendix gear out of the starter motor.
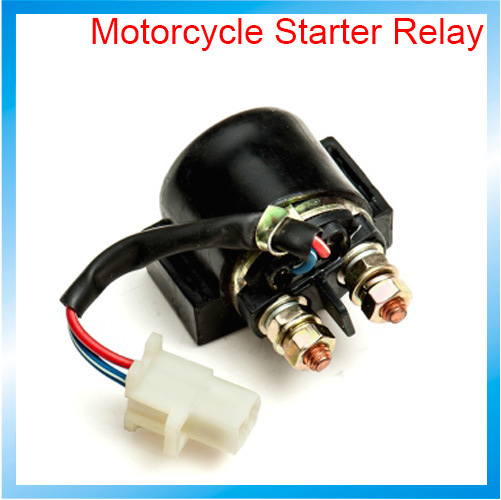
Testing a Bendix Gear Starter with Separate SolenoidThe starter has a single wire connecting to it from the solenoid. The solenoid has two terminals at one end, and a pair of wires leading out from the other end. The starter motor features a Bendix gear.
1. Connect a negative jumper cable to the negative terminal of the battery, and the other end to the body of the starter motor.
2. Connect a positive jumper cable to the positive terminal of the battery.
3. Touch the free end of the positive jumper cable to the positive wire coming from the starter. The starter motor should spin and the Bendix gear should be forced out of the starter. If it doesn’t, the starter motor is faulty and must be replaced.
Testing Only the Solenoid1. Connect a negative test lead to the negative wire coming from the solenoid, and a positive test lead to the positive wire coming from the solenoid.
2. Connect a positive jumper cable to the positive test lead, and the other end to the positive terminal of the battery.
3. Connect a negative jumper cable to the negative test lead.
4. Touch the free end of the negative jumper cable to the negative battery terminal. The solenoid should make a clicking sound, indicating that it's working.
5. Connect a multimeter to the two terminals on the solenoid.
6. Set the multimeter to resistance. The multimeter should show an open circuit.
7. Touch the free end of the negative jumper cable to the negative battery terminal. The multimeter should show an open circuit, proving the solenoid is working. If the solenoid makes no sound and doesn’t make a closed circuit, it’s faulty and must be replaced.
Testing a Starter with Separate SolenoidThe starter has a single wire connecting to it from the solenoid. The solenoid has two terminals at one end and a pair of wires leading out from the other end. There is no Bendix gear, but there’s a splined shaft coming from the starter motor.
Testing Only the Starter Motor1.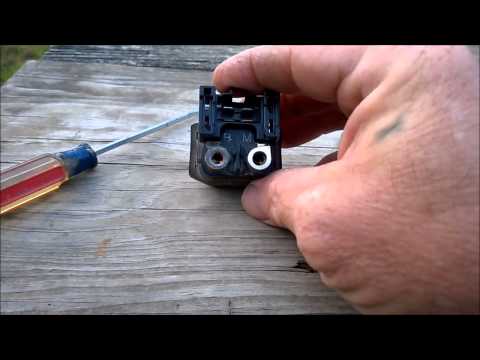 Connect a positive jumper cable to the positive terminal of the battery, and the other end to the nut on the starter motor that secures the positive wire from the solenoid.
2. Connect a negative jumper cable to the negative terminal of the battery.
3. Touch the free end of the negative jumper cable to the negative battery terminal. The starter motor should spin. If the starter motor fails to spin, it’s faulty and must be replaced.
Testing Only the Solenoid1 -7. Repeat the steps for testing only the solenoid, as outlined in the previous section.
body
Delivery options and delivery speeds may vary for different locations
Sign In
or enter a zip code
Email * Password *
REPAIR & HOW TO
MAINTENANCE
TROUBLESHOOTING
GUIDES
TIPS & TRICKS
ALL ARTICLES WATCH VIDEOS ABOUT US SHOP PARTS CONTACT US
A motorcycle, ATV or side-by-side that won’t start is frustrating, but testing to see if the starter motor is at fault is a piece of cake.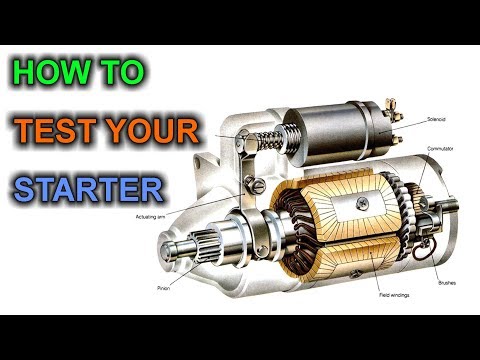
Despite coming in various shapes and sizes, all starter motors work the same way, so you can apply these steps whether you’re testing one for a motorcycle, ATV or side-by-side. Watch the video above for the full version of testing powersports vehicle starters, or read on below for the quick version.
Testing Motorcycle, ATV and UTV StartersStep 1. Use a digital multimeter set to DC volts to check if the vehicle’s battery is properly charged. Connect the multimeter’s probes to the positive and negative terminals of the battery. If the reading is between 12-13 volts, the battery is good. However, if the reading is below 12 volts, you’ll need to charge the battery.
Step 2. Using jumper cables, connect the positive cable to the positive terminal on the battery, and the negative cable to the negative terminal.
NOTE: To avoid an electric shock, make sure the free ends of the jumper cables don’t touch one another.
Step 3. Attach the negative jumper cable to the starter motor’s body to ground it.
Step 4. Hold the positive jumper cable to the battery cable terminal on the starter motor, which will activate if it’s working correctly. If there’s something wrong with the starter motor, then nothing will happen.
NOTE: The starter motor doesn't have to be removed from the vehicle. If you’re testing a starter motor that’s already been removed from your bike, ATV or UTV, hold it firmly as you test it to prevent it from moving around. The starter motor’s battery cable terminal is usually on the starter motor body, but may be on the solenoid if your starter motor has one.
If you’re having starting problems, the starter motor is just one of several electrical components that could be causing problems. The starter relay or solenoid could be the actual culprit. Watch the video below to learn how to test a starter solenoid for a motorcycle, ATV or UTV.
body
Posted by by MotoDoctor
One of the problems with starting the engine on an ATV is found in the electrical system. To start the engine, we need to turn on the ignition and press the "Start" button (if the ATV is in gear, you need to additionally press the brake pedal). All ATV owners are familiar with this startup process. But here is the problem itself, after the actions performed, your ATV does not even make any sounds.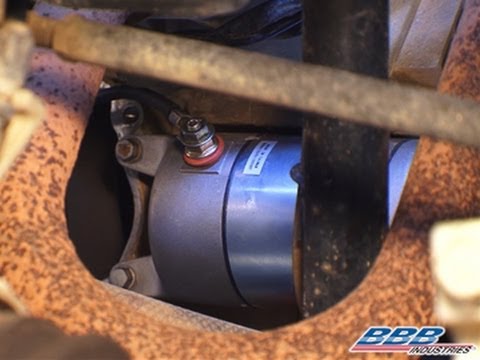 Of course, first of all, we check whether the battery is holding a charge. If the battery is good, we proceed to check the wiring connections. Sometimes at the factory, when installing electrical equipment, the connecting chips are turned on, but not fixed with a lock. So sometimes, due to unscrupulous assemblers, these chips are disconnected and the contact naturally disappears. It is not very difficult to identify such a malfunction; it is enough to inspect the entire electrical wiring circuit and determine where there is no reliable connection. True, for this it is often necessary to dismantle plastic elements, so that there would be access to all electrical equipment connections. If it's plastic on a Chinese ATV, be extra careful as he is very fragile.
 Very often, the power relay of the electric starter fails. In order to check it, it is enough to close two contacts between each other (2 nuts x 8,) 2 power red wires, this is the positive wire of the electric starter in the gap. If all other elements are in good order, then the electric starter will start working and you will have to replace the starter power relay. But in rare cases, the power relay itself is working properly, but the power that should come to it is missing and naturally the relay will not work. This is where you will need a control or multimeter to check whether power is supplied (+) and (-) (12 volts) to the starter relay. In some ATV circuits, the starter relay constantly receives (-) and (+) is supplied when the (start) button is pressed, and in others, vice versa, you can determine all this with the help of instruments. For example, you have determined that the power is not going to the relay, then we recommend that you check the start button for serviceability.
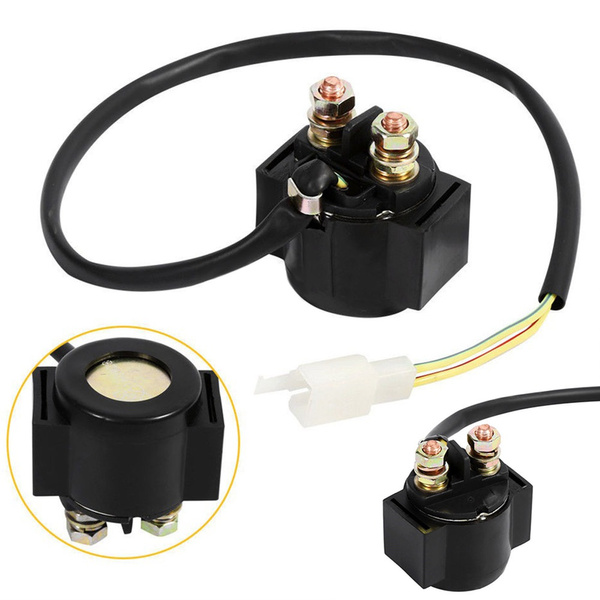 But as we said, the first thing to check is all electrical wiring connections. And now let's consider the option if power comes to the starter power relay and the relay itself works but the electric starter is silent, then here it seems to be faulty. In this case, you need to unscrew the mounting bolts and remove the starter from the ATV launcher. In this state, turn on the button (start), if the electric starter does not start working, then the malfunction is in it. In this article, we examined the problem of an electric start malfunction on an ATV, which is directly related to the operation of electrical equipment, but in some cases the engine cannot be started from an electric starter due to a malfunction of the mechanical start system, this is the so-called electric starter overrunning clutch. If it fails, only the hum of the electric starter will be heard at the time of launch. In this case, this part must be replaced. This entry was posted in Motorcycle Repair Tips by MotoDoctor.
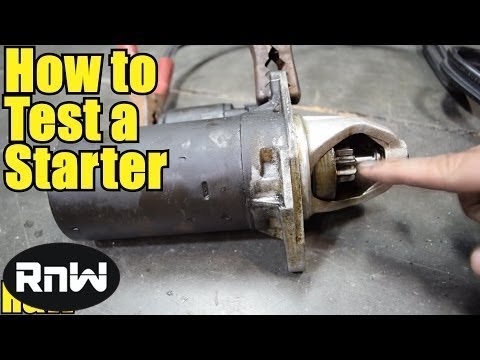 Bookmark the permalink.
 ATV won't start? Don't know where to start troubleshooting? Then let's try to find out the main reasons why an ATV may refuse to start.
Unfortunately, the equipment of any manufacturer sooner or later starts to act up, no one is safe from this, but finding a malfunction and starting an ATV that refuses to start is not so easy, especially if you are far from a service station.
No matter how trite it may sound, the first thing to do is to check the presence of gasoline in the gas tank: believe me, very often a person tries to start an ATV with a dry tank.
Check if the engine power button is disconnected, it is usually located on the steering wheel on the left side, and also pay attention to the fuses, one of them may have blown.
Next, take a multimeter and measure the ATV battery charge level: a charged battery should produce from 12.6 to 12.8 volts and confidently turn the starter, if the battery is low, charge it.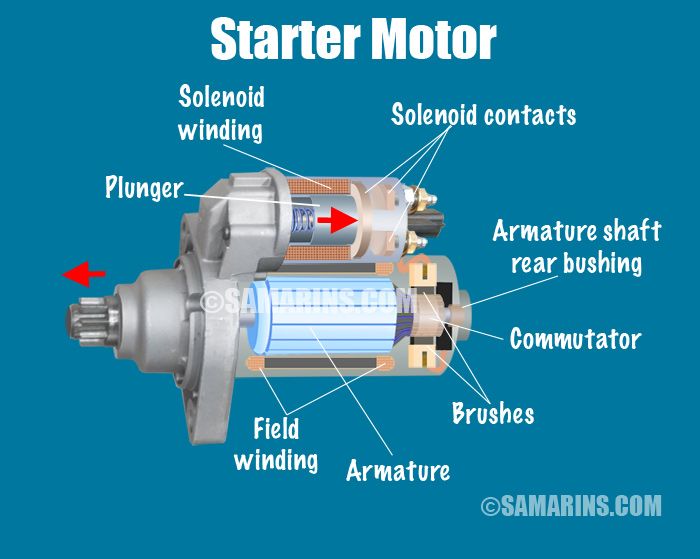
It is also necessary to pay attention to the battery terminals, they must be clean and not oxidized, and the clamping bolts must be tightened.
If, when trying to start the ATV, you notice that the starter does not turn, you must first check and, if necessary, replace the starter relay. To check if the starter itself is working, you need to make sure that the engine mass is in good condition (oxides, no contact, wire damage) and apply positive to it directly from the battery (observing the polarity), if the starter spins, look for a problem in the wiring. If there is no reaction to your actions, most likely the starter is out of order.
Check spark plug condition and spark. This is what a spark plug looks like when installed in a serviceable and tuned engine:
If you notice a significant deviation in the color of the spark plug, you may need to tune the ATV carburetor.
In order to check the presence of a spark, you need to unscrew the spark plug, insert it into the candle cap, lean it against any metal part of the ATV (do not forget about safety precautions: there should be no gasoline smudges nearby) and turn the starter, the spark should be sure and distinct noticeable. If there is no spark, it is necessary to replace the spark plug, if there is no spark, look at the wiring, and also replace the ignition coil.
Make sure your ATV's air filter is clean and saturated and that the air pipe from the filter to the carburetor is free of damage or blockage.
Determine if fuel is entering the carburetor, if the fuel filter is clean, if the fuel pipes are intact, clean the carburetor with cleaning fluids and blow out the passages.
Determine if the fuel pump is OK. After turning on the ignition, you should hear the sound of turning on the fuel pump and pumping gasoline into the fuel system. It is also necessary to check the operation of the fuel pump relay.
A very common cause of a poor engine start is a worn piston and, as a result, poor compression (as a rule, this applies to ATVs with decent mileage), compression can be measured with a special device called a compression gauge.
Quite often the ATV does not start well in winter, but there is a set of measures that greatly facilitates the start of the ATV, you can get acquainted with them by clicking on the link.