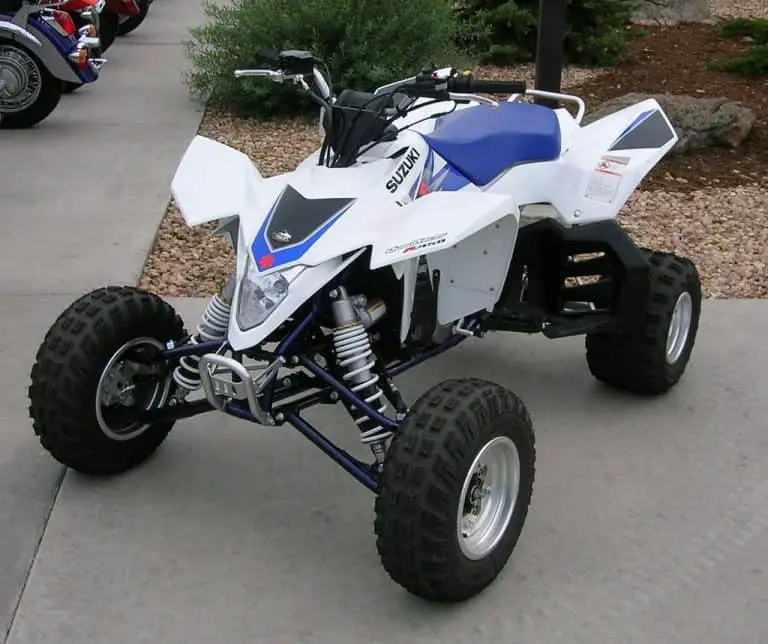
Your ATV is a beast of the outdoors, seldom spending much of its life inside. The plastic body of ATVs becomes faded from the sun’s rays, and thrashing around in dirt, mud, snow, and water doesn’t help. Plastics get scuffed by boots or passing debris, and cracks can appear in the body or windshield.
There are a few options for restoring your ATV’s faded plastic so it looks like a showroom model again. These options vary in cost and difficulty. In this guide, we’ll look at all the common ways to restore the luster of your ATV’s plastic body.
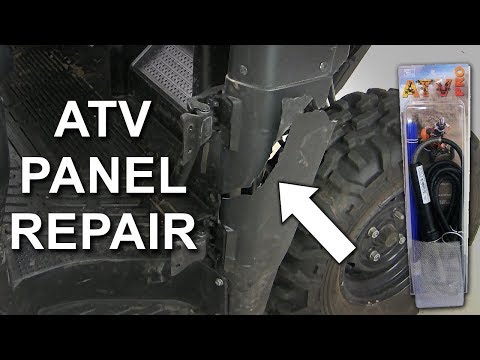
Image from www.can-amtalk.com
Linseed oil can restore faded plastic, but it takes ages to dry. You want boiled linseed oil, instead. Note—this doesn’t mean you boil the linseed oil yourself! It means that the linseed oil has been pre-treated to dry faster.
To speed things along, choose boiled linseed oil and mix it with paint thinner. We recommend a 40/60 ratio of linseed oil and paint thinner.
Start by cleaning your ATV thoroughly. For best results, you’ll want to remove the rack and any other parts of the machine that are covering the plastics.
Apply the mixture to your plastics using a dry cloth. You’ll notice the linseed oil will remove the oxidization that’s causing fading. After you’ve applied the mixture to all the plastic, allow it a full day to dry.
If you keep your ATV covered and don’t use it every day, this fix will last for a few months. If you constantly use your ATV outdoors, this treatment may be required to be performed again in 4-6 weeks.
ATV are waterproof & breathable riding gear
Find out the items that suit your needs
You’ll need good access to your ATV’s plastics, so remove the skid plates and racks. If they are severely damaged in any way, you may want to replace them completely. To complement your better-looking new plastics, you may want to strip or sand your racks and paint them with a spray-on bedliner.
Next up, give the ATV a good clean overall. A mixture of dishwashing liquid and water will remove all the grease and oils from the surfaces.
Now it’s time to prepare the plastic for waxing. This means sanding the plastic with fine sandpaper, working your way up from the lowest number of sandpaper up to the highest. You can use an oscillating tool to speed up the process. Make sure you’re wearing safe gloves, and finish up by sanding with steel wool.
Apply a vinyl floor liquid wax to the plastic using a car wax applicator. Using thin coats, you can work on one section of the plastic while another section dries. You will need to apply several coats, buffing out the plastic after each application.
After the final coat is complete and bone dry, finish up with an automotive wax for an extra layer of sheen.
This process is more involved than the linseed oil and paint thinner fix, but it typically has a longer-lasting result.
Image from www. atvhonda.com
Instead of a linseed oil and paint thinner mixture or vinyl liquid wax, you can use a dedicated plastic restorer product. While most of these products work very well, they are basically just variations of our above options with slightly different chemical compositions.
Image from Lea Arnold YouTube channel
Using a heat gun does work to make plastics look new, but it has downsides.
To perform the procedure, you use a heat gun set to a low setting and blow it from a few inches above the problem plastic. Voila—the plastic looks as good as new.
But it’s not really an option that we recommend. It works by melting the top layer of the plastic, which in turn makes the plastic more brittle. Every time you perform a heat gun restoration, your plastics lose some strength.
Where we would suggest using a heat gun is to work out small cracks in the plastic. Severe cracks necessitate replacement, though.
These are the top ways to restore your ATV plastic. Another option is to cover your faded plastic with a new lick of paint from a spray paint that’s specifically suitable for plastic. Whatever option you choose, with just a little bit of elbow grease you can have your ATV back in showroom condition.
SPORTSMAN Black
36 EUR
32.40 EUR
-10%
HIT
ENDURO LIGHT Graphite
the most durable
458 EUR
412.20 EUR
-10%
HIT
ENDURO Camogrey
the most durable
657 EUR
591.30 EUR
-10%
HIT
ENDURO Graphite
the most durable
279 EUR
251.10 EUR
-10%
HIT
ENDURO Graphite
the most durable
657 EUR
591.30 EUR
AQUAMASTER-ZIP LIGHT Camogrey
with central zipper
598 EUR
412. 50 EUR
-10%
HIT
ENDURO LIGHT Camogrey
the most durable
458 EUR
412.20 EUR
AQUAMASTER LIGHT Red
reliability & comfort
438 EUR
324.50 EUR
NEODRY Black
17 EUR
11.90 EUR
-10%
HIT
ENDURO Camogrey
the most durable
279 EUR
251.10 EUR
AQUAMASTER Blue
reliability & comfort
647 EUR
582.30 EUR
-30%
HIT
AQUAMASTER Red
reliability & comfort
259 EUR
181.30 EUR
-40%
HIT
AQUAMASTER Orange
reliability & comfort
259 EUR
155.40 EUR
AQUAMASTER Red
reliability & comfort
677 EUR
591. 40 EUR
-40%
HIT
AQUAMASTER Camogreen
reliability & comfort
259 EUR
155.40 EUR
BELT
9 EUR
8.10 EUR
ENDURO BF Camogrey
bootfoot waders
528 EUR
475.20 EUR
ENDURO BF Camogreen
bootfoot waders
289 EUR
173.40 EUR
ALL SEASON Black
62 EUR
55.80 EUR
ENDURO BF Camogrey
bootfoot waders
329 EUR
296.10 EUR
Explore all
Since ATVs invest the majority of their time outdoors, their plastic body ends up being discolored from the sunlight's rays, as well as surging around in dirt, mud, snow, and also water does not help. Plastics get messed up by boots or passing particles, and also splits can appear in the body or windshield.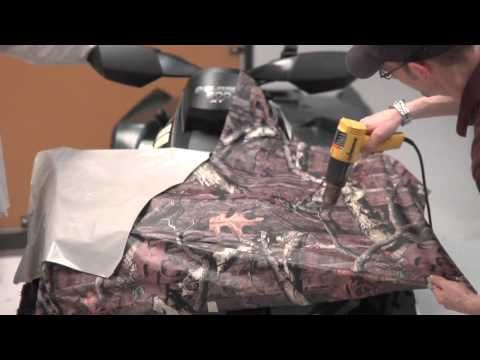
There are a few choices for restoring your ATV's faded plastic so it appears like a showroom model once more. These alternatives differ in price as well as problem.
In this guide, we clarify exactly how to make your ATV resemble new. We provide you with some suggestions on exactly how to restore ATV plastic.
Table of Contents
Now that you understand what creates your ATV plastic to fade allow's take a look at the various ways you can recover your vehicle to its previous glory.
When it concerns restoring your ATV, there are many methods that can be made use of to take on discolored plastic, with everyone delivering different outcomes. So to help you at the same time, we have actually detailed the various techniques down below.
Before you restore your ATV plastic, you should keep your ATV clear. Wash the ATV completely using Dawn dishwashing fluid. Dawn helps get rid of oils and grease from the surface area. And afterward, completely dry the maker totally. If there are scratches, you will also require to sand its plastic surface.
Linseed oil can recover discolored plastic, however, it takes ages to dry. You need boiled linseed oil, rather. Note-- this does not imply you steam the linseed oil on your own! It implies that the linseed oil has actually been pre-treated to completely dry faster.
To speed up points along, choose boiled linseed oil and mix it with paint thinner. We advise a 40/60 proportion of linseed oil as well as paint thinner.
Begin by cleaning your ATV extensively. For best results, you'll intend to eliminate the rack as well as any other parts of the device that are covering the plastics.
Apply the mix to your plastics using a completely dry cloth. You'll discover the linseed oil will remove the oxidization that's causing fading. After you have actually used the blend to all the plastic, allow it a full day to dry.
If you maintain your ATV covered and do not use it on a daily basis, this restore will certainly last for a couple of months. If you continuously use your ATV outdoors, this treatment might be called for to be done again in 4-6 weeks.
The following video shows you how to restore ATV plastic with boiled linseed oil.
There are plenty of products in stores that declare to recover plastic. One of the most preferred is Solution Finish and CAR GUYS Plastic Restorer.
A look through customer testimonials shows that they work. How much time the remediation lasts differs from item to item, and just how well you protect your ATV. Yet most appear to last for a number of months.
When using a certain restorer, inspect the instructions of the application on the label. Also, the majority of these items are likewise helpful for plastic. If your ATV seat has a plastic cover, you can make use of these restorers to reverse fading.
First, you should remove the skid plates and racks. If they are drastically damaged whatsoever, you might intend to replace them totally. To enhance your better-looking new plastics, you may intend to strip or sand your racks and repaint them with a spray-on bed liner.
Next up, offer the ATV a good clean overall. Now, it's time to prepare the plastic for waxing. This means fining sand the plastic with fine sandpaper, working your way up from the lowest amount of sandpaper to the highest. You can also use an oscillating device to quicken the process. Make certain you're wearing risk-free gloves, and finish up by fining sand with steel wool.
Use a vinyl flooring liquid wax to the plastic using a car and truck wax applicator. Using thin layers, you can service one area of the plastic while one more section dries. You will need to apply a number of coats, and polish the plastic after each application.
After the last layer is full and also bone dry, end up with an automotive wax for an added layer of luster.
This process is more complex than linseed oil and paints thinner restoration, but it usually has longer-lasting results.
This is the debatable one that we don't advise. It works such as this: you set the heat gun to the lowest setting and blow it a few inches away from the plastic, moving slowly over the discolored areas.
This approach generates instant outcomes. The faded plastic instantly appears new and also glossy.
While it functions, how it works is the issue. The heat partially thaws the top layer of the plastic, making it show up new.
Comparable to various other plastic restore methods, the heat gun method does not last forever. Oxidation as well as fading will certainly return after a number of weeks or months. So you need to duplicate the treatment.
The trouble is that every time you use a heat gun, the plastic gets more brittle as well as more probable to crack as you set about your riding.
So we do not suggest making use of a heat gun. Use linseed oil or a plastic restorer. If you want long-term remediation, see the last method below. You can watch the following video to learn how to restore ATV plastic with the heat gun.
For the last approach, we are going to go over; we have selected an option that is arguably one of the most efficient when it comes to restoring ATV plastic. If you see that your ATV has actually begun to discolor, you can constantly battle the issue by repainting it.
You can do this by using spray paints ideal for ATV plastic, although you will need to apply a primer coat and a safety top layer for the best outcomes.
Like the majority of recovering approaches, paint is not permanent as well as will certainly start to fade with time. Nevertheless, it can last much longer than various other repair choices and can be quickly reapplied whenever the plastic begins to discolor.
If you want to learn more about paint, you can click here to get a guide for painting your ATV step-by-step.
Broken plastic is a little bit a lot more challenging to fix. If a piece of the plastic has come off, not simply a basic fracture, you may be much better off changing the whole plastic part.
However, if it's just a crack, there's hope. We discovered numerous feasible means to repair broken ATV plastic. Nonetheless, most of them, such as using epoxy or superglue do not work well. As quickly as you go out with the ATV once again, the sealed cracks are then loosened
The solution that appears to work ideal is melting the plastic. You can use a plastic welder, heat gun, soldering iron, or some other source of heat to melt the plastic along the crack. You'll require to apply stress on both sides of the plastic up until the melted plastic remedies and holds.
For larger fractures, you may need to thaw an exterior plastic to fill the fracture. You can also get plastic welding rods or reinforcement plastic mesh.
When it comes to the windshield, because it is likely acrylic, an acrylic solvent concrete or an acrylic adhesive is the best option.
Adhere to the directions on the label. Keep in mind to clean the windshield before using any item.
Plastic burs very easy as well as wet fining sand will prevent that. With the 180 grit just sand the actually bad areas as well as get the deep scratches, nothing even more. After they have gone away, Use 220 on the overall vehicle.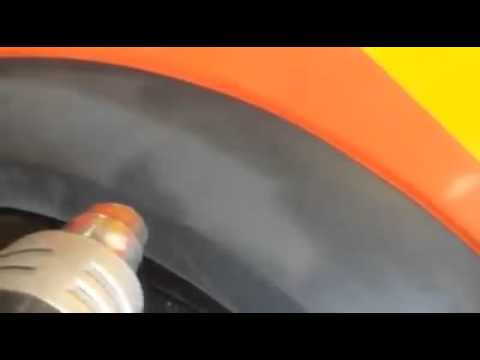 Sand up until the shade is also all over and the scratches are gone.
Brightening with Toothpaste or Sodium Bicarbonate Toothpaste and baking soda are both light abrasives that you can make use of to brighten plastic. For deeply etched or blemished plastic, capture non-gel toothpaste straight onto the surface and also buff it in a circular movement with a microfiber or cotton cloth.
WD-40 Multi-use product is excellent for most plastic surfaces that have actually had a great deal of exterior direct exposure, so it's great for garden furniture. It is very important to note that Polycarbonate and clear polystyrene plastics are among the very few surfaces where WD-40 multi-purpose products can be avoided.
The very best method I have actually located for removing light scrapes is to choose some 1500 Grit Wet Sandpaper. Just utilize the sandpaper over the locations with scrapes and also enthusiast it out when you're done. You can end up with a coat of the plastic restorer I discussed above to make it look new.
To restore the shine, apply a small amount of plastic or metal polish just enough to cover the dull areas, then apply it in a circular motion with a clean, dry cloth. You may need to repeat the process a few times, but eventually, the plastic will shine like new again.
The Most Comprehensive Motorcycle Camping Gear Checklist (Ultimate guide for you)
Rodney L Herron
Rodney L is a technical writer and product consultant with over a decade of experience in the motor industry. Rodney is a fan of performance machines that run fast and loud and an expert in all things custom. His numerous articles and write-ups are available at our knowledge base. Whether it’s something wrong with your motorcycle or you are building a custom bike, you can trust Rodney’s experience.
Well-maintained plastic is a reliable indicator of attitude towards a car. But competent care of plastic in a car is complicated by the fact that each car has at least four types of it.
In today's article, we analyze the species diversity of automotive plastic, its typical problems and ways to solve them.
Headlights, dashboard.
Dust, rags, road chemicals, aggressive chemicals, time, sun.
1. Scratches. To scratch the transparent plastic, just wipe it with a dusty cloth.
2. Yellowing. Transparent plastic oxidizes and turns yellow over time. Road chemicals, harsh chemicals, sunlight, chips and scratches speed up this process.
3. Turbidity. If the plastic is severely scratched or oxidized, it becomes cloudy.
Yellowing and slight damage can be removed with a special cleaner. In the running state, only polishing will help. The plastic on the dashboard can only be protected with a quartz coating. Headlights - hydrophobic coating for plastic.
How to care for headlights
Plastic cleaner. Removes minor scratches and yellowing. The kit includes a protective composition with water-repellent properties.
Polishing will effectively remove scratches, haze and yellowing and restore clear plastic to its original appearance.
Clear plastic surface restoration and protection kit. It consists of a special cleaner and a protective composition based on silicon dioxide. Gives hydrophobic properties, protects against oxidation and physical impact.
Suitable for both glass and clear plastics. Gives strong water repellency, prevents deposits in the form of dirt, smog, midges and bird guano. It also effectively prevents the formation of an ice crust on the headlights.
Glossy plastic is usually used to decorate the interior of a car. It is located in prominent places and often comes into contact with the driver, passengers, their belongings and clothing.
How to care for your interior
Keys, key chains, metal buttons and rivets, cheap polishes, greasy fingers, dust, rags.
1. Scratches. Glossy plastic is easily scratched by keys, coins, rings, bracelets and other hard objects. And in modern expensive cars, glossy plastic is so vulnerable that it scratches even if you wipe the dust with soft microfiber.
2. Fat. Greasy finger prints and a greasy film from cheap plastic polishes.
Scratches can only be removed by polishing, while greasy stains are easily removed by liquid interior cleaners with a degreasing effect. Only quartz protective coatings are suitable for protecting glossy plastic. They harden and prevent scratches.
Polishing will effectively remove scratches and restore glossy plastic to its original appearance.
Multipurpose aerosol cleaner. Gently cleans and refreshes any surfaces in the cabin: leather, textiles, glossy and structural plastics, glass and LCD screens. Effective against light dirt.
Quartz coating forms a hard protective shell on the surface that will protect against accidental scratches. Creates a deep glassy sheen and hydrophobic effect.
Soft, lint-free microfibre is ideal for cleaning delicate glossy surfaces. Tests and wipe tests showed the best cleaning effect without scratches and streaks on the paintwork.
The area of external plastic is very wide: bumpers, fenders, pillars, sills, wipers, moldings, roof rails, engine compartment.
Sun, road chemicals, harsh chemicals, other vehicles, curbs, fences and heels.
1. Burn-in and fading. The plastic on the outside of a car is almost always rough and black, an ideal target for chemicals and UV rays. Over time, it loses color and becomes dirty gray.
2. Mechanical damage. One of the tasks of the outer plastic is to protect the paintwork from scratches, taking damage on itself. So he scratches very actively.
External plastic can be restored and protected from fading using special coatings. Restoring the natural pattern of the outer plastic is impractical. Minor damage is not very noticeable, and in case of severe damage, it is better to buy a new part.
Kit for cleaning and protecting unpainted structural plastics. The composition, interacting with air, creates a solid protective film on the surface. Prevents fading and restores black factory shine for up to 6 months.
Professional treatment for restoring bare plastic parts. Restores dull and faded plastic, returning it to its original appearance.
Almost all plastic in the cabin is matte: door cards, dashboard, seats, pillars.
Sun, time, cheap polishes, sharp objects.
1. Burn-in and fading similar to exterior plastic. The inner matte plastic also loses color, but much more slowly than the outer one.
2. Obesity. As a rule, it happens after ordering a comprehensive interior cleaning at a car wash. The plastic begins to shine greasy, slip and smell “delicious”. Many car owners like this and continue this vicious practice.
Plastic must be cleaned of grease and protected from fading with internal plastic products that do not oil the surface, but return the natural matte sheen.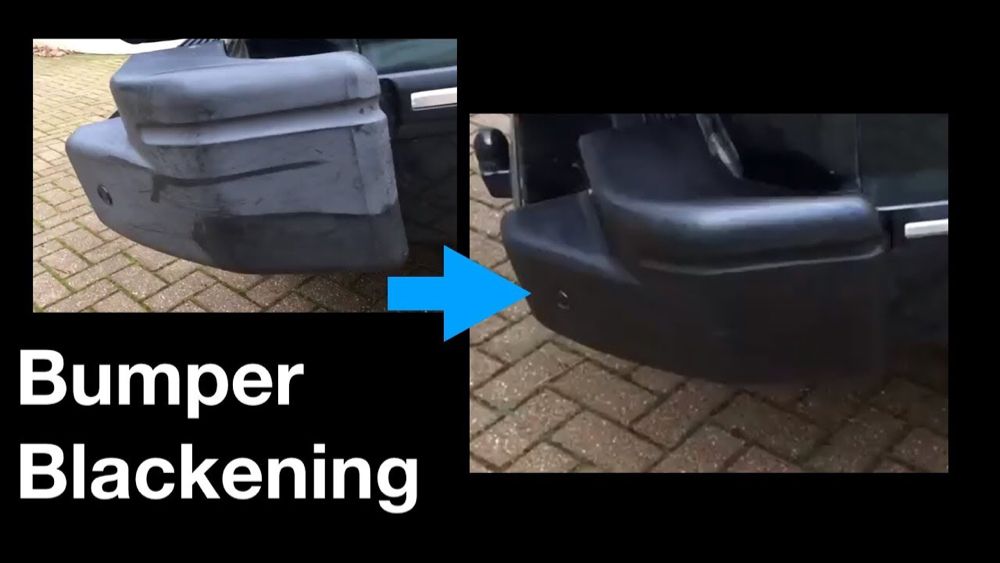 It is good if the protective coating has antistatic properties - less dust will settle on the plastic.
Repairing compound for plastics and rubber restores surfaces to a factory matte finish. Protects against fading and cracking, gives antistatic properties.
Cleansing spray based on Japanese conifer extract. Does not cause allergies, leaves a pleasant light aroma in the cabin. Includes a microfiber brush for easy application.
Car plastic care is not difficult if you have all the necessary tools and car cosmetics. But having a whole arsenal of tools, cleaners and protective coatings for plastic is not at all necessary if you have the opportunity to sign up for detailing.
Free diagnostics To sign up for a free diagnostics at the nearest detailing studio, call 063 049-49-49 or send a request and we will call you back. Sign upAddresses and phone numbers of detailing studios
Share
Send
Many modern motorcycles are replete with plastic panels, they are needed to create a complete look of the bike, improve aerodynamics and protect important components. In order to protect these parts from damage, modern polymers are made flexible and impact resistant, but even this does not save the motorcycle from falls and accidents. In such cases, the manufacturer offers to replace the part with a new one, which costs a lot of money. We have prepared several affordable options for how to make plastic on a motorcycle with your own hands.
First of all, it is necessary to determine the degree of damage. With the proper approach, it is possible to restore a completely broken part, but sometimes it will cost at the level of buying a new one. If the damage is relatively minor and relates to a structure that does not carry a critical load, such as part of the body of a motorcycle (maxi scooters), then cosmetic repair methods are suitable.
Cracks, chips and gluing together several pieces of plastic can be done using hot air soldering or a soldering iron. Responsible, load-bearing structures, as well as parts with a high degree of damage, are best repaired using methods that involve restoring the mass of a plastic part and its characteristics (stiffness, elasticity, etc. ). In cases where plastic can no longer be repaired with a patch or gluing, there is an option to detail from scratch. To do this, you will need to carefully study the entire modeling process, have a lot of summary time and nerves. Often, in such cases, it is easier to purchase a used spare part and repair or even buy new plastic.
To repair the plastic of a motorcycle with heated air, you will need a building hair dryer, but not any, but with a temperature controller. You can use the cheapest device, but then there is a risk of overheating the plastic, which will lead to the loss of its basic properties. Overheated material will be brittle and may break under the vibrations from driving on normal roads. You will also need a special nozzle with a thin nozzle, about 5-8 mm.
In addition to the hair dryer, you will need a large piece of plastic identical to the one being welded. To do this, you should pay attention to the marks of the part, most likely you will have a product of the PP, RA or ABS brands in front of you.![]() Polypropylene PP, for example, melts at 300 degrees, and starts to burn at 350, so it should be welded at a temperature of 300 - 340 degrees. Polyamide or PA should be welded at 410 - 460 degrees, ABS at 360 - 400.
Polypropylene PP, for example, melts at 300 degrees, and starts to burn at 350, so it should be welded at a temperature of 300 - 340 degrees. Polyamide or PA should be welded at 410 - 460 degrees, ABS at 360 - 400.
Soldering process:
Advice. If the plastic twists a lot initially, then for ease of working with it, you can fasten it with brackets.
 8 - 1.5 cm thick, this will be our solder.
Such a repair of motorcycle plastic with your own hands is practically no different from the previous one. The main difference will be the tool used. You will need a high power soldering iron that you don't mind getting dirty. The type of material to be welded and the appropriate solder are also important here. The latter can be found in the form of special tapes in stores.
Welding process:
 While the plastic is still liquid, level it with a stinger to get an even layer.
 Advice. With proper skill, you can simultaneously make a hollow and fill it with solder.
So the process will take much longer and require more concentration, but the layers of plastic will hold on better, which means that the connection will be more durable. If you did everything right, then in the end you will get a strong seam that looks rough on the inside, but with the outer one is almost perfectly even. This can be achieved due to the deep penetration of the mass during the formation of the recess.
Note! Some advise using reinforced metal mesh to strengthen. This option only makes sense if you are working with fragile low quality material that is not able to bend.
Motorcycle plastic repair can be done by gluing parts together.
For this we need:
Gluing process: First of all, we remove the defective part, thoroughly wash it with hot water, then clean the areas around the cracks and the ends of the chips, and finally degrease the treated parts. Next, we dilute the resin with a hardener, keep in mind that the material will keep in a plastic state for 2-4 hours, so it is better to cook it in small parts. If you add a little castor oil to the mixture, it will turn out to be more ductile, which is especially important for flexible plastics. The finished resin, on the inside of the part, is applied with a brush in one layer. Next, we put a layer of fiberglass with a width of not more than 5 cm and cover it with another layer of glue. In total, 3-5 layers of mesh should be obtained, and the final layer is glue. Remember! All work with epoxy resin should be carried out with gloves and goggles. Upon completion of work, the part is left to dry for a day, at room temperature. A sign of the hardening of the material is the absence of adhesion and the strength of the structure. You can press lightly on the seam to test its strength and to make sure the material has set. If everything suits, the repair is completed, otherwise we completely remove the layer and apply a new one. There is still the outer part, but it should be treated with putty to prevent damage and then painted over. Gluing is needed to create a strong base, and the final work is best done with more workable materials.
Speaking of motorcycle plastic restoration, do not forget about the complete replacement of missing or damaged parts. Here we divide the process into making the panel from scratch and making the missing piece. The hardest part is making the part yourself. It is possible to completely repeat the factory forms only from fiberglass. The process is very long, not the cheapest and suitable only for enthusiasts. Initially, you should make a matrix that repeats the shape of the future part. A layer of fiberglass and resin is gradually applied to the matrix, thereby forming the part.