Spread the love
Looking to paint your wheel rims black? You can save bucks by doing it yourself at home. Here’s our step-by-step guide on how to paint your rims black.
If you’re a car enthusiast, you already know how popular black rims are. For the uninitiated, black rims have a huge fan base and are a head-turner. If you’re on the mission to make your car look cool and stylish, then black rims are the way to go. No matter what size your car is, black rims on your vehicle can never go wrong. So, if you’re looking to paint your rims black using DIY techniques, you’ve arrived at the right place. In this post, we’re explaining how to paint your rims black. Keep reading to know more.
Follow our step-by-step guide and learn how to paint your rims black.
For best results, we recommend removing the wheels. That’s because you can end up applying the pain unevenly if you don’t remove the wheels from the vehicle. Use a jack, lug wrench, and jack stand to remove the wheel from the base.
Separate the wheel from the tire. By removing the wheel from the tire, you can avoid spraying paint. If you’re looking to paint only the face of the wheel, then you can leave it as it is.
You need to first clean the wheel before painting them. After removing the wheel, clean it with a high-quality wheel cleaner. First, rinse the wheel with water, then apply the wheel cleaner. Now, use a soft brush scrub and remove the dirt and grime. Finally, rinse it off with water and dry it using a microfiber towel.
After cleaning the wheel, you will now see the scratches and bumps in it. If they are mild, you can skip this step. However, if they are deep, use sandpaper and water to smoothen the surface. Use 300-grit sandpaper and water and sand the entire wheel. Next, use 500-grit paper and repeat the same step.
Once you’re done sanding the wheel, run your finger over it, you should be feeling a smooth surface.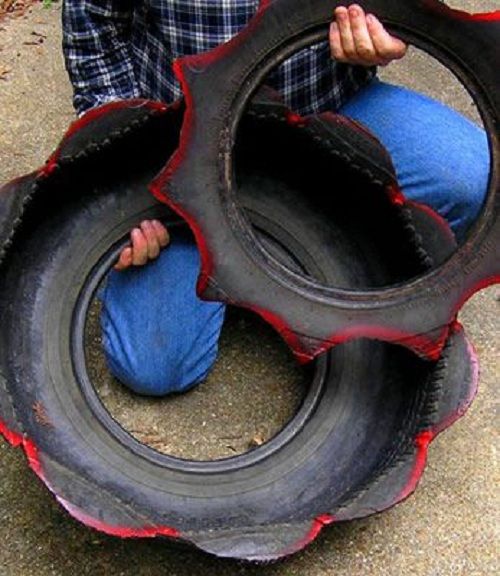 Now spray water over the wheel and dry it with microfiber towels.
Wear a protective glass and gloves to safeguard yourself. Next, choose a dust-free place with ventilation to paint. Place the wheel on the floor or the wall and begin the painting process.
Now tape the outline of the rim. The portion inside the tape is what you’ll be painting. Using plastic wrap, cover the entire wheel. Cut out the center of the plastic – the spot you’ll be painting – using a razor or knife. The others parts are protected from overspray.
Before painting, you need to apply primer to the wheel. You should be applying two or three coats of primer and follow the duration between each coat as per the instructions on the product. The primer will protect your wheel from rusting and make the paint look even across surfaces.
The actual painting process begins now. Shake the paint well and start spraying it on the wheel.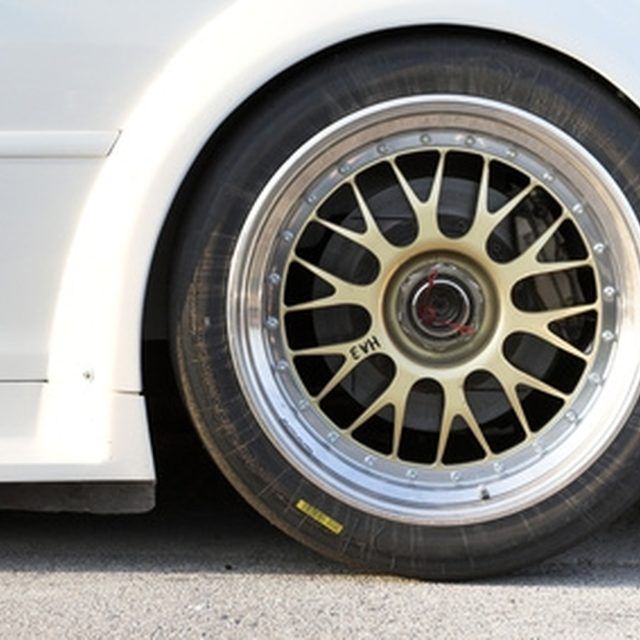 Like the primer, you’ll be applying multiple coats of paint. Spray the paint back and forth at a consistent pace. Don’t leave any gap. You should wait and allow the paint to dry before applying the next coat. Two thin coats followed by a thick coat should get the job done.
Once you’re done painting, check the wheel and allow it to dry. Follow the same steps to paint other wheels.
Read our blogs for information on the best airport parking and hourly parking spots near you and the most affordable insurance for your car.
Updated: Mar. 20, 2019
Next Project›
Family Handyman
If you go through the trouble of detailing your aging car, sooner or later the rusty wheels are going to bug you. Here's how to refinish the wheels so they look new again.
By the DIY experts of The Family Handyman Magazine
Compare the pictures. The difference that sanding and repainting makes can be striking.
Sometimes a middle-aged car can still look fine except for wear and tear on the wheels and wheel covers. Fortunately, you can fix this yourself for very little cash. Removing the rust and painting your wheels take a full day. (Don’t panic—mostly you’re waiting for paint to dry.) Then the wheels must dry for 24 more hours after painting before you remount them. So make other arrangements for transportation for a day. The supplies to paint rims costs about $50 from any auto parts store. Here’s how to paint rims and how to refinish wheels.
Besides the primer and paint, you’ll need masking tape, plastic sheeting, a drill and a wire wheel. If the wheels are really rusty and the rust has pitted the metal, use “rusty-metal” primer. However, if they’re only lightly rusted, buy self-etching primer instead. It’ll prime any bare metal and bite into the old paint around the rest of the wheel.
Next, buy spray paint formulated for wheels. (Rust-Oleum, Dupli-Color and VHT are three well-known brands carried by most auto parts stores that are the best spray paint for rims) Wheel paint has higher pigment content, is more chip- and wear-resistant, handles higher temperatures and repels brake dust better than ordinary household spray paint. Then buy clear coat spray (gloss or satin) to further extend the life of the paint. Two cans each of primer, paint and clear coat is usually enough to paint the outer face of four wheels. Double the amounts if you plan to paint the inside of the wheels too.
If you want to refinish the wheel covers, buy three cans of plastic-rated metallic spray paint.
Jack up the car and support it with jack stands.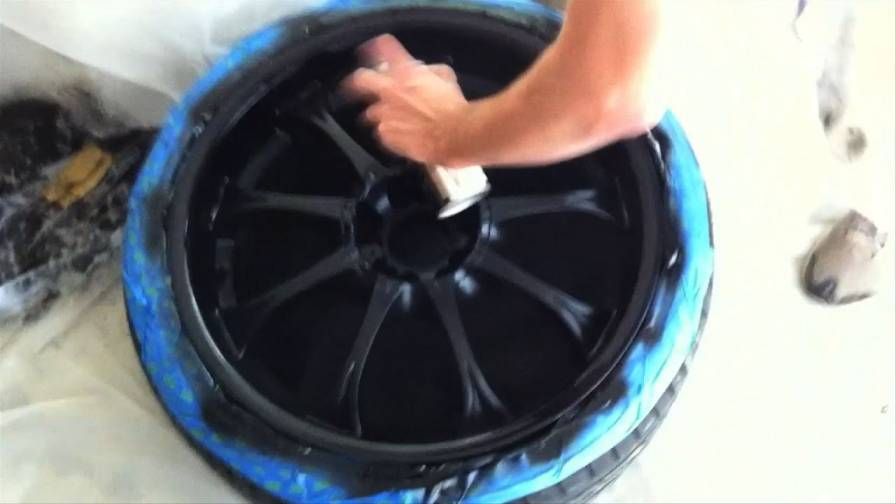 Then remove the wheels and scrub them with heavy-duty spray cleaner, a brush and water. Rinse off all the crud and blow the wheels dry with compressed air or a leaf blower.
Select a well-ventilated area to spray the wheels. Cover the floor with a tarp to catch the overspray. Then set out two sawhorses and lay down three 2x4s. Set the dry wheels face up on the 2x4s.
Apply masking tape to the tire and draw an arrow pointing to the center of the weight. Write the weight markings on the tape so you can get them back in the same place. Then insert a small Phillips screwdriver into the circular opening and tap the screwdriver until the weight pops off.
Wire-brush the rusted areas down to the bare metal. Then lightly scuff all the painted areas around the entire wheel, including areas near the tire bead and lug nuts. Slow down around the valve stem so you don’t damage it.
If you paint over the wheel weights, you’ll see the old paint spots the next time the shop rebalances your wheels or you change tires. So take the time to remove them before you start painting (Photo 1). Next, don an N95 paint respirator and protective eyewear and remove the rust with a drill and a wire wheel (Photo 2). Blow off the dust with a leaf blower or an oilless compressor—not compressed air from an oiled compressor. (Oiled compressors often spit out oil droplets, which can cause fish-eyes in the paint. Trust me on this—I’ve done it and ruined paint jobs.) Then wipe down each wheel with a tack cloth.
Apply two coats of primer, letting each dry for the time recommended on the can.
Apply the color and protect it with clear coat spray. We painted our wheels a glossy black, and in this photo we’re spraying on the first of two coats of clear coat.
Mask all around the wheel using small sections of masking tape (this is really tedious). Next, lay plastic sheeting over the wheels and cut out the center wheel portion with a scissors. Tape the sheeting onto the first layer of masking tape before you start the tire rim paint job. Then mask off the valve stem.
Read the can labels to find the recommended wait times between coats. Then apply two coats of primer (Photo 3), three coats of paint and two coats of clear coat (Photo 4). Let the wheels dry for 24 hours. Then remove the sheeting and tape. Reinstall the wheel weights and remount the wheels.
To make the rest of the car sparkle, see Car Cleaning Tips and Tricks.
Even though they’re plastic, wheel covers can be sanded smooth and refinished.
Most plastic wheel covers are painted. After a while, the paint peels and all those curb kisses gouge the plastic. You don’t have to buy new wheel covers. Just refinish the old ones.
Start by scraping the peeled areas. Then feather the peeled edges with 120-grit sandpaper. Sand down high ridges on the gouges until they’re level with the rest of the wheel cover. Then wash the wheel cover with heavy-duty cleaner and a scrub brush. Rinse and dry. Then paint the entire wheel cover with a metallic spray paint rated for plastic.
Peelable paint is the latest craze. Car buffs use it to protect their wheel covers and rocker panels over the winter months or to give their rides a shot of color. Peelable paint is a spray-on rubbery coating that peels off when you’re done with it. If you scratch it, you can simply recoat it. Use it on any smooth surface indoors or out.
When you use peelable paint outdoors, it should be removed after three months. You can leave it on longer, but it’ll be harder (or impossible) to remove. But indoors, it’s removable for nearly a year.
Peelable paint is available at auto parts stores, home centers and craft stores. Rust-Oleum, Dupli- Color and Plasti Dip are three well-known brands of peelable paint.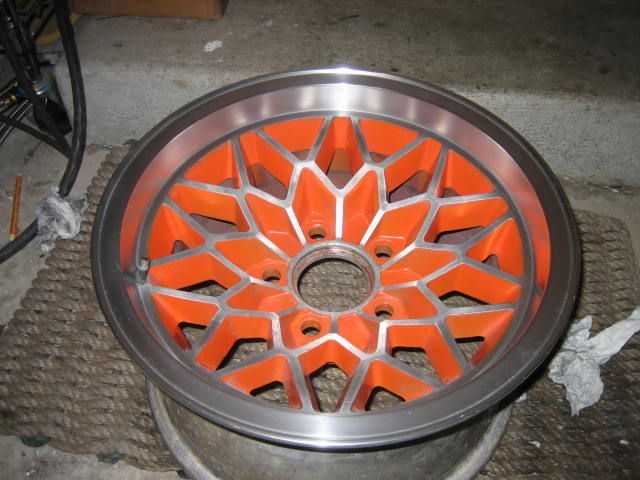
Have the necessary tools for this DIY how to refinish wheels project lined up before you start—you’ll save time and frustration.
Avoid last-minute shopping trips by having all your materials ready ahead of time for this how to refinish wheels project. Here’s a list.
Originally Published: December 11, 2018
ⓘ
From home remedies to professional products, there are different ways to care and take care of. do let the chrome of our bike .
Gently scrub the brake surface of the wheel with a steel wool, dishwashing sponge, or a sponge dampened with a citrus degreaser.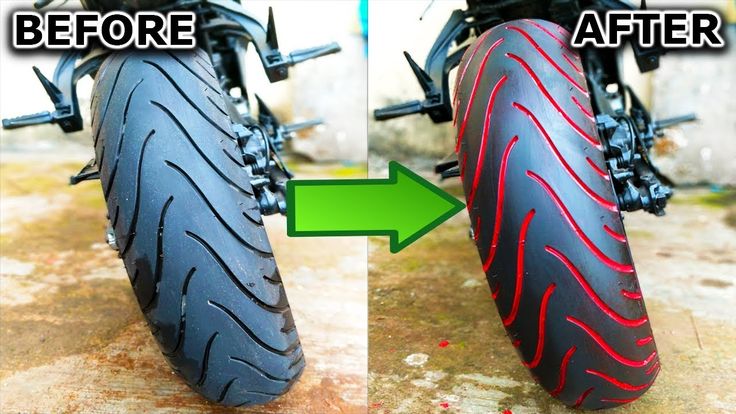 Work around rin Following the "roughness" of the surface with the fabric, work laterally where the spacers are.
Paint the tire in short passes, about 20 cm from the rubber, being careful not to go too far in the same place to prevent excessive paint buildup and dripping. Apply several thin coats, allowing time to dry in between until the rubber is completely covered.
The solution for shine to materials chromed is to make a paste of ash or flour and water. It is distributed over the product and allowed to dry. Then wipe with a dry cloth to remove the paste and shine .
In a bottle, mix 600 ml of cola with 200 ml of glycerin, 50,000 pinol or feverin and 100 ml of ethyl alcohol. You are going to sponge this mix on tires and you will see how they shine.
Choose one good quality paint . Look for a low pressure sprayer: the slower the paints the the easier it will be to work with. It is not recommended to mix brand paintings with no lines, as they may not react well together.
White: Although is a color neutral because, like black, they are not exactly Colores , white is one of 's best colors to be visible in a bike .
These prices are for picture on full suspension mountain bikes: paint picture One color (no fluorine): 175 euros. Two-tone paint (without fluoride): 245 euros. Paint in three colors (without fluorine): 315 euros.
Spray cleaning spray on wheels car, this will help aluminum return your own color. Let this act for about 20 minutes.
Expert Trick: For to remove rust from aluminum, you can use lemon or white vinegar, both of which are acidic. Clean all surfaces rin . You should only use a soft bristle brush. wheels no matter how dirty they are. You can use the brush to spread the detergent over rin .
According to the Farmer's Almanac, pour vinegar over the rust spots and wait until it dissolves. Another option is to wet a rag with a good spray of vinegar and go through the chains bicycles and tires.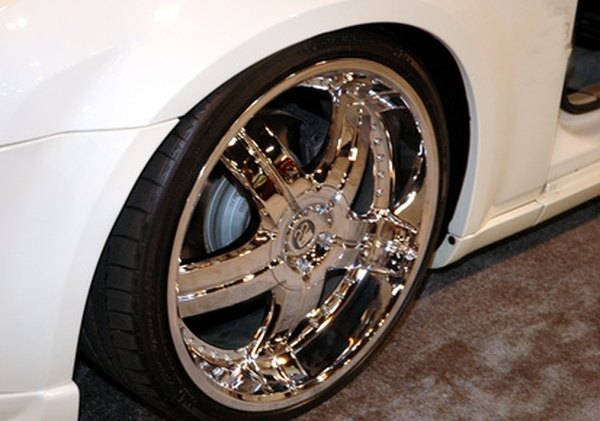 After a few minutes, rinse well so that the vinegar does not damage the metal.
The best tire paint is an acrylic spray or aerosol. For this reason, you should buy a spray in the color you like and apply it to your skin. tire at a distance of about 25 centimeters.
La painting acrylic and epoxy are the most shown for this type of de material.
Whether you're talking about a full-size car or radio control, anyone who loves four-wheel "friends" wants their car to stand out. Traxxas offers some of the most stylish and authentic rims and tires in RC, but we can always do more to add a little extra flavor and custom style. Below we have a few ideas to inspire you and we hope you give them a try and make your own style.
Tires with white lettering have a classic look and will really make your rubber stand out. We tried drawing letters with a brush as well as coloring them with pens, and we got better results with pens. The pen's paint was more opaque, and the hard felt pen tip reduced the number of errors that went beyond the lines. Of course, your experience may differ - if you prefer a brush, then this is the best way to do it. If you're wrong or think you don't like the color, soak it in a thinner and the paint will come off easier with your toothbrush. Be aware that tire lettering will quickly crack when the tire is bent and scraped off in off-road conditions. If you want to keep your hard work alive, you can use letter tires to showcase or at least take lots of pictures.
Choose a fine tip pen for maximum drawing precision. We have had good results with both of these brands. To avoid blots, apply the paint in very short strokes or spread it on the tire. A second layer may be required.
This Maxx 2.8 tire has flashy graphics that look fantastic in white. For other colors, first paint over the letters white and let them dry completely. Then apply color.
Highlight nuts and bolts with chrome
"Chrome" paint is a very impressive material - it really does look like a galvanized finish. In pen form, it makes it easy to add realistic, simulated equipment. Just color in whatever you want to be "chrome". The color itself is a little pricey, but the result is worth it.
You can find "chrome" handles at hobby and craft stores. The 1mm tip is best for handling wheels. The paint is very thin and easily soaks into the simulated fastener of this TRX-4 Sport wheel.
This is a pretty major styling update and it only took a minute. If your truck has black axle nuts, you can replace them with chrome plated nuts!
The Mercedes-Benz® G 63 wheels only have a few "chrome" bolt heads, but that adds a bit of elegance to the look.
Parts with real equipment
How about adding real details to your wheels? Check the RC aircraft section of your favorite hobby store for 2mm socket head screws that can be easily attached to some wheels as a solid styling upgrade. All you have to do is drill a 1/16" hole and screw in. Choose stainless steel screws for a corrosion-resistant, high-contrast look on black wheels.
These 2x8mm screws are longer than required, you will only need 2mm of thread. They are easy to cut to size with pliers. The castings on this TRX-4 sports wheel serve as a guide for drilling 1/16" holes for mounting screws. Drill slowly, you only need to go 2mm deeper.
Here is the final look. There is nothing more like real wheel nuts than the wheel nuts themselves! Remember this simple truth!
Parts for Beadlocks
The beadlock wheels are a great upgrade for any TRX model. No glue is required, so the discs can be easily reused, and the rings, sold separately, allow you to choose any color you like. You can also purchase Method 105s wheels with rings installed and tires in 1.9" and 2.2" sizes. They look great as is, but you can add even more style by adding stainless steel screws and flipping the rings.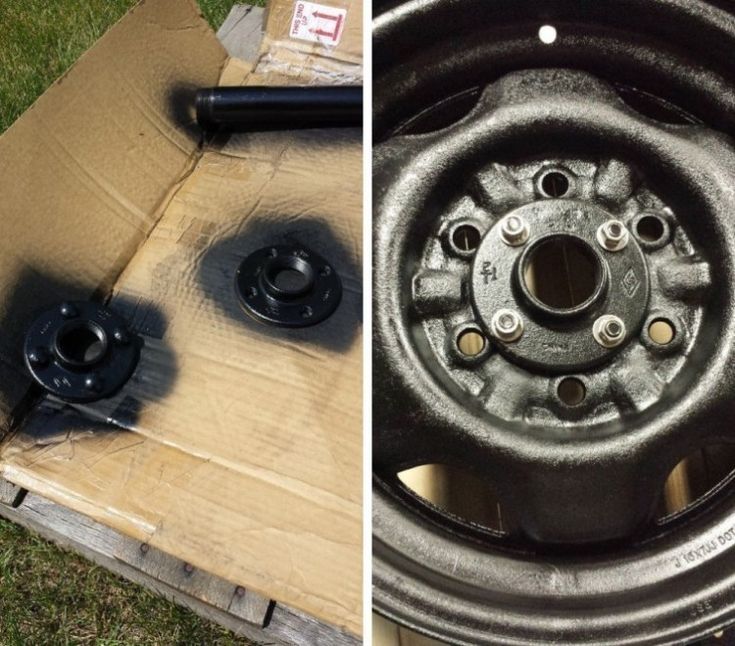 Flipping the ring can reduce the tire's stability in extreme situations, but if you're not trying to win the competition, give it a try.
The stainless steel screw kit includes all hardware needed to replace black oxide rims on four Method 105 1.9" or 2.2" wheels. Black back, stainless front. The stainless steel screws will not rust and have good contrast with the rings and wheel nut.
Lock rings are available in red, orange, green, blue, satin and black so you have plenty of options to customize and personalize your model. Traxxas Summit owners can also choose from different colors.
Flip the rings over and screw onto the wheel for more sculpting! If you have free 2 minutes, you can paint over the reliefs with the color you need!
Paint Over Chrome Effects
No one makes chrome wheels quite like Traxxas, and the highly reflective wheels turn into true sparklers as they spin in the sun. They also provide some fun detailing opportunities. You can reduce the sheen with clear paint to create more of a satin or "raw aluminum" finish. Or paint the chrome clear for an anodized or metallic finish, depending on the color you choose.
The wheel on the left is mirror chrome, which is how it comes from the factory. The center right of the wheel is coated with a brushed aluminum finish.
For a colored chrome effect, wrap the tire and apply a clear color to the rim. The disk will retain maximum shine, and if you use pearlescent paints, they will give a more interesting look.
Most Traxxas chrome wheels are black under a shiny finish, and with a degreaser, the chrome can be removed to reveal a glossy black wheel. If you remove a rim from an installed tire, you will find that any chrome under the tire adhesive will be protected from the solvent, leaving a strip of chrome where the wheel meets the tire.
The degreaser will clean the chrome off the wheel in an hour or two.