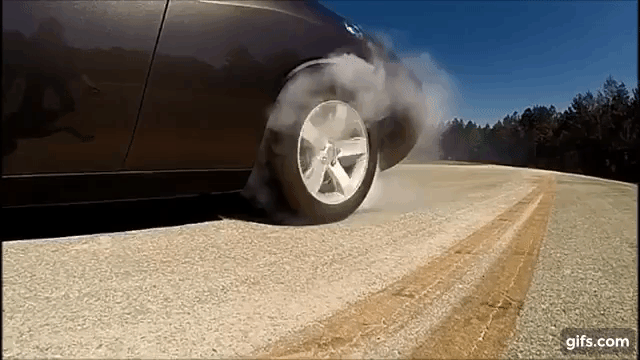
If you are looking to improve the appearance of your vehicle, making your tires stick out is a great way to do it. In this article, we will provide easy steps that you can follow to make your tires look their best. With a little bit of effort and some basic knowledge, you can have tires that really stand out!
There are 2 main methods used when you want to know how to make tires stick out.
If you are considering how to make your tires stick out, the easiest and most common way to do this is buy a set of wheel spacers.
Wheel spacers work by moving the wheel outwards from the hub, creating more space between the wheel and the fender. This gives the illusion that your tires are sticking out further than they actually are.
In addition to making your tires look bigger, wheel spacers can also improve handling and performance by increasing traction and stability.
The other way to make your wheels stick out is to simply purchase wider wheels for your vehicle. This will also require you to purchase larger tires that are compatible with the new width of the wheels.
Wider rims will fill out the wheel wells more and make your tires look bigger. It is important to make sure that the width of the wheels and tires are compatible with your suspension and brakes. If you go too wide, you run the risk of damaging your suspension or not being able to stop properly.
Wider rims will also improve handling and performance by increasing traction and stability, however they will also decrease your vehicles fuel economy due to the increased rolling resistance. Their larger weight will also decrease your car’s acceleration and may also increase your vehicle’s stopping distance.
Both methods of making your tires stick out – wheel spacers and wider wheels – have their own set of pros and cons. It is important to do your research to figure out which method is best for you
Before you go ahead and purchase your new wheels or wheel spacers, it is important to know how much space you are legally allowed to make your tires stick out past your fenders.
In most states, the maximum amount of space allowed is two inches. This means that you can have a maximum of two inches between your tire and your fender.
However, it is important to note that this measurement is taken from the center of the wheel to the edge of the fender. This means that if you have a wheel that is three inches wide, you can only have one inch of space between the tire and the fender.
Another important consideration is the height of your wheel and tire combination. The taller the combination, the more space you will need between the tire and the fender.
This is because a taller combination will protrude further out from the side of the car, and thus will need more space to avoid rubbing. If you are unsure about the height of your wheel and tire combination, it is best to consult with a professional to ensure that you have the correct measurements.
The width of the wheel is also an important consideration when wanting to know how to make tires stick out.
A wider wheel will protrude further out from the side of the car than a narrower wheel.
This means that you will need more space between the tire and the fender to avoid rubbing. If you are unsure about the width of your wheel, it is best to consult with a professional to ensure that you have the correct measurements.
The offset of the wheel is the distance between the center of the wheel and the edge of the wheel. A positive offset means that the center of the wheel is closer to the edge of the wheel, while a negative offset means that the center of the wheel is further away from the edge of the wheel.
A wheel with a positive offset will protrude further out from the side of the car than a wheel with a negative offset.
This means that you will need more space between the tire and the fender to avoid rubbing. If you are unsure about the offset of your wheel, it is best to consult with a professional to ensure that you have the correct measurements.
The thickness of the spacer is also an important consideration. The thicker the spacer, the more space you will need between the tire and the fender to avoid rubbing.
When purchasing new wheels, especially if they are significantly larger, it is important to check the backspacing. If your new wheels are the same diameter and are simply just wider, then you shouldnt need to worry about this.
Backspacing is the distance between the back of the wheel and the edge of the wheel. A positive backspace means that the back of the wheel is closer to the edge of the wheel, while a negative backspace means that the back of the wheel is further away from the edge of the wheel.
A wheel with a positive backspace will protrude further out from the side of the car than a wheel with a negative backspace.
This means that you will need more space between the tire and the fender to avoid rubbing. If you are unsure about the backspacing of your wheel, it is best to consult with a professional to ensure that you have the correct measurements.
Another important consideration when purchasing new wheels is the bolt pattern. The bolt pattern is the distance between the bolts that attach the wheel to the car.
Most cars have a bolt pattern of either four or five bolts. However, some cars have a different bolt pattern. It is important to make sure that the new wheels you purchase have the same bolt pattern as your car.
If they dont, then the new wheels will not be able to attach to your car, so it is important to check this before you purchase.
There are a few things to keep in mind when purchasing wheel spacers.
First, you will need to know the bolt pattern of your vehicle. This is because the size and dimensions of wheels will vary between cars and manufacturers. As a result, you will need to make sure that the spacers you purchase are compatible with your vehicle. You can find this in your vehicles handbook.
In addition, it is important to consider the thickness of the wheel spacer. The thicker the spacer, the more pronounced the effect will be. If you are looking for a subtle change, then a thinner spacer may be a better option.
Second, you need to make sure that the spacers you purchase are compatible with your tires and wheels. This is because some spacers may not work with certain tires or wheels. If you are unsure, it is best to consult with a professional to ensure that you purchase the correct product.
There are two main types of wheel spacers: hub-centric and lug-centric.
Hub-centric spacers are designed to fit over the hub of the wheel, and thus will require that your wheels have a center bore that is large enough to accommodate the spacer.
Lug-centric spacers, on the other hand, are designed to fit between the wheel and the lug nuts. This type of spacer does not require that your wheels have a center bore that is large enough to accommodate the spacer.
The type of spacer you choose will depend on the type of wheels you have, as well as your personal preferences. Once you have purchased your wheel spacers, the next step is to install them. This process will vary depending on the type of spacer you purchase.
Third, be aware that some spacers may require modification to your suspension in order to properly fit. This is because some spacers may change the offset of your wheels, which can affect how your suspension functions.
Installing spacers may also cause your tires to rub against your fenders. This is another reason why you may need to raise your vehicle’s suspension to allow more space for your vehicle’s tires. Alternatively, some people choose instead to trim their fenders to provide more clearance.
If you are unsure about whether or not your spacer will require modification, it is best to consult with a professional.
Finally, you will need to decide how many spacers you want to purchase. Most sets come in pairs so that you can space our either both the front wheels or the back wheels, but you can also find singles if that is what you prefer. Most people buy 2 sets and space out all 4 wheels at the same time.
Once you have all of this information, you are ready to purchase your wheel spacers and make your tires stick out!
Installing your new spacers is relatively simple and can be done at home with some basic tools. However, if you are unsure about the process, it is always best to consult with a professional to avoid any damage to your vehicle.
The first step is to jack up your vehicle and remove the wheels. Once the wheels are removed, you will need to attach the spacers. how you do this will depend on the type of spacer you have purchased.
If you have hub-centric spacers, you will need to fit the spacer over the hub of your wheel. If you have lug-centric spacers, you will need to fit the spacer between the wheel and the lug nuts.
Once the spacer is in place, you can then reattach your wheel and lower your vehicle back to the ground. Repeat this process for each wheel, until all of your spacers are installed.
And that’s it! You have now successfully installed your new wheel spacers.
Once you have installed your spacers, it is important to check them regularly to ensure that they are tight and secure. This is because over time, spacers can loosen and fall out, which can be dangerous.
If you follow these steps, you should have no problem making your tires stick out. The great thing about this modification is that it is completely reversible and leaves no lasting impact on your vehicle.
To make your tires stick out is relatively inexpensive to achieve and with just a little bit of effort, you can have a great looking car that turns heads!
We hope you enjoyed this article and found it informative. If you have any questions then please leave a comment below or get in touch via email or through social media and we will read and respond to every comment, email or question. Thanks for reading!
The cost can vary between $50 to $150 depending on the size of the spacers and if you decide to buy 2 or 4.
Wheel spacers are most commonly made of stainless steel and should last a lifetime if taken care of properly. With that being said, there are a few factors that can contribute to the premature wear of your wheel spacers including exposure to salt and ice.
Giving my truck the right stance is something that I care about. Besides wanting out pickups to be capable work horses, we want our trucks to look the part too. For many, this means giving the truck an appropriately wide & athletic stance that looks tough and aggressive. This is usually done by having wheels and tires that stick out a little from the side of the truck.
How do your make truck tires stick out? For your tires to stick out, your wheels have to have the right offset. From a top view, offset is the location of the wheel mounting surface in relation to the center line of the wheel. This mounting surface needs to be closer to inside of the wheel than it was on the factory wheels for tires to stick out.
The exact offset you will want depends on several factors such as how wide of tire do you want and how far do you want it to stick out.
To better understand offset, from a top view the center line of a wheel becomes your reference point no matter where your wheel mounting surface ends up being. A wheel with a mounting surface that aligns perfectly with the center line of a wheel is considered to have a zero or neutral offset.
When your wheel mounting surface is closer to the outside or road side of the vehicle, then the wheel has a positive offset which would pull the wheels in closer to the vehicle compared to a zero offset.
Negative offset places the mounting surface of the wheel closer to the inside or brake caliper side of the vehicle, pushing the wheels further out and away from the vehicle compared to zero offset.
Offset is measured in millimeters (mm) so a +28 offset is a positive offset that places the wheel mounting surface 28 mm from the center line of the wheel closer to the outside (road side) of the wheel. A -28 offset is a negative offset that would place the mounting surface 28 mm from the center line of the wheel closer to the inside (brake side) of the wheel.
Generally speaking, most factory wheels, especially on trucks, have a positive offset to begin with. This means that you won’t necessarily have to get a wheel with negative offset to make your tires stick out. Rather, you just need to change the offset in the negative direction so that it becomes less positive, neutral, or negative.
To illustrate, lets say you have a factory wheel that is a 17 x 7.5 with 31MM offset. This means it is 17 inches in diameter by 7.5 inches wide with a positive offset of +31 mm from the wheel’s center line. If you wanted to keep everything else the same but wanted to make your tires stick out or poke 31 mm (about 1.22 inches) farther than where the outer edge of the stock tires rode, you would get a 17 x 7.5 wheel with 0MM offset (zero or neutral offset). If you wanted to make the tires stick out even further, you could get a wheel that is 17 x 7.5 with -31MM offset so your tires would stick out 62 mm (2.44 inches) farther than they did with the stock wheels. You get the picture.
If all you are changing is the the offset and nothing else, than it is pretty simple. However, if you start changing other things such as wheel widths and tire sizes, there it gets more complex very quickly.
The width of a wheel plays a very big role in how offset will affect how much your tire will stick out. For example, lets say you have a wheel that is 7.5 inches wide with a zero offset and a 265 mm (10.43 inch) wide tire that lines up flush with the outer edge of your fender. If you install a wheel that is 8.5 inches wide with a zero offset and a tire that is 295 mm (11.61 inches) wide, the 8.5 inch wheel would stick out 1/2 inch more than the 7.5 inch wheel while the edge of the 295 mm wide tire would stick out 15 mm (0.59 inches) more than the 265 mm wide tire did. The interesting thing is that the wheel and tire would also stick that much further into the inside of the fender or vehicle.
To have the inner portion of the 295 mm wide tire run in about the same location as the 265 mm wide tire did, the wider 8. 5 inch wheel would need to have an offset of -15 mm. This would make the outer edge of the 295 mm wide tire stick out 30 mm (1.18 inches) more than the 265 mm wide tire.
In addition to wheel offset, backspacing is another important thing to consider when you start looking at changing your wheels to make your tires stick out. Backspacing is the measurement from the wheel mounting surface to the inside edge of the wheel closest to the vehicle. If you have too much backspacing your wheel might end up rubbing chassis or suspension components on your truck.
If you have two wheels of the same size but one has zero offset and the other has positive offset, the wheel with positive offset will have more backspacing.
Two wheels of different sizes, but both with zero offset, will not have the same backspacing. The wider wheel will have more backspacing. If this causes the tire to set too far into the fender, a negative offset could move it out which will also cause the outer edge to stick out from the truck more.
A change of a wheel offset, a wheel width, or a tire size will change the geometry and or location of the wheel and or tire. Any of these changes has the possibility of creating clearance issues between the tires and the body, suspension, steering components, or chassis of your truck. This needs to be considered when trying to make your tires stick out. Even if all you have done is change the offset of your wheels only to make them stick out, the may rub with some of the edges of your fender when you turn the wheels as they will make a wider arch. This could also be true when the suspension articulates and pushes the wheels higher into the fenders.
The extent of your clearance issues will depend on how much offset there is to push the wheels out, how wide the wheels & tires are, and how large in diameter the they are as well.
Some possibilities to address clearance issues are as follows:
What are wheel spacers? Wheel spacers are devices that are installed between a wheel hub assembly and a wheel mounting surface to increase the space between the two for increased clearance. They can make a wheel and tire stick out without purchasing or installing new wheels.
Tuning spreads along the roads of Russia at the speed of lava after the eruption of Vesuvius. Thousands of official dealers, network services and garage workshops will willingly take on the transformation of a car, whether it is a domestic “classic” at the price of a TV or a premium sedan that costs the price of a good apartment in the capital. Hundreds of exhibitions, festivals and competitions are held annually throughout the country. But does all this mean that there are no "white spots" on the tuning map? No. Now we will talk about a popular phenomenon, which, nevertheless, still raises many questions - tire preload, or stretch.
The word "stretch" is a Russian transcription of the English stretch - "pull", and is pronounced similarly. The common spelling "stretch" is a misnomer. Simply put, rubber is a “house” when a tire of a smaller width is put on a disk than is calculated by the manufacturer. For example, a 195mm tire instead of a 255 on a 9" wide rim. This is achieved by tensioning the sidewalls of the tire, the so-called profile. Now the profile is not perpendicular to the contact patch, but is at an obtuse angle.
How blunt is determined by the amount of interference, and it, in turn, depends on several factors: the difference in the width of the disk and tire, the height of the profile, the tire manufacturer and a number of others, but more on that later. In most cases, when stretching, the inner and outer edges of the disc bulge outward. Now that you associate the word "stretch" with more than just jeans, it's time to answer the main question.
Depending on the area of use, the answer to this question will be different. Below is a complete list of the "pros" and "cons" of stretch, now we will talk about primary sources. Historically, the method of stretching narrow tires on a wide disk appeared almost simultaneously in Germany and Japan at the end of the last century. But if in the east the cause was drift , then in the old world it was legislation, or rather attempts to get around it.
In Germany and Belgium, the law prohibits the operation of cars if the contact patch is outside the arches - this left no choice for lovers of a wide gauge. By pushing the disc out of the fenders, the stretch allowed the tire to stay inside and everyone was happy. As for drifting, the tension is appropriate here for several reasons: a narrow tire is easier to break into a skid, it costs less, and due to the “house” it breaks less under lateral loads that occur in sliding.
Decades later, all the reasons were intertwined, and now light stretch can be found even on some cars coming off the assembly line, such as the Infiniti Q60, but it was most widely used in the stens style.
In order not to get confused, it's time to put together all the terms related to stretch. "Stens" (from English stance - "landing", "posture", "posture") is a style in which stretch is used in most cases. According to his canons, the car should be pressed to the ground as much as possible, and the wheels to the arches. The latter has its own name - “fitment” and denotes the relative position of the disk, tire and wheel arch, or fender (wheel arch extension).
Such a fitment is considered ideal when the edge of the wheel arch is in the gap formed during a strong stretch - it is called a poke. The latter is often possible only when using an air suspension, which allows you to raise the car while driving, saving the arches from contact with the disk. Examples of a static, that is, without height adjustment, fitment are distinguished by a larger “rim gap” (rim gap is the distance from the edge of the disk to the wheel arch). Due to the operation of the suspension, the rim gap of a static car can range from a few millimeters (with an extremely stiff suspension) to five centimeters. In any case, the stronger the tightness, the more likely it is to secure the wheel arch and achieve a better appearance.
Let's say you've made the decision to stretch. What is needed for this? First, define your goals. If this is drifting or another sports discipline in which handling is at the forefront, then you should start by looking for tires in the right parameters, after which the required disk width will become clear.
Example: for track days, tires of dimension 225/40 R18 are selected, the recommended wheel width for which is 7.5 inches. Increasing the width of the disk by an inch, we get a slight tightness, and by two or three - a strong one.
On the contrary - if the appearance is more important than driving characteristics, then we are looking for discs of the maximum width that the wheel arches can accommodate. Suppose it is 10 inches in the seventeenth diameter. It is recommended to install tires of at least 275 millimeters on them, which means that a width of 245 or less is suitable for stretch.
It should be borne in mind that the height of the tire profile has an almost stronger effect on the ability to preload than its width.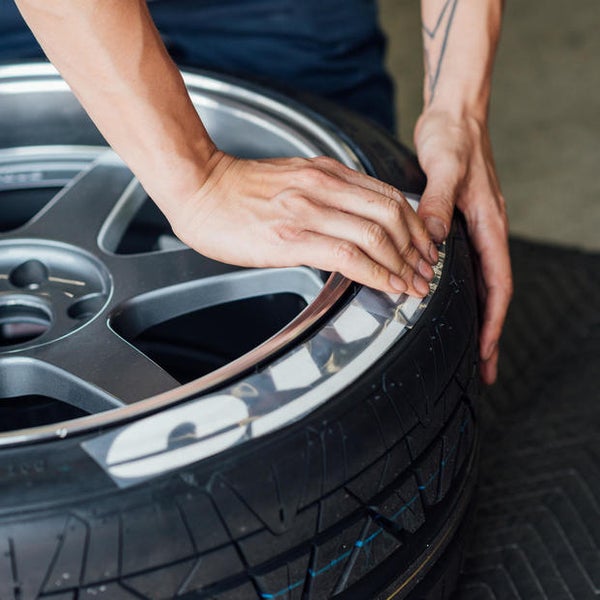 Low-profile tires have stiffer sidewalls, which make them harder to stretch, but give more effective stretch compared to 50% or more profile height.
In order to understand the variety of sizes, enthusiasts create entire photo libraries, the most popular of which is tyrestretch.com. The name that speaks for itself will allow you to decide on the size and model of tires without resorting to experiments - hundreds of people have already tried different combinations. But even in spite of this, the choice can turn into an epic: tires of the same marking, but from different companies, can differ markedly in size, composition and characteristics. Decided? Buy.
Alas, the purchase of stretch wheels is no less “exciting” than the choice. Let's start with disks - it's easier with them. The only defining parameter here is the width. There is also a departure, but it has nothing to do with tightness, so we will not dwell on it. The rest is determined by personal preferences and budget: stampings or forged composites, new or used, ready-made version or "custom" in a single copy.
With tires it is more difficult, and even if we are talking about new ones. The fact is that “new” often means opposite things: produced a few months ago or never put on wheels. The latter may be ten years old - despite the fact that the shelf life of car tires is five years. Information about the production date is located on the sidewall of the tire and consists of four digits, the first two of which are the week of manufacture, and the second are the year.
If for some reason the choice falls on used tires, among other things, you need to pay attention to the condition of the toe - this is the inside of the bead. It should be free of cuts and cracks, as it ensures the tightness of the "stretched" tire. Without stretch, damage to the toe is not critical, because the tire is adjacent to the disk with the entire plane of the bead. You should also pay attention to the geometry of the inner ring - its curvature due to improper storage will prevent you from pulling a narrow tire on a wide rim. Finally, when everything is bought, the most interesting thing lies ahead.
It is better to assemble wheels where they have experience in explosion and installation of non-standard sizes. If you do not approach the choice of a tire shop carefully, at best you risk simply not putting the tire on the rim, and at worst - damaging both. Let us focus only on the pumping procedure, because the rest of the actions do not differ from ordinary tire fitting.
The problem here is that the tire will take the desired stretched position only at high internal pressure (from 3 to 15 atmospheres). The narrow size of the tire prevents such pressure from being generated. Humps (sides on the disk that do not allow the tire to get off inward) are located far from the tire beads, therefore, you have to resort to various non-standard methods.
There are two options: seal the missing space with an auxiliary chamber or resort to an explosion. The second option is simpler and more technologically advanced. He, in turn, has two methods: explosive pumping (booster) and setting fire to a flammable liquid. In the first case, air is pumped into a cylindrical receiver with a volume of about 20 liters, after opening the valve of which, within a tenth of a second, it enters the tire, inflating it. When ignited, high pressure is created by the expansion of instantly heated air. Gasoline (or another flammable liquid) is applied to the entire circumference of the inner rim of the disk and set on fire with a torch. At the same time, air is supplied through the nipple, which does not allow the tire to jump back to its original position after the explosion. After the tire has taken the desired position on the rim of the disk, the operating pressure is set from 2.5 to 4 atmospheres.
+ less tendency to break under lateral loads
+ the ability to take out the disks from the wheel arches while maintaining the track
+ reduction of the height of the profile when preloaded
+ lower cost of narrow tires compared to wide
+ the ability to lower the car more
+ visual enlargement of the disk
- lack of protection of disks from curbs
— high requirements for the condition of tires
- Less ride comfort
- more labor-intensive installation procedure
- high probability of disassembly in case of pressure loss
- increased load on the tire profile
practice
Articles / Repair and maintenance Air filter index: Parts price pullback, no shortages and a flurry of fakes The ruble exchange rate has stabilized in recent months at a relatively comfortable level for importers. Did prices for spare parts and consumables follow? In general, yes, and the prices for some... 435 one 0 09.11.2022
Articles / Popular questions Not only alcohol: with what symptoms it is forbidden to drive Usually, only alcohol and drug intoxication are considered restrictions with which it is forbidden to drive. At the same time, all the symptoms with which you can not drive a car are indicated in one bulletin. 896 0 one 07.11.2022
Articles / Interesting 5 reasons to buy and not to buy Daewoo Matiz I Perhaps Matiz in Russia became the third car in terms of the number of ridicule after Zaporozhets and Oka. But are these caustic chuckles in the direction of a pretty car fair? Maybe it's just bra... 2904 3 one 06.11.2022
Test drives / Test drive Haval Dargo vs Mitsubishi Outlander: the dog is barking, the stranger is coming In the Haval dealership in the south of Moscow, life is in full swing: buyers look at cars, communicate with managers and sign some papers. While I was waiting for the test Dargo, the same cross... 15590 7 205 13.09.2022
Test drives / Test drive Motor from Mercedes, emblem from Renault, assembly from Dacia: test drive of the European Logan 1. 0 It would seem that what's new can be told about the second generation Renault Logan, known to every Russian taxi driver, as they say, up and down? However, this car has... 13185 ten 41 08/13/2022
Test drives / Test drive Geely Coolray vs Haval Jolion: Free Cheese? If! Do you want to buy a car today with a full warranty, on credit at an adequate rate, without wild dealer markups? Now this is still a task, because a full-fledged chain of "representation - s... 10271 26 thirty 08/10/2022
The cat can extend and hide its claws.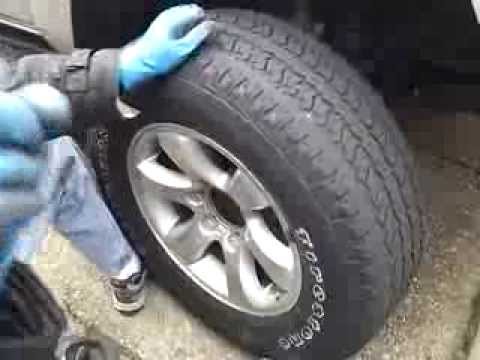 And how do changes in the protrusion of studs over the tread from optimal affect tire performance?
Most tire manufacturers find 1.2-1.3 mm of stud protrusion above the rubber to be optimal. Let's not question these figures. Nevertheless, in stores you can find "studs" of some companies, studded in different ways: sometimes the studs are practically hidden in rubber, and somewhere they stick out, towering up to two millimeters above it.
We decided to check what and how the deviations of the stud protrusion value in one direction or another affect. Continental AG came to help us in this study. At our request, its specialists prepared three versions of Barum Norpolaris tires with different stud protrusions - 1.3 ("normal"), 0.8 ("reduced") and 1.8 ("increased") millimeters.
We chose these tires because they use conventional round studs. "Diamond" used in tires Continental and Gislaved, square (Nokian) and triangular (Kumho) were not of particular interest to us, since they may have other dependencies.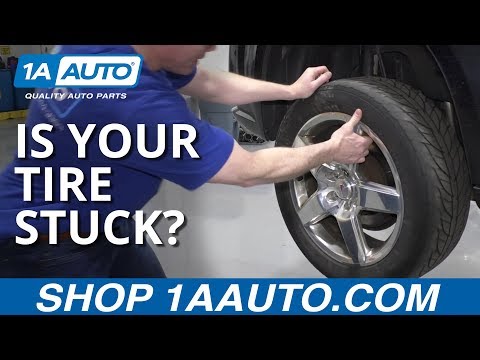 And round studs are found in most winter tires.
The first nuances came to light during the studding process. It turned out to be by no means an easy matter to deepen or underplant the “nails”. Since in Barum Norpolris tires, as in almost all modern ones, “nests” for studs are “cast” during the “baking” of tires, corresponding protrusion pins are made in the mold for this. Therefore, to deepen the spikes, it was necessary to apply increased efforts during their installation. But in the process of running in and testing, they tend to take the correct position, since compressed rubber pushes them from below.
It is also not easy to “release” the studs - any under-compressed studs will take their rightful place at the required depth during running-in. To guarantee an increased protrusion, the Continentals had to put rubber wads, cut from half a millimeter rubber, under each spike.
Another thing is when holes are drilled for studs in a finished tire (an old technology that is becoming obsolete) - here deviations in the depth of the holes will lead to the fact that the stud will either fail or stick out unnecessarily.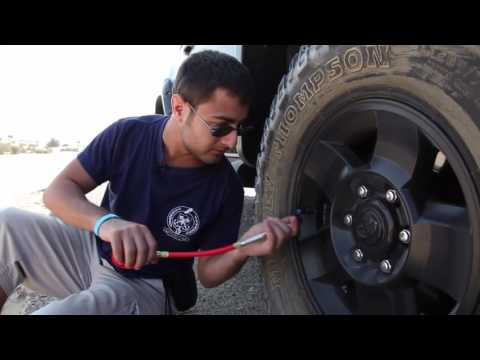
All of the above applies to studs with the correct “protrusion” of the carbide insert over its body.
The second variant of possible deviations is possible due to the use of studs that do not match in height or substandard, in which the insert protrudes above the body not as required.
For tests, we mainly used the VW Golf V, which was driven in two versions - with electronics (ESP and ABS) and without. More expensive ContiWInterViking 2 tires were used as base tires. Measurement results are shown in Table 1, specific changes in Table 2.
More clawed tires grip ice better - we didn't make any discovery here. But we found out exactly how much. Within our accepted limits (+ 0.5 mm), each additional tenth of a millimeter of protrusion improves longitudinal grip by about 3%. The braking mode with ABS is least affected - 2.4%. Please note - in skid braking, the most clawed Barum Norpolaris were able to beat the more thoroughbred ContiWinterViking 2.
Lateral grip is less affected by the amount of claw extension - 0.9-1.4% for each "ten". Moreover, when the electronics are turned on, the influence is greater. The most remarkable thing is that the more clawed Barum Norpolaris beats Conti again, both with and without electronics. I think the reasons are clear - in the latest tires, the studs are oriented (across) in such a way as to improve the longitudinal grip in the first place.
The only drawback on the ice that we could find in excessively protruding claw spikes is the complication of handling due to the delay in the car's reactions to steering wheel turns and unpleasantly sharp slips in sliding. Therefore, the controllability score is reduced to 6 points.
Within the same limits (half a millimeter), there is a decrease in grip - 2.1-3.3% for every 0.1 mm - in acceleration and deceleration with electronic assistants. Moreover, in cases with ABS and ESP, from a decrease in the protrusion of the spikes, the coupling properties lose from 3.0 to 3.3% per tenth of a millimeter. But the losses for a car without electronic "limiters" are slightly less - 2.1-2.4% for every "ten" of a millimeter. The transverse properties also deteriorate, but not so noticeably - 0.5–1.3% for every 0.1 mm. The behavior of the car on ice is “smeared”, characterized by sluggish reactions. It feels like the rubber works more than the spikes. The controllability score is also 6 points.
It turns out that on ice, whatever one may say, it is more profitable to extend claws more. And what if you have to brake on wet pavement?
Here, the larger studs in the presence of ABS slightly lengthen the braking distance, without electronics they reduce it by almost the same amount.
Reducing the protrusion slightly shortens the braking distance only with ABS,
and does not affect the braking performance with locked wheels.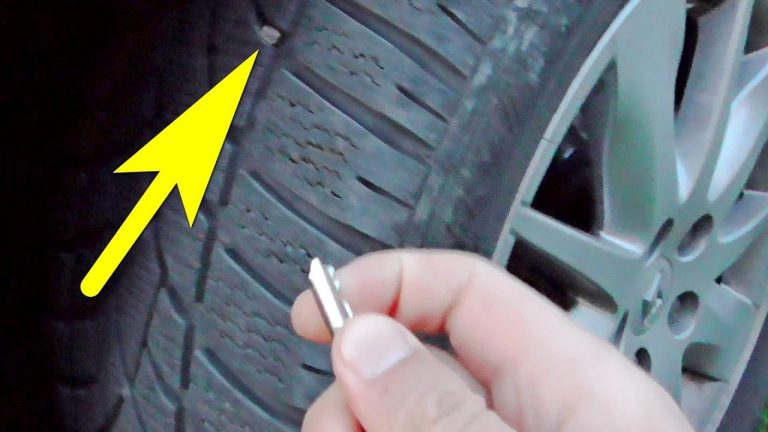
So, is it possible to release claws?
Do not rush to conclusions - the most unpleasant thing lies in the last lines of Table 1 - the total number of studs that fell out or lost the carbide insert on the entire set after all tests. In the case of "standard" and "reduced" lugs, the number of losses after the tests is the same - 10 studs on all four wheels. And with an “increased” protrusion, losses ... double! Moreover, due to the front wheels. Thus, for every 0.1 mm increase in protrusion, the loss of studs is 20%.
Yes, increasing the protrusion of the studs improves traction on ice, but somewhat complicates handling. But the main trouble is the rapid loss or damage of the spikes in the front wheels, which ultimately leads to a deterioration in traction.
When buying studs, contact authorized tire centers. And if life forces you to buy tires in a dubious place, pay attention to the protrusion of the spikes.