Snow chains for your car that you can easily build at home… made entirely from zip ties.
RELATED: 17 Clever Winter Gear Organization Ideas
In this article:
Usually made from steel, snow chains are attached to car tires to provide maximum traction in the snow, making the process of driving less of a headache. While every resident that lives in a snow-filled community probably has at least one set of snow chains, that doesn’t mean that it’s not a good idea to know how to build your own snow chains and how to put on snow chains in case of an emergency.
But you might be surprised that you can make your own chains…with just zip ties. Not meant as a replacement for actual snow chains, but these DIY-models from Instructables’ user movemaine, can provide some quick traction in an emergency.
For One Tire
Make sure to check how many openings your rims have. One “snow chain” will go through each opening, so if you have six openings, you’ll need six chains.
If you have more or fewer openings, simply adjust the number of zip ties you use, but the process will be identical for all types of rims.
InstructionsStart by tying a small zip tie to the long zip tie (which we’ll call the chain) about 6 to 8 inches away from the head. Tighten the small zip tie as hard as possible without damaging it.
Add a second small zip tie about an inch away from the first small zip tie. Continue this pattern until you’ve got six small zip ties attached to your chain.
 Trim the Zip Ties
Using a pair of scissors, trim the small zip ties to about 1/4 of an inch in size. You would not want some excess zip ties to be stuck and in the way of making driving complicated.
Repeat these steps over to complete as many snow chains as needed. Do this on all others and make sure every zip tie is trimmed properly.
RELATED: How Zip Ties Can Help you Bike Through a Blizzard
Once all your chains are finished, it’s time to attach them to your tires.
As a tip, turn your wheel all the way to the right. This will make the entire process much easier.
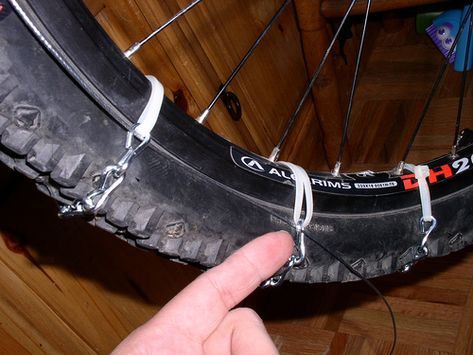
Now insert your chain through any of the openings of the rim, with the head in first, and then pull it around the other side of the tire, back to the front. Pull the chain towards the end of the opening that it would naturally slide over to help prevent it from moving around.
Connect the zip tie and tighten it, all while keeping the smaller zips (which is the grip) on the tread of the tire. Once they’re set, tighten the chain as best as you can.
Repeat this process for all the openings on the tire. Around 5 to 6 zip ties will work for each tire of your vehicle.
They will stay on your tire when driving with snow chains through snow and ice, but they will likely break off if you drive for a long period of time on concrete alone.
Go ahead and watch the video provided by Jason Day and see how the zip tie snow chains are being used in a 6-inches of snow field:
Winter comes and goes, but there are many places across the world that have snow all year ’round, leaving many with no choice but to stock up on tools that make life easier in the snow and ice. One such winter accessory that many people heavily rely on to literally get through snowstorms are snow chains.
While they provide traction, these snow chains are by no means a permanent solution to driving on snow. So make sure that this coming winter season you are all set for your gear and for your own safety!
Did you enjoy our post? Let us know your results in the comments section below!
UP NEXT:
We love getting feedback; it helps us improve the site and choose which topics to cover. We love doing cool DIY projects by making craft projects, home decor projects, upcycling ideas, recipes, tutorials, and anything you can do yourself.
That’s why we created this site, we want people to be more in touch with their creative side and realize that there’s a lot of things that they can do themselves. We’d love to hear from you and create a community of DIY enthusiasts where any project is just a click away.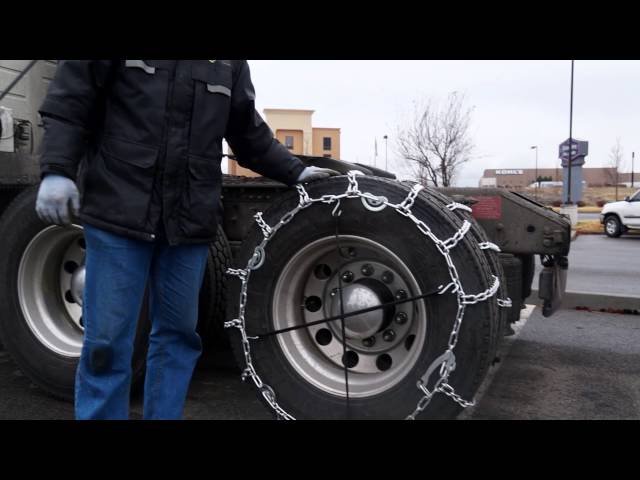
Stay connected with us on Facebook, Twitter, and Instagram!
Editor’s Note: This post was originally published on January 18, 2016, and has been updated for quality and relevancy.
| (800) 853-2651 Shop Now |
| Allis Chalmers | Case | Farmall IH | Ford 8N,9N,2N | Ford | |
| Ferguson | John Deere | Massey Ferguson | Minn. Moline | Oliver | |
|
| |||||||||||||||||
Experienced motorists can give thousands of examples when mud, ice or deep snow prevent the successful completion of a trip. The power of the driving wheels is powerless in such situations - only a tug or a winch. After such unpleasant moments, some owners refuse to travel in bad weather, others put studded tires . However, there is another category of drivers who prefer to independently manufacture additional equipment to increase cross-country ability.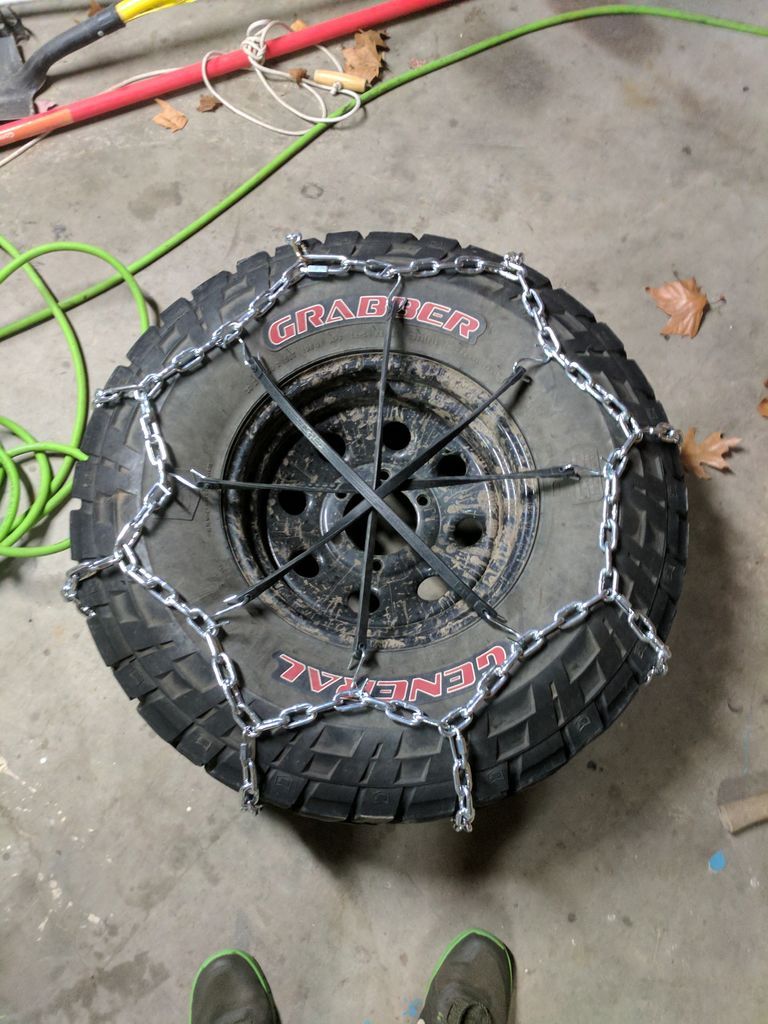
Contents
The basic scheme is an elementary design, which consists of a set of steel links or reinforced wire. The uniform distribution of components over the entire area of the tire is the key to the successful operation of the product.
Do-it-yourself classic snow chains in video look like two elements that are located longitudinally along the radius of the wheel from the outside and inside.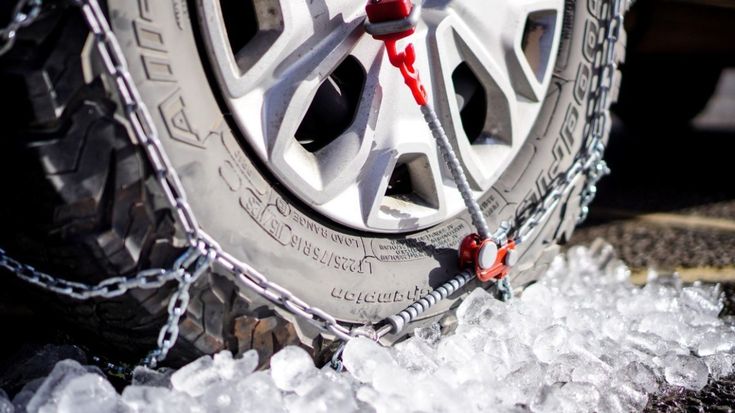 Between themselves, they are connected by transverse parts, the so-called lugs. The manufacturing technique is not difficult even for novice motorists. The layout of parts is carried out according to three schemes:
Each of the above types has its own advantages and disadvantages. The first option with a "ladder" in terms of financial concepts, as well as labor costs, is the most accessible. No less interesting is the solution with bracelets, which are also convenient when mounted on a wheel.
The inability to purchase factory devices that increase cross-country ability, as well as their high price, push motorists to solve the problem on their own. It should be noted that this is quite a reasonable choice - the necessary components can be found in any hardware store, and every self-respecting driver has a minimum set of tools.
It should be said that information about how to make snow chains with your own hands and video does not always include a list of design elements. Let's dwell on the simplest model, made according to the "ladder" scheme. For its implementation you will need:
On average, it will take about 15 meters of chain to assemble chain devices for driving wheels of a passenger car, more exact figures will be known only after specific measurements. It is recommended to use stainless metal hardware as chains. The preparatory process ends with the collection of tools:
Experienced motorists assure that at critical moments a cable or even simple rigging helps out well. They can simply wrap the wheel, another question is that such things are not always at hand. Moreover, this method is categorically contraindicated for machines equipped with a disc-type brake system. Therefore, it is better to be patient in advance and make a “chain kit” yourself.
When making snow chains with your own hands using accessible videos, where the footage of the blanks is not always indicated, it is important to make accurate measurements of the radius and width of the tire. Based on the results obtained, calculate the parameters of the future product. The number of cross members ( grousers ) is also selected individually for each car model. Masters recommend focusing on the fact that in the plane of the contact spot of coated rubber there should be two transverse parts at once.
The procedure for assembling the cross-country device is to perform the following steps:

With certain skills and tools, the operation will take about 40-60 minutes. It will be useful to have experience in welding, which will allow in practice to abandon threaded connections, which will positively affect the quality of the device.
In the manufacture of traction control devices in the garage, drivers most often use the following types of locking mechanisms to fix them on the tire:
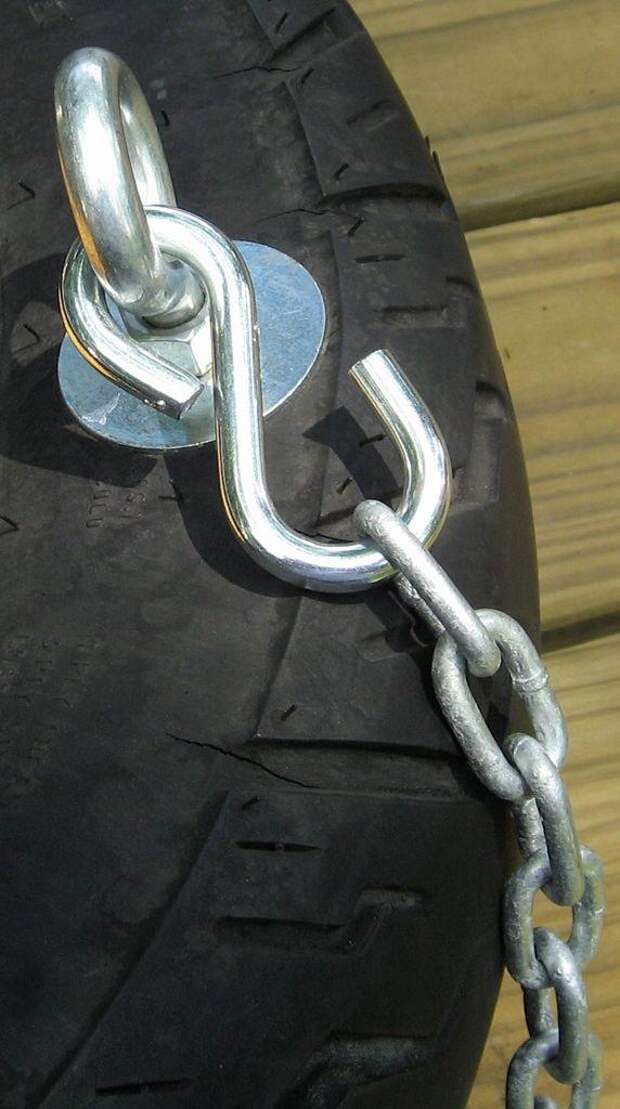
Some homemade chains for wheels are equipped with an S-shaped lock design, which is closed with a four- or hex key. However, many complain about the unreliable fixation and the lack of adjustments for this option. In addition, the installation of such equipment is a complete inconvenience.
The second way of fixing the chain device is more common and holds quite well. With a properly laid chain, fastening is done with a screwdriver without any problems. For a full guarantee, motorists are advised to tie the contact point with a soft wire of 1-3 mm. Dismantling of the equipment also happens quickly without much effort.
Model of ratchet lock used on trucks. Differs in high reliability and simplicity in operation. The sample provides fixation without the use of additional materials.
Experts recommend mounting anti-skid equipment on all wheels, and not just on the drive ones. Incorrect installation can lead to damage to the ABS sensors, brake system components and fender liner, as well as side cut tires . On SUVs with a connected second axle, the device is placed primarily on the pair that is constantly in operation.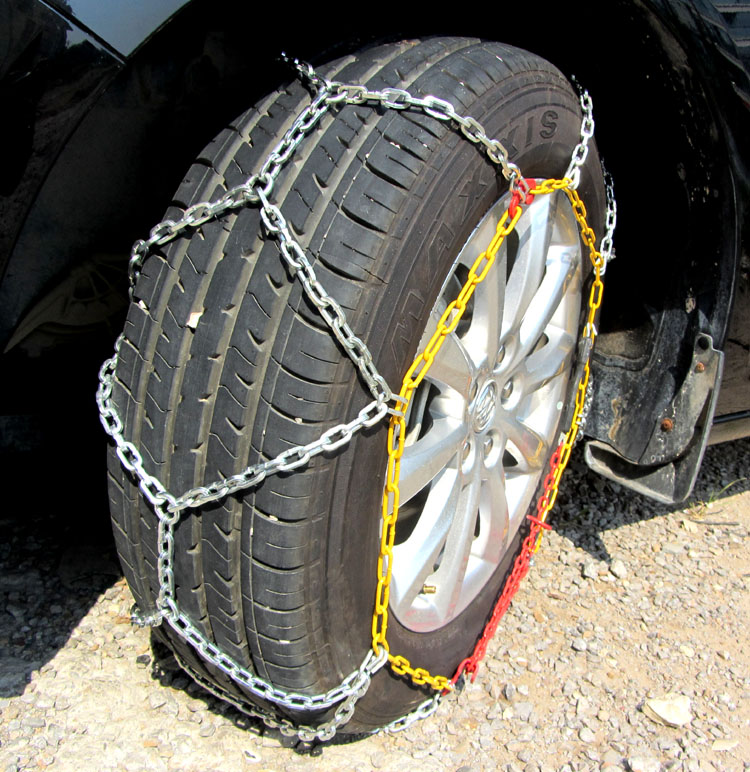 The installation operation is carried out in two ways:
The essence of the question is not only how to properly make snow chains on a car with your own hands from the video - you should think about installation work even before entering the problem area. This is the only way to enjoy the operation, save your time and avoid annoying mistakes.
It makes no sense to describe the first method using a jack - the procedure is elementary and will not cause any difficulties even for a novice driver. The only recommendation is to reduce the pressure in the tires to facilitate the work.
Another question is when this device is not at hand. In this case, you can install chains on snow wheels with your own hands using the following technology:
Important! To evenly distribute the components of equipment , drive 20-30 meters and then make the final adjustment. This event will guarantee the maximum fit of the product to the rubber.
Auto shops sell traction control straps - a worthy alternative to chain equipment. Differ in the possibility of quick installation and low price. But here, too, the engineering thought of our motorists does not stand still, they skillfully learned how to copy factory copies.
The bracelets are the same self-made snow chains , but without longitudinal elements, their advantages are as follows:
For the manufacture you will need a modest set:
To equip wheels with a standard size of 195 and 205 mm, 4-5 meters of hardware products will be required. The stores also sell ready-made kits for self-assembly of bracelets, with the exception of Chinese kits, they are quite decent quality and inexpensive. It consists of:
The kit is easy to use, transported in a special case and does not take up much extra space. An important advantage of metal bracelets is the ability to install on wheels with disc brakes. And if you take into account the reviews, then the owners of expensive foreign cars do not disdain to use such devices, which also says a lot.
Any anti-skid equipment adversely affects the safety of tires, as well as the condition of the chassis. You need to be especially careful when choosing locks for homemade chains for car wheels , since trouble-free operation of the car depends on them.
Walking on hard surfaces is not allowed. When driving on loose snow or mud, you should maintain a driving mode of 20-30 km / h, it is not recommended to allow wheel slip. Experienced drivers advise while driving to periodically control the tension of the equipment around the entire inner and outer perimeter of the tire.
Contents
Design and types of anti-skid means
Installation method without jacking up the machine
Alternative solutions
Things to remember
Any motorist with experience has had unpleasant moments when the drive wheels of the car began to slip in mud, ice or deep snow. It is often almost impossible to get out of such situations on your own - only with the help of another vehicle. How are our colleagues doing? Some people buy studded tires after such incidents, others simply put the car on a "fun" during natural disasters.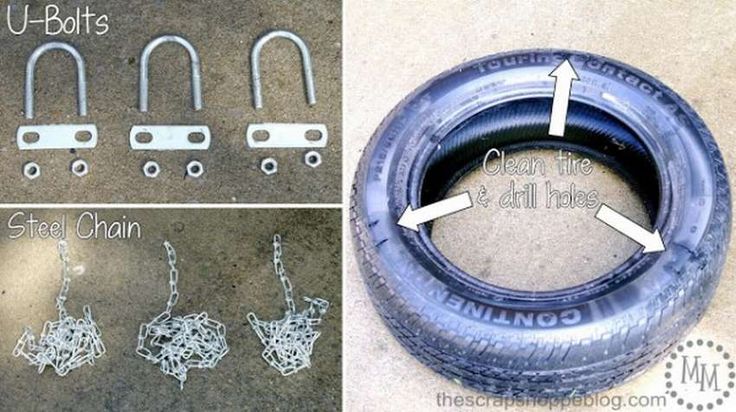 But there is another category of motorists that uses homemade chains for wheels and, I must say, quite successfully.
These devices are based on a simple design consisting of steel links or reinforced wire . A successful application lies in the uniform distribution of the elements along the entire radius of the tire. Failure to comply with this condition threatens to break the product and loss of anti-skid properties. The classic scheme, proven by more than one generation of motorists, consists of internal and external components that run around the entire circumference of the tire. They are interconnected by transverse parts, the so-called " grouser ". The manufacturing technology of do-it-yourself wheel chains is available even for beginners. Depending on the layout of the structural elements, there are three types of devices :
Each type has its own advantages and disadvantages. In terms of labor costs, the first option is the most accessible - "ladder" .
It is not always possible to purchase an anti-skid device - the high price and lack of availability of the right size makes car owners decide such issues on their own. I must say that this is a pretty good choice - all the necessary components are always available in hardware stores. In a critical situation, you can try to simply wrap the tire with a cable or a piece of metal rigging , but not everyone carries a similar set with them. Moreover, for a disc brake system, this option is absolutely contraindicated - such a design will disrupt the operation of the mechanisms. Therefore, it is worth preparing in advance homemade chains for wheels , for which will need :

The dimensions of the workpieces depend on the dimensions of the tire used, so it is important to measure the desired values in advance. The number of transverse parts is also individual - craftsmen recommend making sure that there are two "crossbars" at once in the plane of contact between the tire and the ground. Thanks to this scheme, traction characteristics and reliability of the entire product will increase. Preparatory action process and do-it-yourself assembly of chains on wheels consist of the following items:
As you can see from the description, with some skill and tools, the operation will take no more than 40 minutes.
Those who have welding experience can put it into practice and refuse threaded connections, which will certainly affect the quality of the equipment.
Having checked the reliability of the finished product, it remains only to install it on the car.
The anti-skid device is mounted first of all on the drive pair and this is done using two methods :
The choice of method is up to the driver, but it is worth focusing on one recommendation - you need to think about installation in advance, even before entering a difficult area . Only in this way will it be possible to avoid annoying mistakes and save a lot of time.
Before proceeding with the operation of installing the homemade chain on the car wheels , carefully lay it, not allowing the links to twist. Next, proceed according to the points:
Do-it-yourself mounting of the chain on the wheels of a car using a jack is similar to the technology described above, its only advantage is to facilitate the task. For a better installation, you must first reduce the pressure in the tires, but after the operation, do not forget to restore normal parameters. This procedure will allow the product to fit as tightly as possible to the tire.
The idea of folk craftsmen does not stand still - and now they offer an alternative solution: anti-skid bracelets . In principle, these are the same home-made metal chains for wheels , only with a difference in the absence of longitudinal elements . The advantages of bracelets are as follows:
So what is needed for the manufacture of :
For 195 and 205 mm tires you will need about 4 meters of chain. As you can see, the costs are minimal, and you only need to cut the material to the required length. Another alternative option - kits for DIY wheel bracelets using chains , are quite affordable and of good quality (except for Chinese ones).
Set consisting of:
The kit is very easy to use and does not take up much space. An important plus is the possibility of using machines with disc brakes . Judging by the reviews, owners of expensive SUVs do not disdain to use them, which once again speaks of the practicality of the device.
For more information on how to make your own anti-skid bracelets, see the video:
Anti-skid chains must not be used when driving on paved roads (concrete, asphalt). In conditions of loose snow or soil, it is recommended to adhere to a speed of 10-20 km / h. Wheel slippage must not be allowed.
After installing the anti-slip device, after driving the first 100 meters, you should stop and check the reliability of its fixation, as well as the tension around the entire perimeter. A loose chain can cause damage to suspension and steering components.


 This short series will take a look at the basic layout of a simple hydraul ... [Read Article]
 , our products, or our website nor are we sponsored by them. John Deere and its logos are the registered trademarks of the John Deere Corporation. Agco, Agco Allis, White, Massey Ferguson and their logos are the registered trademarks of AGCO Corporation. Case, Case-IH, Farmall, International Harvester, New Holland and their logos are registered trademarks of CNH Global N.V.