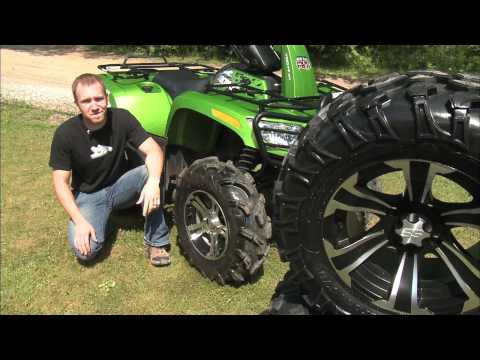
Most ATV owners will experience a flat tire at some point, typically caused by a sharp rock, dry stick, or a rusty old nail behind the barn. While string plug kits offer a convenient way of fixing a tire leak on the go, it is not considered a permanent solution.
So how do you properly patch an ATV tire? To do so, you need to dismount the tire and install the patch from the inside. While installing an internal patch plug can save a tire that otherwise would be destined for the junkyard, it is not something you can do on the trail or out in the woods. You’ll need a handful of tools and about 15-30 minutes of your time.
Please note that not all types of ATV tire leaks and punctures can be repaired with a patch. Please refer to this post to make sure patching is the best alternative to fix your leaking tire.
With this guide and a few budget-friendly tools, you’ll be able to patch your ATV tire properly at home.
Things You’ll Need:
Tools required to patch a tire. In addition, you’ll need tools to dismount the tire.
Spray some soapy water to identify the precise location of the leak. You will notice tiny air bubbles appearing where the leak is located. Use a marker to mark the leak for future reference.
When installing a patch plug, you need to prepare the hole, so the plug part of the patch fits and seats properly.
To do so, you’ll need a spear-shaped rasp, like the one that comes with string plug kits, or a drill-bit rasp to use with a drill.
Poke the drill bit once all the way in and out while running the drill, or move the manual rasp in and out several times until the hole is circular.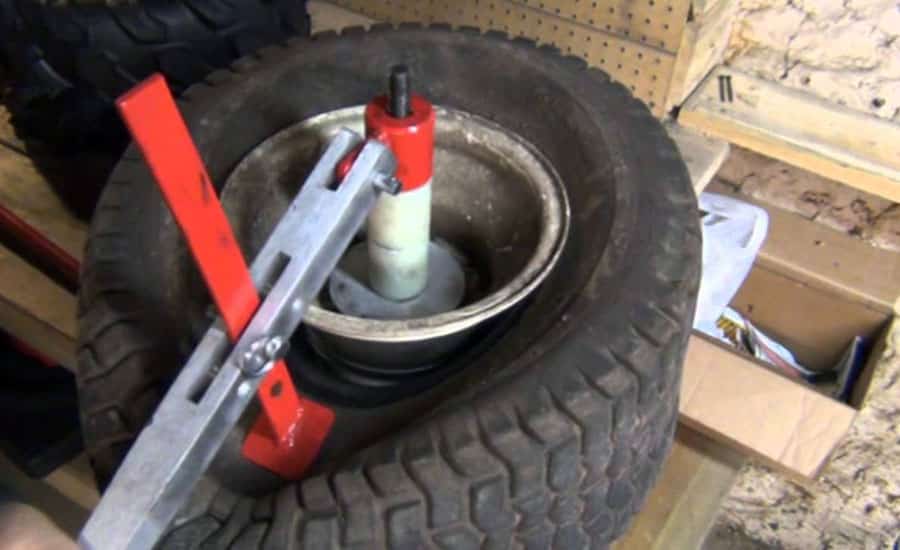
To access the inside of the tire, you’ll need to remove it from the rim. To do so, you first need to deflate the tire completely.
Your best option is to use a valve stem core removal tool to remove the valve stem core from the tire valve. This method will deflate the tire in seconds. Valve stem core removal tools come in a wide variety of shapes, and you can pick one up for cheap at most auto supply stores or on Amazon for a few dollars.
Deflate the tire using a valve stem core removal tool.If you don’t have such a tool but have a pair of needle-nose pliers that will fit inside the tire valve, you can use it to unscrew the valve.
As a last resort, you can use a small object to depress the needle in the valve stem core manually. While this will take some time, it will do the job when in a pinch.
This step is typically the one that concerns most people. While it does require some knowledge and caution, it’s well within what most home mechanics can achieve.
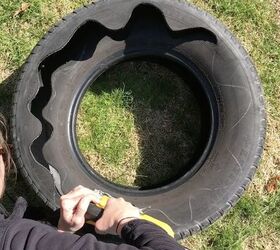
I prefer using my portable tire changer as it’s an affordable yet effective way of breaking almost any tire bead at home.
Break the tire bead using a bead-breaking tool.Place the tire so that the tool sits on the tire edge, as close to the rim as possible. Apply some soapy water as this will help the tire to slide over the bead of the rim.
Press the handle until the tire slides over the tire bead. You may need to reposition the tool several times to break the bead completely.
If the tool slides down the tire’s sidewall, stop pressing and reposition it up by the rim. Pushing the tool too hard into the sidewall can cause damage as it’s the weakest part of the tire.
If you don’t want to spend money on a bead-breaking tool, consider making a simple DIY tool like the one I made before purchasing a dedicated tool. It only costs a couple of dollars in materials and a few minutes of your time.
Here are some other alternative methods of breaking the tire bead for home mechanics to consider.
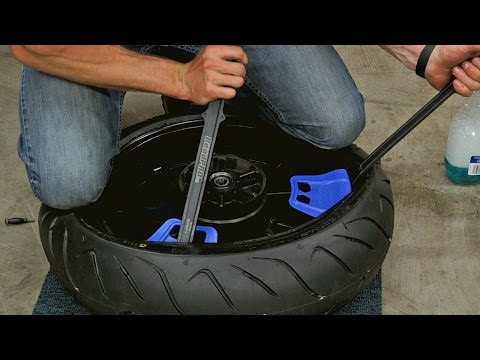
Use your tire changing tool or a couple of tire irons to remove the tire from the rim.
Use two tire irons to dismount the tire. Begin with one iron, then insert the other. Work your way around the tire until it pops over the rim.Again, start by using one tire iron, and use the other to complete the job.Dry up any remaining soapy water from the inside of the tire using a rag. Use your marker to mark around the puncture before removing the protruding object to keep track of your leak. Use some pliers to remove the object causing the leak from the tire.
While most instructions say that you should clean the area around the leak with a pre-buff-cleaner product, it’s not a mandatory step.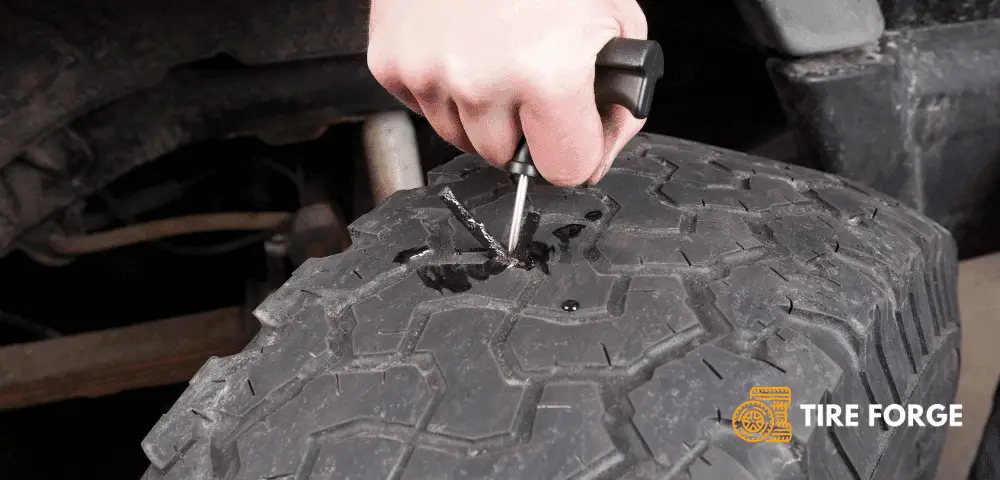 I’ve never had any issues skipping this step, as long as I clean properly after buffing the rubber.
Use a drill with a tire buffer to buff up the rubber where you will be installing the patch. This step will smooth out the texture inside the tire and ensure proper adhesion between the patch and tire.
Go over a few passes in each direction until you get an even, coarse surface. Do not go too deep as you may damage the tire cords. Make sure the buffed area is slightly larger than the patch.
Do not go any deeper if the cords begin to appear like in this photo!If you don’t have a tire buffer tool, you can use a rubber file to do the job manually. While this method does take more time and elbow grease, the finished result should be just as good.
Grease or rubber shavings will reduce the effectiveness of the glue.
Apply tire glue (rubber cement) on the prepared area. Apply enough to cover the whole buffed area, and try to get some into the hole. About 4-5 pea-sized beads should do. Use a small brush to spread out the glue evenly. Allow the glue to air dry.
Make sure the rubber cement is spread out evenly.Carefully remove the plastic backing of the patch, making sure you don’t contaminate it with oil from your fingers.
Remove the plastic backing.You can apply some rubber cement to the probe as a lubricant, but it is not necessary if the hole is prepared correctly. Insert the probe through the hole until it appears on the outside of the tire.
Insert the patch metal probe into the hole.Gently pull on the metal probe with some pliers. Do not pull too hard, or the probe will come apart from the plug. As soon as the rubber plug starts coming through, shift your grip and pull on the rubber instead of the probe. Keep pulling until the plug bottoms out.
Take your tire patch roller and run it down over the patch flush several times in a criss-cross pattern. Make sure the edge of the patch seals properly to the tire. When you are done, the plastic coating should peel off relatively quickly.
Start in the center and work your way outwards. Shift directions 90 degrees from time to time until the plastic backing starts coming off and the patch is nice and flush with the tire.As a finishing touch, apply some rubber cement to seal the edges of the patch.
Seal the edges with rubber cement for a longer-lasting repair.Cut off the protruding rubber stem flush with the tire using a sharp knife or razor blade. Do not pull up on the plug; just cut it as it is.
Cut the plug flush with the tire.
The tire is now properly patched!
This patch should stay in place during the remaining lifetime of your tire.If you don’t know how to install the tire back onto the rim, please refer to step 5 -11 in this post, where I go more into detail on how to change ATV tires at home.
While this process may seem a bit intimidating at first, you’ll learn that it’s actually not that bad after doing it a couple of times. It does require an initial investment of a few tools, but knowing how to properly patch your ATV- and Powersports tire at home will likely save you both time and money in the long run. Good luck and be safe!
Due to the rough terrain that ATV tires are subject to, getting a rip or puncture in tires is not uncommon. However, rips are especially mind boggling for ATV owners who recently bought new tires. Get new tires is pricey and patching tires seems to be more economical, but can ATV tires actually be patched?
The good news is that ATV tires can be patched much like a regular car tire.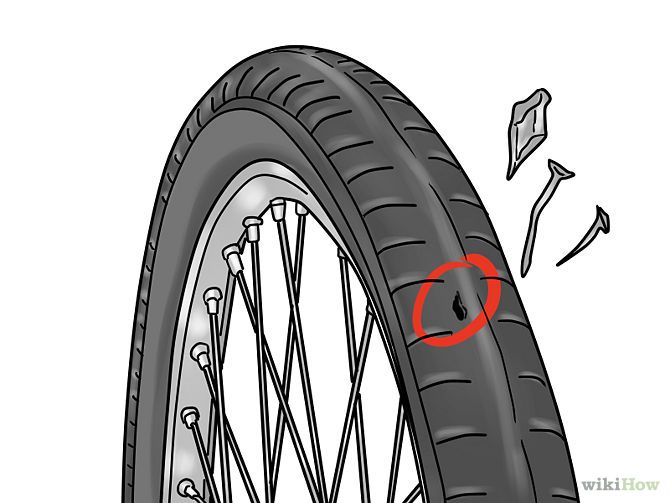 Depending on the quality of the patch, the repair may even last a while before you have to worry about it. Patching an ATV tire can save you some money if you learn to do it yourself.
Patches aren’t permanent, especially for ATVs that are often driven on rocky terrain. If the patch doesn’t break, it’s possible to keep your tire until it’s time to change to a new one, although it’s recommended to get a new tire.
In this post, we will go over everything you need to know about patching up your tires.
Patching vs Plugging ATV TiresThere is a slight difference between patching and plugging of tires. Patching is usually done from the inside of the tire and on rips or sidewall tears. These rips will require a larger patch to cover the rip.
Plugging is usually done on the outside and works best for hole punctures caused by spikes or other sharp objects. The repair of these kinds of damages are usually pretty straight forward and requires a tire plug kit.
If you have tubeless tires, patching from the outside is probably the easiest option. You don’t need to remove the wheel. All you need is a tire repair kit and some CO2 cartridges.
No matter which tire repair kit you choose, it will usually come with the following items:
Here are the steps you need to plug your tire using the tire repair kit:

Sidewall rips and tears are sometimes unavoidable and if you’re using tubeless tires, you need to be prepared to fix rips on the fly.
For slidewall rips, it’s best to patch the tire from the inside. This minimizes the chances that the patch will rub other objects outside of your tire, making your patch more secure.
For this fix you’re going to need to remove your tire from the rim. It’s recommended that you practice this at home by deflating your tires, that way you will know what to do even if you’re stranded in the middle of nowhere.
For removing the tire from the rim, you will need two tire irons with flat blades that will be used to wedge the tire out of the rim.
Here are the steps you need to follow if you want to remove your ATV tire from the rim.
Once you have removed the tire, the next step is to patch it from the inside.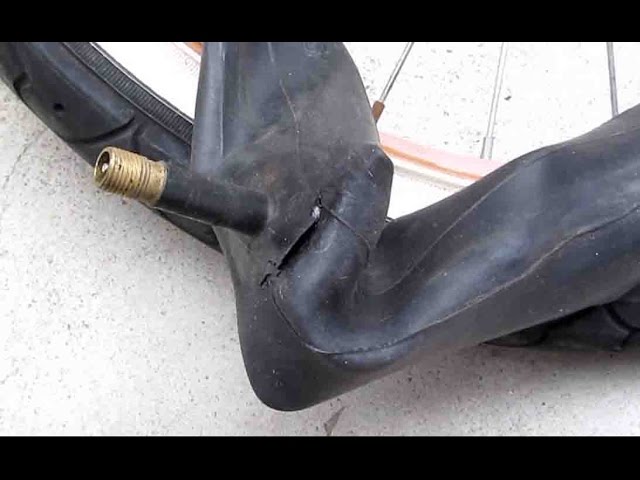 You will need a tire patch kit for this procedure. A tire patch kit will usually come with the following items:
Here is how you would use the tire patch tool:
Once your tire is patched and ready to be placed back onto the rim. The steps to do this is basically the reverse of removing the tires.
Here are the steps for installing the ATV tire back onto the rim:
It’s all fun and games when you’re riding near your home. Even if your tires rip or puncture, you will be able to quickly run home and get the supplies you need to fix them.
However, if your riding in a remote area, you wouldn’t want to be stranded with a 500 pound machine. Therefore, it’s a good idea to bring along a few items with you if you’re planning for a long trip.
Here is a list of things you bring with you. You can put them in a bag strapped to your ride:
The above list provides the basics of what you’ll need for repairing tires. Before you go, do some planning, get an idea of the area and terrain you will be riding on and bring the necessary items with you in case you get a flat tire.
Can You Put Tubes in ATV TiresYes, you can put tubes in your ATV tires. Tubes are usually made of latex or butyl rubber. They are inserted inside of your tires and when inflated, provides an extra layer of protection and structural integrity for your tires. They are great if you run into large rips on the sidewall of your tires that may be difficult to patch.
Keep in mind that if your sidewall rips, you still need to replace your tires or patch it. The innertube is there is maintain the structural integrity until you can get home.
Most ATV tires nowadays are tubeless but it’s not a bad idea to install them.
Should You Slime or Fix a Flat Atv Tire?Slime is a type of tire sealant that you squeeze into your ATV tires or tube. When a puncture occurs, air from inside of the tire will escape through the puncture. If you added Slime to your tires, the air will drive the slime through the hole. As the slime passes through, it dries and plugs the hole.
So should you use Slime on your tires or fix your ATV tires by patching or plugging? The answer to this question depends on the types of damage you have on your tires. Let’s discuss this in detail below:
Advantages of using Slime Using slime can provide an easy way for you to seal off the hole.
 If you are debating if Slime is right for you, check out Slime’s Official FAQ to learn more about this product.
To use Slime on your ATV tires, follow these instructions:
A typical ATV will require 24oz (710ml) of Slime
ATVs are famous for their stability and reliability, however, even the highest quality models, including Stels ATVs, can fail. Of course, only a master can deal with serious breakdowns, but you can do something with your own hands, and some breakdowns will have to be repaired on your own, including punctured tires. This is one of the most common problems that ATV riders face, and it's not surprising, especially given that ATVs move on such surfaces, where there is no need to talk about safety. That is why you need to be ready in case of trouble to solve the problem. The main thing, as in many ways, is not to panic, so if you hear a suspicious hiss, don't be scared, but take out the first aid kit of your ATV.
I must say right away that it is better to replace a damaged tire, but this is not always possible and can be done on the spot, and minor repairs will allow you to finish the trip and return home on your fours. In fact, there is nothing complicated about this, and it is quite possible to repair holes up to 5 centimeters in diameter, the rest are usually associated with damage to the device itself, so there is no need to talk about the end of the trip.
In order for the test not to take you by surprise, you need to prepare in advance and always have a few basic things with you. Designate storage space on your ATV ahead of time and remember to refill as you use it. Often in repairs, the main problem is precisely the need to get out of the ground what you forgot to take with you from home.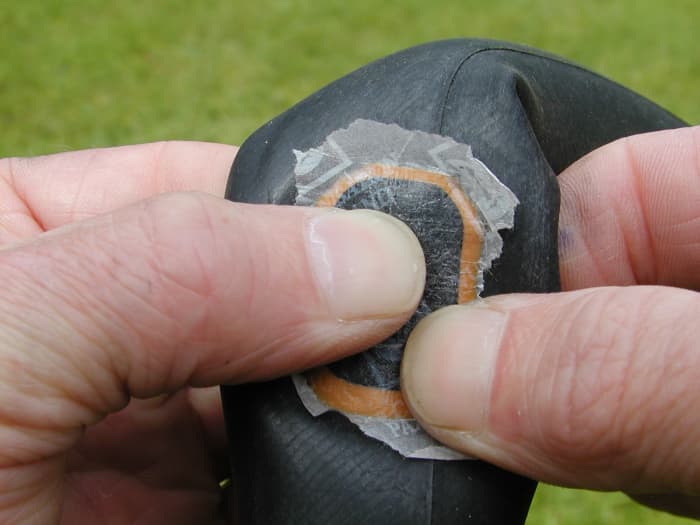 So, here is a list of what will make you feel confident on any road - a repair kit, it includes a reamer - an expander and a special tool for installing patches.
Patches, this is exactly what ends quickly and that you need to constantly buy more, the rest of the materials are not consumables or you can do without them. Patches come in different shapes, for example, I prefer long ones, the main thing is their good stickiness.
Pump. After the “treatment”, the tire will have to be pumped up and you cannot do without a pump. Here the choice is yours, manual or electric, as for me, the simpler the better, folding pumps are still good, they take up less space in the trunk, although it's more about your personal preferences and the possibilities of your wallet.
Rubber adhesive. In principle, there is usually enough sticky layer on the patches, but just in case I carry it in the trunk too, the whole gluing process is greatly simplified. A pressure gauge is a device for measuring tire pressure, if you bought an ATV in a store, it usually comes with an ATV.
If you notice an air leak, start by looking for a hole in the tire, if the tire is already deflated and the air is coming out weakly, inflate the tire and find where the air comes out. It is usually quite easy to find a hole if it is caused by a foreign object - a nail or a branch. If you don't see the hole, spin the tire on the wheel and listen for exactly where the hiss of the escaping air is heard. In the most extreme case, put the tire in water - a puddle or lake - and you will be able to see the air bubbles escaping. Remember that air can escape not only through a hole in the tire, but also through the junctions of the tire parts or the tire and the valve.
Once you find the hole, work the edges of the hole with a reamer, making the surface rough, after that the patch will better adhere to the rubber. Take a patch tool and thread the patch into it, if there is glue, smear it with a little glue and insert it into the tire halfway. The next moment is very important - you need to quickly pull the tool out of the hole, but do not pull the patch with you.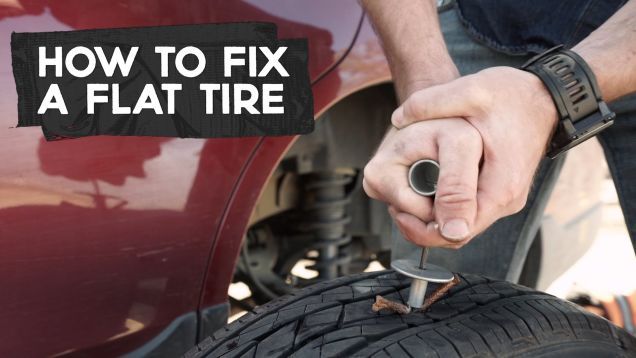 If you are doing this for the first time, you may need to practice - I told you that patches run out quickly. Usually, if the hole is microscopic, one patch is enough, but sometimes you have to use several, in this case, repeat the steps, inserting the patches until the air stops coming out of the hole. When the hiss is no longer heard, leave the tire for a few minutes to allow the glue to dry. Do not forget to trim the ends of the patches protruding from the operation site, leave no more than three millimeters, otherwise such a patch may simply fall out while driving. When everything is ready and your tire has restored its integrity, pump it up to the required pressure and you can continue driving. Do not forget that if the hole was large enough, after returning home, the tire will have to be changed to a new one.
As you can see, everything is not so difficult and you will quickly learn how to spend no more than a few minutes on repairs, by the way, if you don’t want to practice repairing a tire in the middle of a track or forest, do it at home, especially if you have never used a repair kit before.
October 19, 2018
In the last article, we discussed what to do when an ATV tire is punctured, but punctures and cuts are different.
Side cuts are considered the most unpleasant, as their recovery is complicated by the specific structure of the tire. The sidewalls of the tire must be elastic, as they take part of the road load.
A common puncture in the sidewall of an ATV tire is rare.
Tire sidewalls are more likely to be cut than punctured. In case of a side puncture or cut, the tire must be changed, as its reliability is significantly reduced, and it will not withstand the loads for which it is designed.
But what if you are far from civilization?
There is a method that will reliably repair a tire, but it will be a longer procedure than a simple ATV tire puncture repair.
Side cuts often occur in the mountains where there is kurumnik, since ATV tires are designed to operate at low pressure, the tire bulges very much when riding and can go under a sharp stone, which will create a side cut.
So, what is required for repair:
ATV tire side cut repair sequence: