Doing a wheelie on a quad might seem hard, but if you practice and do it right it becomes easy. If you use proper technique, doing wheelies on a quad can be done safely, and is a lot fun.
Wheelies can be dangerous, especially if you’re trying them out for the first time. It is important to take your time learning, and wear proper safety gear. A helmet and goggles, gloves, boots, long pants, and a chest piece are all recommended. For the best safety gear check out the recommended gear section of this site.
If you have proper safety gear and feel comfortable on your quad, then let’s learn how to pop a wheelie the right way.
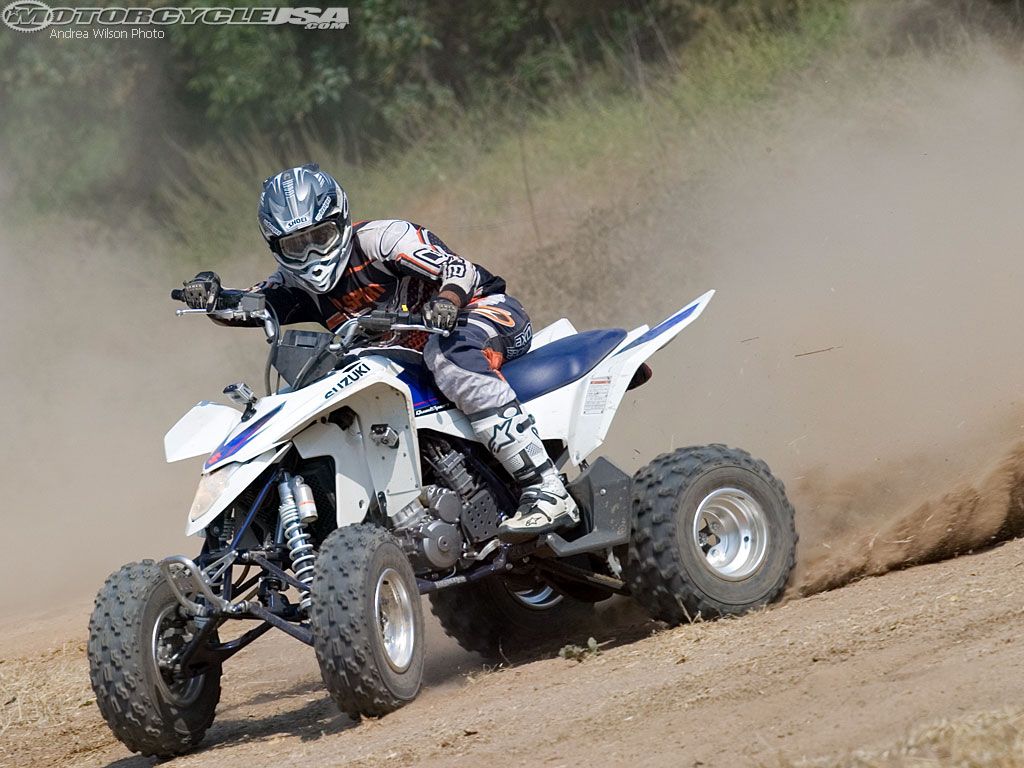
You can learn and perform a wheelie on most any stock quad. You will usually see them mostly done on sport quads or racing/trick type quads. Even though they may look cooler, don’t think you can only pull a wheelie with a sport type ATV. You can pull a wheelie on any type of ATV with or without a clutch if you do it the right way.
Although it can be done on a stock quad, here are some things to consider for optimum setup of your machine.
Most of the time having a low tire pressure is ideal for stunts, tricks, and wheelies. Having your tire pressure lowered a bit will help with turning, balance, and traction. It helps with turning because your tires will squish more on whichever side you shift your body weight too.
When this happens it allows your quad to turn more easily in that direction. When the tire squishes, its diameter shrinks, allowing you to turn by just leaning from one side to the other.

Having that flat spot on your tires allows for more traction when trying to get up into a wheelie too. When more of the tire can make contact with the ground, you will get a better lift. Set your tires to an air pressure lower than stock to increase the flat spot where your tires touch the ground.
For normal trail riding I set mine to 5-6 psi and I can pull wheelies easily. If you want to set your tires specifically for wheelies, start with 3 psi and go from there. It’s best to try different things and see what works best for you.
Here is an article about ATV tire pressure if you want to know more.
Make sure your throttle isn’t loose, and that it operates smoothly without sticking. It can be dangerous to be up in a wheelie and your throttle gets stuck. Nothing special to do here except basic maintenance and make sure everything’s working the way it should.
This is mostly personal preference. Just adjust your clutch so that you are comfortable using it. Leaving it stock is probably the best way to go for beginners, if you want to customize it a little for yourself that is fine too.
Some people want their clutch to grab and release real close to the handle bars. You will be pulling your clutch all the way in most of the time with this setup. Others want the clutch to engage with the slightest touch. It’s all up to the rider and what they prefer.
I like it somewhere in the middle, and that is how the machine comes from the factory. It works, that’s how it was made, so I’m good with it.
You probably don’t need to do anything special to your sprocket for pulling a wheelie. Most stock sport quads are fully capable of pulling up into a wheelie even in 4th or 5th gear.
However, if you want to you can change out the front and rear sprockets to different sizes. Usually known as ‘gearing up’ or ‘gearing down’. For the purpose of doing wheelies I would suggest gearing down. By installing a larger rear sprocket you are gearing down, which increases the final drive ratio.
This will reduce top speed but increase acceleration, which what you want to be able to pull up into a wheelie.
If you don’t want to hassle with all of that, don’t worry. Like I said, you can get most any stock quad up into a wheelie without any modifications.
The important thing here is to make sure your chain is adjusted to factory specs. A loose chain will cause you to make changes in the way you use your throttle to get into a wheelie. And having a sloppy drivetrain can cause other issues as well.
If you change out your sprocket, it is a good idea to change the chain out with it. It is best practice to let your sprocket and chain wear together. There is no need to go out and buy a special chain just to do wheelies with.
A grab bar is sometimes called a wheelie bar, and it’s the bar on the quad right behind the seat. You’ve probably used it to pick the ATV tires up off the ground to move it to the side. This is a fairly important piece to have if you plan on doing wheelies a lot. It will stop you from tipping your quad backwards onto yourself.
The idea behind this piece of equipment though is to have it but not need it. You should not consider your wheelie successful if you used the wheelie bar to stop you from getting hurt.
The only thing to do is to check it for cracks and bends. If your wheelie bar is damaged I would consider getting a new one. If you don’t have a wheelie bar, consider getting one, or be really careful.
You can find a grab bar for almost any quad at a reasonable price on Amazon, here is a link to get your search started.
You really don’t need any special modifications to your quad to do a nice wheelie. You could try some of the things I mentioned above if you’re having a hard time, but everything is just optional. Some people prefer different handle bars for added security and better control.
For doing wheelies getting an aftermarket pipe might be something to consider. You will get more low end torque which will help you when trying to lift into a wheelie. This is more helpful on lower powered quads like a 200cc. The higher powered quads won’t need the added benefit of an aftermarket exhaust.
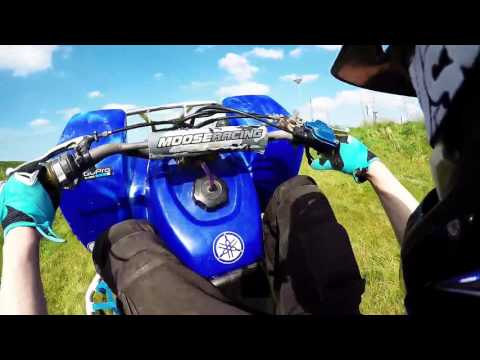
The way you position yourself on the quad makes a big difference in how you do a wheelie. You should keep in mind the different body positions for what type of wheelie you are trying to perform. A few options are the sit down, stand up, split, and seat standing.
This is the most common type of wheelie, and the one most people try to do first. It seems easier because all the controls are easily accessible and you feel comfortable riding in this position. But I don’t recommend this position for beginners.

For beginners just doing a quick pull the front up and set back down wheelie this is good. It is a good way to get a feel for the machine, but I don’t recommend trying to ride a wheelie this way if you’re just starting out.
If you go too far back in the wheelie the quad can tip over backwards, and this is one of the hardest positions to hop off the machine in.
This is how I like to pull up into a wheelie. I spend a lot of my time riding in the standing position anyways, unless I’m going for long distance rides. I like having a clear view of whats ahead of me a better understanding of how high the front end is in a wheelie.
Start in a standing position with your hands on the controls and feet on the foot pegs. The controls, like the brake and clutch, can be a bit harder to reach, so you might get tired more easily in this position. Your legs will get tired faster while standing also.
If you tip too far backwards, it is easier to hop off in this position so I think it is safe for beginners. You also have more leverage to pull up with to get into a wheelie.
You would want a grab bar for this position. Stand with your right leg on the right foot peg, your hands on the controls, and your left foot on the grab bar. You could do something similar with your left knee on the seat. This is basically the standing position except with your left foot back on the grab bar.
Jumping off in case of an accident is easy in this position, so I would say it’s safe for beginners to try. The gear shift can’t be used in this position so it’s not really good for long riding wheelies. But, for getting a feel for the quad and short or slow wheelies this is fine.
Be careful of your foot on the grab bar catching the ground when you wheelie. It can be dangerous and cause injury if your foot hits the ground and you get pulled off the machine. You can protect yourself by instantly lifting your foot off the grab bar, putting all your weight on the leg using the foot peg, if anything bad does happen.
In this position you are standing with both feet on the seat or grab bar with your hands on the controls. You will have no control over the rear brake or the gear shift so this position is definitely not good for longer wheelies. Stick to short pop-up wheelies with this one.
Although you won’t have access to your rear brake, it is as simple as hoping backwards and letting go to get off the quad in this position. I think it is safe for beginners to try, and you will see success quicker because of how easy it is to pull up the front into a wheelie.
Again, be careful that your feet on the grab bar don’t catch on the ground if you pull too far back into a wheelie. You can protect yourself by immediately getting your knees on the seat and getting your feet off the grab bar if anything bad does happen.
Once you find a position that works for you, you need to turn your focus to balancing your quad and your throttle control. Knowing how to use the throttle and finding the balance point will not only help you get into a wheelie, but will help you ride the wheelie longer. The balancing point is when you’ve pulled up into a wheelie and no longer need to accelerate anymore to keep the front end up.
Some people like to chop the throttle by quickly giving gas and backing off repeatedly. The idea there is that the machine will be given just the right amount of gas to sustain a wheelie.
I haven’t found that to be the case. In fact what I’ve noticed works best is to just use the throttle as smoothly as you can. I will give it a good amount of throttle to get the front end off the ground, and when I get to that perfect balancing point, I smoothly adjust the throttle down so I can hold the quad steady.
The balancing point will be different depending on your riding position because of your body weight. Speed and incline also play a role in where the balancing point is. If you are going slow, the balancing point will be higher up than if you were going faster.
At first, be ready to use your rear brake to bring the front end back down in case you pull up too much, at least until you learn where your balancing point is. It really is something you have to find on your own through practice and experience.
The most important aspect of getting the front end up is speed. I don’t mean you need to be going fast to do it, I mean you need to get the front up quickly and smoothly. If you try to slowly bring the front up, you will end up needing to accelerate more than you wanted to.
Getting the front up will be easier depending on the quad, a sport quad for example, will be the easiest. You may have to hit the throttle harder or pull up on the handle bars more on smaller or utility machines, but it can be done.
You will be using the ATV’s engine power and the power of you pulling on the handle bars to lift the front end. Think of it as something like a brute force method. This is the most common method I use, and it’s pretty easy. It’s not all brute force, it takes a bit of timing, but it’s the easiest to master right away.
Just before you hit the power band and get that burst of power, let off the throttle slightly and then hammer it wide open while pulling up on the handle bars. You should be pulling up on the handle bars just as you get that burst of power from the engine. To help you out, you could pull your body weight back to add to the lift from pulling on the handle bars.
This will take some time to get used to. Every machine is different and every rider is different. Take it easy at first and be careful not to over do it by tipping the quad over backwards. Experiment a little before going full throttle and ripping the handle bars off the machine.
Using this method you will use the clutch to help you pull the front up more quickly and smoothly. Mastering this method will also allow you to more consistently get into a wheelie every time. This is usually done by more advanced riders. I really only use the clutching method when I’m at a dead stop, that way I can get into a slow moving wheelie if I want to.
The benefit of the clutch is the rear tires going from no power with the clutch pulled in, to having a burst of power sent to the wheels immediately. It helps get the front end up quickly even at low speeds, and if you do it enough, it becomes second nature.
I don’t recommend doing this method to beginners, get good at the traditional power method first.
This is the easy part, all you’re doing here is exiting the wheelie. I would recommend a few pointers to help make the transition softer on you and your quad though.
You want to make sure your wheels are straight when your front tires touch back down. If your tires aren’t straight it could jolt the quad sending you in a direction you don’t want to go, or worse, you could lose you grip and end up in a dangerous situation.
Sometimes there isn’t much time to plan and think about exiting the wheelie. If you forget everything else, just remember, wheels straight and hold on.
Shifting is the same in a wheelie as it is normally. Smooth transitions from one gear to the next using the clutch. You shouldn’t have to switch gears anyways. Once your in the wheelie, maintain throttle control and balance to keep riding the wheelie. If you want to accelerate while in a wheelie though, you will need to switch gears.
I don’t recommend switching gears and accelerating your wheelie for beginners. Get good at balance and keeping your wheelie at the same speed first. Then move onto accelerating wheelies if you want to.
To do an accelerating wheelie, get the front end up like we talked about above. But this time keep the front end low, like near the lower end of the balancing point. This is helpful because for the next part you need to accelerate up to just before your quad needs to shift.
Right before you need to shift get your quad higher, a little passed the balancing point. Doing that will give you enough time to make the shift without your ATV’s front end coming down out of the wheelie. Release the clutch smoothly while giving a little throttle to keep the machine up in a wheelie.
The main thing to focus on here is smooth deliberate transitions. You shouldn’t feel rushed, and you should have a feel for the quad throughout the process. That will help you compensate after the shift to keep your front end in the air. I typically stay in the same gear when I pull a wheelie. It’s a lot less to worry about and more fun I think.
You should never need to use your rear brake to keep yourself up in a wheelie. It is good to know when to use the brake though. I would say other than finding the balance point and throttle control, the rear brake is the most important thing for pulling off a wheelie. If you don’t properly use your rear brake when you need to, you could end up damaging yourself, or worse, your machine.
The problem here isn’t how you use the rear brake, you would use it just like you would on the ground. The trouble is remembering to use it at all. A lot of people panic if they pull up to high into a wheelie.
You want to keep your foot ready to hit the brake before your grab bar hits the ground. If you have to bail off the ATV to save yourself that’s a different story. But most of the time, hitting the brake instead could have saved you the hassle.
To practice using the rear brake, you could keep popping up into little wheelies and use the brake to come back down just to get used to it. I did this when I first started learning and it helped me remember to keep my foot ready to brake.
Using slight pressure on the brake can help you stay in that perfect balancing point to ride out long wheelies too. If you start to feel like you are tipping past the balancing point, apply a little pressure to the rear brake to bring you back. After a while, you will learn to use the throttle and brake together to keep you up in a wheelie longer.
You got up in a wheelie, great! But now how do you turn? Even though the front tires are up in the air, it is possible to still steer your quad. It’s not all that difficult either really. I talked a little about this in the tire pressure section above.
You will use your body weight to steer the quad. By leaning your body weight to the left or right of the machine you can get your quad to move in that direction. You have to anticipate when and where you will want to turn because the quad doesn’t usually turn immediately after you lean. Start your lean a little before you actually want to start turning.
If you want to, you can still turn the handle bars to help you steer. I’ve had people tell me it works like the rudder of a boat, but I doubt it works that way. The main benefit in using the handle bars is to help you lean. You still need to lean to turn, but using the handle bars may help you lean off to the side a little more.
Alright, now that you’ve got all the steps we can put them together to pull off a wheelie. After you’ve decided what body position you want to be in, you need to know what gear you want to pull up in. When I first learned, I used 2nd gear. For me it was easier to find the power band, and in 1st gear the balancing point was higher so it made me nervous. The higher gear you’re in, the faster your going, the lower the balancing point will be. Find a gear and speed you will be comfortable with.
Now, let off the throttle and punch it right away while pulling up on the handle bars. This will lift the front end up. Remember, keep your foot ready to hit the rear brake just in case. Now that the front tires are up, you want to get to the balancing point as soon as you can. Stay on the throttle until you reach that point. This is the hard part, getting into the balance point will be the hardest part of a wheelie for beginners.
Slowly ease off the throttle as you approach the balance point. I can typically stay in the balancing position using only a quarter to half of the throttle. Once you’re in this position it’s all about staying there. Keep in the balancing position by using the throttle and your body weight to make adjustments. For me, this was the funnest part about doing wheelies. Once I could get into a balance, I loved to see how long I could stay there.
When you’re done with your wheelie, it’s time to lower the front end back down. Keep your handle bars straight and slowly let off the throttle. When your tires are a couple feet from hitting the ground, give the quad some throttle to make an easy smooth landing.
You aren’t going to read this and all of a sudden be able to pull off amazing wheelies for miles. This stuff takes practice and patience. For some people it can be hard at first, just take it slow and over time you will see improvements. When you start to see improvements, it can be addicting.
Doing tricks like this on an ATV can be dangerous. I always recommend you wear proper safety gear when trying things like this on your ATV. A helmet and goggles, gloves, boots, long pants, and a chest piece are all recommended.
For the best safety gear check out the recommended gear section of this site. Better safe than sorry.
If things go south on you and you think you need to hop off the machine, do it. It’s best to never get into that situation in the first place though. Get a feel for your quad first, and don’t try anything that is above your abilities. Learn the right way, and you will be pulling wheelies in no time.
Sharing is caring!
| |
“When we first started riding, we thought
that a wheelie was just a wheelie, and a trick was just a
trick. While I won’t be talking about very many different tricks in this little write-up, we will be talking extensively about wheelies. We will be going over almost every aspect, from the General setup of your quad, to the techniques used to help you go for miles on two wheels. I have read various “How to pull wheelies” articles and I hope that this one is much more in-depth, realistic, and helpful for you. Before we get underway, I’d just like to start off
by reminding you that wheelies can be dangerous, and should
only be attempted by those who are extremely comfortable on
an ATV. Now that we have that out of the way, let’s get started. Setup:
Modifications: Posture:
Basics of Throttle Control & Balance Point: Smoothness is the key here. Throw away any advice that anyone has given you regarding “blipping” or “chopping” the throttle, as that is nothing but bad news. The basic idea behind throttle control is to use a lot to get the quad from the ground to the balance point, but then smoothly adjust it to a point where you can almost hold it steady. The Balance point is the angle where the quad requires no
more acceleration to keep the front end in the air. Knowing
this point is one of the keys to doing wheelies. While I can’t
really describe in words where this point is, you will feel
it when you get there. It varies depending on speed and seating
position, as well as if you are on a flat surface, or an incline. Though Throttle Control and the Balance point may be the most important factors in a wheelie, you will soon learn that the Rear brake is your best friend. Lifting the front tires:
I personally only use this method when I’m going to wheelie from a dead-stop. It allows me to pull the front end up much quicker, which makes my wheelie speed slower. Setting it back down: It’s ideal to set the front end down with the wheels
straight, and your body in a secure position. It also helps
to accelerate as the front tires come in contact with the
ground to really help smoothen the landing. Shifting: Keep in mind; you should not Have To shift. Once you find
the balance point, and develop good throttle control, you
can virtually stay in a gear and wheelie forever without acceleration. For those of you who are ready to shift because you want
to, not because you have to, here is how you do it. Power
up the wheelie like normal. Keep the front end near the lower
end of the balance point, and slowly accelerate. Once you
are almost to the point where you need to shift (I’m
not talking about bouncing off the rev-limiter either), bring
the quad up higher so you are slightly passed the balance
point. Once there, you should be able to pull the clutch in,
and shift to the next gear. Smoothly release the clutch while
providing a little bit of throttle, as you normally would
when shifting gears on the ground. The key here (as with most
aspects of the wheelie), is to be smooth, and not try to rush
things. Please use the clutch, for your sake, and for your quads sake. There is really no reason to do otherwise. If you cannot shift in a wheelie while using the clutch, you really need to practice more. Steering the Wheelie: While in a wheelie, simply lean to the side where you want
the quad to go. You will feel the quad start to pull in that
direction. This typically does not happen instantaneously,
so lean a little bit before you actually want the quad to
turn. When you want to stop turning, simply lean a little
in the opposite direction to get the quad to track straight
again. Despite what you may have heard, turning the bars while in the air does not help at all in my opinion. Some say that they act like a rudder and cause the quad to turn. If this is the case, it is very minimal. The only advantage to turning the handlebars is to help you lean off to the side more. The Rear Brake: Everyone makes mistakes. That is a fact, and that is why it is important to know how to use your brake in a wheelie. I know what you are saying; “How is it any different than using my brake normally?”. The answer is, that it is not any different than you would normally use it, however hitting your rear brake is typically not your first reaction when you overcook a wheelie. Usually what happens when beginners go passed the balance
point, is they go into panic mode because they are nervous,
and totally forget about everything else and simply just want
to bail or hold on and ride the wheelie out. Well, neither
one of those are the right solution to your problem. The proper
way to correct a wheelie gone bad is to apply the rear brake
(preferably before you hit the grab bar). A technique I used to learn the rear brake was to keep popping the quad up in 1st gear, and intentionally go passed the balance point and force myself to hit the back brake to bring the quad back down. At first your main goal is to just get the front end back on the ground, but eventually after you practice your technique, you will be able to apply clutch and throttle, to keep the front end up in the air. This is also the first step to learning slow, walking-speed wheelies. Putting Everything Together: The thing to keep in mind is that nobody is the same, and
you have to experiment a little bit to see what works best
for you. Gear selection, body position, and etc., are all
optional. Maybe you want to go slow in the split position,
or maybe you want to do a fast standup. If you are worried
about hurting yourself or your quad, it is best to start out
in a lower gear, or if you are a little more fearless, maybe
a higher gear works best for you. I personally learned to
do wheelies in 3rd gear. The reason why 1st gear can be tricky
to learn in, is because the slower you are going, the higher
the balance point is. You also have less gear to work with,
meaning it’s easier to run out of RPM’s if you
have to make a lot of throttle adjustments. Now that you know what gear you want to start in, it’s time to get the front end up off the ground. Since I typically use the “Power Method” to wheelie at speed, that is what I will use to explain it here. Get the quad rolling low in the RPM range just below the
power band (approx ¼ Throttle typically). Let off the
throttle, and immediately open it back up and pull back on
the handlebars. Once the front tires are airborne, you will then have to
make your initial throttle adjustments. This where wheelies
are won or lost for the beginner. The idea is to get the front
end up to balance point as quickly as possible, so stay in
the throttle. As you approach the balance point, you can ease
up on the gas, and once you are in the balance point you should
be able to stay between ½ - ¼ throttle, making
minor adjustments here and there. You do not want the front
end dropping below the balance point, otherwise you have to
apply more throttle to get it back up, and you may have to
set the wheelie down if you run out of RPM’s, so conserve
them as best you can. If you find that your engine speed is very high, you can slowly go back to the high end of the balance point, which will actually allow you to slow down a little bit. Once you are ready to set the front end back down after a few miles or so, simply ensure that your bars are straight, slowly let off the throttle until the front wheels are only a foot or two off the ground, and then accelerate slightly for a smooth landing. That’s pretty much all there is too it. Reality:  This is something that takes time and practice. Some
learn faster than others, but practice always makes perfect. This is something that takes time and practice. Some
learn faster than others, but practice always makes perfect.
Wheelies can be very tricky and elusive for some people at first. Just because your next door neighbor says wheelies are easy, doesn’t mean you should feel bad for not being able to do them yet. Once you learn them, you will think that they are easy too. Just be patient, take things one step at a time, and you will continue to progress each day that you practice. Another thing that is never fun to talk about is the danger
aspect. In general, Quads are dangerous machines and need
to be respected 100% of the time. This becomes even more important
when you are pulling of maneuvers that they were not specifically
designed for. Please be safe, and always ride within your limits. Remember that there will always be a chance for another wheelie. If things get sketchy, just set her down and try again when the situation allows. There is no reason to risk hurting yourself, or anyone around you by trying to go an extra few feet on two wheels. Josh Lanphear
|
||||||||
| Copyright 2002-2022, ATV Riders All Rights Reserved - ATV Riders Forum - Message Board - Archive | |||||||||
Podolsk,
15 km Simferopol highway To contacts
#stuntriding #training
10 years ago
Author: f4rider. Translation: Maximoto, Serjik. nine0004
To begin with, it must be said that everything stated here is my personal experience and the experience of my other familiar stunt riders. Following the following tips won't help you avoid falls, sprains, sprains, or even fractures, but it's still safer than if you taught yourself.
A lot of bikes suffer from oil starvation with long runs on the rear wheel and leaving the bike for 12 hours with the engine running. Especially known for these Gixers and CBR 900RR (895cc '93-'95 models, SC-28 series engines). You can protect the engine from oil starvation by moving the oil intake closer to the rear wall of the crankcase or by pouring oil above the prescribed level (usually to the maximum level provided). I and some other stunt riders add 1 liter of oil more than the norm. Overflowing oil doesn't seem to be a problem for Hondas, but I've read that there have been problems with gixers. (So it is, but not for all models. When oil is overflowed in models since 2001, problems begin with clutch slippage, due to which the motorcycle loses traction and categorically refuses to climb onto the rear wheel. But at the same time, oil overflow does not affect on SRAD '9 models8 - '00.) So the best solution for the jixer would be to install an extended oil pickup. You can order a modified oil intake for a jixer through ebay, for example, from us))
No special training or modification of the motorcycle is required for training. Almost every sportbike gets on the rear wheel from first gear without problems. If your bike isn't spinning in first gear, it's not the bike. High gears are not needed until you start riding the rear wheel sitting on the tank - High Chair Wheelie (and then on weak motorcycles), riding in a candle without hands and in circles. nine0004
When you wheelie at high speeds, you need good tires in the back (no Kings Tire or touring balloons). A tire with a visible or even palpable cord can create dangerous vibrations. I've tried doing a wheelie on a lunging wheel, and it's causing the bike to wobble insanely and it's hard to find the balance point. The new tire completely eliminated this problem. Decrease tire pressure below normal. To drive in a candle at speeds over 30 km / h, make the tire pressure between 1.4-2.1 atm. For driving in a candle at speeds below 30 km / h 0.84 - 1.4 atm. In general, the optimal pressure for driving on the rear wheel. 1.2 -1.4 atm. A lower tire pressure will make the ride in the plug less stable. nine0004
Most (or all, I'm not sure) bikes with fuel injection have this sensor. It can turn off the engine if you lift the bike very high into the candle. The sensor must be disabled. It's easy on Hondas. It is necessary to cut off the wires going to the sensor and bridge them together, and insulate the remaining wire. This method does not work for jixers. The copper ring in the sensor must be removed, or insulated with something like silicone. nine0004
if you learn to ride in a candle for 12 hours, then the pipe (or pipes) will have to be shortened. On some bikes, the pipes touch the ground at the same time as the tail. If the pipe gets caught on the ground, it may cause a fall. I would even say that it will inevitably lead to a fall. The pipe can be shortened by simply cutting off a piece from it and welding or riveting the tip back onto it, or simply buying it. Ready-made short pipes can be purchased here: starboyz.com. nine0004
Damper is not necessary in principle for wheelies, but sometimes it can save you from falling. When you lower your front wheel to the ground and the wheel is not straight, you can start to wobble, possibly leading to a fall. If you control the drop of the wheel and its position when it touches the ground, then you can do without a damper. But it's better that he was.
While learning to ride a wheelie, you are likely to drop your bike. Don't go to a fortune teller. The bars will provide the best protection you can count on. They will certainly save a lot of money, but they will not completely protect your bike in case of falls. nine0004
Yoke if you plan to train 12 o'clock wheelies. There are two opinions whether it is worth learning to ride in a wheelie with a yoke or better without it. My advice: yoke, but remember that the impact of iron on asphalt is much harder than plastic. But plastic is much more expensive. The yoke can also be ordered from us, the same brands as the arches.
Be sure to wear a helmet, jacket, gloves and other protection if you want to continue riding after falls. (On my own, I would advise you to buy wider jeans and wear knee pads under them. Also a very useful “turtle” thing, or, in a competent way, full protection of the torso). nine0052 Motorcycle equipment for street and stunt riding is made by ICON.
If you have an ATV or motocross bike, it's best to practice on them first. You will learn to control the gas and understand where the balance point is, this will help you a lot in learning to ride a rear wheel on a full-size motorcycle. So if you're ready to learn to ride in the back then:
Make sure the rear brake is working and the brake foot is in a comfortable position for you. nine0004
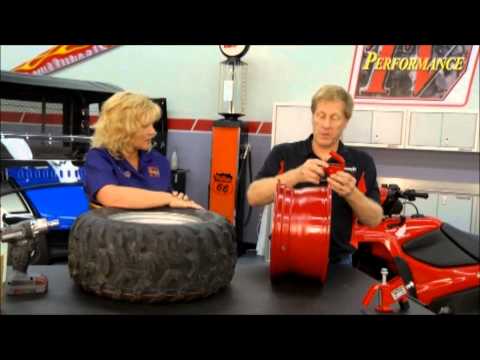
Check chain tension. The free play should be 3-4 cm. Remember that an understretched chain can come off and cause a lot of trouble, and an overtightened chain will quickly devour the stars and may break.
Check that the footpegs are not cracked and that all bolts are properly tightened.
I recommend learning wheelies in first gear. It's easiest for a bike to slip in first gear, and it's also important that many bikes have a rev limiter in first gear.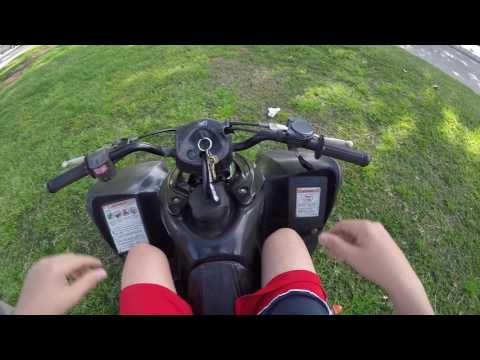 This will prevent you from over-revving the engine. You and your bike will also suffer less damage when falling in first gear due to the noticeably slower speed of the wheelies. For this very reason, I don't think it's a good idea to wheelie at high speed until you get into the habit of using the rear brake. It's also much easier to go from climbing in first gear to climbing in second than vice versa. I think 30 km/h is a good speed to start learning, at slower speeds the bike becomes less steady and loses stability. I also recommend starting training with your left foot on the passenger footpeg and your right foot on the front footpeg with your toe on the brake pedal. At first it will look awkward, but then you get used to it. Most people think that riding in a candle is much easier to control while standing than sitting. (It's very easy to explain. Standing will make it much easier for you to move the bike while maintaining your balance.) It's also much easier to lift the bike into the candle while standing.
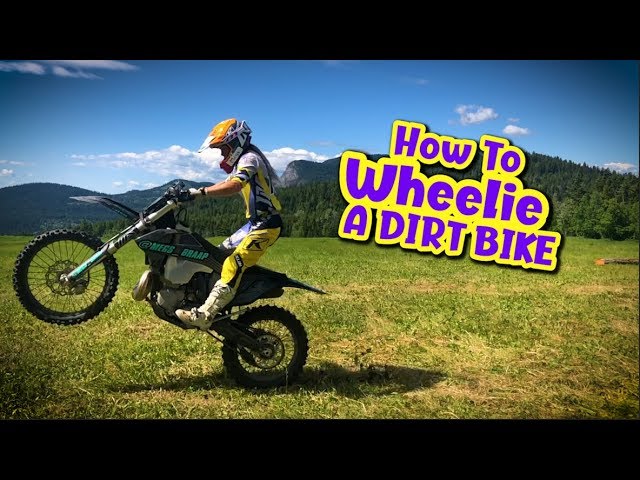 Remember! Only falls can teach you how to ride on the back wheel and work the gas smoothly. nine0004
Clutch up is the best way to lift a bike into a spark plug because there is always enough power to lift the bike onto the rear wheel. At the same time, this leads to slightly faster wear of the clutch discs. What does not concern the chain. I have never heard of any problems with the chain as a result of additional loads. There are many advantages to the clutch lift method over the gas lift method:
This method allows you to lift the bike into a candle that cannot be lifted off the gas;
You can drive in the spark plug at a lower rpm, respectively at a lower speed. This allows beginners to hold the bike longer at the candle and balance point. And also get less painful injuries;
The rise is more predictable. This should be explained. When gas lift occurs, the front rises relatively slowly. When the front rises about a meter above the ground, there is a sharp jump upwards, since the gas is almost completely open. This can lead to unpredictable consequences. When the clutch lift is done correctly, the front rises almost immediately to the balance point, and there you can control the height of the lift already with the gas and / or body position. With a little practice, the clutch lift will become very stable and not scary at all. nine0004
All pros lift the bike with the clutch. You want to be like them, don't you?
There are a couple of different clutch lift methods. I prefer the second method. Method 1: Accelerate a little first, then depress the clutch with one (or two) fingers until the discs disengage. Then add gas and quickly release the clutch. Method 2: Close the throttle, fully depress the clutch with one (or two) fingers. Open the gas to normal speed (you can do the so-called gas flow) and drop the clutch. As you learn this method of climbing, don't throttle too hard before dropping the clutch. This will allow you to feel and learn the process of lifting the motorcycle with the clutch. Gradually increase the speed, and soon your wheel will rise close to the balance point. When climbing, slow down as you approach the balance point. If you are already past the balance point and releasing the throttle does not help bring the bike back to its normal position, lightly apply the rear brake. Climbing off the clutch in second and third gear may require extra effort, depending on the size of the bike. If the bike won't get out of the clutch, then a jerk will help. Do it at the moment you release the clutch and lean back a little. nine0004
I don't recommend shifting while riding in a spark plug unless you can use the clutch. Shifting gears in a spark plug is hard on the gearbox. Also, if you make a mistake with the gear, the bike will drop very sharply on the front wheel, which is bad for the fork legs.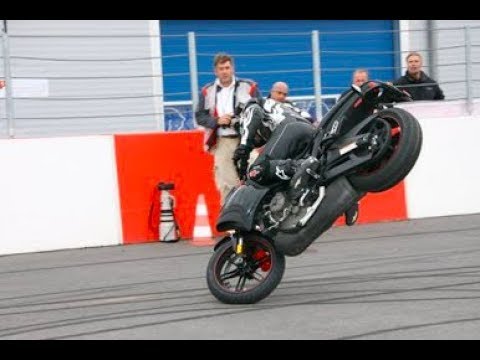 My advice: learn to ride in a candle in one gear, without switching. How to properly lower the front wheel to the ground. Hold the throttle until the front wheel touches the ground. If you need to quickly lower the front wheel to the ground, turn off the throttle first. When the wheel goes down, then open the gas. Then the landing will be soft. nine0004
Reduce tire pressure to 1.2-1.4 atm.
Engage first gear.
Accelerate to 20-25 km/h.
Depress the clutch.
Add some throttle and drop the clutch.
Repeat step 5, increasing the speed until the front wheel approaches the balance point. nine0004
Reduce the throttle if the wheel is over the balance point.
Apply and release the rear brake gently.
Hold the throttle until the wheel hits the ground.
Fore-aft balance controlled by throttle and rear brake. It is very good to learn first on an ATV or motocross bike. If the front wheel is in front of the balance point, then you must increase your speed. This can be compensated by more gas. If you are past the balance point, then use the rear brake or engine braking to return to it. The point of balance is the position of the bike in which it is not necessary to increase or decrease speed to stay in the same position. The height of the balance point depends mainly on the speed of riding in the candle. The higher the speed, the lower the balance point. The balance point also depends on the weight distribution of the motorcycle and the position of the rider on it. The goal of riding in a candle on balance is to keep the bike in balance for as long as possible. This is done by opening and closing the throttle, and applying the rear brake if required. Over time, you will learn to keep the bike in the candle, smoothly working the gas / brake.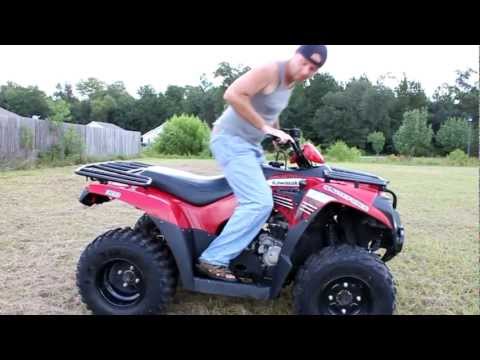 nine0004
This kind of balance is controlled by the position of your body on the bike. It is very useful to practice on a bicycle, motocross bike. When the motorcycle rides in a candle at a speed of over 35 km / h, then it is in balance. If the speed is less, then you have to balance the body. The principle is pretty simple. Quickly move to the same side that the bike falls on. For example, if the bike is leaning to the left, move to the left. This movement will cause the bike to turn to the left, compensating for its lean. nine0004
In my experience, I think front wheel flare can be caused by a worn tire (large flat contact patch), rough throttle and/or some body movement. Flail after landing from a candle at low speed is due to high pressure in the rear balloon and / or loss of lateral balance.
To steer the bike well in the candle, the bike must be at or behind the balance point.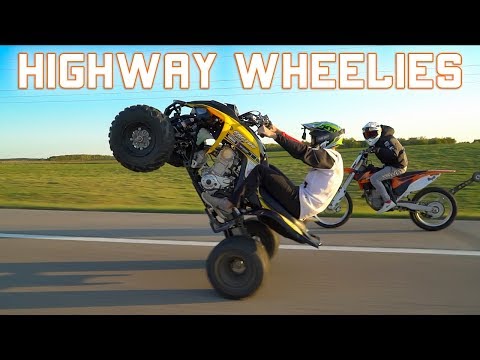 To control the bike in a candle at a speed of about 35 km / h, you just need to tilt it a little in the direction of the turn. To turn at lower speeds, you first need to tilt it in the direction you want to turn. For example, if you want to turn to the right, first slowly lean to the right. Then lean to the left a little faster, turning the steering wheel a little to the left. This will cause the bike to start to roll to the right. Then, without leveling the bike, you have to hold that angle. This will cause the bike to turn right. nine0004
Slow wheelie is riding behind the balance point. This is one of the hardest parts of learning to ride a wheelie because it requires not only skill but also courage. To learn how to use the rear brake, you must keep the bike behind the balance point by holding it with the rear brake. You will soon get used to it and riding in this position will become normal for you. To ride slowly in a candle, it is enough to keep the bike behind the balance point.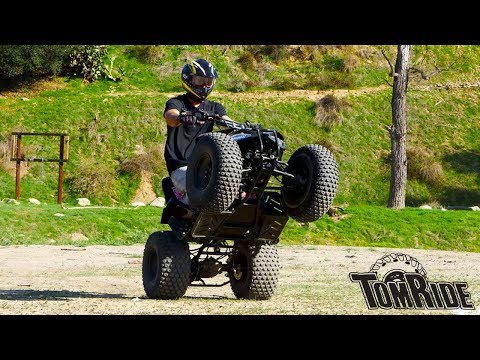 If you get scared at this point and hit the rear brake hard, it will cause the front wheel to move forward and down without slowing the bike down. When slowing down, you should keep the bike behind the balance point by applying gentle pressure on the brake. As for the 12 hour ride, do the same, just release the rear brake a little and let the bike rest on the tail (or better yet, on the frame specially prepared for this). If you plan to stop in a 12-hour stance, then first brake and stop moving, and only then turn off the engine. nine0004
First of all, increase the idle speed. I increase to 3500 rpm. High idle makes the slow wheelie very smooth. But be careful, the first time you try to drive in a slow wheelie with increased idle speed, you can roll over, so protect yourself with a rear brake. When riding slowly on the rear wheel in the spark plug (with idle running), after some practice, you will only use the rear brake and use the throttle only to lift the bike up the spark plug and lower it to the ground. Once you understand all this, then all the varieties of riding in a candle will become clear to you. nine0004
Recommended
TOP 10 Best Stunts and Combos StuntArt Magazine Training Motocross Enduro - Video School Magazine F4i ZX6R R6 CBR GSXR stunt bike review French Stunt Romain Jeandrot nine0004
Podolsk,
15 km Simferopol highway To contacts
#stuntriding #training
10 years ago
Willy - controlled riding on the rear wheel of a motorcycle.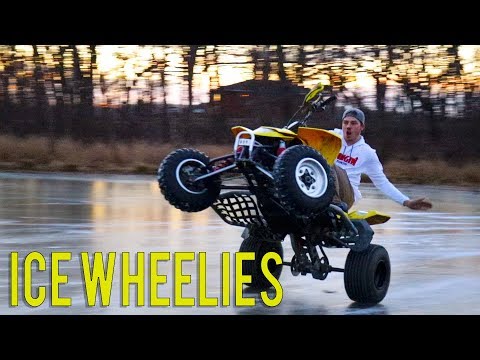 The longitudinal balance is controlled by the gas and the rear brake, the transverse balance is controlled by the body. If you decide to learn how to do a wheelie, then you need stunt bike (enough cage and frame) , equipment (helmet and knees are the most important) and training place (lots of space, smooth asphalt and no cars) . Everything is clear and obvious here! The easiest way to master a wheelie is in the basic stand-up position, because. it is easier to jump off the motorcycle during a rollover. Of course, you can study while sitting, perhaps it will be easier for someone, but most people start standing. It is necessary to lift the motorcycle from a place or at a very low speed, because. the lower the speed, the safer the fall. It is obvious that vpulya at speeds up to the cut-off from traffic lights, trying to lift the front wheel, is much more dangerous, although people learn this way too.
 nine0004
The whole process can be divided into phases:
The purpose of is to keep the motorcycle steady for a couple of seconds at a standstill or very slow speed. At the same time, do not take your feet off the footrests, and your hands on the steering wheel - balance only with your body. This is to prevent the motorcycle from tilting to the side when the front wheel is lifted. When you learn how to hold steadily and feel comfortable in the stand-up position, you can begin to raise the front wheel. nine0004
First you need to adjust the motorcycle:
Turn idle to 3-3.5 thousand so that the motorcycle can ride with the gas closed.
Lower the pressure in the rear wheel to 1.2-1.4 atmospheres , this will increase the stability of the bike on the rear (you need to strive for a pressure of 2. 5 atm, but in the first couple such pressure will seriously slow down progress) .
To break off front wheel , depress clutch with one finger.
RPM a couple of thousand and keep it stable - no need to re-gas (it is very important to keep a stable throttle, gas is intuitively reset during re-gas) .
Shift your body weight onto your left foot and release the clutch (or rather release it very quickly), keep your right foot on the rear brake. The weight must be transferred to the tail not only to make the motorcycle easier to rise, but also not to tilt to the side (if you press hard on the right footrest, the motorcycle will pull to the right side) .
To begin with, increase the speed before engaging the clutch by 2-3 thousand. When you have confidence, add 1-2 thousand until you get close to the balance point (the motorcycle will start to pass a couple of extra meters) . At this point, constantly concentrate on the rear brake and apply if it looks like you are flipping (do not press the brake hard, otherwise you will fly through the handlebars) .
When you learn how to pull the motorcycle to the balance point in a stable and controlled manner and drive a few meters, you need to make attempts to lift the motorcycle beyond the balance point and return it with the rear brake. Strictly speaking, this is the Willie. Those. the goal is to raise the bike above the balance point, bring it back with the brake, add gas if it starts to go down, and so on ad infinitum. To get used to the brake faster and apply the brakes properly, brake before the wheelie starts (foot should slightly press the rear brake) .
Delay in a stand-up position. Index finger on the clutch, right foot on the brake, pressing it down a little.

 Then as we progressed we learned that a wheelie was
more than just a wheelie, and a trick was more than just a
trick. Upon mastering the sport, we now know that a wheelie
is just a wheelie, and a trick is just a trick.” –
K.Woods & M.Gorka
Then as we progressed we learned that a wheelie was
more than just a wheelie, and a trick was more than just a
trick. Upon mastering the sport, we now know that a wheelie
is just a wheelie, and a trick is just a trick.” –
K.Woods & M.Gorka Please also remember to wear the proper safety gear
every time you get on your Quad, regardless of the type of
riding you will be doing.
Please also remember to wear the proper safety gear
every time you get on your Quad, regardless of the type of
riding you will be doing.  It actually is very true, and helps in a
couple of different areas; Turning and Balance. When using
a lower tire pressure it allows your tires to “squish”
more when your weight is placed over them. That means when
you lean over the left or right hand side of the quad, the
rear tire on the side you are leaning towards compresses
some, making the diameter smaller, which causes the quad
to turn in that direction. Don’t forget that the pressure
in each tire needs to be adjusted so that the quad tracks
in a straight line on a flat surface. It doesn’t necessarily
mean that you have to have them equal; there can be a lot
of factors that cause it to pull to one side or the other,
so adjust accordingly.
It actually is very true, and helps in a
couple of different areas; Turning and Balance. When using
a lower tire pressure it allows your tires to “squish”
more when your weight is placed over them. That means when
you lean over the left or right hand side of the quad, the
rear tire on the side you are leaning towards compresses
some, making the diameter smaller, which causes the quad
to turn in that direction. Don’t forget that the pressure
in each tire needs to be adjusted so that the quad tracks
in a straight line on a flat surface. It doesn’t necessarily
mean that you have to have them equal; there can be a lot
of factors that cause it to pull to one side or the other,
so adjust accordingly.
 The higher ply tires are more rigid than
the lower ply, and require more air to be taken out of them
to get this affect. It is best to experiment and decide
what works best for you. I typically run about 2-3psi in
my rear tires, sometimes less.
The higher ply tires are more rigid than
the lower ply, and require more air to be taken out of them
to get this affect. It is best to experiment and decide
what works best for you. I typically run about 2-3psi in
my rear tires, sometimes less.

 I like a clutch that grabs and releases nice and close
to the handlebars, where others like a clutch that barely
needs to be pulled in to grab. It is personal preference.
Also, despite what you may have heard, wheelies will not
kill your clutch (at least if done properly). I have been
riding wheelies on my quad for almost 5 years, and my stock
clutch has never been touched.
I like a clutch that grabs and releases nice and close
to the handlebars, where others like a clutch that barely
needs to be pulled in to grab. It is personal preference.
Also, despite what you may have heard, wheelies will not
kill your clutch (at least if done properly). I have been
riding wheelies on my quad for almost 5 years, and my stock
clutch has never been touched.
 Nothing really needs to be done with it, but look
it over for cracks or weak points that could cause it to
snap or bend when hit. If you have previously bent the bar,
it may be a good idea to just replace it, as everyone knows
that it will bend even easier the 2nd time. Some people
choose to run aftermarket, or home fabricated bars that
are stronger or last longer when scraped on the ground.
I do not use those types of bars for more advanced wheelies,
and I surely do not think they are needed for learning standard
wheelies. If anything, you can have someone put a bead of
weld along the back of your bar which will make it take
longer to wear through. Keep in mind though, the idea is
not to have to use it, as it does not always save you from
a crash, and in some cases can even cause one.
Nothing really needs to be done with it, but look
it over for cracks or weak points that could cause it to
snap or bend when hit. If you have previously bent the bar,
it may be a good idea to just replace it, as everyone knows
that it will bend even easier the 2nd time. Some people
choose to run aftermarket, or home fabricated bars that
are stronger or last longer when scraped on the ground.
I do not use those types of bars for more advanced wheelies,
and I surely do not think they are needed for learning standard
wheelies. If anything, you can have someone put a bead of
weld along the back of your bar which will make it take
longer to wear through. Keep in mind though, the idea is
not to have to use it, as it does not always save you from
a crash, and in some cases can even cause one.
 I will do my best to point out the ups
and downs for the ones that I can think of.
I will do my best to point out the ups
and downs for the ones that I can think of. This is also not an ideal position for beginners to be in
if they do happen to go back too far on the wheelie, as
the quad can tip all of the way backwards under some circumstances
if the rear brake is not applied. In that case it is not
easy to step off in this position.
This is also not an ideal position for beginners to be in
if they do happen to go back too far on the wheelie, as
the quad can tip all of the way backwards under some circumstances
if the rear brake is not applied. In that case it is not
easy to step off in this position. In the result of an error
that causes the quad to fall back on the grab-bar, you can
often easily step off. Unfortunately, the brake and gear
shift can sometimes be a little bit harder to reach, and
there is a lot more stress on your arms and legs which can
affect long distance wheelies for some.
In the result of an error
that causes the quad to fall back on the grab-bar, you can
often easily step off. Unfortunately, the brake and gear
shift can sometimes be a little bit harder to reach, and
there is a lot more stress on your arms and legs which can
affect long distance wheelies for some. This position really helps you judge the height of the quad,
and can be really nice when practicing slow wheelies, as
you can just step off if you go back too far. You can also
adjust your weight back and fourth easier in this position.
One downfall to this position is the fact that the gear
shift is not accessible, but that normally is not a problem.
However a more serious issue can be the fact that your left
foot can sometimes hit the ground if you hit the bar, which
can cause you to be pulled off of the quad and possibly
injured. I have no had this happen to me, but I have heard
and seen cases where this has happened.
This position really helps you judge the height of the quad,
and can be really nice when practicing slow wheelies, as
you can just step off if you go back too far. You can also
adjust your weight back and fourth easier in this position.
One downfall to this position is the fact that the gear
shift is not accessible, but that normally is not a problem.
However a more serious issue can be the fact that your left
foot can sometimes hit the ground if you hit the bar, which
can cause you to be pulled off of the quad and possibly
injured. I have no had this happen to me, but I have heard
and seen cases where this has happened. The advantages to this position are the fact that more weight
is towards the rear of the quad, causing the balance point
to be lower. Much like the Standup, and Split, you have
an unobstructed view of what is in front of the quad. Turning
and control is good in this position because you can throw
your weight around a lot easier (side to side, front to
back). However your gearshift and brake are out of reach
in this position. Luckily it is easy to bail in the chance
that something goes wrong.
The advantages to this position are the fact that more weight
is towards the rear of the quad, causing the balance point
to be lower. Much like the Standup, and Split, you have
an unobstructed view of what is in front of the quad. Turning
and control is good in this position because you can throw
your weight around a lot easier (side to side, front to
back). However your gearshift and brake are out of reach
in this position. Luckily it is easy to bail in the chance
that something goes wrong.
 It is higher the slower you are going, and lower the faster
you are going.
It is higher the slower you are going, and lower the faster
you are going.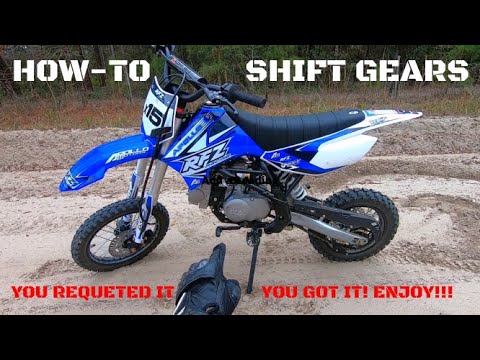 This way is pretty simple,
but you do need to be familiar as to where your quads power
band is, and it does take a bit of timing.
This way is pretty simple,
but you do need to be familiar as to where your quads power
band is, and it does take a bit of timing.  A slip of the clutch can also assist in getting the front
end of lower powered quads up in higher gears. This is normally
geared more for the advanced riders.
A slip of the clutch can also assist in getting the front
end of lower powered quads up in higher gears. This is normally
geared more for the advanced riders. In some cases
this is hard to do because you could have the RPM’s
tapped out. When that occurs simply pull in the clutch and
hold on. It will be a lot more gentle than the front end slamming
the ground under engine braking. If anything though, make
sure that the wheels are straight and you are holding on.
In some cases
this is hard to do because you could have the RPM’s
tapped out. When that occurs simply pull in the clutch and
hold on. It will be a lot more gentle than the front end slamming
the ground under engine braking. If anything though, make
sure that the wheels are straight and you are holding on.
 Feel what the quad is doing, and compensate as needed
after you have completed the shift.
Feel what the quad is doing, and compensate as needed
after you have completed the shift. It also helps to keep the quad as high in the balance
point as possible, which causes more weight to be put on the
tires.
It also helps to keep the quad as high in the balance
point as possible, which causes more weight to be put on the
tires. 
 Unfortunately, most
people cannot make this their first reaction without it happening
to them a few times.
Unfortunately, most
people cannot make this their first reaction without it happening
to them a few times.
 5th or 6th gear
(depending on how many your quad has) is theoretically the
easiest gear to wheelie in because the balance point is lower,
and you can make several major throttle adjustments and still
not tach the engine out. Obviously the downside is that if
you were to fall, or hit something, you’d probably be
in a serious world of hurt.
5th or 6th gear
(depending on how many your quad has) is theoretically the
easiest gear to wheelie in because the balance point is lower,
and you can make several major throttle adjustments and still
not tach the engine out. Obviously the downside is that if
you were to fall, or hit something, you’d probably be
in a serious world of hurt.  The front end will then lift.
 Also, always remember to keep that rear
brake covered!
Also, always remember to keep that rear
brake covered! I have seen a lot of people get hurt doing wheelies,
and I have taken quite a few spills myself. You have to accept
the fact that there is a chance of seriously hurting yourself,
or your quad every time you get on it. Regardless of the type
of riding you choose to do.
I have seen a lot of people get hurt doing wheelies,
and I have taken quite a few spills myself. You have to accept
the fact that there is a chance of seriously hurting yourself,
or your quad every time you get on it. Regardless of the type
of riding you choose to do.