Every editorial product is independently selected, though we may be compensated or receive an affiliate commission if you buy something through our links. Ratings and prices are accurate and items are in stock as of time of publication.
Modern vehicle tires are tough, standing up well to rough terrain and thousands of miles of driving. Trouble is, tires are not invincible. Every so often car tires spring leaks. Air can start leaking from anywhere on a tire, and the location of the leak determines whether or not you can fix it yourself. And if you can't fix it yourself, the location of the leak will also tell you if you need a professional repair or a new tire.
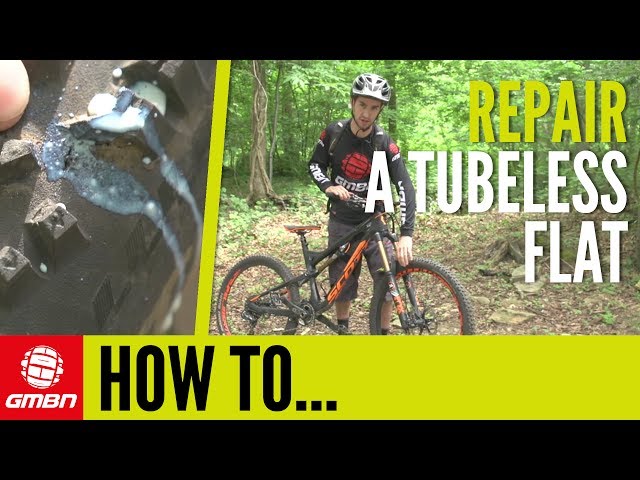
Whether or not your tire is tubed or tubeless affects things, too, because only tubeless tires can be repaired using the technique of plugging that we'll show you here. The good news is that modern vehicles always have tubeless tires, and this means that repairing with a rubber plug is often an option.
Plugging a tubeless tire is only a possibility when your puncture is in the tread area. If the air leak is where the sidewall of the tire meets the rim — this is called a "bead leak" — you'll need to visit a mechanic with a tire machine to dismount the tire from the rim and remount it with sealing liquid applied to the bead. If your sidewall has been punctured, you need a new tire, because damage there can lead to a blowout at highway speeds, even after repair.
Learn exactly how to plug a tire so next time you spring a leak between your treads, you'll be able to get up and running again in record time.
Total time completing the repair is about 15 minutes. Doing the work yourself will save you about $20 and the time spent driving to the garage and waiting.
Steve Maxwell for Family Handyman
Complete DIY projects like a pro! Sign up for our newsletter!
Do It Right, Do It Yourself!
Originally Published: August 27, 2020
Posted by Jefferson Bryant Know How
Flat tires tend to happen at the worst time in the worst places. If you are on the road or outside of normal business hours when your vehicle has a flat and the spare is missing or no good, you might feel stranded, but there is an option—a tire plug kit. This is something that anybody can do, you just need the right parts.
Liquid tire repair might get you down the road, but it could make your tire repair difficult and possibly damage the TPMS (Tire Pressure Monitor System) unit inside the rim itself depending on the formula. The best solution for an emergency tire repair is a tire plug. Made from cork and a gooey adhesive that keeps it place and seals the tire, a tire plug repair is an excellent way to get your car back on the road until you can get to a tire shop for a proper internal patch.
Installing a plug in your tire works for pierced tread area only. You cannot fix sidewall damage, compression breaks (from potholes, gravel roads or curbing) or any other type of catastrophic tire damage. The most common road hazards you will find are punctures from nails and screws. Fixing these issues are perfect for the good old fashioned tire plug. If you are wondering how long does it take to plug a tire, then the answer is just a few minutes. Most of the time is spent preparing to perform the plug itself. Here’s how to plug a tire with a plug kit.
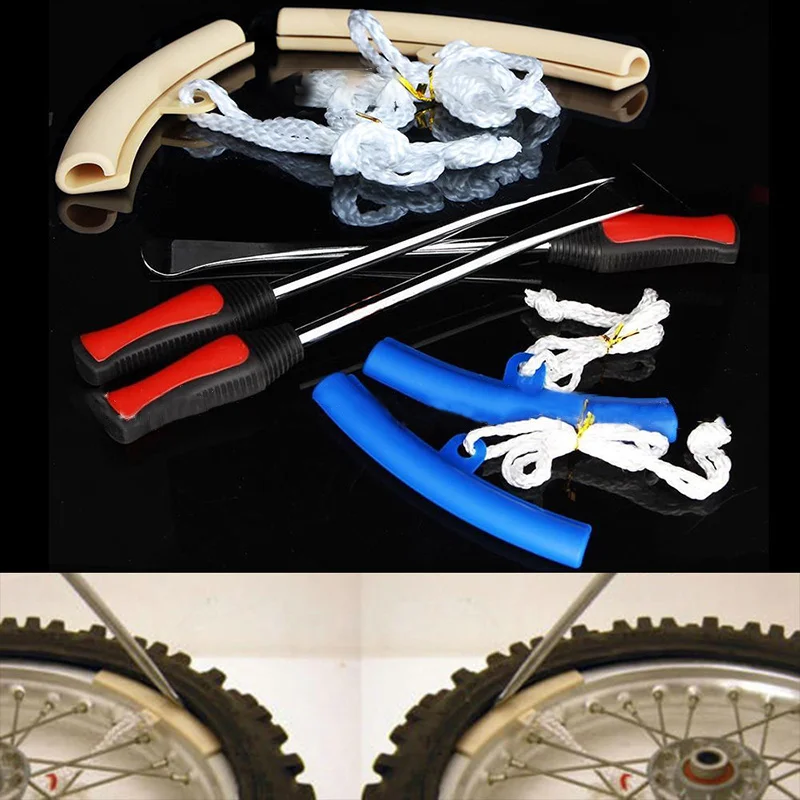
You will need the following to make a tire plug repair:
There are all kinds of tire plugging kits, but you want the most complete tire repair kit which comes with the plugs, the installation tool, and the reamer tool. Some flat tire repair kits just come with the plugs and installer, but the reamer tool is a necessary component to a good repair.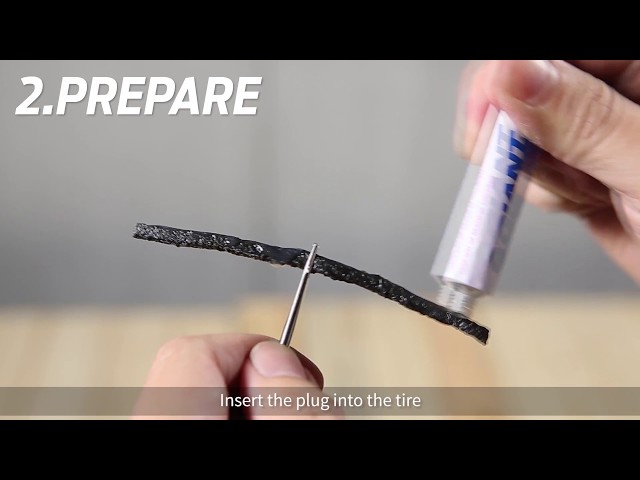 Some tire plugging kits also come with liquid cement. You can use it or not, but the cement helps make a more permanent repair.
Locate the puncture. If you don’t see or hear the puncture, spray some soapy water on the tire and look for bubbles.
This is a small staple that was dropping tire pressure by 20 psi in about 12 hours. It needs to go.Remove the offending item. This is usually easy, but sometimes the nail or screw is worn down, making it hard to get a bite on it. This is where the side-cutters come in really handy. You will want to position the tire where you get the most leverage.
Side cutters work best for removing these items, as they can grip small round objects better than regular pliers.Insert the reamer. This will take some effort, as you have to push it through the steel belts. Use a twisting motion and push it into the tire.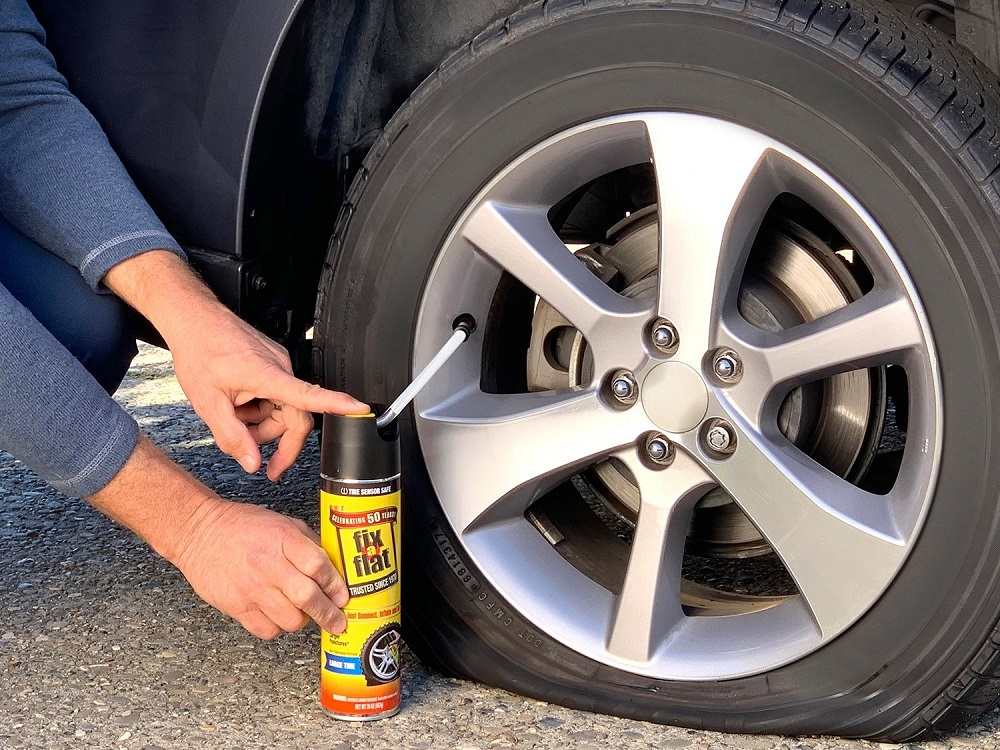 Once the reamer is through, saw it in and out of the tire a few times to really make a nice hole for the plug. Yes, it is counter-intuitive, but it is necessary.
Push the reamer all the way and then saw it in and out a few times to make a clean hole.
Prep the plug and installer. Pull a plug off the strip and push it through the eyelet of the installer tool. The pliers will make this easier. Push a little through, grab it with the pliers and pull the plug halfway through the eyelet.
Pull a cork strip from the tire plugging kit and grab the installer tool, which looks like a large needle with a slit in the eye.Threading the sticky cork tire repair plug is not easy, but if you can get it squished into the hole, you should be able to pull it on through. The side cutters might help.
Insert the plug into the tire. If the kit has liquid cement, apply some to the plug before inserting it into the tire. Simply push the installer into the hole in the tire until the plug is about 3/4 of the way in. Twist the installer tool 90-degrees and pull it out. The plug will stay in the tire and the tool will come out nice and easy. You may trim away the excess plug or leave it to wear away as you drive.
This is what you should see when the tire plug is installed.
Once the tire repair plug is in you can now twist the handle 90-degrees and pull the tool out.
Fill the tire to the proper PSI. If you have a portable air compressor, this will make things easy. However, if you do not, you need to get air very soon.
All done. You can trim the tire plug or leave. You will need air, so don’t go driving until you have the tire aired up.
Every automobile you own should have an emergency tire plug repair kit in the tool box, along with a portable air compressor. These emergency repairs are quite good, but for a long term repair, you should take the vehicle to a tire shop for a proper repair as soon as possible. They will know the best way to patch a tire for your type of damage.
Check out all the steering & suspension parts
Categories
Know How
Tags
emergency repair, flat tire, flat tire repair, patch flat tires, sealant, tire maintenance, tire plug kit, tire pressure, tire safety, tire wear, tires, wheels
A life-long gearhead, Jefferson Bryant spends more time in the shop than anywhere else. His career began in the car audio industry as a shop manager, eventually working his way into a position at Rockford Fosgate as a product designer. In 2003, he began writing tech articles for magazines, and has been working as an automotive journalist ever since. His work has been featured in Car Craft, Hot Rod, Rod & Custom, Truckin’, Mopar Muscle, and many more. Jefferson has also written 4 books and produced countless videos. Jefferson operates Red Dirt Rodz, his personal garage studio, where all of his magazine articles and tech videos are produced.
Author: Aleksey Kokorin
Experienced drivers are not surprised by such a trifle as a puncture, but for the first time beginners usually get confused in the sequence of actions, forget about important details and do not know what to do with a punctured wheel even in a tire shop - especially if they start offering choose from several options or intimidate with expensive repairs. Let's set up an operation algorithm when a flat tire is detected and figure out what to do right away and what to choose later. nine0013
What to do when you find a puncture
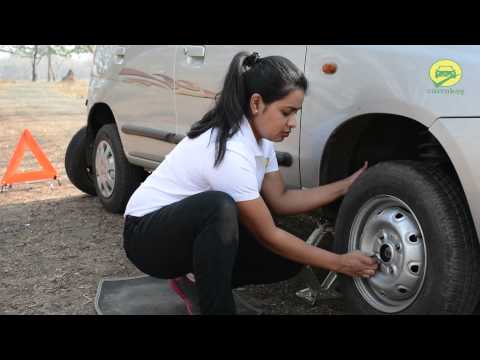
Having found a flat tire, first of all you need to stop in a safe place, turn on the alarm, assess visibility and, if necessary, set an emergency stop sign: according to traffic rules, it is installed at least 15 meters from the car in the village and at least 30 meters outside the settlement. When choosing where to stop, consider the space to the side of the vehicle to handle a flat tire. You should not stop right on the road and in places where stopping and parking are prohibited: even if a punctured wheel belongs to the conditions of a forced stop, it is quite possible to drive several tens of meters on it to choose a safe and convenient parking place. At night or in conditions of limited visibility (for example, in fog or rain), it is imperative to wear a vest with retroreflective elements - this is required by clause 2. 3.4 of the SDA and common sense. nine0013
Now you can start working on the wheel. We will sequentially consider several options for action, and then move on to ways to repair a damaged tire.
The most obvious solution to a flat tire is to replace it. If you have a spare tire that you are sure is in good condition, the best option is to install it and visit a tire shop to repair a punctured tire - such repairs will be more reliable and of high quality than doing it yourself.
If you don't have a suitable spare tire, but you do have a pump or compressor, you can assess the damage to the tire and try to pump it up again to get to the tire shop. It is better to start searching for an air leak with a valve (aka “nipple” or “nipple”): often a faulty spool becomes the cause of a flat tire. It is easy to check it: unscrew the protective cap (if there is one), pour water on it (or slobber it, as in childhood): air bubbles will leak. In this case, you can try to replace the spool valve by unscrewing it and screwing in a new one, but if there is no new valve, as well as a store nearby, you can try just unscrewing and screwing it back in.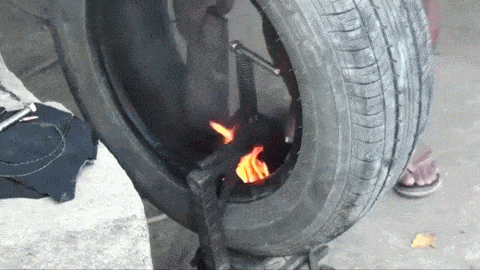 Regardless of whether it helped or not, you need to visit a tire shop to replace the entire spool or valve. nine0013
If the valve is tight and the tire is flat, it is most likely a puncture. The easiest way to find a puncture that is free of foreign objects is to pour water on the tire while looking at the surface: the damage will reveal itself as air bubbles. However, often the cause of the puncture can be found along with it: a self-tapping screw, nail or other arbitrary object sticking out of the wheel will clearly indicate the place of depressurization. In this case, you do not need to immediately remove the foreign object from the tire: it partially seals the hole, and if the pressure loss is slow, you can try to pump up the wheel and drive to the tire shop. nine0013
The same goes for wheels that are leaking from the rim or from a faulty valve. Usually, in this case, the air is bled slowly, and you can pump up the wheel and have time to get to the place of repair.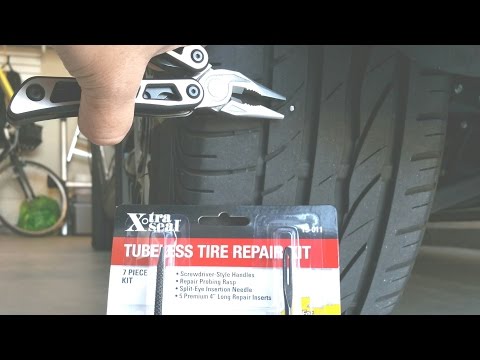 By the way, rim leakage can occur due to disk deformation upon impact - for example, when hitting a pit with sharp edges. Such situations are fraught with damage to both the disk and the sidewall of the tire, in which case the disk will need to be corrected, and the tire repaired or even replaced. To avoid rim leaks, you need to inspect the rims every time you change tires. The loss of tightness occurs either due to corrosion or due to disc deformation, and not only steel, but also light alloy wheels can corrode. So if you see paint blistering or rust on the rim, the tires need to be put on rim sealant: when changing tires, this will be cheaper than the subsequent removal and re-tire to fix a leak on the rim. nine0013
If you find a puncture, but there are no foreign objects in it, and you do not have a spare wheel and tire repair kits, there is another popular method of temporary "repair". You can screw a self-tapping screw into the found hole - if, of course, you have one. In extreme cases, you can look for a self-tapping screw in the cabin by unscrewing it from some interior detail.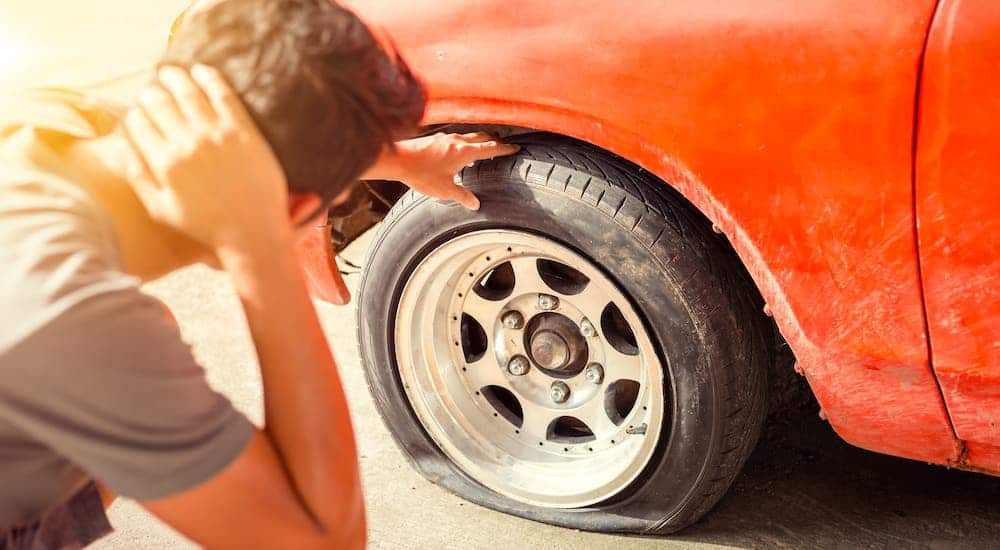 This method cannot be called reliable: it is unlikely to ensure complete tightness of the wheel, but at least it can help you get to the nearest tire shop. nine0013
And a couple more useful remarks. If the wheel is completely flat, then it is easier to inflate it without a spool: the latter must be unscrewed, then the tire must be inflated and quickly screwed back in. The fact is that the spool itself, when inflated, resists the compressor, and in the event of a loose fit of a flat tire to the disk, the power of a simple magazine compressor may not be enough, and the absence of a spool helps to increase air flow and facilitate the operation of the compressor. If this does not help, you can jack up the car by hanging a flat tire: this will improve the fit of the tire to the disk, and the chances of inflating the tire will increase. nine0013
On-Site Repair Methods
Now let's look at options for repairing a tire yourself using special materials that you should carry with you or, if a puncture caught you in the city, buy it at the nearest auto shop.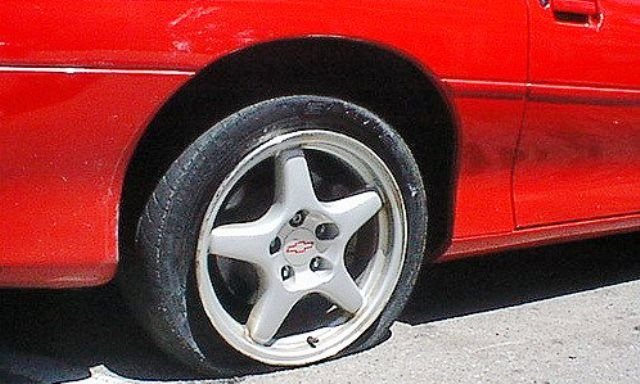
1. The most common, cheapest and easiest way to do it yourself is to install a raw rubber band. The harnesses are sold complete with an abrasive awl to expand the hole in the tire and improve the contact of the repair harness with its edges, as well as a needle for installing the harness and an adhesive to fix it and at the same time seal the puncture. When choosing a repair kit in a store, you should pay attention to the following nuances:
Install the harness in the following order. First, the found hole is expanded with an abrasive awl - you need to insert and remove it several times into the puncture site. Then the tourniquet is inserted into the eye of the needle, and glue is applied to it.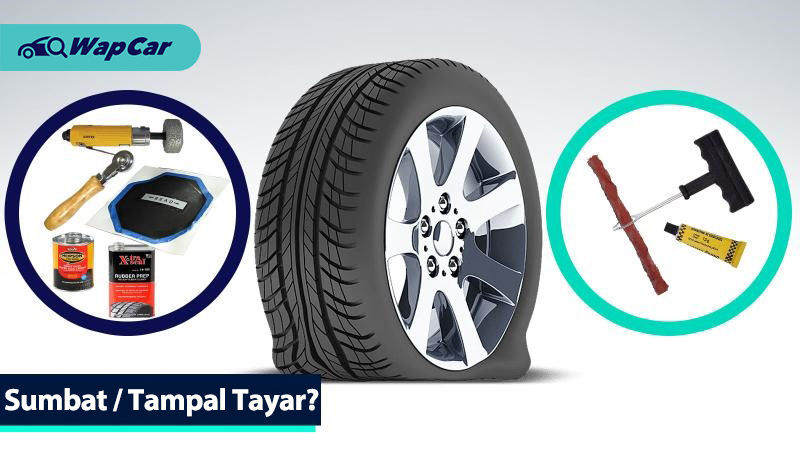 After that, the needle with the tourniquet must be inserted into the hole in the tire and pulled out sharply - so that the tourniquet remains in the hole, and the needle comes out without it. If everything worked out, it remains only to cut the end of the harness flush with the surface of the tire and pump up the wheel. nine0013
The advantages of repairing with a harness are quite decent reliability, simplicity and low cost. On a well-repaired tire, you can drive for a long time, and if the repair site starts to poison, you can either replace the harness or have the tire repaired in a quality service. Among the minuses is the possibility of damaging the cord during installation, as well as lower reliability compared to “full-fledged” repair methods in a tire shop. Strictly speaking, a tourniquet is still a temporary repair, so if it is possible to pump up a wheel and get to a tire fitting, then it is better not to enlarge the hole in the tire and get to the experts. nine0013
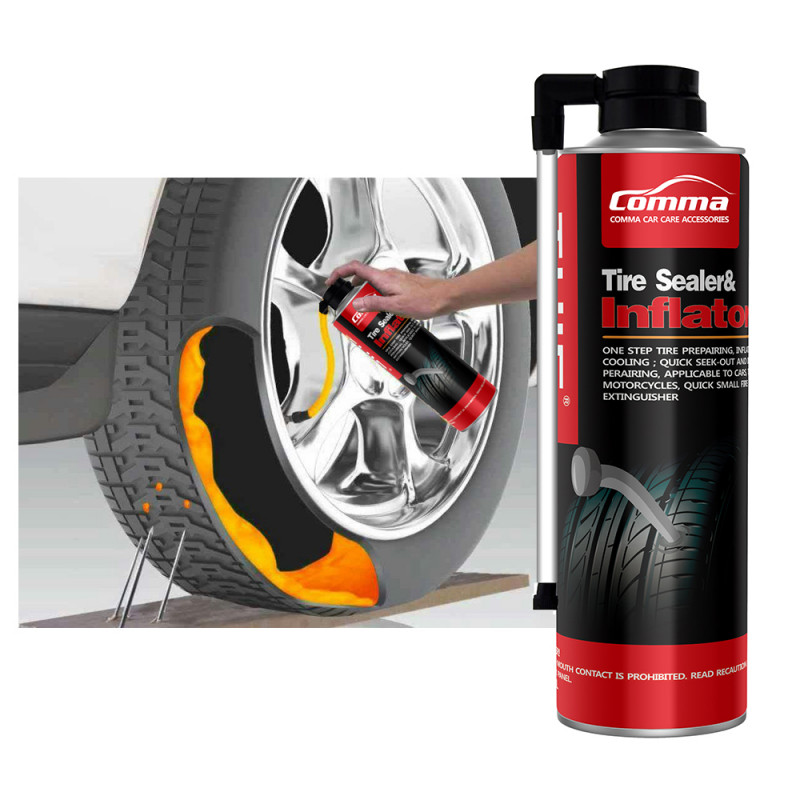
2. The second repair option is aerosol liquid sealants sold in cans. To repair a punctured tire with sealant, you need to remove the foreign object from the puncture site, then pour the sealant into the wheel through the valve, twist it to distribute the composition inside the tire, pump up the wheel and drive several kilometers at low speed for the final uniform distribution of the sealant.
Among the advantages of this repair is the simplicity and less labor intensity compared to installing a harness. However, there are also disadvantages: the larger the hole, the higher the chance that the sealant will not be able to eliminate it, and such a repair can affect the wheel balance. Compared to a tourniquet, it can be considered even less reliable and preferable, but simpler. nine0013
Repair options at a tire shop
If you put on a spare tire and brought the wheel to a tire shop, you may also be offered several repair options. Consider the most popular with an indication of the advantages and disadvantages.
1. The first repair method is the same harness installation as described above. As we remember, the tourniquet refers to a temporary repair, so among tire specialists this method is considered bad form, but many workshops do not exclude it from the list of services. All the advantages and disadvantages are the same here: such a repair will be the fastest, simplest and cheapest, but less reliable than other methods. It is worth choosing it in cases where the price and / or speed of the procedure is more important to you than anything else. If quality is a priority, then it is better to fork out for the options listed below. nine0013
2. The second option for repairing a puncture is to install a patch on the inside of the tire, the so-called cold vulcanization. In this case, the tire is removed from the disk, the surface around the puncture is treated with an abrasive, and the damage is sealed with a special patch. This is a more preferred repair method than a tourniquet: it is more reliable and durable, especially in the case of side punctures, when not the thick tread part of the tire is damaged, but the thinner sidewall. Among the minuses, only a higher cost can be noted: in addition to the actual tire repair, you will have to pay for the removal and installation of the wheel (or do it yourself), tire fitting and balancing. nine0013
3. The third option is a "complex" of the first and second: installation of the so-called repair "fungus". The “hat” of the fungus is a patch, and the “leg” is threaded from the inside of the tire to the outside. After gluing the patch, the excess part of the leg is cut off, as in the case of the tourniquet. Thus, not only the inner surface of the tire is closed, but also the hole itself. The advantages and disadvantages of this repair method are generally the same as those of a patch.
4. An extreme, “emergency” measure when repairing a punctured wheel is to install a camera in it. Typically, this method is used for tires that are no longer worth repairing, or “for reliability” after repairing a complex puncture. It should be understood that almost all modern tires are tubeless, that is, they are not designed to install a camera, so it’s not worth driving a wheel repaired in this way for a long time.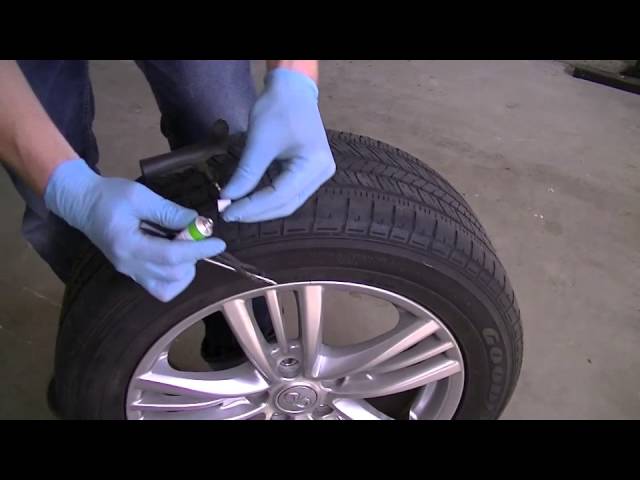 Installing a tube is a temporary solution for riding until a new tire is purchased, and sometimes such wheels are left as spares. So this repair method can be kept in mind as a backup. nine0011
Finally
We have deliberately left out of this text such methods as combined repair of tires with a tourniquet and a patch and hot vulcanization. The first is used quite rarely and for specific damage, and it is enough just to know about its existence. Well, the second is used to repair serious side cuts, and it is not only rare, but also very expensive. The cut site in this case is prepared, filled with raw rubber and processed with a hot press for vulcanization. Equipment for this procedure is not available in every tire shop, and the cost of repair can be about half the cost of a new tire. nine0013
interesting popular questions
Articles / Competition Dream car: what has changed in 20 years Everything in this life flows, everything changes.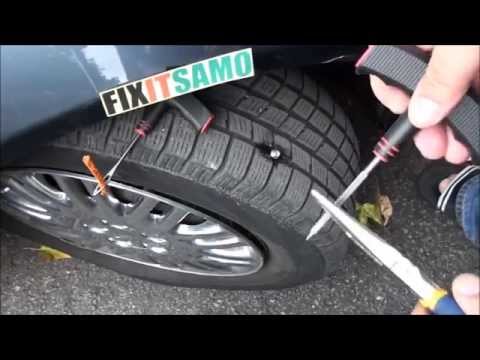 The tastes of motorists are no exception. Most recently, we put together the dream car of most of our readers. It turned out to be a crossover, besides gasoline ... 437 0 0 12/20/2022 nine0011
Articles / Popular questions Electronic contract of sale: what is it and how to conclude it We have already figured out how to register an accident according to the European protocol in electronic form through the State Services, and also found out what are the pros and cons of an electronic TCP and how to re-register a car with it. Today... 84 0 one 12/20/2022 nine0011
Articles / Interesting 5 Reasons to Buy and Not to Buy a Honda Civic IX Honda in general, and the Civic in particular, have a mixed reputation.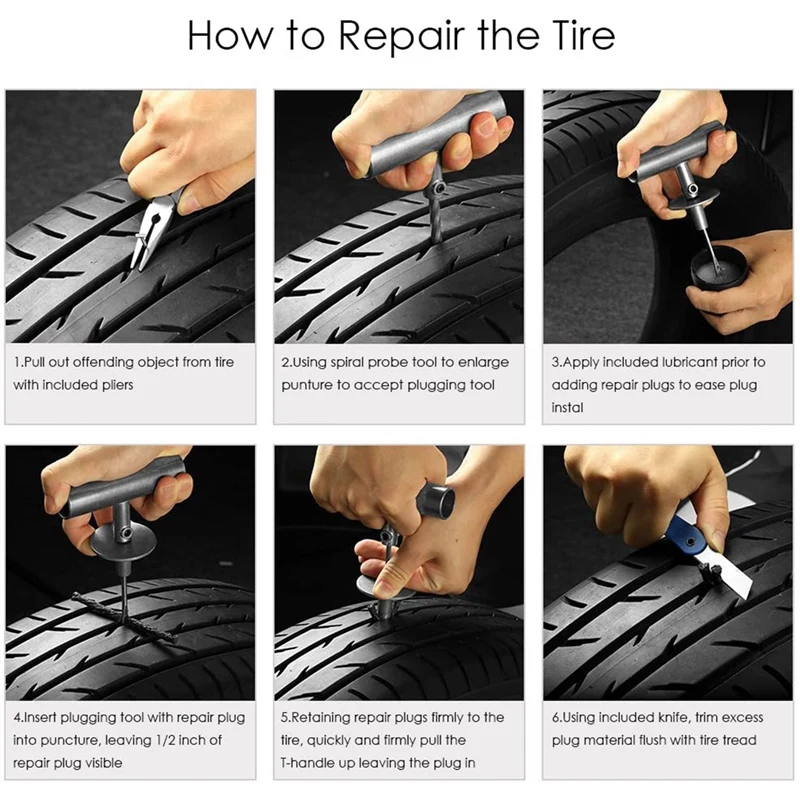 It seems that the car does not break down too often, but the cost of maintenance seems to many to be too high. Looks good, but... 1123 one 2 12/18/2022 nine0011
Test drives / Test drive Haval Dargo vs Mitsubishi Outlander: the dog is barking, the stranger is coming In the Haval dealership in the south of Moscow, life is in full swing: buyers look at cars, communicate with managers and sign some papers. While I was waiting for the test Dargo, the same cross... 19438 7 205 13.09.2022
Test drives / Test drive Motor from Mercedes, emblem from Renault, assembly from Dacia: test drive of the European Logan 1. 0 It would seem that what's new can be told about the second generation Renault Logan, known to every Russian taxi driver, as they say, up and down? However, this car has... 15323 10 41 08/13/2022 nine0011
Test drives / Test drive Geely Coolray vs Haval Jolion: Free Cheese? If! Do you want to buy a car today with a full warranty, on credit at an adequate rate, without wild dealer markups? Now this is still a task, because a full-fledged chain of "representation - s... 12750 26 thirty 08/10/2022 nine0011
Trouble with the wheel can happen at any time and to anyone. Now we will tell you what to do in this case and how to understand that the wheel is broken or dangerous to use. When repair is suitable, and when the tire is only subject to replacement.
In addition to the banal nail sticking out of the wheel, there are indirect signs of tire deformation:
while driving, the car leads to one side; nine0011
ride stiffness increased;
became worse handling and maneuverability;
extraneous sounds appeared in the car, similar to champing;
other drivers on the road honk and draw attention.
Outwardly, tire failure may look like swelling or a foreign object can be seen. Sometimes the foreign object is not visible, but the tire is flat or the cut is visible. nine0011
In any of these situations, it is no longer possible to drive the car further, but it is necessary to repair the tires.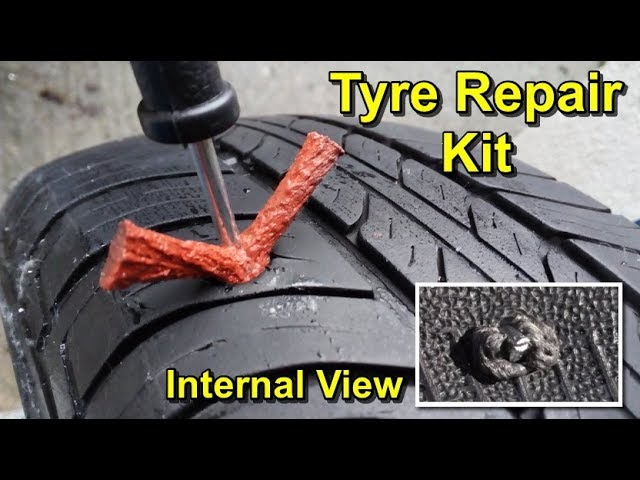
The most common cause of tire failure is poor road quality or improper vehicle operation. Another reason is tire tread wear. The transverse protrusion at the bottom of the tread groove is the tire wear indicator, do not ignore the tread indicator.
By the way, if you were driving technically correctly and hit a deep pothole, then the responsibility for this lies with the road service. You can call the traffic police and draw up a protocol, take the case to court. nine0011
There are several types of tire failure, let's look at the differences.
The most harmless option. But the use of such rubber is strictly prohibited. This is fraught with deformation of the sidewall, the tire overheats, delaminates, the cords break, and the wheel frame becomes unusable. So the harmlessness ends with the beginning of the trip. Definitely need repair, independent or in the tire center. nine0011
When a tire is punctured, the cord may or may not be damaged. When removing the culprit of the deformation, inspect the puncture site well. The edges are even and close well - the cord is not damaged. Then tire repair can be done without removing the wheel.
What to do to repair:
Further actions depend on the repair kit that you use.
If it is a sealant, it must be poured through the nipple, turn the wheel with the deformation down and wait for sealing. nine0011
If you have a tourniquet or insert, then the edges of the hole need to be sanded, treated with a special compound, and with the help of an awl, plug the puncture with a tourniquet. Then pull out and cut flush with the rubber surface.
If the cord is damaged:
But the repair does not end there, further balancing of the wheel will be needed. But the price for this service is still lower than the cost of a new tire.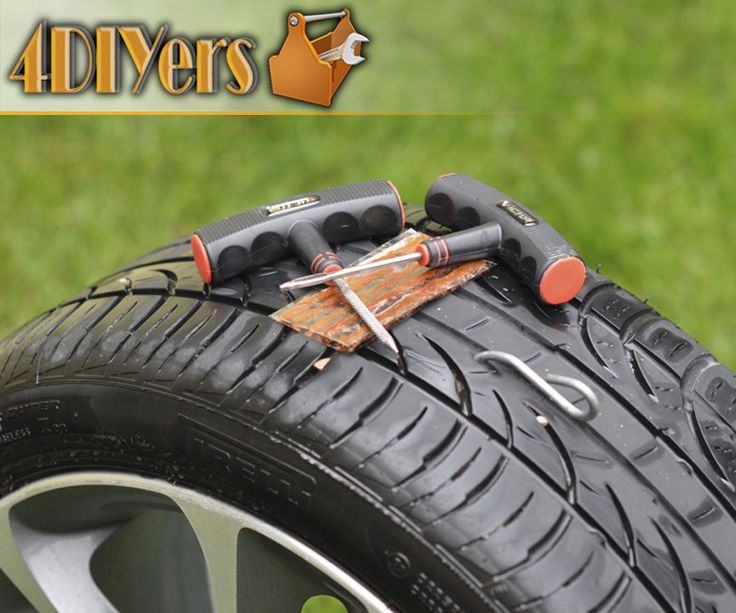 nine0011
Moisture and air enter the cord through cracks. The tire is failing. In this case, tire repair is not possible, only replacement.
Due to the cut, the integrity of the frame is violated and it will no longer be possible to restore it, the repair will not save. In addition, this most often occurs on the road, and after a cut, the tire has time to make a few more revolutions, which leads to even more damage.
Repairing side cuts is the most difficult of all. A longitudinal incision can only be repaired if it does not exceed 35 mm. And the transverse should be no more than 25 mm. This is due to the extent of the violation of the integrity of the threads. But even with a slight deformation, we do not recommend repairing side cuts. It is better and safer to change the tire. Even the best side cut repair does not guarantee that an obstacle or contact with a bump in the road at high speed will not lead to tire blowout and loss of control. This is too high a price to pay. nine0011
The cord breaks or the frame exfoliates. As a result, a hernia appears. This happens due to impact, collision with an obstacle, factory defects. As with a fissure, a hernia cannot be repaired. Another danger is that the hernia can explode at any moment. So you need to drive very carefully to the nearest service station, and it is better to rearrange the damaged wheel back.
There is an option to put a reinforced patch on the hernia, but it does not guarantee safety on the road. Such repairs can be considered only to reach the destination. nine0011
Whatever damage to the wheel may overtake you on the road, we do not recommend trying to repair it yourself, especially without special skills. Repair of hernias, punctures, cuts and even side cuts of tires is available in the network of service centers of the Wheel for Free, and if it is not possible to repair or it will not be practical, the masters will offer to replace the tire.