Search
Home Features How to Plug and Repair a Tubeless Motorcycle Tire
Sacre bleu! The discovery we all dread, usually right before a ride. Don’t attempt to repair a severe gash or cut, or a puncture in the sidewall of the tire. Once you get the hole plugged, it’s off to your dealer for a new tire.Considering how bulletproof the rest of our motorcycles have become, it’s ironic that it only takes a little 1 ½-inch box nail in a tire to bring the whole show to a halt. We’re fortunate today that tubeless tire technology prevents intrusions by nails, screws and other foreign objects from becoming catastrophic blowouts. The object usually stays in the hole, the only place from which the tire can lose air, so it deflates more slowly than a puncture in a tire with a tube on an unsealed spoked wheel (which can lose air through all of the spoke nipples and even the tire bead).
But even if that pointy thing does stay put and flush with the tread surface, as it flexes back and forth in the carcass the tire will eventually deflate enough to become a problem. Hopefully you will have noticed its presence or even received a low tire-pressure warning before that happens.
Of course, if it doesn’t stay put or is large enough to stick out of the tire (like a 6-inch gutter nail — don’t ask), the tire will probably deflate rapidly enough to strand you by the roadside. Unless you’re lucky enough to be next to a motorcycle shop at the time, you’re going to need either a good roadside assistance plan or a tubeless tire repair kit. (We’ll cover tube-type tire roadside repairs in another installment).
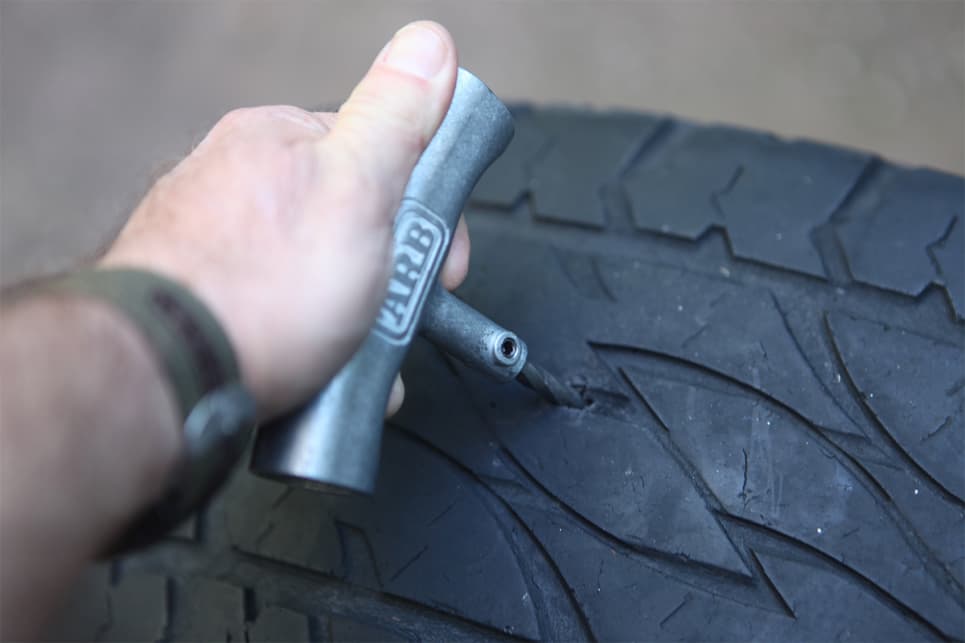
Once you’re sure your glue isn’t dried out and you have a way to re-inflate the tire, pull the offending object out. You may need pliers if it’s really in there.Use the reamer in the kit to enlarge and clean the hole—this is where large T-handles make the job a lot easier. Take some extra time if the tire has steel belts.Install a worm on the insertion tool — note that its tapered tip is split to allow the tool to pull free of the string once it’s well inside the hole.Put some rubber cement on the worm and a blob on the hole, too, and slowly insert the string in the hole about two-thirds of the way. If it falls inside the tire, just start over with a new string. Gently pull the insertion tool free, leaving the worm in the tire. Again, T-handles make this much easier.Use the knife in the plug kit or any sharp blade to cut the plug flush with the tread surface. Give it a few minutes to set up, inflate the tire and then spray some water or a soapy solution on the plug to make sure it’s holding air.
Here at Rider we’ve fixed enough tubeless punctures to appreciate that the most dependable tire repair kit you can carry uses rubber strings or “worms” for the plug that gets inserted into the tire, preferably the large red ones like those in the T-Handle Tubeless Tire Repair Kit from Stop & Go.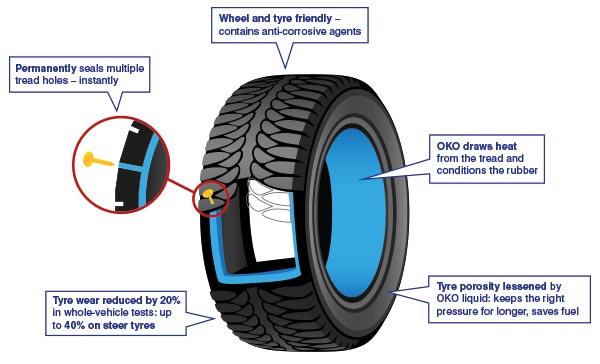 There are more convenient plug types, but the strings rarely let us down. If you’ve had good luck with liquid sealers, installed either pre- or post-puncture, more power to you — we often carry Slime for tube-type tires on bikes that have tubes in the hope of avoiding a roadside tire dismount. But we change bikes too often to make using the pre-installed sealers practical, and prefer to avoid irritating the mechanic who has to change a tubeless tire on a wheel full of messy sealer.
Advertisement
Repair kits that use string plugs often come with rubber cement, which — depending on the string type — may not be necessary to complete the repair, but at a minimum it acts as a lubricant to ease inserting the plug, and seems to help vulcanize the plug to the tire. It’s important to keep your glue supply fresh (preferably unopened), or you may find that it has dried out when you need it.
Stop & Go’s T-Handle Kit has everything you need to affect a solid repair. Just add pliers and something with which to inflate the tire (CO2 cartridges or a compressor). Stop & Go also offers a plugging kit that uses special mushroom-shaped plugs that don’t require glue, and the pocket version doesn’t take up any more space than the T-Handle Kit, so we often carry both. A portable mini compressor beats the heck out of CO2 cartridges if you have the space. Stop & Go’s is small, inexpensive and has a built-in gauge.
No matter what sort you use, any plug inserted from the outside should be considered a very temporary repair used to get you and your bike to the nearest replacement tire. Limit your speed per the plug kit instructions, and replace the tire as soon as possible. Special patch plugs inserted from the inside of a tubeless tire are certainly safer, but even if you can find someone who will install one for you, every tire manufacturer (and even those who sell patch plugs) recommend replacing the tire instead since it has to come off anyway.
The photos in this article cover the basic plugging process with rubber strings. Depending on the size of the hole, you may need more than one — I once used three in an ATV tire and it got me back to camp.
Aug 02, 2020 at 10:00am ET
By: Justin Hughes
A flat tire can turn a great ride into a bad one in no time flat. (Pun fully intended.) Unless you ride a Ural, motorcycles don't typically carry spare wheels. With a little luck and a little elbow grease, you can make your tubeless tire hold air again, at least for the ride home or to the shop to get replaced.
It's important to note that I specified tubeless tires. If your tire has a tube, like on bikes with spoked wheels such as cruisers and dual-sports, this method won't work, so don't even try it. There's still hope for you, though. You can either patch the hole in your tube or carry a new one that holds air and swap it over.
The most common cause of air leaks is running over debris that sticks into your tire, like nails or screws.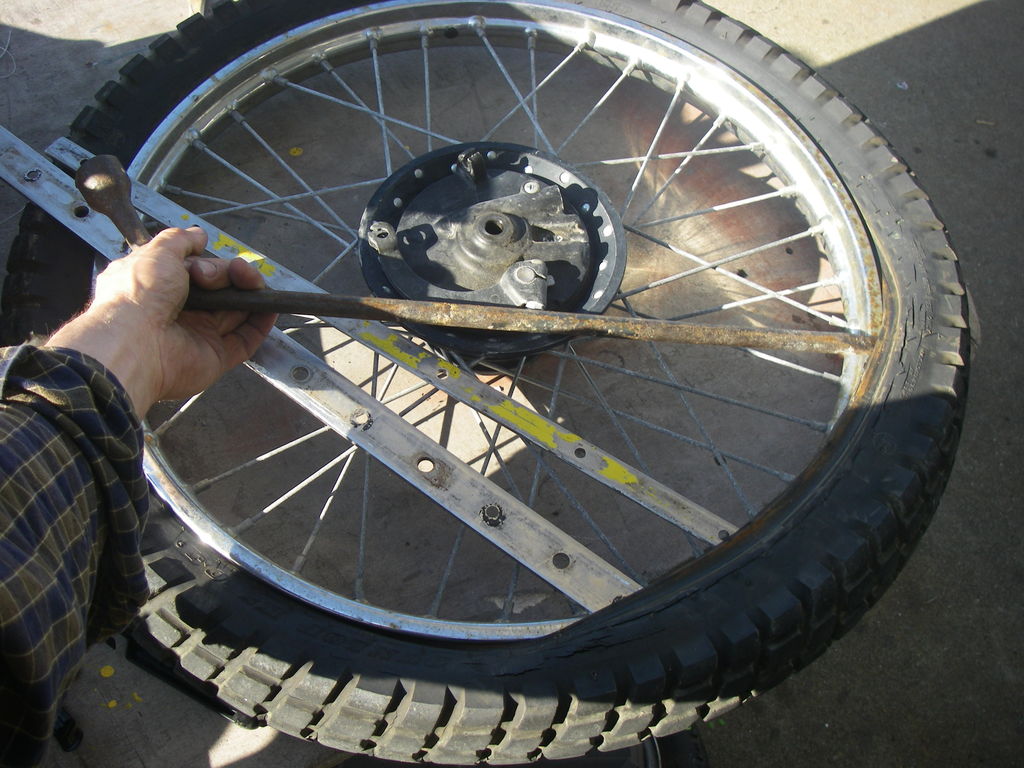 If you're lucky, it will stick in there really well, resulting in the air leak being quite slow. This gives you time to notice the change in pressure from the bike's handling, or from frequent pressure checks, which all of us are doing, right? Anyway, in this case, you'll likely be doing this in the comfort of your own driveway. If you're unlucky, you might be doing it on the side of the road.
What you want to see is a puncture in the meaty part of your tread, like this. If the puncture is in the sidewall, forget about it. You need a new tire. Don't even try plugging the sidewall. It won't be safe, even if it holds air temporarily. This hole, however, is in the middle of the tread and can be plugged.
What you need is a basic plug kit like this. It consists of a rasp, a needle tool, five or more sticky strings, and maybe some rubber cement. Some sticky strings are already coated in adhesive, which is fine too. All that's not included is a pair of pliers to help remove the nail, screw, dinner fork, 10mm wrench, torpedo, etc.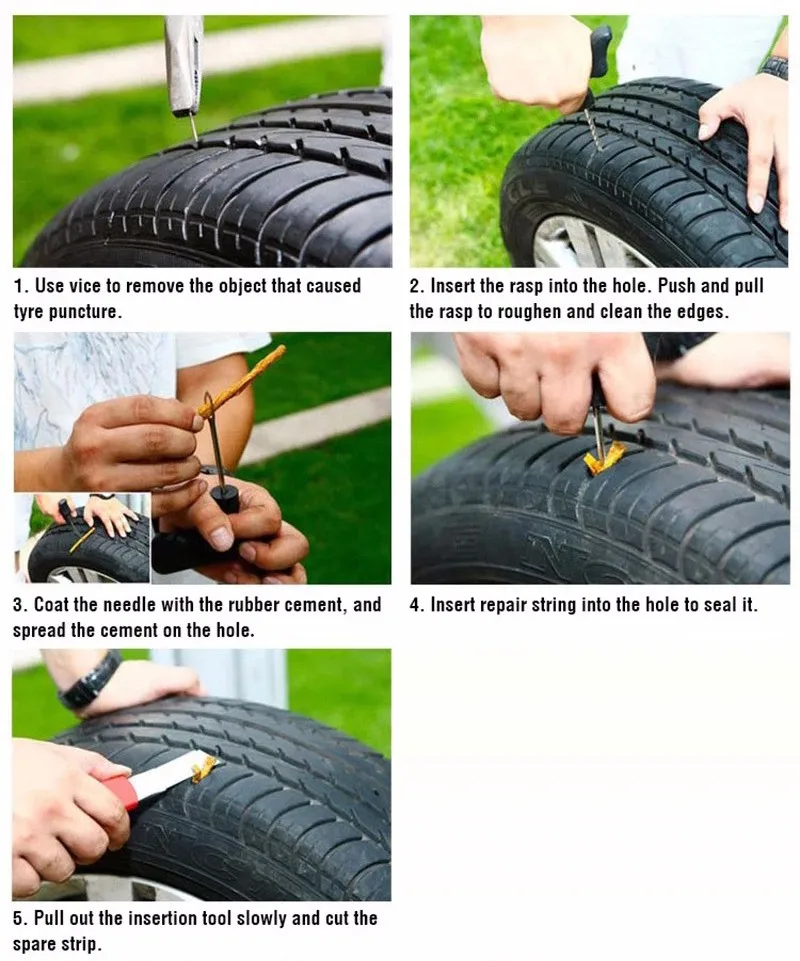 from the tire.
The next step is to make the hole bigger. Yes, bigger. This seems like the opposite of what you want to do, but making the hole a known size will help the plug fit inside it properly. That's what the rasp is for. Stick it into the hole in your tire and work it in and out until the hole is the same size as the rasp. This also makes the rubber on the edges of the hole quite rough, which will help hold the plug in place.
Now that the hole is prepared, it's time to plug it. Grab the needle tool, as well as one of the sticky strings. This string is your tire plug. Stick it through the hole in the needle tool about halfway, so the ends are even.
If you have rubber cement, glop a bit around the sides of the hole. Then shove the needle tool, plug and all, into the hole until about one-third of the string remains visible, and pull the needle tool out. The needle tool is split at the tip like a pinched fork, so you can remove it from the tire while leaving the plug behind.
Some people recommend cutting the string and rubber cement flush with the surface of the tire. You can certainly do that, but I've also found the excess string and rubber cement will wear off quickly from riding, leaving a similar result. Once the cement dries, reinflate the tire to your manufacturer-recommended pressure and check for leaks. More than likely, you won't have any.
Obviously, this means carrying some way to reinflate your tire with you. Some people rely on small tubes of CO2, while others carry a traditional electric tire pump. I prefer the electric pump. It may be bigger and heavier, but it'll never run out of air the way those small cartridges might if you haven't sealed everything correctly.
How safe is it to ride on a plugged tire? Obviously, the best solution is to replace it as soon as possible. The tire's structure is compromised, and although it now holds air, it was never meant to work with a hole in the middle of it. If you can't get the proper size tire quickly, though, or if you're simply flat broke, you can get away with riding gently on a plug for quite some time. I wouldn't recommend any track days or high-speed canyon runs on a plug, though.
esportby.com
An easy way to quickly restore tire tightness and continue your journey. True, for this you need to have the right wheel repair kit with you.
Maxim Stroker
“Catching” a nail, screw or piece of wire in a wheel on the track is a trifling matter and somewhere even everyday. However, it turns into a serious "trouble" if this happens, for example, at night or a couple of tens of kilometers from the nearest tire fitting point. In theory, in this case, you need to put a spare wheel and go further. Although, in the case of a family trip on vacation, the process of digging it out from under a pile of junk in the trunk can turn into an adventure that deserves a separate story. Be that as it may, often the trouble does not come alone and the spare tire can be broken literally on the next kilometer.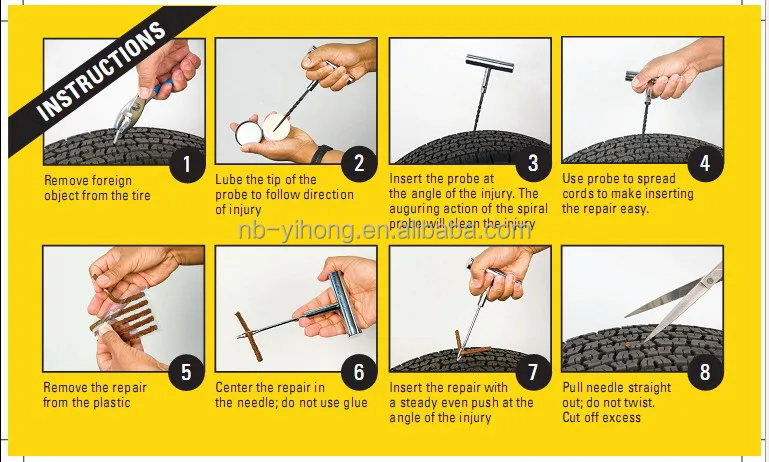 After all, where one carnation fell on the road, there may well be another one, and another, and another ...
With a couple of crippled wheels, you'll either have to wait an unknown amount of time for a tow truck to be sent in, or fix it yourself. Therefore, in a not particularly urbanized area, it makes sense to carry a repair kit with you to eliminate punctures in tubeless wheels. In principle, it can be of any manufacturer. The main thing when choosing it in the store is to make sure that the “drill” included in the repair kit is not very toothy and sharp. After all, his task is simply to clear a puncture hole in the tire, and not to break its metal cord. The second recommendation: the flagella, which are supposed to close the puncture hole, should be plump and reinforced with thin wire or plastic threads.
n-i.kiev.ua
And the third criterion for choosing a wheel repair kit is the obligatory presence of a tube of glue in it. Yes, yes: there are also “glueless” sets on sale, which are essentially useless.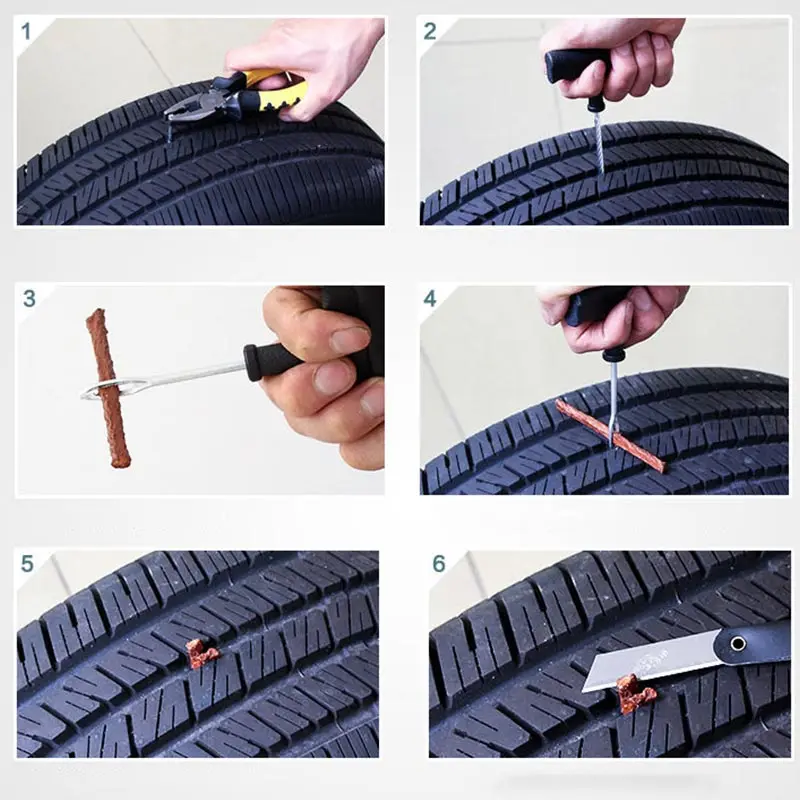
So, we notice that the wheel is flat (or has already been blown off) and proceed to eliminate the problem. Most often, the hole in the rubber is not visible. Therefore, to begin with, we hang out the damaged wheel by raising the car on a jack, and inflate it with a pump or compressor to 3-4 atmospheres. If even after that it is not possible to detect damage by the whistle of escaping air, we methodically and consistently wet the entire surface of the wheel and look for bubbles at the puncture site.
Having found a puncture, we take the “drill” from the set and pierce the damaged area with it several times. So we clean the surface of the hole before gluing. Next, we smear the “drill” with glue from the set and again immerse it in the hole. We repeat this operation and, leaving the “drill” sticking out in the hole smeared with glue, we take out the flagellum and insert it halfway into the eye of another tool - the “overgrown needle” (sometimes called the “awl”), also available in the repair kit. We coat the flagellum with glue and, quickly pulling the “drill” out of the hole, insert our “needle” there so that the ends of the flagellum remain above the surface of the wheel tread. Next, we pull out the “needle-awl” and wait a few minutes until the glue grabs. After that, we pump up the wheel and carefully cut off the protruding tails of the flagellum with a knife. Everyone, you can move on.
Test drive of one of the best family minibuses
20311
wheels, summer tires, cheap cars, repairs, tires, winter tires, track
A motorcycle gives you a feeling of freedom, allowing you to discover new routes. However, in reality, this freedom can turn into a trap in an instant if you are unlucky enough to puncture a tire somewhere in the middle of the road.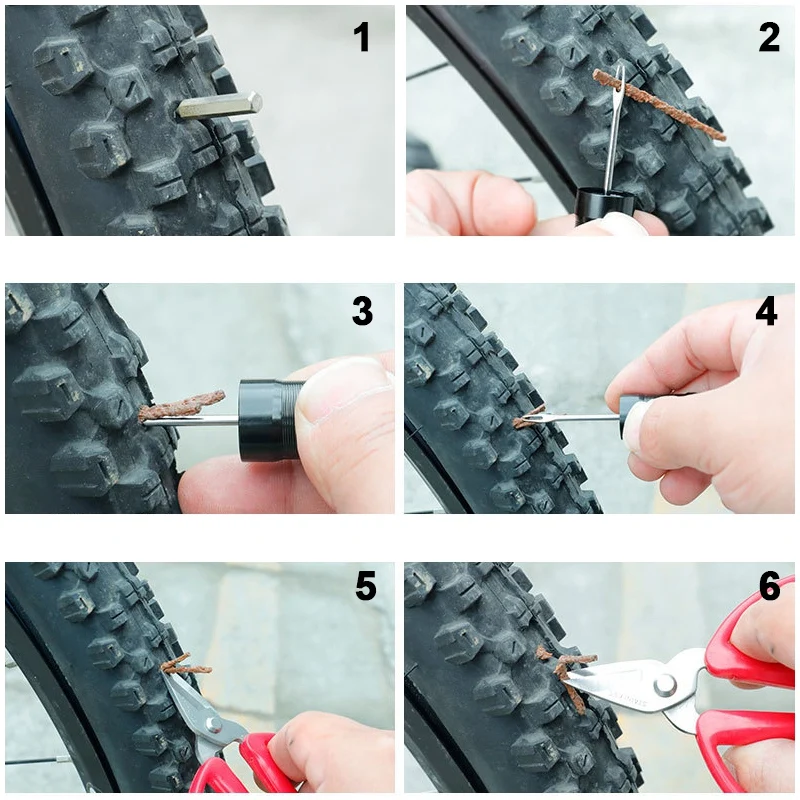 The feeling of annoyance will be ten times stronger if there is no way to fix a punctured wheel. At this point, it remains only to hope for cellular communication and help from other drivers on the road. Therefore, consider the basic recommendations for repairing a motorcycle tire on the road.
Always keep a rubber band or tire repair insert in the trunk. This simple tool will add peace of mind on the road. It will be much better if you learn how to use it in advance. You don't want to be the guy who has the right tool but lacks the skills to fix a problem, even something as simple as fixing a tire, do you?
The repair technology for tube and tubeless tires is different, but both types are subject to restoration (at least to such a state as to get home). Repairing a tubeless tire is easier. Repairing a tubed tire requires removing the wheel, removing the tire, and removing the tube to install the patch.
So you run over a nail, screw, glass or that damned sharp stone and punctured a motorcycle tire. If the object that caused the damage is still in the rubber, the first step is to remove it. Pliers are great for this. Therefore, you should always keep this tool in the trunk: with it, you need to grab an object sticking out of the tire. Try to pull it out along the same path that it entered the tire so that the puncture does not increase and become torn.
After removing the object, clean the edges of the pierced hole. To do this, the repair kit must have a special tool - a tool for cleaning holes. All debris and rough edges must be removed to create a surface for patching.
Next, you need to install a patch. Different kits offer different types of patches, so you should read the kit's manual to complete this step correctly. However, there are two main types of patches: long cord patches and fungus patches. Some kits may include adhesive to bond the patch to the tire rubber.
Patches or cord inserts are supplied with an awl for installation. It is necessary to bend the cord in half, and thread one half into the tool.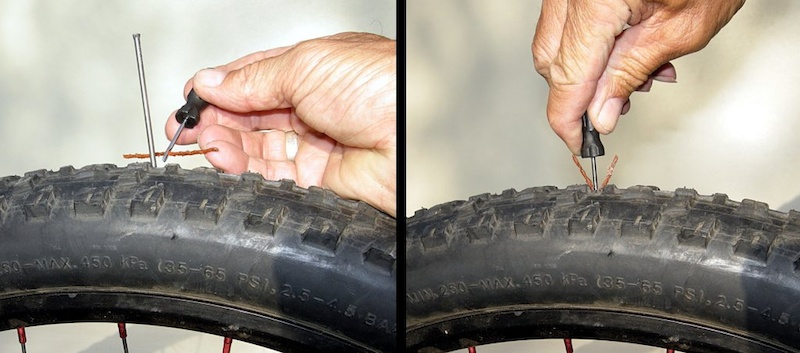 This is necessary for a tight fit of the material. Next, bring the cord into the hole until it protrudes above the tire by about 1 centimeter. Then you can pull it out of the awl and put the tool aside. Take a knife and cut off the excess patch material by about 0.5 centimeter.
Fungus patches (plug and play type) require the use of a special tool for installation. Again, you must follow the instructions for the specific repair kit. Then stretch the patch material with pliers. When the puncture is closed, you can cut the patch over the tire.
After installing the patch, the tire needs to be inflated. For repairs on the road, you will need either a 12V electric compressor that can be connected to the motorcycle's electrical system, or a CO bottle 2 . Carrying a compressor with you is not always convenient. A more compact and more portable option is to use the small CO 2 bottles in combination with the tire inflator. This is the fastest way to inflate tires on the road.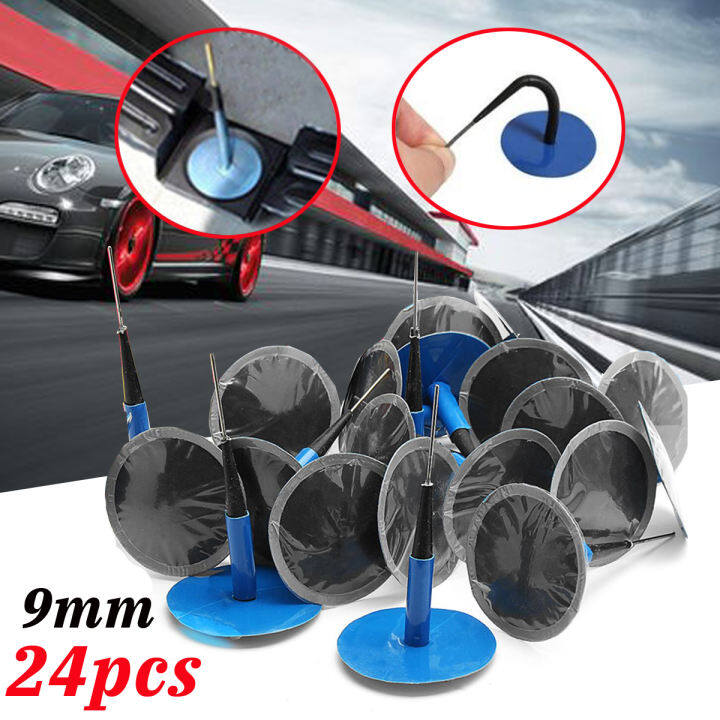
If possible, apply some soapy water to the patch to make sure it is airtight. If there is a leak, you will see tiny air bubbles around the repaired area.
On-road retreading of tube tires is a more labor-intensive process. If your motorcycle is equipped with such tires, then you will need a few more tools to repair them. In most models, you will have to remove and disassemble the wheel in order to get to the camera. The vehicle owner's manual should describe how to do this and what tools to pack in your luggage. In addition, you will need a tire removal tool. It makes the job easier.
Once the inner tube has been removed from the wheel, the remaining air must be completely bled out. The next step is to prepare the camera for patching. The repair kit should include a special scraper to roughen the surface around the punctured hole. This treatment is necessary to ensure adhesion of the patch to the chamber material.
After completing the preparation, you can start installing the patch.