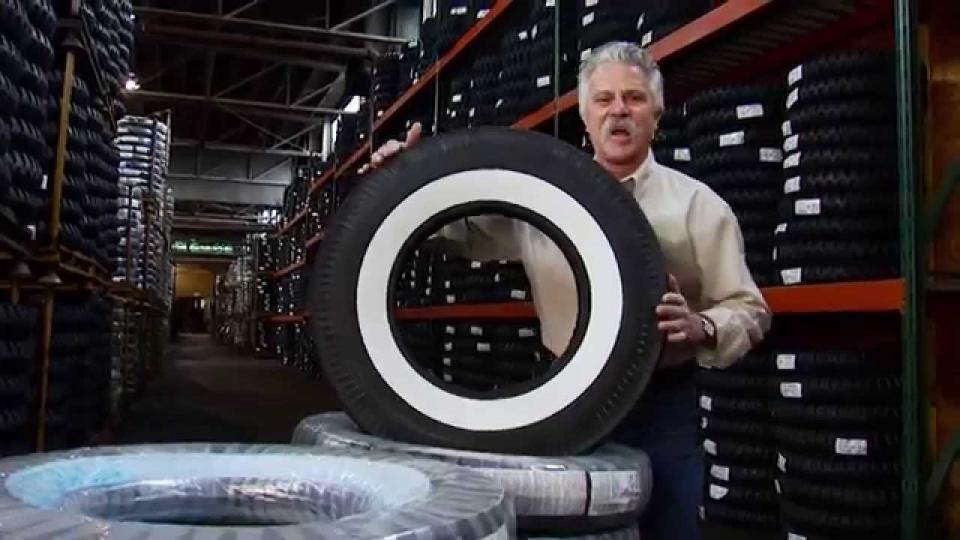
There's something about whitewall tyres that instantly invoke a feeling of nostalgia, taking you back to the 1950s when rock and roll was exciting and new. Fast forward to today, and the signature circles of white paint around the sidewall still go well with vintage cars and motorcycles, but they also look right at home on modern-day rides, instantly giving them classic, old-timey vibes.
You can only get these tyres through customization, which can set you back by several hundreds of dollars. But the good news is that you can follow our whitewall tyre hack, which only takes a few hours!
But first, learn how this eye-catching tyre design came to be, how it caught on, and why it slowly faded from the market.
A Brief Timeline of Whitewall Tyres
But even if whitewall tyres are no longer in mass production, we still see them from time to time. Why? Some tyre makers sell them to a niche market, while others offer whitewall customization. Vintage lovers now have a choice between the classic thick white stripes of yesteryears or the thinner white circles that give cars an old-fashioned touch.
If you want whitewall tyres, you can also try doing them yourself! Read our step-by-step DIY that's as fun as it is fulfilling.
How to Do Your Whitewall Tyres
To start doing your whitewall tyres, prepare this checklist:
Ready with all the things you need? Follow these 7 steps to do your whitewall tyres:
1. Clean your tyres.Clean tyres make the paint and primer stick better on the rubber. Do this in a shaded area to keep you and the tyres cool. After thoroughly hosing the tyres down, preferably with a high-pressure washer, apply a cleaning solution. Use a bristle brush or scrubbing pad to remove dirt and grime. Rinse thoroughly, then dry them out with a clean microfiber cloth. Want more cleaning tips? Read our step-by-step guide to cleaning your tyres safely and efficiently.
💡Pro-tip: To make your tyre cleanser, mix a capful of dishwashing liquid in a bucket of water. Cleaning your tyres promotes longer tread life and ensures their grip.
2. Remove the tyres.
After taking off the hubcap, loosen the nuts with your lug wrench. Put the jack under your car to raise its bottom. To stabilise the jack, put a jack stand or a piece of wood beneath it. Now, you can remove the lug nuts with your hand and remove the tyre.
3. Place masking tape.Lay the tyre on a flat surface covered with cloth or cardboard. Using masking tape, cover the edge of the tread. To shield the wheel from paint, tape cardboard over it. Keep the masking tape smooth and tight on the protected areas so that paint won't seep under it.
4. Start with a primer.To ensure that the paint stays on the tyre, spray all-purpose and water-resistant primer on the rubber.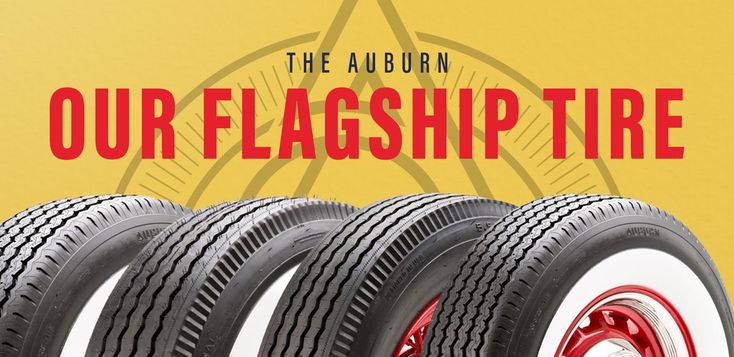 Start from the top, working your way to the bottom. After covering the tyre, allow the primer to dry for about an hour before applying a second coat.
💡Pro-tip: It's best to apply three coats of primer to protect your tyres from discolouring.
5. Time to paint!
You can purchase whitewall paint online or in auto supplies stores. You can also use acrylic paint or spray-on white paint that sticks on smooth surfaces like plastic. Apply white paint on the exposed rubber and let it dry completely. While waiting, clean your paint brush by dipping it into turpentine. Once the first coat is dry, apply a second or third layer to keep the paint nice and even.
6. Apply a clear coat of paint.When the paint is completely dry, you can apply clear paint for added protection because sunlight can turn the white colour to yellow. When the coating is dry, remove the masking tape and bask in the glory of your new DIY whitewall tyres!
7. Maintain your whitewall tyres.
Nothing lasts forever, including your DIY project. To maintain your whitewall tyres, clean them regularly. You can also put baking soda on a damp cloth, gently wiping it on your tyres before rinsing. Repeat the process until the white on your tyres pops. If some paint flakes off, use a white paint marker for a quick touch-up.
There you have it! No need to break the bank to get your vintage-inspired white wall tyres. Enjoy your cool ride, and share this article with anyone who wants to go down this fun DIY path.
Get Your New Tyres at the Lowest Prices!
With whitewall tyres, you enjoy the feel of classic cars minus the drawbacks and dangers of using old tyres. Ensure your tyres have sufficient tread to protect you from accidents and legal issues! Shop at Tyroola today for our wide range of tyre brands and sizes, plus wheels to keep your ride stylish and safe.
Shop at Tyroola today for the best prices and deals!
| How-To - Wheels and Tires
Trends come and go within our hobby, but there are a few things that stand the test of time. While many hot rodders have changed their opinion about stance, color combinations, and interior fabrics over the years, we've noticed that wide whitewall tires have remained a popular alternative to generic black sidewall tires. There is no question that tire and wheel styles have evolved over the years, but we're going to take a look at the history of whitewall tires and how it has influenced the hot rod community.
Before we concentrate solely on hot rods, let's take a look at whitewall history in the automobile manufacturing world. Originally, tires were off-white in color, due to the color of the natural rubber formula. Tire manufacturers then added zinc oxide to the formula, which gave the tires a brighter white appearance. White tires were not a status symbol or aesthetic feature—it was just how the tires were produced. The tires would quickly turn to a beige color as they traversed the dirt roads of yesteryear.
It wasn't until 1910 that BFGoodrich started adding carbon black to its tires, as this ingredient added strength and durability to the rubber. Soon, most new cars rolled out of the factory on black tires, as this updated chemistry resulted in a stronger tire. Since adding carbon black to the rubber was an additional production cost, some tire companies added it only to the tread surface. This resulted in the first tire with a white sidewall quite by accident. The whitewall would later be refined, and it eventually transitioned to a strip of white rubber being added to the tire's all-black carcass during the manufacturing process.
Though the whitewall tire was not originally a fashion statement, this look caught on quickly and became an affordable upgrade to most passenger cars. New car buyers could elect to spend a few extra bucks and have their car equipped with wide whitewalls; this appearance package was popular for quite some time.
As tire and wheel size evolved through the years, the diameter shrank, while the widths grew slightly. And by the end of the '50s, most American cars were rolling on 14x5 wheels, with the option to upgrade to tires with a 2.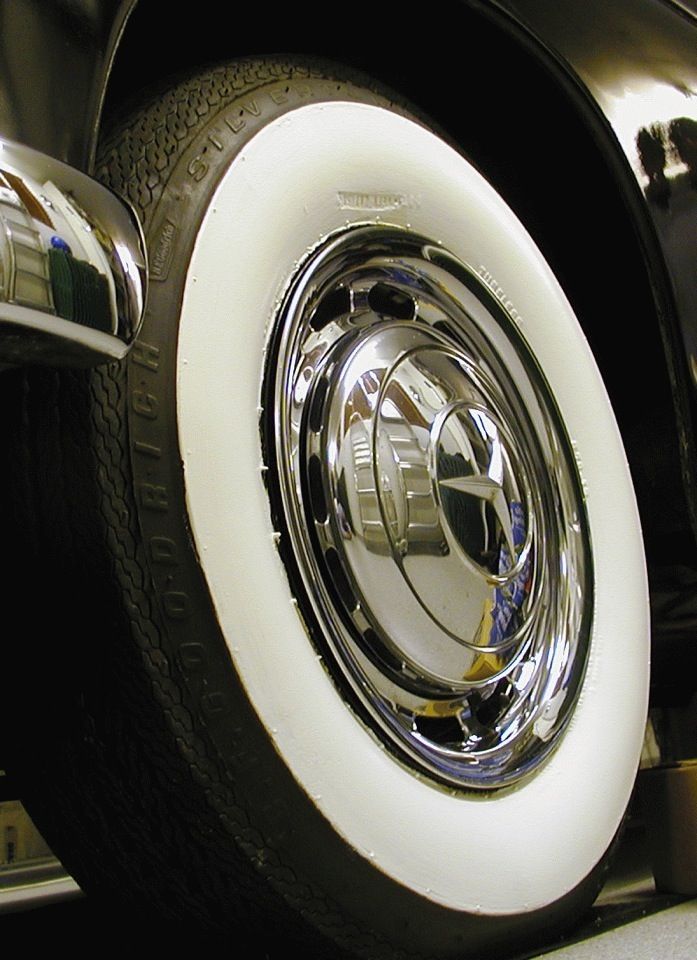 5-inch whitewall. In 1962, a major transition happened, as wide whitewalls were phased out of most regular car options, being replaced with 1-inch whitewalls. These too, would eventually shrink to 7/8-, 3/4-, 5/8-inch, and so on, until the whitewall all but disappeared.
Certain makes and models kept the whitewall tire alive as an option, but this change in original equipment came at a time when aftermarket tire manufacturers were experimenting with new styles and designs. By 1970, the raised white letter tire took a stronghold in the muscle car community, and the sporty looks naturally fit the bill for modified cars of the era. This was also a transitional time for tire companies, as the switch from bias-ply to radial was happening across the country.
Hot Rod Tires
If you weren't around for those initial days of hot rodding, we can simplify the hobby by breaking down '40s and '50s hot rods in two very basic categories: race-inspired hot rods and customized show cars. The race-inspired cars typically used blackwall tires, which were often passenger car tires modified for racing or purpose-built race tires. On the other hand, customized show cars had a much more glamorous appearance with slick paint and chrome plating, so wide whitewalls were a natural extension of that high-end styling. These two basic categories have blended and crossed over many times since the inception of the hobby. These days, there is always a battle of blackwall versus whitewall tires when it comes to traditional hot rods, but it started as a matter of preference, and that's where we'll leave it.
Early hot rods and customs often used a different tire size to accentuate the car's features—smaller tires would effectively lower the car's ride height, while larger tires would fill the wheel openings. It was up to the owner to choose the appropriate tire size for their vehicle, and of course, this created the big 'n' little craze that is still relevant today. You could find a pair of tires from a Cadillac for the rear and match them up with a pair of tires from an Austin or some other compact car for the front. It wasn't quite as simple as thumbing through a catalog to pick out your desired sizes, but it led to some creative combinations.
As tire manufacturers discontinued wide whitewall tires in the '60s, the molds were often sold to foreign manufacturers, or simply placed in storage. Enter Corky Coker, a young man from Tennessee who jumped into his father's tire business with a huge goal in mind. He went after those discontinued molds, hoping that someday he could put them back into production, in an effort to serve the automotive restoration market. What he didn't realize was that his efforts would eventually create an industry all its own and reach customers in the hot rod marketplace.
During the '70s and '80s, Coker Tire originally catered to the bone-stock restoration crowd. The tire market changed drastically when Coker Tire introduced the world's first wide whitewall radial tire in 1994, as it was a turning point for classic cars, hot rods, and customs. This was a tire that offered the old-school sidewall with modern radial construction, and it really put Coker on the map. The tire featured a true whitewall radial construction, which required a revised mold and several additional steps in the tire building process, compared to regular blackwall passenger car tires.
The new tire availability in 1994 encouraged hot rodders and custom builders to use wide whitewall tires, and Coker Tire continued to reach the market with custom sizing and additional brands. Of course, Coker Tire still offers the authentic Firestone, BFGoodrich, and other bias-ply tires, but the radial whitewall tire market helped car enthusiasts get the nostalgic look without the finicky handling characteristics of a bias-ply tire. It was a big breakthrough and part of the reason you see so many hot rods and customs with wide whitewalls to this day.
Coker Tire hit another milestone in 2013 with the introduction of the American Classic "bias look" radial tire. This tire is built to replicate the narrow tread design and piecrust shoulder of vintage bias-ply tires, but offer the ride quality, safety, and tread life of a modern radial. Even with all of the advancements and various brands, the folks at Coker Tire tell us that the original Coker Classic wide whitewall radial is still one of its best-selling tires.
The process that Coker Tire employs is lengthy and expensive, and the development process starts with a series of drawings and a specific mold for each tire size, style, and brand. The mold is typically made of steel or aluminum, and they are very heavy and highly resistant to wear and tear. The tire mold is one of the final processes of the assembly line, but it's what gives the tire its shape and design features.
Manufacturing starts with a little bit of chemistry, as the rubber compound is developed from natural and synthetic rubber, as well as various chemicals and curing agents. This rubber mixture is formed into sheets, which are 40 inches wide and 3/8-inch thick. The sheets are then sent to a calendar, which is a piece of machinery that applies the rubber to polyester fabric to create the ply layers. By squeezing the rubber sheet and a layer of fabric between steel rollers, the tire technicians can determine the final thickness of the material. The sheet then goes to a cutter, which allows the operator to precisely cut it to the desired length, width, and angle before it is rolled into a liner and sent to the tire-building machine.
As the trimmed sheet of rubber moves down the assembly line, its final destination is the tire-building drum, where the first form of assembly can be performed. The number of rubber sheets used determines the tire's load rating, and the majority of passenger car tires feature a four-ply construction. In the early years of tire manufacturing, cotton was used in the ply sheets, but it is now common to use polyester cord material.
Bundles of steel wire are placed in a bead former, which coats each strand of wire with rubber, so it will adhere to the rest of the tire. This creates a bead bundle and the number of wire strands is dependent on the size and load range of the tire. The bead bundles are placed on either end of the tire-building drum, where the ply edges are turned up around the bead bundle and locked into place. After the beads are installed on the tire carcass, a strip of white rubber is cut to the appropriate length and placed on the sidewall area. Once the carcass is complete, this is called a "Green Tire."
The Green Tire is then loaded into a specific mold, which rests inside of a curing press. The mold determines the tire's size, tread pattern, sidewall details, brand names, and DOT information. Each mold features a curing bladder, which is inflated by steam and pushes the hot rubber out into the mold details. During the curing process, the rubber reaches 360 degrees F.
When the curing process is complete, the tire still needs some more work to reach completion. The tire is inflated on a special wheel and allowed to cool, and then sent to its final inspection area. When the tire passes inspection, it continues its path to the cleaning and inspection area. A special attachment, based on the whitewall width, lightly cleans the sidewall of the tire so that the whitewall is clean and white. It is then protected with a blue coating that keeps the whitewall from being damaged in transit, before being wrapped in plastic and sent into the warehouse for shipping.
By this lengthy process, you can easily surmise that Coker Tire's process is labor-intensive and it's not quite as automated as one might think. Handcrafted, genuine whitewall tires might cost a few bucks more than your average tire, but true whitewalls are anything but average tires.
Imitation Whitewalls
Dating back to the early days of hot rodding, the hobby consisted of low-budget, grassroots guys who cut, stitched, and handmade parts to customize their car. Even though wide whitewall tires were available at the time, many hot rodders couldn't afford them, so they resorted to imitation whitewalls.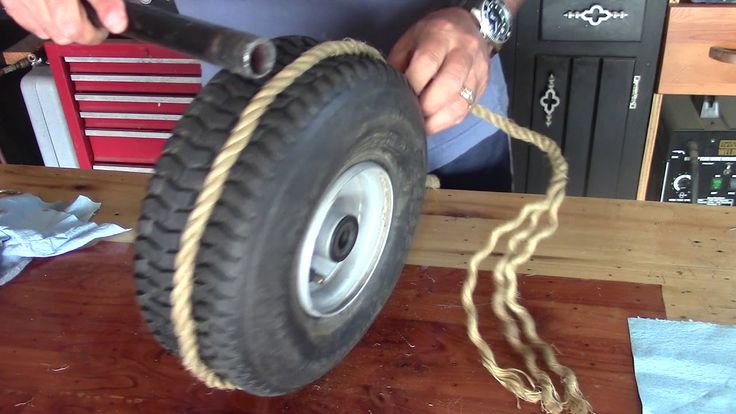
Originally, you had a couple choices for imitation whitewall tires. You could paint the sidewalls white if you were a high school kid on a paper route budget. If you had a couple more dollars to spend, you could buy a set of portawalls, which are whitewall inserts that rest between the rim and the tire bead. Portawalls give the appearance of a whitewall tire from a distance, but you can typically see that it's not actually part of the tire at close inspection.
Tire customizing has been around for a long time, and it's not something we'd suggest if you plan on driving your car. Modern-day tire customizers are a little more sophisticated, but the companies that offer imitation whitewalls still don't have the tried-and-true construction that stands the test of time. Their method involves taking an existing blackwall tire and adding a whitewall to it by grinding the sidewall down and bonding a strip of white rubber to the tire. This is a very similar process to the old days of re-capping tires, but it involves the sidewall instead of the tread. The major hazards with recapping or any tire modification include unnecessary and extraordinary heat cycles, as well as reduced material thickness. If you have a sidewall puncture, even on your daily driver, the tire is typically deemed unfixable, so the idea of grinding on the sidewall to apply an imitation whitewall isn't exactly confidence inspiring.
Other forms of imitation whitewalls include decals, which is a modern type of portawall. Tire stickers are a common modification for enthusiasts who want the sporty looks of a white letter tire, but these companies are starting to jump on the whitewall bandwagon. While this method may be cheap, it's not permanent and it certainly doesn't look as good as a true whitewall tire.
Today's do-it-yourself imitation whitewall involves grinding the sidewall of a white letter tire. Any white letter tire has a strip of white rubber, just like a whitewall, so grinding the black rubber reveals the layer of white rubber beneath. Taking a grinder to your tire's sidewall is certainly the sketchiest way to get the whitewall look, so take your safety into consideration and avoid this method.
It's easy to see why various types of imitation whitewalls have come and gone. None of the methods are comparable to manufacturing a tire with a whitewall from day one. Sure, there may be a price difference, but when it comes to safety, durability, and good looks, it's hard to argue with the advantages and long-standing heritage of a real whitewall tire.
All-white tires were not a sign of wealth or luxury in the early days of the automobile. Tires were originally a beige color, until manufacturers started adding zinc oxide to the formula to provide a bright white appearance.In 1910, BFGoodrich was the first company to utilize carbon black in its rubber formula. This ingredient added strength to the rubber, but it also changed the rubber's color to black. Shown is the Goodrich Silvertown Cord high-pressure tire, a common tire from around 1910 through the '20s. As the years went on, tires and wheels evolved, and whitewalls became a form of decoration, especially for American automobiles. By the '30s, it was a factory option on many cars, and by the '50s tires like this Firestone 6.70-15 was commonplace in the automotive market.The hot rod world utilized whitewall tires very early on, but they were typically used on customized show cars, rather than race-inspired hot rods. This highly customized roadster pickup, photographed in 1955, sports a set of wide whitewalls. Our best guess is that the owner upsized to approximately 7.00-16 to get a distinct look.Many early hot rods used blackwall tires, like the ones on this bare-bones 1932 Ford roadster. The combination offers a sinister look, especially with the black steel wheels.In comparison to the black-on-black highboy, this very similarly prepared Deuce roadster has a more flashy appearance, with bright red paint, beige steelies, and wide whitewalls. It certainly offers a drastic difference, and it was a common combination in the '50s.
 Even though wide whitewalls were phased out of regular tire production in the '60s Coker Tire filled the void in the market. In 1994, Coker Tire debuted the world's first wide whitewall radial tire, which encouraged hot rodders to go back to the nostalgia look of wide whites.In 2013, Coker Tire made another big leap in the whitewall tire market with the introduction of the first "bias look" radial tire. The American Classic features the looks of a vintage bias-ply tire with the ride quality of a modern radial. This is a genuine whitewall tire and it's perfect for traditional hot rods and customs.Manufacturing a tire is a labor-intensive process, and it's not quite as automated as you might think. After the chemists develop a formula for the rubber compound, the materials are formed into rubber sheets, which contain ply cord material.Rubber sheets are wrapped around a tire-building drum and mated with one another until the appropriate number of layers are in place. This number of layers is determined by the tire's load rating.
 Then, the white rubber is installed on the sidewall area of the carcass, and the rubber coated steel bead bundles can be added.The carcass slides over a bladder, which fills with steam and pushes the rubber into the mold reveals. This gives the tires its shape, size, and distinct lettering. An easy way to tell a genuine whitewall tire from an imitation whitewall is to look at the sidewall—if it doesn't have a brand name, siz, or DOT number on the sidewall, it's not the real thing!As the bladder fills, it begins pushing the drum-like tire carcass out as the mold closes and heats the rubber to 350 degrees F. The heating process brings the layers of rubber together, and ensures that the white rubber is a permanent part of the tire.After the molding and curing process, the tire is removed from the mold and sent to the cleaning and inspection area. The tires are inflated on a special wheel and the whitewall is cleaned of any debris created from the manufacturing process.The end result of the Coker Tire's whitewall tire manufacturing process is a tire that you can install and trust for many years.
 This 1955 Chevrolet mild custom sits on a set of Coker Classic bias-ply whitewall tires, and it looks like it just rolled out of a custom shop in the '60s.
 Lately car tuning has been very popular. Vehicle owners do not skimp on finishing their cars, they change the shade of the car and the color of the headlights, apply all sorts of images and even darken the rear windows. Most, of course, transform the appearance of the body, but some of the motorists are experimenting with the color of the wheels, for this a unique rubber paint is used. In this article, we will look at how to apply paints on rubber, as well as understand the process of painting wheel tires.
Contents
Experts distinguish several functions of this kind of coloring compositions, while it is worth noting that they have a unique consistency, high durability and incredible pigmentation. Rubber paints are used primarily as a protection of rubber products from the negative effects of environmental factors, as well as from the effects of other chemical compounds (gasoline, oil).
Rubber is characterized by a rapid loss of its original appearance and elasticity, the constant use of tires only exacerbates this situation. Therefore, to protect rubber, it is recommended to use universal coloring compounds.
Another of the main functions of rubber paints is to provide reliable waterproofing of rubber products, in particular car tires. Such a measure is simply necessary when operating the car in regions with high humidity or in places where direct contact of rubber with water is expected. To increase the reliability of rubber waterproofing, it is customary to paint the material with special paints of a suitable modification.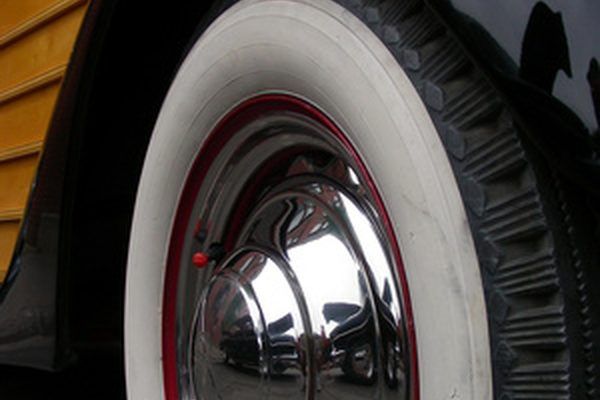
Attention! The painting process increases the resistance of the surface to weathering, as well as its water-repellent properties (this applies to both salt and fresh water).
Most often, this coloring composition is used for painting rubber fixtures, especially for car tires. For those motorists who seek to change the original appearance of their car, tire painting will be a great solution. Such a transformation of the wheels will give the vehicle a more stylish, unique design. The most important thing here is to choose the right color and type of paint.
Important! Not all types of rubber paints that are available in stores are suitable for painting car tires.
And yet, how to paint rubber, what paint is suitable for vehicle wheel tires? This is a rather complicated question, therefore, before buying paint, it is better to consult with a specialist (depending on the purpose, the seller will select the appropriate modification of the coloring composition for you).
Standard acrylic or enamel paints cannot be used for painting tires, as car wheels are constantly subjected to increased mechanical stress (such paint mixtures are not able to withstand prolonged mechanical stress).
Let's highlight the main criteria that paints must meet:
When choosing a material for painting car tires, pay attention to the composition. For the highest quality and durable application, paints based on rubber, latex or polyurethane are suitable. They allow you to achieve a uniform layer of the required degree of strength, that is, such a coating will not disappear at the first load, as well as during tension and compression.
Please note! Ordinary paints, for example, for walls, which also contain latex, are completely unsuitable for painting tires (they do not contain enough of the main component that gives elasticity).

In the video: application of rubber paint.
Car wheels can rightfully be called one of the most important parts of a vehicle, especially for sports cars, where tires and a single design of the wheel structure become a distinctive design component. If you want to profitably transform your vehicle, then the first question you should ask yourself is how to paint rubber?
There is a wide range of tire paints, tire paints and other similar items on the market today. If you cannot find such compositions in your city, you can always contact a specialized center where services such as painting and car tuning are offered.
The process of painting wheels can be divided into two main steps:
Let's take a closer look at the second stage, since it is here that many problems arise:
1. Tire bleeding. Before painting tires, tires must be inflated to working condition.
2. Cleaning the work surface. The area to be painted over must be cleaned of dirt and degreased with a special agent (White spirit, universal degreaser).
3. Selection of painting zones. If you plan to paint a specific area on the tire, use electrical tape to hide other elements.
4. Paint application. First, decide which tool it will be more convenient for you to work with (brush, roller or paint sprayer). Spray paints are also on sale, it is much more convenient to work with them, but the material consumption is greater. Before applying the paint, it is recommended to heat it up a little so that it lies more evenly. Layers should be at least two or three.
5. Drying. It is important to leave the tire to dry after applying each layer for about 24 hours, only after the previous one has completely dried, a new layer is applied. After the finish coating, the product can be put into use in a day.
Tire painting technology consists in partial painting, this is due to uneven location (that is, one part of the tire is hidden, and its main surface is constantly in contact with the road). During long driving, the tire is subject to rapid wear of the tint coating. That is why it is wrong to compare body painting and vehicle tire painting.
In most cases, white paint is used for rubber objects, which favorably emphasizes all the features of the wheels. However, tuning companies have a wide variety of shades, both neutral and bright colors. Black paint and well-pigmented colors are used to decorate collectible cars due to their high cost and certain difficulties in applying. On the contrary, the white color of the composition is relatively inexpensive and does not require special skills in painting work.
Difficulties may arise in painting narrow tires made of low-profile rubber, in such cases, partial tinting of individual areas or surface highlighting of any inscription or image is used.
When choosing solid paint, the painted surface of the tires should be left to dry for a while so that the paint lays down more evenly, and subsequently there are no scuffs, bald spots and chips. For partial painting, it is recommended to use special coloring markers, now they can be found in almost any automotive store.
Wallpaper is one of the most common facing materials due to its low cost, excellent decorative effect and durability. In addition, you can glue the walls with rolled canvases with your own hands without involving craftsmen, because there is nothing complicated in this process. But it is at this stage that “small mistakes” are quite often made, which then result in “big problems”.
After reviewing thousands of reviews, we have found some typical popular problems that arise when wallpapering:
We offer you to get acquainted with the reasons for the lack of a qualitative result of the gluing work and ways to prevent negative consequences.
The most common reason why wallpapering does not bring the desired result is simple laziness to read. Referring to "their own many years of experience", the craftsmen themselves do not bother to read the instructions attached to roll products, adhesives and consumables. Therefore, the strong recommendation is number 1 - carefully read the manufacturer's instructions and do not deviate from the proposed technology a single step.
Air bubbles are one of the most common problems when wallpapering. For high-quality removal of air from under the canvas, it is recommended to use a specialized tool.
This can be a STAYER plastic wallpaper spatula FEATHER - a simple and effective hand tool for smoothing the fabric. It provides a comfortable grip. The working edge is thinned and quite flexible. Thanks to this, you will not damage the decor on the wallpaper and will be able to remove all the air from under the strip.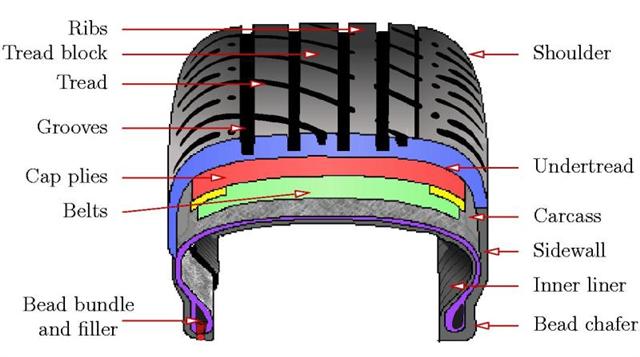
For work at height, the STAYER MASTER pressure roller is best suited. Its peculiarity lies in the high-quality material for the manufacture of the roll and the presence of a byugel for attaching the handle and working with high walls and ceilings.
The rubber used has an optimal density that will not damage the front layer of the wallpaper and will provide good pressure. You need to work with a roller, starting from the top and, gradually lowering, glue and smooth the canvas.
In the case when the wallpaper has already been applied and it is impossible to correct it, it is permissible to use a syringe with a thin needle. Type in the adhesive composition. Pierce the canvas with a needle in the place of the air bubble and squeeze out a little glue. Then gently smooth the area with a roller. All work must be carried out with extreme care so as not to damage the front decorative layer.
A banal problem inherent in paper based canvases.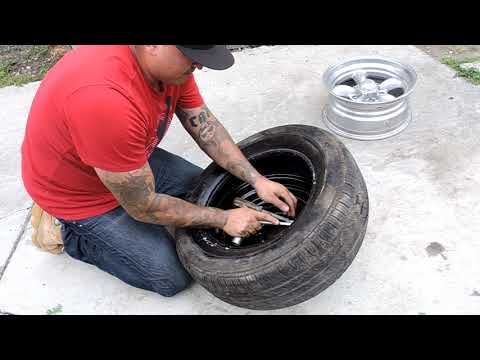 The gluing of such canvases is carried out by the method of double application of glue: on the wall and on the canvas. When smearing wallpaper, the paper is saturated with moisture and swells. In this case, the width of the web is extended by about 0.5-2 mm. After gluing to the wall, the glue dries, and the reverse process occurs with the material - shrinkage. The wallpaper pulls together and forms a sad gap.
There is only one conclusion - do not glue wallpaper on a paper basis end-to-end, if the manufacturer did not indicate this in the instructions. Rolled paper-based panels are overlapped. However, if it is made large, then after shrinkage, seams will be visible on the wall. To avoid such a result, make the overlap minimal in 1-1.5 mm.
Non-woven wallpaper in almost 100% of cases should be glued end-to-end. But at the same time, one must strictly understand that interlining itself is a material with a low level of water absorption. Unlike a paper base, interlining does not tend to absorb moisture abundantly from the adhesive solution. Therefore, this type of canvas is not anointed before gluing, and the adhesive composition is applied exclusively to the wall.
A common mistake is applying glue to wallpaper with a non-woven backing. In this case, there is a risk of soaking and stretching of the web. If you are just starting to glue non-woven fabrics, then do not treat their back side with an adhesive solution. In addition, the adhesive composition itself must be specialized for non-woven wallpaper and be of the proper quality.
Not recommended for use with vinyl, paper or general purpose blends. The closed composition can overmoisten the fleece base, which will eventually lead to contraction of the web and the formation of gaps. Ideal for non-woven wallpaper:
Suitable for all types of non-woven wallpaper. Made from modified starch with the inclusion of bactericidal additives. Characterized by high performance parameters:
QUELYD Non-woven Adhesive has a high load-bearing capacity and increased adhesion. Ideal for high-density wallpaper, all types of non-woven wallpaper and high-density vinyl sheets. It is acceptable to use in conjunction with fiberglass wallpaper and painting interlining. Has the following characteristics:
Mold is a very common and common problem in rooms with moderate humidity. Particularly susceptible to the appearance of fungi are freezing and non-insulated bases from the outside. Most often, vinyl wallpapers on a non-woven base suffer from mold. They pass vapors worse, and the resulting condensate creates all the conditions for the development of fungi.
To avoid such a disastrous result, it is recommended to treat the base with antibacterial agents before pasting the wallpaper. It is advisable to take the composition of deep penetration. In addition, use special adhesive formulations that contain antiseptics and antifungal components. An example of such a product is wallpaper glue KLEO EXTRA Non-woven.
This is an absurd mistake of many inexperienced craftsmen, which is associated with incorrect wall filling. Often, in order to save time and finances, not the entire wall is puttied, but only minor defects: cracks, potholes, bumps. This is done with mixtures, the color of which differs significantly from the tone of the base. After applying light and thin wallpaper, the puttied places begin to shine through. Hence the sad spots on the wallpaper.
To avoid such consequences, there are several ways to do it:
A fairly common problem with wallpapering is poor edge retention at the seam. So that they do not peel off after drying, it is recommended, after applying the wallpaper to the wall, re-lubricate the edges with glue using a small brush, press it with high quality. For rolling joints, it is better to use a specialized pressure roller STAYER BARREL.
Working roller made of plastic with ribs, which allows to increase the pressing force. On the handle there is a yoke for installing an extension cord and working with high walls, on ceilings.
There can be several reasons why wallpaper falls off after gluing. Each of them requires a detailed explanation.
Normally, wallpaper is applied to mineral substrates such as concrete walls or plaster. The peculiarity of these surfaces is excessive moisture absorption. The adhesive solution, which is applied to the wall, very quickly “goes” into the structure of the mineral material, and the remaining adhesive is not enough to ensure proper adhesion.
To prevent the wallpaper from falling off after drying, the walls must be primed. Priming compositions will not only increase the adhesion force of the adhesive to the panels, but also reduce and even out the moisture absorption of the surface. If the base is highly absorbent, then priming should be carried out 2-3 times.
The choice of adhesive composition must be approached with no less responsibility than the purchase of the roll material itself. Powder compositions can be designed for a certain type of wallpaper, have different bearing capacity and have additional properties. It is especially important to choose the right glue for wallpaper for painting. Such adhesive solutions must provide a high holding force. Due to this, they are suitable for high-density canvases.
Example, XCLASS for cullet:

Paintable wallpaper is considered an excellent alternative to puttying. Their use greatly simplifies the repair and allows you to get an excellent final result. However, not all wallpapers can be used for painting. For these purposes, painting interlining and fiberglass cloths are considered the highest quality.
In fact, paint interlining consists of non-woven threads intertwined with each other randomly. Unlike fiberglass, it does not differ in its original texture and is more suitable for simplifying repairs, leveling walls and hiding defects.
You can choose a brand with an original texture from glass wall papers for painting, which allows you to give the wall pronounced decorative properties. We offer several original versions of popular wallpaper for painting.
This is a low density paintable wallpaper without a vinyl front layer. They do not carry a high load on the base, which makes them a good option for applying not only to walls, but also for pasting ceilings.
They are easy to apply and hide small imperfections like cracks or chips well.
Multiple repainting with water-dispersion paints is allowed.
Coating should be applied only after the adhesive has completely dried.
Paintable wallpaper with medium density of durable fleece fibres.
Well suited for strengthening the base of walls, hardening old plaster, visual elimination of defects, cracks, chips of small irregularities.
Apply to ceilings and walls.
Several repaints of VD with paints are allowed.
The increased density of this brand of painting interlining up to 130 g/m2 makes this roll product more durable and resistant to damage.
This product can be used for finishing walls in office and administrative premises with increased operational loads.
Suitable for residential buildings.
Walls and ceilings can be pasted over.
This brand of wallpaper for painting is made from pure 100% non-woven fibers of increased density 150 g/m2.
Distinctive feature - resistance to tensile loads and strength.
Recommended for high quality wall finishing inside residential, administrative, office, retail and auxiliary premises.
GlassBand textured wallpaper for painting with a density of 125 grams is used for high-quality wall finishing.
Medium density allows them to be applied on all substrates.
Due to the pattern, wall defects, such as bumps, potholes or cracks, are well masked.
Wallpapers are easy to stick, provide reliability and the possibility of multiple repainting the walls in the desired shades with HD paints.
They are similar to the previous glass fiber brand, except for the texture pattern.
Here it is a herringbone style, which provides an even distribution of texture and excellent visual perception of the decor.
These paintable cullets are of medium density.
Good tear resistance, moisture absorption, durable and practical.
GlassBand fiberglass with a medium matting pattern have a density of 70 g/m2, due to which they do not have a high own weight and do not create a load on weak substrates.
The pattern is an interlacing of threads, due to which irregularities and defects are well hidden, and the wall acquires a pronounced decorative effect.
Best for application on prepared and leveled walls.
Can be repainted multiple times.
Excellent for finishing residential buildings.
An analogue of the previous model with the same texture pattern, and in the same design.
The main differences are in density. Glassband GlassBand matting average 115 g/m2 have an average density, which better hides defects on the surfaces of the bases.
Wallpapers are characterized by increased resistance to tearing and can be used in public areas, administrations and offices with increased operational intensity.
GlassBand glass fiber matting ceiling 110 g/m2 is the best choice for high-quality decoration of ceilings and walls.
Small weave pattern does not create a cluttered effect.
Sufficiently high density and resistance to tearing provide high-quality concealment of cracks and other flaws and guarantee durable operation.
Let's summarize.