Posted by Jefferson Bryant Know How
Flat tires tend to happen at the worst time in the worst places. If you are on the road or outside of normal business hours when your vehicle has a flat and the spare is missing or no good, you might feel stranded, but there is an option—a tire plug kit. This is something that anybody can do, you just need the right parts.
Liquid tire repair might get you down the road, but it could make your tire repair difficult and possibly damage the TPMS (Tire Pressure Monitor System) unit inside the rim itself depending on the formula. The best solution for an emergency tire repair is a tire plug. Made from cork and a gooey adhesive that keeps it place and seals the tire, a tire plug repair is an excellent way to get your car back on the road until you can get to a tire shop for a proper internal patch.
Installing a plug in your tire works for pierced tread area only. You cannot fix sidewall damage, compression breaks (from potholes, gravel roads or curbing) or any other type of catastrophic tire damage. The most common road hazards you will find are punctures from nails and screws. Fixing these issues are perfect for the good old fashioned tire plug. If you are wondering how long does it take to plug a tire, then the answer is just a few minutes. Most of the time is spent preparing to perform the plug itself. Here’s how to plug a tire with a plug kit.
You will need the following to make a tire plug repair:
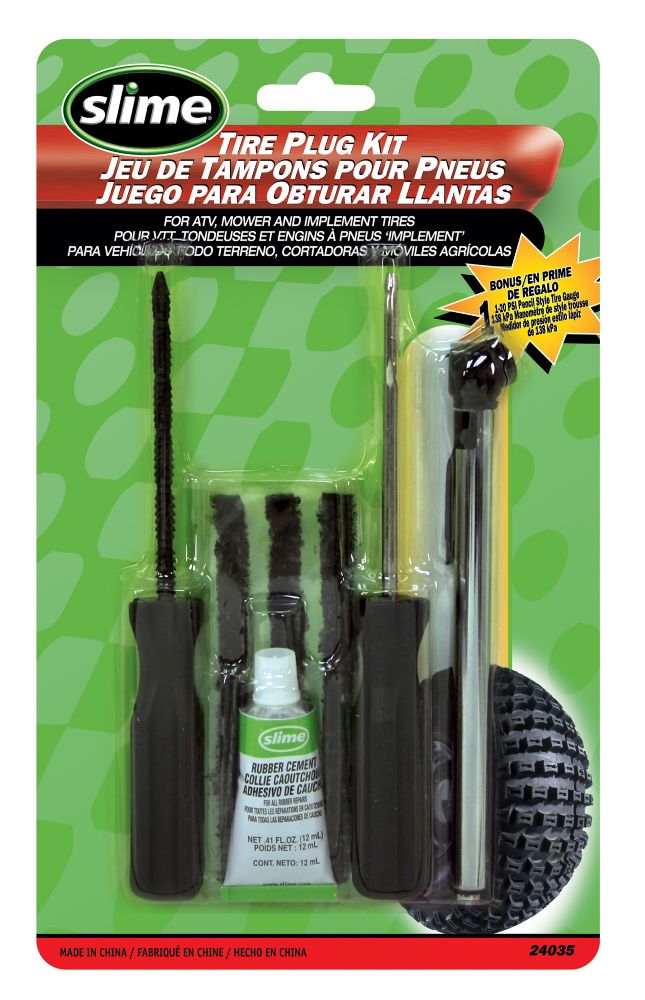
There are all kinds of tire plugging kits, but you want the most complete tire repair kit which comes with the plugs, the installation tool, and the reamer tool.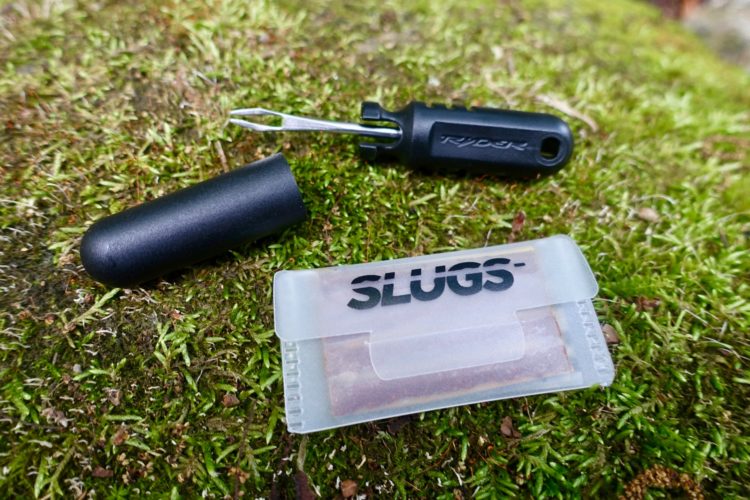 Some flat tire repair kits just come with the plugs and installer, but the reamer tool is a necessary component to a good repair. Some tire plugging kits also come with liquid cement. You can use it or not, but the cement helps make a more permanent repair.
Locate the puncture. If you don’t see or hear the puncture, spray some soapy water on the tire and look for bubbles.
This is a small staple that was dropping tire pressure by 20 psi in about 12 hours. It needs to go.Remove the offending item. This is usually easy, but sometimes the nail or screw is worn down, making it hard to get a bite on it. This is where the side-cutters come in really handy. You will want to position the tire where you get the most leverage.
Side cutters work best for removing these items, as they can grip small round objects better than regular pliers.Insert the reamer. This will take some effort, as you have to push it through the steel belts. Use a twisting motion and push it into the tire. Once the reamer is through, saw it in and out of the tire a few times to really make a nice hole for the plug. Yes, it is counter-intuitive, but it is necessary.
Push the reamer all the way and then saw it in and out a few times to make a clean hole.
Prep the plug and installer. Pull a plug off the strip and push it through the eyelet of the installer tool. The pliers will make this easier. Push a little through, grab it with the pliers and pull the plug halfway through the eyelet.
Pull a cork strip from the tire plugging kit and grab the installer tool, which looks like a large needle with a slit in the eye.Threading the sticky cork tire repair plug is not easy, but if you can get it squished into the hole, you should be able to pull it on through.
 The side cutters might help.
Insert the plug into the tire. If the kit has liquid cement, apply some to the plug before inserting it into the tire. Simply push the installer into the hole in the tire until the plug is about 3/4 of the way in. Twist the installer tool 90-degrees and pull it out. The plug will stay in the tire and the tool will come out nice and easy. You may trim away the excess plug or leave it to wear away as you drive.
Push the tire plug into the hole. Don’t twist the plug as you push it in, just go straight down and stop when there is about a 1/2-inch exposed.This is what you should see when the tire plug is installed.
Once the tire repair plug is in you can now twist the handle 90-degrees and pull the tool out.
Fill the tire to the proper PSI. If you have a portable air compressor, this will make things easy. However, if you do not, you need to get air very soon.
All done. You can trim the tire plug or leave. You will need air, so don’t go driving until you have the tire aired up.
Every automobile you own should have an emergency tire plug repair kit in the tool box, along with a portable air compressor. These emergency repairs are quite good, but for a long term repair, you should take the vehicle to a tire shop for a proper repair as soon as possible. They will know the best way to patch a tire for your type of damage.
Check out all the steering & suspension parts
Categories
Know How
Tags
emergency repair, flat tire, flat tire repair, patch flat tires, sealant, tire maintenance, tire plug kit, tire pressure, tire safety, tire wear, tires, wheels
A life-long gearhead, Jefferson Bryant spends more time in the shop than anywhere else. His career began in the car audio industry as a shop manager, eventually working his way into a position at Rockford Fosgate as a product designer. In 2003, he began writing tech articles for magazines, and has been working as an automotive journalist ever since. His work has been featured in Car Craft, Hot Rod, Rod & Custom, Truckin’, Mopar Muscle, and many more. Jefferson has also written 4 books and produced countless videos. Jefferson operates Red Dirt Rodz, his personal garage studio, where all of his magazine articles and tech videos are produced.
Tire plugging is the fastest method to repair a punctured car. Tire plugging uses a cord to prevent the airhead from escaping. If you are an experienced person, you can avoid damage to your car with simple tips.
So, how long does a tire plug last? Most manufacturers say that plug versions can last 7-10 years if installed correctly.
Yet, this number is meant as a reference because you can’t always fix it perfectly.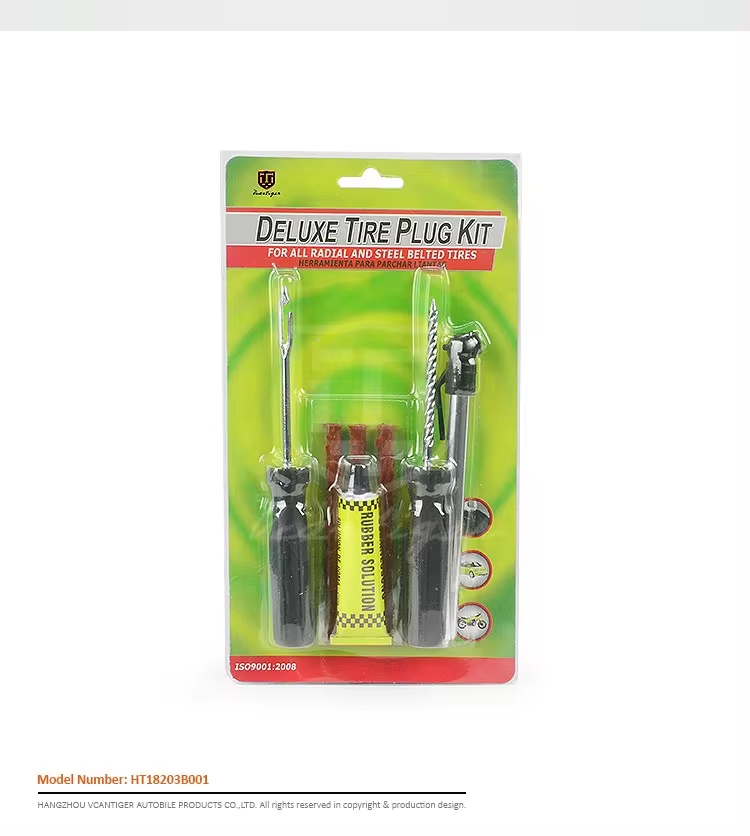 The article gathers useful knowledge and some of the most frequently asked questions about tire plugs. Let’s scroll down to read more information!
Buy Best Tire Repair Kits at Amazon.com
What Is A Tire Plug?It is the primary tool in the repair by plugging method. From the outside, it looks like a standard wire, and the structure is quite remarkable; it is a sticky object; depending on the case, the item can expand or contract to match the size of the hole.
Its working principle is also quite simple: after being inserted into the tire, the plug wire will sense the pressure, determine the shape of the wound, and then automatically expand to adapt.
In addition, the material that makes the wire must be guaranteed to meet the standards, confirming the certainty so that after the air is pumped in, there will be no problems.
There is no denying the convenience that the plug method brings, and you can even repair it without removing the tire from the rim. You can even plug in the tire in some exceptional cases, even when the wheels are connected.
When a vehicle is repaired correctly and maintained, a plug’s life span can last up to 7-10 years. It is an unbelievable number for a wheel that has been repairable.
However, manufacturers advise users not to overdo patching like this in practice. When using too many repair measures, the impact will affect the inherent functions, causing deflation and explosion.
When traveling on the road, the car’s wheels have problems, do not rush to decide when the experience is not proficient; the best way is to take the car to a repair center to have expert advice on the appropriate repair method.
Is Plugging A Tire A Good Idea?Buy Best Tire Repair Kits at Amazon.com
Plugging or patching is only a temporary measure before you have enough time to change into a new tire.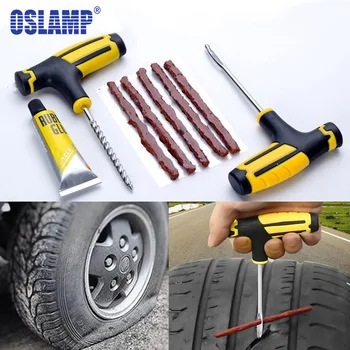 The life of a tire after plugging can last from 7-10 years or 25,000 miles; no one can be sure that there will not be any problems.
Plugging in tires will be a good idea, even effective if the wheel is in an emergency that needs to be moved.
Is It Safe To Plug In A Tire?You can safely use your plugged-in tires when traveling in a specific section of the road. Unlike a spare tire, which has a short life, it is possible to prevent air from escaping through a previous puncture completely with a plug repair method.
Via many surveys, experts think there is a better measure than a plug – radial patch. It is a suitable method available on almost all popular tires on the market.
The process takes about 30 minutes while using a wire to insert the air hole takes up a few minutes. Both must be vulcanized to reinforce and increase the rubber surface’s certainty.
Is It Ok To Drive On A Plugged Tire?As long as the wound has adequately been reinforced, you are entirely safe traveling by car with tires. The safest time to use is not too long from when you repair using the above method.
Besides, some notes have also ensured stability when operating this type.
However, do not drive when there is a wound near the wall or on the side of the wheel; if the plug diameter exceeds ¼ inch, it is best to replace the tires.
Finally, the body’s weight, do not use plug tires to carry heavy objects; this inadvertently puts pressure on the wheels when the tires are weak.
How To Plug In A Tire?Here are some ways to help you better understand the plugging process.
Step 1: Locate the leakThis step does not require you to remove the wheel altogether, but you can use a jack to support the wheel’s weight, so it is pretty easy to do the following steps.

The above article has provided you with knowledge related to plugging or manipulations to perform this process.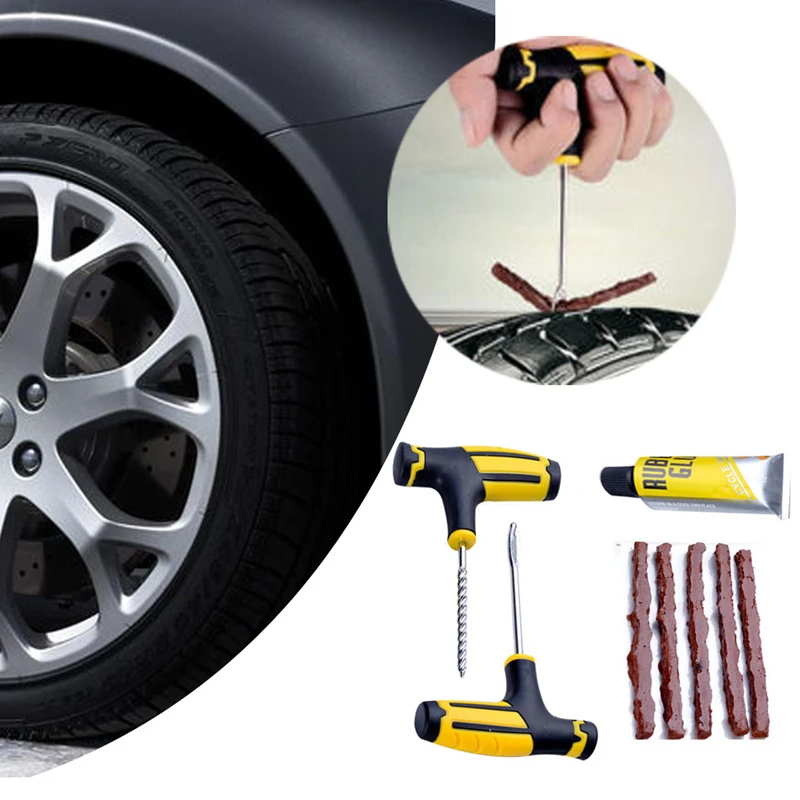 Hopefully, it will help you when you encounter a similar situation.
According to history, one day in 1888, an English veterinarian and cyclist, John Dunlop, tired of shaking through the countryside of Britain on molded rubber tires, glued a piece of water hose with a ring and pumped it up with a football pump - this is how the first pneumatic tire appeared.
History is silent when it was pierced for the first time - but most likely it happened in the same year. So the need for tire repair appeared simultaneously with their appearance.
Puncture required cut with burr Over the past 124 years, tire repair technology has been brought to almost perfection. For several decades (after tubeless tires in the vast majority have given way to tubeless ones), the repair procedure has practically not changed.
This procedure is outwardly quite simple - and car owners (as well as part of the workshop workers offering this service) have the false impression that it is not particularly important to follow the prescribed technology exactly - they say, "it will do." And many "specialists" do not really know the technology. And therefore they sincerely believe: why do we need all sorts of "extra" actions? Why take the tire off the rim when you can keep the wheel off the car at all? The client is in a hurry - so you can plug a puncture (and a cut) with a cord, as they say, “on the go”. Does not poison the air, and everyone is happy. By the way, some workshops that promise “repair of punctures and cuts” do not have anything at all, except for cords and an awl for their installation.
In fact, each stage of tire repair technology is, as they say, "written in blood" - like military regulations and safety instructions. And this is not an exaggeration: what threatens a sudden rupture of a wheel at speed is not worth saying - if people do not die, then they are very lucky . ..
..
We asked our expert, one of the heads of the Russian representative office of the German company "REMA TIP-TOP GmbH" Alexander Akhapkin, to talk about tire repair technology and those common mistakes (or even outright hack work) that car owners have to face.
- Tire repair, in general, comes down to a simple and understandable action: you need to plug the resulting "hole" in it. It sounds simple - like the instructions for skydiving: stepped out of the plane and pulled the ring. Only now, no one jumps with a homemade parachute, especially one packed according to rumors and advice from neighbors. Although the consequences of such a jump and improper tire repair are quite comparable.
So let's go in order: how to do it!
So, the first step: determine the type of damage - is it a puncture or a cut?
The difference, of course, is in size. Roughly speaking, if no more than 1-2 cord threads are damaged, then this is a puncture. Anything more is a cut.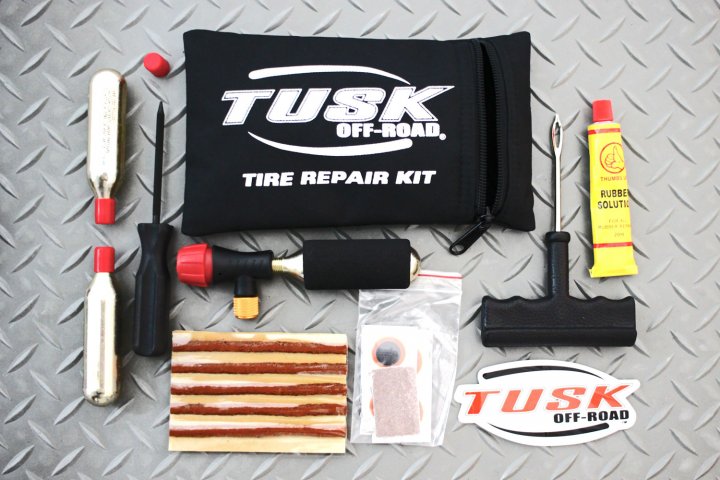
If it is a cut, it is important to determine its size. Tires have speed categories - and the higher it is, the smaller the amount of damage that can be repaired. For example, it is allowed to repair the tread of a category Q tire (not higher than 160 km/h) if the damage is not more than 20 mm. If the tire category is S (up to 180 km / h), then the size of the permissible damage is not more than 12 mm. And on a category H tire (up to 210 km / h), only a puncture with a diameter of not more than 3 mm can be repaired.
In general, damage limits depending on their location, size and speed category of the tire are given in special tables RemaTipTop, compiled according to the results of tests and tests.
When repairing with a cord, it is necessary use adhesive For example, regarding damage to the shoulder of a category Q tire (up to 160 km/h), repairs are allowed if the “injury” does not exceed a diameter of 8 mm. And damage to the sidewall can be repaired if it is no more than 35 mm long (along the side height) and up to 20 mm wide.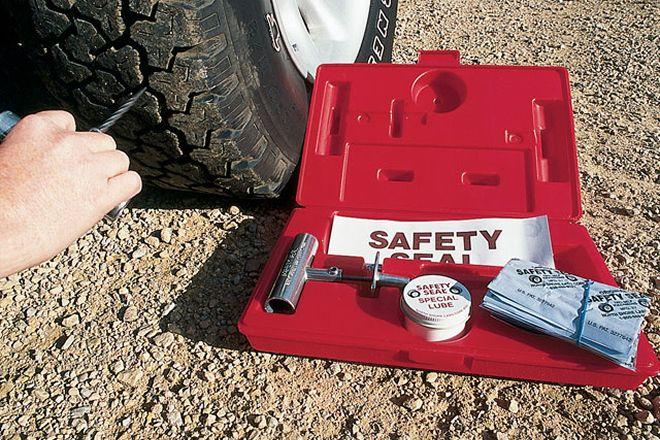
Second step: what kind of repair is needed? To get there - or capital? The fact is that the most common repair of a puncture with a cord is actually exclusively temporary - just to get to the station and overhaul the tire. And often the car owner asks to fix an expensive tire with a cord, which he puts on an expensive car - and stops there. And at the stations they “go forward” to him: they say, the consequences are at the expense of the customer ...
But even with such a repair, some "masters" manage to cheat. The cord, before placing it in the puncture, is not even smeared with glue. There is a category of cords made of "raw" rubber (they are also called "snotty"). And it is mistakenly believed that glue is not needed for them. No - it's a must!
In addition, when repairing with a cord, it is necessary to form a hole with a burr to enter the repair material. And this is very often not done (on the principle - and so it will do!). For ten kilometers, maybe it will “get off” . ..
..
Step three: puncture overhaul, after which the tire will reach its physical wear.
Fungi are installed at "vertical" puncturesHere the choice of repair tactics depends on the location and area of damage. If the puncture axis runs perpendicular to the tread surface, then it is preferable to seal it with a fungus. If the puncture axis runs at an angle of more than 12 degrees from the surface, then a plug must be used.
Tire repair fungus is preferred, but if the puncture is at an angle, the fungus head will not be able to fit snugly against the inside of the tire. And over time it can come off - which, of course, is unacceptable.
In principle, all actions of the wizard when using both fungus and cork are the same. The puncture is drilled with a burr with a diameter of 3 mm or 6 mm. The repair area from the inside of the tire is processed with a roughening tool - this is done so that the glue applied to the fungus cap or patch (if cork is used) firmly adheres to the surface of the tire.
But this is followed by an outwardly simple but obligatory operation - the dust formed after drilling and roughening is carefully removed with a brass or coconut brush, and then vacuumed. Moreover, simple “blowing” or brushing with a rag is unacceptable!
Processing with a special solution - required!Then the repair area is smeared with glue (the Germans call it "cement" - that's what it says on the containers with it. In fact, this is a high-tech adhesive system) and a fungus or cork is introduced into the hole - from the inside of the tire! Moreover, until the moment of installation, it is impossible to remove the packaging from the fungus or cork - it can be easily removed when they are introduced into the hole to be sealed. After installing the cork, its excess is cut off - and the repair area is smeared with glue. A patch is applied on top.
Next, the fungus cap or plaster is rolled on. And it remains only to cut off the excess fungal stem or cork from the outside of the tire.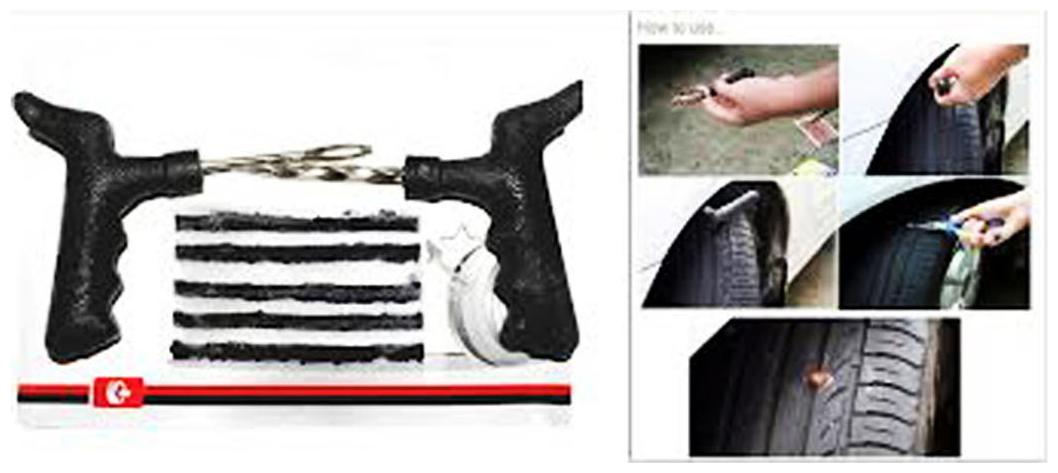
It is very important for temporary repairs with a cord and a major fungus or plug to use materials from only one company! The fact is that the adhesives themselves are spilled: some are based on hydrocarbons, and some are based on trichlorethylene. In addition, adhesives from different companies, even on the same basis, differ in composition. And therefore, in case of confusion, a reliable connection will not work - at best, it will last for some time. But - a little time ...
Fourth step: overhaul of large damage. Let me remind you that damage is considered large if it exceeds the puncture, but does not go beyond the maximum allowable. With such damage, the tire is only scrapped - it is no longer possible to achieve the necessary reliability.
The technology of such a repair is simple - but there are no "extra" steps and steps in it. Outside, the place of damage is cut "under the funnel" - part of the damaged rubber is removed, the remains of the cord. From the inside, the place under the patch sticker must be roughened.
Then the dust must be carefully removed after processing with a vacuum cleaner - and this operation must not be skipped!
Next, the “funnel” is treated with a special solution: in the case of using the “Tip Top” technology, this is “MTRThermopress”.
And filled with raw rubber of the same brand as on the tire - heated strips or a special extruder. Raw rubber is treated with the same solution. And immediately closed with insulating foil for subsequent vulcanization.
Please note - do not skip a double treatment with mortar, nor cover the vulcanization site with foil!
A plaster is applied from the inside of the tire to the damaged area. And be sure to roll with a special rolling - this stage also cannot be skipped.
Something about Band-Aids: Don't try to save money by replacing your branded Band-Aid with the first piece of rubber you find! In fact, a patch is a rather complex rubber product reinforced with synthetic or steel threads that coincide with the direction of the tire cord threads.
Patches are produced separately for bias and radial tires. For their correct orientation (it is very important!) Arrows are applied on each of them, which are directed to the sides. You cannot cut the patch "to size" - it cannot be cut at all due to the complex internal construction of the cords. Companies produce several sizes of patches - and you need to choose from them using the Type Top damage table.
There are also inexpensive vulcanizers - for example "Junior"Naturally, the use of patches and adhesives with which they are glued, produced by different companies, is unacceptable - “cement” is applied to the surface of the patch, which needs to be smeared on the surface from the inside of the tire: only in this case the connection will be reliable and durable.
Step five: vulcanization. In order to vulcanize a “sandwich” of raw rubber, a tire and a plaster, it must be heated. But the problem is that vulcanizers, whose power allows you to warm up the entire volume of the repaired area, are expensive and consume a lot of electricity. In addition, they are bulky - the area of \u200b\u200bthe heating plate must exceed the size of any patch. So not every workshop can afford such a vulcanizer.
There is another solution - the so-called "two-stage" repair method. This is when a vulcanizer that is more affordable and consumes less electricity is only the site of damage. Its size is not enough to vulcanize the connection of the patch and the tire.
But it's okay - there is an effect called "cold vulcanization". Glue BL and the coating of the plaster from Tip Top are just capable of such a "cold" vulcanization.
However, if after a one-stage - “hot” - vulcanization, the tire can be mounted on wheels and installed on a car, then after a two-stage one (when only raw rubber warms up, and the patch is glued “cold”), you will have to wait at least 24 hours before mounting. It is these days that constitute the second stage - the time is required for the cold polymerization of the connecting layer to be completed.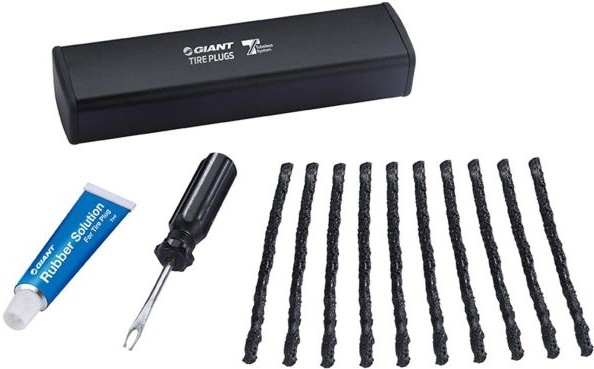
So, to summarize, the “main secret of tire repair” is not in some particularly complex nuances of the technology - it is simple. The secret is in the accuracy and meticulousness of following simple instructions. In which, I repeat, there are no “extra” stages
tire service
Author: Aleksey Kokorin
Experienced drivers are not surprised by such a trifle as a puncture, but for the first time beginners usually get confused in the sequence of actions, forget about important details and do not know what to do with a punctured wheel even in a tire shop - especially if they start offering choose from several options or intimidate with expensive repairs.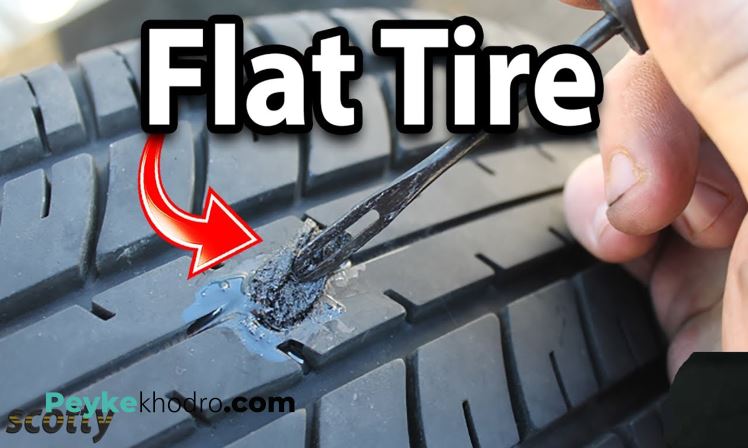 Let's set up an operation algorithm when a flat tire is detected and figure out what to do right away and what to choose later.
What to do when you find a puncture
Having found a flat tire, first of all, you need to stop in a safe place, turn on the emergency alarm, assess visibility and, if necessary, set an emergency stop sign: according to traffic rules, it is installed at least 15 meters from the car in built-up area and at least 30 meters outside the built-up area. When choosing where to stop, consider the space to the side of the vehicle to handle a flat tire. You should not stop right on the road and in places where stopping and parking are prohibited: even if a punctured wheel belongs to the conditions of a forced stop, it is quite possible to drive several tens of meters on it to choose a safe and convenient parking place. At night or in conditions of limited visibility (for example, in fog or rain), it is imperative to wear a vest with retroreflective elements - this is required by clause 2. 3.4 of the SDA and common sense.
Now you can start working on the wheel. We will sequentially consider several options for action, and then move on to ways to repair a damaged tire.
The most obvious solution to a flat tire is to replace it. If you have a spare tire that you are sure is in good condition, the best option would be to install it and visit a tire shop to repair a punctured tire - such repairs will be more reliable and of high quality than doing it yourself.
If you don't have a suitable spare tire, but you do have a pump or compressor, you can assess the damage to the tire and try pumping it up again to get to a tire shop. It is better to start searching for an air leak with a valve (aka “nipple” or “nipple”): often a faulty spool becomes the cause of a flat tire. It is easy to check it: unscrew the protective cap (if there is one), pour water on it (or slobber it, as in childhood): air bubbles will leak. In this case, you can try to replace the spool valve by unscrewing it and screwing in a new one, but if there is no new valve, as well as a store nearby, you can try just unscrewing and screwing it back in. Regardless of whether it helped or not, you need to visit a tire shop to replace the entire spool or valve.
If the valve is tight and the tire is flat, it is most likely a puncture. The easiest way to find a puncture that is free of foreign objects is to pour water on the tire while looking at the surface: the damage will reveal itself as air bubbles. However, often the cause of the puncture can be found along with it: a self-tapping screw, nail or other arbitrary object sticking out of the wheel will clearly indicate the place of depressurization. In this case, you do not need to immediately remove the foreign object from the tire: it partially seals the hole, and if the pressure loss is slow, you can try to pump up the wheel and drive to the tire shop.
The same goes for wheels that are leaking from the rim or from a faulty valve. Usually, in this case, the air is bled slowly, and you can pump up the wheel and have time to get to the place of repair. By the way, rim leakage can occur due to disk deformation upon impact - for example, when hitting a pit with sharp edges. Such situations are fraught with damage to both the disk and the sidewall of the tire, in which case the disk will need to be corrected, and the tire repaired or even replaced. To avoid rim leaks, you need to inspect the rims every time you change tires. Loss of tightness occurs either due to corrosion or disk deformation, and not only steel, but also light alloy disks can corrode. So if you see paint swelling or rust on the rim, the tires need to be put on rim sealant: when changing tires, this will be cheaper than the subsequent removal and re-tire to fix a leak on the rim.
If you find a puncture, but there are no foreign objects in it, and you do not have a spare wheel and tire repair kits, there is another folk method of temporary "repair". You can screw a self-tapping screw into the found hole - if, of course, you have one. In extreme cases, you can look for a self-tapping screw in the cabin by unscrewing it from some interior detail. This method cannot be called reliable: it is unlikely to ensure complete tightness of the wheel, but at least it can help you get to the nearest tire shop.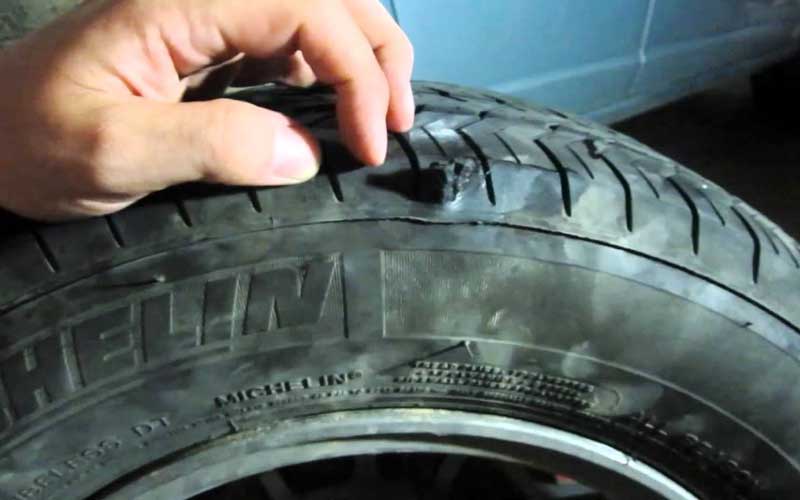
And a couple more useful remarks. If the wheel is completely flat, then it is easier to inflate it without a spool: the latter must be unscrewed, then the tire must be inflated and quickly screwed back in. The fact is that the spool itself, when inflated, resists the compressor, and in the event of a loose fit of a flat tire to the disk, the power of a simple magazine compressor may not be enough, and the absence of a spool helps to increase air flow and facilitate the operation of the compressor. If this does not help, you can jack up the car by hanging a flat tire: this will improve the fit of the tire to the disk, and the chances of inflating the tire will increase.
On-Site Repair Methods
Now let's look at options for repairing a tire yourself using special materials that you should take with you or, if a puncture caught you in the city, buy at the nearest car shop.
1. The most common, cheapest and easiest way to repair yourself is to install a raw rubber band. The harnesses are sold complete with an abrasive awl to expand the hole in the tire and improve the contact of the repair harness with its edges, as well as a needle for installing the harness and an adhesive to fix it and at the same time seal the puncture. When choosing a repair kit in a store, you should pay attention to the following nuances:
Install the harness in the following order. First, the found hole is expanded with an abrasive awl - you need to insert and remove it several times into the puncture site. Then the tourniquet is inserted into the eye of the needle, and glue is applied to it. After that, the needle with the tourniquet must be inserted into the hole in the tire and pulled out sharply - so that the tourniquet remains in the hole, and the needle comes out without it.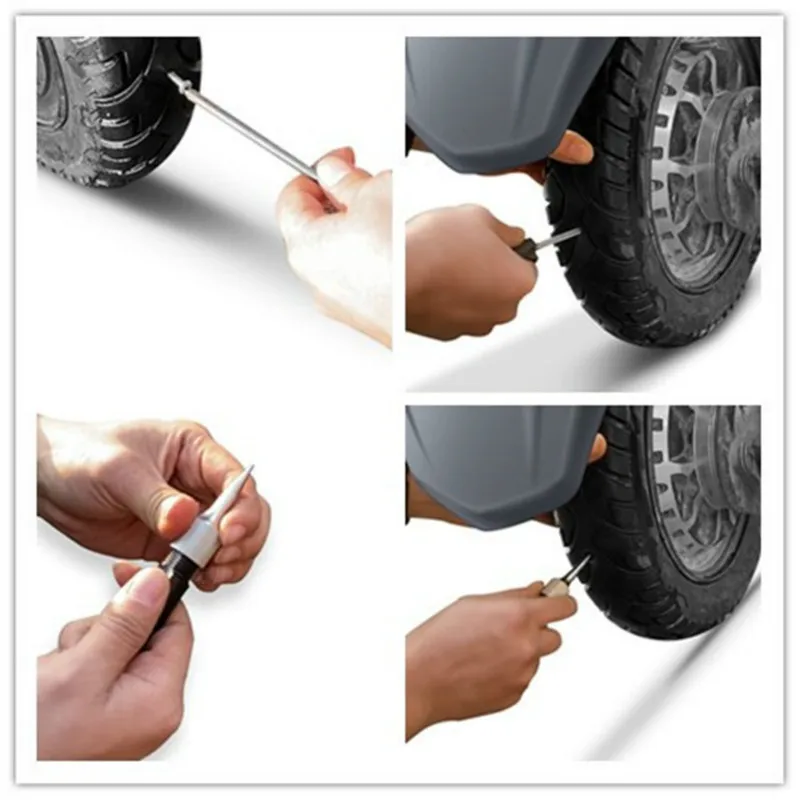 If everything worked out, it remains only to cut the end of the harness flush with the surface of the tire and pump up the wheel.
The advantages of repairing with a harness are quite decent reliability, simplicity and low cost. On a well-repaired tire, you can drive for a long time, and if the repair site starts to poison, you can either replace the harness or have the tire repaired in a quality service. Among the minuses is the possibility of damaging the cord during installation, as well as lower reliability compared to “full-fledged” repair methods in a tire shop. Strictly speaking, a tourniquet is still a temporary repair, so if it is possible to pump up a wheel and get to a tire fitting, then it is better not to enlarge the hole in the tire and get to the experts.
2. The second repair option is aerosol liquid sealants sold in cans. To repair a punctured tire with sealant, you need to remove the foreign object from the puncture site, then pour the sealant into the wheel through the valve, twist it to distribute the composition inside the tire, pump up the wheel and drive several kilometers at low speed for the final uniform distribution of the sealant.
Among the advantages of this repair is the simplicity and less labor intensity compared to installing the harness. However, there are also disadvantages: the larger the hole, the higher the chance that the sealant will not be able to eliminate it, and such a repair can affect the wheel balance. Compared to a tourniquet, it can be considered even less reliable and preferable, but simpler.
Repair options at a tire shop
If you have fitted a spare tire and brought the wheel to a tire shop, you may also be offered several repair options. Consider the most popular with an indication of the advantages and disadvantages.
1. The first repair method is the same harness installation as described above. As we remember, the tourniquet refers to a temporary repair, so among tire specialists this method is considered bad form, but many workshops do not exclude it from the list of services. All the advantages and disadvantages are the same here: such a repair will be the fastest, simplest and cheapest, but less reliable than other methods. It is worth choosing it in cases where the price and / or speed of the procedure is more important to you than anything else. If quality is a priority, then it is better to fork out for the options listed below.
2. The second option for repairing a puncture is to install a patch on the inside of the tire, the so-called cold vulcanization. In this case, the tire is removed from the disk, the surface around the puncture is treated with an abrasive, and the damage is sealed with a special patch. This is a more preferred repair method than a tourniquet: it is more reliable and durable, especially in the case of side punctures, when not the thick tread part of the tire is damaged, but the thinner sidewall. Among the minuses, only a higher cost can be noted: in addition to the actual tire repair, you will have to pay for the removal and installation of the wheel (or do it yourself), tire fitting and balancing.
3. The third option is a "complex" of the first and second: installation of the so-called repair "fungus".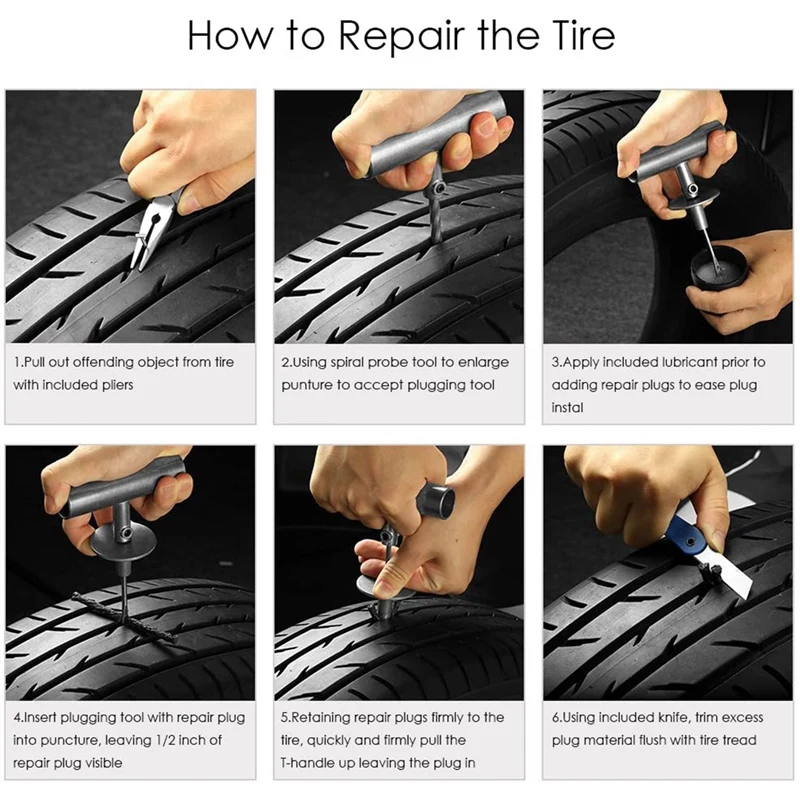 The “hat” of the fungus is a patch, and the “leg” is threaded from the inside of the tire to the outside. After gluing the patch, the excess part of the leg is cut off, as in the case of the tourniquet. Thus, not only the inner surface of the tire is closed, but also the hole itself. The advantages and disadvantages of this repair method are generally the same as those of a patch.
4. An extreme, “emergency” measure when repairing a punctured wheel is to install a camera in it. Typically, this method is used for tires that are no longer worth repairing, or “for reliability” after repairing a complex puncture. It should be understood that almost all modern tires are tubeless, that is, they are not designed to install a camera, so it’s not worth driving a wheel repaired in this way for a long time. Installing a tube is a temporary solution for riding until a new tire is purchased, and sometimes such wheels are left as spares. So this repair method can be kept in mind as a backup.
Finally
We have deliberately left out of this text such methods as combined repair of tires with a tourniquet and a patch and hot vulcanization. The first is used quite rarely and for specific damage, and it is enough just to know about its existence. Well, the second is used to repair serious side cuts, and it is not only rare, but also very expensive. The cut site in this case is prepared, filled with raw rubber and processed with a hot press for vulcanization. Equipment for this procedure is not available in every tire shop, and the cost of repair can be about half the cost of a new tire.
interesting Popular questions
Test drives / Test drive Haval Dargo vs Mitsubishi Outlander: the dog is barking, the stranger is coming In the Haval dealership in the south of Moscow, life is in full swing: buyers look at cars, communicate with managers and sign some papers. While I was waiting for the test Dargo, the same cross... 1479eight 7 201 09/13/2022
Test drives / Test drive Motor from Mercedes, emblem from Renault, assembly from Dacia: test drive of the European Logan 1.0 It would seem that what's new can be told about the second generation Renault Logan, known to every Russian taxi driver, as they say, up and down? However, this car has... 1259four ten 41 08/13/2022
Test drives / Test drive Geely Coolray vs Haval Jolion: Free Cheese? If! Do you want to buy a car today with a full warranty, on credit at an adequate rate, without wild dealer markups? Now this is still a task, because a full-fledged chain of "representation - s.