Written By: Riley (and 5 other contributors)
Difficulty
Moderate
Steps
14
Time Required
30 minutes
Sections
1
Flags
1
If it’s time to change the rear tube and tire of your dirt bike, follow this guide. This includes pulling the tire off the bike, tearing it down, and re-mounting it.
12mm Wrench
Available for sale on Amazon
Buy
Valve Stem Core Tool
Available for sale on Amazon
Buy
No parts specified.
First pull the cotter key out of the axle that holds the tire on. Then pull the nut off of the axle.
Edit
Edit
The bolt is off the axle already so use a rubber mallet to beat the axle out of the wheel. After the axle is far enough through, you can pull it out the rest of the way with your hands.
Edit
The wheel is now off. Now you should take the valve core out of the tire with a valve core tool, and release all the air. Use a size 12mm wrench and take the nuts off the valve stem, and the bead lock. Which is the other thing in the rim with a nut on it besides the valve stem.
Edit
Do not take the nut all the way off of the bead lock, Just make sure it as loose as possible.
Edit
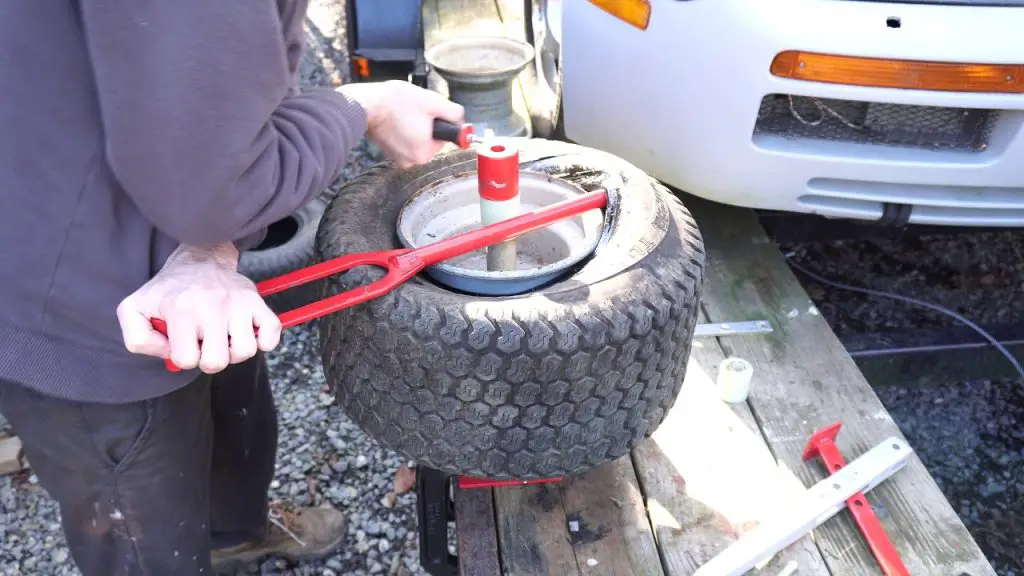
After all the air is gone you need to break the bead loose on both sides. Just push down so the tire goes away from the rim.Then spray soapy water in between the rim and tire all the way around on both side. Then take the tire iron and wedge it between the rim and tire. Once wedged use leverage from the rim to pull the tire up and away.
Edit
Then take the dirt bike tire iron and wedge it between the rim and tire. Once wedged use leverage from the rim to pull the tire up and away.
Edit
Once you have it pulled go about 5 inches down the rim and use the same leverage idea. Once you have it pulled away take the first spoon out and move 5 inches again and wedge it again. Repeat this step until one side of the tire is off the rim.
Edit
If you are actually changing the whole tire repeat this to pull the rest off the tire off. If not pull the tube out of the slit that you have made by pulling the half of tire off.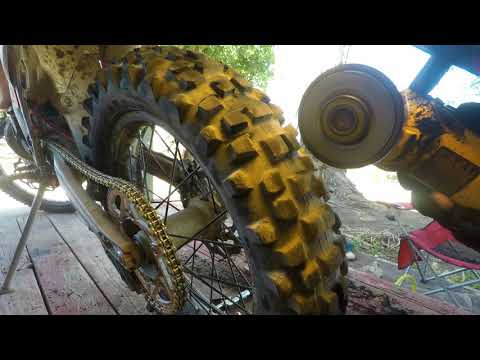
Edit
Put the new tube in the tire. put the valve stem through the hole in the rim then put one of the nuts on it.( not the bead lock.) Add a little bit of air to the tube.(the less you use the better off you are.)
Edit
Now do the same method of leverage, but put the tire back on.( Be extremely careful to not pinch the tube between the tire spoon and the rim.)
Edit
Once the tire is back on the rim add more air this should push the bead lock out. Now you can put the nut back on the bead lock as well.(do not tighten yet.) make sure the tire is at the correct pressure and everything looks good, now you can tighten down the bead lock, and the valve stem. After the valve stem is tight put the second nut on.
Edit
Now the tire is ready to go back on. When putting the tire back on make sure the spacers are in the correct areas. make sure the chain is on the sprocket. Lastly, make sure the break disc is inside the break pads.
Edit
Remember when I told you to mark where your tightening blocks where? This is where that comes into play. Align the blocks to their original spot, then tighten the nut on the axle. Now you are done, and your bike is ready to ride.
Edit
Almost done!
To reassemble your device, follow these instructions in reverse order.
Conclusion
To reassemble your device, follow these instructions in reverse order.
Cancel: I did not complete this guide.
6 other people completed this guide.
with 5 other contributors
Badges: 5
+2 more badges
View Statistics:
Past 24 Hours: 14
Past 7 Days: 87
Past 30 Days: 362
All Time: 16,147
During my last tire change, I decided to make a guide on how to change a dirt bike tire at home.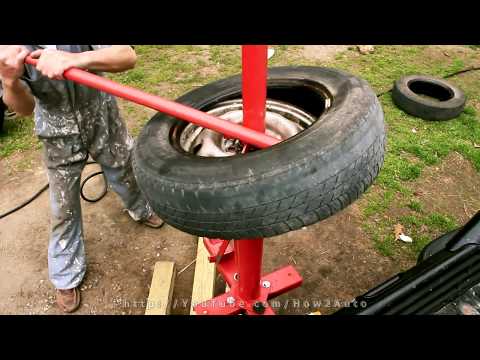 Changing a dirt bike tire can be a pain and is avoided by most riders, but when using the right tools, it can be done with ease and will be no harder than an oil change. For as long as I’ve owned dirt bikes, I’ve always changed my tires. I was too stubborn to pay a shop and I always wanted to work on my bike myself. I remember buying my first set of tire irons and promptly destroying the inner tubes on the first few tire changes and cursing myself as it would have been cheaper if I did bring it to a shop.
Now to change a dirt bike tire takes about 20 minutes and don’t think twice about it. It’s kind of nice to be able to mount your tires as soon as they get to your door or to swap out used tires for different riding or to flip tires around to use the sharp edge on both sides of the knobs. The following is my step by step guide for changing a dirt bike tire, from unmounting to re-installing on my 2014 KTM 450 SXF swapping out a Dunlop Geomax MX32.
Over the years, I’ve accumulated all the tools I need to change a dirt bike tire. I started off with the 2 curved tire irons and then onto the 3 spoon type after learning a couple of tricks to make changing easier. After struggling and thinking “There’s got to be an easier way to do this!,” I found out about using a Bead Buddy, tire stem puller, tire changing lube, and lastly, a dedicated tire stand. Here is a post where I talk about all the tools I use.
The tire I’m swapping out and putting on are both Dunlop Geomax MX32 front tires. I had and extra set laying around that only had a couple of races on them. I’m also reusing my Bridgestone Ultra Heavy Duty Motorcycle Tube.
Some other items are Rim Strip Tape, Baby powder, and tire mounting lube. I ended up using some tire black spray for mounting lube in a pinch, but you can get mounting lube specific for using on tires and also window cleaner can also be used, although it evaporates quick and can dry up on you sometimes.
Rim Tape
The first step to change a dirt bike tire is to unmount it. To unmount the front wheel, put your bike on a stand or a motorcycle lift to lift the front wheel off the ground. Remove the axle nut, and then loosen the 4 axle pinch bolts. To remove the axle, you can use a T-wrench or a ratchet extension to push the axle through the fork lugs.
After setting up the wheel on a tire stand, you will need to deflate the tire and disconnect the inner tube and rim lock. Use the valve core tool to pull out the valve core and keep it out for the rest of the unmounting. Taking out the core lets the inner tube compress completely. If you just deflate the tire by pressing on the valve, the inner tube will still contain some air and will make unmounting the tire harder. After taking out the core, remove the valve stem nut. For the rim lock, you just need to back the nut off but you don’t need to remove it. After loosening it, press down on the rim lock to make sure it moves freely.
Now you are prepared to unmount the tire. The first step is to pop the tire off its bead. What you are trying to do is to drop the bead of the tire into the center of the rim. The rim is U shaped and by dropping the bead into the center, it lets the tire move so you will have a little more room to pull the bead over to the outside of the wheel. Start by loosening the tire near the rim lock. Hold down the rim lock so the tire can drop behind it. You can spray the tire with some tire lube if it’s sticking.
This is the toughest part to change a dirt bike tire. Use plenty of tire lube and take your time and work on small sections at a time. Spray the tire and rim with plenty of tire lube and start at the section of the tire at the rim lock. Insert the tire irons about 4 inches apart from each other and work a small section at a time. Getting the first section of the tire over is the hardest part, but once you get it going, the rest of the tire will slide right over.
With one side off, flip the tire over and repeat. You want to pull both sides of the tire to the outside of the wheel. When both sides of the tire on the outside of the wheel, push the wheel down into the tire and pull the wheel through the middle of the tire.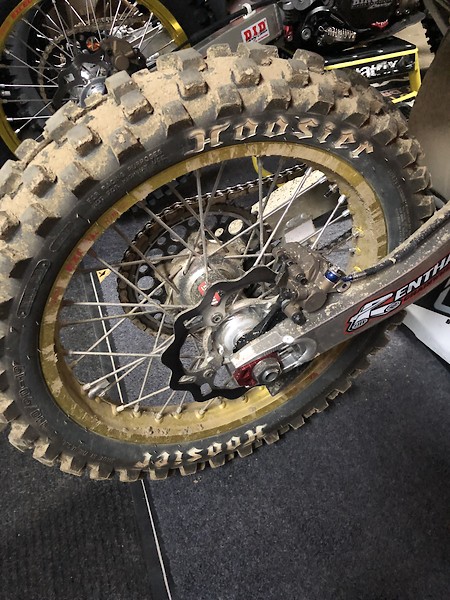
Check to make sure the rim tape is in good shape and hasn’t broken in any spots, dirt, and dust can get in the tire and acts like sandpaper on the inner tube when riding. With standard tubes, it’s a good idea to replace the inner tube at each tire change. With extra heavy duty inner tubes, you can get a couple of tire changes out of them before they wear thin. I run Bridgestone heavy duty inner tubes and will usually go 3-4 tire changes before replacing them. Inner tubes wear just like tires and start to ball up and thin out after so many hours.
Clean off the inner tube and make sure the tire is free from sand or other debris.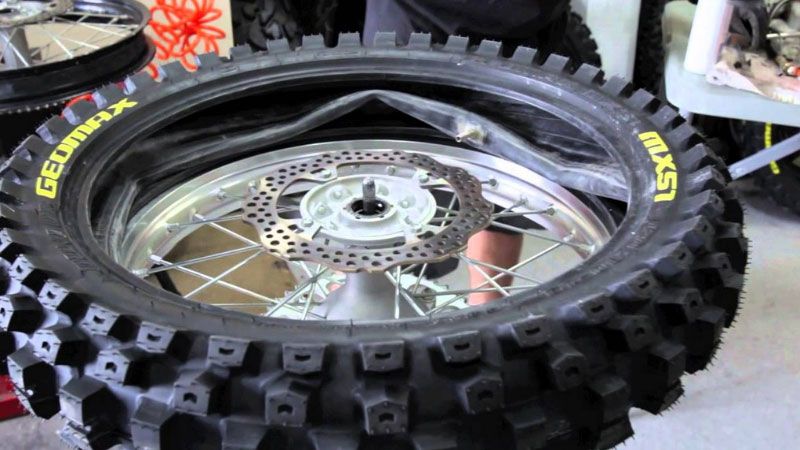 If you are mounting a new tire or re-using an old one, one tip is put a little bit of baby powder into the tire before adding the inner tube. The baby powder will act as a dry lubricant between the tire and inner tube and will help with rubbing and friction wearing the inner tube thin. Add a small amount the tire and rotate the tire around to spread it out. Also, you will notice on tires there will be a mark, a yellow circle in this case. This marks the light side of the tire. You should put this marker near the valve stem and rim lock.
Depending on the size of your wheel, you might need to use a valve stem puller to get the valve stem through the hole in the rim. The tool is fairly cheap and will save you some scraped up hands. Once the valve stem is pulled through, tighten the valve stem nut to hold the tube in place. After that, re-insert the valve stem core.
Mounting the tire is a little different then unmounting when you change a dirt bike tire. You can get half the tire on using the 2 long curved tire irons. You’re going to want to set the tire bead between the rim lock and the rim. This allows the tire bead to sit in the lower drop center which helps the tire to be pulled over. You can work most of the tire onto the wheel using a tire stand, but the last section I find easier with the tire on the ground and using your knee to hold the tire in place.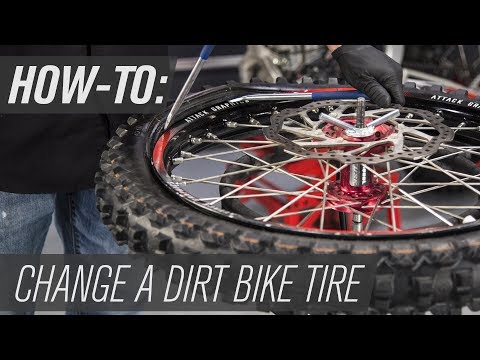 Reach through with the curved end of the tire iron and lift the last section over the rim.
This is where having a bead buddy and a good set of tire irons comes in handy. Starting at the rim lock, push the tire down into the drop center of the wheel. Make sure the rim lock is out of the way and hold the tire down with the bead buddy. Work the tire around with the tire irons taking small sections at a time near the end. The last section is always the toughest so use plenty of lube and work it in small sections.
Final steps are to tighten down the valve stem inflate the inner tube to set the bead.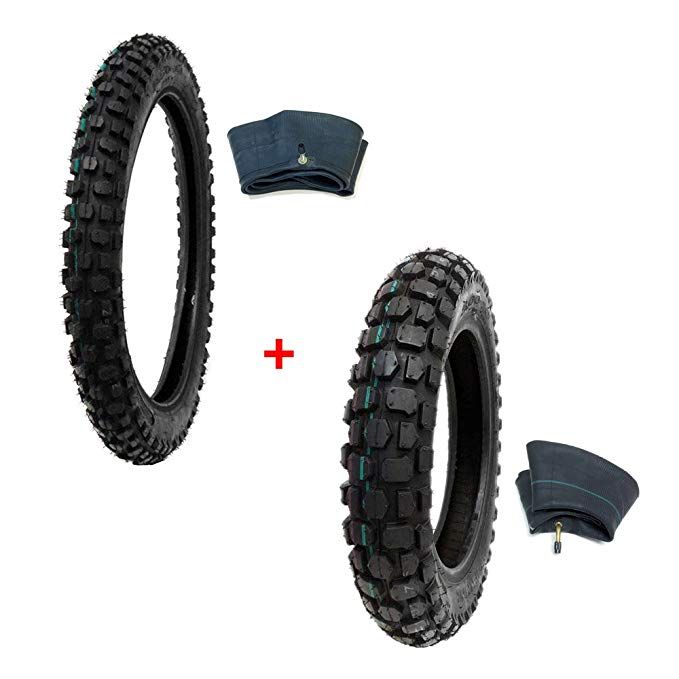 You will have to over-inflate the tire to get the bead to “pop” on. You can run a finger around the rim edge to feel that the tire is fully seated. After the bead sets, deflate the tire to 12-15 psi and tighten the rim lock.
The last step to change a dirt bike tire is mounting the wheel. Pretty straight forward but with one tip. Use a flat blade screwdriver to spread the brake pads. This will help to keep the fork from spinning while you try to get the brake disk lined up.
Many cyclists are used to the telltale hissing sound coming from tires. At any moment, your high-tech mountain bike can be put out of action by a simple thorn or a small piece of pebble.
Since the advent of pneumatic tires, this problem has haunted cyclists, tiring with the frequency of punctures and the amount of work needed to fix them. And only recently, bicycle tire and rim manufacturers have decided to create a universal tubeless system (UST).
This system is a sealed rim in which the holes for the spokes and the nipple are completely airtight. Also, the non-porous rim sidewalls have improved grip on tire walls that are thicker than conventional tires. During tire inflation, the air presses the tire bead (lower edge of the sidewall) into the corresponding groove in the rim flange, thereby sealing the contact between the tire and the rim.
Theoretically, the advantages of a tubeless tire include low weight (due to the lack of a tube, although tubeless tires are heavier than conventional tires), less pressure (providing better grip) and the absence of pinch punctures (also known as "snake bites").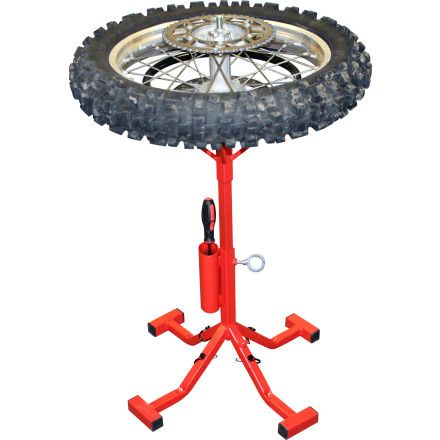 If you add some sealant to the system, then penetrating punctures will also be a thing of the past.
But what about a cyclist with conventional rims without sealing? Just buy a conversion kit, tubeless or Tubeless Ready tires and he can send his bike tubes to the dustbin of history.
Of course, you can only add sealant to a conventional chamber. In this case, you won't gain any weight or grip advantage, just add a little weight to the wheels, but it will help you avoid punctures and not spend money on new tubeless tires and a tubeless conversion kit. Read our guide to using Gremetic in chambers.
Remove the wheels, tires and tubes from the bike. If the wheels are old, greasy and dirty, clean them with hot soapy water or alcohol. The rubber tape will need to be taped to the spoke bed of the rim, so the rim needs to be clean and free of dirt so that the tape is snug against it.
Take the rim tape and unfold it so that the nipple is on the inside of the tape. Run your fingers around its circumference and check it for cuts, nicks, bulges, and proper molding that could cause air to leak. Even if the tire drops a few psi in a day, it can be very annoying.
Position the part of the rim tape with the nipple in the spoke bed, gently push the end of the nipple through the hole provided for it and pull it out the other side. The piece of tape near the nipple is slightly thicker and therefore difficult to install correctly, but it is important to install it correctly now so that you do not have to look for the source of leaks later.
Next, you need to install the remaining section of the rim tape in the spoke bed. This is easier said than done as the tape is tight against the rim. The easiest way to install it is with a screwdriver with a long thin handle. Position the screwdriver perpendicular to the rim between the rim and the rim tape. Slowly moving the screwdriver around the circumference of the rim, set the rubber band evenly in the spoke bed.
First of all, make sure you have a working nipple that does not let air through. Most nipples have a special threaded lock washer that screws onto the nipple body. The nipple usually comes with a rubber o-ring that needs to be installed between the lock washer and the rim. By flattening the O-ring, you will create an additional seal on the outside of the hole.
Now that the rubber rim is in place and lying in the center of the rim, you need to check the uniformity of its tension throughout the entire length of the rim. Air can leak between the rim and the rim tape if there are loose or tight areas on the tape. Again go around the rim with a screwdriver and equalize the tension of the tape. This will take a few minutes.
Tires from different manufacturers or even different models from the same manufacturer differ in installation complexity, quality and other characteristics. If the tires were not installed on the wheel, then first install them as usual with tubes, inflate to the maximum recommended pressure and leave them overnight. After that, they will be much easier to install and pump.
Place the wheel on your feet so that the nipple is at the highest point of the wheel (at 12 o'clock). First, place the tire beads near the nipple, then walk with both hands around the circumference of the tire (in different directions), loosening the bead over the rim wall along the way. Once you get to the very bottom of the wheel, leave an 8-inch section.
Some sealants can be applied without removing the nipple core, the spring-loaded piece that screws into the nipple body and allows air to enter the tire without escaping, but most cannot. Sludge Sealant can be injected without removing the core of the nipple. Removable core nipples are included in many conversion kits, but not all. The core must be unscrewed and removed. Be careful not to lose it as it can easily roll over furniture on the floor. If you have a nipple without a core to be removed, then immediately go to step 12.
Now that you have completely seated the tire on the rim and removed the core of the nipple, you can inject the required amount of sealant into the tire using the narrow line nozzle. Shake the sealant bottle well before doing this.
After the sealant has been poured through the nipple, screw the nipple core back. Before screwing in the core, it is recommended to lubricate its threads with petroleum jelly, which will reduce the likelihood of jamming of the core or difficulty in turning it.
If you don't want to or can't apply sealant through the nipple, leave a small section of the tire bead exposed on the rim and pour sealant through it. Use a bottle with a nozzle to infuse the sealant, as a natural rubber tire is difficult to keep its shape. Suspend the wheel carefully so as not to spill the sealant from the tire.
To install the last section of the tire, carefully rotate the wheel so that the uninstalled section is on top. Now you can let the sealant spread all over the tire. Do not worry if a little sealant still leaks.
Start inflating the tires with the car pump until the tire beads press against the rim. When the pressure is too high (about 60 - 80 psi for UST tires and Tubeless Ready tires), the tire beads should click into place with a characteristic "clicking" sound. Be careful when handling this high pressure. Your tires are now tubeless.
Air can escape between the rim and tire. Raise the wheel, take it by the tire like you are holding a tray. Shake the wheel well so that the sealant spreads throughout the tire, reacts with the air and creates a thick sealing layer. Even if you skip this step, over time, the sealant will still spread on its own. Leave the wheel for 15 minutes, then repeat this step again. Air leakage should stop.
Hold the wheel up to your ears and listen carefully for air leaks. If a leak is found, then it is most likely a microscopic hole. Repeat step 15 and/or add more sealant.
The carcass of the UST tire is impregnated with special rubber to retain air. Tubeless Ready tires have thinner walls, which means they are lighter and less airtight.) They have a dockable bead needed to install them as tubeless. At the same time, Tubeless Ready tires can only be used as tubeless tires in conjunction with liquid sealant, but we still recommend buying UST tires. Theoretically, with the help of sealant, you can use both tubeless and conventional tires, but you can only install them correctly by trial and error.
The current tire size designation standard is ETRTO (European Tire and Rim Technical Organization). So marking 37–622 indicates the width of the tire along the cord 37 mm with an inner diameter of the tire 622 mm. The designation is simple and logical, and correlates well with the designations on the rims. However, it does not show the maximum tire width. Until now, the so-called. "imperial standards". The designation 28x1" means the approximate outer diameter of the tire and its approximate maximum width.
The word “approximately” gets anything in a very strange way, for example, diameters of 559 mm (MTB), 571 mm (Triathlon) and 590 mm (Touring) are designated as 26″. And tires with a diameter of 622 mm and 635 mm are designated as 28″, and with a diameter of 630 mm as 27″! For bike computers that allow you to set the tire diameter in mm - set the value obtained by calculating from the tire circumference. Because neither ETRTO nor imperial standards give you the value you need.
The fit (specified in the ETRTO) tire size must be slightly larger than the fit width of the rim. So tires 23 and 25 mm wide can be put on rims from 13 to 17 mm (ETRTO). It is possible to install a wider tire on a narrow rim (and this practice is now ubiquitous), but then there is a risk of breaking the rim from high shock loads at high pressure in the tire. This is partly why low pressures are always recommended for wide tires.
The tire consists of a braided carcass with a bead cord wrapped around the edges on both sides. The frame is impregnated with a rubber compound, and then the upper part of the tire itself (tread) is molded under pressure from above.
The frame is usually made of nylon fiber. The thickness of the lines and the density of the weave of the fiber determine the flexibility, weight and puncture resistance of the tire. Measured in EPI or TPI (Ends Per Inch, Threads Per Inch). Thinner threads are easier to bend, but also easier to break. And a denser pattern is more puncture-resistant, but also heavier. The optimal figure is a density of 55-60 EPI.
The rubber compound usually consists of the following components: synthetic or natural rubber (40-60% of the total weight), filler (carbon black, silicon, 15-30%), softeners (glycerine oils), anti-aging agents (aromatic amines), vulcanizing components (sulphur), vulcanization accelerators (zinc oxide), pigments and other additives.
A lot of energy is spent on the deformation of the rubber at the point of contact between the tire and the road. It is impossible to create such a composition that it holds the road perfectly and rolls well at the same time. Because the tenacious compound must strongly deform and thus fit the road surface, and to reduce energy loss, a rigid compound is needed, in which deformations would be minimal. The way out is in the two-component structure of the tire, which is difficult to manufacture, when only the outer layer of a separate part of the tread is made from a thin coating of soft rubber. Or by adding specific fillers to the rubber, such as silicon.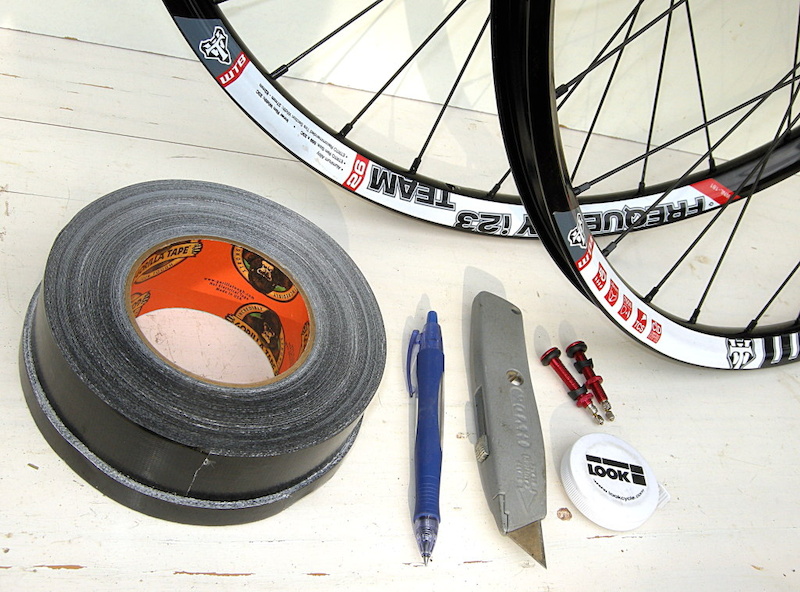 But this dramatically increases the weight of the tires.
Despite the use of new materials, progress has not gone further than the idea of keeping the outside of the tire as far away from the tube as possible so that various glasses and nails simply do not reach the tube, getting stuck in the material layer. Any, even the most modern protection is built on this principle.
Do not rely on carbon or aramid (Kevlavr) fiber bands. They are easily pierced through thin weaving with thin sharp objects, but are very difficult to cut. The principle is based on this - with a thin sewing needle you will pierce the tape without effort, and with a thick awl it is much more difficult (because it is more difficult for a thick object to push the fibers in weaving to form a hole, and it is almost impossible to break the fibers). In total, a tire with such a tape can successfully withstand thick blunt nails, but it is elementary to prick, say, from a pushpin or hard needles of subtropical plants.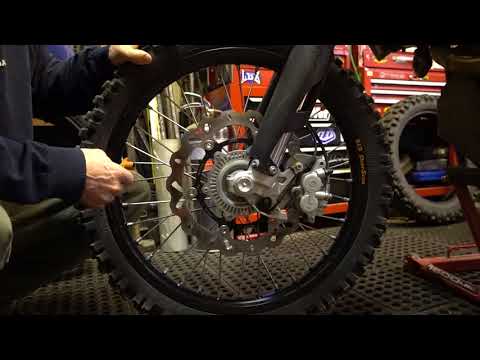
provides a rigid coupling with the rim with its cord when the tire is inflated. The same can be said about the rims. At extremely high pressure (10–20 atm), the weaving of the tire (usually along the bead) is more likely to break than the cord will jump out of the rim.
Folding rubber is characterized by replacing the bead cord made of steel wire with a flexible cord made of Kevlar fiber. This usually reduces tire weight by 50–90 gr and provides additional convenience during its beading and transportation (the tire is completely flexible).
Tubes are still used on highways. They are actually a chamber on which an additional layer with a tread is vulcanized on top. The tube is glued to the rim. This design gives the least weight and greater safety, because. even with the most catastrophic puncture with a tube rupture, it remains on the rim and allows you to safely stop the bike. However, the puncture resistance of highway tubes is minimal due to the lighter construction.
Tubeless rubber is a reinforced tire that is actually glued with a special compound to a special sealed rim. There is no air chamber. Therefore, the requirements for the tightness of the fit of the tire to the rim are very high. The wheel nipple is screwed into the rim. Tubeless tires often allow you to reduce the weight on the wheel, and most importantly, reduce the effects of punctures, because. puncture air deflates more slowly than traditional rubber. Tubeless rubber is sealed in case of a puncture from the inside of the tire with ordinary patches.
Only a perfectly smooth wheel rides perfectly on a perfectly smooth surface. That is, when driving on smooth asphalt, any even the most slightly protruding tread creates rolling resistance. Slicks are the best choice here. Due to the larger contact area and usually a special compound that is tenacious to asphalt, they create maximum grip with the surface with minimal rolling resistance.
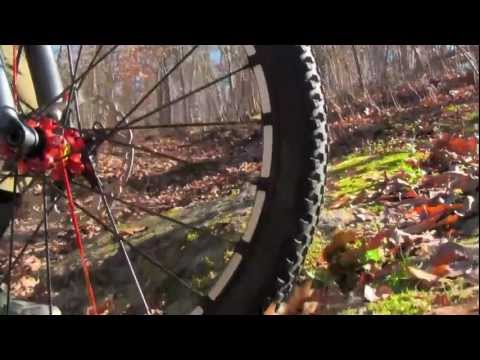
On soft, slippery, muddy surfaces, slicks have little to no grip on. The essence of an aggressive tread pattern is to reach a hard surface under a soft layer. The pattern can be very diverse and is usually specially designed for a specific direction of rotation of the wheel. The arrows “Direction ->” indicate the direction of rotation of the wheel along the arrow, and the arrows “<– Front Backward->” indicate the direction of rotation when the tire is installed on the front or rear wheel, respectively.
The greatest contribution is certainly made by the aerodynamic resistance of the oncoming air flow when the cyclist is moving. Moreover, for tires with a high aggressive tread pattern, the air resistance created by the protruding parts of the tire at high speeds also makes some contribution. However, at speeds below 30 km / h, these energy losses, even with the worst tread, are comparable to the energy losses in a bicycle chain drive.
The energy dissipated during rubber deformation is the second most important factor and depends on the following tire parameters (in descending order): pressure in the tire, tire thickness, tire diameter, thickness of the rubber layer over the weave and weave type.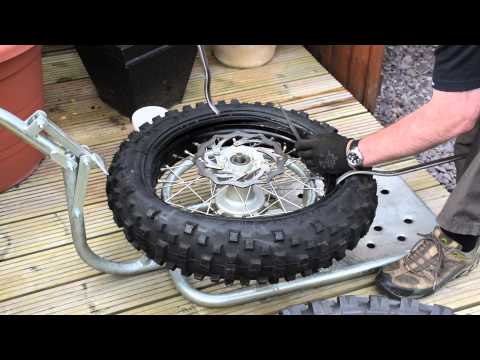 The larger the diameter of the wheel, the less deformation the rubber undergoes at a particular point on it, which is why 28″ wheels are still used in road cycling.
The thinner the tire, the smaller the contact patch. However, starting from a certain minimum limit, the contact patch becomes not transversely ellipsoidal, but round, and then it already has the shape of an elongated longitudinal ellipse. In the longitudinal direction, more material works for bending (the contact area also turns out to be larger), which increases the resistance. Therefore, very thin tires (naturally at normalized pressure) roll worse than thicker ones. The ideal ratio of tire width and tire pressure is such that the contact patch is an even circle. This is true only for slicks and smooth asphalt. For tires with a developed tread on dirt tracks, the largest transverse contact area is always preferable and a longitudinal spot is not acceptable at high pressures.
Road irregularities contribute a lot to resistance.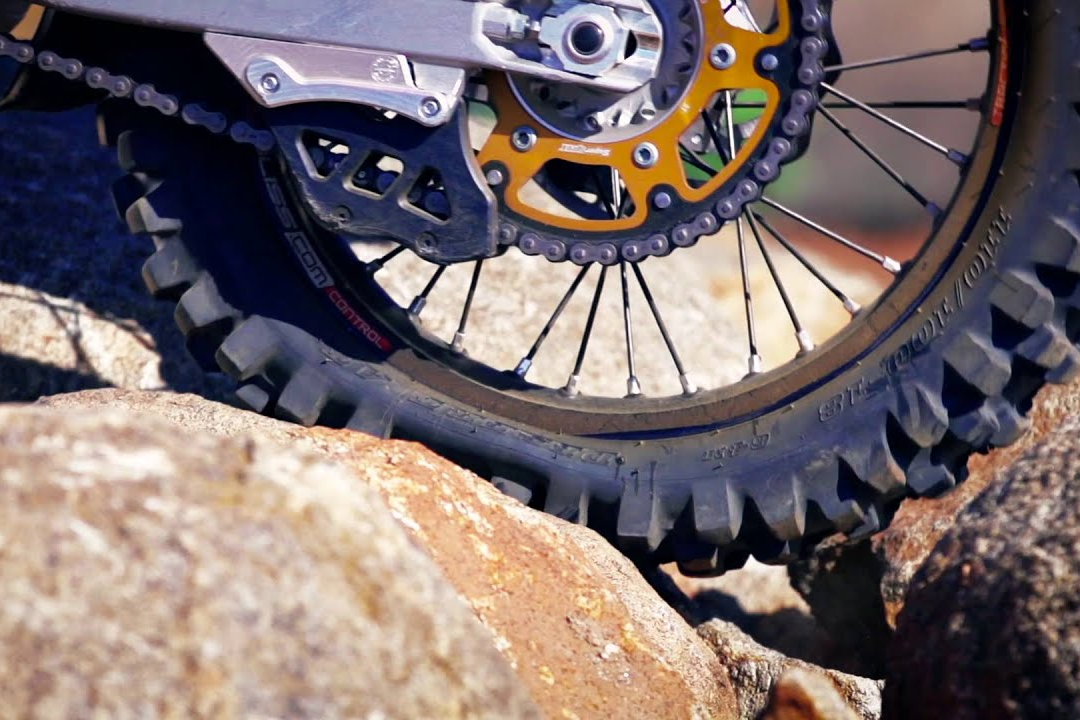 At low pressure, the tire “eats” the unevenness, although absorbing energy for deformation, but without interfering with the motion vector. At high pressure, the tire bounces over bumps, which drastically reduces speed, redistributing energy into unnecessary work of tossing the entire bike up.
It is also worth noting that any anti-puncture technology introduces additional resistance when rolling rubber, because. additional energy is spent on bending additional material.
An important component is the inertia, which must be overcome during each acceleration and extinguished during braking. The total mass does not contribute as much as the mass of the moving parts due to the larger radius of the wheels. Almost one gram of wheel weight is equal to two grams of frame or rider weight. To appreciate this, mentally add 250 grams of dirt per wheel and, accordingly, imagine that you suddenly suddenly gained a whole kilogram without this dirt.
For road racing, even at low accelerations, every gram on the wheel counts.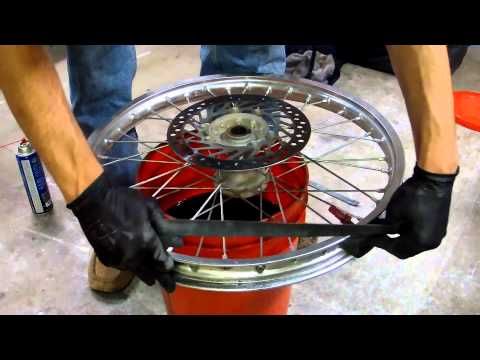 On the contrary, for tourist riding at a constant speed on flat terrain, the weight of the wheels (as well as the bike as a whole) is not so critical.
In any case, try to develop a style of riding in which you maintain a smooth, even pace throughout the trip with minimal use of unnecessary braking. Remember that you lose energy not only when the bike is obviously braking, but also when it is subsequently accelerated. This will save you a lot of energy.
Tire wear is highly dependent on the quality of their manufacture, the selected compound, the thickness of the tread layer and the density of the carcass weave. Naturally, wear depends on operating conditions. A tire is considered completely worn if the top layer of the tread is worn to a completely smooth state (MTB rubber) or when a visible cord weave appears along the raceway (for slick rubber). Soft compounds wear out faster than hard ones. Compounds with the addition of special fillers (for example, silicon) are erased for an extremely long time (more than 15,000 km of run).
The average mileage of the tire must be at least 2000 km. Usually for high-quality rubber, this figure is from 4 to 8 thousand kilometers (more for road slicks than for MTB rubber). For thin or soft tires for sports use, the guaranteed mileage can be in the order of 1000 km in the intended road conditions.
Rubber is a rapidly aging material. Despite special additives, the quality of tires deteriorates over time. The main source of danger that cannot be eliminated when driving is the harsh ultraviolet radiation of the sun. Therefore, it is not recommended to store the bicycle in an area open to sunlight. Prolonged exposure to UV radiation can lead to loss of elasticity, brittleness, delamination of rubber.
Optimum storage conditions are between +10 and +25C in a dark, dry place. Under such conditions, high-quality tires and tubes can be stored for more than five years without loss of their properties.
When storing the bicycle for a long time, it is necessary to periodically (at least once a year) check the tire pressure and turn the wheels in order to avoid fatigue stretching of the tire carcass.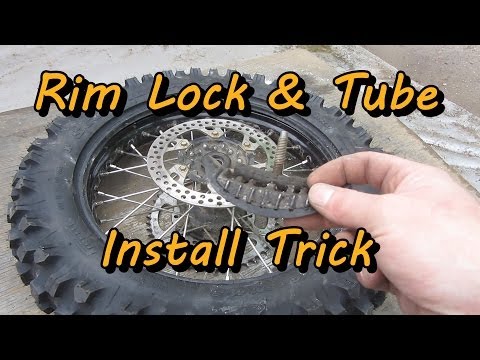
Inner tubes are made of special rubber based on special synthetic rubber or latex, much more elastic than the base rubber of tires. The chamber can be structurally a one-piece molded tube (“Mold curing”) with a transverse seam (more expensive manufacturing technology, greater chamber strength and seam reliability) or two halves of a tube with a double longitudinal seam in diameter (cheap, common chambers).
The use of latex allows for thinner and significantly lighter tubes that are more flexible and thus less rolling resistance. However, latex rubber quickly loses pressure, is very sensitive to ultraviolet
, heat and oil products, ages extremely quickly and loses elasticity. With a needle puncture, the chamber usually bursts along its entire length without the possibility of its recovery. Therefore, the addition of latex to the compound is used very carefully with special chemical additives and only for expensive cameras for professional use, where the advantages in weight and rolling resistance are justified over the risk of fatal puncture and capricious operation.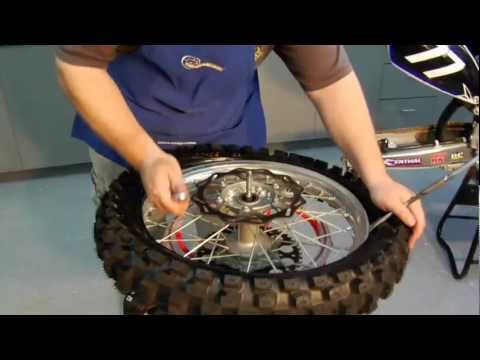
An ordinary high-quality chamber with a serviceable nipple and without punctures loses pressure by no more than one atmosphere per month. Moreover, the higher the pressure, the faster it is lost.
The most common mistake made by beginners is the incorrect sequence of tire beading, despite the apparent simplicity of this process.
The correct way to do this is to put the tire on one side (with one of the two bead cords) on the rim, insert the chamber nipple into the rim hole, push the slightly inflated chamber under the tire without kinks and jams, and seal the other side of the tire onto the rim. You can not stuff a completely deflated camera. Do not use sharp objects. It is necessary to ensure that there are no chamber jams between the tire and the rim.
Sometimes it is difficult to “stretch” the tire onto the rim, because Standard rim flange diameter tolerances are 4.7mm, and for most tires the manufacturing tolerance is 2mm. However, the flexibility of even a steel bead cord allows you to put a tire on the rim with a diameter difference of up to 10 mm.