Chapter 6
Installing a trailer hitch is a relatively easy automotive job. A typical tow hitch installation may involve some of the following steps: removing the spare tire, lowering the exhaust, removing existing vehicle hardware, lifting the hitch into position and torqueing the hitch hardware to the correct values.
In this guide, we''ll cover step by step how to install a hitch. We'll also answer questions about cost, time, warranty and offer some pro tips. CURT hitches are especially easy to install because most are no-drill and require only a few simple tools. If you'd prefer to take your vehicle in for professional installation, CURT also has a complete network of dealers and installers.
8 Steps for Installation
Towing Tip!
Before purchasing a hitch, look up the installation instruction sheet or installation video online for the hitch you are considering, and then decide if it is something you can handle on your own or if you will need to bring it to a professional installer.
Yes, you can install a trailer hitch by yourself as long as you have the right tools for the job. DIY hitch installation is a great way to save money on the trailer hitch installation cost.
CURT custom hitches are engineered to make installation as easy and as minimally invasive as possible. Most CURT hitches can be installed with common hand tools, right in your own garage.
6 Pro Tips for Hitch Installation
The first step to installing a trailer hitch receiver is to read the instructions. Familiarizing yourself with the steps involved in the installation will give you confidence in your work and will help you determine if you're up to the task.
You can find the installation instructions for each hitch using the CURT Installation Sheet Finder or on the number page. We also recommend checking out our installation video library on YouTube.
Before you begin, set aside the tools necessary for the tow hitch installation. These may be different depending on your specific hitch, but in general, a hitch installation only requires some basic tools found in the average do-it-yourselfer's tool box.
The following are some of the tools used during the installation of a trailer hitch:
Download tools list
Next, you will need to place wheel chocks on your front wheels.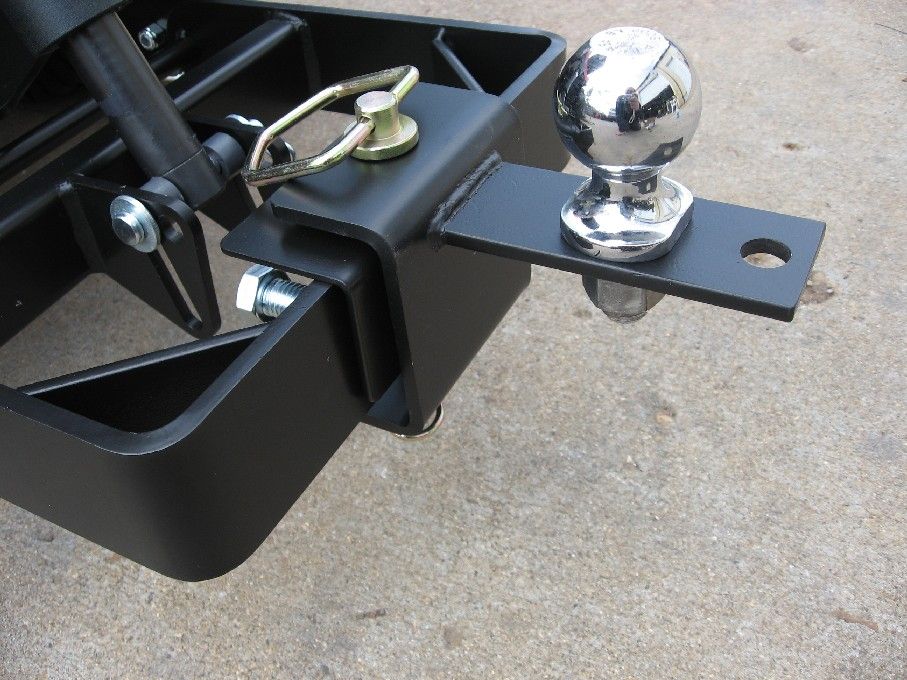 You may also need to jack up your vehicle, depending on your particular hitch and work space.
Jacking up the vehicle is not necessary for most hitch installations -- even a car hitch installation -- but it does provide extra space underneath the vehicle to work. Make sure the emergency brake is activated, that your vehicle is at a safe height and that you use jack stands to ensure the vehicle is properly stabilized.
It always helps to have extra light when working underneath the vehicle, and it will help when referencing the installation instructions during the install. Position the light so that it illuminates your work space without obstructing what you're doing.
At this time, you can familiarize yourself with the various bolts, holes and other components you will be accessing during the installation.
On some receiver hitch installations, the rear spare tire stored underneath the vehicle will be in your way as you install the hitch. If specified in the instructions, remove it and set it aside.
This may also be the time to lower the exhaust. A small number of CURT trailer hitches require the tailpipe and part of the exhaust assembly to be lowered during the installation.
Some trailer hitch installations require certain bolts and rubber plugs to be removed to make way for mounting the hitch frame. Others require small panels or a heat shield to be removed or trimmed. Still others may require drilling into the frame.
For some hitch installations, the existing vehicle hardware may be used to bolt the hitch into place. Whatever the case for you particular hitch, all necessary hardware will be included for a complete installation.
With your vehicle and hardware prepared, you can move the hitch into position. You may need assistance at this point as trailer hitches can weigh up to 50 lbs. or more. This is especially important for a truck hitch installation because truck hitches tend to be heavier.
For the hardware, typically you will only need to tighten the nuts and bolts enough to hold the hitch in place. Once all trailer hitch bolts are attached and hand-tightened, you can move on to torqueing.
When all of the trailer hitch bolts are in place, torque them to the values specified in the installation instruction. The amount of torque required various by the size of bolts. Some hitches only require around 100 foot-pounds of torque, while others require 150 foot-pounds or more. Make sure you have the proper tool to safely torque your hitch into place.
Towing Tip!
If your tow hitch installation requires you to feed bolts in through a hollow frame and you accidentally lose a bolt inside, getting it out can be extremely tedious. However, it CAN be done. Insert a telescoping magnet in through the hole, and lure the bolt to the hole until you can pull it out.
If you'd prefer a professional touch and you're looking for where to get a trailer hitch installed, the CURT Where to Buy page provides a complete list of local dealers and installers. Simply put in your address.
You can browse installers by distance and service level, view their address and phone number, navigate a live map and get directions from any address.
The underbody of a vehicle is exposed to a wide variety of outdoor elements, causing corrosion over time.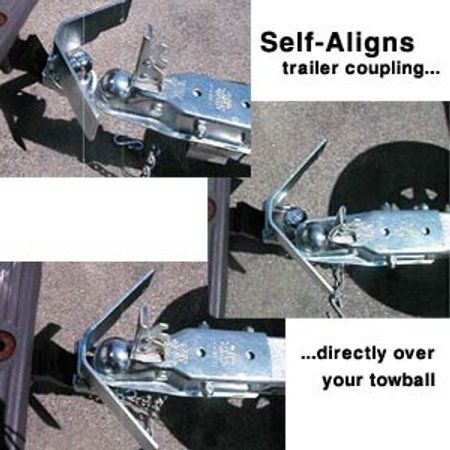 Some hitch installations use pre-existing weldnuts on the vehicle to mount the hitch. If these weldnuts have rust on them, it will be impossible to properly thread the trailer hitch bolts.
Before starting the installation, note the condition of the weldnuts. For minor rust and buildup, use a penetrating lubricant and wire brush to clean the threads.
For heavier rust, use a thread tap to make sure the threads are clear. The tap must be perpendicular to the weldnut to avoid stripping the threads.
A hitch receiver installation may require hardware to be fishwired through holes in the vehicle frame (fishwire will be included with your CURT hitch, if needed). To do this, pass the coiled end of the fishwire through the mounting hole and out the access hole. Install a spacer onto the coiled end, and then thread the bolt onto the coil.
Next, pull the other end of the fishwire through the mounting hole so the bolt stud passes through the spacer and out the mounting hole.
Finally, lift the trailer hitch assembly into position if it is not already in place, feeding the fishwire through the correct mounting hole on the hitch. Carefully remove the fishwire from the bolt and apply the appropriate nut.
To reverse fishwire hitch hardware onto your vehicle’s frame, begin by threading the bolt onto the coiled end of the wire. Then, insert the bolt into the mounting hole, head first (the hole may need to be enlarged with a die grinder first).
Next, feed the wire through a spacer and insert the spacer up into the mounting hole. Then, pull the wire down, allowing the bolt stud to pass through the spacer and out the mounting hole. The spacer should keep the bolt head stuck inside the frame.
Finally, position the hitch and pass the wire through the appropriate mounting hole on the hitch. Then, carefully remove the fishwire from the bolt and apply a nut.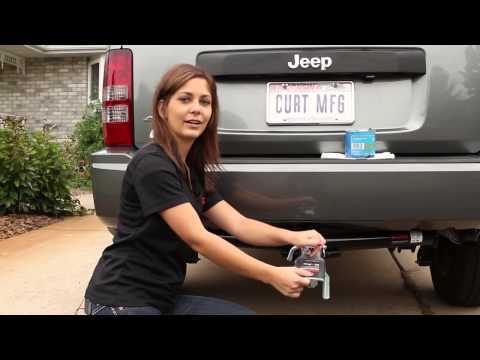
To ensure a tight fit against the vehicle, some hitch installations require the vehicle’s exhaust system to be temporarily lowered.
To lower the exhaust, typically all you need to do is separate the rubber isolators from the exhaust hanger rods. Begin by supporting the tailpipe and exhaust system with wire ties or rope at the hanger points. Be sure to leave a few inches of slack so the exhaust can be lowered.
Then, squirt the connection points with a soapy water mixture or lubricant. Next, use a pry bar to carefully pry between the rubber isolators and hanger stops.
While it is rare for CURT hitches, some installations may require drilling into the frame, particularly if there are not enough pre-existing mounting holes to attach the hitch.
Begin by marking the drill locations with a paint pen, using the hitch as a guide. Then, drill a small pilot hole. Cobalt drill bits and cutting lubricant are recommended.
Gradually increase the size of the hole using larger and larger drill bits until the correct size for the bolt is reached. You can also use a step drill bit for this process.
Some hitch installations may also require the hole to be enlarged to accept a spacer. For this, a die grinder is recommended.
A tow hitch installation may require plastic fascia panels on the vehicle to be cut or trimmed to make space for the receiver tube.
To begin, mark the areas to be trimmed using masking tape. Then, use a utility knife, rotary cutoff tool or aviator shears to cut off the marked areas.
Remember to go slowly! If using a utility knife, we recommend scoring the cutting line and then making multiple passes to ensure a clean cut.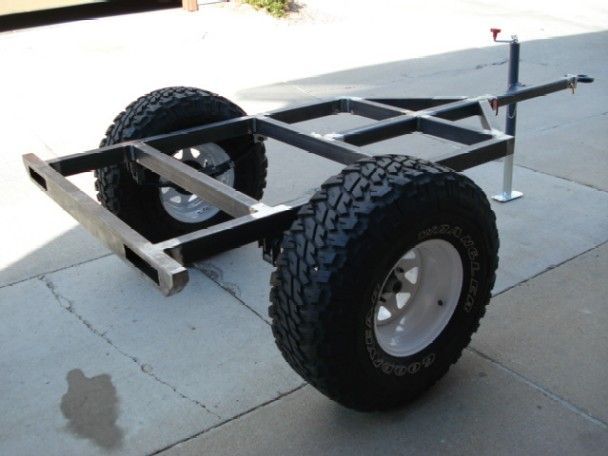
How much does it cost to install a hitch?
A professional hitch installation can cost anywhere from $50 to over $250, depending on the labor rates of the automotive shop and the difficulty of the installation. Some hitch installations are more intensive than others, increasing the cost as more time is required.
How long does a hitch installation take?
Hitch installation can take anywhere from 30 minutes to a few hours or more, depending on the level of expertise of the installer, the tools being used, the condition of the vehicle and so on. For a helpful guideline, check the installation instructions for your specific hitch.
Will installing a trailer hitch void my warranty?
Installing a trailer hitch will not void a vehicle’s warranty. The Magnuson-Moss Warranty Act, passed by Congress in 1975, ensures that consumers can install aftermarket parts without the fear of voiding their warranty. One stipulation is that the installation must be done properly. An improper installation will not be covered (e.g. bolt holes drilled too close together, different hardware used, etc).
Learn more on the Federal Trade Commission website.
How do you attach a trailer hitch?
To attach a trailer hitch to a vehicle, have a friend help you lift the hitch into position. If you don’t have a helper, you can hang the hitch from the vehicle frame, using a length of wire or rope. With the hitch suspended, begin to thread the mounting bolts until the hitch can remain in place without assistance. Then, torque the bolts to the correct values.
Discover more great tips and how-tos on the Lippert blog -- your destination for all things RVing, towing, boating and beyond!
8 different atv hitches in stock & ready to ship today
Sort: By Price: Lowest FirstBy Price: Highest FirstBy Product Name: A-ZBy Product Name: Z-ABy Brand Name: A-ZBy Brand Name: Z-A
Rigid (Part #: UTV-FM1)
| Fits | John Deere XUV 620i green/yellow, 620i olive/black and 850D green/yellow |
| Max Gross Trailer Weight | 1,300 lbs |
| Max Tongue Weight | 130 lbs |
| Made In: | USA |
List Price: $62.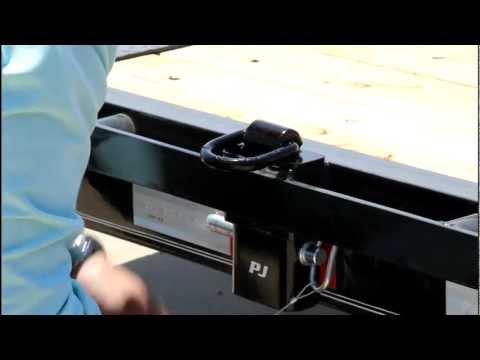 95 95 |
| Now Only: $41.99 |
Rigid (Part #: ATV-WM125)
| Made In: | USA |
| List Price: $63.95 |
| Now Only: $51.99 |
Rigid (Part #: ATV-125)
| Ball Hole Size | 3/4" |
| Ball Sizes | 2" |
| Drop | 2" |
| Finish | Black powder coat |
| Fits | 1-1/4" receivers |
| Length | 7 inches |
List Price: $64. 95 95 |
| Now Only: $51.99 |
Rigid (Part #: ATV-WM2)
| Made In: | USA |
| List Price: $73.95 |
| Now Only: $58.99 |
Rigid (Part #: ATV-2)
| Ball Hole Size | 3/4" |
| Ball Sizes | 2" |
| Drop | 2" |
| Finish | Black powder coat |
| Fits | 2" receivers |
| Length | 7 inches |
List Price: $73. 95 95 |
| Now Only: $58.99 |
Rigid (Part #: UTV-FM1-008)
| Fits | John Deere XUV 620i green/yellow, 620i olive/black and 850D green/yellow |
| Max Gross Trailer Weight | 1,300 lbs |
| Max Tongue Weight | 130 lbs |
| Made In: | USA |
| List Price: $103.95 |
| Now Only: $74.99 |
Rigid (Part #: UTV-FM1-ATV2)
| Fits | John Deere XUV 620i green/yellow, 620i olive/black and 850D green/yellow |
| Max Gross Trailer Weight | 1,300 lbs |
| Max Tongue Weight | 130 lbs |
| Made In: | USA |
List Price: $131.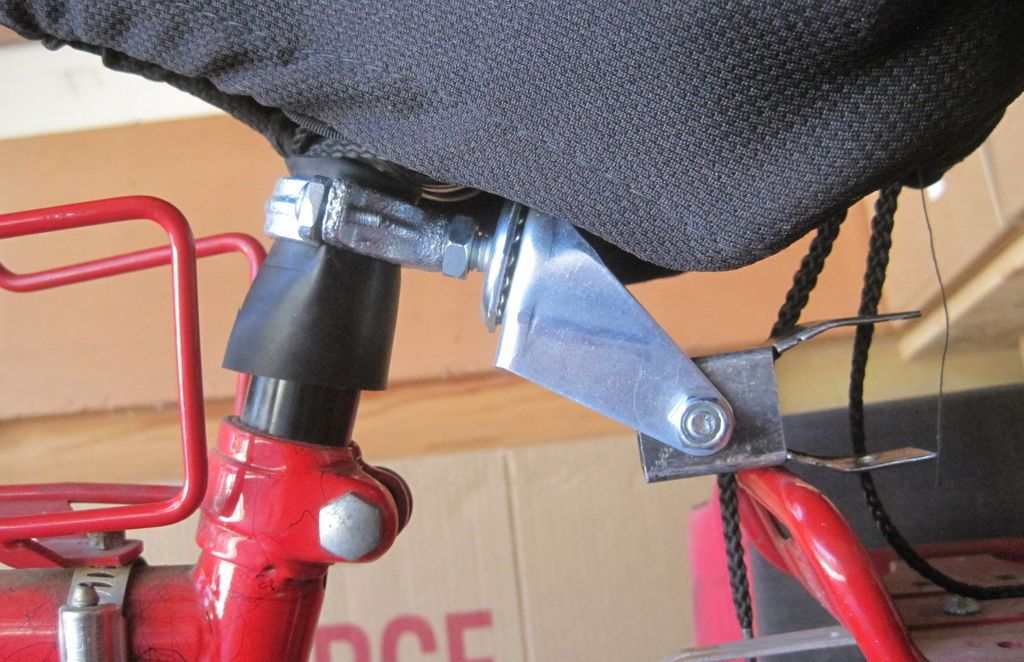 95 95 |
| Now Only: $92.99 |
Rigid (Part #: UTV-FM1-WM2)
| Fits | John Deere XUV 620i green/yellow, 620i olive/black and 850D green/yellow |
| Max Gross Trailer Weight | 1,300 lbs |
| Max Tongue Weight | 130 lbs |
| Made In: | USA |
| List Price: $137.95 |
| Now Only: $96.99 |
For the most part, we will talk about making a towbar for 150-250 cubic meters ATVs, since the industry has bypassed its attention to this detail, and the owners have to “trick” something on their own. We will also touch on the topic of installing a towbar on ATVs with a larger cubic capacity.
The big brothers have a simpler towbar installation, as a rule, they all already have a mounting platform.
And it remains only to purchase or make with your own hands just such a simple device.
Heavy-duty attachment options are also available for this hitch to pull heavy loads.
There are also sites of this type, and the owner only needs to purchase a tow ball (often it is already installed).
Speaking of towbar balls, you can save a lot by buying a KAMAZ hydraulic cylinder ball head instead of a ball, it costs less, and the mount and ball diameter (50mm) are absolutely identical.
I think that even a baby will understand the installation, and we will not describe it, but move on to “our smaller brothers”.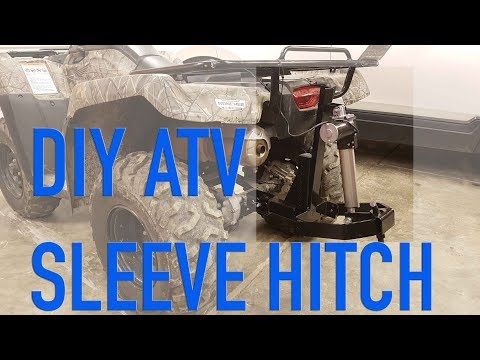
Do-it-yourself installation and manufacture of a towbar for an ATV 150-250 cubic meters.
First you need to decide where exactly to attach the towbar: to the swingarm or to the ATV frame. The opinions of ATVs on this issue differ: some argue that mounting exclusively to the pendulum will not be entirely correct, some, on the contrary, advocate this type of mounting, and we decided to present all the options, and we, dear readers, will give you the freedom to choose.
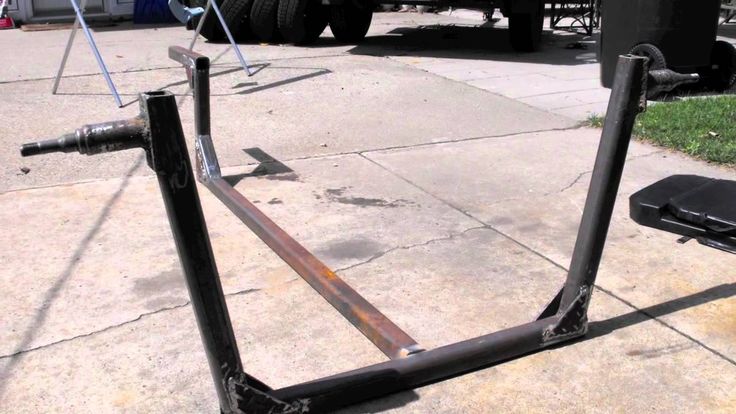
Attaching the towbar to the ATV swingarm.
Everything is very simple here: it will take 2-3 hours to make, you will need metal plates 2.5 - 3 mm thick, a grinder, a welding machine and longer bolts that tighten the pendulum.
Another way to attach the towbar to the swingarm. Everything is clearly visible in the photographs, so we will not do a description.
Attaching the towbar to the ATV frame.
To attach the towbar to the frame, two ears are welded to the front,
the rear part is attached at the top to the internal thread of the luggage carrier.
All provided mounting options are quick-release (maximum 4 bolts), are quite simple to manufacture, and now it will not be difficult for you to install the towbar on the ATV. But do not forget that an ATV of 150-250 cubic centimeters is far from being a tractor, try to use light trailers and do not tow more than 150-200 kilograms in order to avoid undesirable consequences.
If you have any questions, feel free to ask them in the comments.
"Tension roller...
How to..."
 Welcome to our ATV Club!
 Posted by by MotoDoctor
It's no secret that children love to imitate adults. Almost all all-wheel drive ATVs have a tow hitch and such an ATV serves as a good helper in a country house. But unfortunately children's ATVs are not equipped with such a contraption and trailers for them are not sold. But many children also want to load some rubbish into their trailer with their dad and “sip” behind their quadric. In fact, a children's ATV is quite capable of pulling a trailer weighing up to 80 kg. The specialists of our motorcycle service have made such a trailer based on a two-wheeled garden cart. We will tell you how you can make such a miracle of an assistant yourself, and perhaps such information will come in handy for those dads whose children want to help with the housework.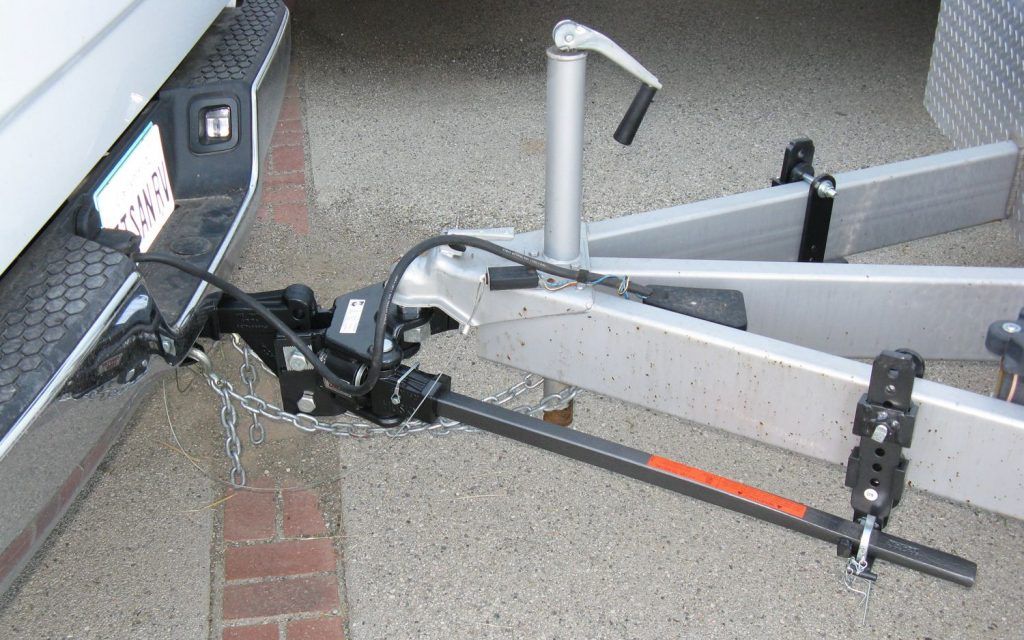 Well, first you need to purchase such blanks as 1. Tow bar for a car (a ball mounted on a tow hitch). 2. Lock for towbar. 3. 2 wheel garden cart. We attach the towbar to the bushing of the rear pendulum in such a way that it is rigidly connected to the fastening elements of the bushing itself. The towbar should not walk up and down, left and right. Otherwise, the silent blocks of the pendulum will very quickly become unusable. The ball itself, on which the trailer lock is put on, should be no closer than the edge of the rear wheels of the ATV, so that the trailer does not touch the quadric when cornering. When the installation of the towbar on the children's ATV is completed, you can begin to manufacture the trailer. For the basis of the trailer for a children's ATV, we take a garden cart. The main task is to move the carrying axle to the center of the bogie and strengthen the trailer so that the load mass can be increased to 80-100 kilograms. You can strengthen the trailer for the quadric in various ways.
 At the same time, the trailer for a children's ATV should not be more than 25 kilograms. If on a children's ATV, for which it is supposed to carry a trailer, of a variator type, then the total mass of the load on the towbar should not exceed 50 kilograms. When making a trailer for a children's ATV from a garden trolley, it is best to “put” the axle on bearings, then we will increase the free wheeling of the wheels and, accordingly, reduce the load on the ateveshka motor. The fact is that all motors with a variator are very afraid of excessive loads. On such an engine, the belt or clutch pads often fail. On those quadrics where the checkpoint is semi-automatic, there is nothing to be afraid of. Such a children's ATV is capable of pulling a trailer with a total weight of 100 kilograms. Newly manufactured trailer elements must be carefully treated, primed and painted. After that, you can safely fasten the trailer to the children's ATV and help dad carry anything around the summer cottage.